This post and photos may contain Amazon or other affiliate links. If you purchase something through any link, I may receive a small commission at no extra charge to you. Any supplies used may be given to me free of charge, however, all projects and opinions are my own.
Today I’m excited to show you the xTool S1 Laser and how easy it is to set up and use. Is the xTool S1 laser right for you? Keep reading to find out!
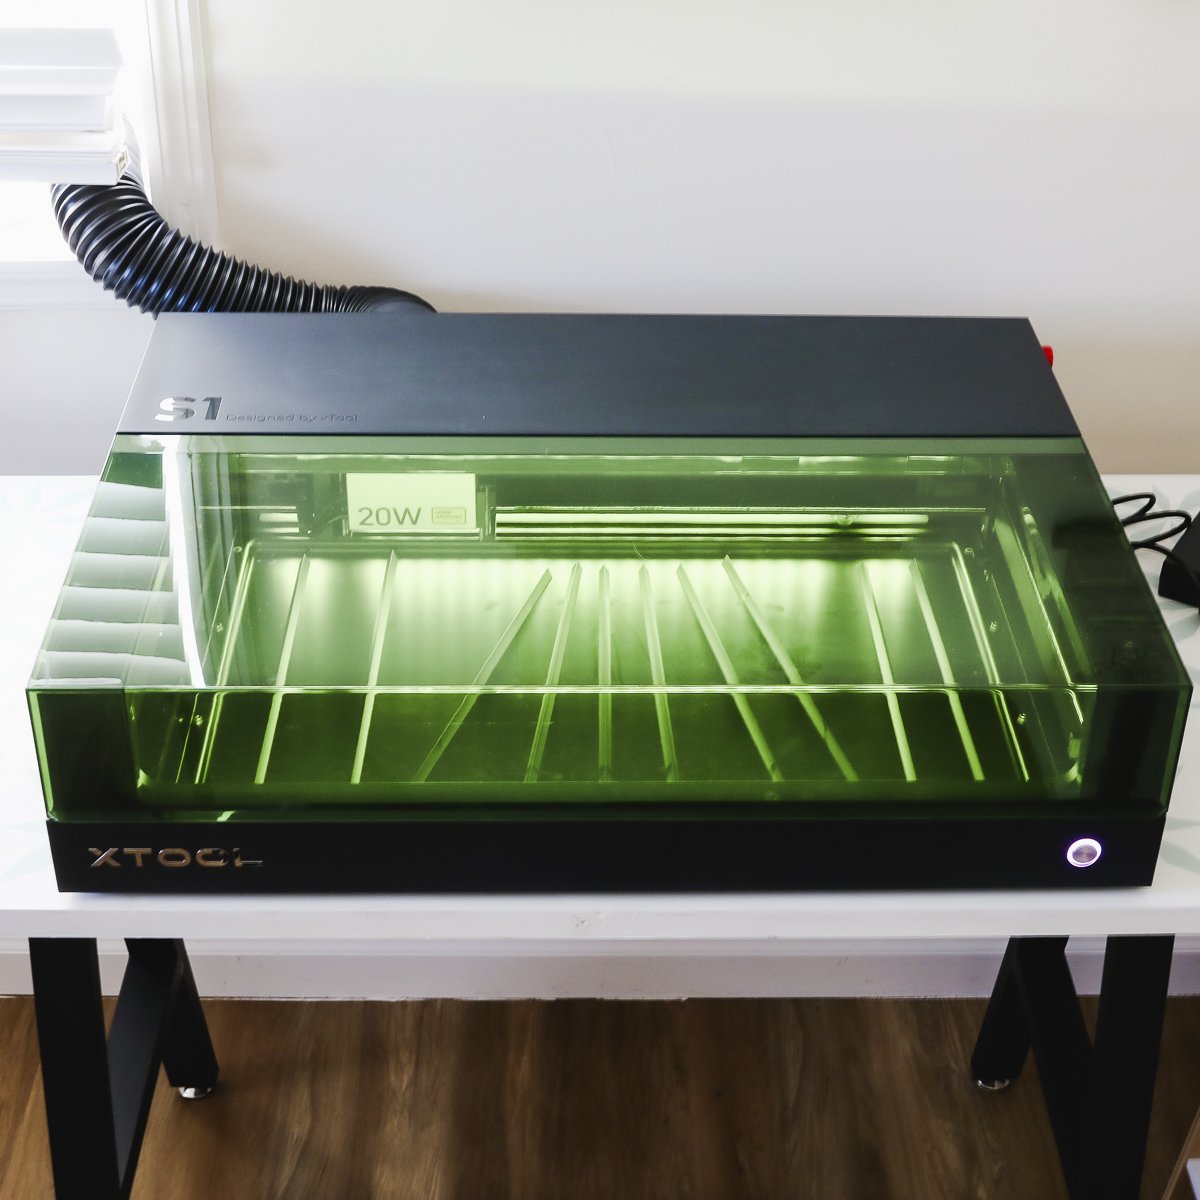
The S1 can be purchased with either a 20-watt or 40-watt laser or a small infrared head that can be used for engraving. These heads are interchangeable, if you purchase the 20-watt head you can purchase the 40-watt laser at a later time and swap it out.
If you’re trying to decide if a laser is right for you, I’m here to help. My free Laser-Ready course will walk you through the different laser types and how they compare to each other to help you choose the right laser for you.
You can watch me set up the laser and make my first project by pressing play on the video below.
In this tutorial, I am going to go over everything that comes in the box if you purchase the laser itself. In a future video, I will review some of the other accessories you can purchase to use with the xTool S1 laser.
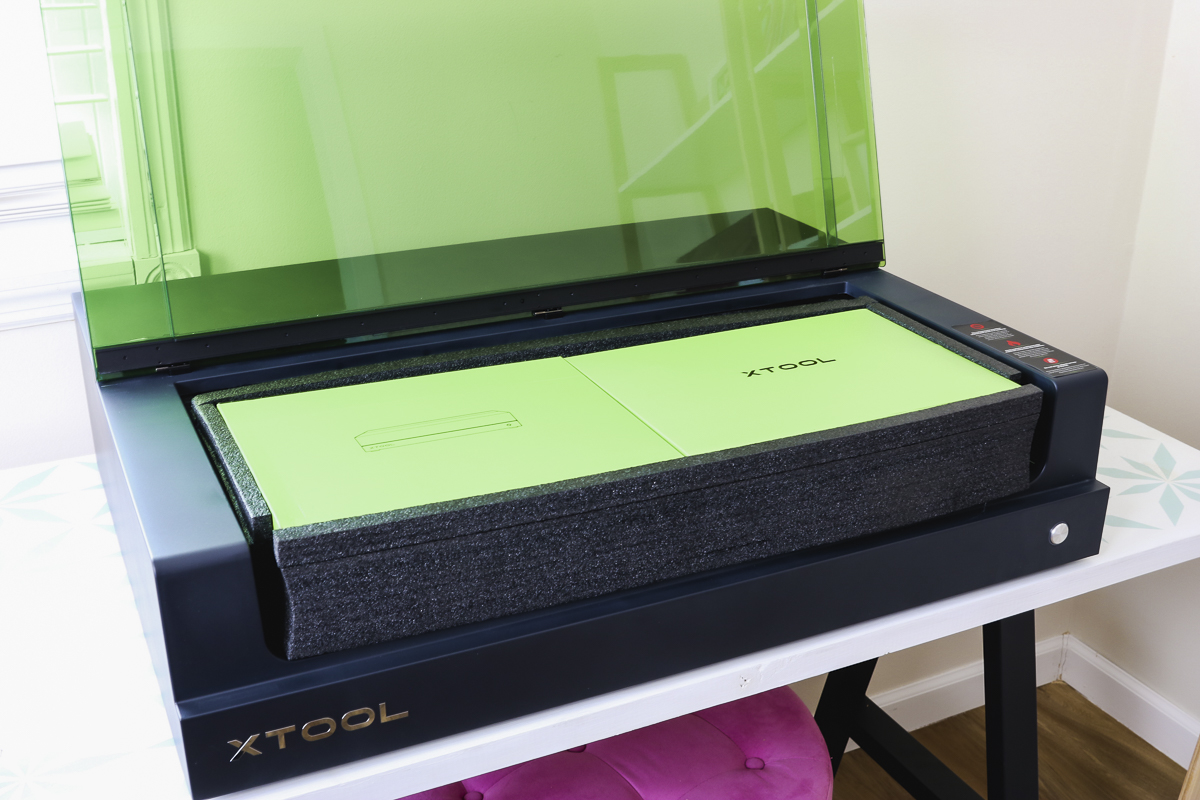
The first thing we’re going to do today is to unbox the xTool S1 laser.
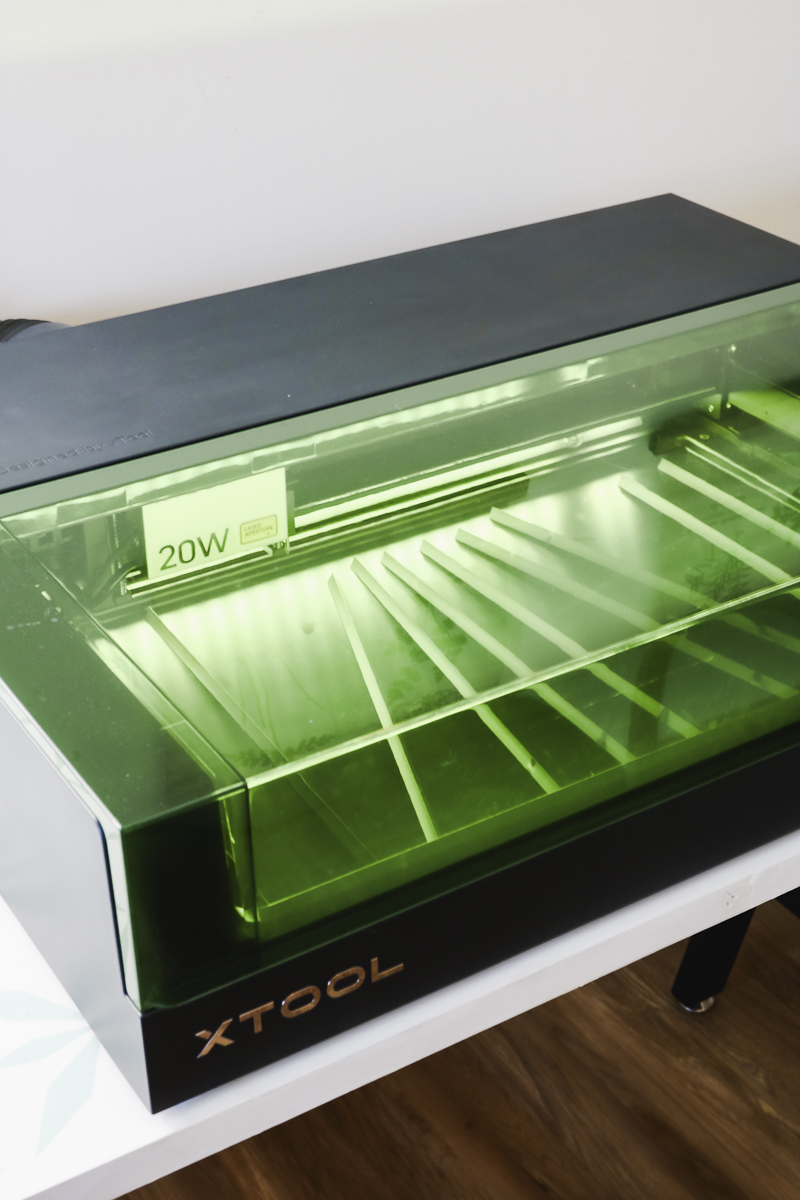
How Big is the xTool S1 Laser?
Inside the box is the machine itself. The laser is about 30 inches wide by 22 inches deep and 7 inches tall and weighs approximately 44 pounds.
It is not overly large and is a manageable size for a home crafter. Because of the size, it could be difficult to lift out of the box by yourself. I recommend having two people lift it out of the box and get it set up on a table. Once it’s set up on the table I can move it around by myself fairly easily.
What Comes in the Box?
Inside the box, there is packaging material and the machine. With the machine out of the box, open the lid and you’ll find more packaging materials and all the components for the laser.
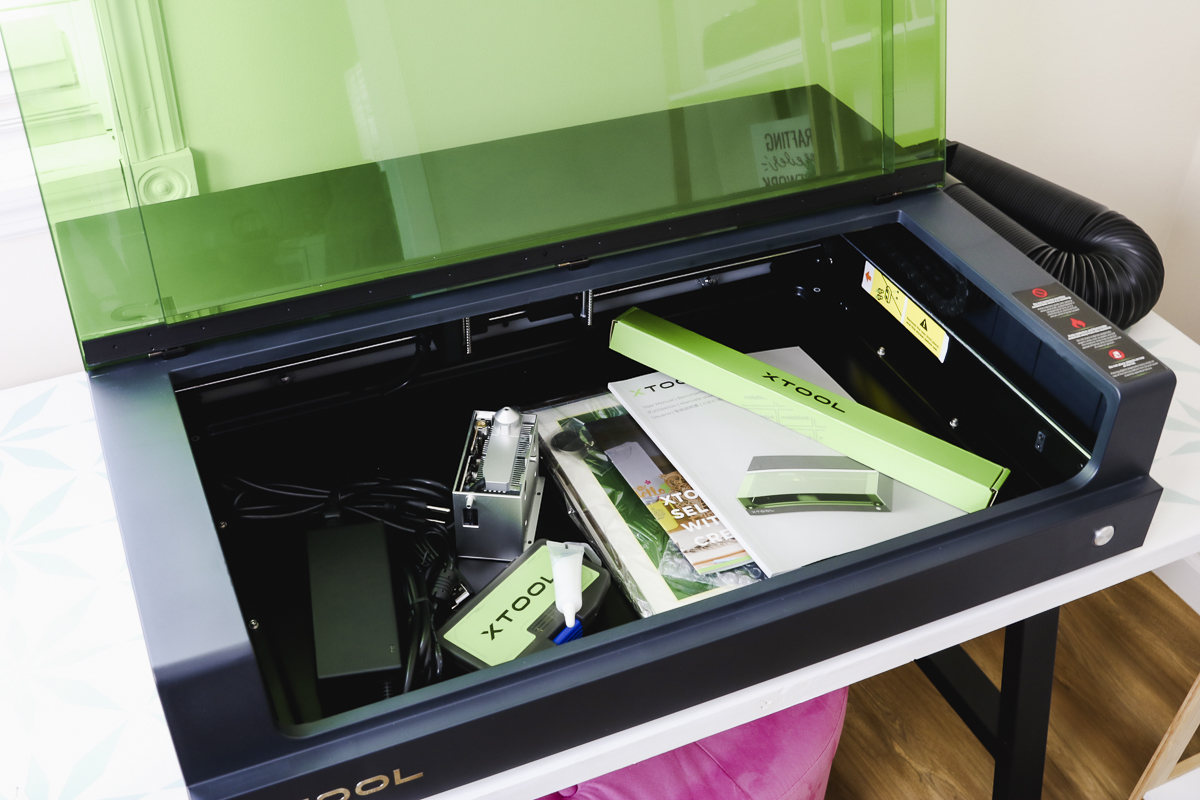
There are a couple of user manuals, a power and USB cord, a little toolkit, sample materials, triangular prisms for lifting materials inside the machine, and the laser module itself.
You’ll also find the exhaust pipe that attaches to the back of the machine for venting the laser out the window.
If you don’t have a window to filter out of, you can purchase an optional air filter accessory that allows you to vent the laser inside.
With the laser out of the box, we can put it together. The steps are very simple for setting up the S1 laser.
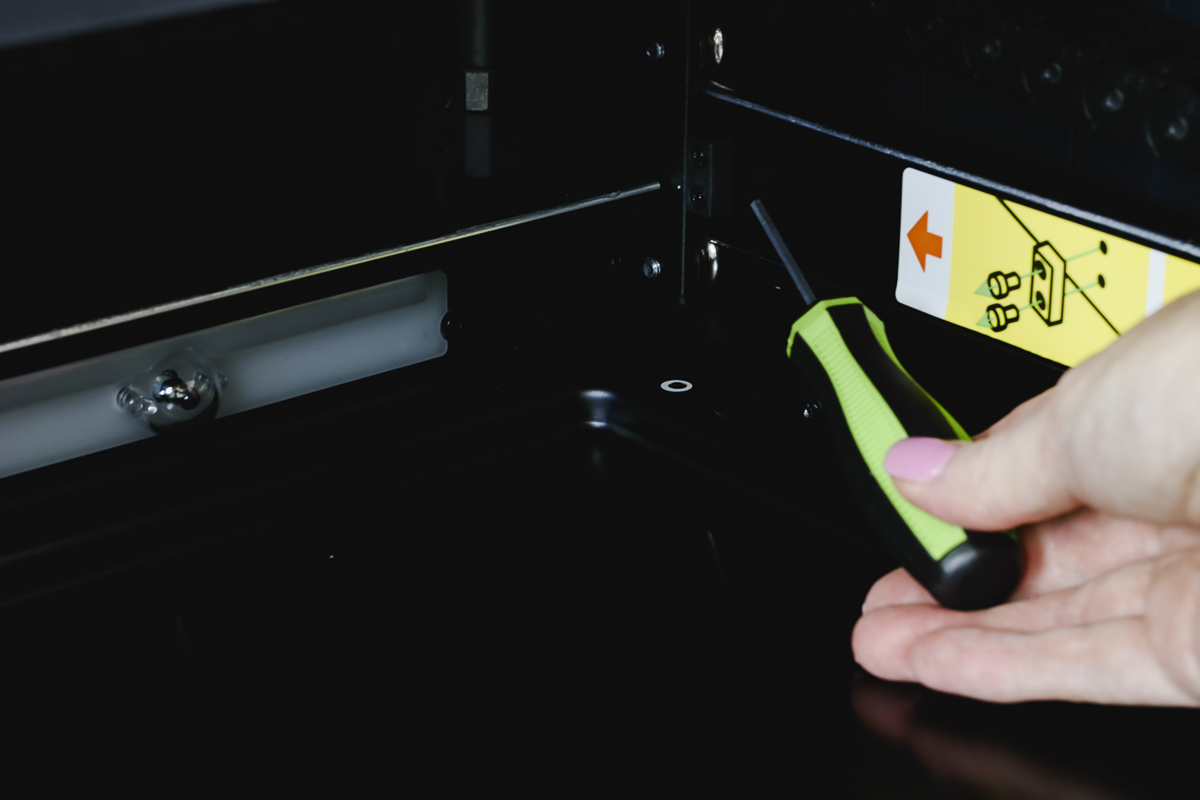
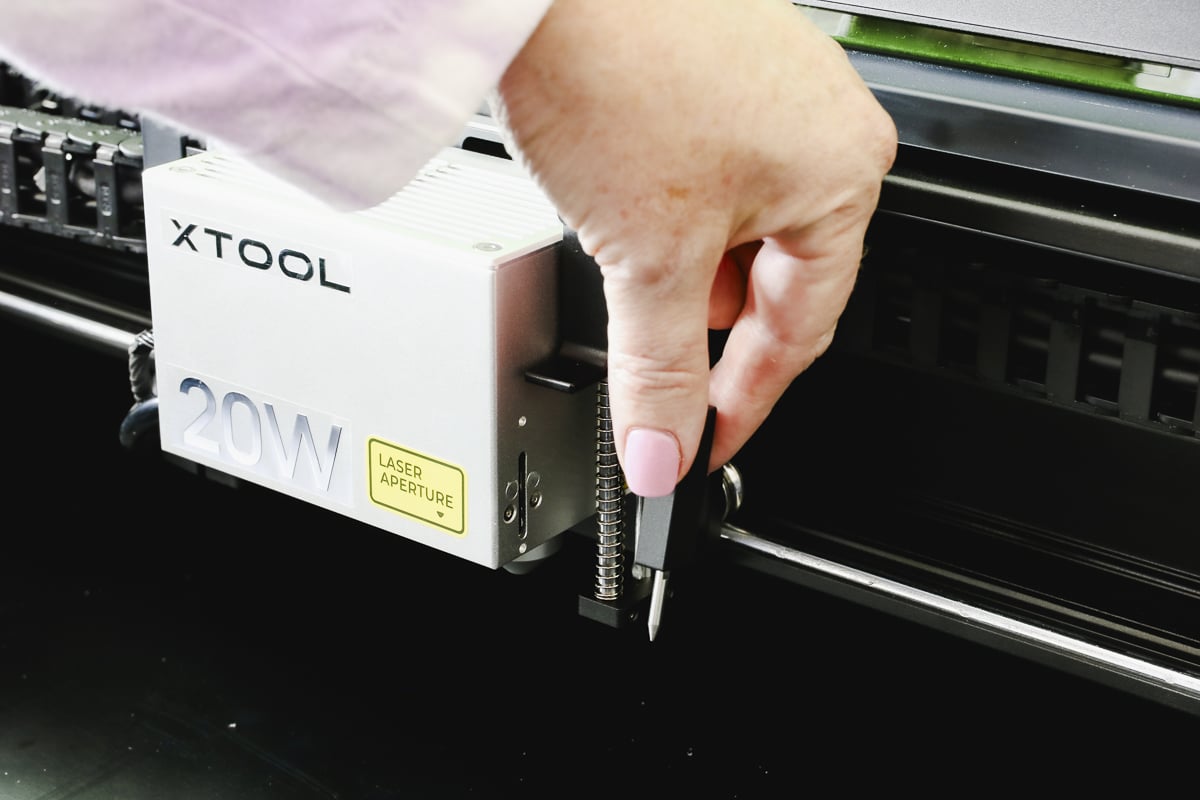
There are two pieces that are added with screws for shipping. Use the screwdriver that comes with the xTool S1 to remove those pieces.
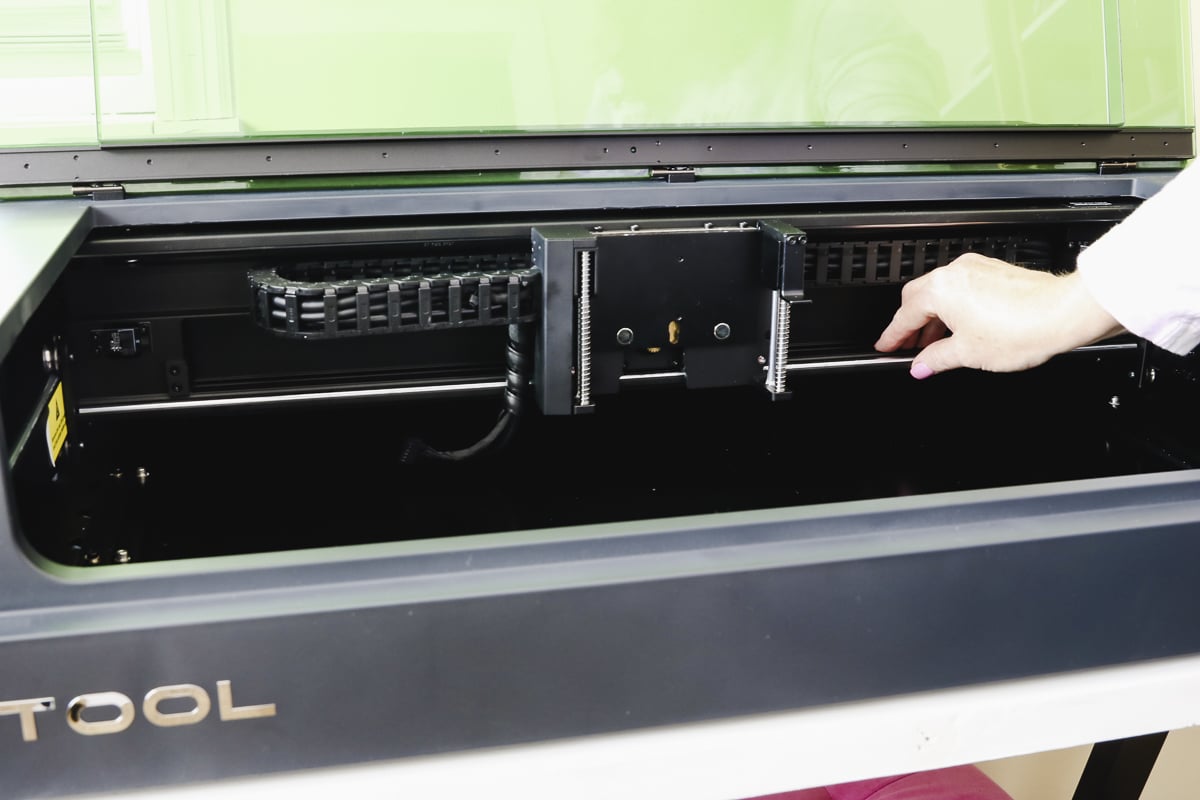
When the pieces are removed, reach into the laser, grab the bar, and gently pull it forward.
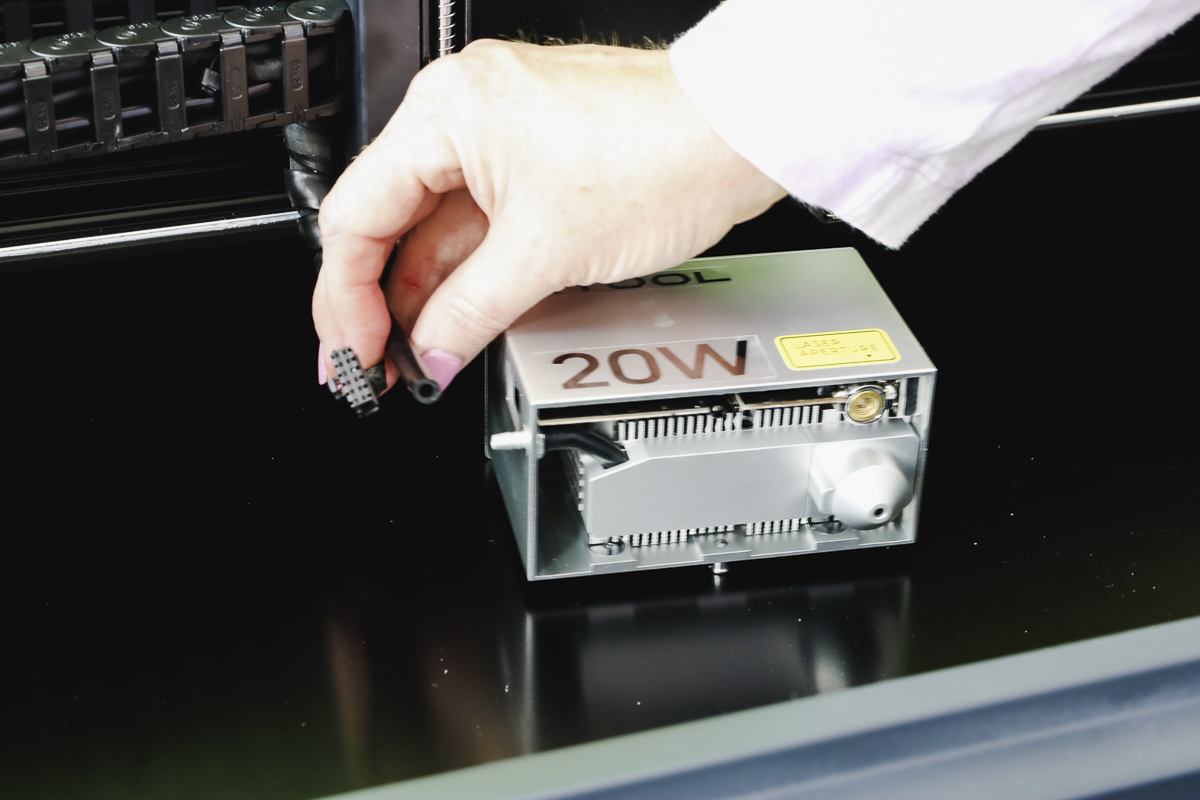
Add the Laser Module to the Laser
On one side of the laser module, there are two ports. Connect the cords of the laser to the ports and push each one into place.
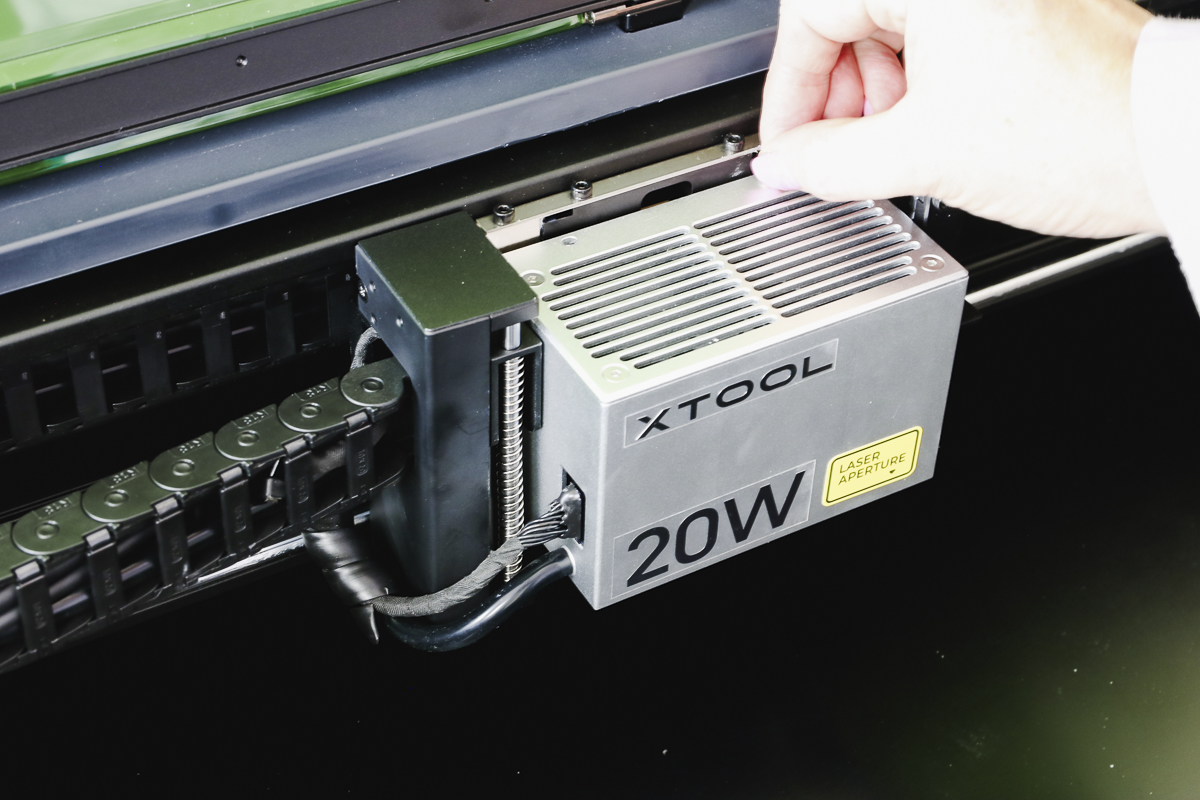
On the back of the module, there is a locating pin that fits into a hole in the laser. With the pin in the laser, press down and it should slide into place. The screw holes should line up at the top. Add the screws to hold it into place.
On one side there is a distance sensor. It is magnetic and will pop into place with locating tabs.
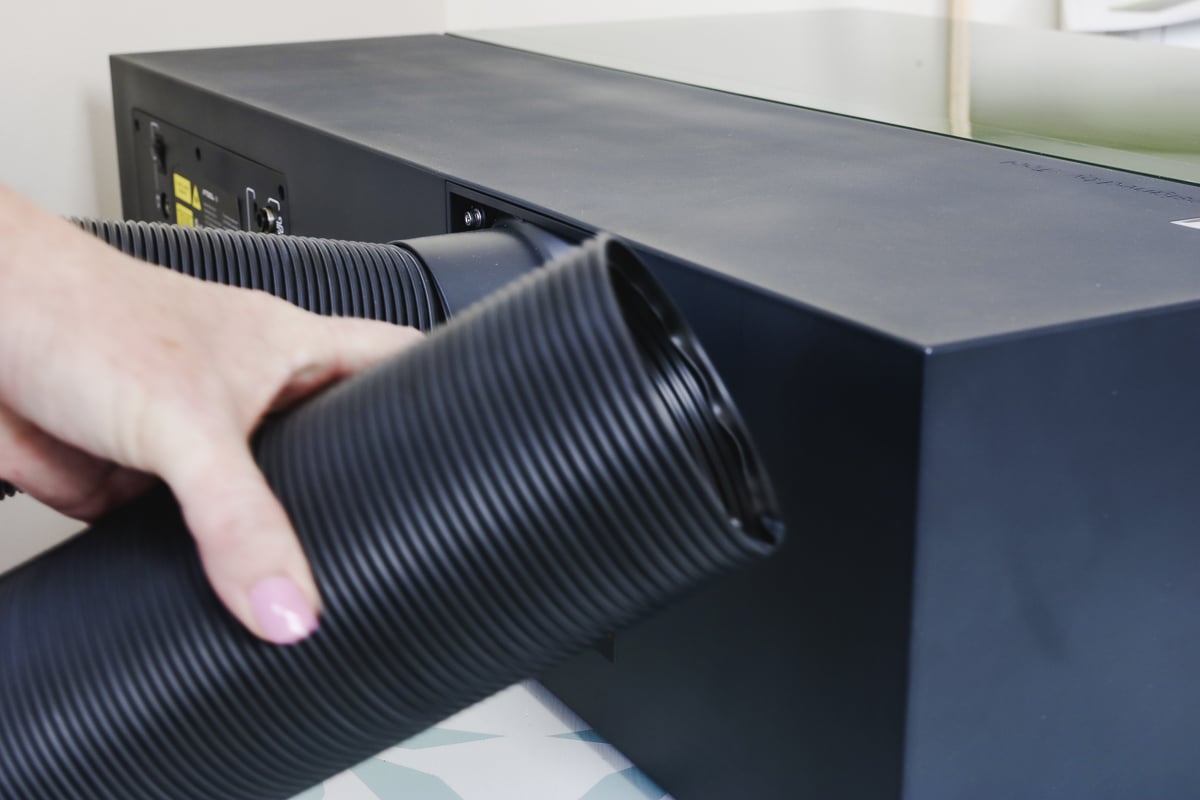
Attach the Hose for Ventilation
Next, we’re going to attach the hose to the back of the laser. Remove the cover from the back and line up the holes on the end of the hose to screw it into place.
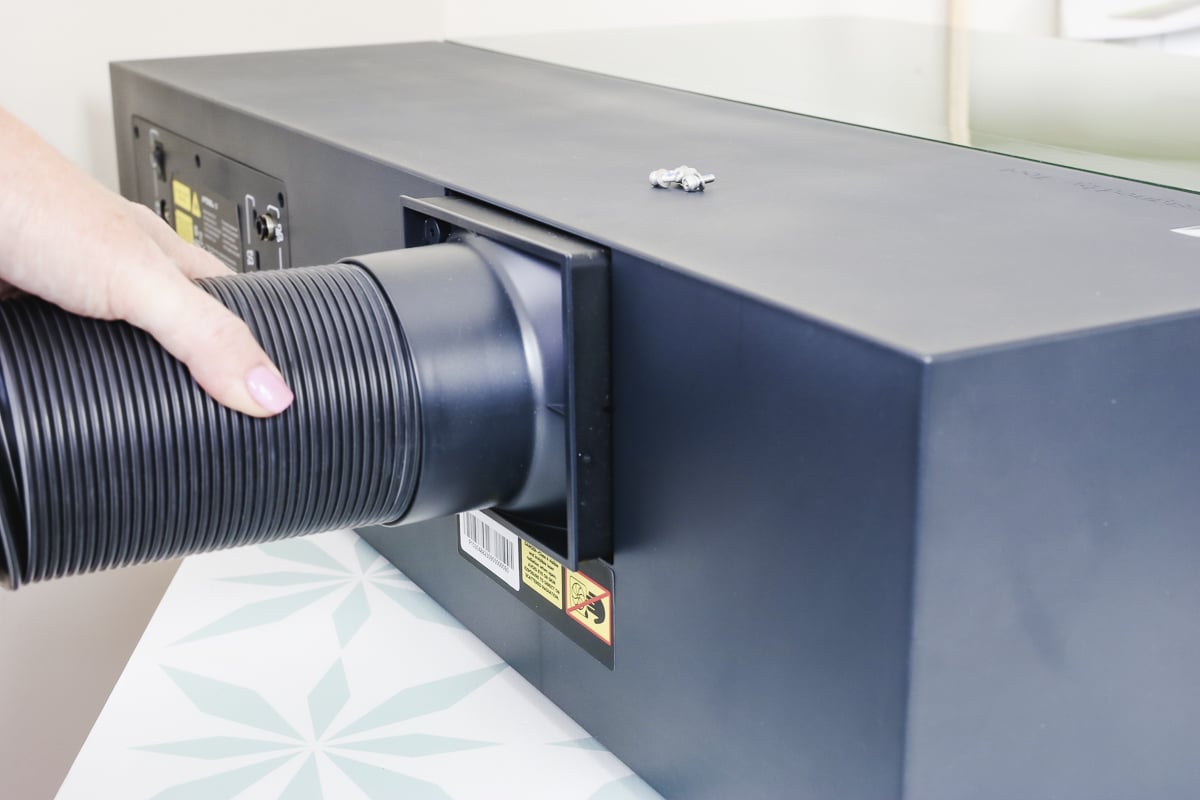
Run the other end of the hose out the window for venting. If you have the Air Assist attachment you can attach it to the back of the laser.
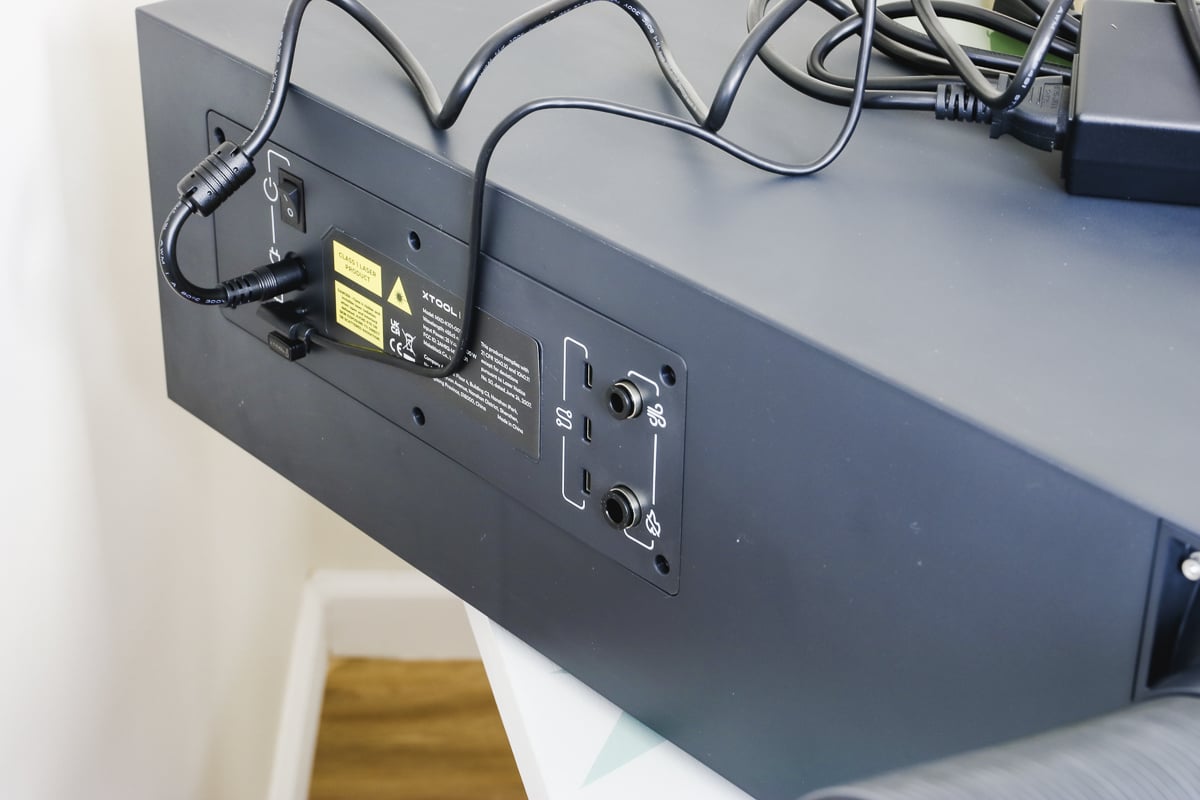
Connect All Cords
With everything that came in the box, you’ll find a little USB key. Put it in the bottom port of your xTool. If you remove this key, it will prevent people from being able to use your laser.
The power cord attaches to the back of the laser in the top slot and the USB cord that you connect to your computer will connect in the bottom port.
With all the cords connected to the machine plug it in and flip the power switch to on.
Place Triangular Prisms in the Bed of the Laser
You need to have something in the bed of your laser to hold up your material. The xTool S1 laser comes with triangular prisms that can be put in the bed of the machine.

You can also purchase an optional honeycomb tray that would replace the triangular prisms. I recommend the honeycomb tray because I prefer it. You can use the prisms to begin with since they come with the machine.
The xTool S1 laser has some safety features that I really like, let’s look at each of those.
Emergency Shut-off Button
On the side of the laser, you’ll see a red emergency shut-off button. With the button pressed in, the machine will shut down. To turn the machine back on, twist the button and it’ll pop back out. If your machine isn’t turning on, check the safety button and make sure it isn’t pushed in.
Fire Detection System
The xTool S1 laser has a fire detection system within the laser itself. The fire detection system will shut the laser down if it detects a fire.
Protective Lid
You should never look at a laser when it’s cutting as it can cause eye damage. The xTool S1 has a green lid that protects your eyes from the laser. You can watch the laser cut through the lid without worry.
I feel that this is a very safe laser to operate. Even with the safety features, you should not leave your laser while it is running.
I also recommend keeping a fire extinguisher and/or fireproof blanket nearby while the laser is operating.
Laser safety is an important part of using a laser for crafting. Make sure you know how to stay safe by watching my laser safety video.
With the laser set up, it’s time to look at the software you need to operate it.
There are two options, xTool Creative Space or LightBurn. I am using xTool Creative Space for this tutorial and future tutorials. If you are a fan of LightBurn, you can use it with the xTool S1.
Connect the laser to the computer using the USB cable and then connect the laser to Wi-Fi. After the initial setup, you don’t need to use the USB cable as designs can be sent over Wi-Fi to the laser.
The whole setup process is very easy within xTool Creative Space.
Now we’re ready to make our first project.
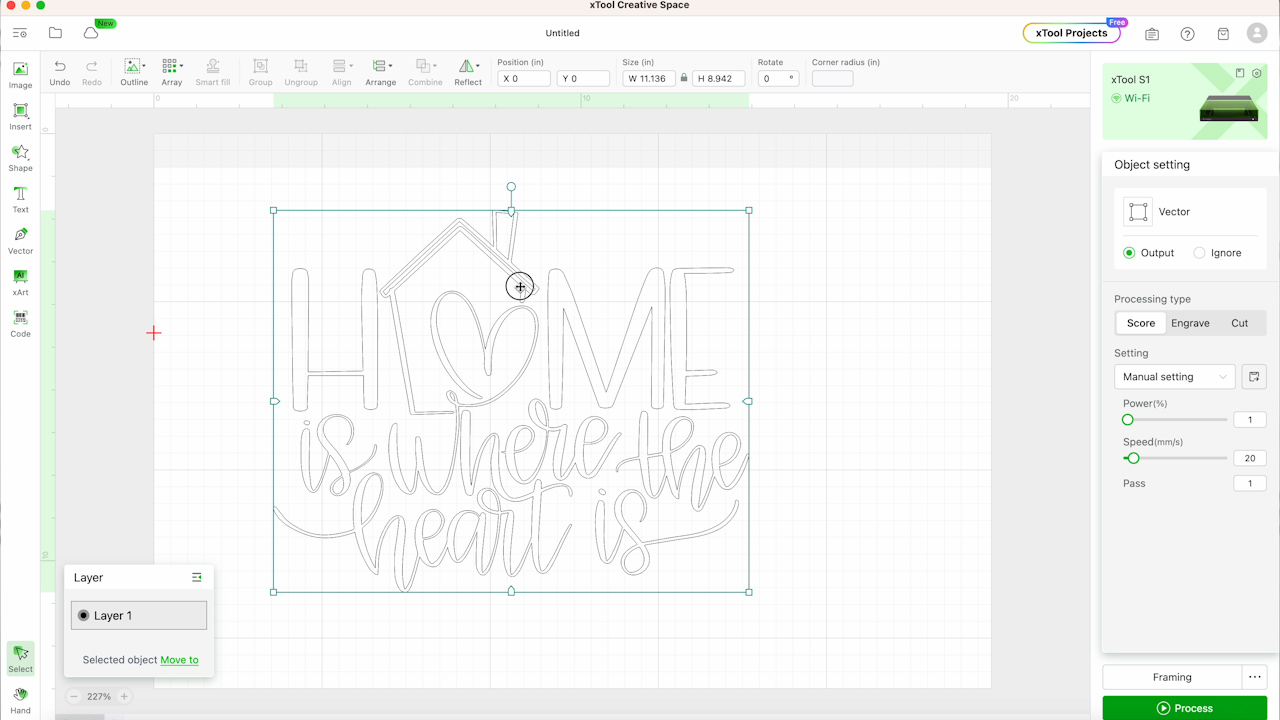
Step 1: Upload Design
Open Creative Space and upload the design you want to use. You can use photo files or SVG files for cutting on a laser. I am using a design that you can get for free here for the project I’m making today.
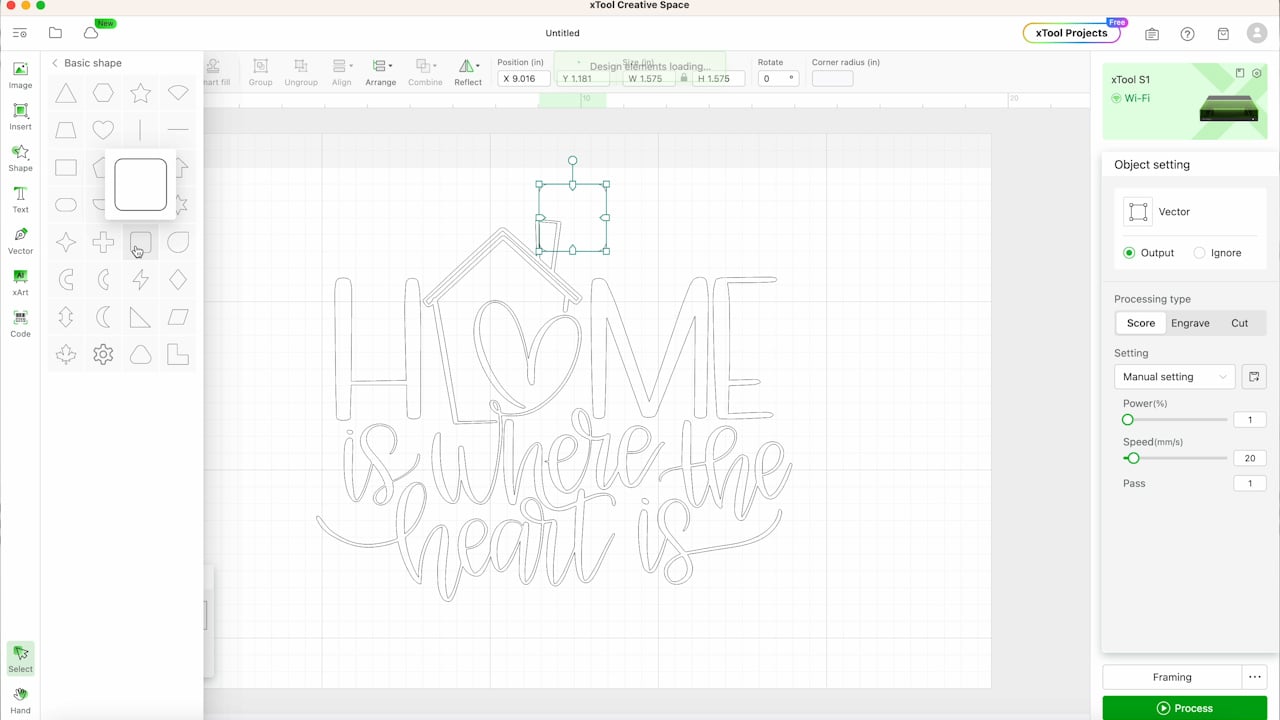
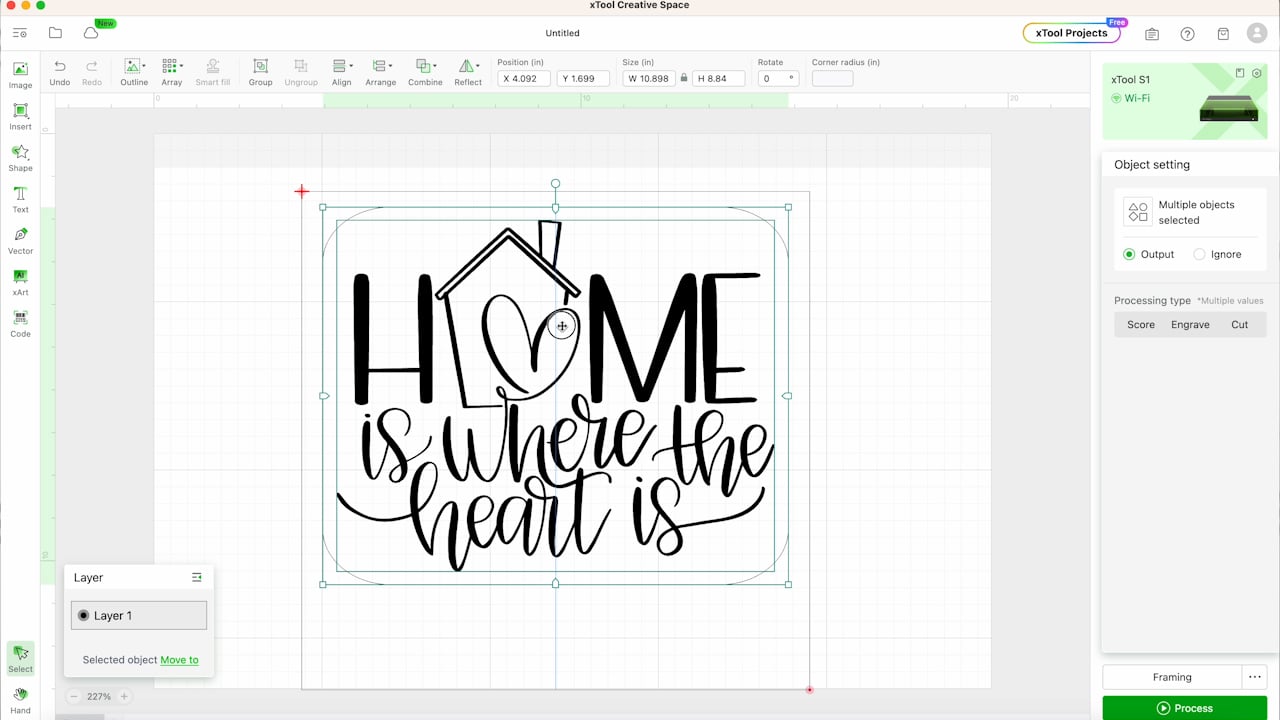
Step 2: Add a Shape Around the File for Cutting
The design I’m using I want to make into a sign. This design does not have a box around it so I am adding a shape right in Creative Space so my laser will cut the sign shape around the design.
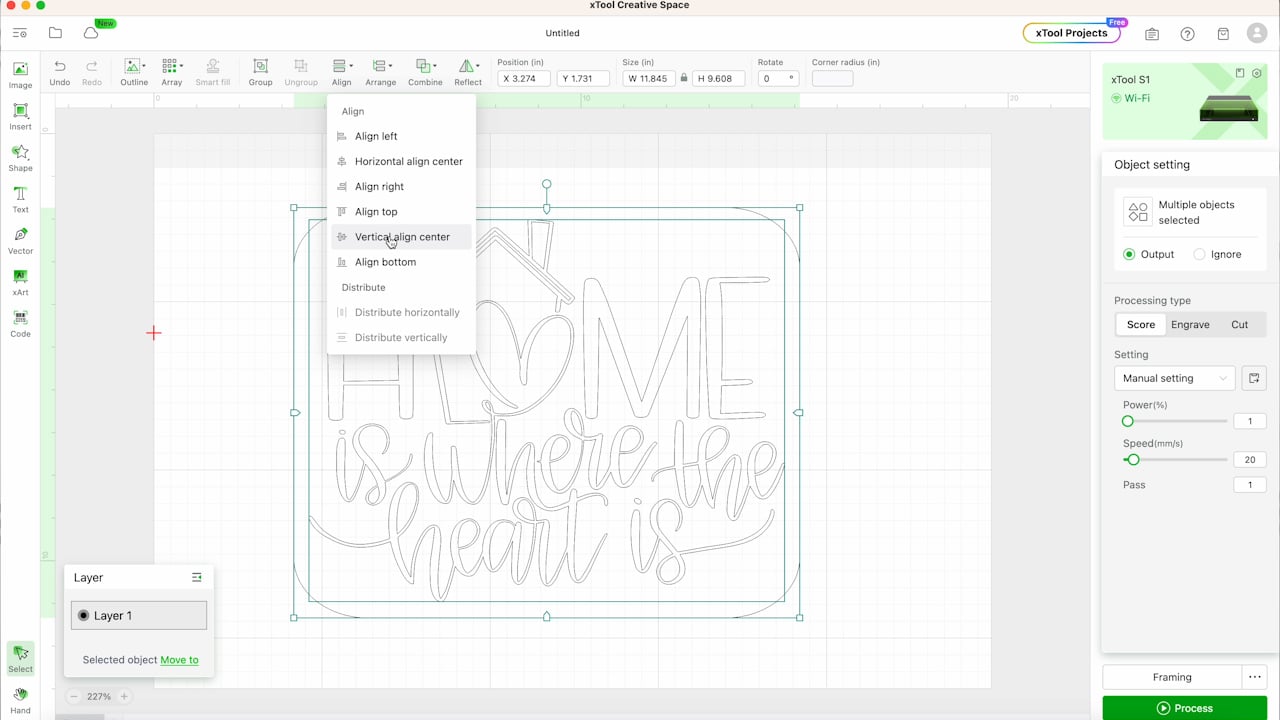
Step 3: Locate Design
There are tools within Creative Space that I will get into in a future tutorial but one of the tools is the ability to move the location of the design wherever you want it. After adding the box, I was able to center the design on the shape but you can move it wherever you’d like.
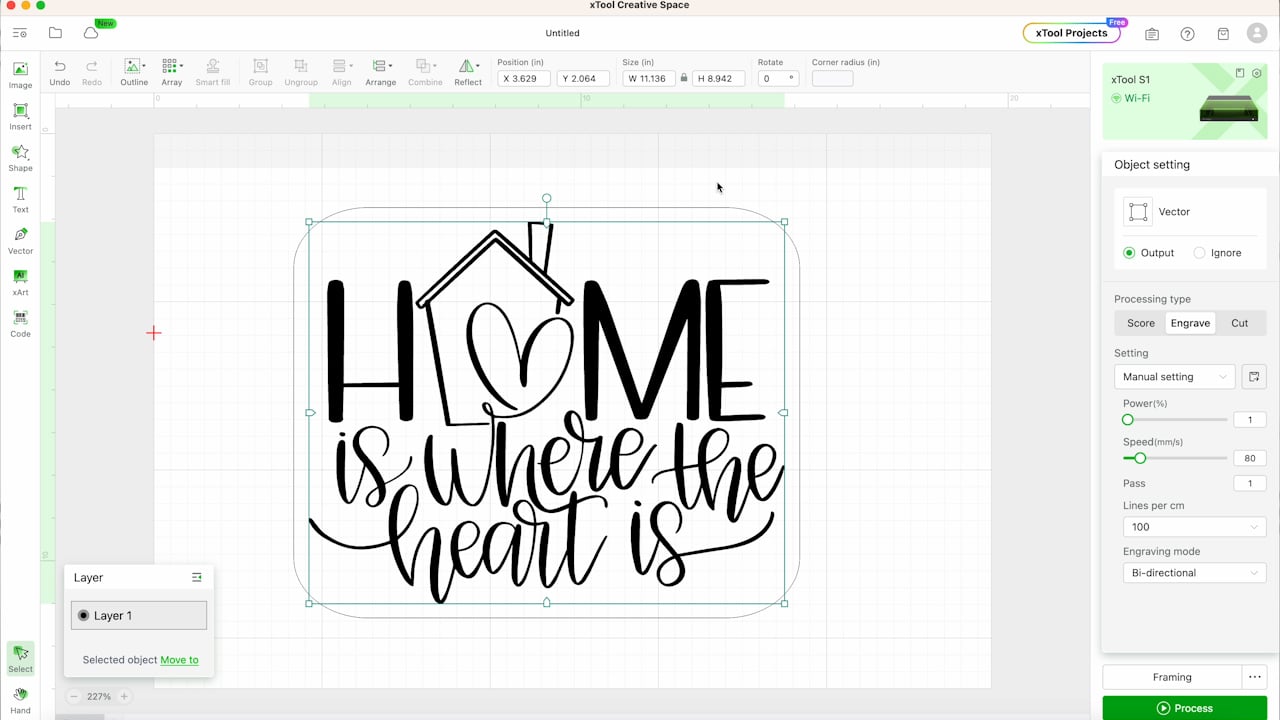
Step 4: Adjust Layer Type
Depending on the file you’re using you may have different layers. You have the option to score, engrave, or cut the different layers.
A score line will barely score the top of the material. Engraving goes deeper into the material but should not cut all the way through. A cut line will cut all the way through the material.
You can also set the power and speed. When you set the material, Creative Space will automatically set the power and speed for you. If you need to make adjustments, you can do that here.
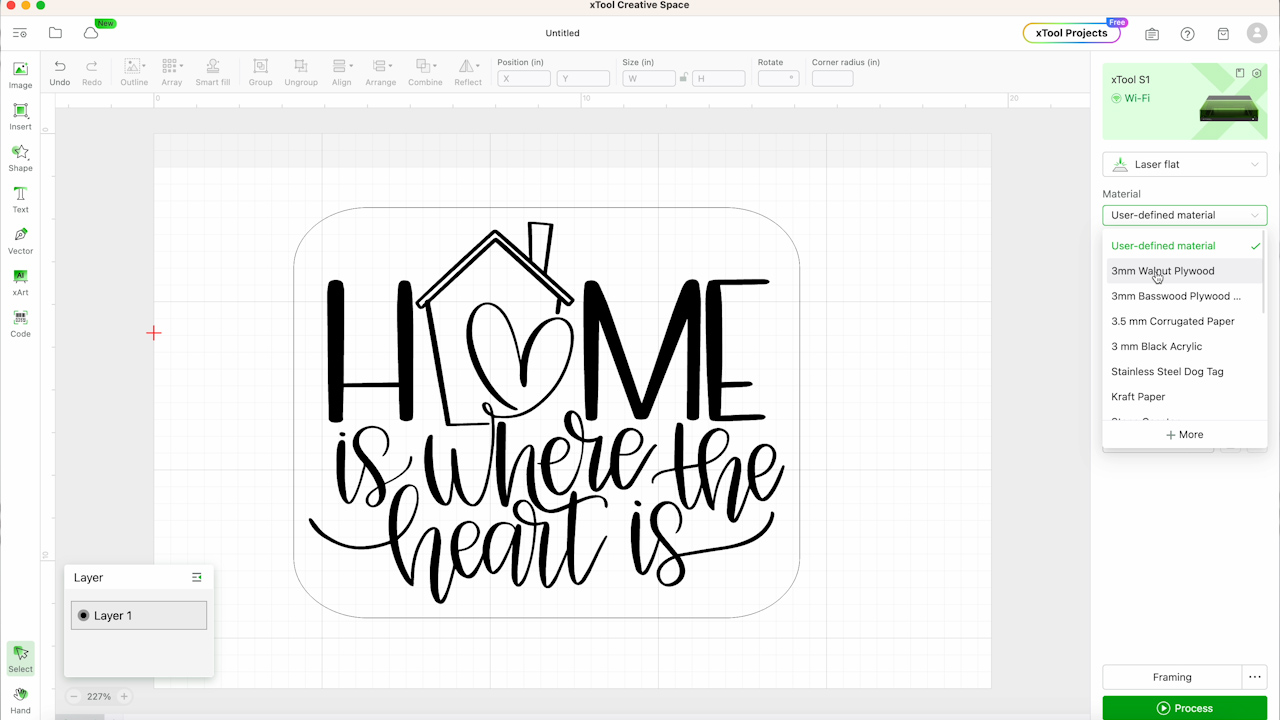
Step 5: Select Material Type
With the design set up exactly how I want it, it’s time to select a material. For this project, I am using 3mm plywood. You can choose whatever material you are using.
Step 6: Place Material in the xTool S1 Laser
Next, it’s time to place the material into the laser. Set it on the triangular prisms or the honeycomb tray and we’re ready to measure the material.

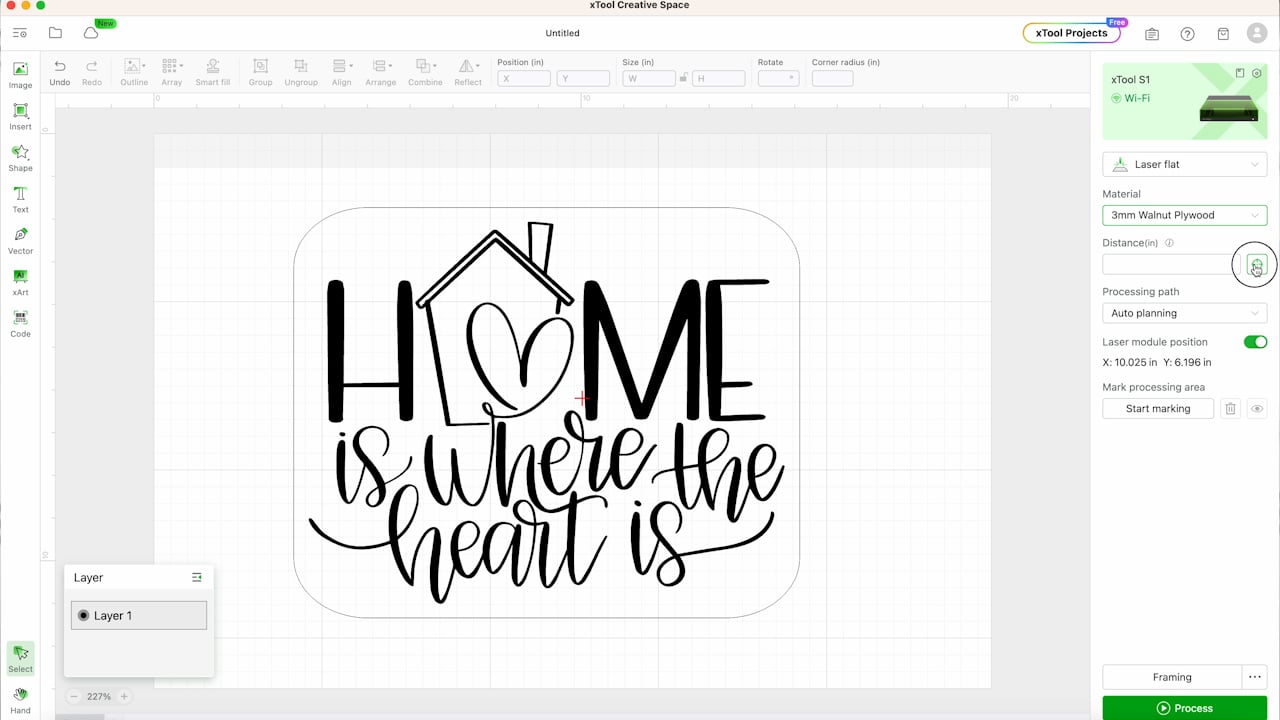
Step 7: Measure Material Thickness
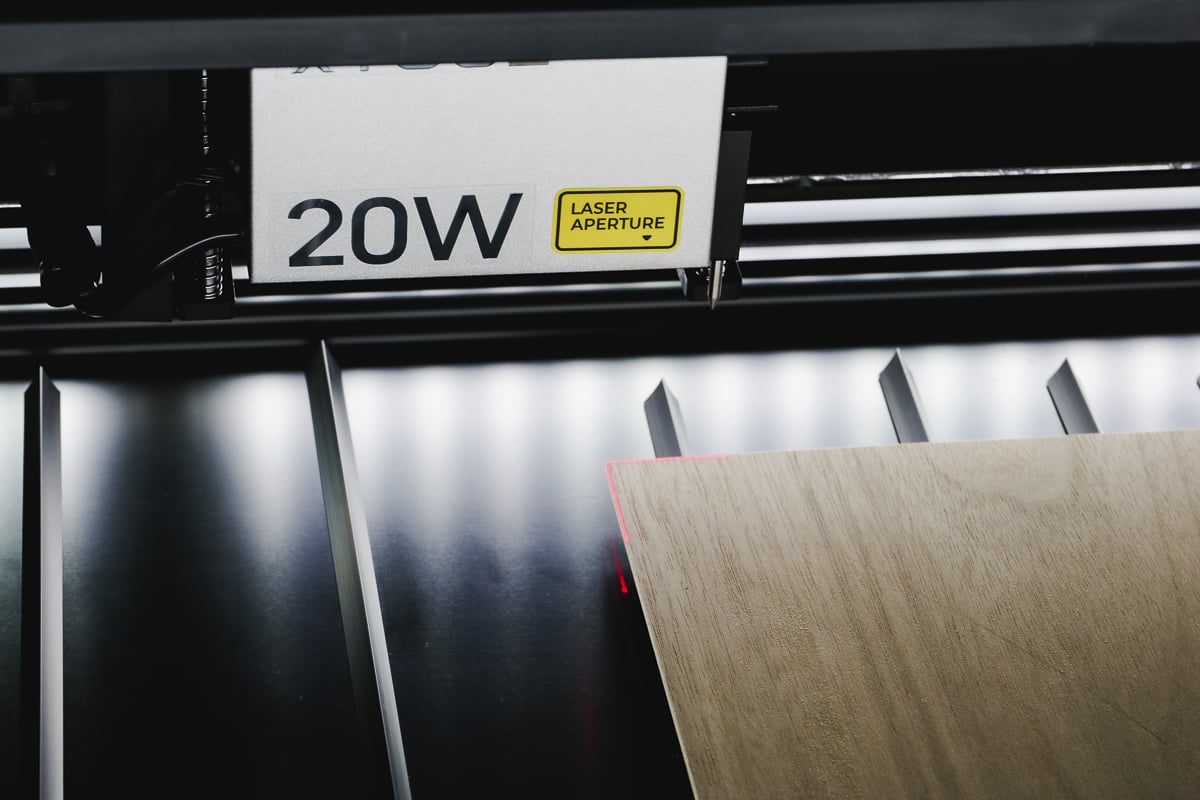
The xTool S1 laser doesn’t have a camera inside the machine. To measure the thickness manually move the laser head to the center of your material.
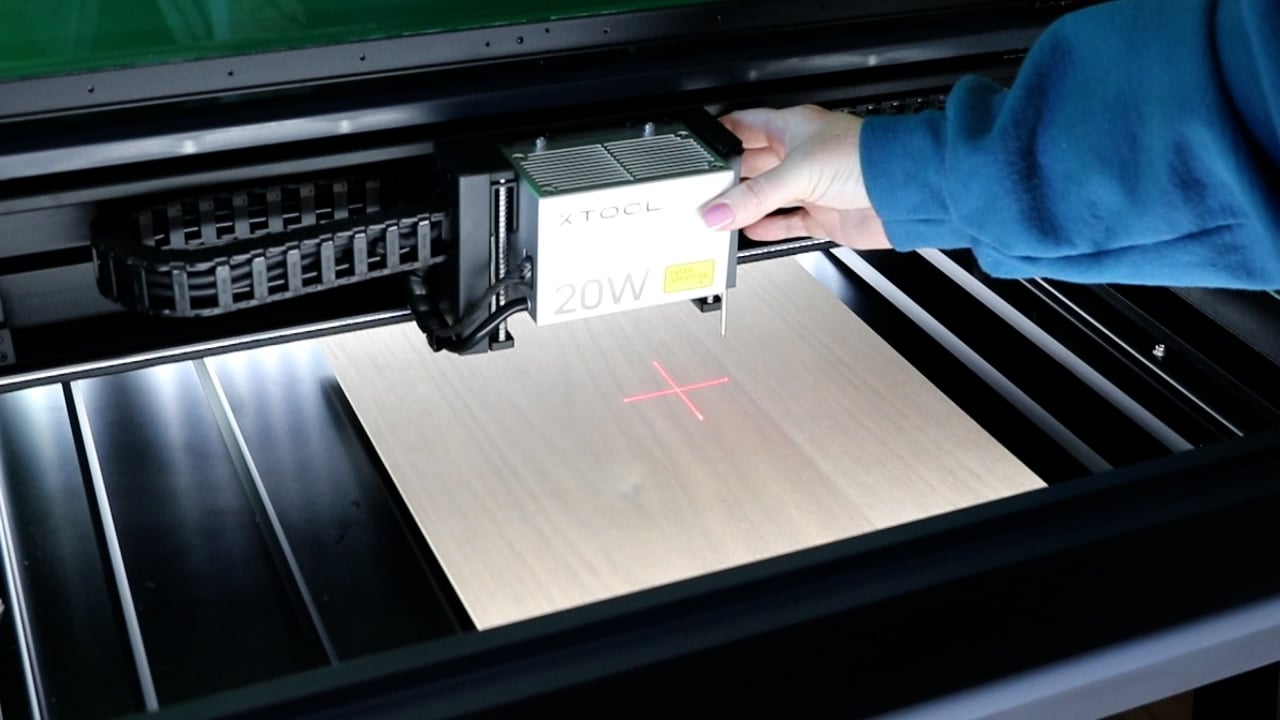
Click the Auto-measure button and it will measure the thickness of your material.
You may be prompted to reset the distance sensor. If you are, press reset, and the machine will automatically reset the distance sensor.
Step 8: Mark the Material
The next step is called marking. Since there is no camera in the laser, we need to set the edges of the material.
Press Start Marking and from there, you have a few options. I am choosing the rectangle because I’m using a rectangular piece of material.
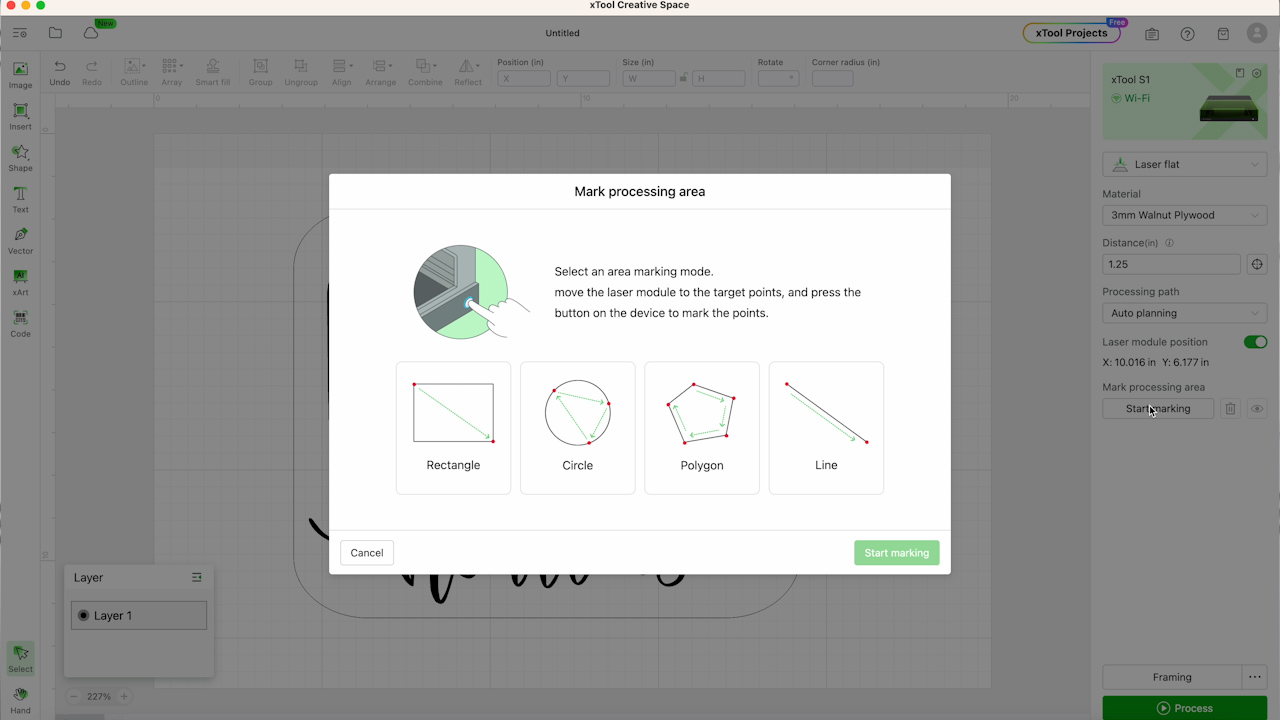
Follow the directions on the screen. Move the laser head to the first corner and press the button on the front of the machine. When it’s done, move the laser to the second point and press the button again.
Make sure that the crosshairs line up with the corners of the material so it marks the correct places and Creative Space has the material located correctly.
Step 9: Resize and Locate the Design in Creative Space
In Creative Space, you’ll see the shape on the screen. That shape indicates where the material is. With the material set, we can now resize the design to fit the material how we want and locate it correctly.
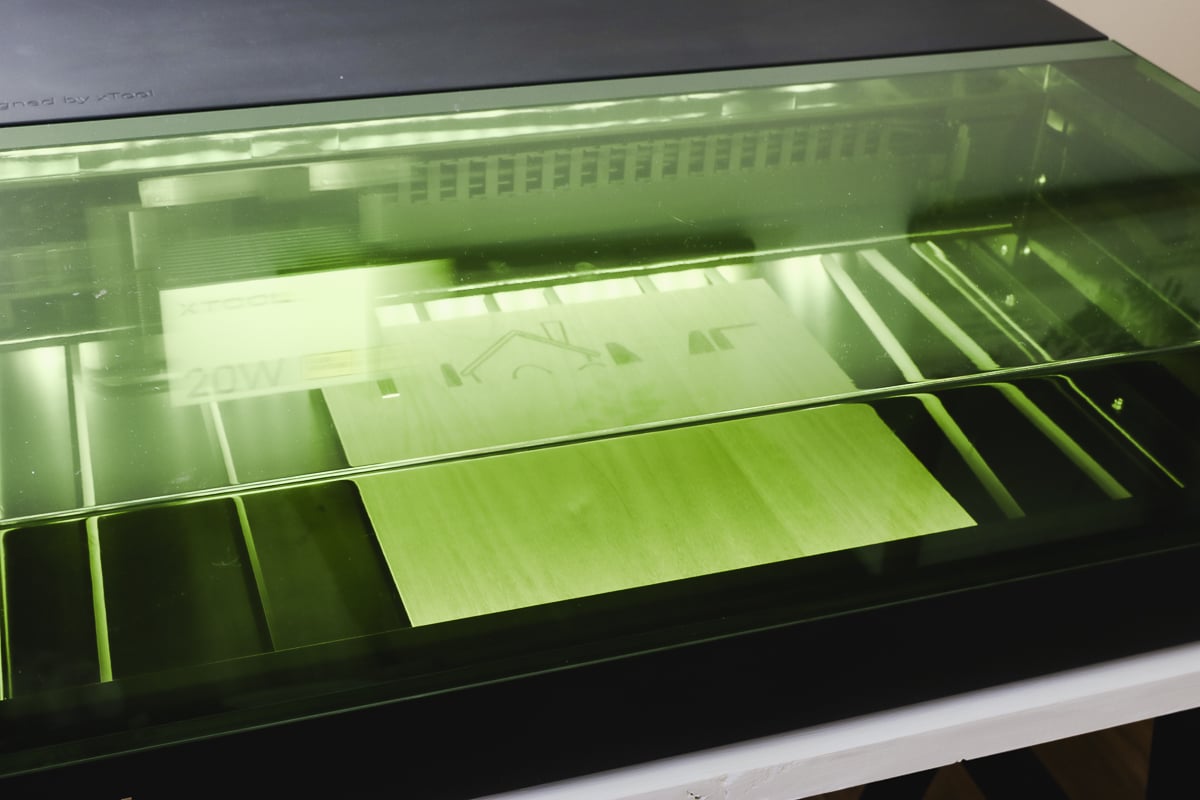
Step 10: Start the Engraving and Cutting Process
With the design located correctly, click Process to send the file to your xTool S1 laser. After selecting Process in Creative Space, press the button on the front of the machine to start the engraving and cutting process.
Once you press the button, the machine will start and it will score, engrave, and cut the design.
My xTool S1 has a 20-watt laser. It will be slower than the 40-watt laser but is fast compared to the Glowforge Aura, which is a 4-watt laser.
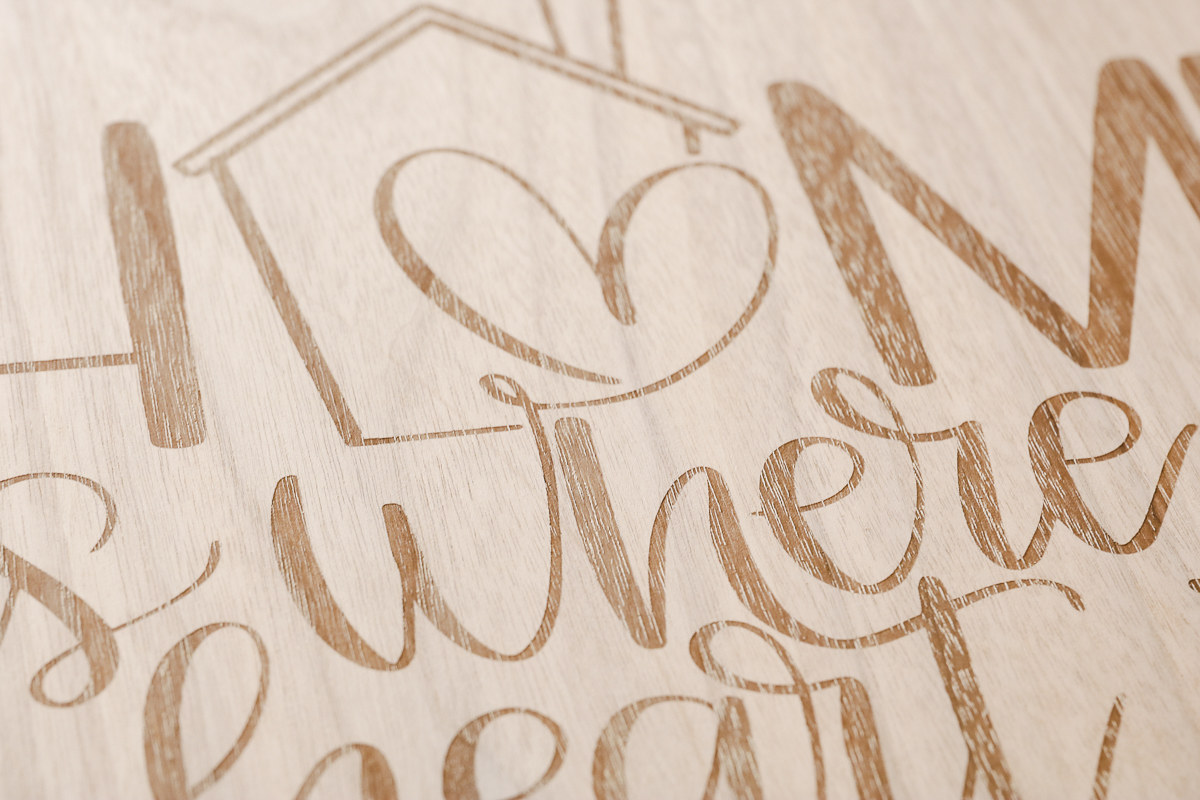
Step 11: Review the Finished Project
Let’s take a look at how the project turned out.
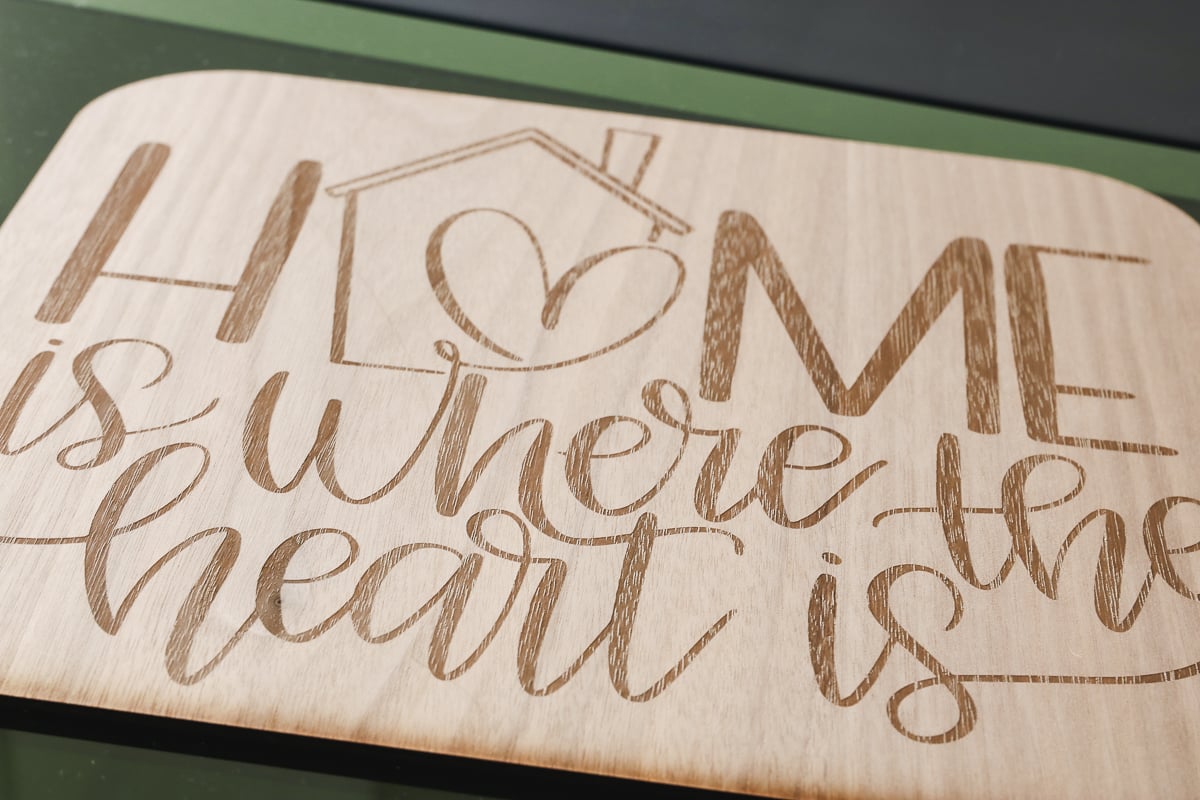
The project was easy to set up in Creative Space and the xTool S1 was very easy to use. I would recommend testing the different settings as you’re getting started. I think this project would have looked better with deeper engraving.
Frequently Asked Questions
Do I Need to Add Masking to Materials?
I was surprised to find that the xTool plywood I used for this project did not have masking on the front or the back. Adding a mask will eliminate scorch and burn marks, I recommend adding a mask to both the front and the back before cutting.
Is the xTool S1 Laser Easy to Use?
I was really impressed with the xTool S1. It is easy to set up and easy to use, and the Creative Space software was very easy, even for the first time using it.
I did have to look up how to measure the thickness of the material and how to mark the corners. I am used to the camera in the Glowforge Aura so that part was a little confusing until I found out how to do it.
It is easy to do once you know how and I was happy with the finished project for the first try.
What Type of Laser is the xTool S1?
The xTool S1 laser is a diode laser. The con of the S1 is that, like other diode lasers, it cannot cut clear acrylic. You’ll also probably find it difficult to cut light colors or materials that are blue.
If you work with a lot of those types of materials, a diode laser isn’t the right laser for you. You’d want a CO2 laser instead.
How Much Does the xTool S1 Laser Cost?
The xTool S1 laser with the 20-watt laser head is about $1,700 as of the writing of this tutorial. If you are interested in the 40-watt laser head the price would be about $2,200. You can see more on the pricing and purchase here.
How Do Other xTool Lasers Compare?
There are other xTool lasers on the market. The M1 series is the bottom-line laser. It is a diode laser and runs about $1,000. There is a D-series of lasers, they are the middle line of lasers but they don’t have the safety enclosure so I don’t recommend them.
The next step up is the S1 laser. The 20-watt is great for engraving and cutting. If you want a faster option or to cut materials that are a little thicker the 40-watt laser head is the way to go. There is another head option for the S1 that would only be used for engraving. I haven’t tried it so I can’t say how well it works.
After the S lasers, you’ll move up to the P2 which is a CO2 laser. That is the laser you’d choose if you want to use clear or light-colored acrylic.
How Does the xTool S1 Laser Compare to Glowforge Lasers?
The xTool S1 laser is a diode laser similar to the Glowforge Aura. The Glowforge Aura is a very low-wattage laser. It can cut and engrave similar materials as the S1 but it is much slower.
If you’re comparing the Glowforge Pro, that is a CO2 laser so it would be comparable to the xTool P2.
When comparing lasers, diode lasers are beginner-friendly lasers that do a lot but have some limitations. CO2 lasers are more of a professional laser. A CO2 laser is significantly more expensive than a diode laser.
What Additional Accessories Work with the xTool S1 Laser?
I will review some of the additional accessories in future tutorials. The bed size of the S1 is approximately 23 inches by 15 inches. You can put large materials right in the bed of the laser which is great for home crafters.
Some of the additional accessories are a riser base and a rotary attachment. A conveyor can also be added, allowing you to cut even larger materials.
If you don’t have a window to vent the laser, you can purchase an air filter accessory that allows you to operate away from a window.
I am very happy with the xTool S1. It’s perfect for home crafters and it can do so many things. The only real drawback is the lack of a camera compared to the Glowforge lasers. That does take a little getting used to but it isn’t hard at all.

If you’re in the market for a laser for your home craft business, the xTool is a great option and I think you’ll be very happy with it. If you have any questions about the xTool S1, leave them in the comments and I’ll be happy to answer them for you.