This post and photos may contain Amazon or other affiliate links. If you purchase something through any link, I may receive a small commission at no extra charge to you. Any supplies used may be given to me free of charge, however, all projects and opinions are my own.
Cricut has a new feature in Design Space that I am excited to show you today. The Cricut Convert to Layers feature will allow us to turn digital photos and drawings into designs that can be cut with your Cricut machine.
If you’re new to Design Space, I have a beginner’s guide that is perfect for those just starting out.
This new tool is currently only available in the mobile app. You can get it in for either iOS devices or Android devices. It will be rolling out for desktop in the future.
You can watch me test the process on a few different images and see how it works by pressing play on the video below.
How to Use the Cricut Convert to Layers Feature
The Cricut Convert to Layers feature is for Cricut Access subscribers. If you are not a current subscriber you will not be able to use this feature.
If you have a new Cricut machine, you may have a free Cricut Access trial. You can test the feature along with other Cricut Access features to see if you use them enough to justify paying for Cricut Access.
Step 1: Upload Image
Before you begin, make sure that your Design Space app is up to date. If you don’t see the features in your Design Space, it likely needs to be updated.
Click Upload and find the image on your device. For the first example, I am going to start with a simple design.
Step 2: Remove Image Background
This image is from Pixabay.com and is an illustration. Since the convert to layers feature is for Cricut Access subscribers you can use the Automatic Background Remover, as it is also a feature for Cricut Access subscribers.
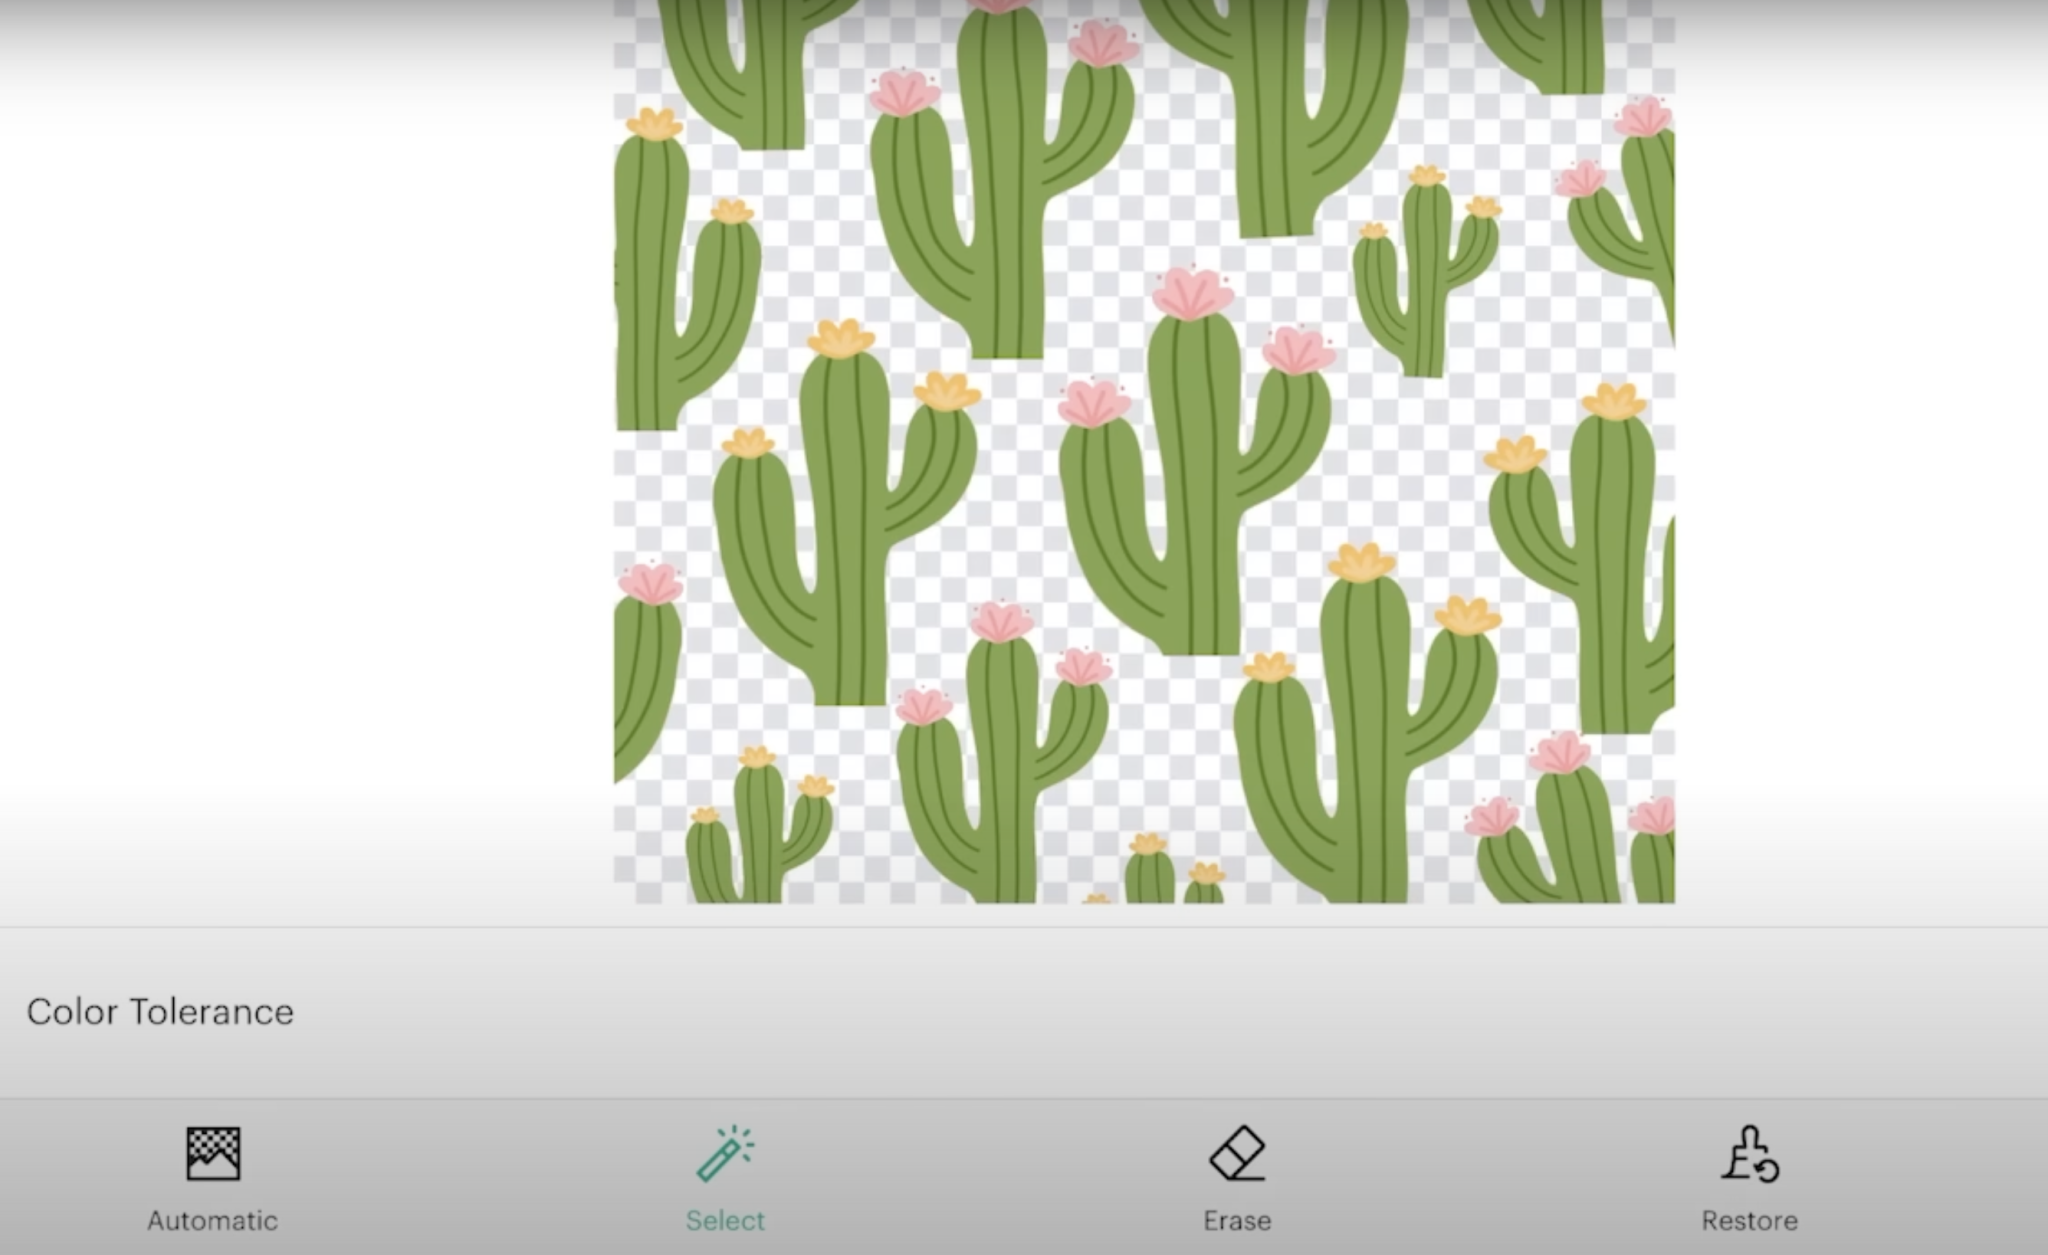
With this design, I do not need all of the cacti as they are repeated and some of them are cut off in the design.
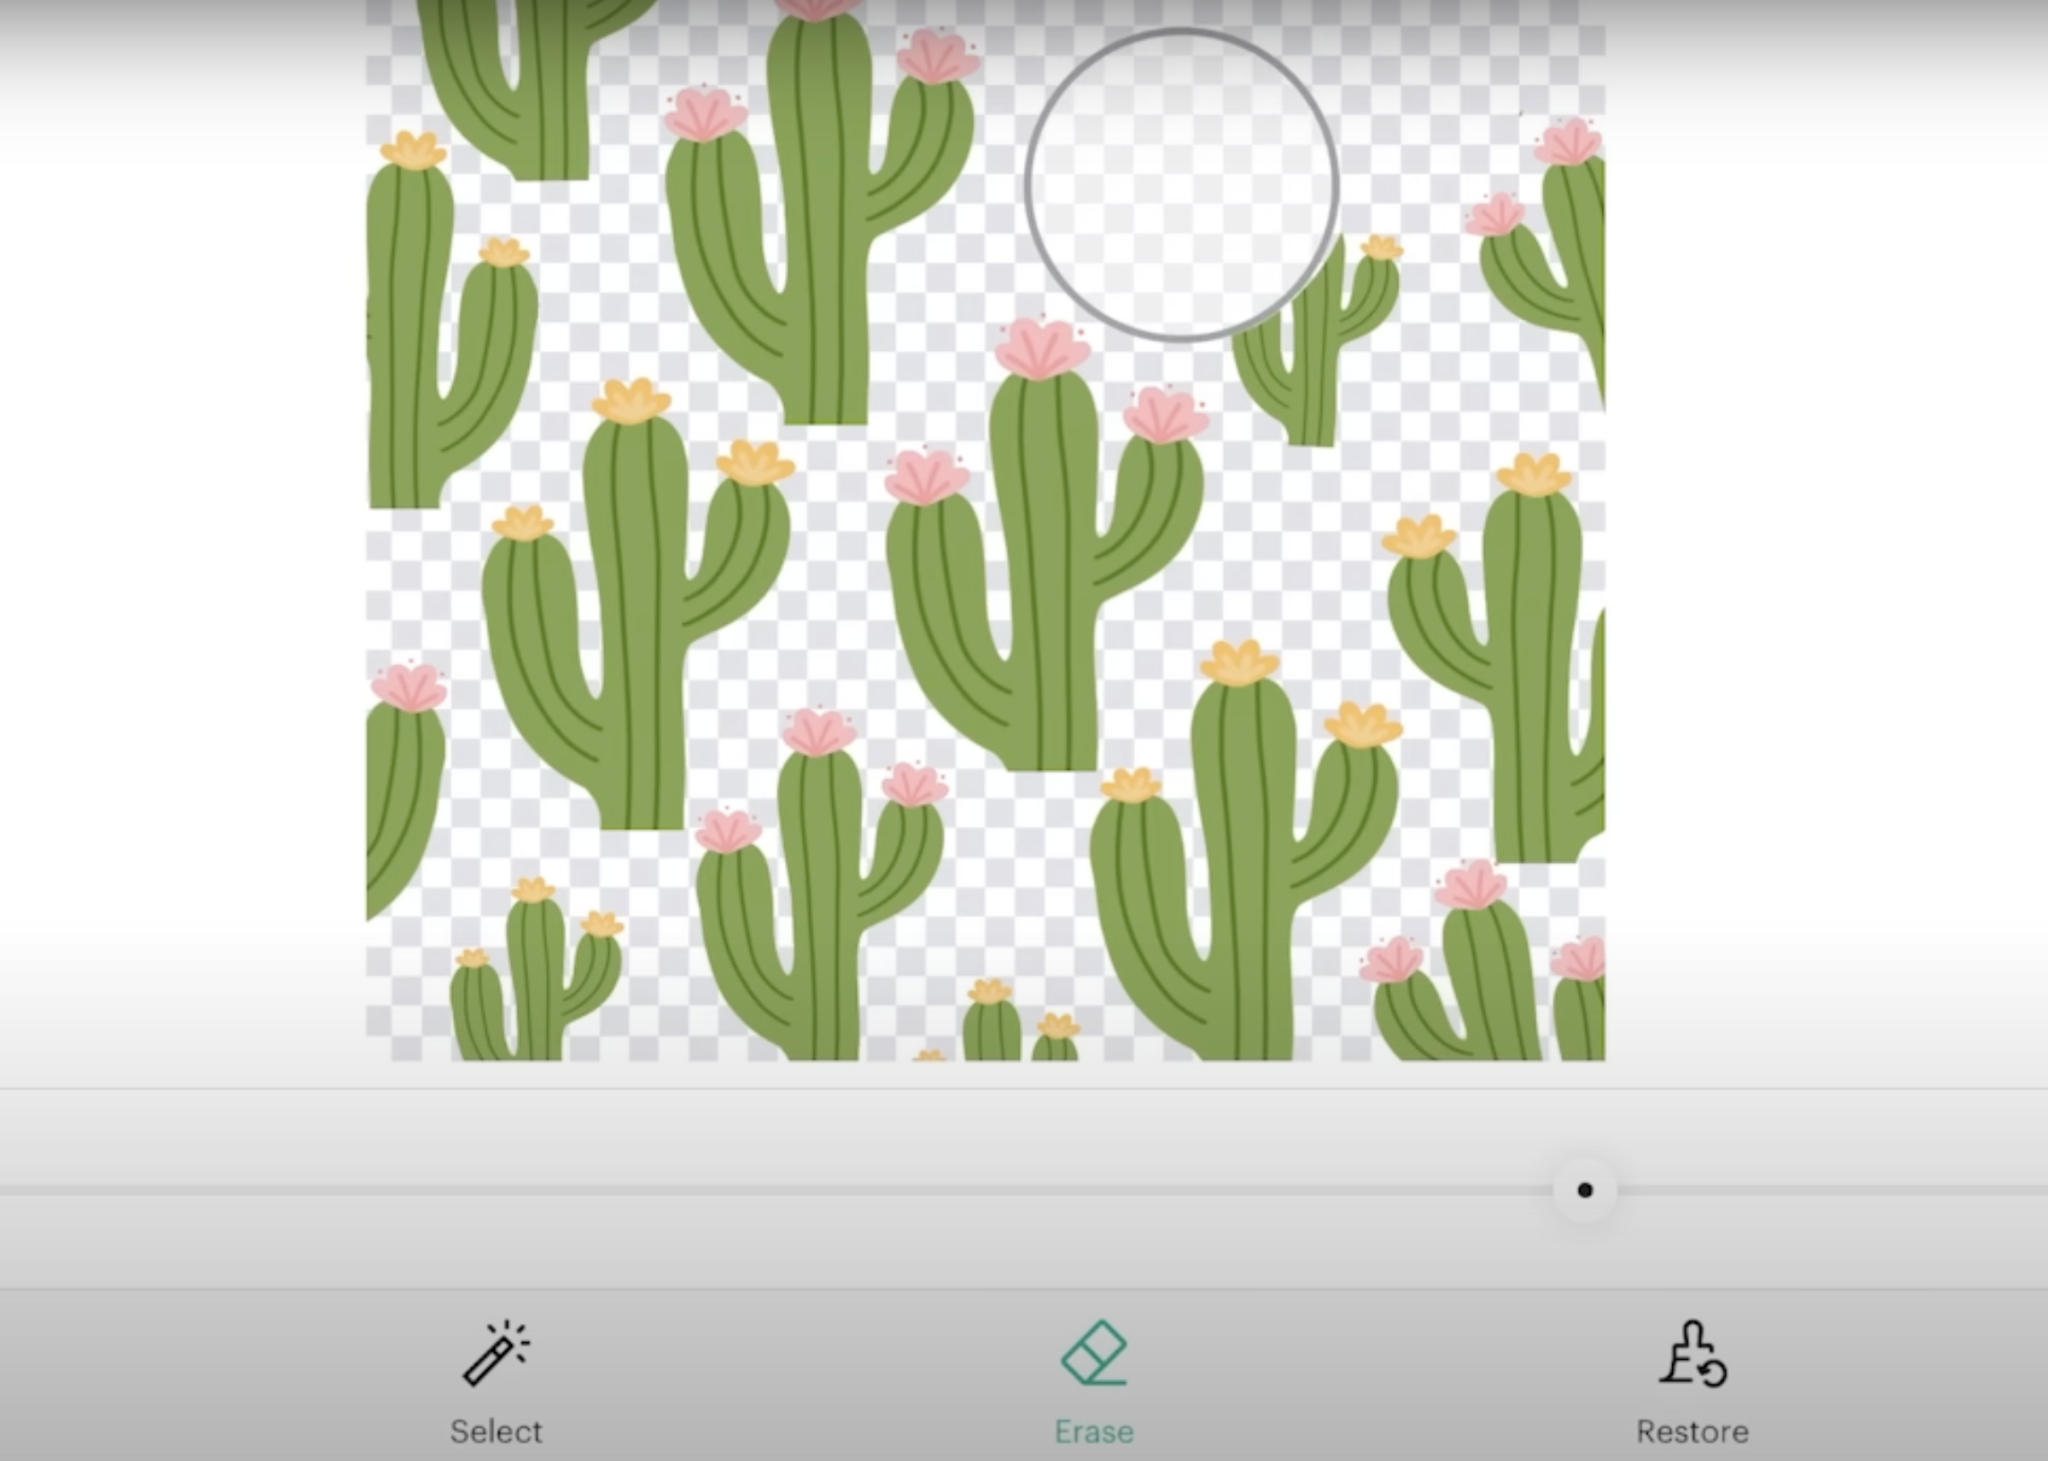
We can use the background remover tool and then use the eraser tool to remove any other items on the screen that we don’t need.
Step 3: Choose Multiple Layers Option
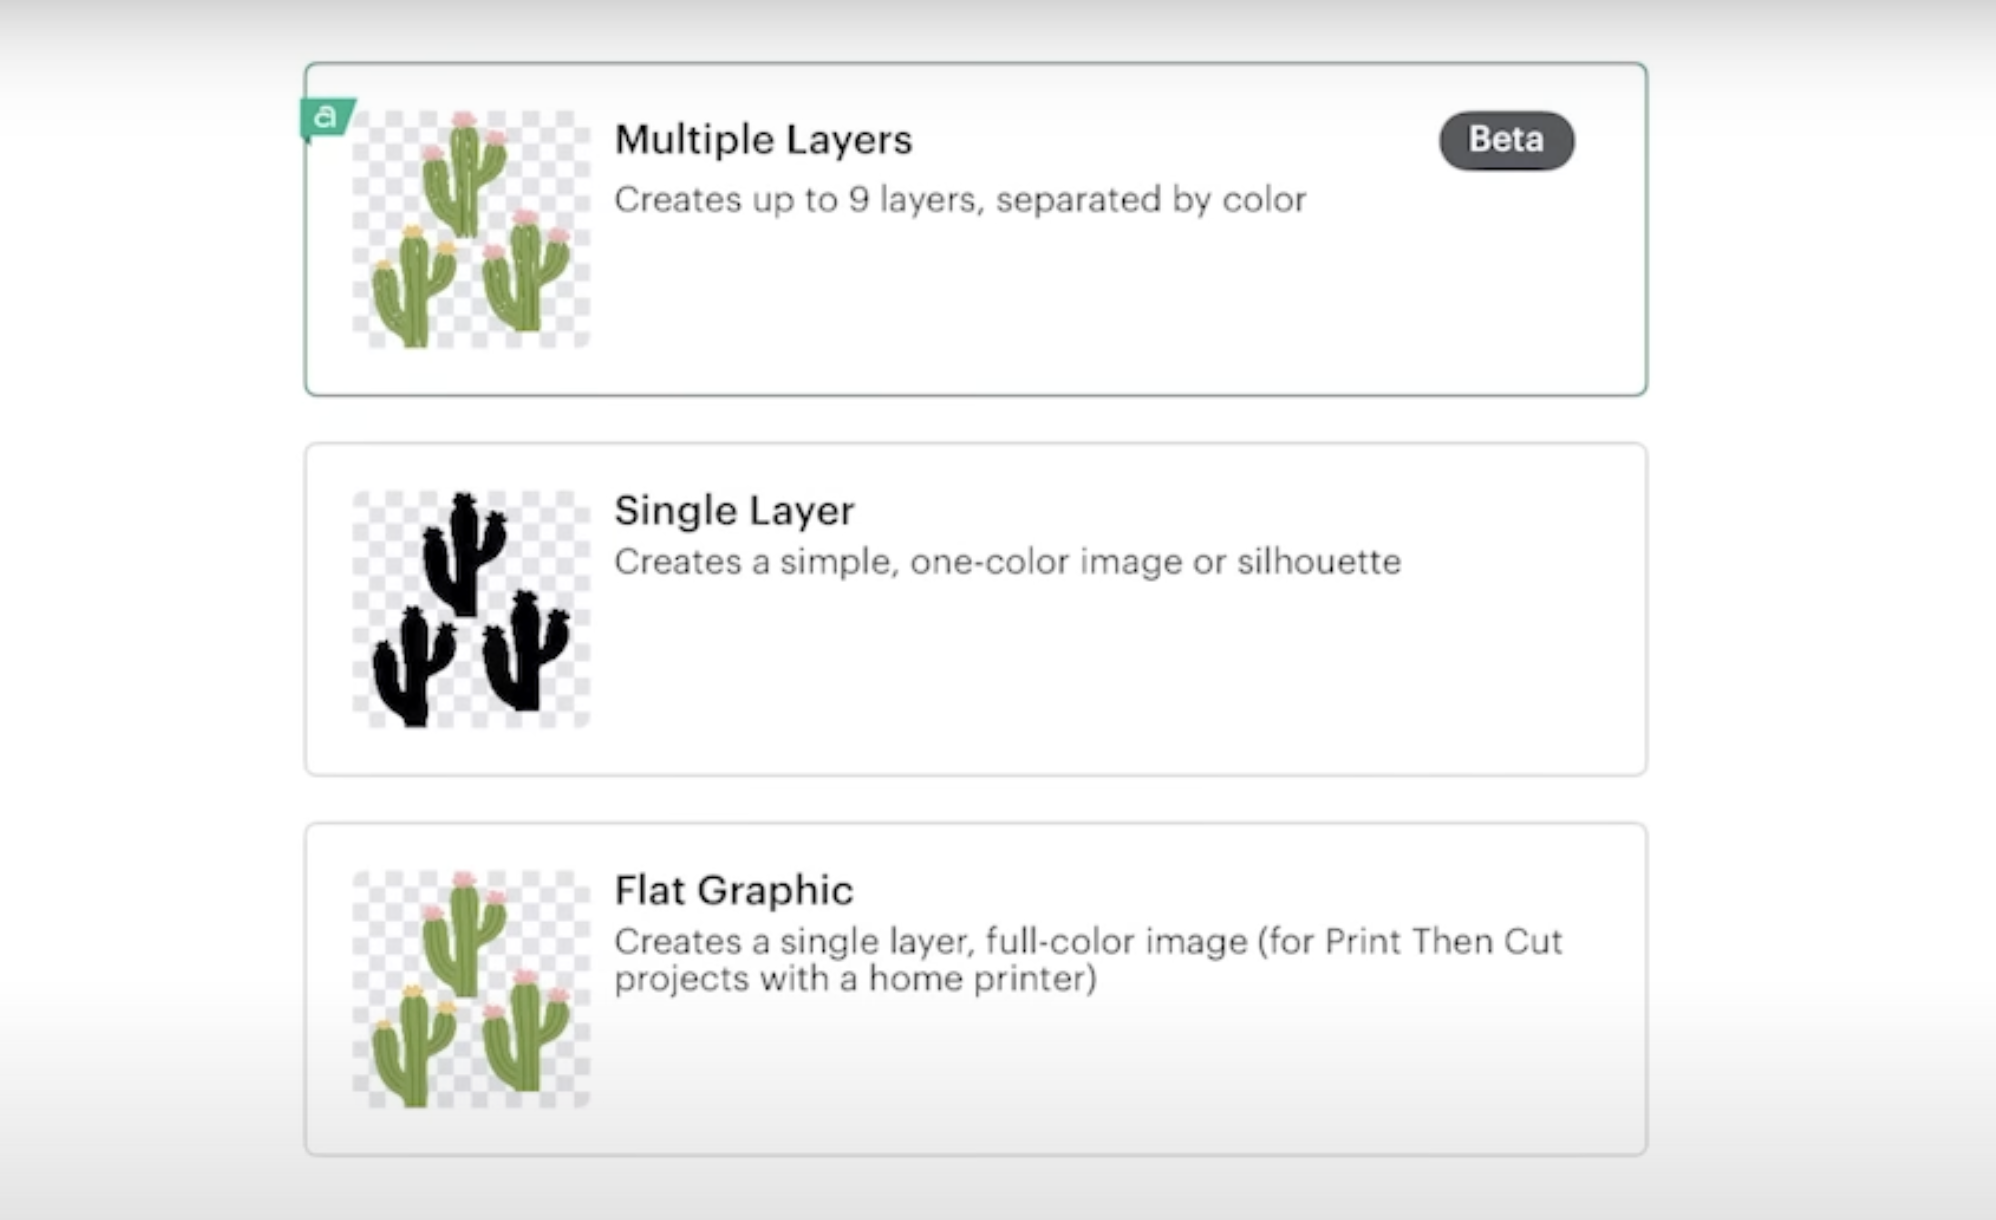
Click Apply and choose how you want to upload.
- Multiple layers – this is the convert to layers feature we will be discussing
- Single layer – Cut around the outside only in one color
- Flat graphic – for print then cut projects
We are going to select the Multiple Layers option for this tutorial.
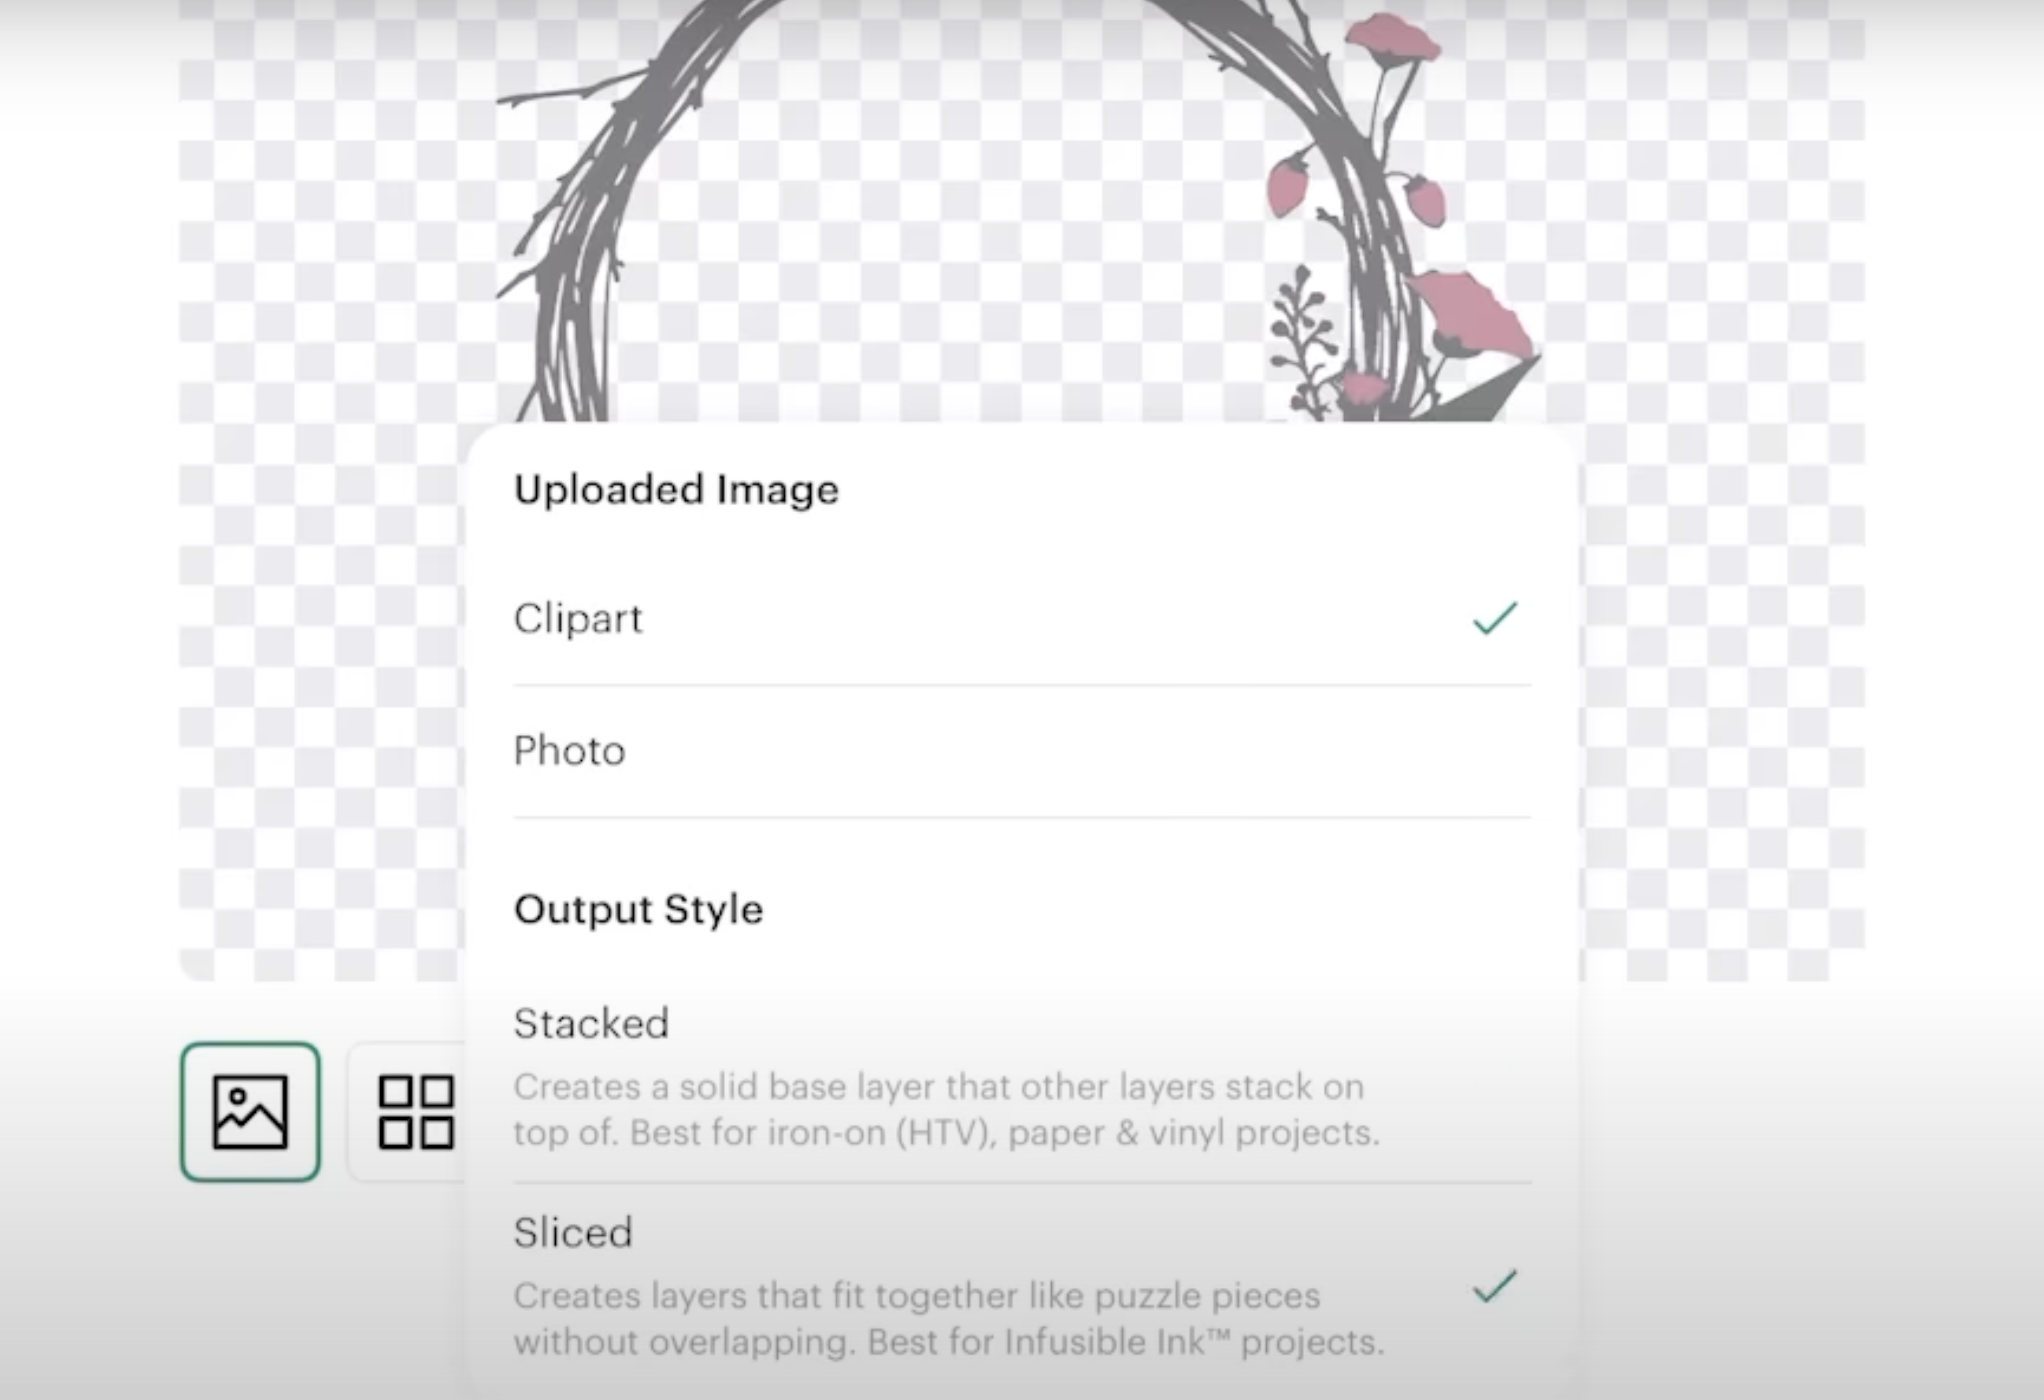
Next, select if your image is a photo or clip art. You may want to check both options as they can give you different results.
Step 4: Choose an Output Style
Now we need to choose an output style. You have two options, stacked or sliced.
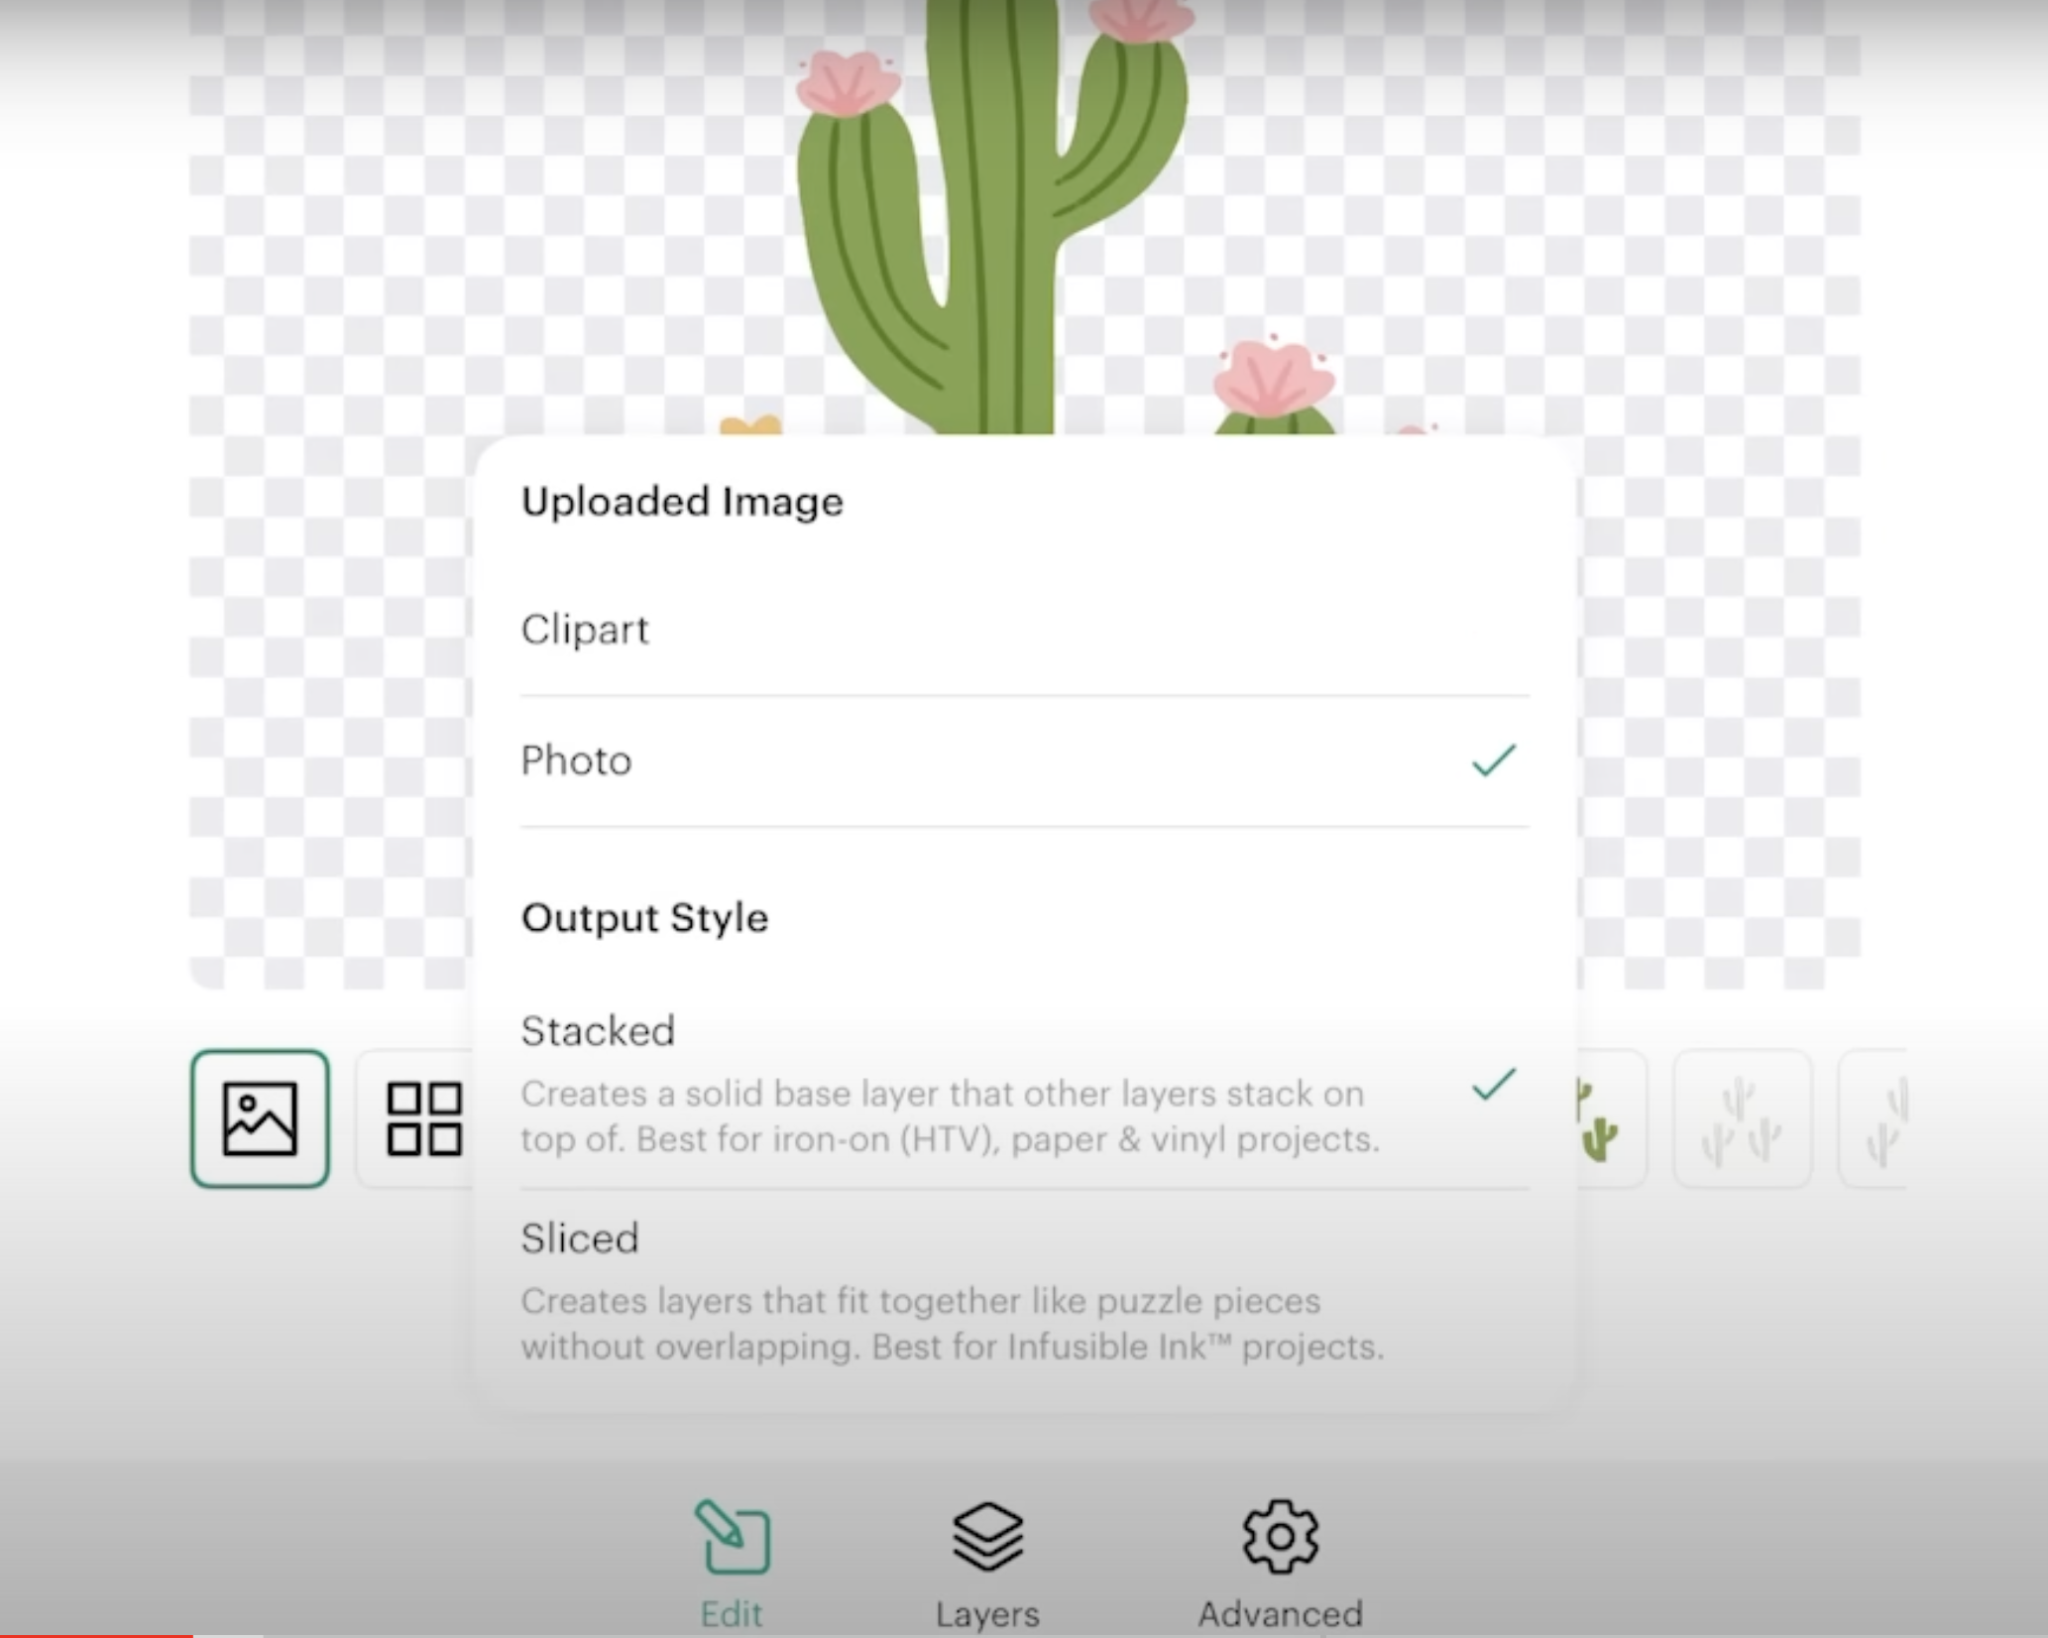
A stacked output will begin with a base layer and each of the other layers will be cut in a way that they can stack on top of each other. The sliced option slices each layer out of the other layer so, in the end, you would piece the layers together.
Step 5: Simplify the Design
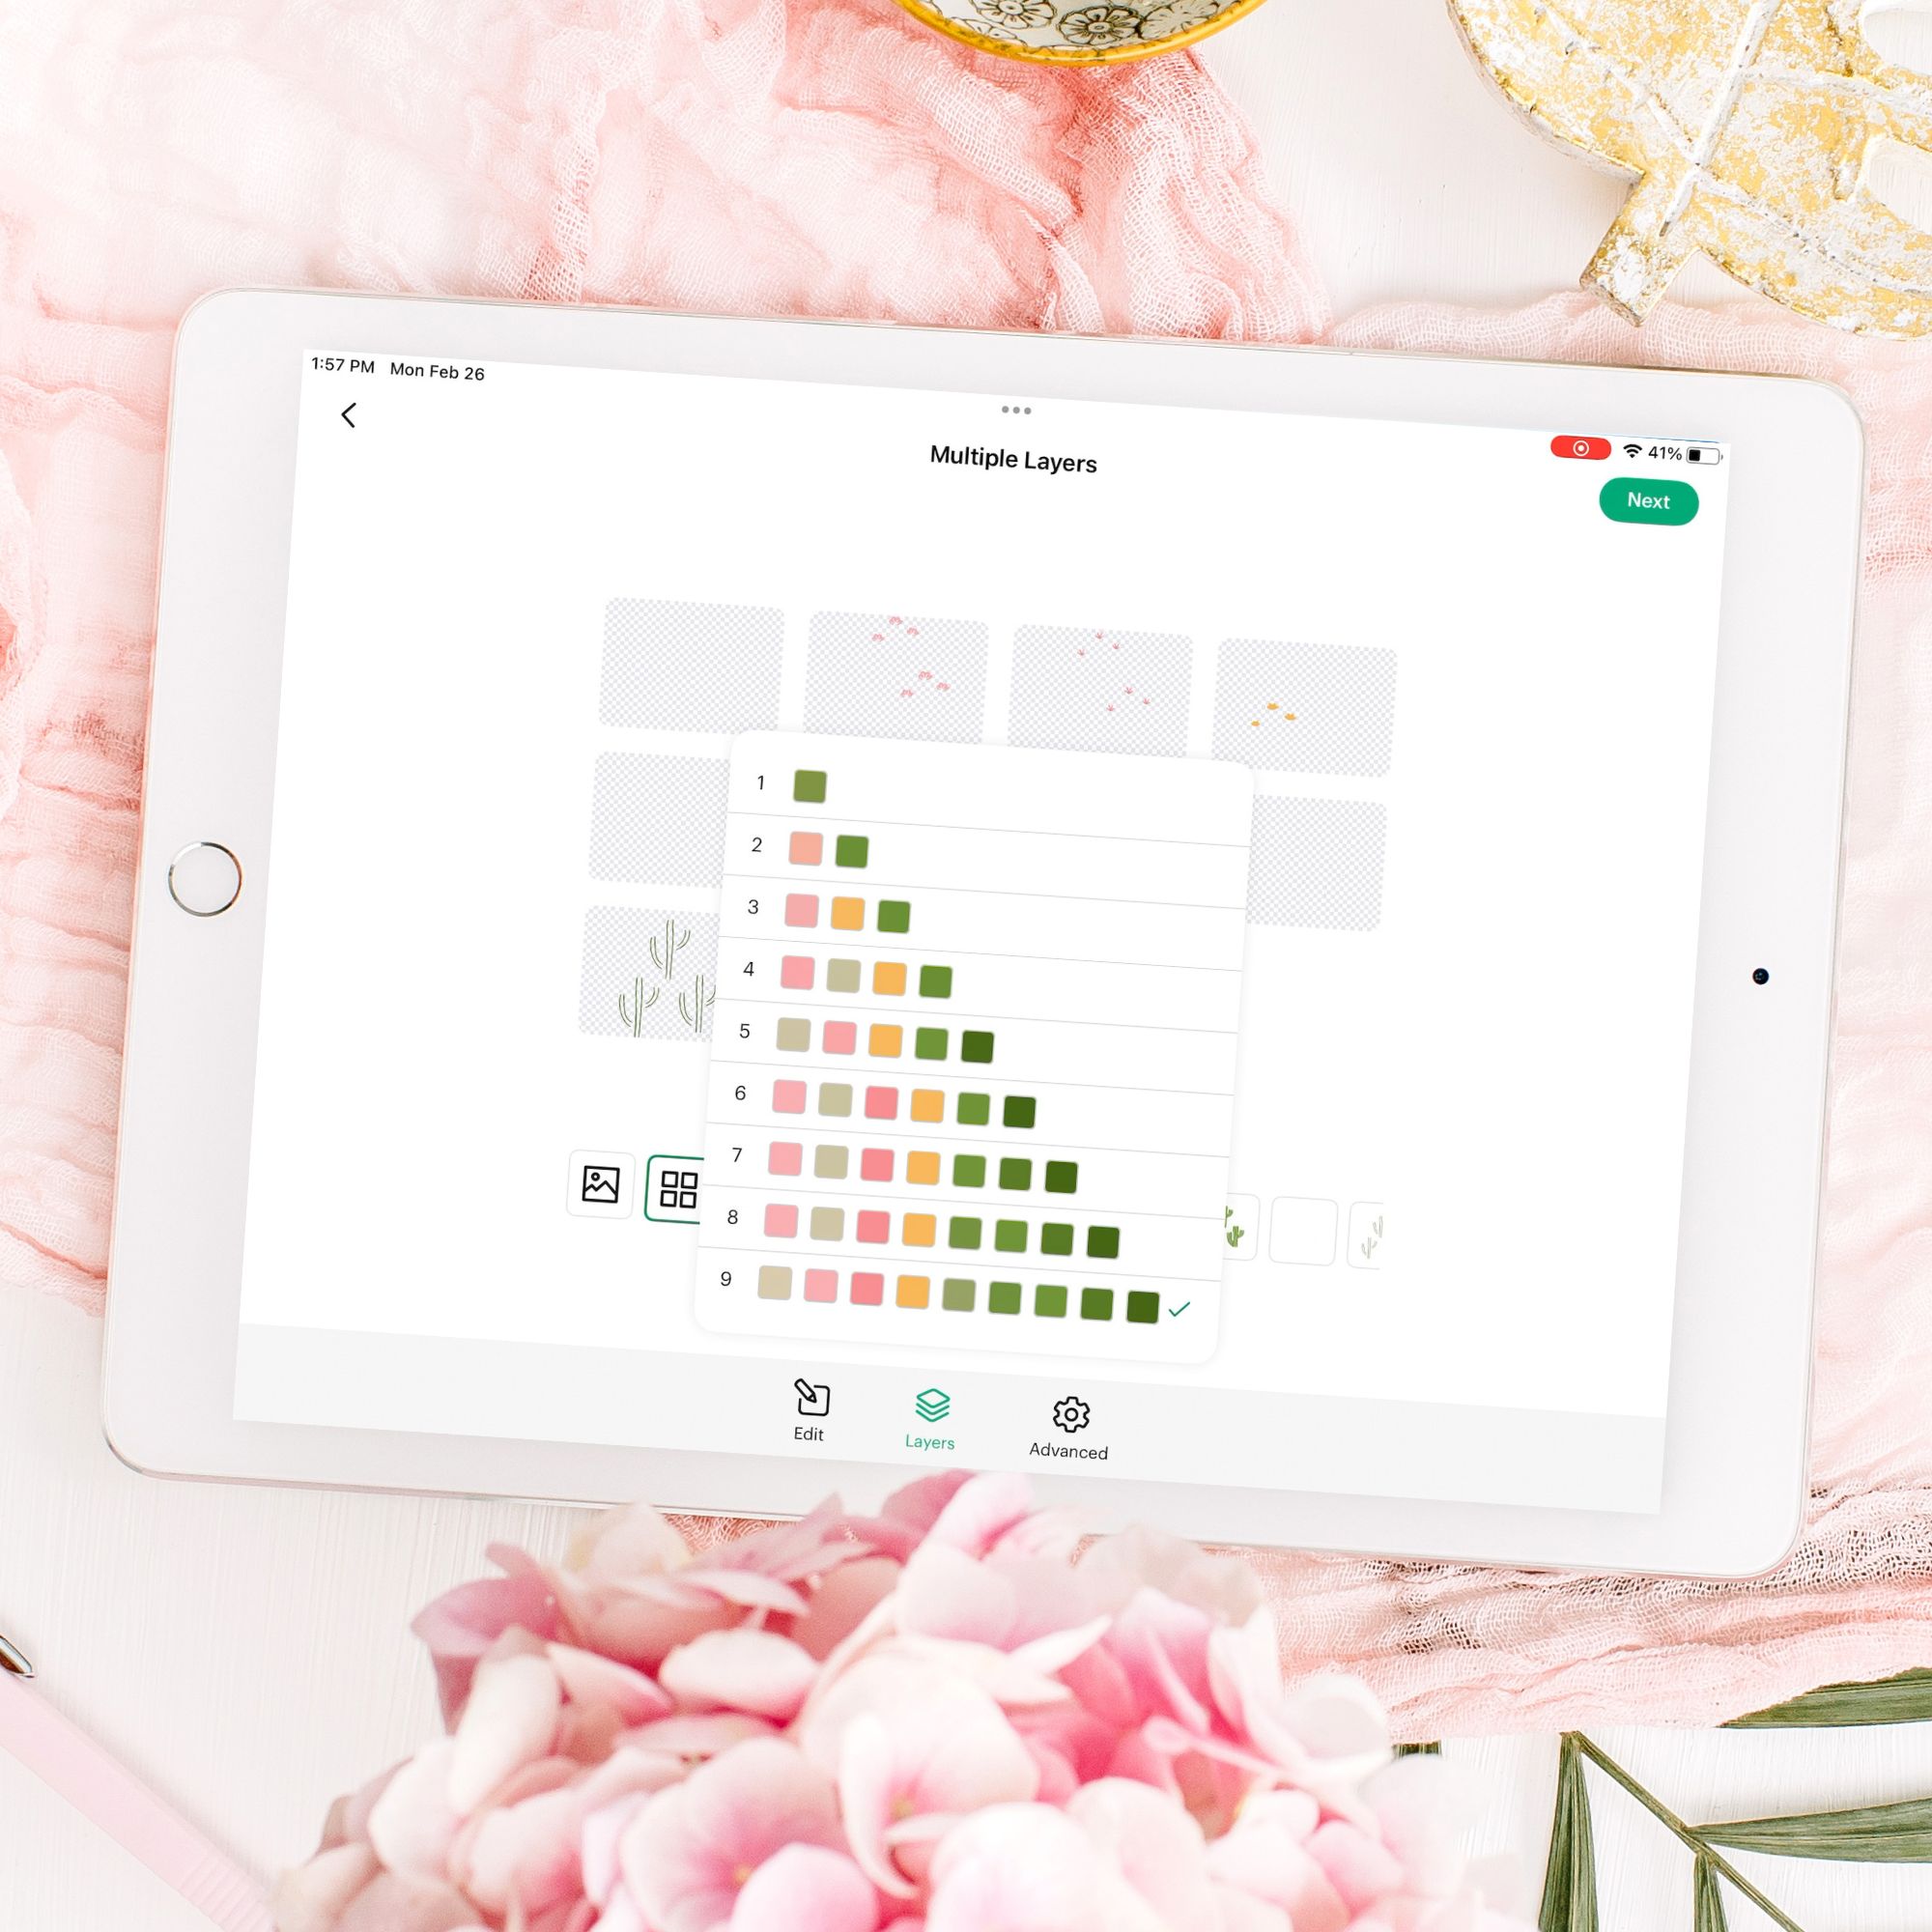
With the output style selected, you can see the layers across the bottom of the screen. I have found that I don’t always need all of the layers to get the design to look right. Click the layers and you can simplify the design.
This design has nine layers and I can click the different options to see what the design would look like if I chose fewer layers.
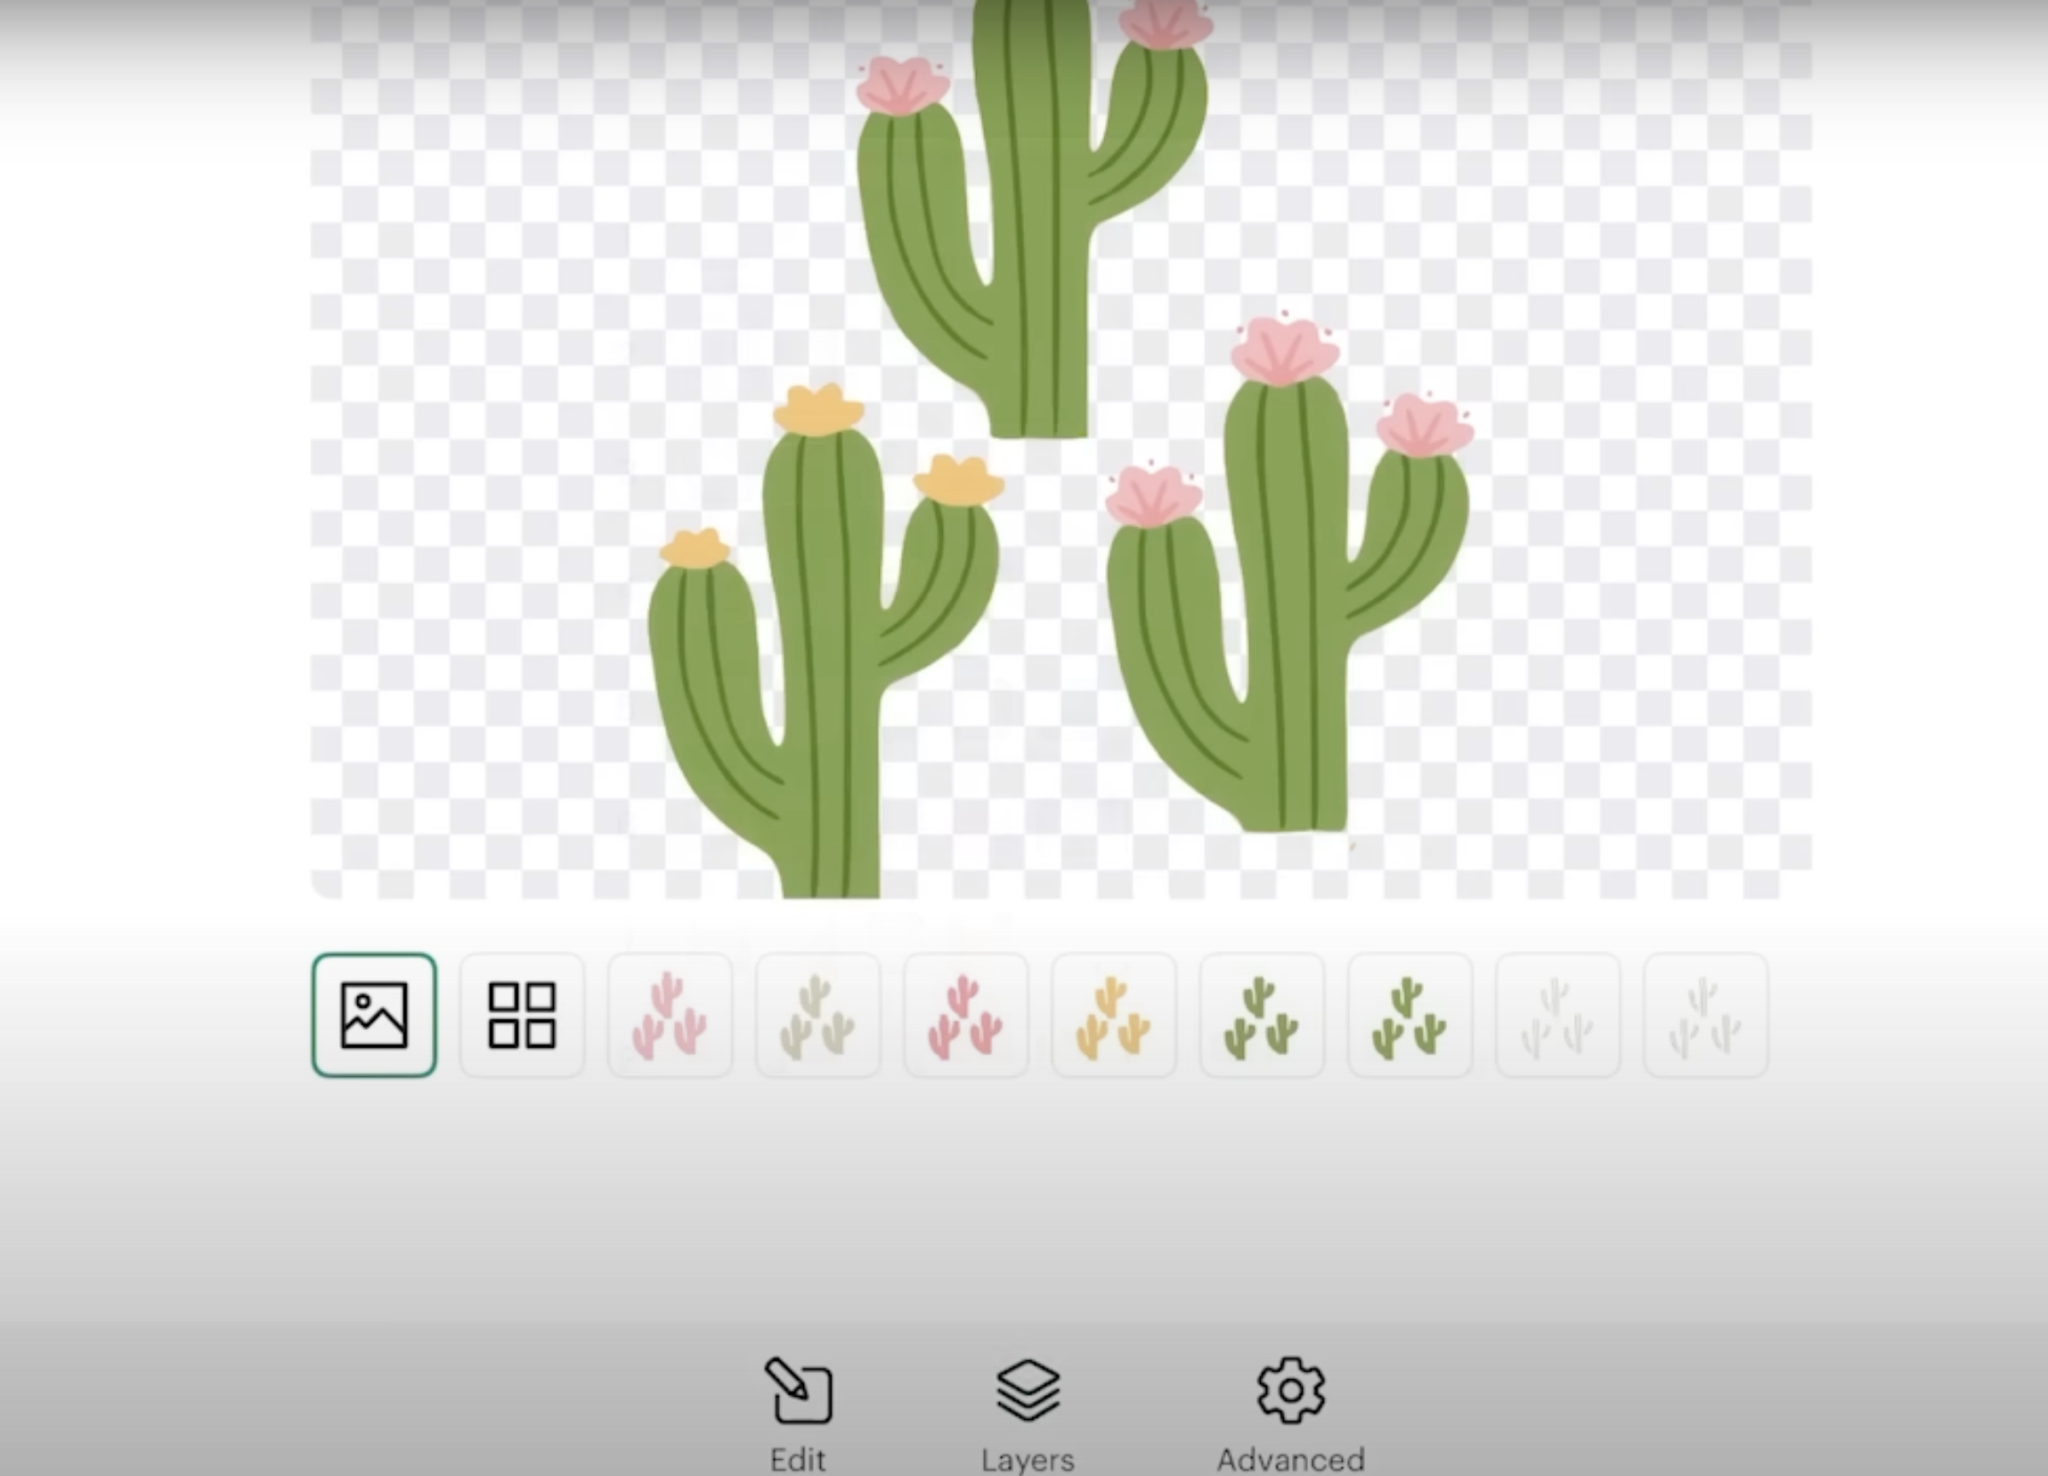
For this design, I was able to go down to 6 layers and the design still looks really good.
Once you have the layers selected, we can peek at the sliced layer option.
We can reduce the layers just like we did with the stacked option and see which option looks best. I was able to look through the different options and ended up with 6 layers that are sliced.
Step 6: Review Design on Design Space Canvas
Now we need to type in an image name and then click Upload.
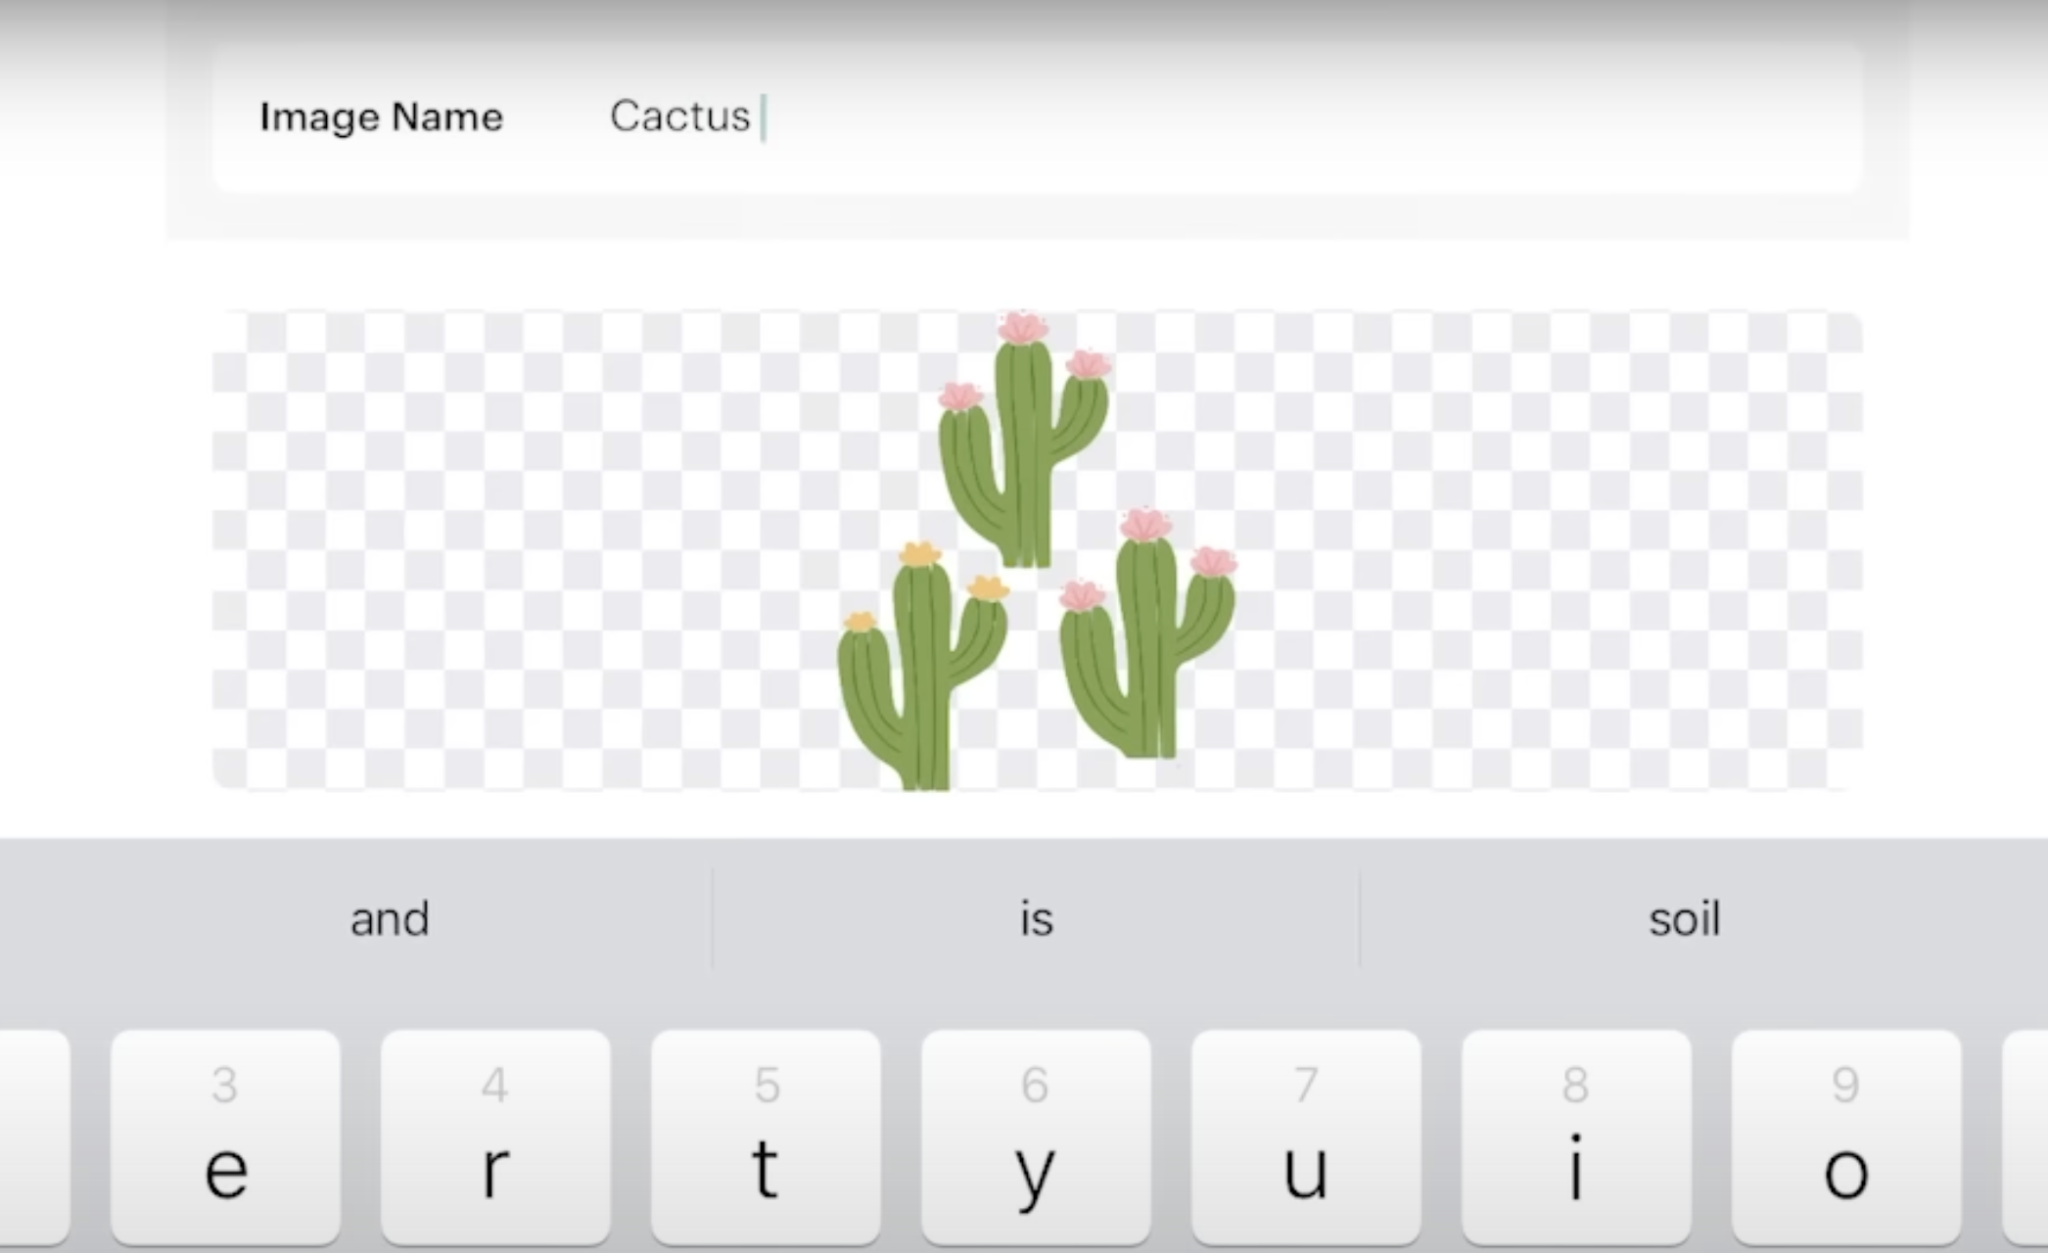
You’ll see that your design is just like other SVG files. You’ll see the different layers in the layers panel and you can resize the design to whatever size you’d like.
Now we can click Make and proceed as you would for any other project.
I recommend looking through the different mats to make sure they look like they did on the canvas and then select your machine and the material and it’s ready to cut.
How to Convert a Complicated Illustration to Layers
What if you have a more complicated illustration? The steps are similar but you may find hat you need to tweak things a bit more.
Step 1: Remove Background and Clean Up Image
For this illustrated design, the background is already removed so I can skip that step. I am going to use the eraser tool to remove the flower that, to me looks out of place and then I’m ready to upload.

Step 2: Choose Your Options
Next, I’m going to select the Multiple Layers option and click Next.
Decide whether Clip Art or Photo is the better option and then look at the number of layers to get the look you want.
For this project, I am choosing the sliced option and I have nine layers to begin with and I can adjust the layers to remove some of the colors.
I ended up reducing the number of layers to seven and it looks good but there are some really fine details in the design.
Step 3: How to Reduce Fine Details
Now this one has quite a few really fine details. Sometimes those fine details don’t cut as well with a Cricut machine. You can use this advanced tab to try to eliminate some of those.
Here I can simplify the image to a low amount and it cleans the design up a little bit. The more I simplify the more it cleans up those small details but it can also change the look of the design. Double-check the design and make sure you still like the way it looks.
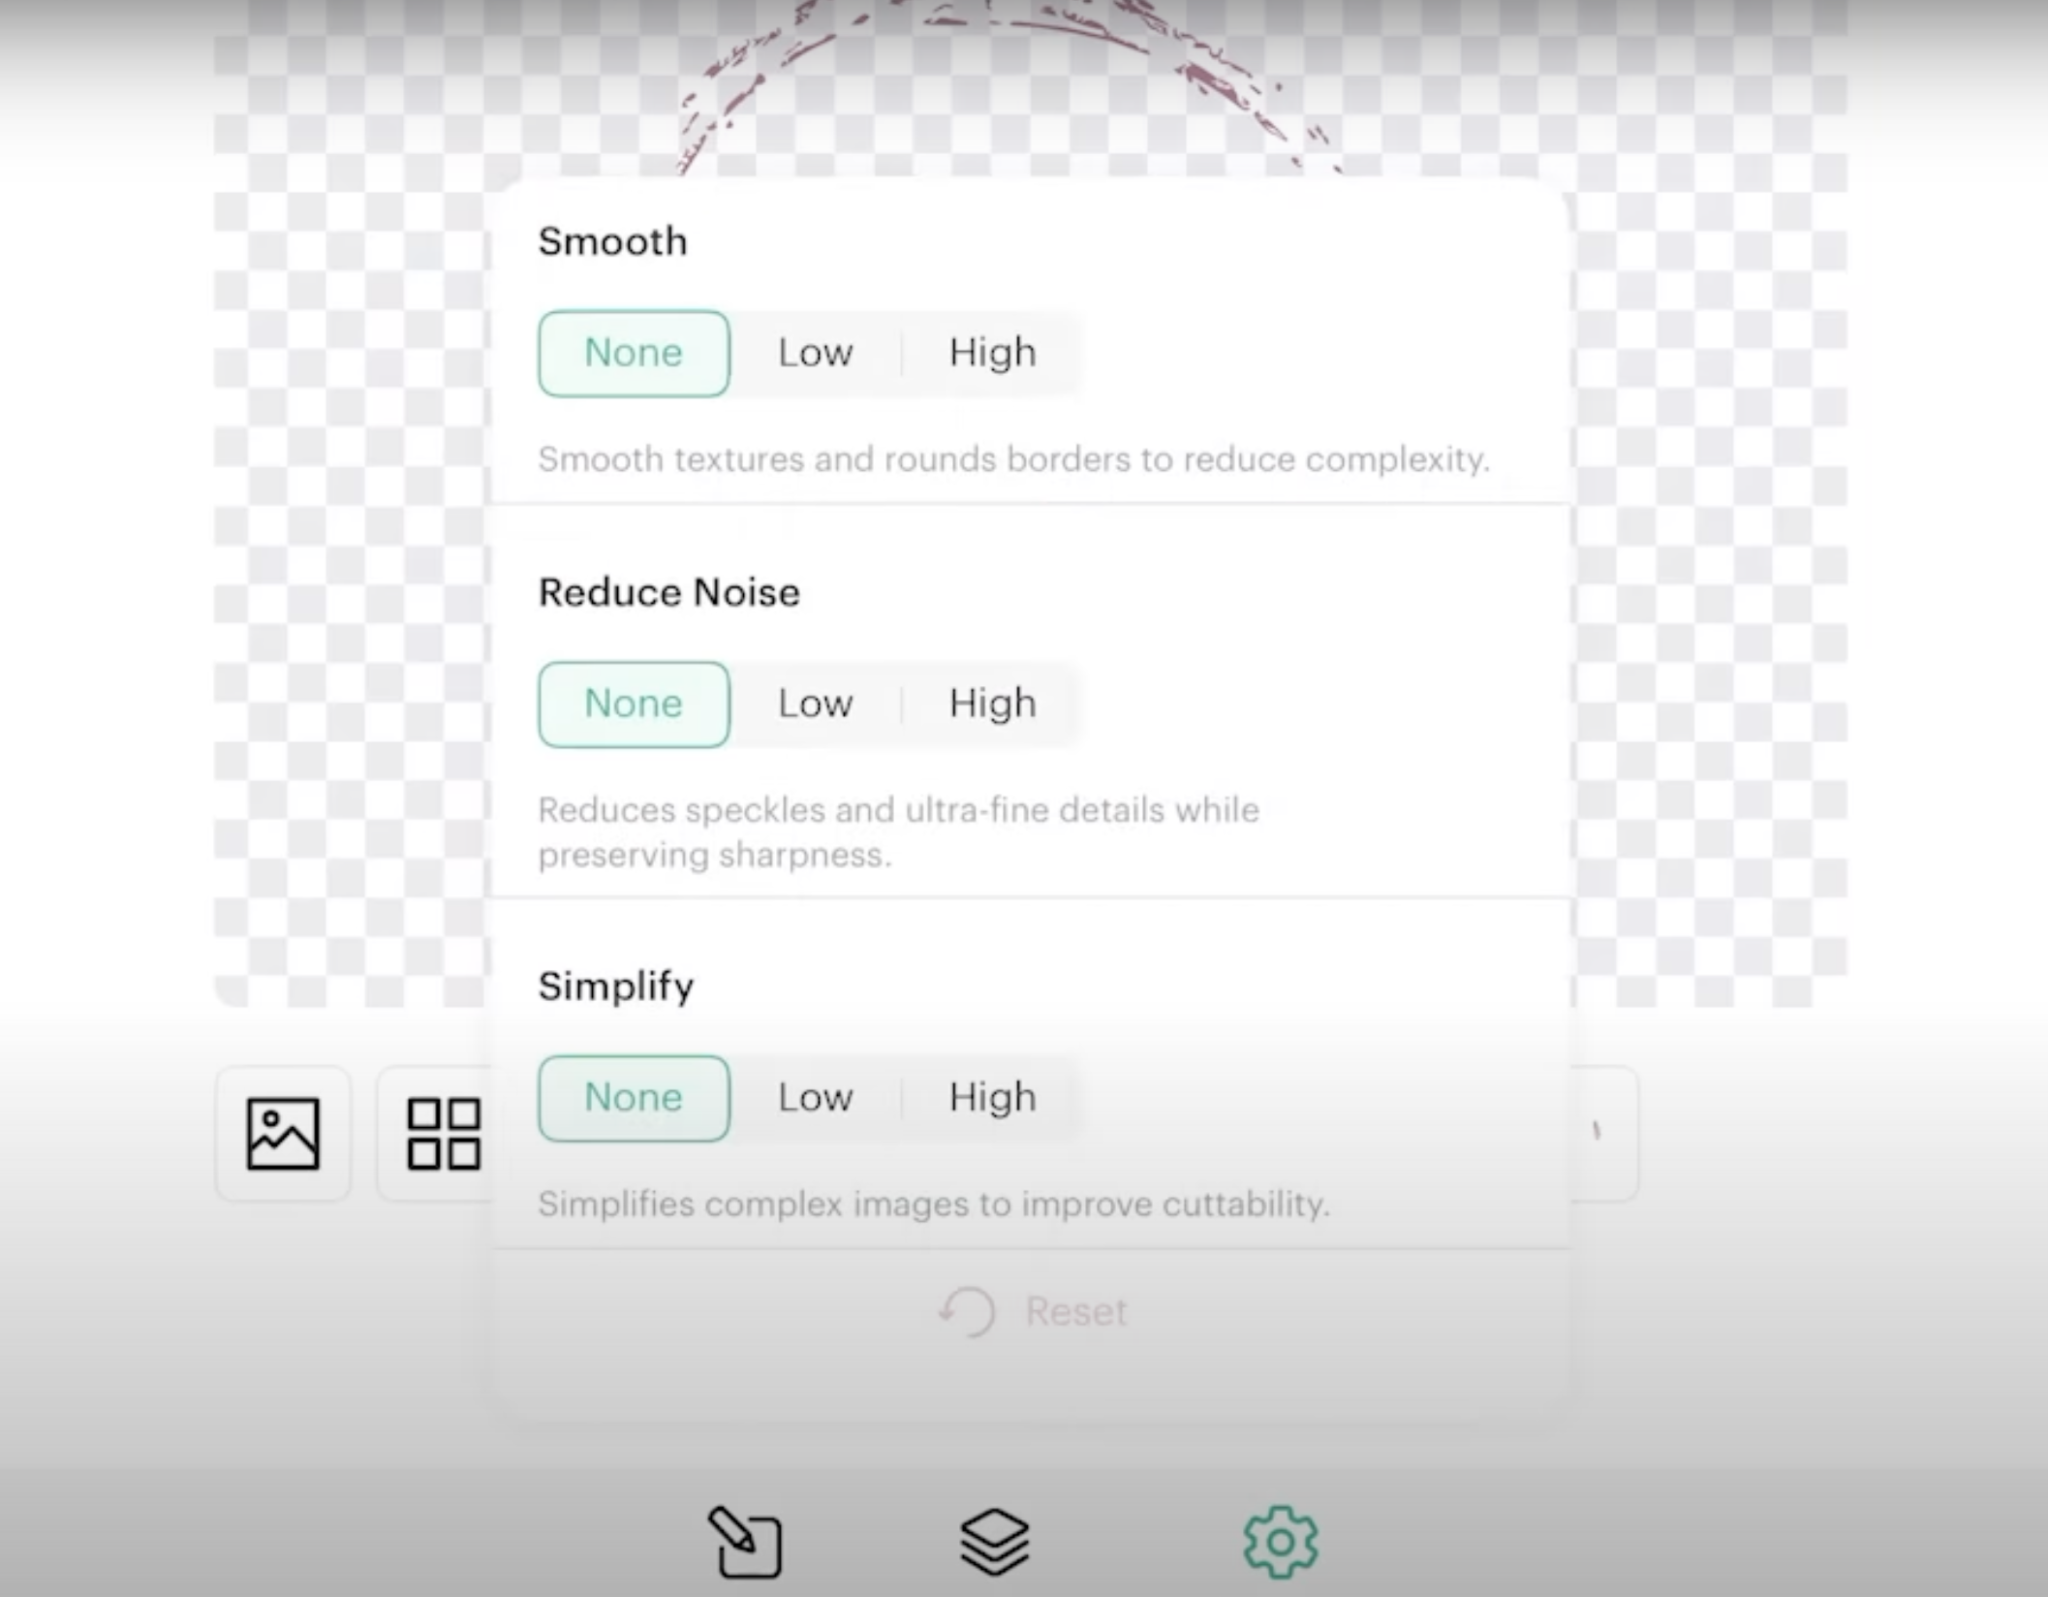
You can also reduce the noise in your design. That will remove more of those little pieces and can impact the design.
Smooth is another tool that you can use to reduce the small details. I did feel like I lost detail when I used the smooth feature.
Make sure you check after each alteration to ensure you’re still happy with the way the design looks.
When you’re happy with the design, give the file a name and click Upload.
Step 4: Use the Contour Tool to Clean Up the Design in Design Space
With the design on the canvas, we can use the Contour tool to remove any other small pieces that may be difficult for a Cricut machine to cut.

The Contour tool is another way that you can clean up an image after you have it uploaded into Design Space. From here, you would proceed as you would with any other project.
How to Convert a Photo to Layers
Now let’s try a photo. To convert a photo to layers we’re going to begin by uploading the photo.
Step 1: Upload and Remove Background
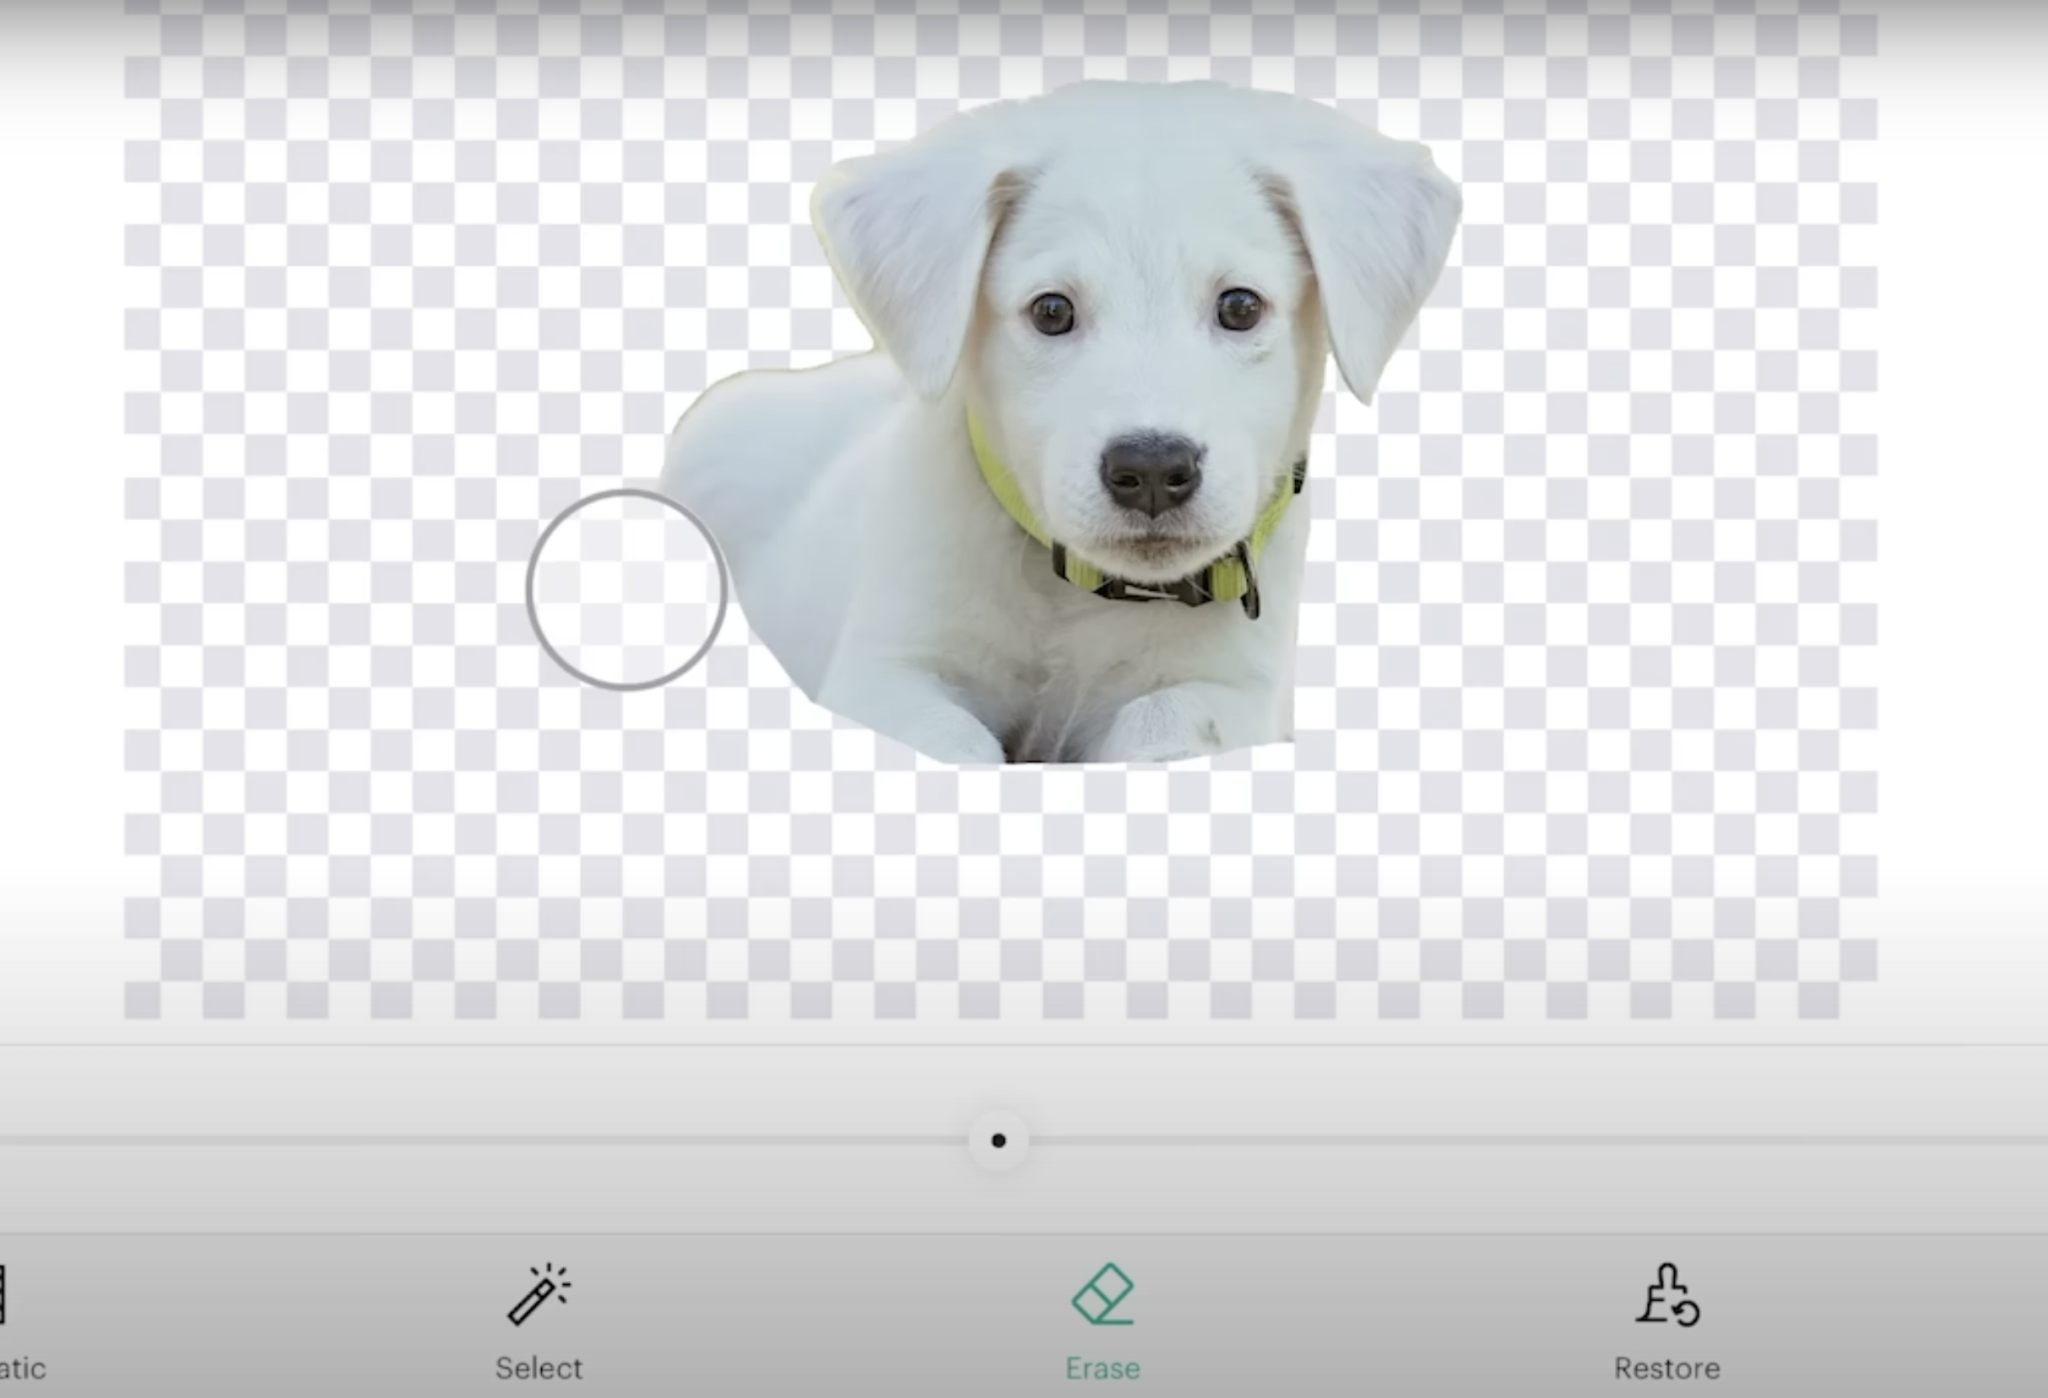
I am going to use the Automatic Background Remover and then the eraser tool to isolate the portion of the photo I want to use.
I want to cut out the head of the puppy in this photo, not the whole dog.
Step 2: Choose Options
With the design cleaned up, I can click upload and then choose the Multiple Layers option and click Next.
For this image, I am choosing the Photo option and will then go through the same steps we did on the earlier designs to find the best options for my photo.
Step 3: Simplify Photo Layers
When you’re using a photo to create your layered design, it’s important to pay attention to how the design is changing as you make adjustments. As you simplify or delete layers, the image can really begin to look different.
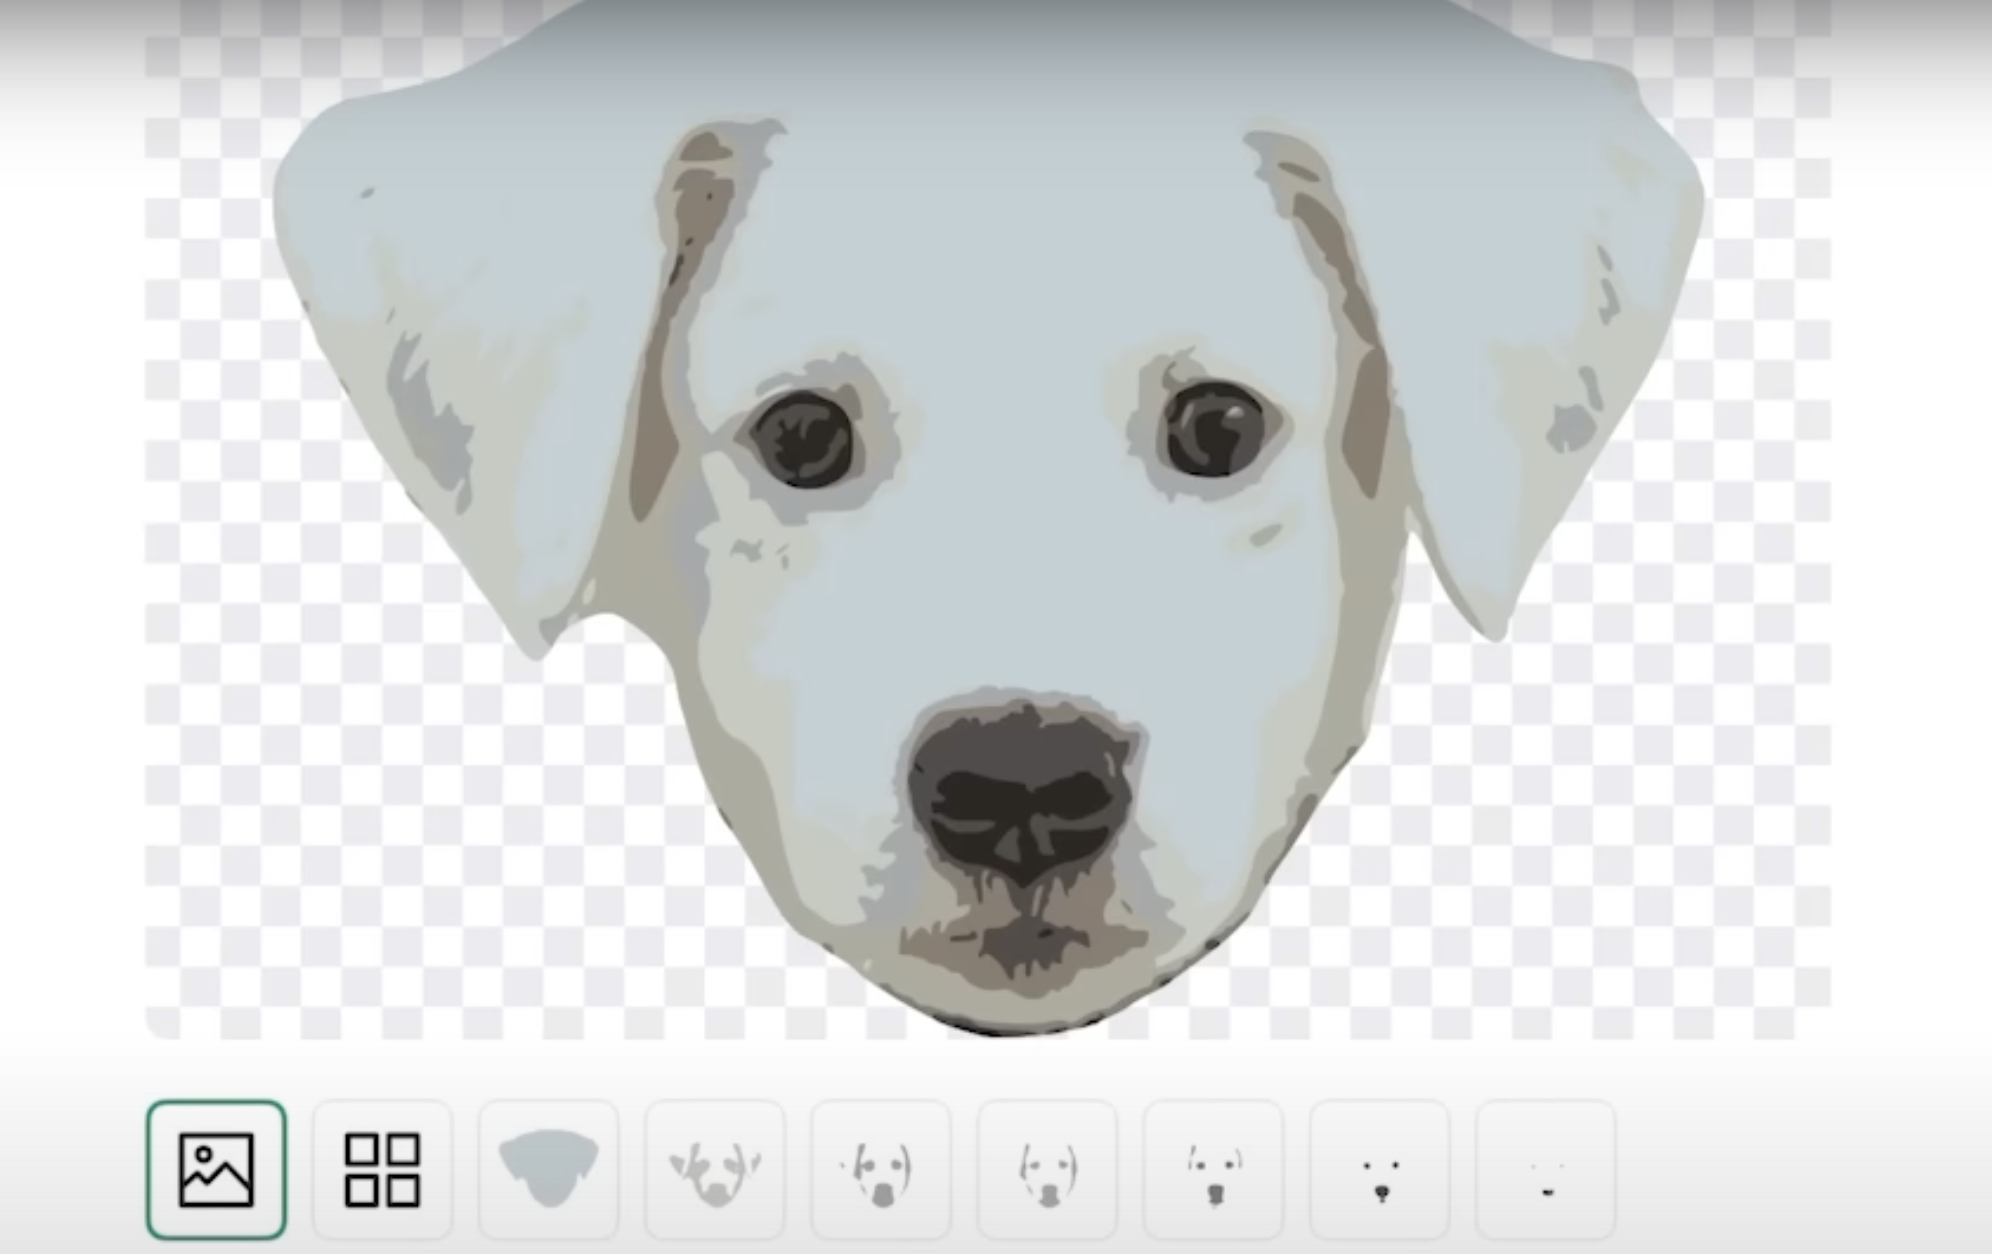
Under the Advanced section, you can make adjustments and see if the results are what we want.
Click the layers, make sure everything looks like it will cut well, and then click into the Advanced features. This area comes in handy with photos. Try each of the different sections and adjust them until you’re happy with the way the design looks.
Click Next, make sure everything looks how you want on the canvas, and then click Make so you can check the different mats.
How to Convert a Detailed Photo to Layers
Next, we’re going to try a very detailed design to see how it does being converted to layers.
Step 1: Upload and Remove Background
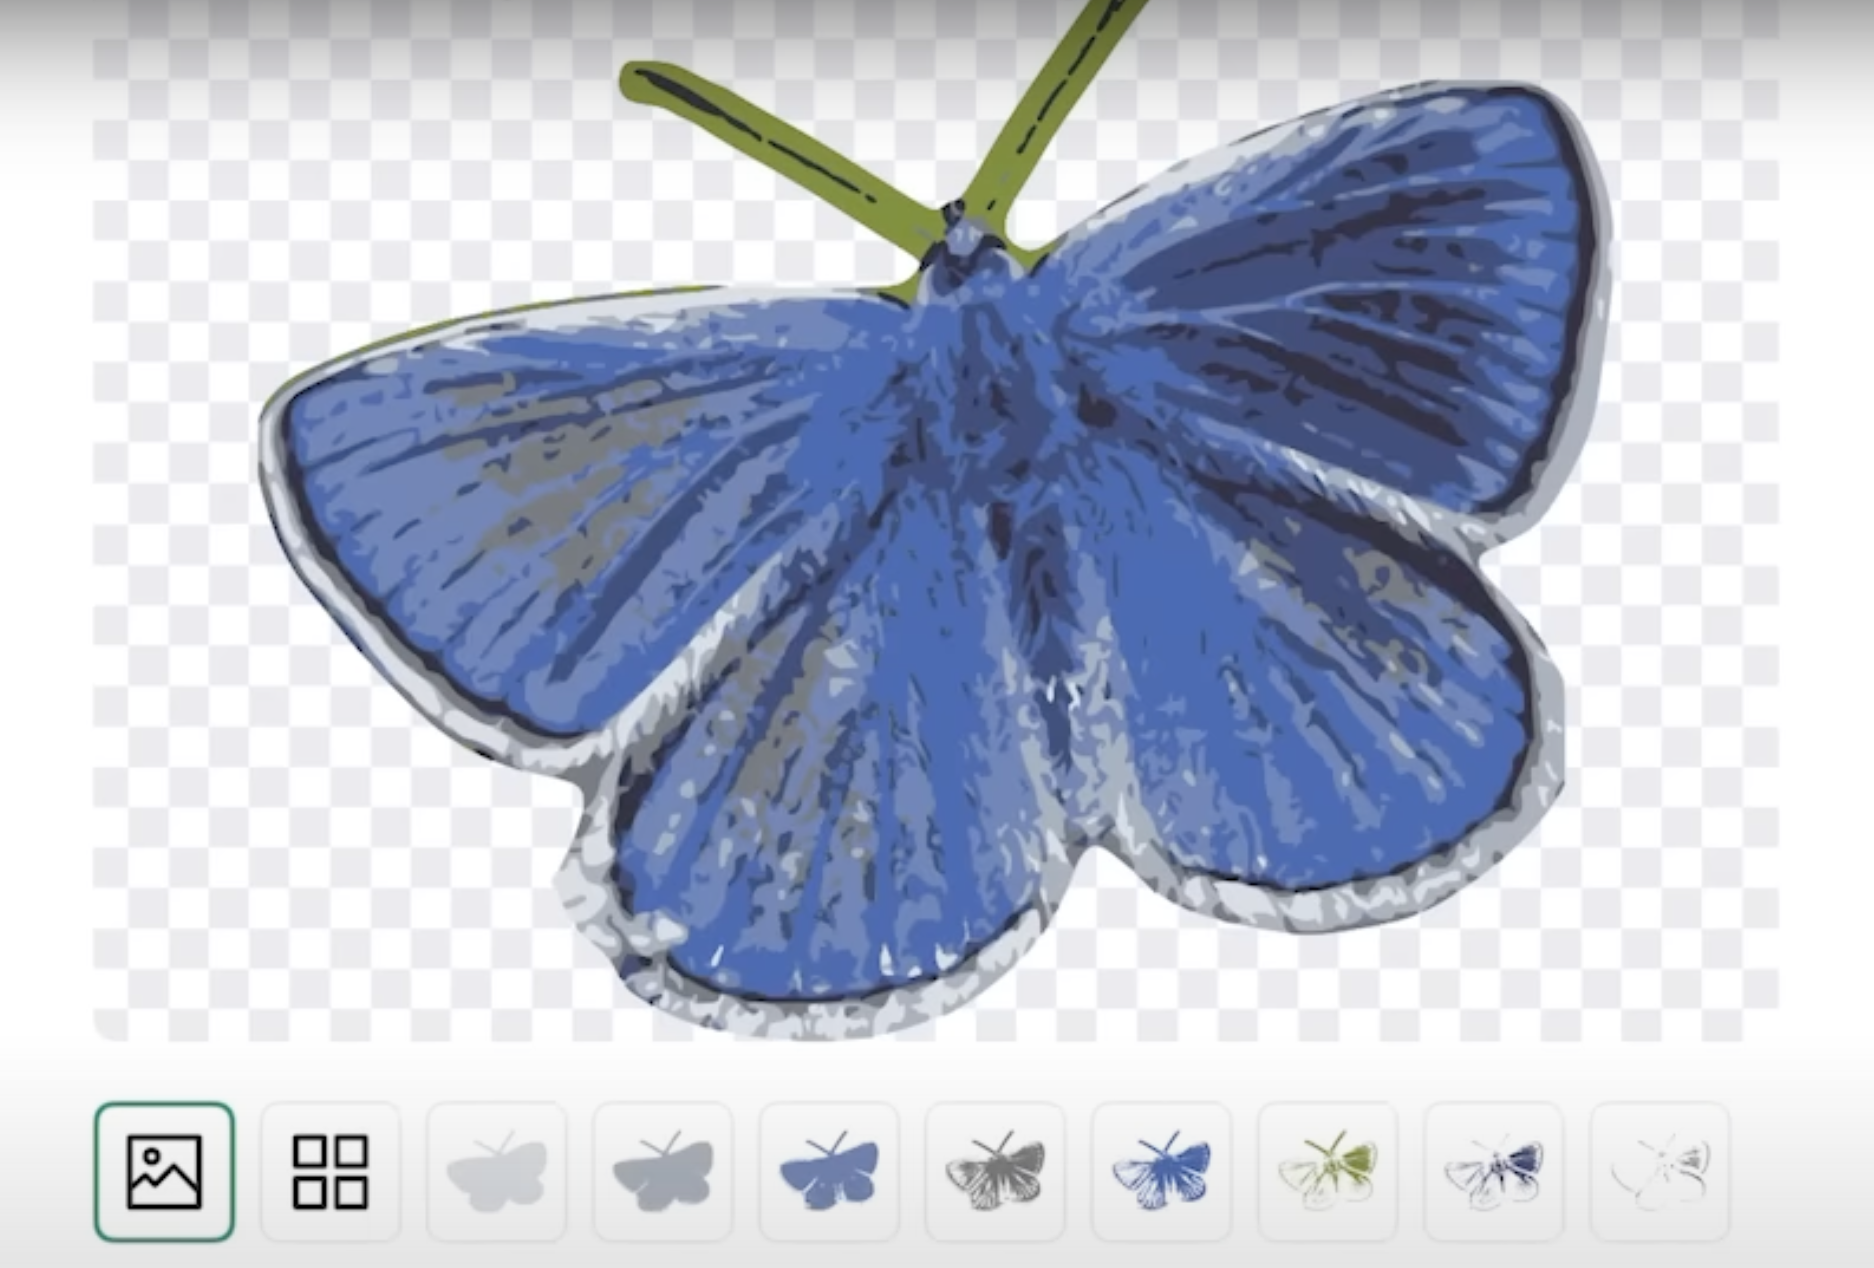
This photo of a butterfly is very detailed and the Automatic Background Remover did a great job removing the background. It did remove the antenna so I am going to use the Restore tool to add the antenna back to the image.

Step 2: Choose Options
Now I can click Apply then Next and I can see what it looks like with the different numbers of layers.
Reducing the layers on this design doesn’t look good, a lot of detail is lost. Adding layers back made it look better and now we can check to see if it looks better uploaded as a Photo or Clip Art.
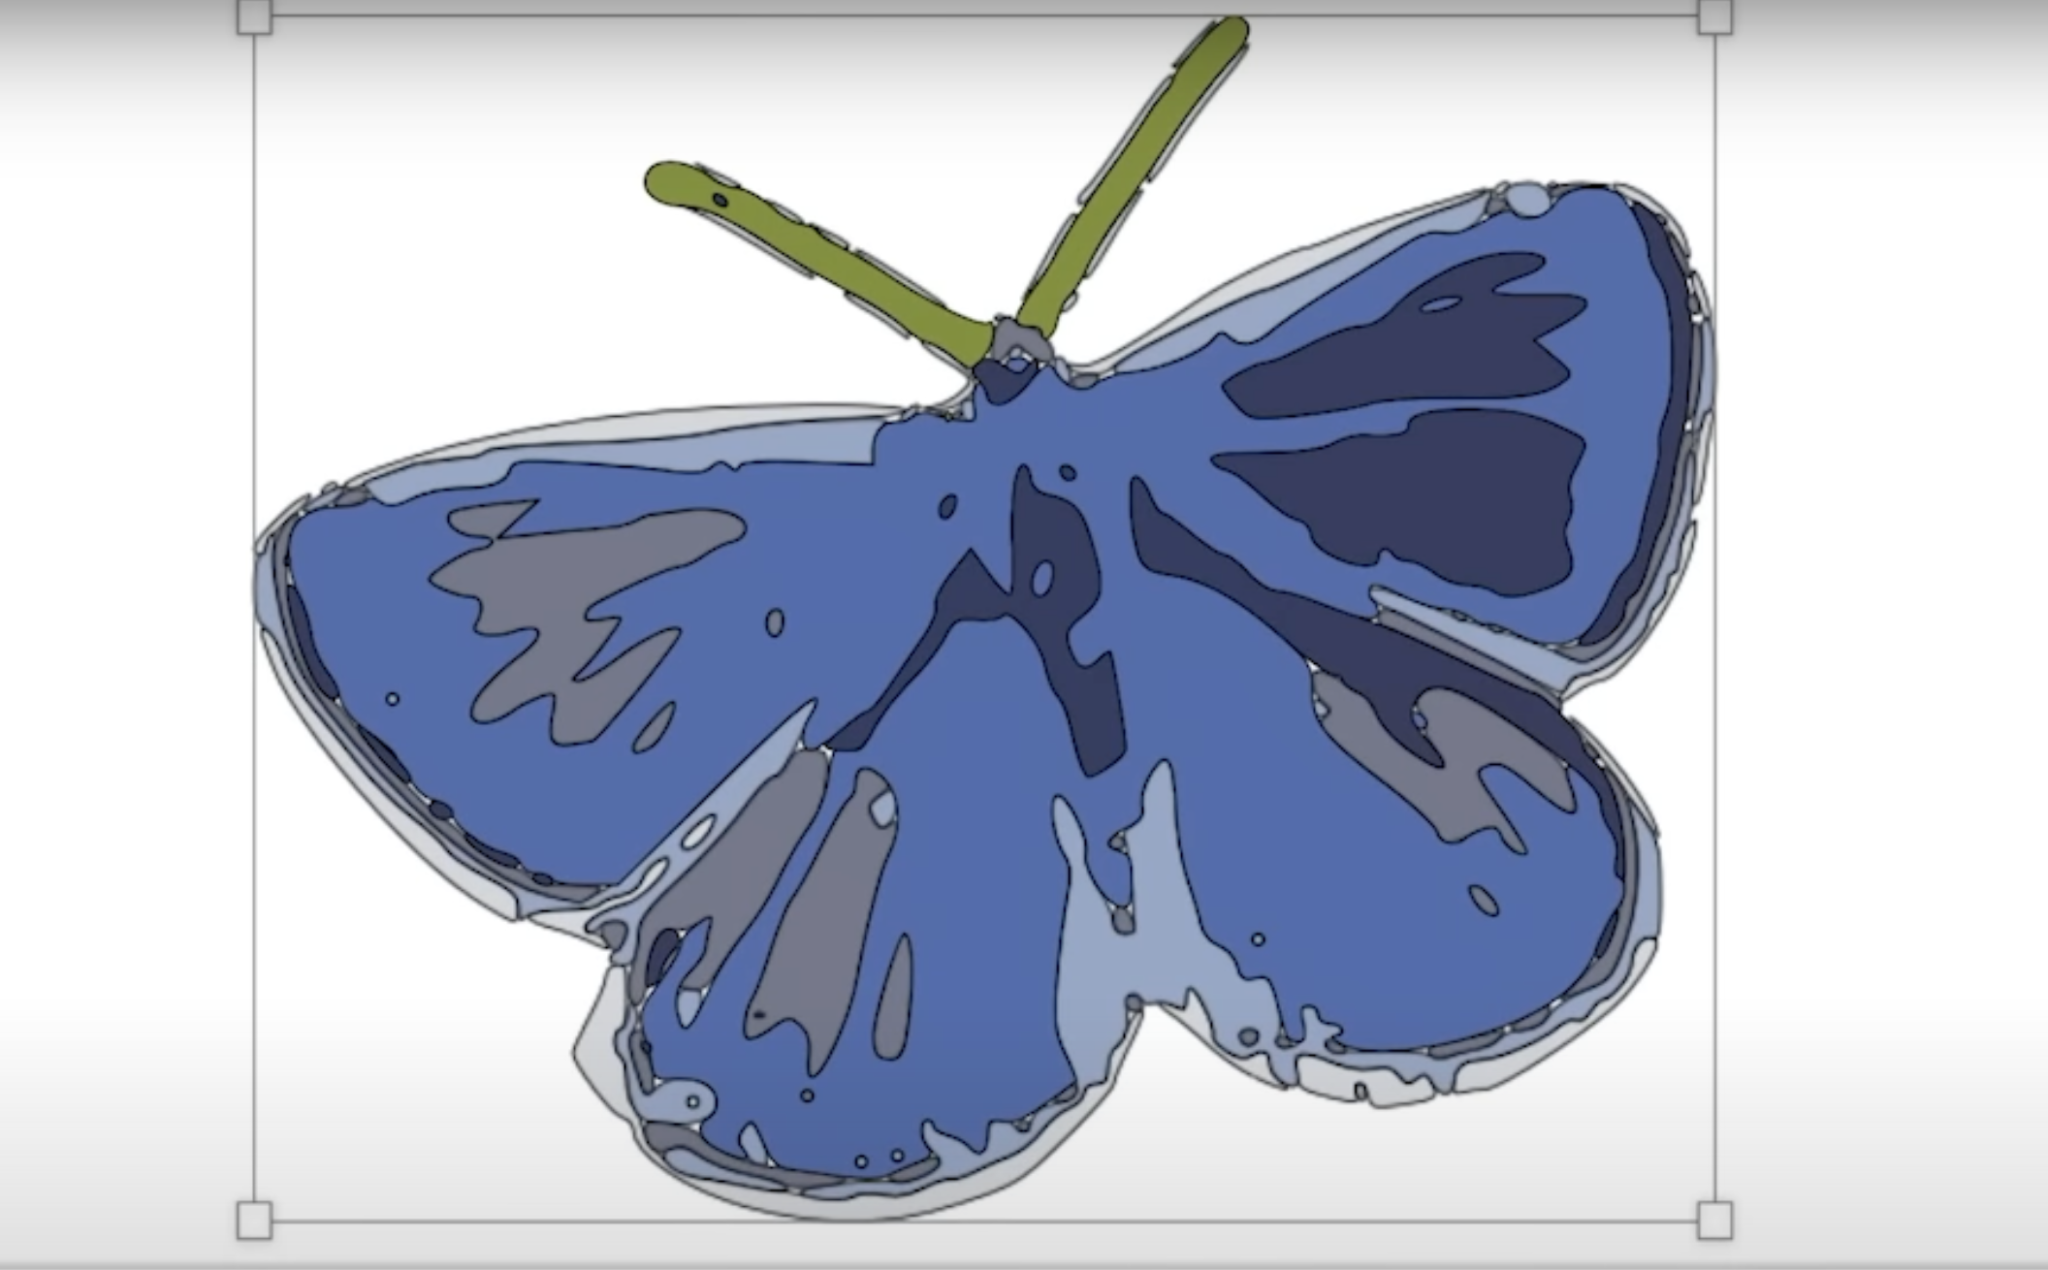
Step 3: Carefully Choose Number of Layers
This photo has a lot of details, so it gives me very detailed layers. I’m going to reduce some layers and you can see it is still very detailed.
Something like this would be difficult to cut and weed. I had to keep messing with the design to get it where it could more easily be cut and weeded.
You may notice, that the more we play with this design the less it looks like the original. I am going to continue to make adjustments to the settings and layers.
If you find there are layers you can’t remove on this screen, you can do that on the canvas screen.
Now that I have the layer looking like I want I can click Next and then look at the design on the canvas. Within the layers panel, I can look at eliminating some layers or using the Color Sync tool to merge some layers.
Again, it is all going to depend on the image you’re using and the look you want in the end.
Cricut Convert to Layers Feature FAQ
Here are a few questions I typically get when talking about the multiple layers upload feature from Cricut.
Where to find Images to Use with this New Feature?
I always want to promote responsible internet usage, which includes the use of images. You always want to use images that you have legal permission to use. You can use photos you take with your phone of pets, flowers, etc. If you took the photo yourself, you can use it.
You can also use images that are royalty-free. Some of the images I am using today are from the site Pixabay. Pixabay offers royalty-free images that you can use for personal use. Make sure you follow the licensing rules for each image you use. Personal use does not give you the right to sell products you create with the designs. You will need a commercial license to do that.
If you are using this new feature, make sure you have the license for the designs you’re using or that you personally own the image. You don’t want to get in trouble down the road for using images you’re not supposed to.
How Does the Cricut Convert to Layers Feature Compare to Other SVG Creator Tools?
As you can see, the Cricut Convert to Layers feature is not perfect. It will work better on some photos and images than others. I have tried a lot of other tools that claim to convert photos to SVG files and I have to say the Cricut tool is pretty good at taking images and converting them to SVG files that are layered.
This process is not going to be perfect with any program. The Cricut Convert to Layers feature does a really good job. I like the ability to clean the design up during the uploading process and again on the canvas as needed.
Many other tools are missing clean-up features completely which makes the Cricut feature better than those by leaps and bounds.
Another issue with these other programs is that the files come into Design Space so large there isn’t enough memory to clean them up.
No tool is going to be perfect. Unfortunately, there is no perfect way to convert a photo to an SVG file, especially those more complicated photos.
Would I Recommend this Cricut Multiple Layers Feature?
I am a fan of this tool. I recommend you jump into Design Space and give it a try.
Remember, this feature is only for Cricut Access subscription members and is currently only available in the mobile app. You may have a free trial if you’ve purchased a machine recently. If not, you can sign up for a subscription and give it a try. You can always cancel if you decide you’re not using it enough.
I hope I’ve answered any questions you have about the Cricut Convert to Layers feature. If you have any other questions feel free to leave them in the comments and I’ll be happy to answer them for you.