This post and photos may contain Amazon or other affiliate links. If you purchase something through any link, I may receive a small commission at no extra charge to you. Any supplies used may be given to me free of charge, however, all projects and opinions are my own.

If you love books half as much as I do, this tutorial is for you. Today I’m going to teach you how to make sublimation bookmarks perfect for adding to your favorite book or giving as a gift to a book-loving friend.
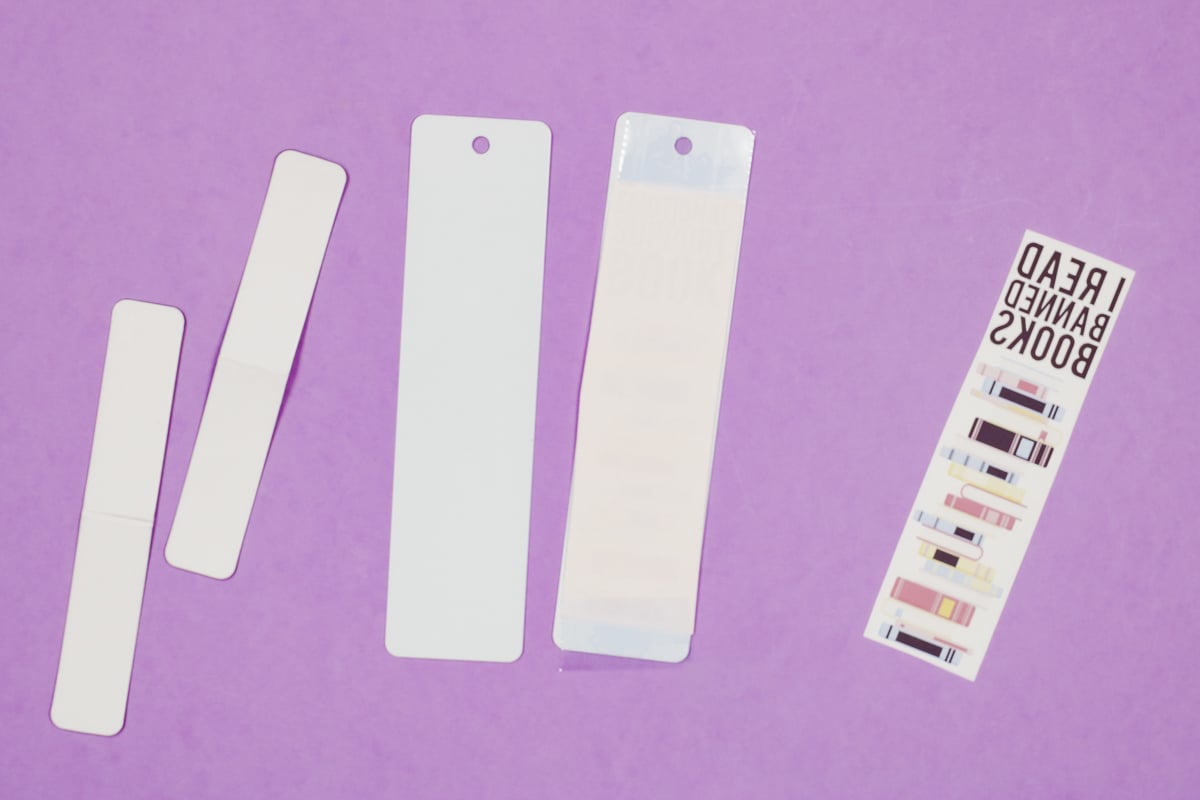
I’m going to test two different sublimation bookmark blanks and see how well they hold up to heat and how the images transfer. If you’re ready to start your sublimation journey, my Sublimation Beginner’s Guide is a great place to start.
Sometimes blanks don’t work the way I hope. I like to try different blanks for you so you can see that sometimes even my projects don’t turn out perfectly and that sometimes a blank just isn’t a good one.
You can watch me test these different sublimation bookmarks by pressing play on the video below.
Making Custom Bookmarks with Sublimation
For the sublimation bookmarks I’m making today I am using these book designs from my friend Cori George over at Hey Let’s Make Stuff. You can use other designs, add names, or even add photos. What you choose to add to your bookmark is completely up to you.
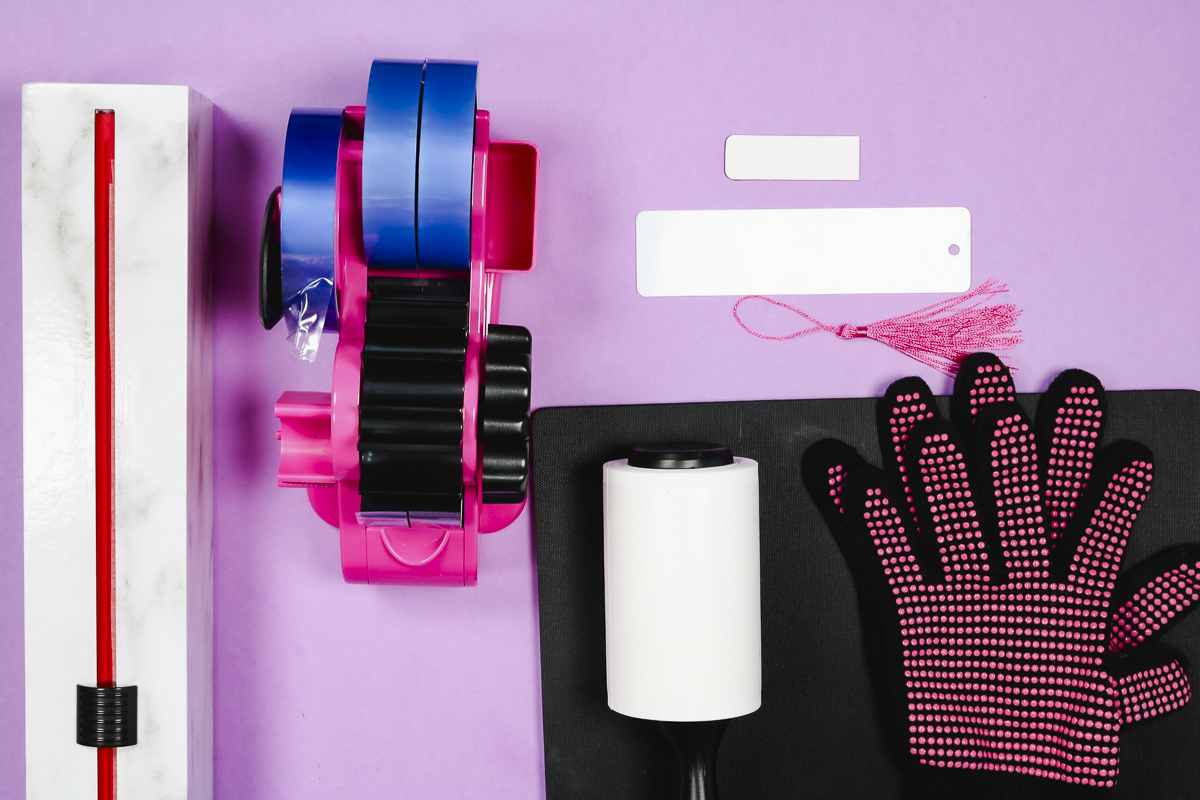
Supplies used:
Step 1: Create a Template in Canva
I really like using Canva to create sublimation prints to fit specific blanks. Let’s walk through the steps to creating a sublimation print for bookmarks in Canva.
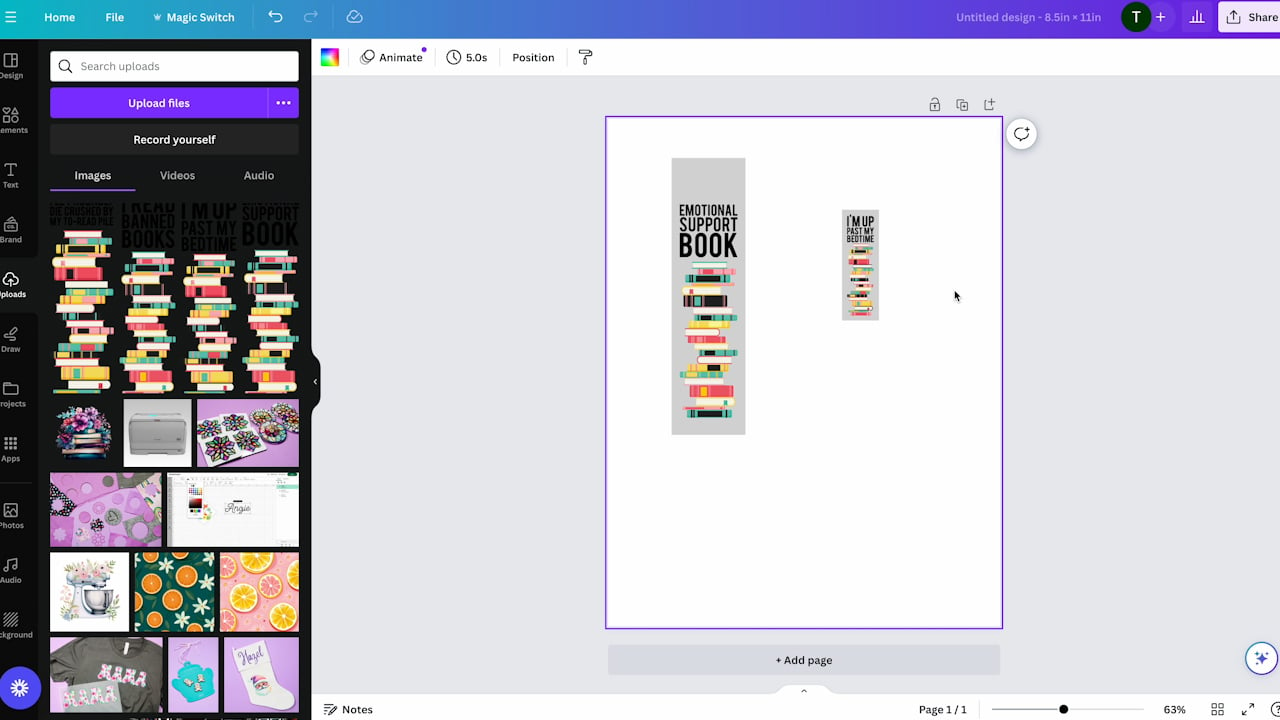
The first thing we are going to do is open Canva and then click Create a Design. I choose Custom Size, change it to inches, and then put in the size of the sublimation paper I’m using. I am using 8.5″ x 11″ sublimation paper in my sublimation printer so I am going to put those measurements in and then click Create a New Design. This will open a new canvas in Canva that we can use.
Next, we need to create a template that is the same size as our sublimation blank. Because I am using two different sublimation bookmark blanks I am going to repeat this process for each different blank.
Since my bookmarks are rectangular, to create my template I am going to click Elements in the lefthand panel and look for a square shape. We want to find a square that has adjustment sliders on all four sides so we can adjust the shape to fit our bookmark.
With the square added to the canvas, we can resize it to match the size of our bookmarks. You will want to make sure that your size adjustment tool is unlocked so you can adjust all sides of the square.
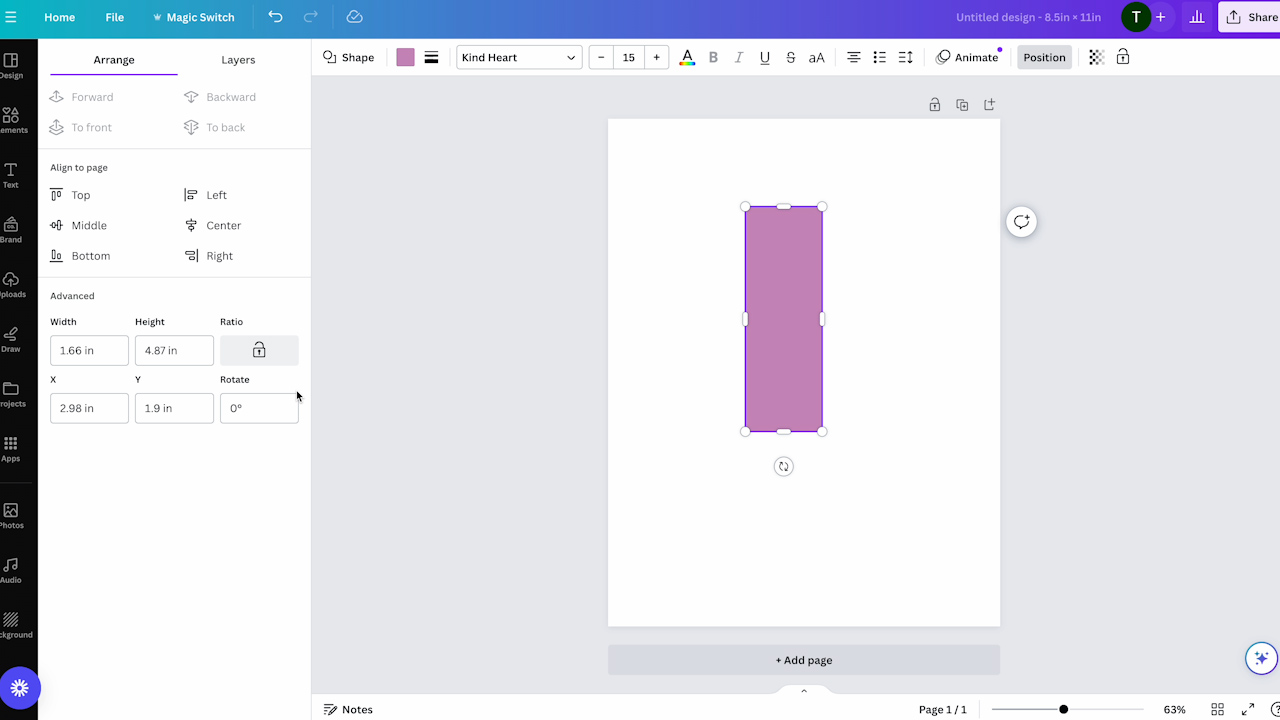
I decided I wanted my template just a little larger than the size of the bookmark so I made the big one 1.6″ wide by 6″ long. You’ll repeat this process for any other sized sublimation bookmark you’re using.
With the template sized correctly on the canvas, you can change the shape to whatever color you would like. If you’re planning to add color to your bookmark, choose that color and then click apply.
I am only using this as a guide to size my design so I am leaving it a color I will be able to see on the canvas.
Step 2: Upload Sublimation File to Canva
With our templates sized correctly and duplicated for however many different bookmarks we want to make it’s time to upload our designs.
In the lefthand panel, click Upload and then find the file on your computer and click Upload. You’ll then see the designs in the upload section of your Canva panel.
To add the image to the canvas, double-click the image and it will pop up on the canvas with the templates.
Step 3: Resize the Image to Fit the Sublimation Bookmark Template
With the image on the canvas, I can use my mouse to move it around and then click in the corner and resize the design so it fits on the template.
My larger metal sublimation bookmark has a hole at the top to string the tassel through. I don’t want my image to go over that area so I need to size the design so it fits the area I can press to and get the whole design.
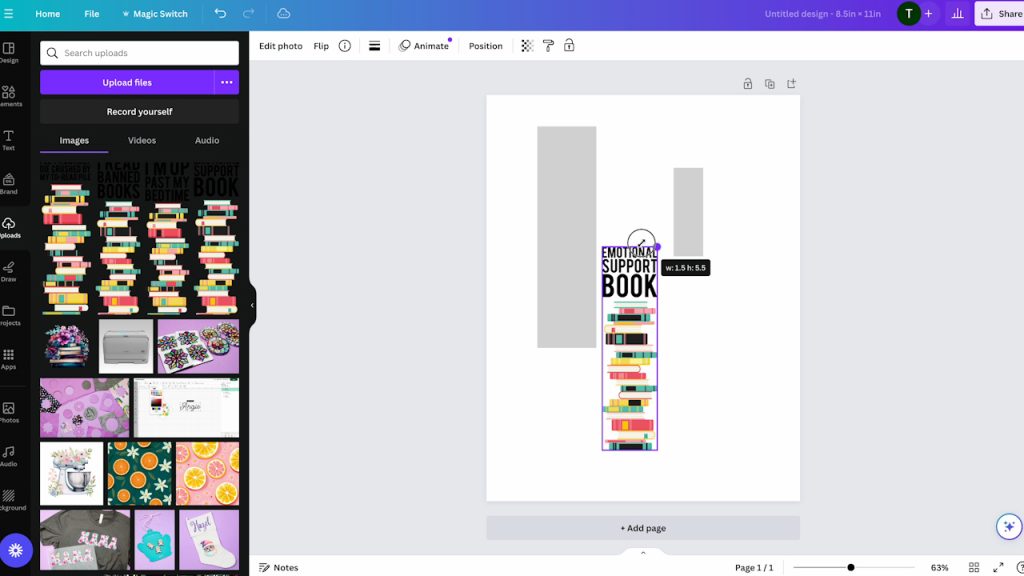
I did make my templates a little larger than the sublimation blank themselves so I don’t want my design to go all the way to the edge or it will not fit on my blank.
For the magnetic bookmark, I am going to resize my design to fit on one side and when I have it sized correctly I am going to duplicate it so I can put it on both sides.
Remember, this bookmark does fold over so make sure you orient your design correctly for both sides.
Step 4: Delete Templates and Save Design
Now that I have all of my designs sized correctly for my sublimation bookmark blank I can delete the templates I used to size them.
For both of my bookmarks, I want the background to be white so I am only printing my design sized correctly. If you wanted your bookmark to have a background color, you could leave the template and print the design with it there.
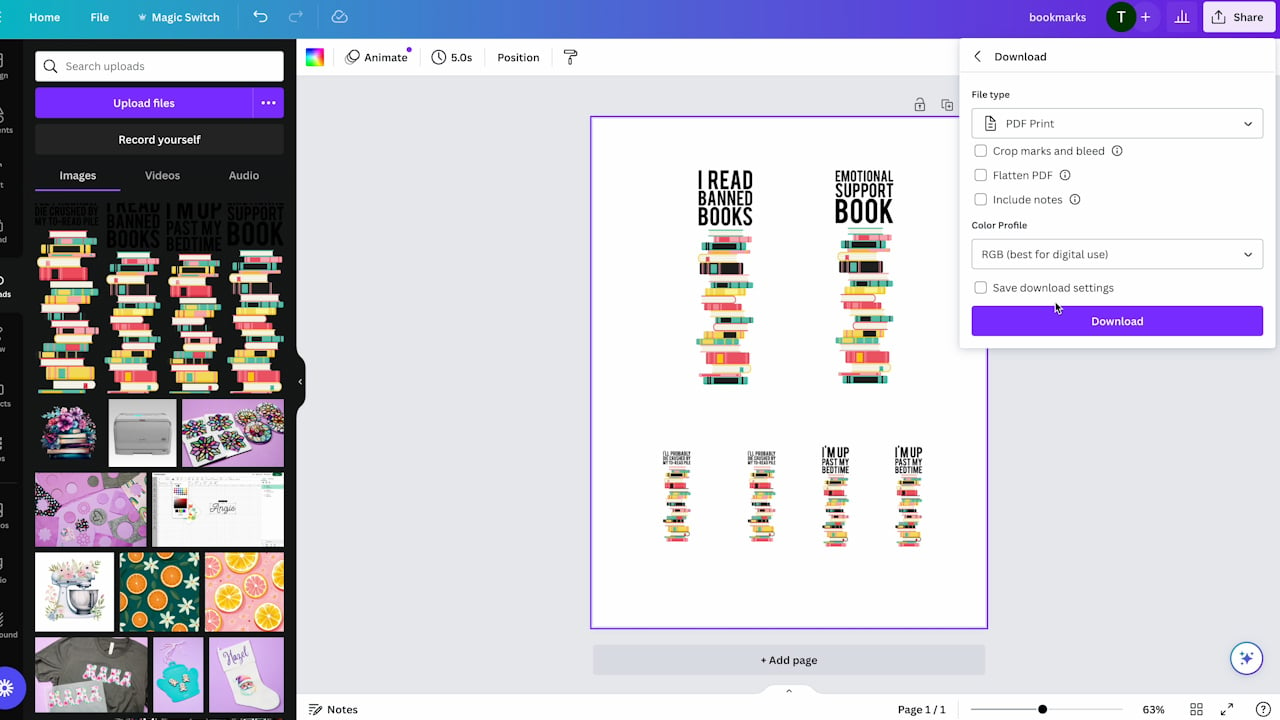
I have deleted all the templates and now I’m ready to save. You cannot print directly from Canva, you have to save your file to your computer. The design will save exactly as you have it laid out on your canvas. If you want to maximize your sublimation paper, you can move your designs closer together or spread them out and give yourself plenty of room to trim around them.
To save your file click Share and then Download and choose what type of file you’d like to save your design as. I usually download it as a PDF for printing and then click Download.
Step 5: Print Sublimation Bookmark Designs
I am not going to go through the whole printing process. If you need help knowing how to print sublimation prints, I have a collection of tutorials for different printers that can help you with that.
I am using my Brother sublimation printer today so I am following the steps to print to that printer. You’ll print however you normally print for your sublimation printer and make sure you mirror your design so it looks right after it’s been pressed.
IMPORTANT: the sublimation print needs to be sublimation ink printed onto sublimation paper from a sublimation printer for it to work for this project.
Step 6: Prepare Sublimation Print
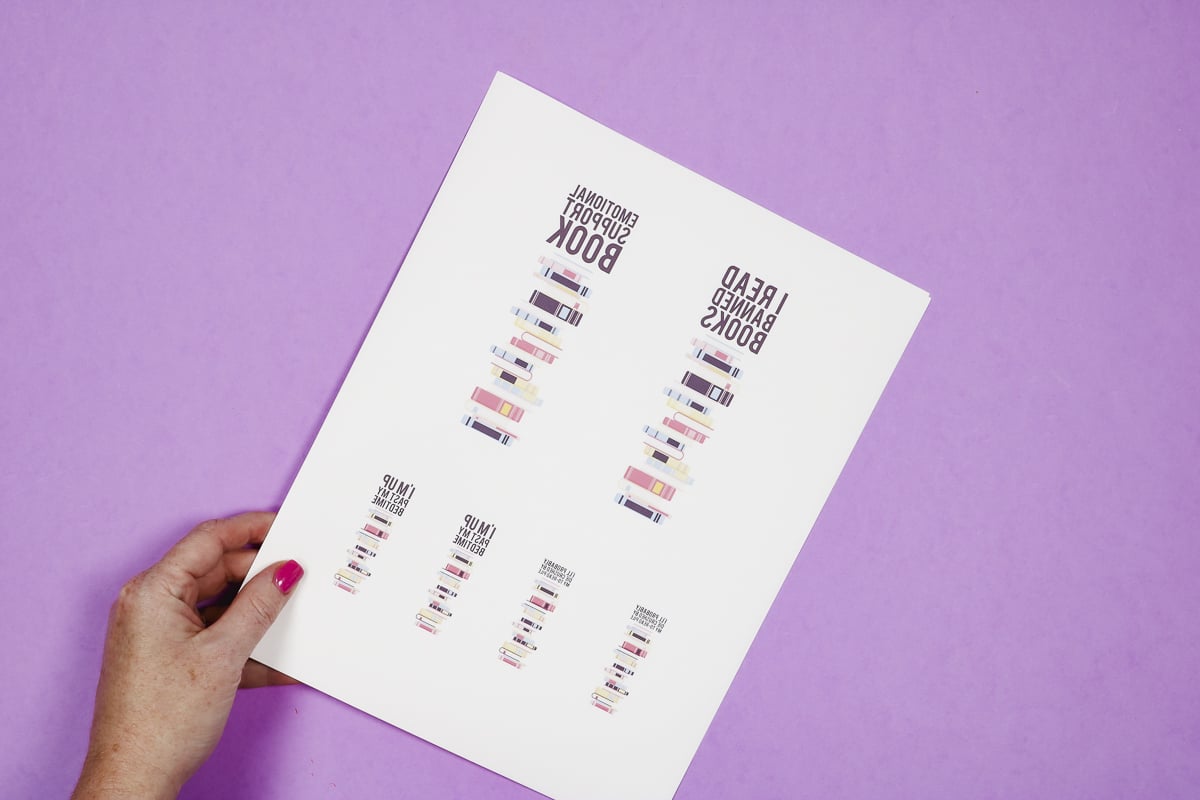
With our sublimation print in hand, it’s time to make sublimation bookmarks. Use scissors or a paper trimmer to cut your designs to the right size. I recommend leaving an equal amount of space on all sides of the design to help locate the design onto the bookmark.
Step 7: Prepare Sublimation Bookmarks
Next, we want to prepare our sublimation bookmarks.
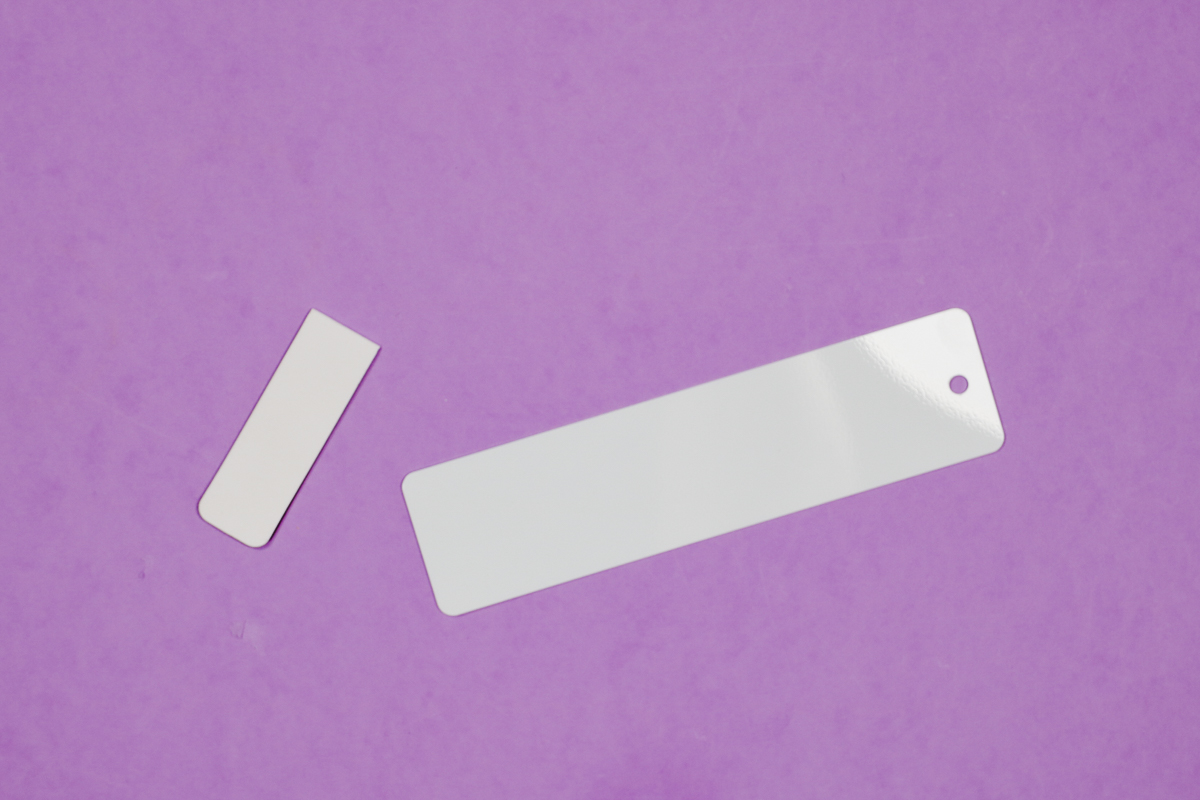
Check both the front and the back of the sublimation blank for any type of protective film and remove it. The metal bookmark did have a protective film. The magnetic bookmark did not have a protective film.
The metal bookmark has a white coating on one side, that is the sublimation side. The other side can’t be sublimated.
The magnetic bookmark also has a white side and a fold line in the middle.
Clean the surface to remove any lint, hair, dust, or other debris. I like to use a lint roller but you can also use a lint-free cloth and rubbing alcohol.
Step 8: Locate the Sublimation Design on the Bookmark
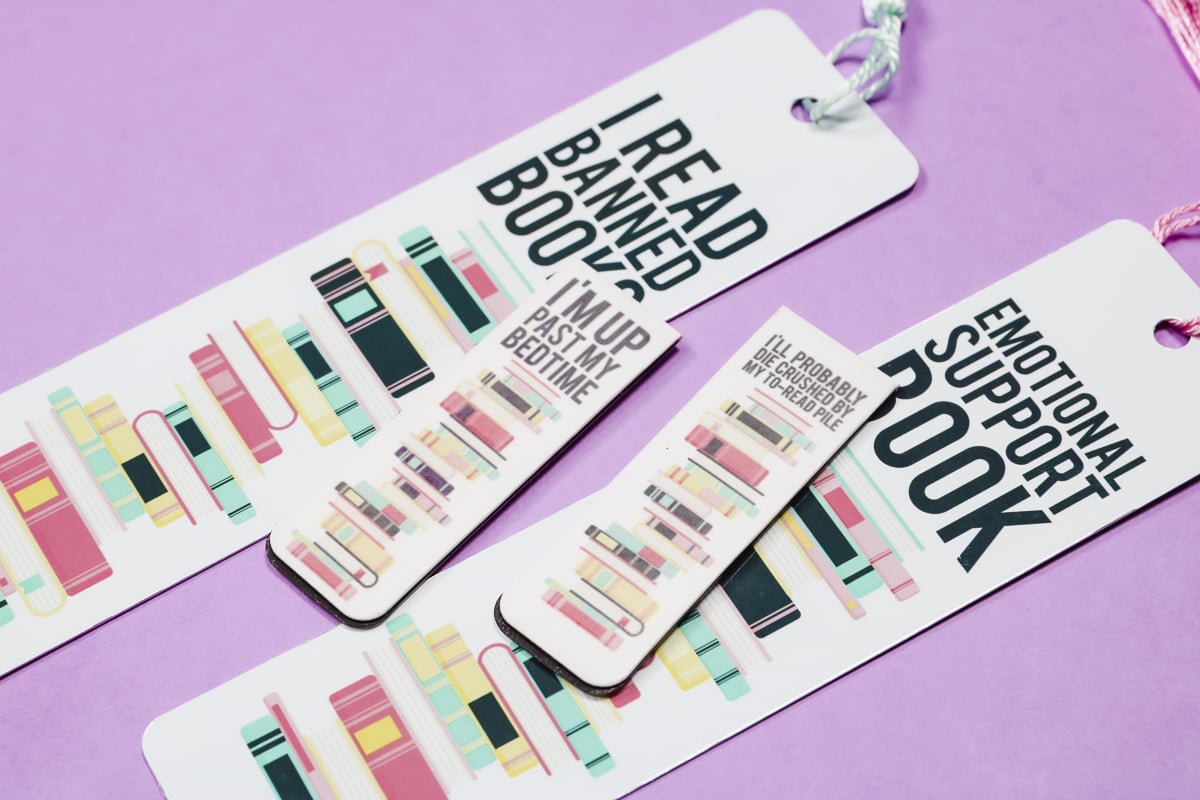
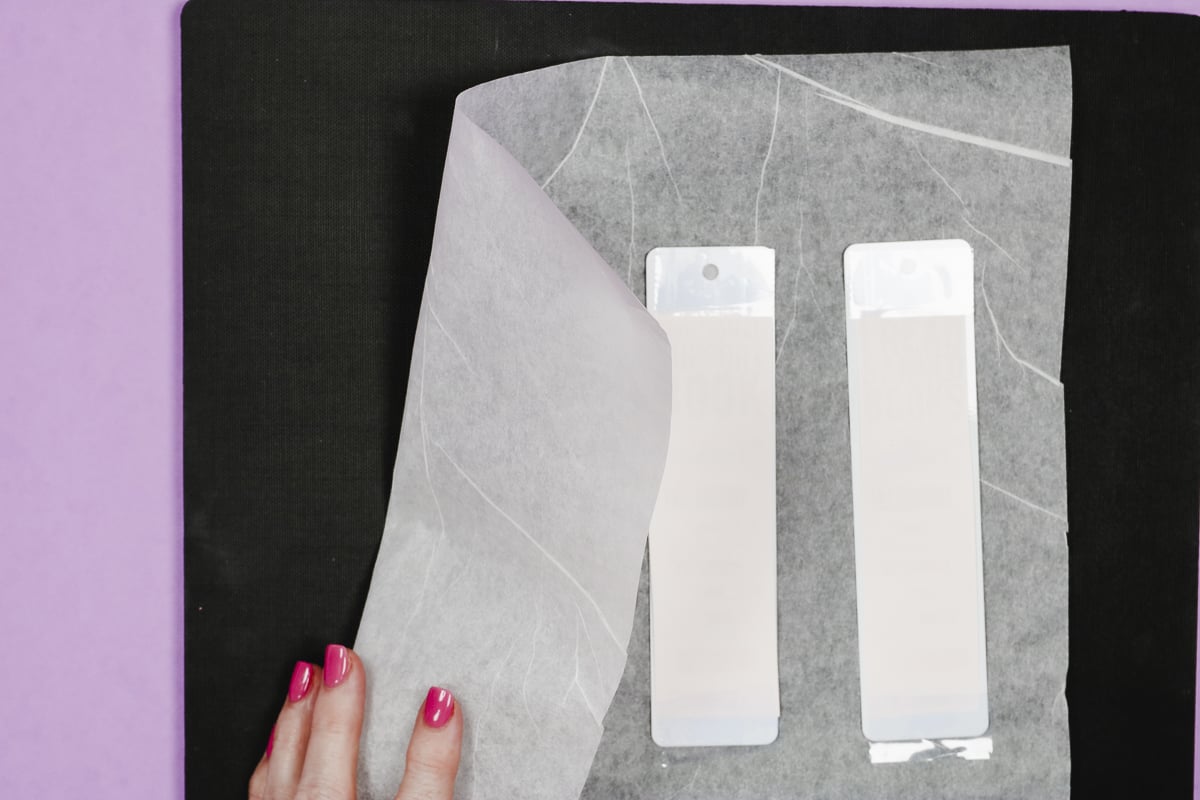
As you can see in the photo below, I trimmed the sides of the sublimation print so I can line up the print so it’s centered on the bookmark.
I can see the design through the back of the paper which helps with locating the design. I don’t want any of the print in the area around the hole so I located the print lower on the bookmark and taped it into place with heat-resistant tape.
For the magnetic bookmark repeat the same process. I added a design to both sides and used heat-resistant tape to secure it in place.
Step 9: Press Sublimation Bookmarks
I am using my Cricut EasyPress to press these sublimation bookmarks. When working with metal blanks, I prefer to use this firm heat-resistant mat from Artesprix.
Add protective paper below the bookmarks to protect the mat from any sublimation ink blowout.
I am pressing both metal bookmarks at the same time. Cover the sublimation print with protective paper and press for the recommended time temperature.
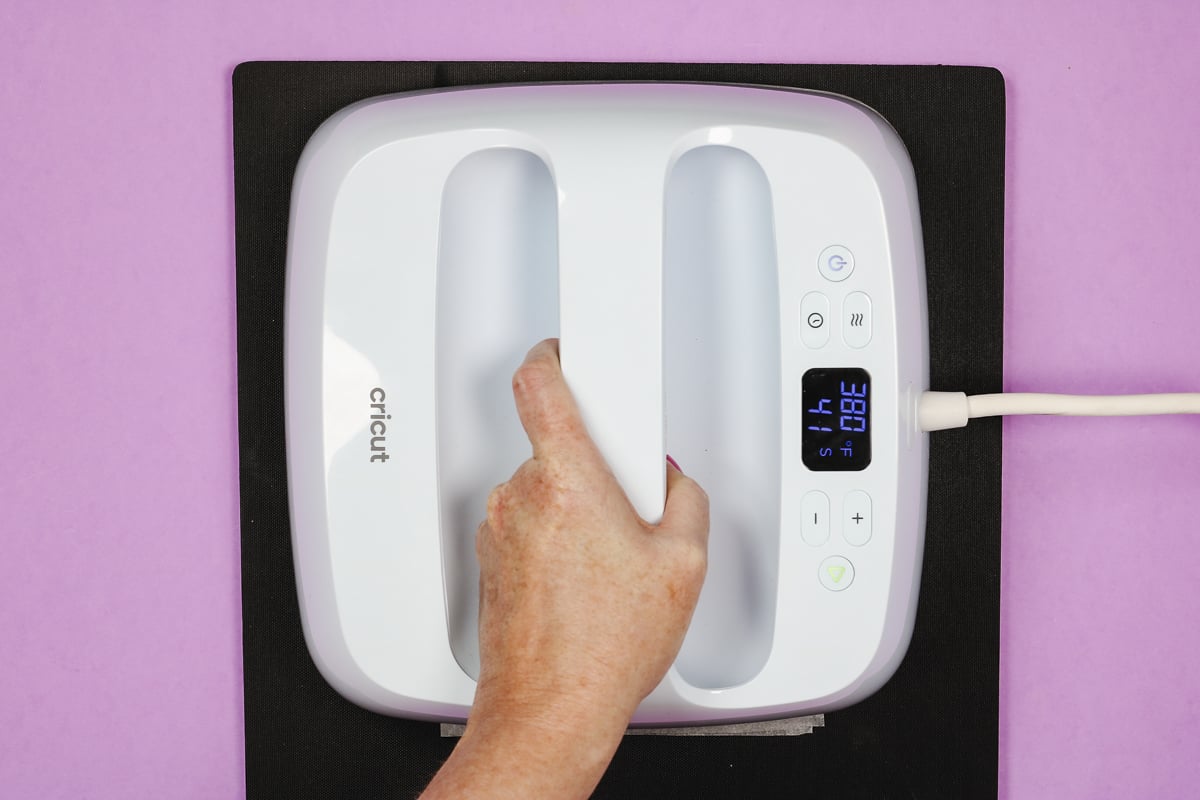
This sublimation bookmark calls for a temperature of 380 degrees for 50 seconds with medium pressure. When the time is up, lift the EasyPress straight up and remove the protective paper.
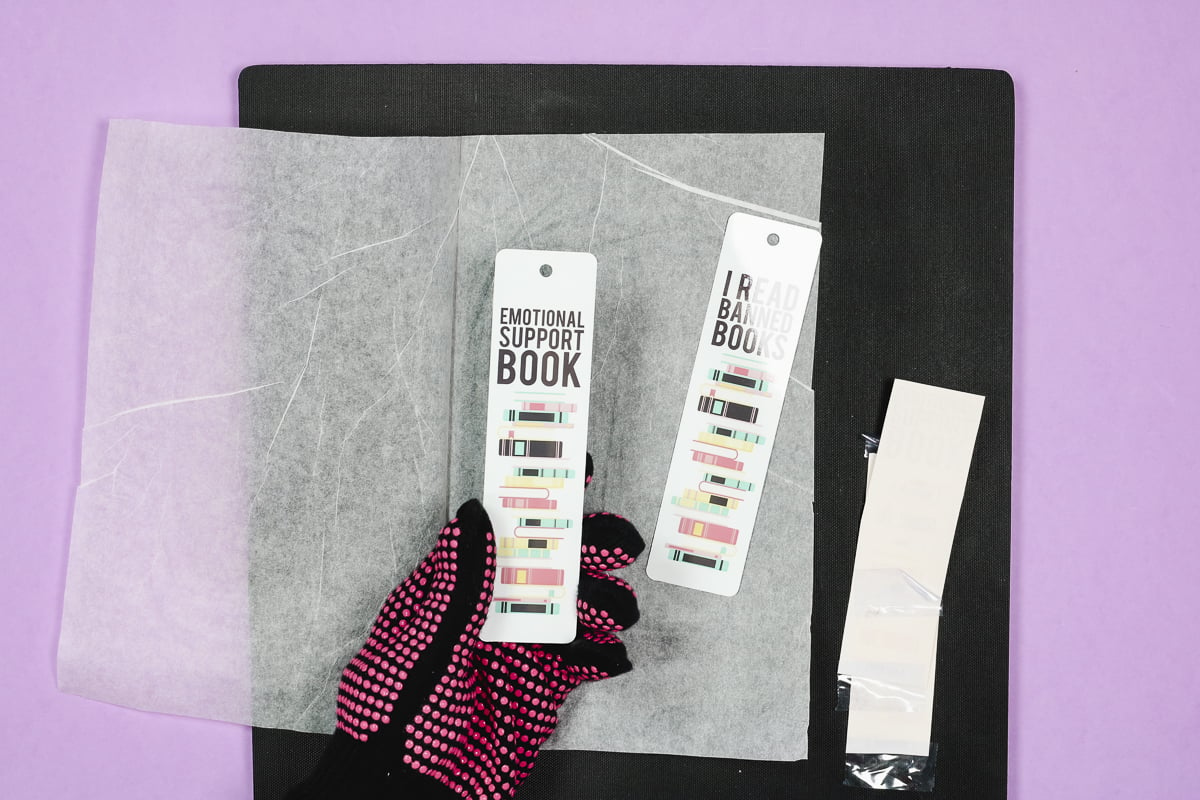
Peel back the sublimation print and reveal the finished design. This time and temperature look really good. I didn’t need to adjust the time or temperature to get a clear and vibrant image.
Next, I’m going to press the magnetic bookmarks.
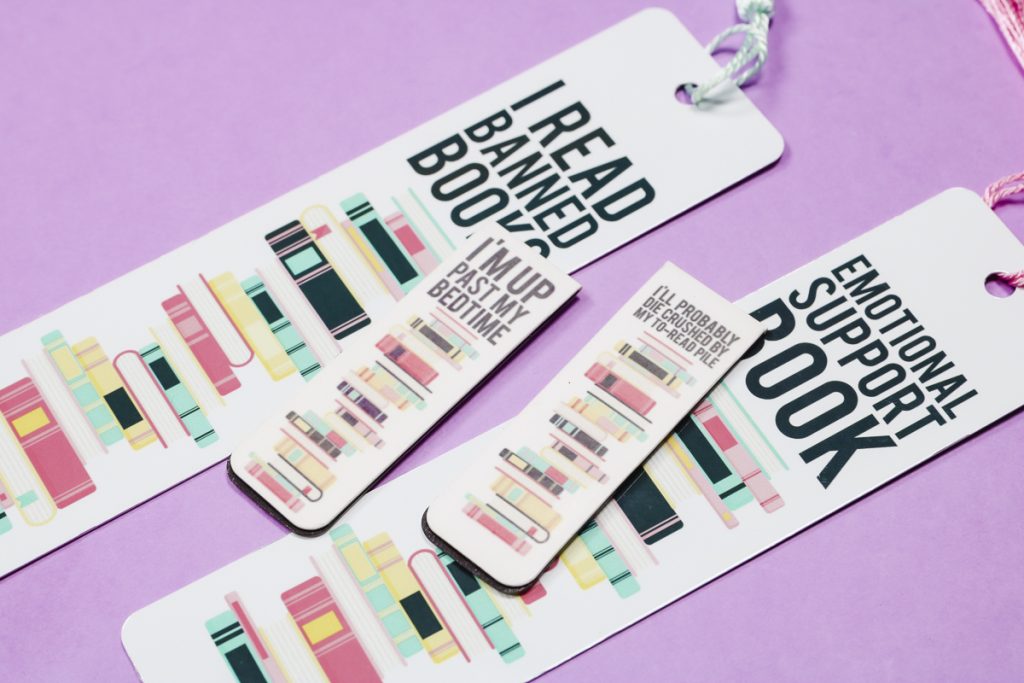
Here you can see the magnetic bookmark with the metal bookmark.
Unfortunately, these didn’t turn out as well. The high temperature damaged the magnet so I had to use the same settings of 380 degrees for 50 seconds. The magnet was still damaged a little with that time and temperature but it works.
Unfortunately, the image itself is very light and not at all vibrant like the metal bookmarks.
If you purchase them, I would save them for lighter designs that aren’t supposed to be bright and vibrant. Personally, I wouldn’t purchase them at all since the metal bookmarks look so much better.
The metal bookmarks come with the tassels and they are such a fun addition, they look great with these designs. Remember, you can get the links to both the sublimation bookmarks and the designs in the supply list above.
I hope I’ve answered any questions you have about making sublimation bookmarks. If you have any additional questions, leave them in the comments and I’ll be happy to answer them for you.