This post and photos may contain Amazon or other affiliate links. If you purchase something through any link, I may receive a small commission at no extra charge to you. Any supplies used may be given to me free of charge, however, all projects and opinions are my own.
Cricut has a brand new feature in Design Space called Create Sticker Maker! Today I’m testing it out to show you how it works so you can get started using it.
This feature is only available for Cricut Access members. If you are not a Cricut Access subscriber and are wondering what this feature does, I’m here to help! Keep reading to learn all about this new feature to help you decide if Cricut Access is something you need to add to your crafting arsenal.
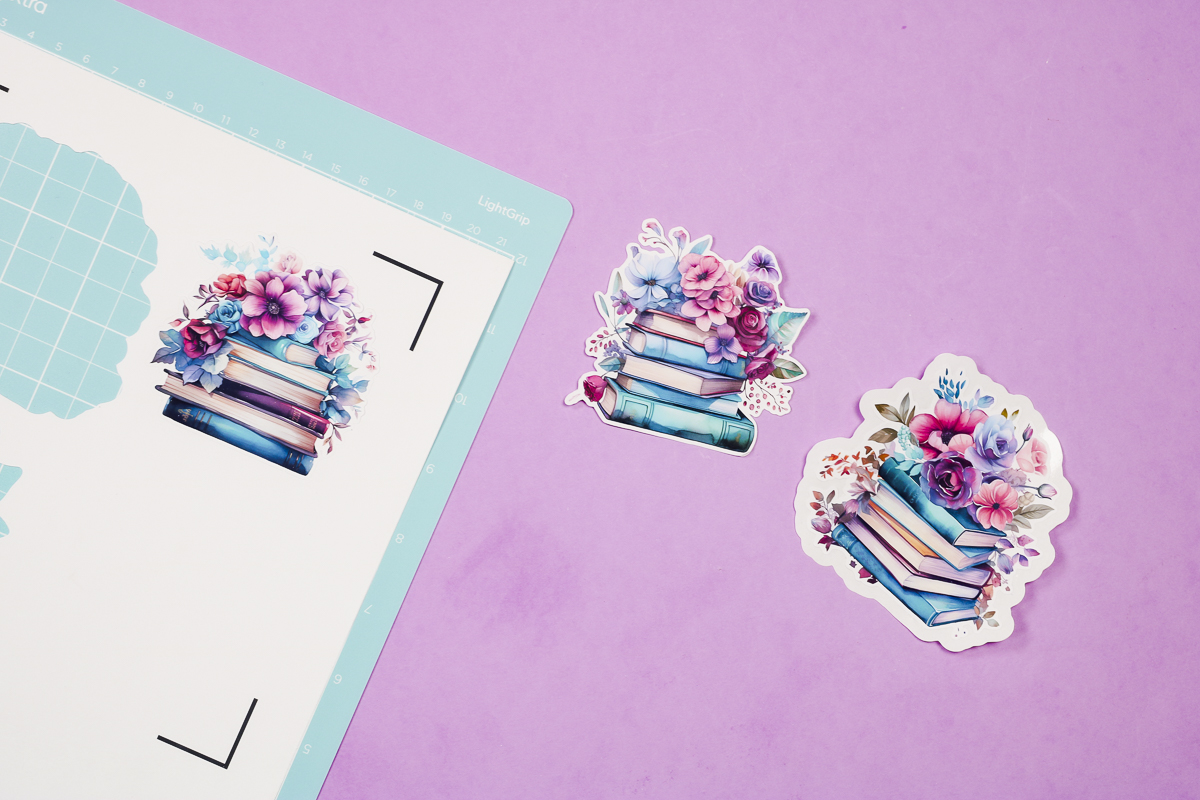
I’m going to use these free book stack images to create my stickers, you can get them in the supplies list below. You can watch me try out this new feature by pressing play in the video below.
Cricut Create Sticker Maker in Design Space
Let’s look at how to use the Cricut Create Sticker function in Design Space.
Supplies Used
Step 1: Open Design Space and Find Create Sticker Maker Function
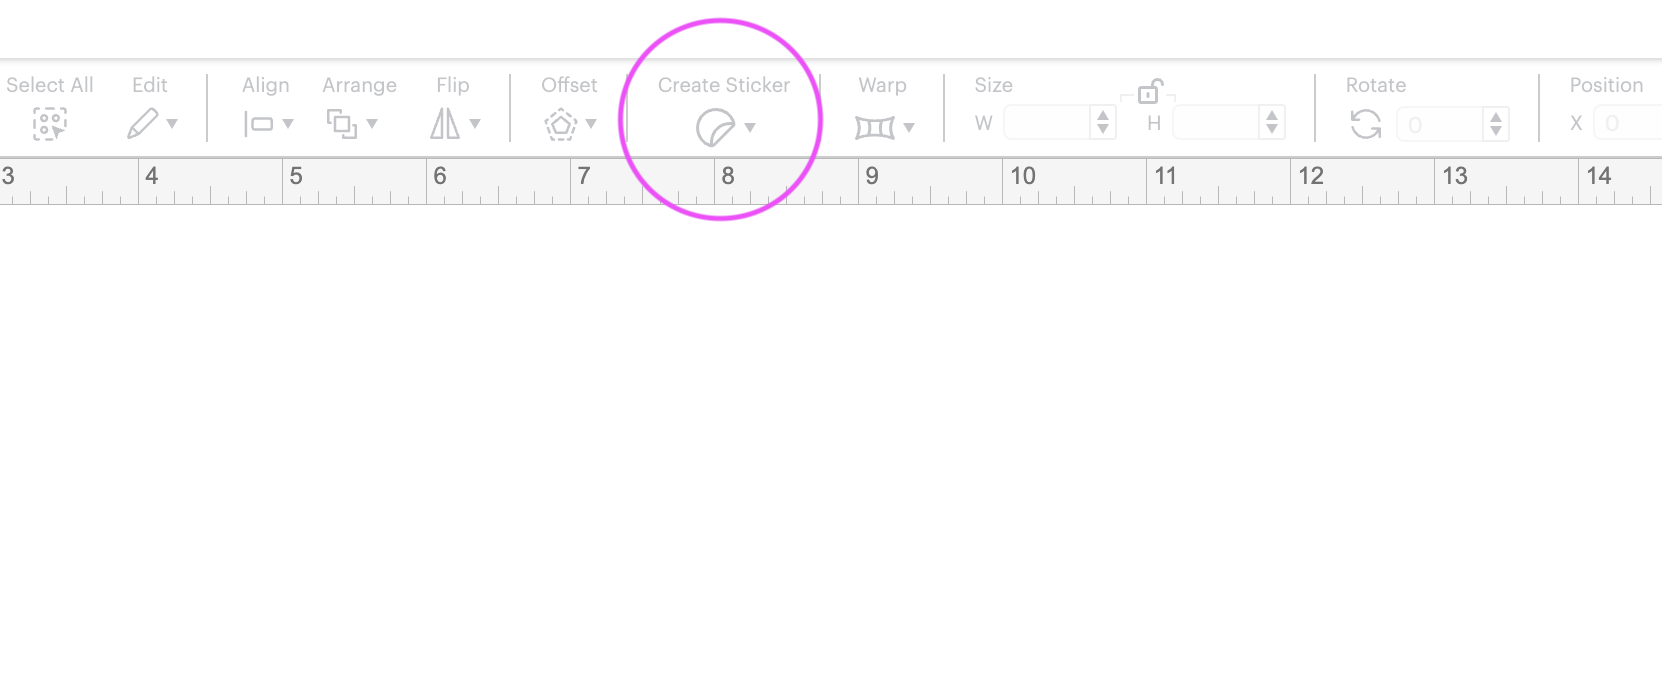
The Cricut Create Sticker Maker function should be in your top toolbar near the Offset function. Depending on when you read this tutorial you may or may not see the function there.
Optional: Change Design Space to Beta Version
If you don’t see the tool, it may still be in Beta mode. Let’s look at how to switch Design Space over to Beta so you can use this feature right away.
To turn your program into the Beta version click on your name in the upper right-hand corner and then scroll down to settings. Click on the General tab and then for Application Experience click from Live to Beta.
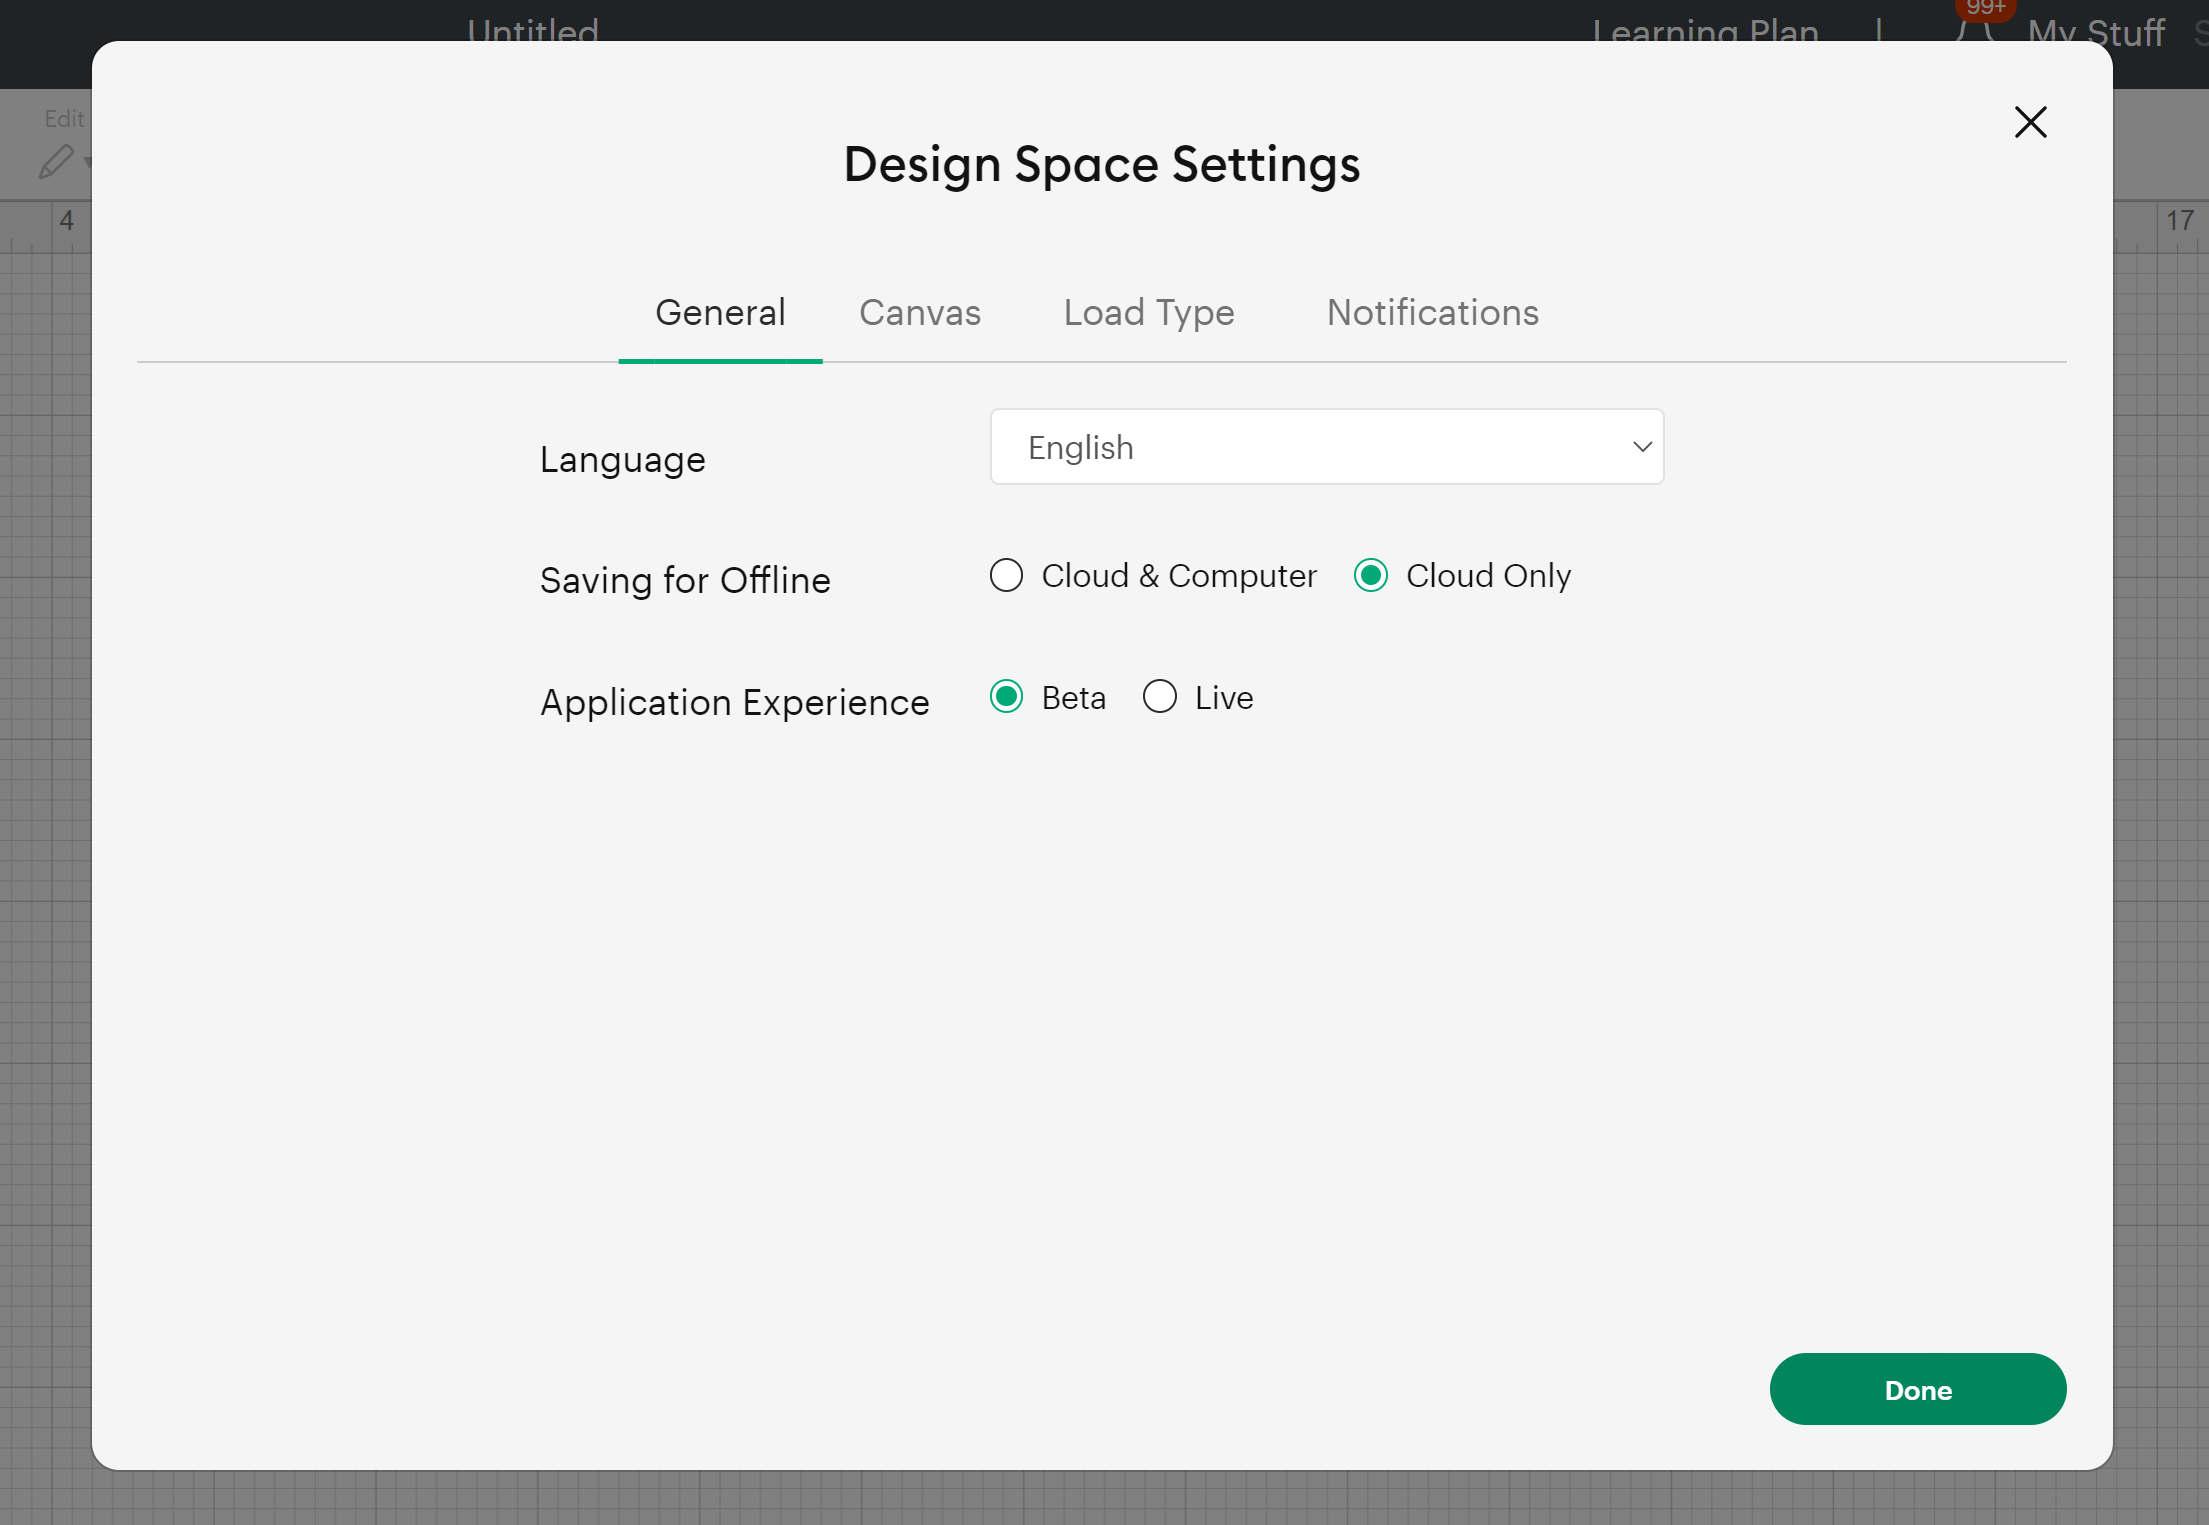
Design Space may restart and re-download when you make this change. It should re-open and you should now see the Create Sticker function in the to toolbar.
Step 2: Upload Your Image into Design Space
I am going to upload the stacked book designs into Design Space but the Create Sticker feature will work with any image.
You can upload your own images, use text, choose designs already in Design Space, or anything you want. Click Upload, Upload Image, Browse your device, and find the image to upload.
For most images, I select Complex and then click Continue. Depending on how your image uploaded you may need to remove the background. Since Create Sticker is for Cricut Access users I am going to use the Automatic Background Remover which is also for Cricut Access subscribers.
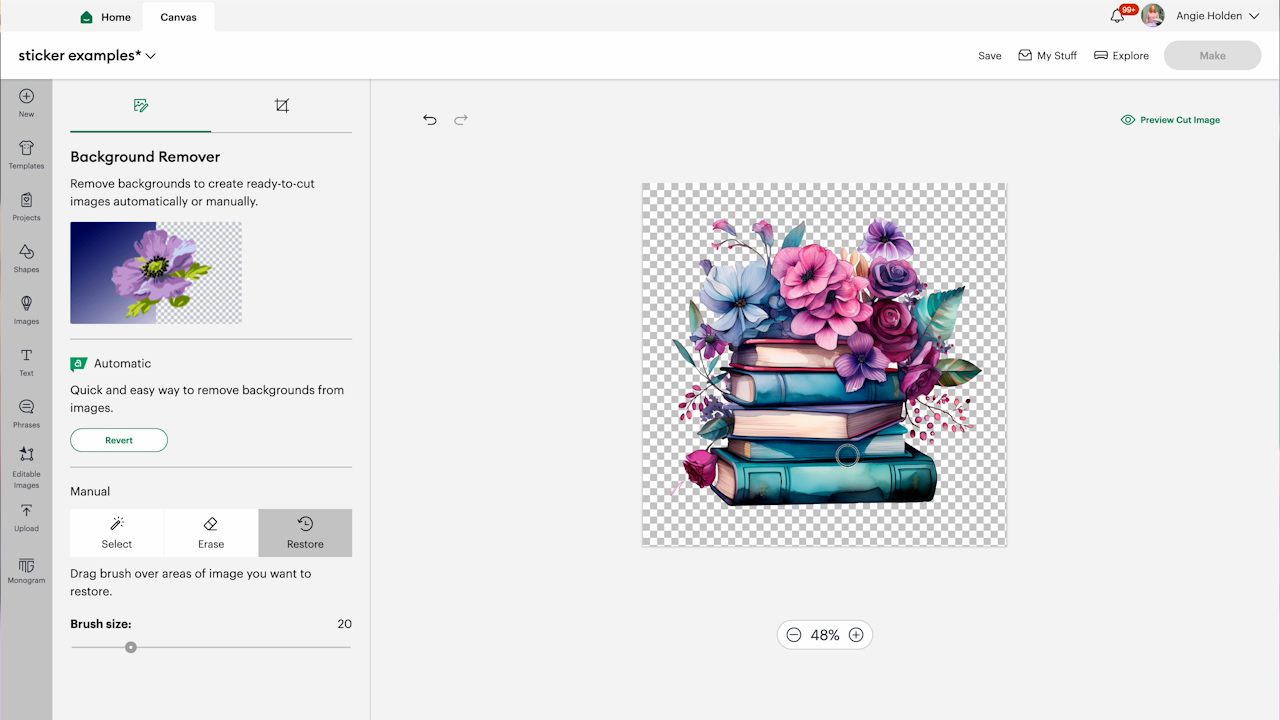
If you aren’t an Access subscriber, you can manually remove the background with the Manual background tools. You can also Restore parts of the design if needed to remove any cuts from the middle of the design.
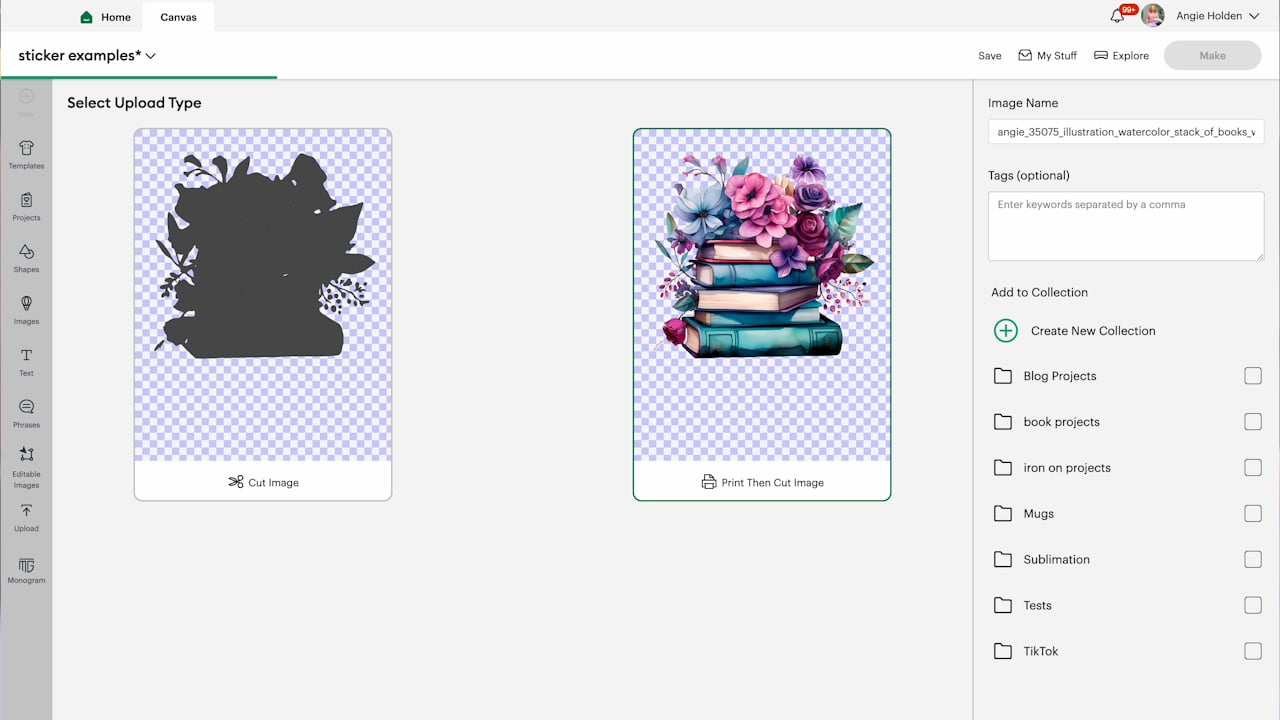
Next, click Apply and Continue. Before choosing the Print Then Cut option I like to look at the cut image to make sure everything looks correct. If it does, click Print Then Cut and then Upload.
Step 3: Decide Between Die Cut and Kiss Cut
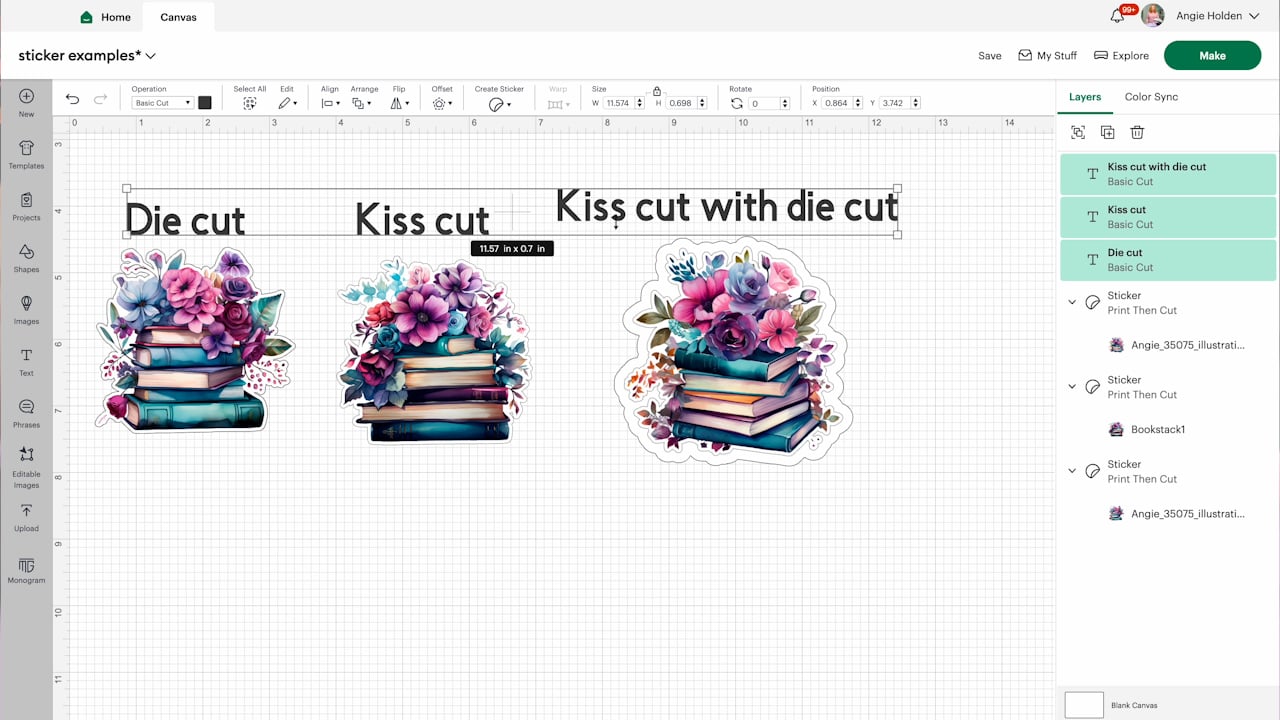
There are two different cut features in the Cricut Create Sticker feature, Kiss Cut and Die Cut.
- The Die Cut feature will cut through both the vinyl and the backer sheet exactly around your design.
- The Kiss Cut feature will cut through the vinyl but will leave the backer sheet untouched.
- You can also opt for a Kiss Cut with a Die Cut edge. This will cut through the vinyl but leave the backer around the sticker. Then add a large offset and die cut an edge around the sticker. This is a great option if you sell individual stickers.
There are different reasons you might choose each option and we’ll look at those in a moment but you will need to pick one option for your stickers.
NOTE If your image isn’t already flattened into a Print Then Cut design, simply click Kiss Cut or Die Cut and Apply and it’ll automatically turn it into a Print Then Cut. You no longer have to use the flatten button to turn a cut file into a sticker.
Step 4: Create a Sticker from an Image
How to Make a Die Cut Sticker
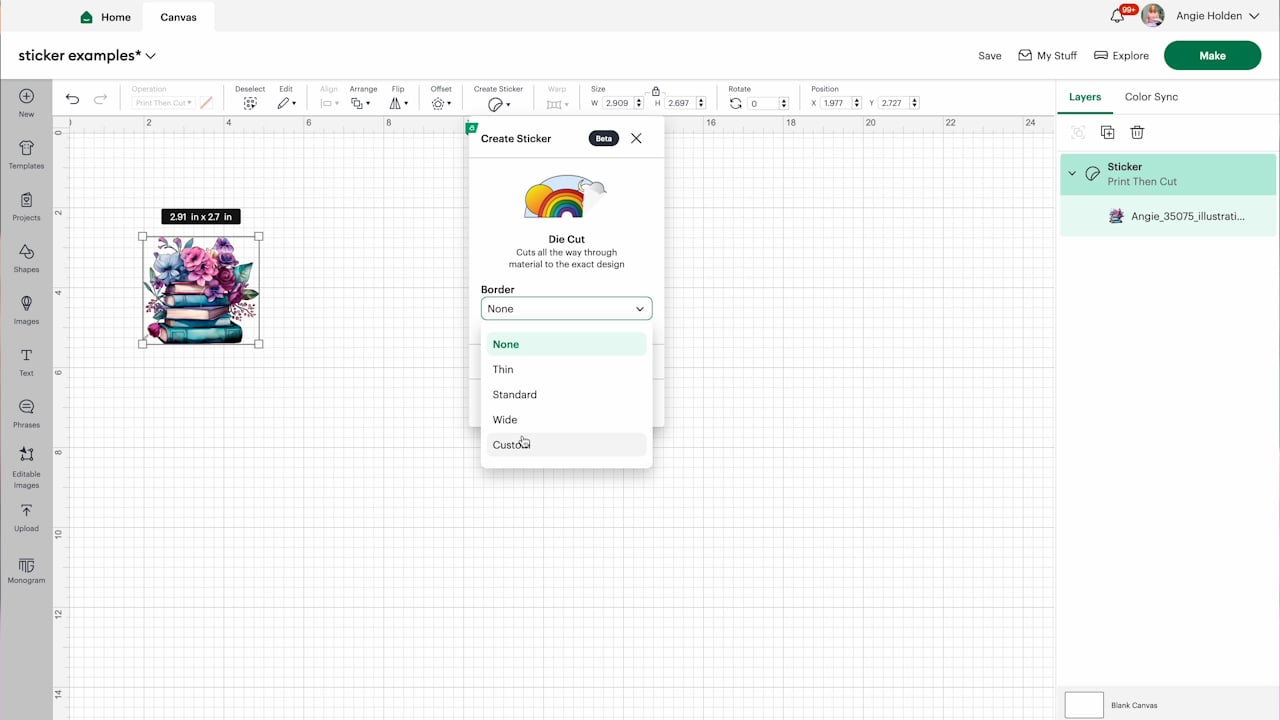
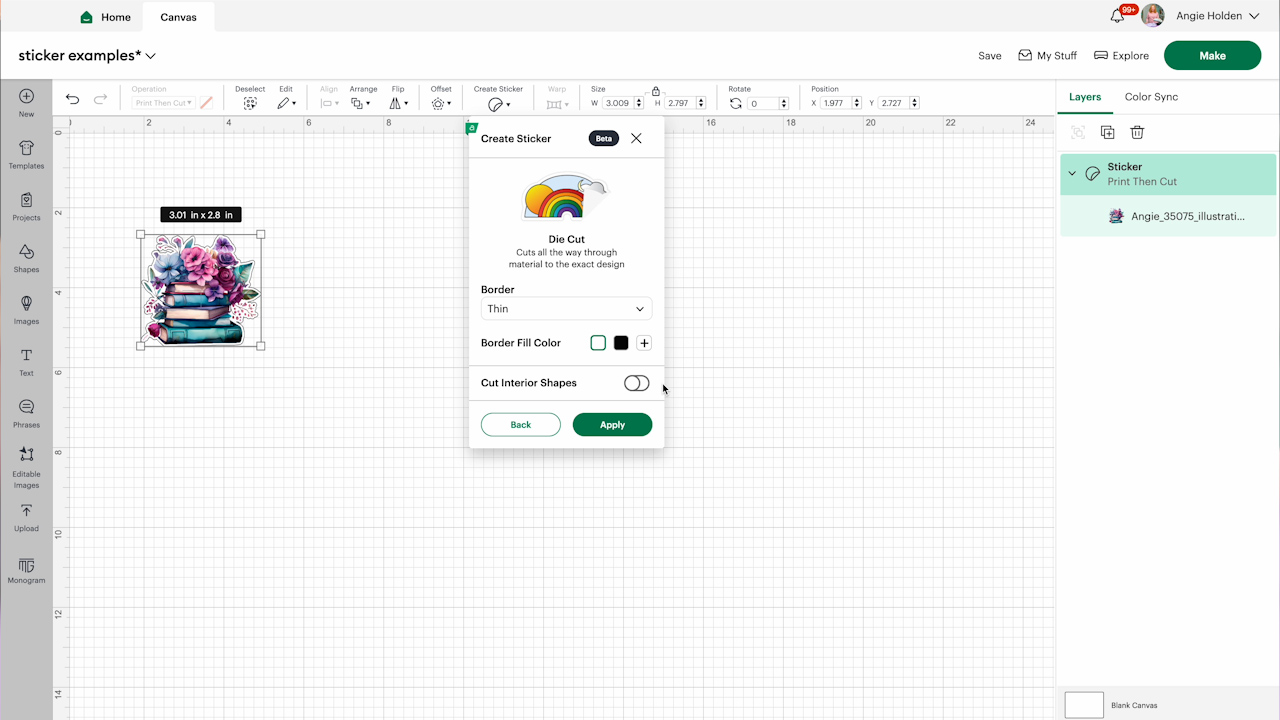
With the design on the canvas, resize the image to the size you want your sticker to be. Click Create Sticker and then choose the Die Cut option. Within this tool, you can add a border around the sticker without having to separately add an offset.
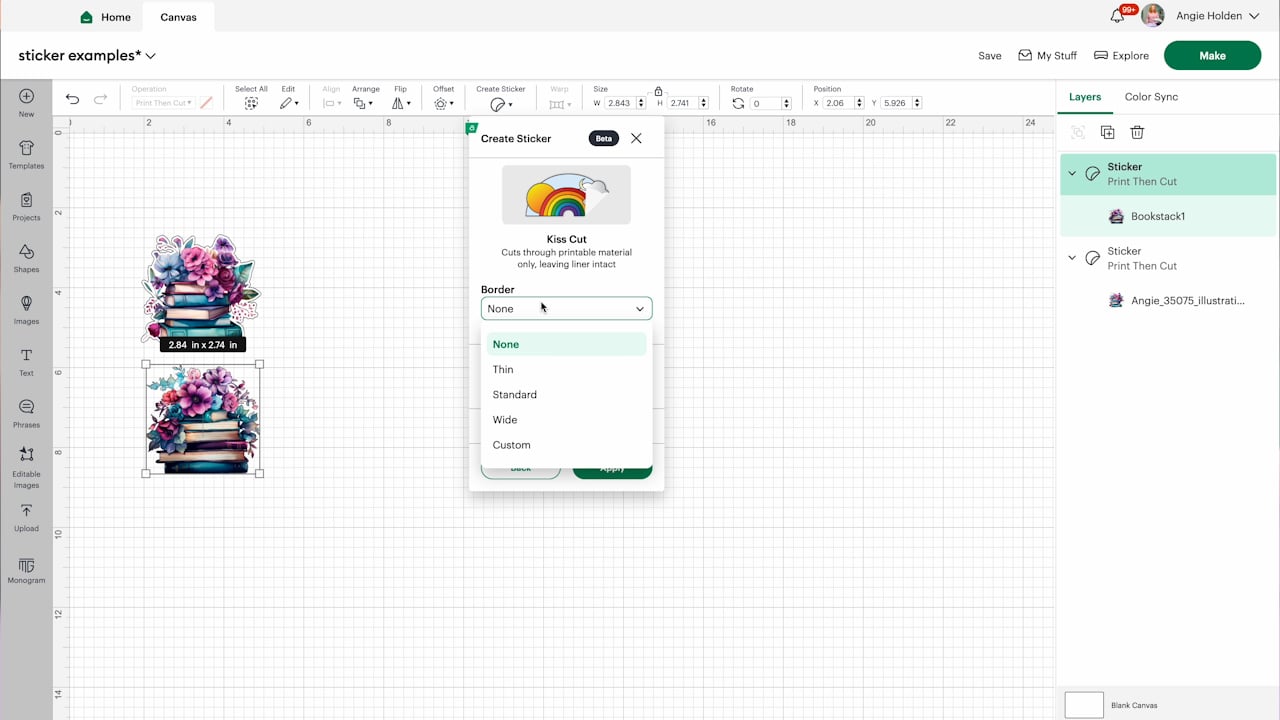
There are 5 different options under Border. None, Thin, Standard, Wide, and Custom. You can see what each one of those will look like and edit them if you decide something else would look better. I usually like a thin white border around my sticker.
You can choose to add a color to the border if you’d like. I like to leave mine white. With the border selected, you can also choose whether to cut out interior shapes or not.
Again, there is no need to use the Contour tool when you use Create Sticker. You will not need to select every different interior shape and decide if you want them or not. Just click the one button to decide whether you want internal cuts or not. I do not want any interior cuts so I’m going to leave that turned off and then click Apply.
How to Make a Kiss Cut Sticker
Next, I am going to select a different image and click Create Sticker again. This time I am going to select Kiss Cut and we can look at the options for that feature. They are similar to the die cut options above.
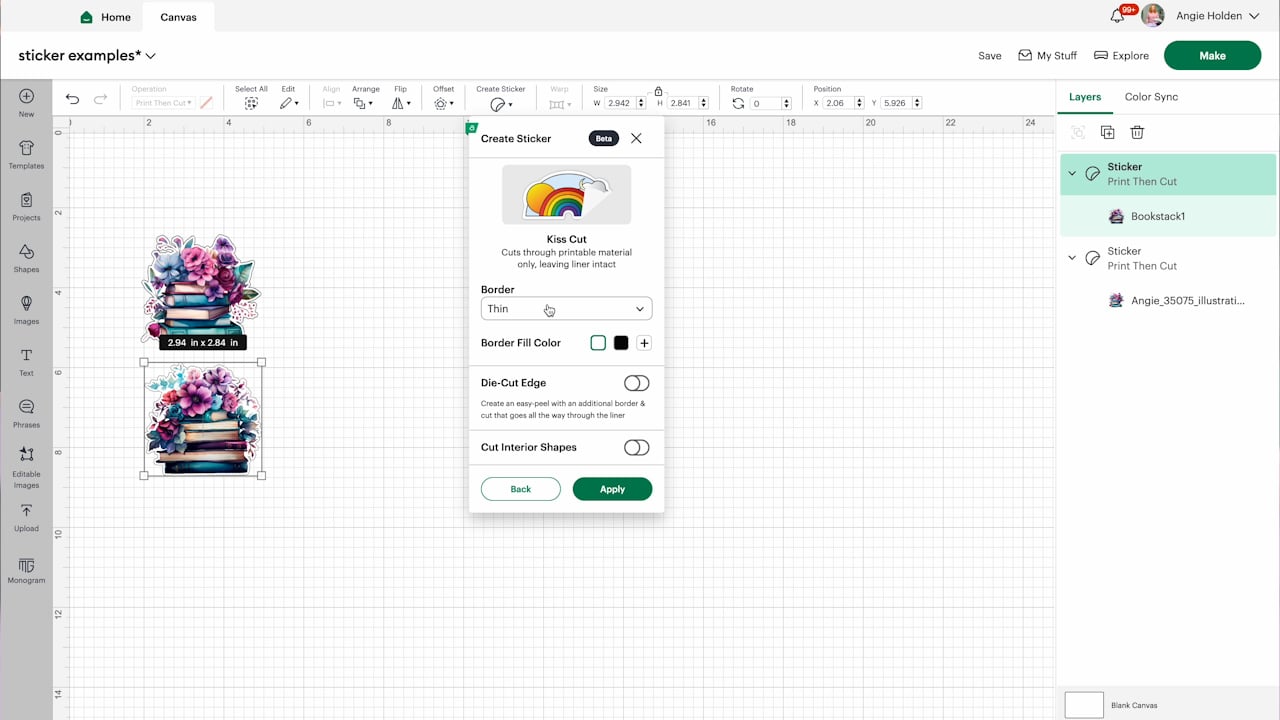
I can again add a border in any size I want and change the color if desired. I am going to choose the thin border size and leave the color white.
For this sticker, I am leaving the Die Cut Edge and Cut Interior Shapes off. This sticker will do a Kiss Cut around the thin border I applied.
Make a Kiss Cut with a Die Cut Edge
The last option is likely my favorite. This option combines both the Kiss Cut and the Die Cut options. The first thing I’m going to do is select the Kiss Cut option and add a border.
Next, I’m going to turn on the Die Cut Edge. I am going to keep Cut Interior Shapes turned off and click Apply.

Step 5: Printing and Cutting Print Then Cut Stickers
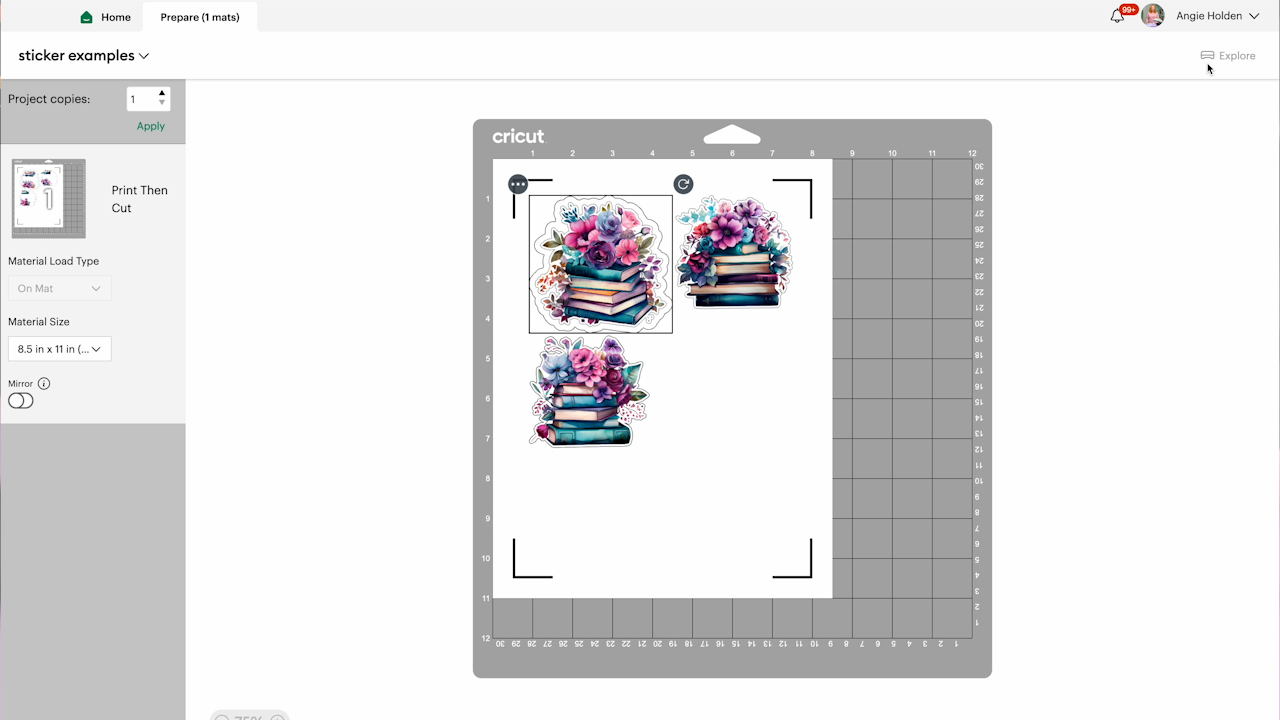
With these three different stickers created on my Design Space canvas, it’s time to print the stickers.
NOTE: The printing and cutting steps are the same as any other Print Then Cut project. Follow the steps within Design Space.
Another great feature of the Cricut Create Sticker function is that I can print and cut all of these designs on one sheet of vinyl.
If the border you added has a color, you can add a bleed. Since my border is white I don’t need to add Bleed.
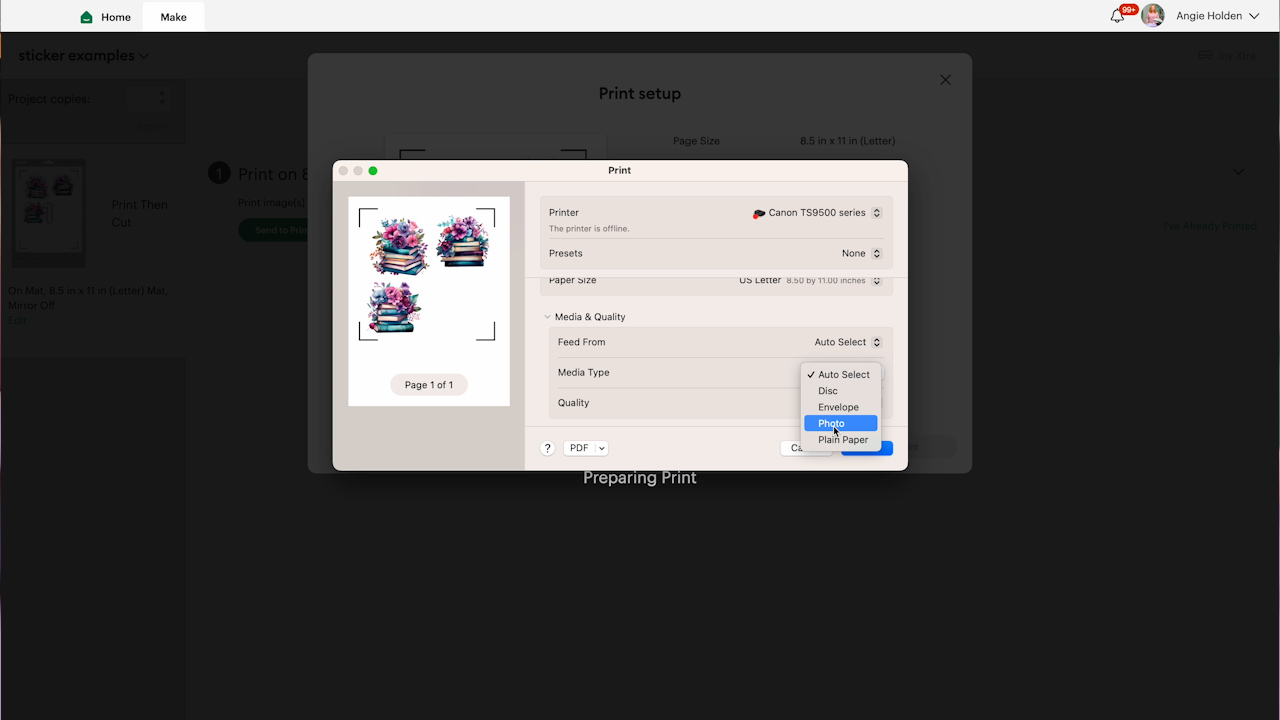
I like to use the System Dialogue Box for printing options. The options you see will depend on both your printer and computer. I like to change the Quality to Best and the paper type you may need to experiment with. I am using the photo paper setting for my printer.
Depending on your setup you may need to try a few different options to get the best results.
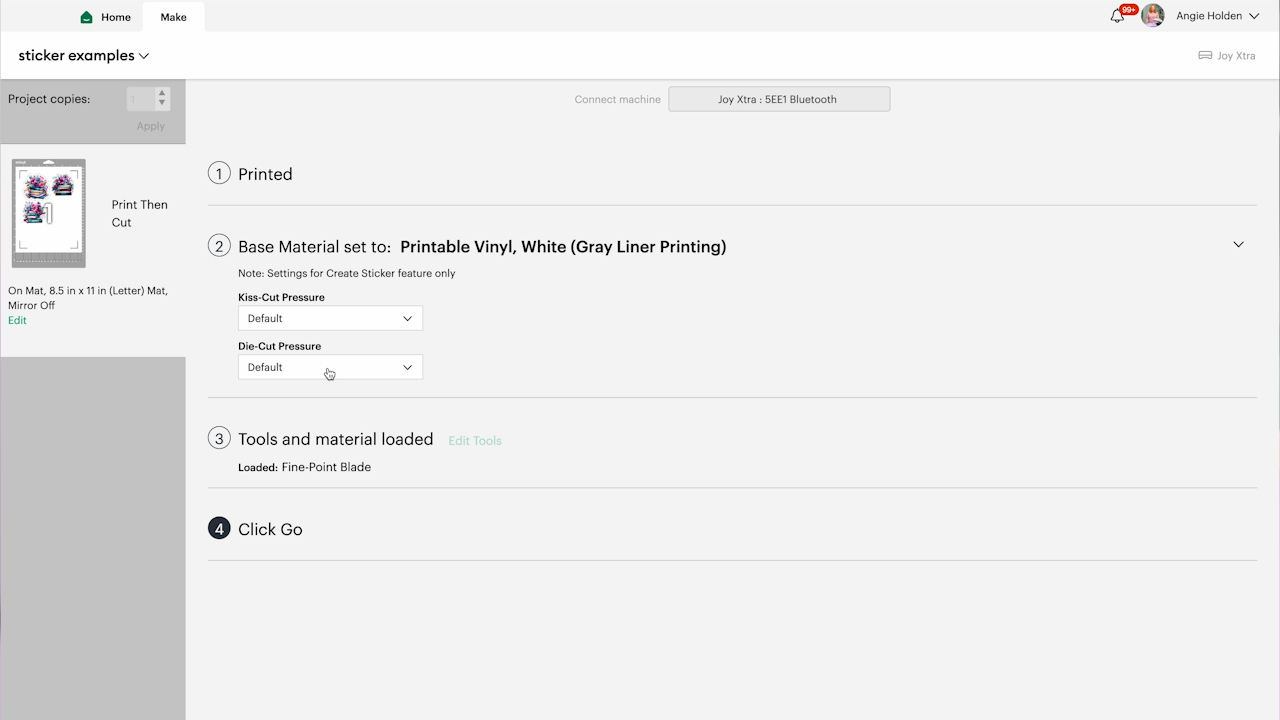
You can also adjust different pressure settings for both the kiss cut and die cut settings. I always recommend a test cut when you’re cutting a material for the first time.
IMPORTANT: If you haven’t used the Print Then Cut feature recently, make sure you calibrate your machine to get the best cuts.
After printing on an inkjet printer, place the printed vinyl sheet on the Cricut cutting mat making sure it’s located the same way it is on the screen.
Select the correct material in Design Space for what you’re using, load it into your machine, and press Go.
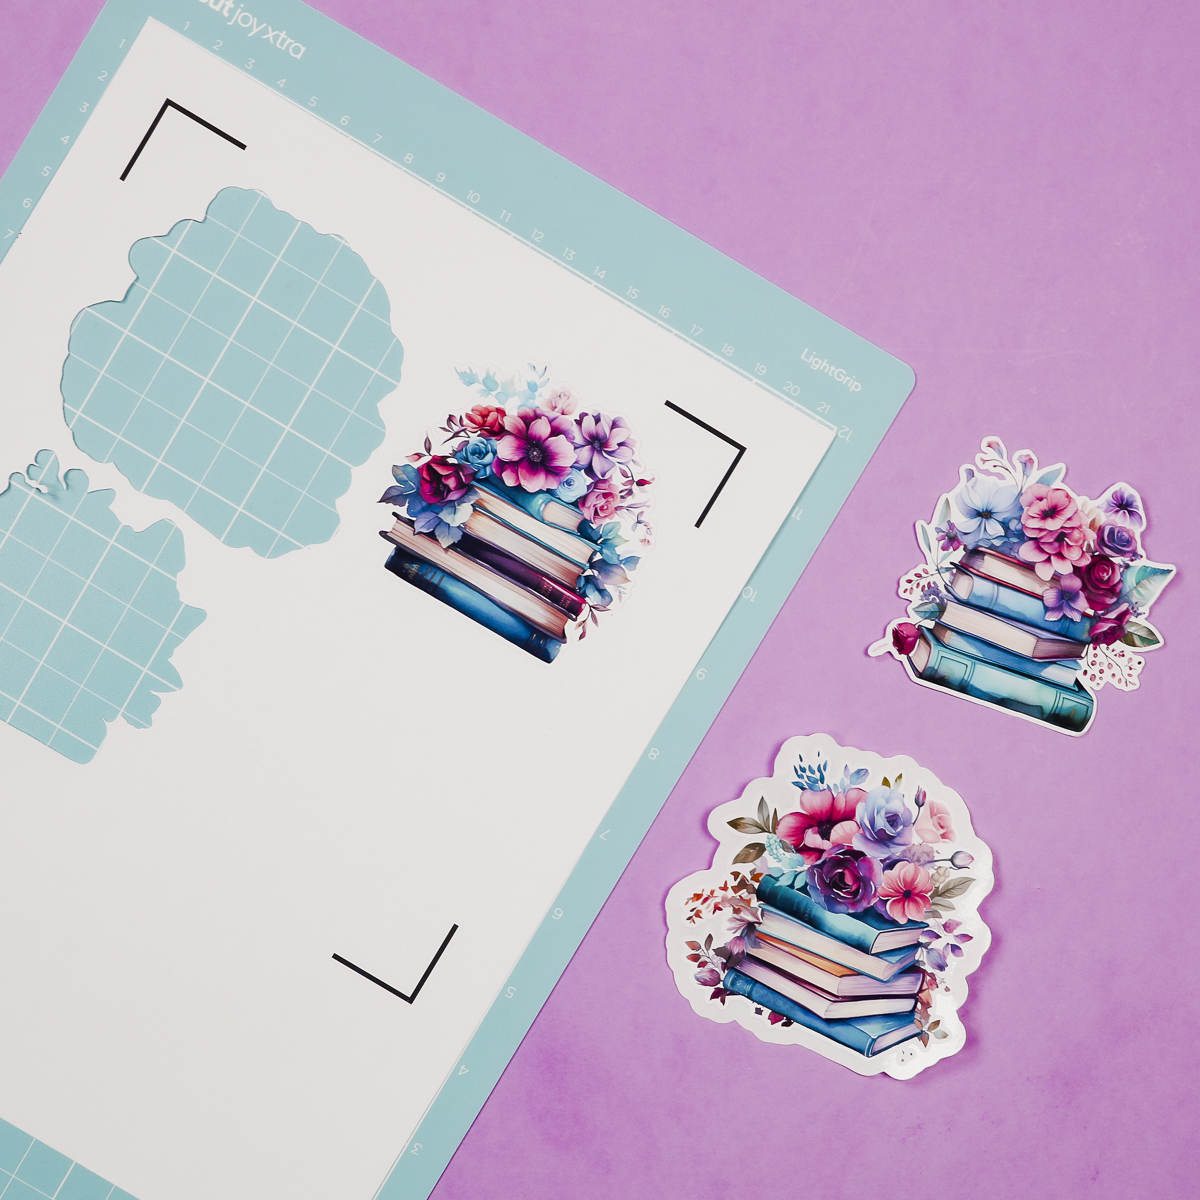
Sticker Cut Type Comparison
Now, let’s look at all of the different options. I love that I was able to cut all three different types on the same sheet of vinyl.
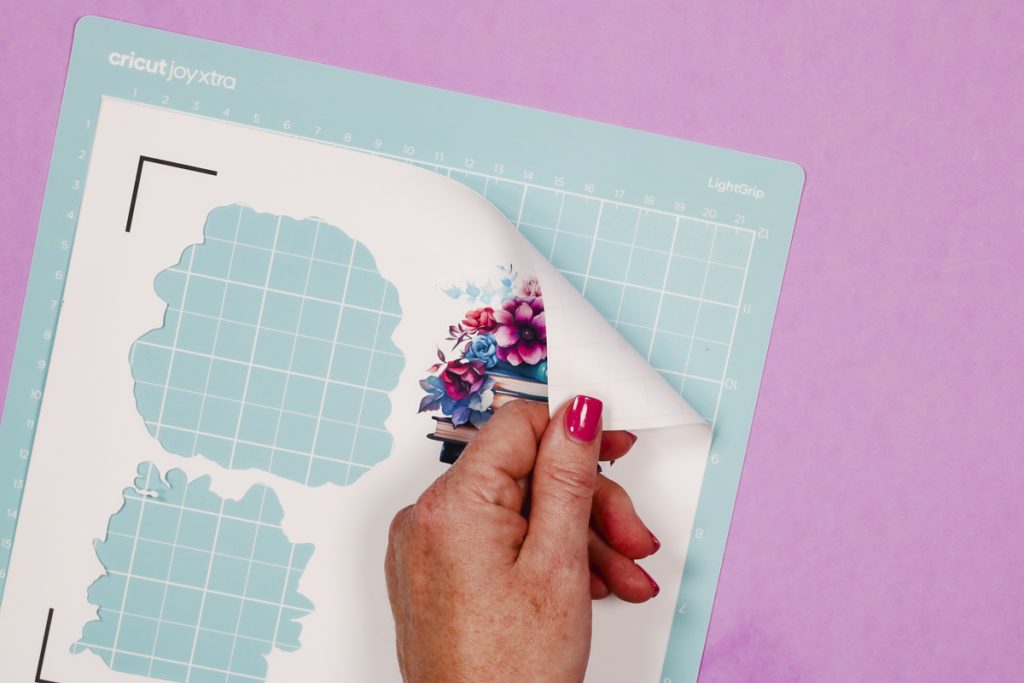
Kiss Cut Sticker
The sticker still on the Cricut mat is the Kiss Cut sticker. This sticker is cut through the vinyl but not through the backer.
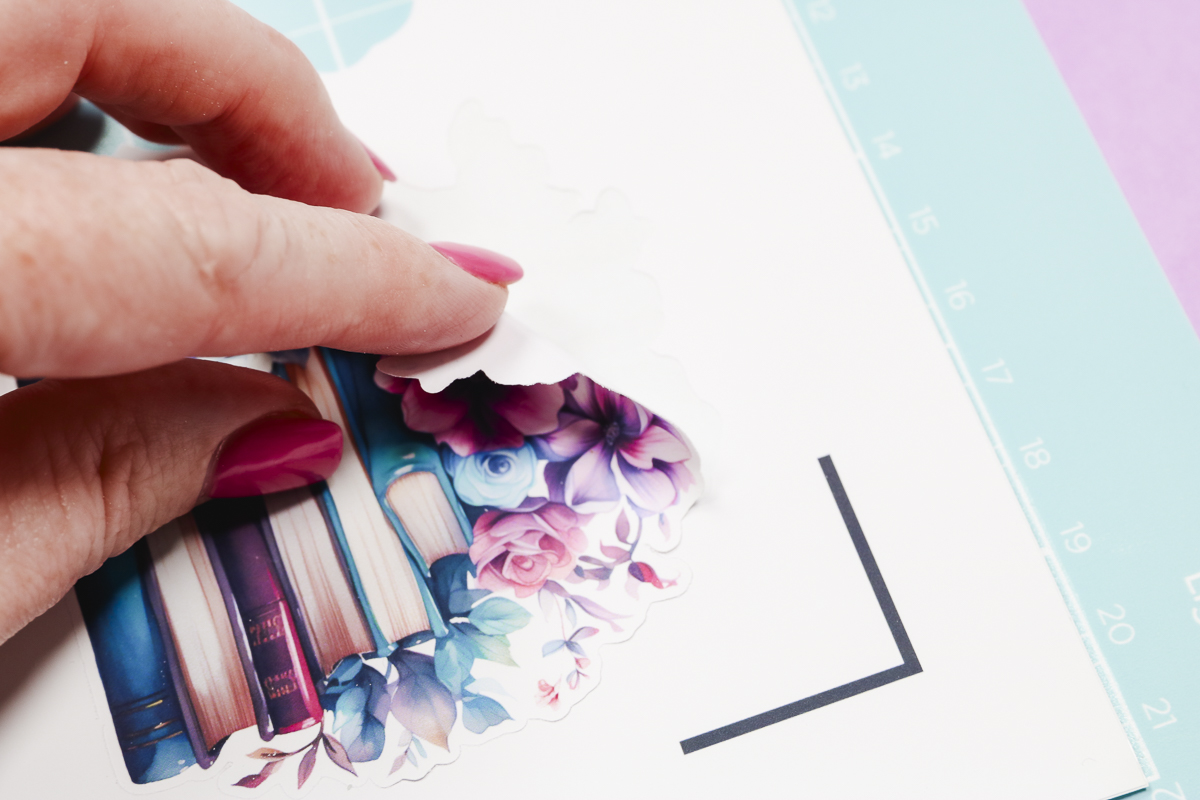
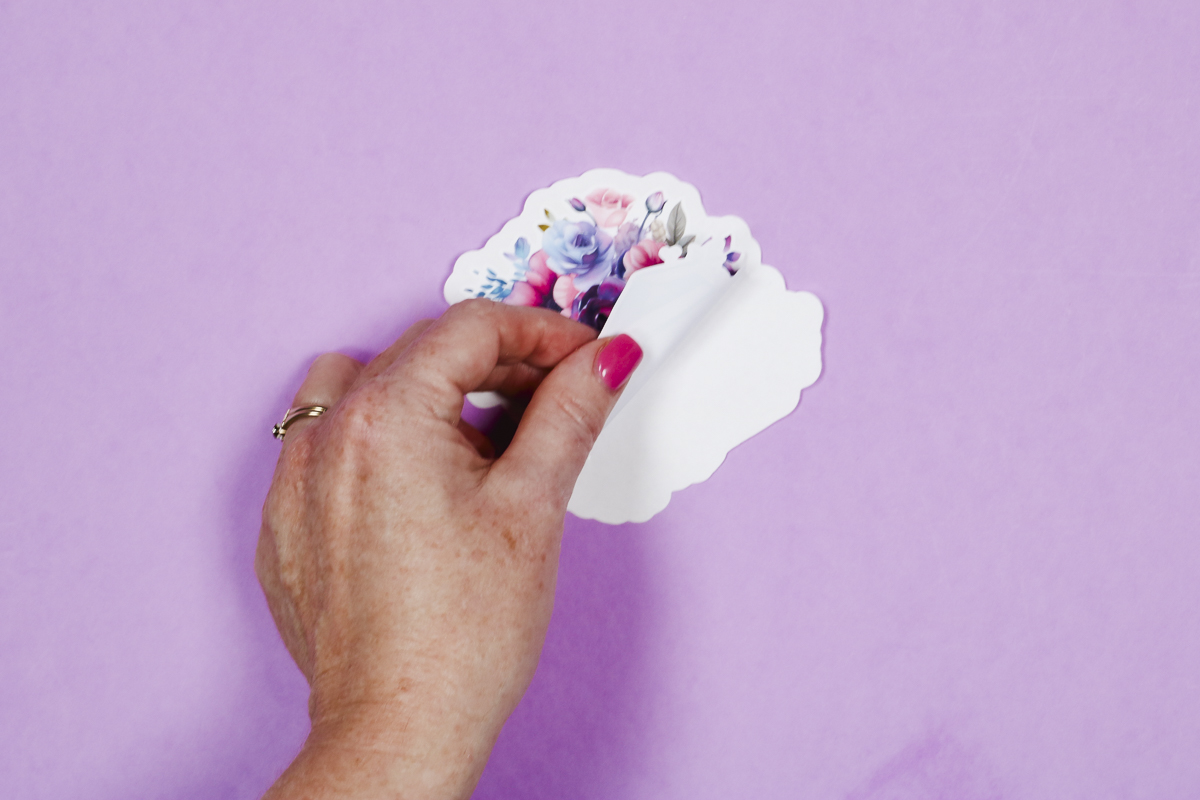
For this sticker type, you’ll need to peel the sticker away from the backer to use it. This is a great option for full sticker sheets.
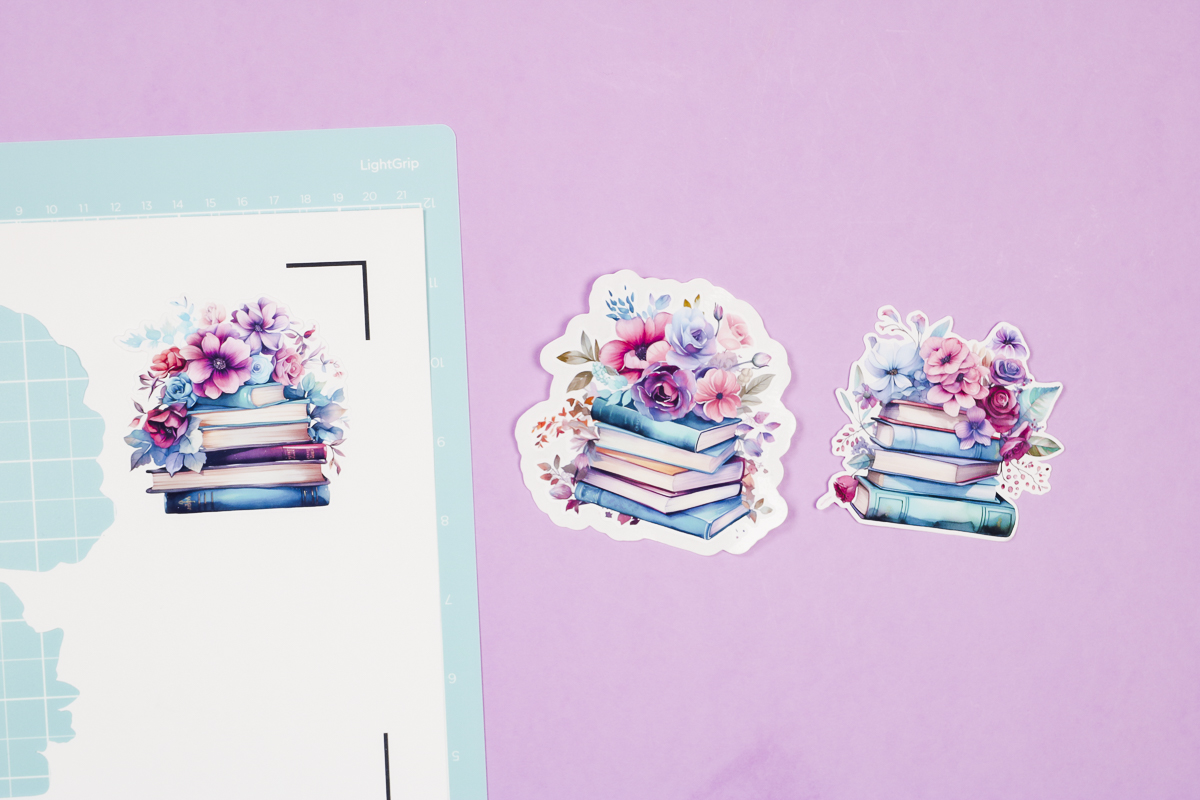
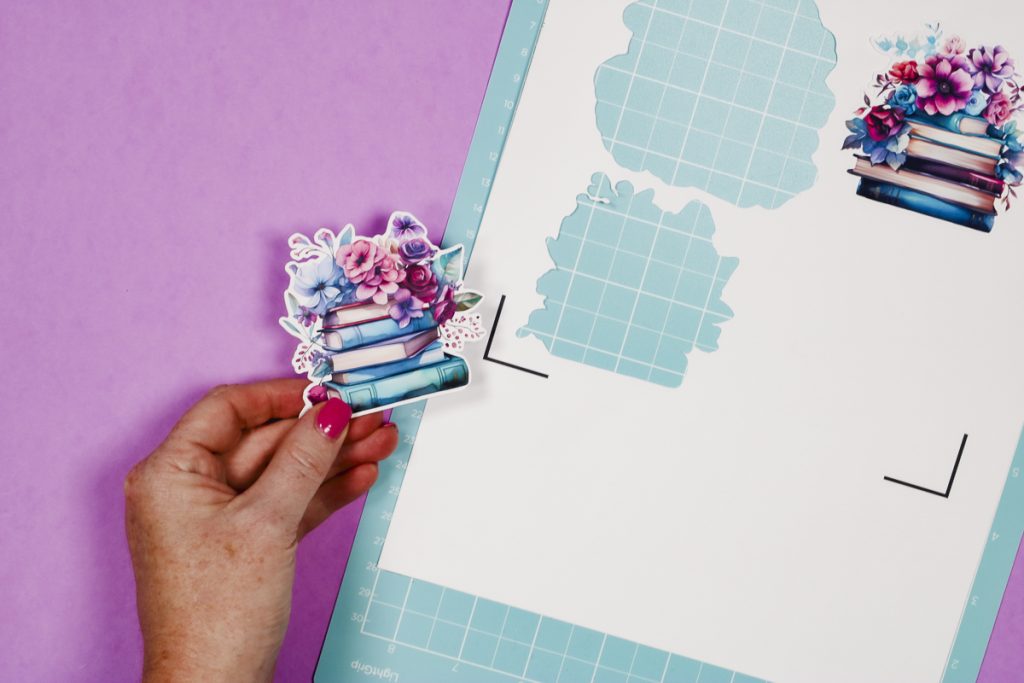
Kiss Cut + Die Cut Sticker
The middle sticker has both the Kiss Cut and the Die Cut. For this sticker, you can see that the kiss cut outlines the sticker and the die cut is cut through the vinyl and the backer.

This sticker option is great for stickers that are being gifted or sold. You will need to peel away the Die Cut area and you’ll be left with a beautifully cut and outlined sticker.
Die Cut Sticker
The last sticker is the Die Cut option. This sticker is cut through the vinyl and the backer around the border.
I think this option is great if you’re gifting or selling stickers and want to maximize how many stickers you can get on one sheet.
Which cut type is best?
Now that we have tested all of the different Cricut Create Sticker Maker options let’s discuss which one worked best.
If I had to choose a favorite, I think it would be the Kiss Cut + Die Cut sticker option. I love how easy it is to peel the sticker away from the backer with this combination.
There are times however that the other options might be a better choice.
The Kiss Cut option would be perfect for full sticker sheets. I think the Die Cut option is great for maximizing the space. It can be a little harder to remove the backer from the sticker with this cut but it may allow for more stickers per sheet.
The ability to test all three options on one sheet was great, especially for the first time testing the Cricut Create Sticker Maker.
Is the Cricut Create Sticker Maker Worth It?
The Create Sticker Maker makes it very easy to create stickers, regardless of the type of cut I choose to use.
There are hacks and workarounds that you can use to make stickers within Design Space if you aren’t a Cricut Access subscriber. The Create Sticker option is easier for sure but if you want to use the workarounds they will continue to work.
If you make a lot of stickers, I would give the Cricut Create Sticker Maker a try. You may find that it’s perfect for your sticker-making needs.
I hope I’ve answered any questions you have about this new Design Space feature. If you have any additional questions, leave them in the comments and I’ll be happy to answer them for you.