This post and photos may contain Amazon or other affiliate links. If you purchase something through any link, I may receive a small commission at no extra charge to you. Any supplies used may be given to me free of charge, however, all projects and opinions are my own.
Are you looking for free sublimation software that isn’t Cricut Design Space? I’m here to show you three free programs you can use to print to your sublimation printer. These programs all do NOT have the size restrictions that you will find in Design Space so you may find it easier to use these if you have been trying to do sublimation with Cricut Design Space.
New to sublimation printing? Check out my Beginner’s Guide here.
Free Sublimation Software
I know many of you use Cricut Design Space to print your designs to your sublimation printer. I also know many of you are frustrated that your print size is limited to 6.75 by 9.25 inches. So today I’m going to walk you through three different free sublimation software programs you can use to print to your sublimation printer.
I’m going to use Google Docs, Canva, and Silhouette Studio. These all have completely free options that I am going to show you. I’ll teach you how to print a regular sublimation design and how to resize it and print it. I’ll also show you, for each one, how to use a template to get the size right for things like a 20-ounce tumbler.
You can actually watch me walk you through each of these free sublimation software programs. Just click play on the video below:
Programs Used
Sublimation Supplies
Using Google Docs for Free Sublimation Printing
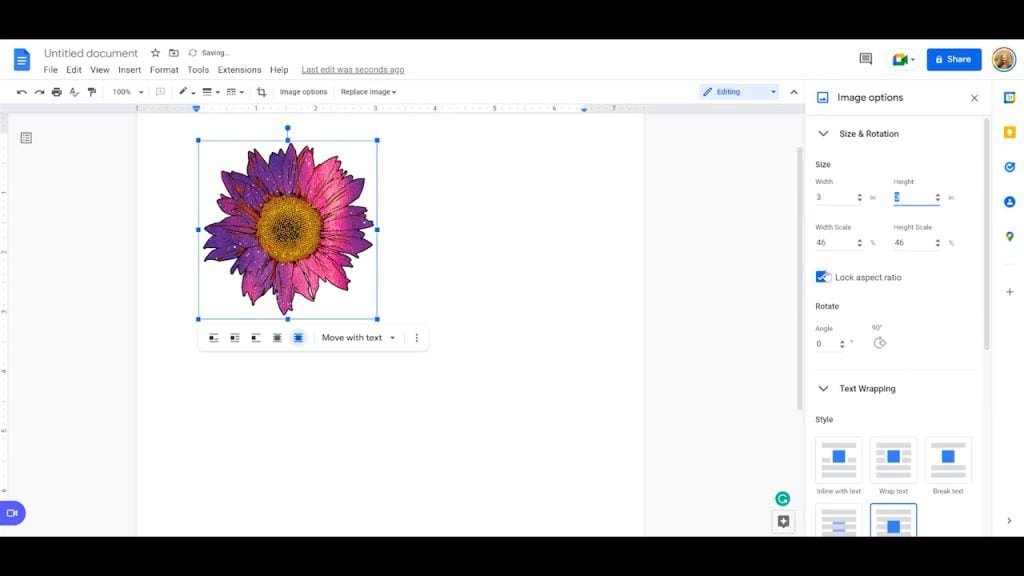
We’re going to start with Google Docs. Did you know you can use Google Docs with your sublimation printer? First, open a new Google Doc, select insert, select image, and then select upload from computer. From there you can find the image on your computer and insert it into the doc. I am using this flower design.

To get the image ready to print I go through this process:
- Click Image
- Right Click and select Image Options
- Click Text Wrapping and select In Front of Text
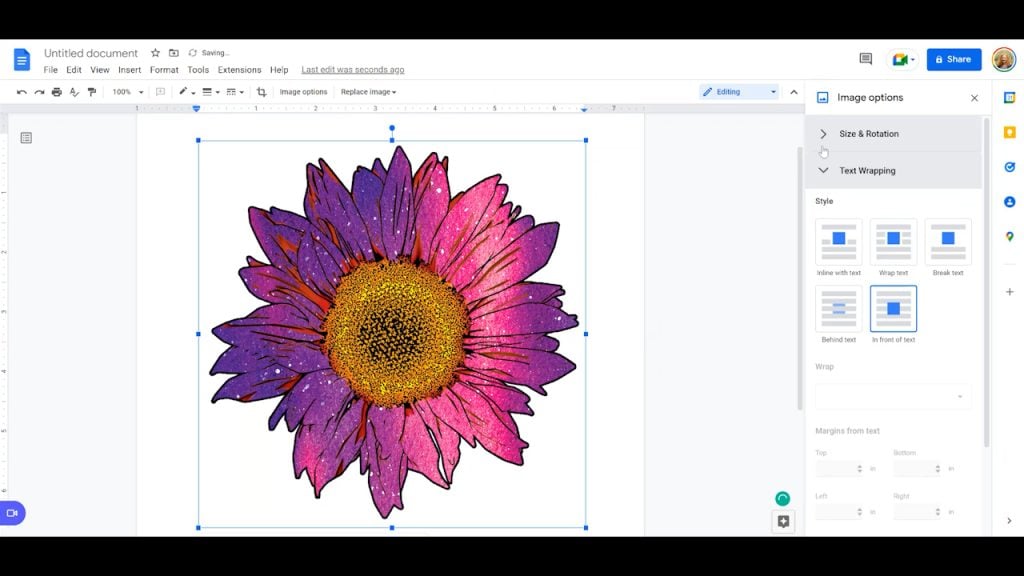
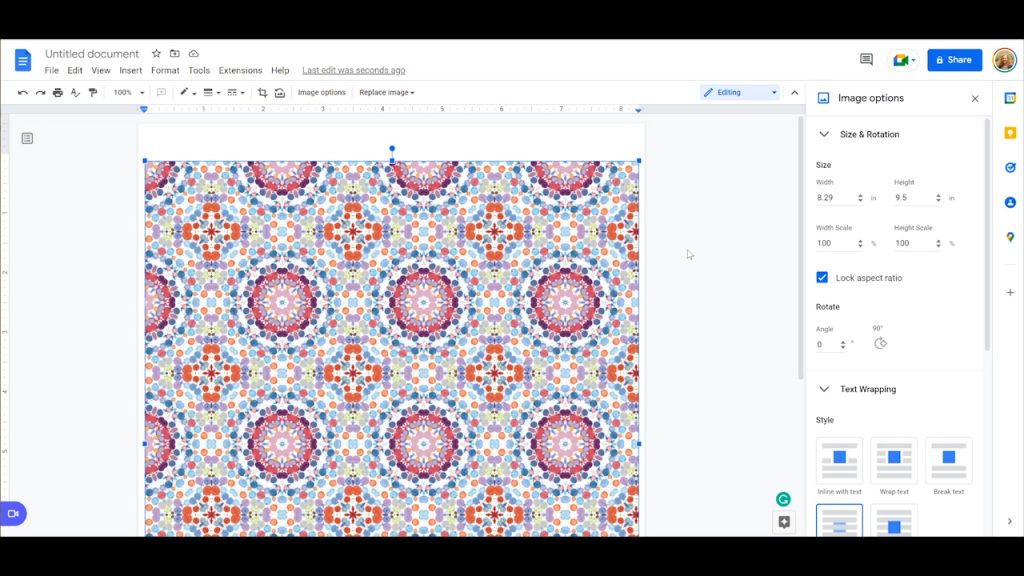
Click size and rotation and adjust the size to exactly what should be printed. If I wanted to print this 3″ x 3″, I can set that here. Distort the image by unlocking the aspect ratio and changing the individual sizes.
You want to watch the height and width scale. Try to keep it at or under 100%. If you go over that, you risk the image being pixelated when printed.
Duplicating Images in Google Docs
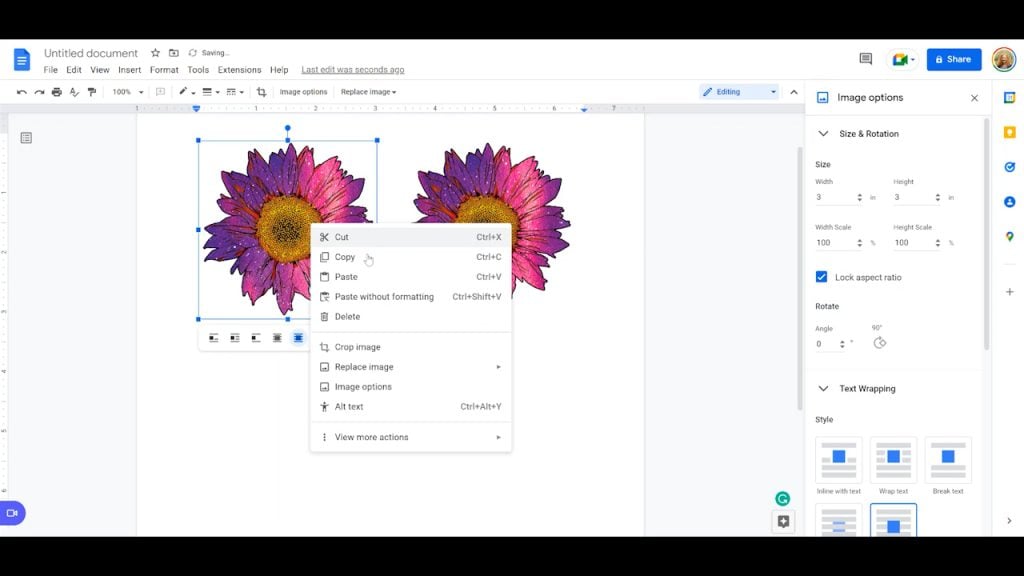
I have my image set to 3 inches by 3 inches. If I wanted to print more than one per sheet, I can right-click and select copy/paste. You can also move the images anywhere you want on the paper and continue to duplicate and fill the entire sheet of paper.
If you need to fit more images on your sheet, get a little extra space by reducing the margin size. Select file and then page set up. You can’t reduce the margin to zero with most sublimation printers but you can reduce them each down.
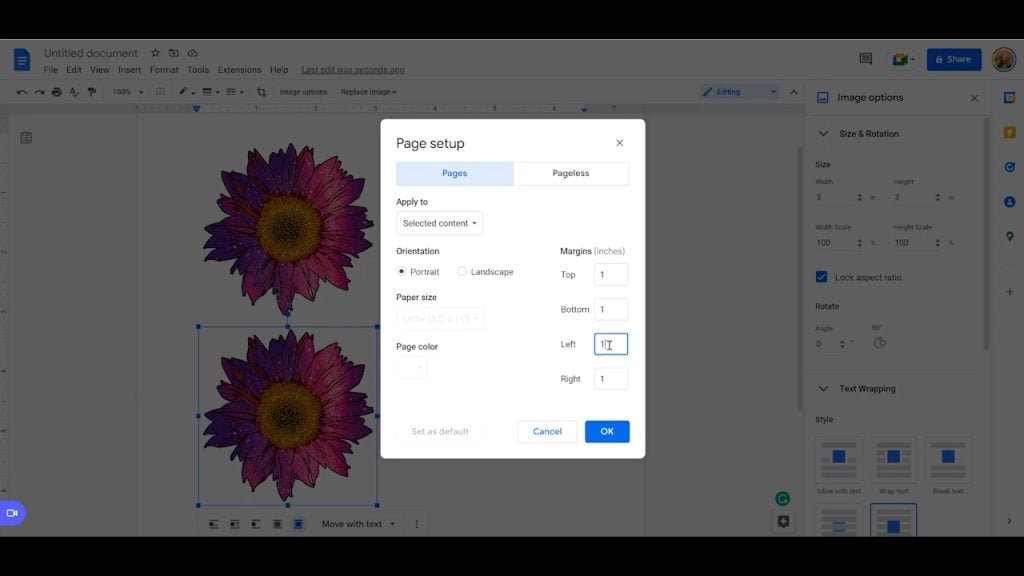
A lot of sublimation printers will also allow you to print up to 8.5″x 14″. To change your paper size, go to page setup, click whole document, and then you can find your paper size in the dropdown and select OK.

Printing with Converted Epson EcoTank
To print on my Epson EcoTank converted for sublimation printing, I follow these steps:
- Under the file tab select print.
- Select the printer you’re using.
- Click more settings.
- Make sure your paper size matches the size set for your image.
- Make sure the scale is 100% so your image doesn’t zoom in or zoom out when printing.
- Print using System Dialogue.
- Select your correct printer again.
- Select preferences.
- Make sure it’s on matte paper setting and high quality.
- Under more options make sure high speed is off and that mirror is on.
- Click OK and you’re ready to print as many copies as you would like.
- If you need to do any color correction, you can do manual color correction with Google Docs. I have a whole video on how to do that here. Follow the steps in that video if you need to do any color correction before you send your image to the printer.
Printing with Epson F170 Sublimation Printer
To print on my Epson F170 Sublimation Printer, I follow these steps:
- Under the file tab select print.
- Select the printer you’re using.
- Click more settings.
- Make sure the paper size matches the size you set on the document.
- Make sure the scale is set to 100% so your image doesn’t zoom in or out while printing.
- Select print using system dialogue box.
- Select the correct printer again.
- Click preferences.
- Here you can do color correction because that option is built into the F170.
- Select either rigid or textile depending on what you’re sublimating onto.
- Make sure quality is on high.
- Click more options.
- Make sure bidirectional is off and that mirror image is on.
- There are a few other settings you can play with if you’re having issues. I cover all of those in my F170 video here.
- Once everything is set correctly click OK and print as many copies as you want.
How to Print a Tumbler Wrap in Google Docs
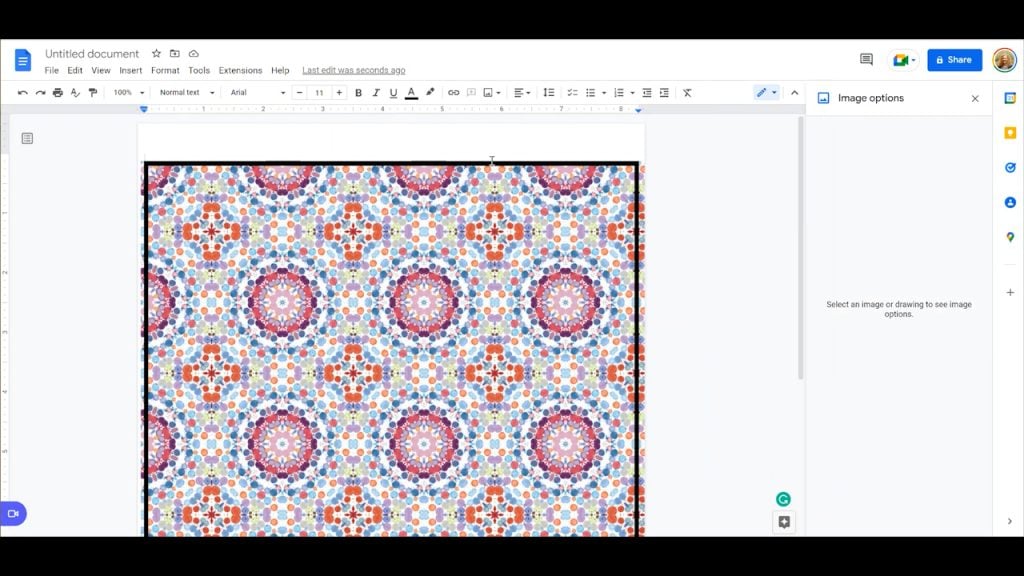
What if I wanted to print something like a tumbler wrap? The first thing I would do is to, again, insert my image and this time it would be something that would be large enough for a tumbler wrap. I’m using a digital all-over patterned paper. Insert it into my document then right-click the image, select image options, then click text wrapping and in front of text.
The template I’m going to use is 8.3 by 9.5. You can find templates where you purchase your sublimation blanks or by googling to find free versions. I’m going to size my all-over patterned paper to the largest dimension which is 9.5″. This size is going to make my height scale over 100%. I’m hopeful since it’s not a lot over it won’t pixelate when it prints.
Now I’m going to add the tumbler template I downloaded.
- Click insert and image.
- Select the template.
- Now the template will come in behind the image.
- Click on the template and right-click.
- Select image options and text wrapping.
- Then click in front of text.
- Click the all-over print and set it behind text.
- This will bring the template to the front.
The template did get resized when I loaded it into the Google Doc. To correct my template size I need to rotate it 90 degrees and set the height to 9.5 inches. The correct size for my template is 9.5″ x 8.31″.
If you notice your template is hanging off the side of your document, adjust your document margins. I lowered mine to .1 on the left and right sides of the margin. This allows me to fit my whole image onto an 8.5″x 11″ sheet of paper.
Adjusting the margins won’t automatically move your image and template over. You’ll need to click both the image and the template and move them over to the margin and make sure they’re lined up on both sides.
How to Size Your Print
If we proceeded and printed with this set up we’d have a black box on the sublimation print. We don’t want that. We need to crop the image itself. To do this follow these steps:
- Click on the image itself.
- Click format.
- Select image.
- Click crop image.
- Now the crop box appears and you can move the crop box to match the template we have on the screen.
- Click enter. Now our image is cropped to the template.
- Click the template layer and delete it.
Now our image is set to the exact size of the template and ready to print just like we did above.
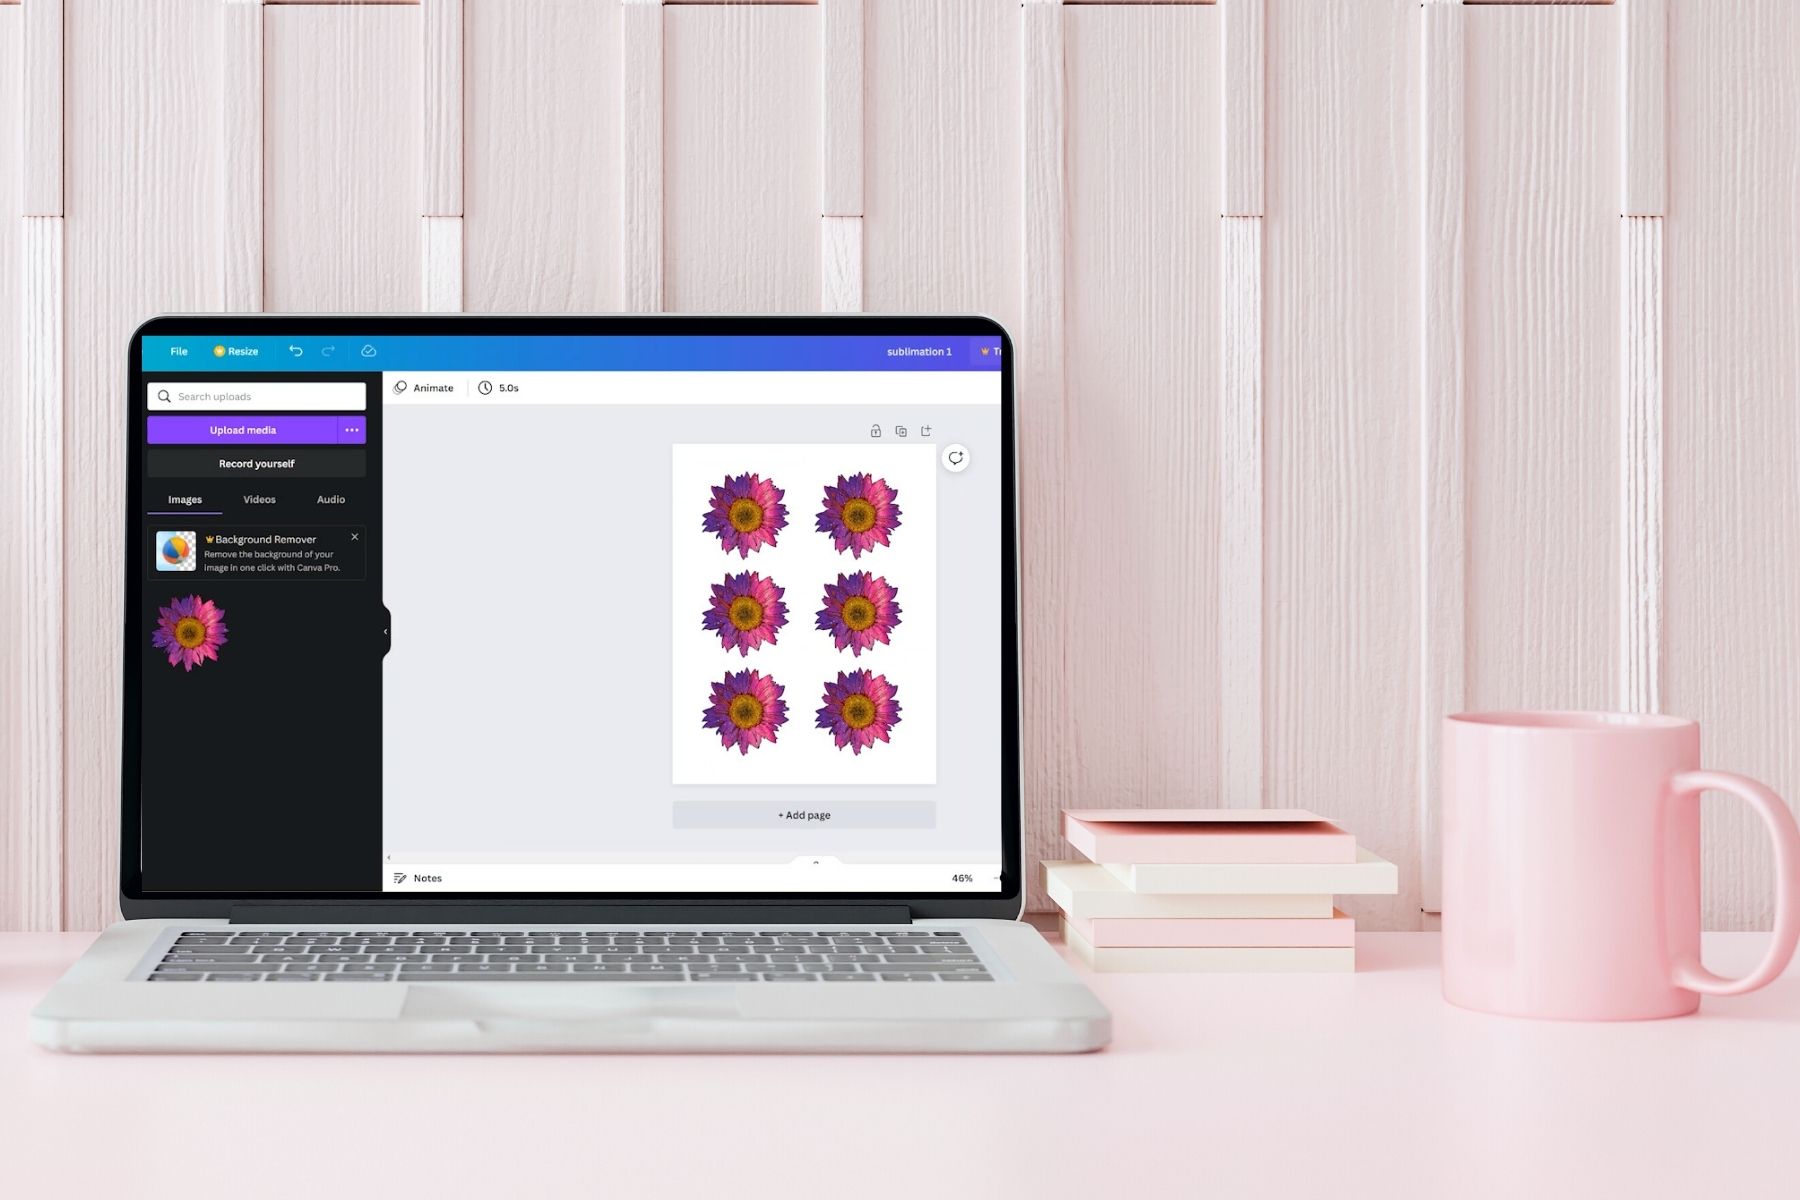
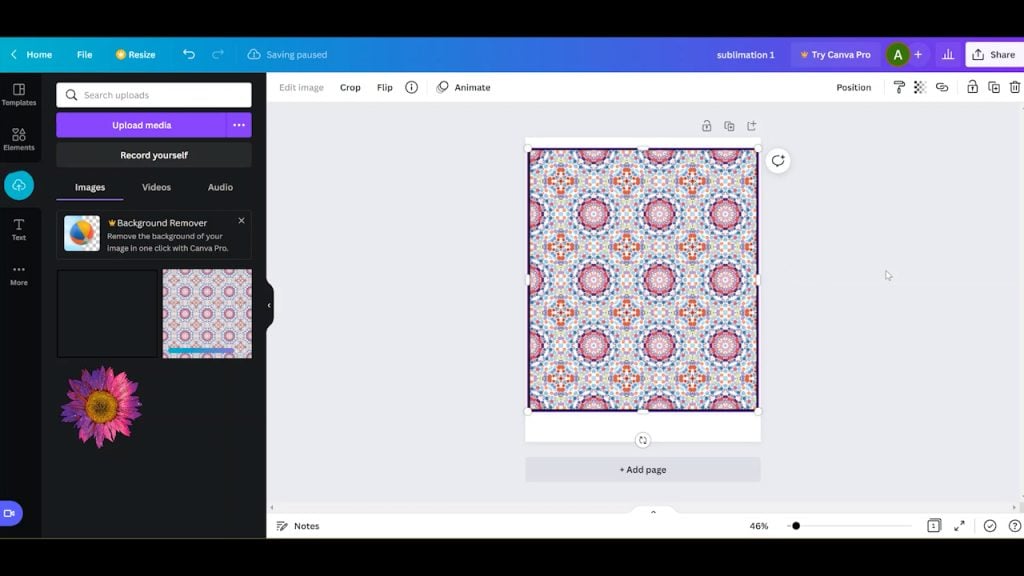
Free Sublimation Printing in Canva
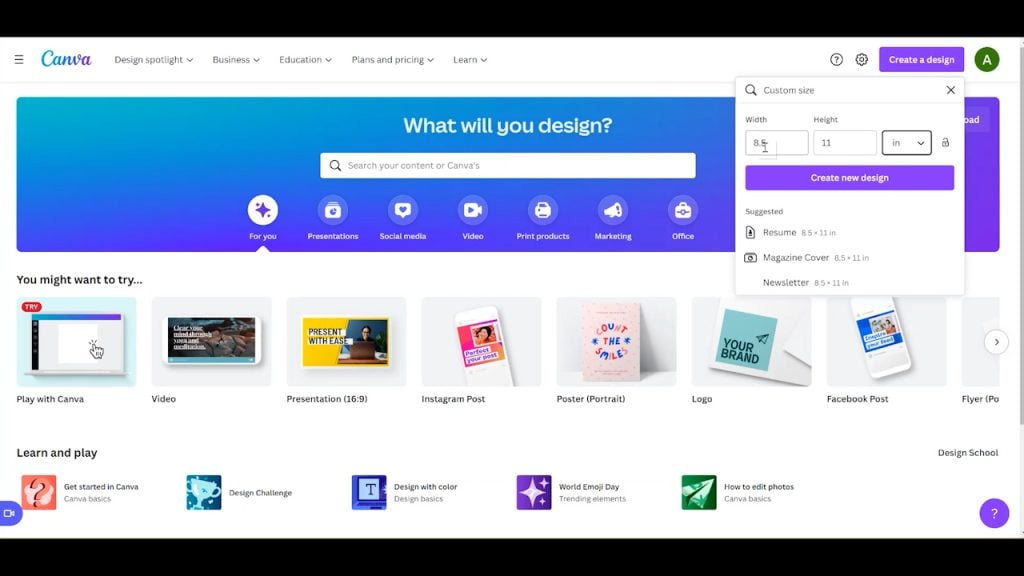
Now I am going to show you how you can print to your sublimation printer using the free version of Canva. Open up Canva and click create a design and set a custom size. You can change the size measurement to inches and set it to the size of the paper you’re using.
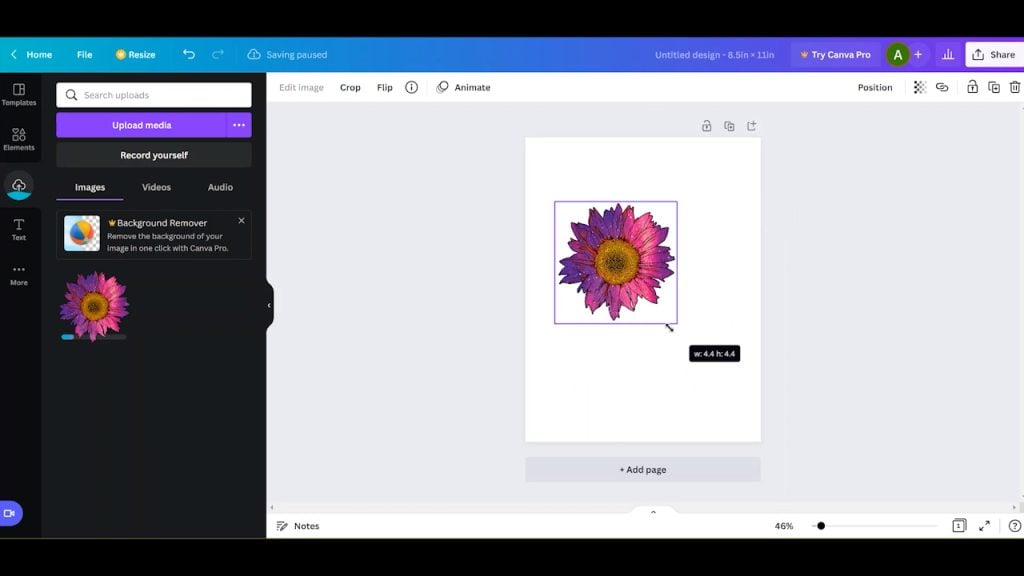
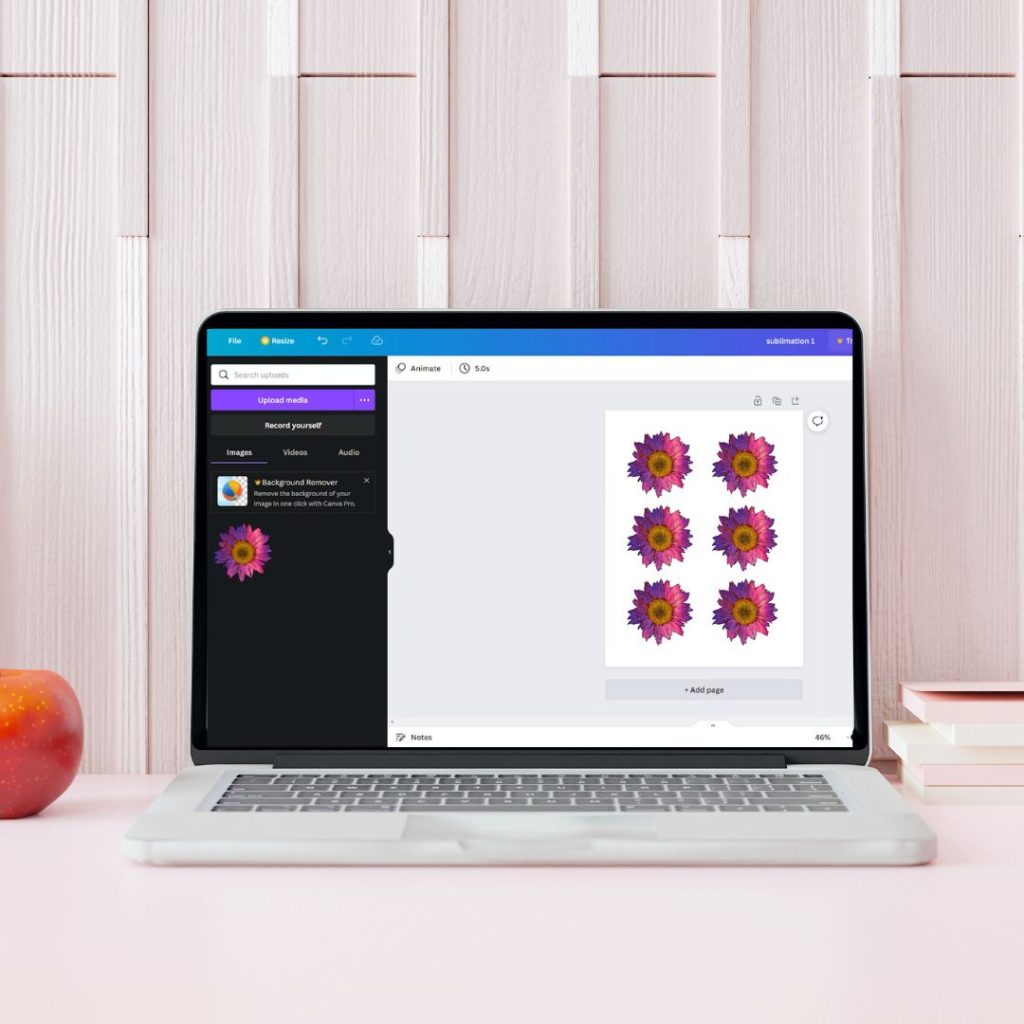
Now that we have our canvas set the size of our paper click uploads and upload whatever image you want from your computer. Once your image is uploaded, you’ll click on the image in the sidebar and it will add it to the canvas. When you add it to the canvas it will come in a certain size. From there you can resize it. As you drag the handles, you will be able to see the size measurements so you can size your image to whatever size you need your design to be.
Duplicating Images in Canva
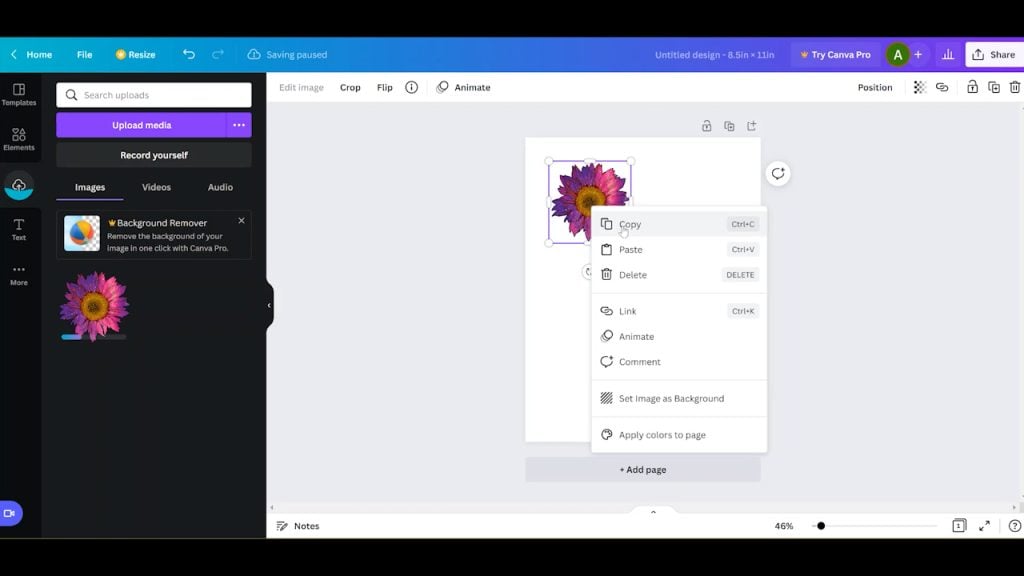
Once you have the image sized correctly you can drag it to move it around onto the canvas. If you want to duplicate the image to print more than one, right-click, select copy, and then right-click, and select paste.
You can do this as many times as you need and then move those images around to fill the entire sheet with your sublimation design. Name your design and it will automatically save it to your Canva account.
Printing Sublimation Designs with Canva
When it comes to printing you can’t actually print from within Canva. You will need to download the image to your computer. Click share in the upper right corner and then download. I like to download it as a PDF print. If JPEG or PNG work better for you, you can select those options as well. Once your design is downloaded you can open it up and click print.
Canva Printing to Converted Epson EcoTank
Open the PDF. Click print and select the printer. Before I print I want to make sure the image size is correct. Select more settings and make sure the scale is set to 100%. We don’t want to fit it to the paper or fit it to the printable area. Both of those options could alter your actual design size.
If you set the scale to 100%, it should be exactly the size that you had in Canva.
From here select print using dialogue box. At this point, the printing process is the same as using Word. Go to preferences and then select matte, high quality, high speed off, mirror image on. If you need to do any color correction, you can do manual color correction as I shared in the video above. There you can click OK and print as many copies as you would like.
Canva Printing to Epson F170 Sublimation Printer
To print to the F170 sublimation printer, we would select that printer and make sure the scale is set to 100% and use the system dialogue box to print. With the F170 printer, we can select preferences and pick rigid or textile depending on what base material we’re using. Make sure to select high quality, turn off bidirectional printing, and make sure mirror print is turned on. Click OK and print as many copies as you need.
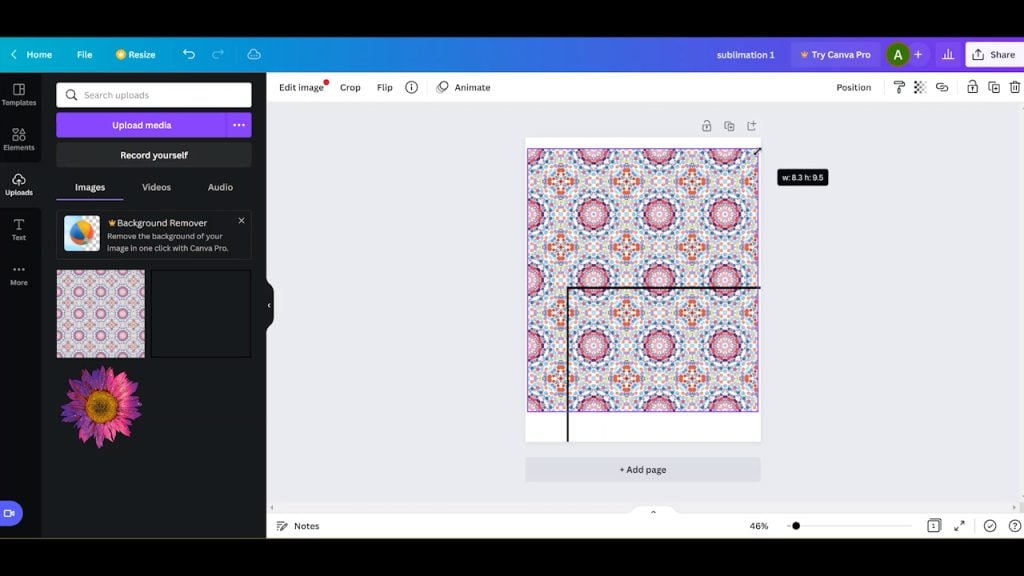
How to Use a Tumbler Template in Canva
To print a tumbler design using Canva the process is similar to using Word. We need to upload the all-over print and resize it so it will be large enough for the wrap. I need my design to be at least 9.5 inches. To resize the image, drag from the corners to fill the page with the all-over print.
Now I need to load my template into Canva. When I added the template, it came in wrong so I needed to rotate it 90 degrees. Once the template is rotated correctly I need to correct the size. The template should be 8.3″ x 9.5″. Again I can resize using the corner and side handles. Move the template to where it fits completely on the canvas.
Now we need to crop our image to fit the canvas. Do this by clicking on the image and then using the handles, slide the sides so they’re the same as the template. Once you have the size right, you can check that it’s exactly right by moving the template out of the way and clicking the corner to see the size. Make sure it’s exactly the same size as the template, 8.3″ x 9.5″.
Now I can delete the template and download this image. The printing process is the same as above. Now we have a full-size sublimation wrap. This one is set for a 20-ounce tumbler. You can always use this process with different tumbler templates.
How to Use a Curved Template with Word or Canva
For both of the projects we talked about above we’re using a simple square crop. What do you do if your template is curved? To create a curved template using Word or Canva, I recommend the following.
- Print a full sheet of your sublimation print making sure it’s big enough for your template.
- Print your template onto a separate sheet of paper.
- Use scissors to cut both pieces of paper to the template size.
I didn’t use the program to get the complicated curves. I just cut it out with scissors and know that it’s right because it matches the template.
Using Silhouette Studio for Sublimation Printing
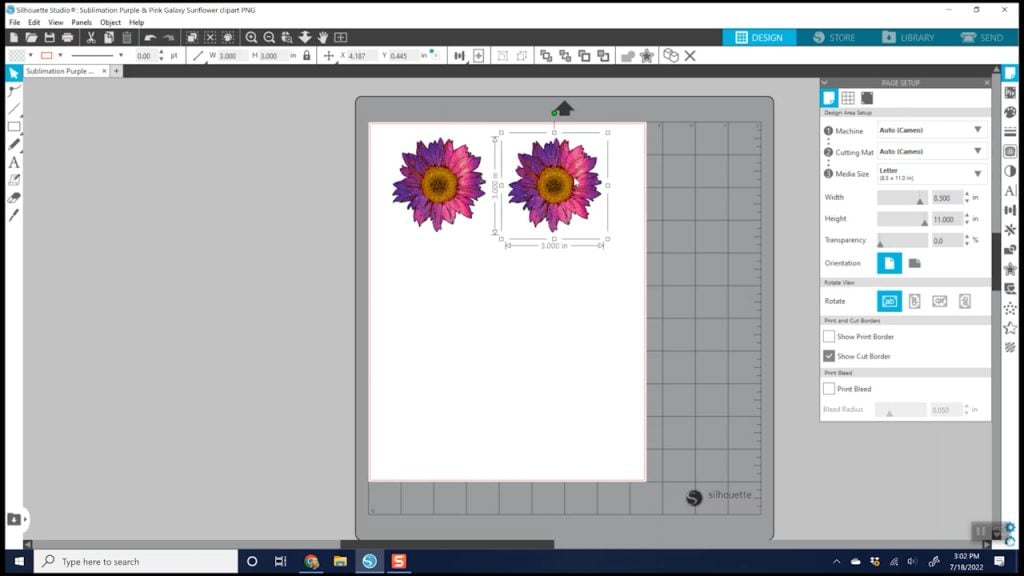
The last free sublimation printing software we’re going to use is the free version of Silhouette Studio. Click open in the top toolbar and find the design you want to use on your computer. When I open the image it opens at 12″ x 12″. We do not want that size so on the right side of the screen we’re going to change our media size to letter size. That is 8.5″ x 11″, you can change it to whatever size paper you’re printing on.

Changing the media size doesn’t resize the image. To resize my image, I can either drag from the sides and corners or I can use the size tool in the top toolbar. You can also use the duplicate tool in the top toolbar to duplicate the image as many times as you need to fill your entire sheet with sublimation prints.
Printing From Silhouette Studios to Converted Epson EcoTank
Once I have the sheet set up how I want it’s time to print. In the top left of the screen, select file and then print. Choose the EcoTank printer and click preferences.
This process is the same as with other programs. Select matte paper, high quality, turn high speed off, and make sure mirror image is on. Click OK, choose the number of copies, apply any manual color correction that you need and then print as many copies as you would like.
Printing From Silhouette Studio to Epson F170
Printing from Silhouette Studio to an Epson F170 is the same as printing from other programs. Select the printer, select preferences and from there choose if your base material is rigid or textile. Make sure high quality is selected and bidirectional is turned off. Make sure to click mirror and then OK. You can now print as many copies as you want.
Using Silhouette Studio to Print Templates
Using templates in Silhouette Studio is very easy. Start by opening your all-over design. Mine opened on a 12″ x 12″ sheet again. I also opened my template file. In Silhouette Studio, my template opened the correct size but it opened in a separate tab. Since my template is the correct size I can just right-click and select copy and then right-click and paste the template onto the all-over print. Now both images are on the same sheet.
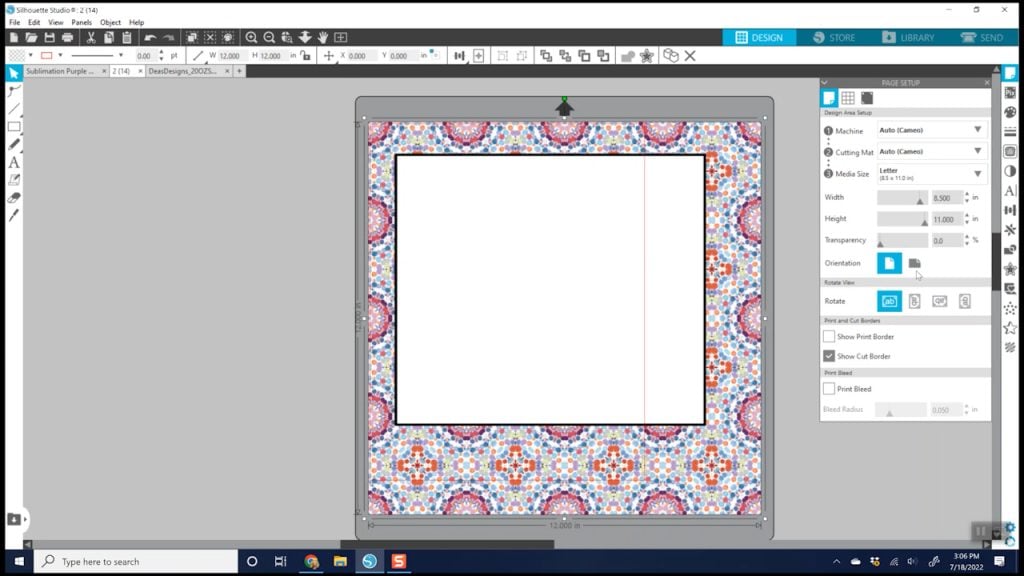
To get my all-over print design the same size as my template I will need to crop the print. Click modify in the right toolbar and then select both the template and the all-over print design and click crop.
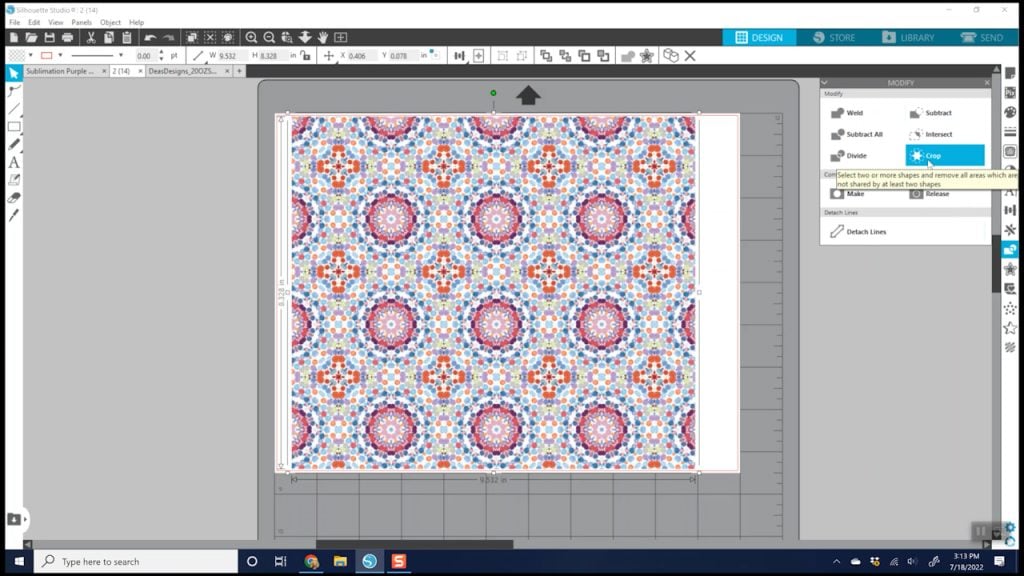
Now my design is the same size as my template, 8.3″ x 9.5″, and ready to print. This process works the same if it’s a straight-side template or even a curved template. This is one of the reasons I think Silhouette Studio is so great for sublimation printing.
Final Thoughts on Free Sublimation Software
As you can see, all three free sublimation software printing options work great. We did talk about basic color correction and how you would need to use manual color correction in these programs.
If you wanted to use ICC profiles to really adjust your print colors you most likely can’t use free sublimation software. You would need to use a program that will cost you money. When I print using an ICC profile, I use Photoshop. I have a few videos to help you use ICC profiles:
If you have an Epson F170, you don’t have to worry about ICC profiles and all that color correction. The ICC profile comes right in the Epson driver. It all just depends on what printer you have and what color options you’re looking for.
If you have a Sawgrass printer, I recommend using the Sawgrass software to print to it. I recommend using their entire ecosystem in order to get the best results and the best print color. Once you buy that Sawgrass printer, you get that software anyway so you might as well use it to print to your printer.
I hope this helps you learn a little bit more about printing to your sublimation printer using some free sublimation software options that have nothing to do with Cricut Design Space. If you have any questions about anything we’ve covered, feel free to ask those in the comments below. Do you have any other free sublimation software programs you want to see me cover in the future? Tell me what they are and I will look into them.