This post and photos may contain Amazon or other affiliate links. If you purchase something through any link, I may receive a small commission at no extra charge to you. Any supplies used may be given to me free of charge, however, all projects and opinions are my own.
I found a new product for Cricut sublimation and just had to test it. We talk about sublimation quite a bit around here. Maybe you’ve been wanting to try sublimation, but you don’t have a sublimation printer. I have a solution for you today. They’re called WalaSub sublimation sheets and they come in several different patterns. They are similar to Infusible Ink sheets but I actually found them easier to work with. Keep reading to see how they work and decide if you want to try them for yourself!
Cricut Sublimation
These sublimation sheets are perfect for cutting on any Cricut machine. However, they do have a few special things you must do in order to use them. Click play on the video below to watch!
Can’t watch the video or miss some of the information? You can follow along below as well!
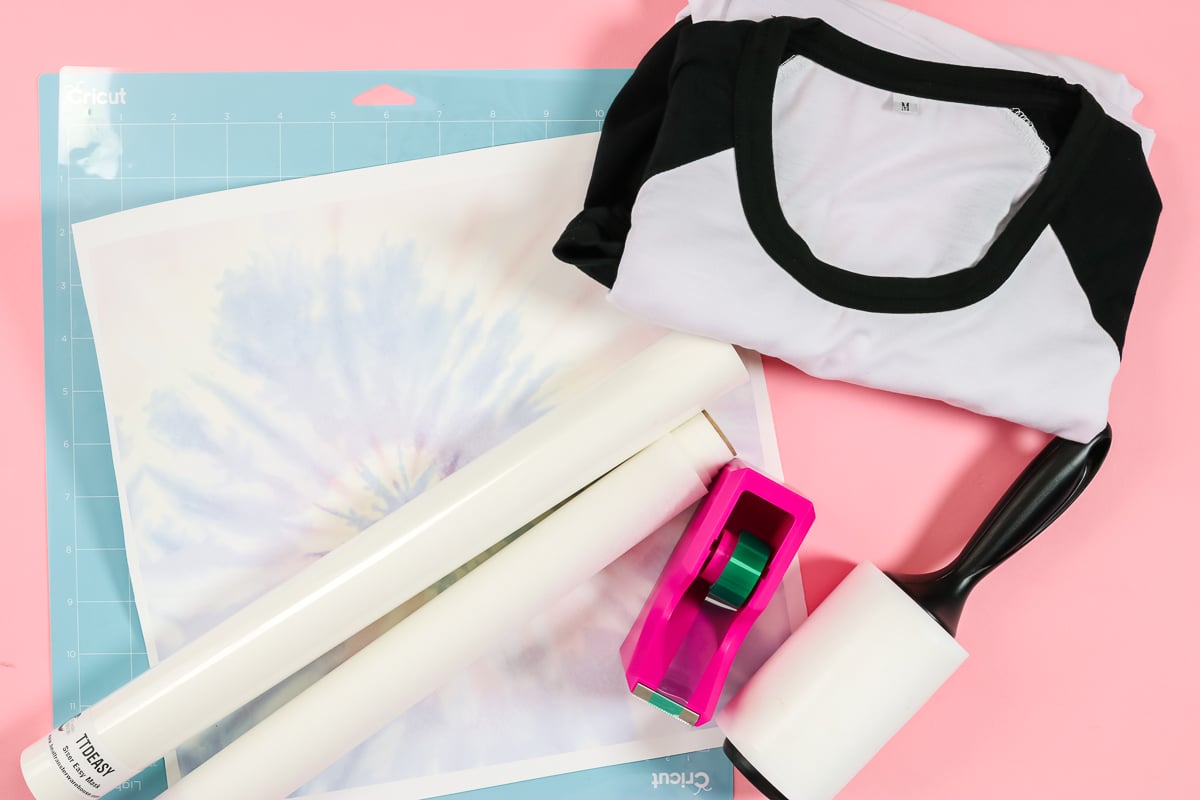
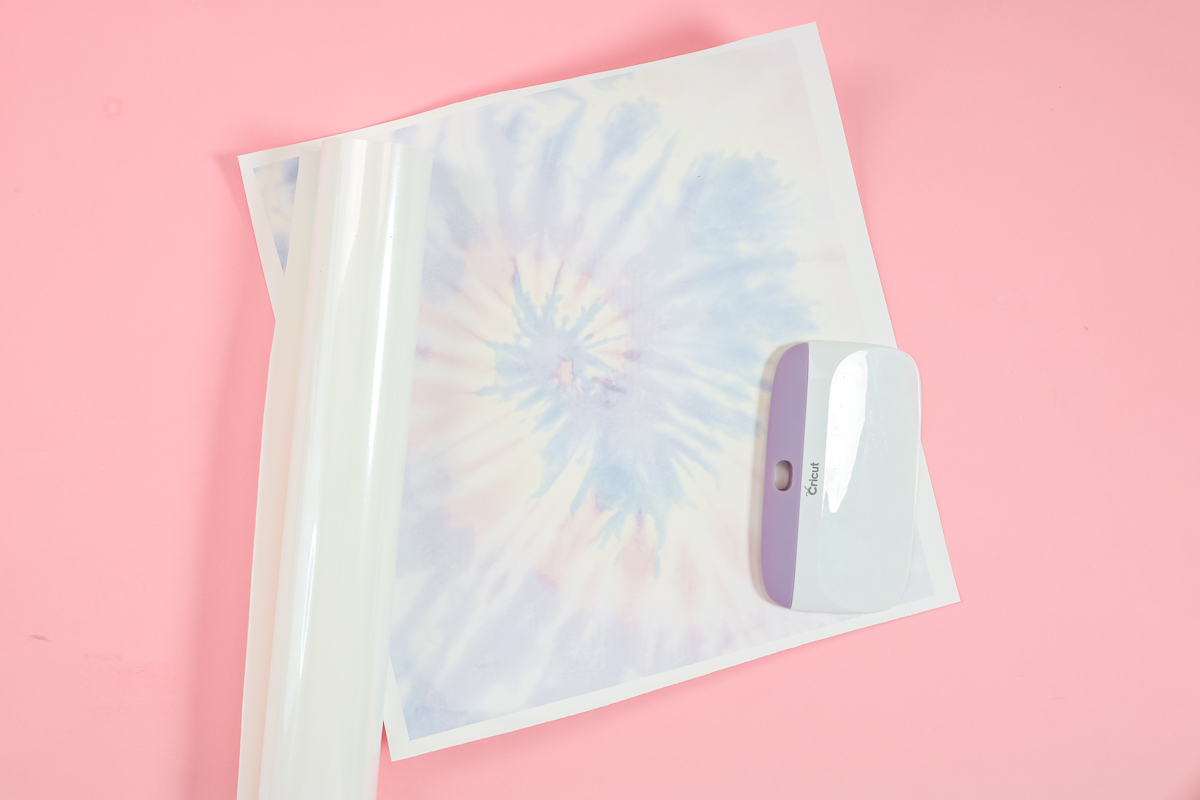
Supplies Needed
What are WalaSub sublimation sheets?
These sheets are sublimation ink printed on a sheet of paper that can be purchased from Heat Transfer Warehouse in 11 x 12 inch sheets. You use them in combination with a mask and cut the sheet with your Cricut machine. Then apply it to your surface and heat the entire thing to get the sheets to react with the poly coating of your blank. Then you will have a permanent sublimation craft without a sublimation printer.
These are very similar to Infusible Ink sheets, however, I do find them easier to cut and easier to weed than the infusible ink sheets. This makes them perfect for any Cricut sublimation project you had in mind! These are great for those of you that have been looking to try sublimation and don’t want to invest in a printer yet. You might want to give the WalaSub sublimation sheets a try. They do have limited prints at this time but are taking suggestions for more print designs.
What can you use WalaSub sublimation sheets on?
These sheets are just like any other sublimation product in that they need polyester to work correctly. So, you will need to put these sheets on sublimation blanks. What is a sublimation blank? You will need something with polyester content. I’m going to use a 95% polyester shirt, but you could also use something that has a poly coating like a sublimation mug or tumbler.
How to Use WalaSub Sublimation Sheets
I just had to give these Cricut sublimation sheets a try. After all, sublimation is one of my favorite crafts lately and I would love everyone to experience it! Even better if they don’t have all of the frustration that Infusible Ink can bring.
Adding Mask
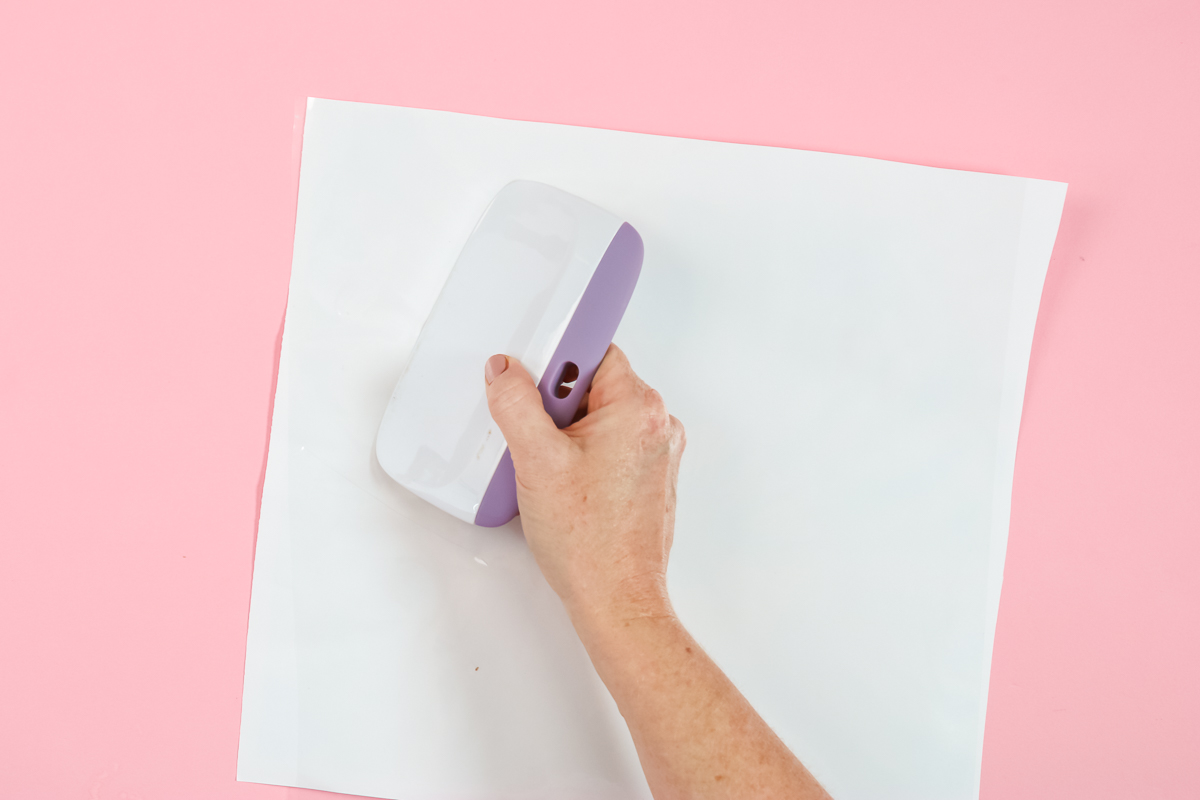
First, flip the sheet over to the back. You want it to be ink-side down on the table. Apply the Siser Easy Mask to the back of the WalaSub sub sheet. I find it is easiest to start applying it on one side. Then press it with the scraper to remove any bubbles from your application while keeping it as straight as possible.
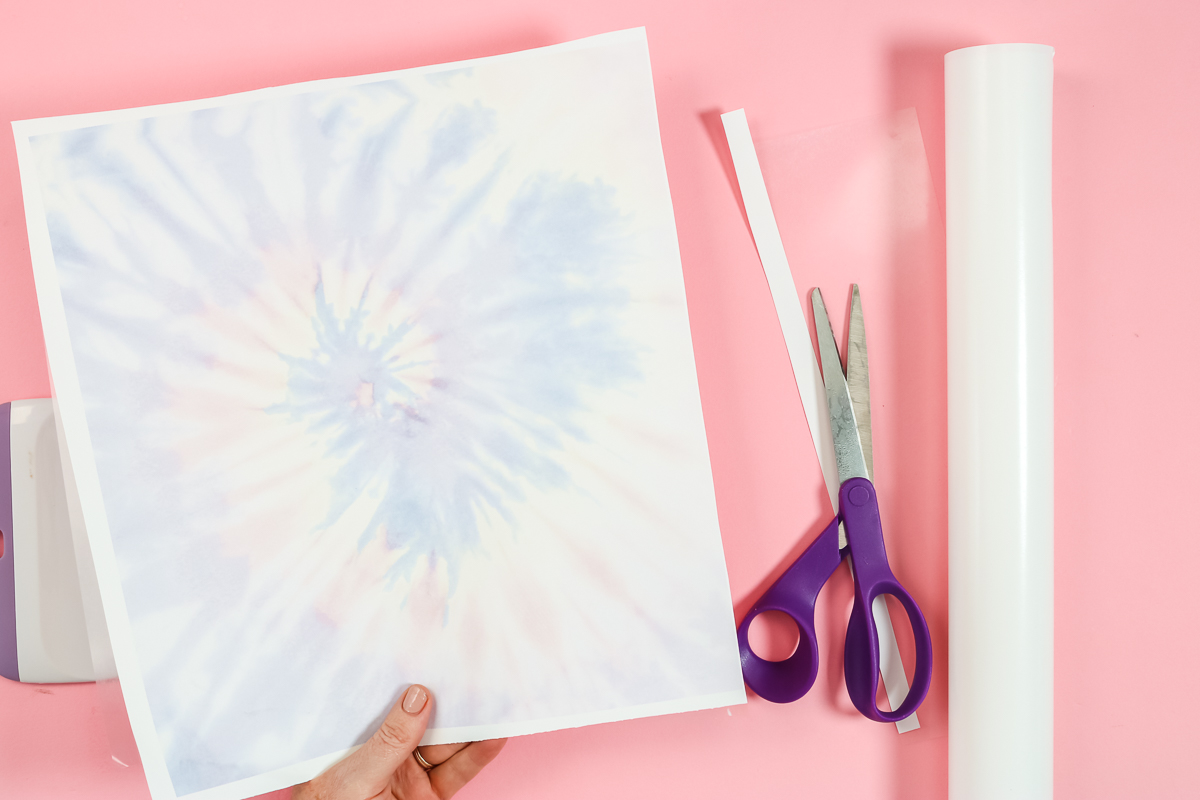
Once you’ve applied the mask to the back, trim away all the excess white around the outside edge as well as any excess masking off the edges. You can trim that either with a paper cutter or a pair of scissors. The WalaSub sublimation sheets are about 11 x 12 inches once you trim off the white area around the outer edge. I ended up with an 11 x 11.5 inch sheet as I did trim a bit extra.
Putting on the Cricut Mat
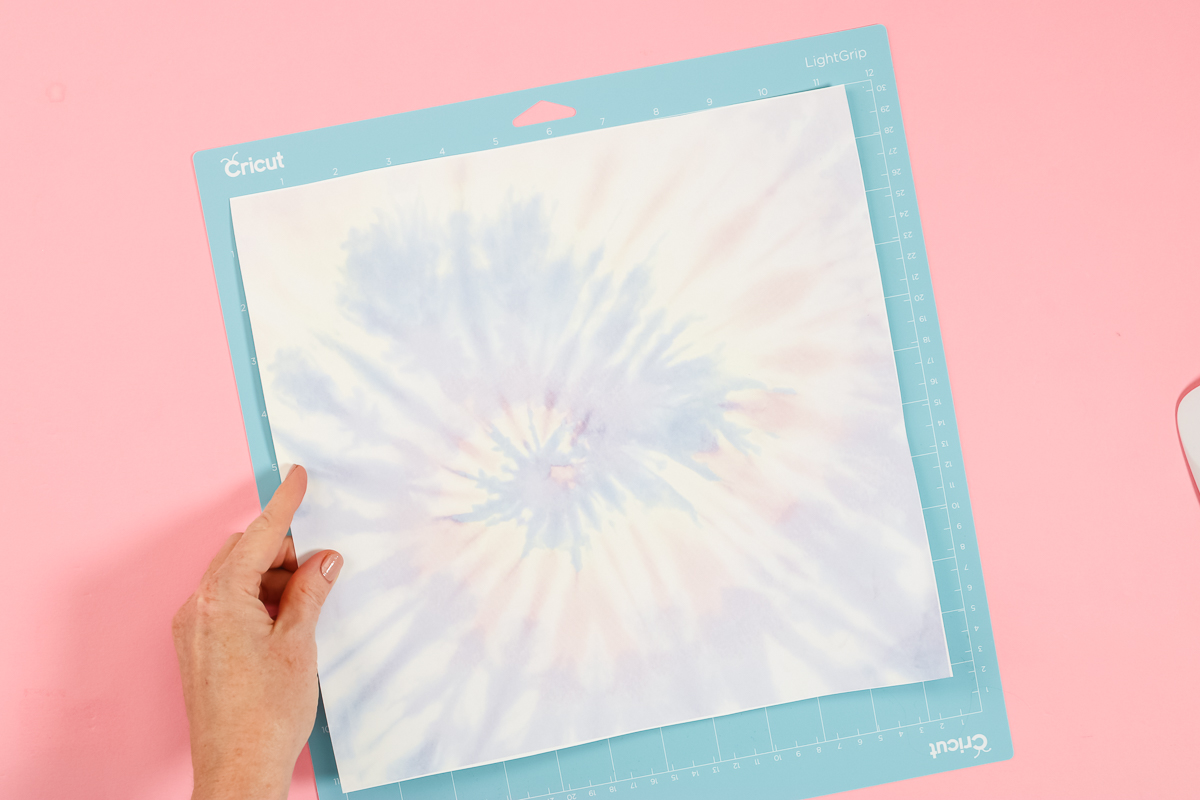
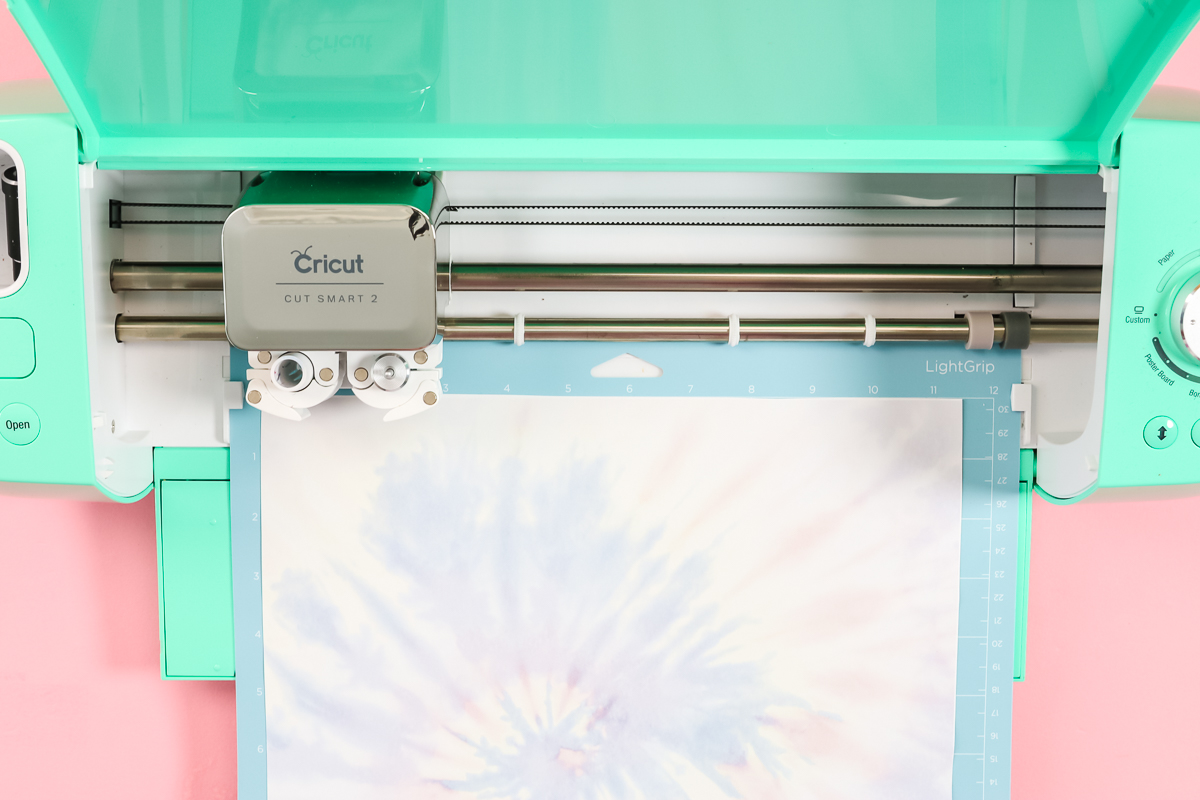
Then put the sheets on the Cricut mat with the ink-side up and mask-side down. Press it down well on your mat to prepare for cutting.
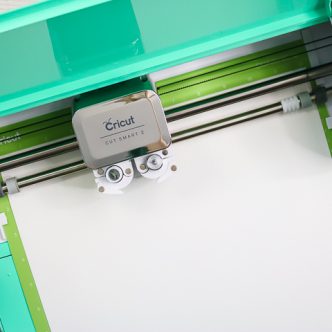
Cutting on a Cricut
Be sure to mirror the cut in Cricut Design Space. I’m using “everyday iron-on” as my setting and the fine point blade is loaded into my machine. You do want a kiss cut on this product so you want the ink side to be cut but the mask to stay in one piece. Then just let your machine cut the design from the sheet. Once it’s done cutting, just remove the mat from the machine. Peel back the mat from the material before weeding the sheet.
Weeding WalaSub Sheets
Once you remove the sheet from the mat, you can cut away any excess to use on another project. Then start removing all excess with your hands. I would recommend doing this with your hands if you can, and not using weeding tools.
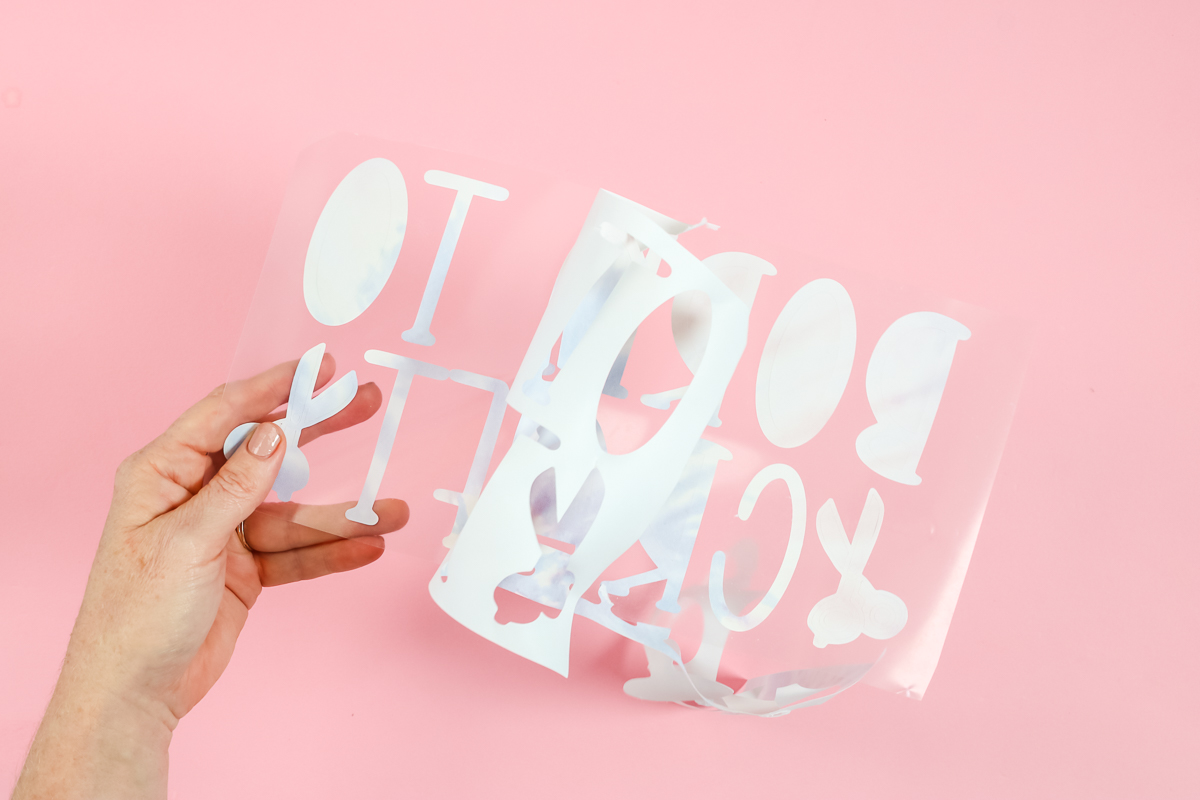
After you remove everything from the outside, start peeling off the centers of any letters or designs. For super small details, you might have to use a pair of tweezers or a weeding hook to dig those out. Just be careful not to scratch the ink on the design itself.
Pressing on a Shirt
I went ahead and added a pressing pillow as well as a piece of protective paper to the inside of my shirt. The pressing pillow helps eliminate any press marks that can get on your polyester shirts. This is a 95% polyester shirt. Remember you do need something with a polyester coating in order for the Cricut sublimation sheets to react.
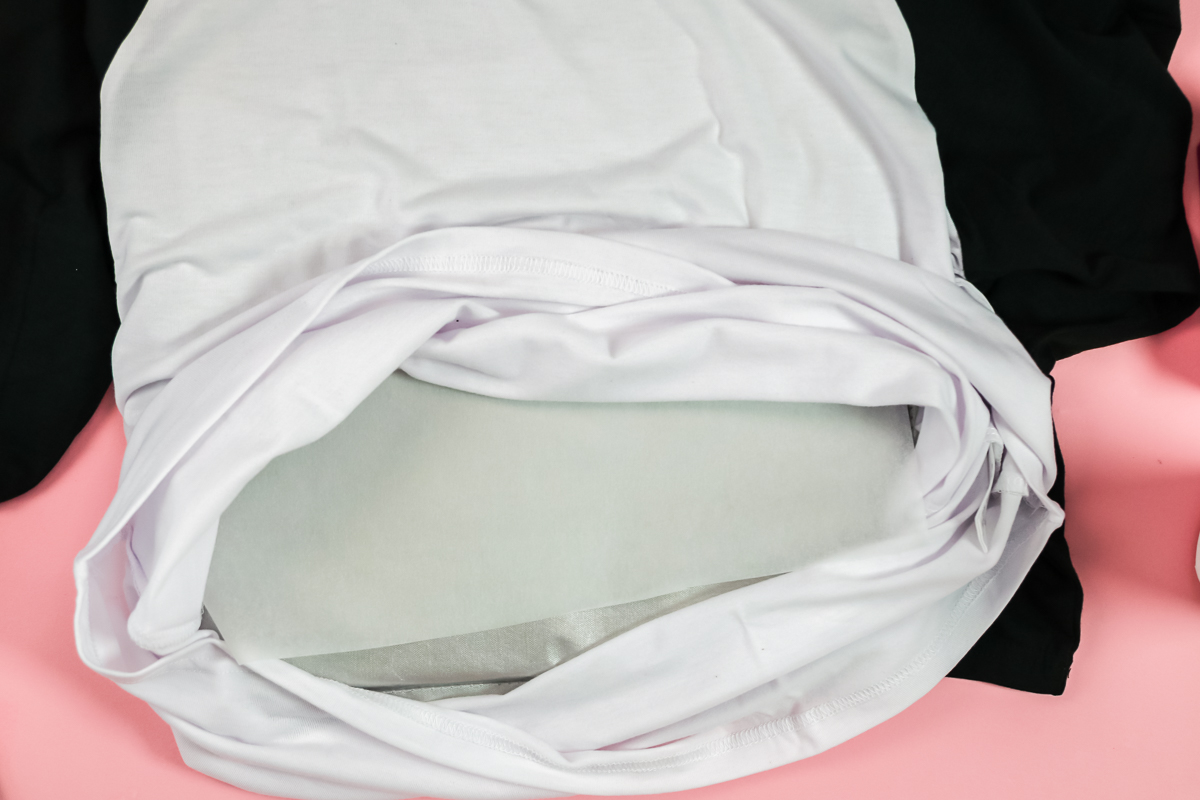
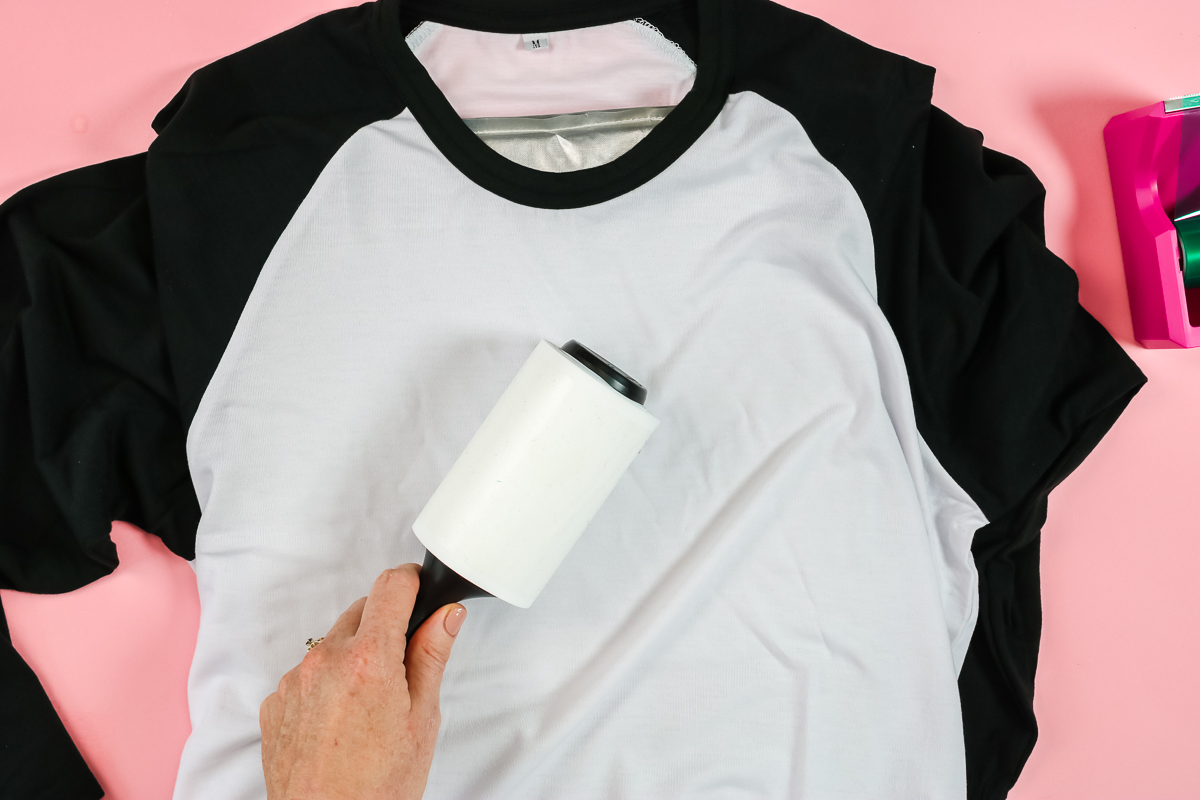
I went ahead and pre-pressed the shirt for a few seconds and lint rolled over the top to remove any debris.
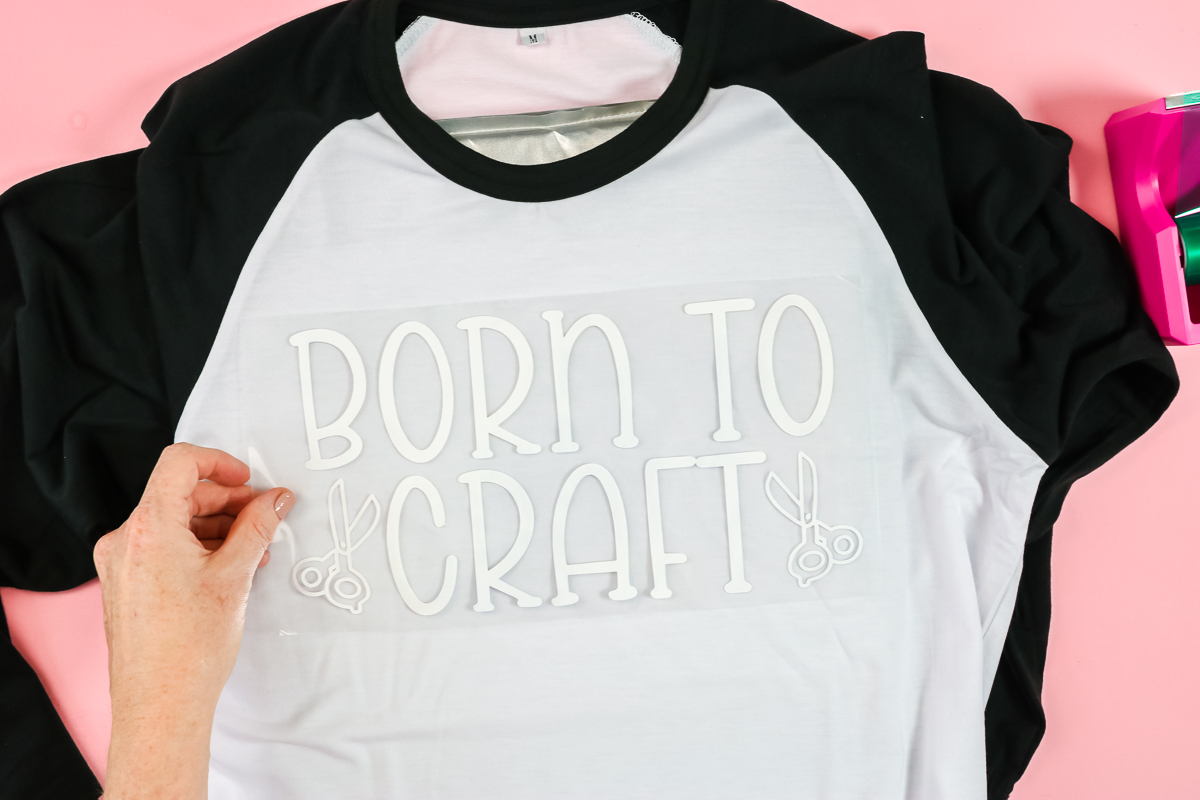
Then just add your design ink-side down onto your shirt. The Siser Easy Mask is sticky so it should hold it into place. If you feel like it’s going to move, go ahead and add some heat tape in order to keep it from moving in your press.
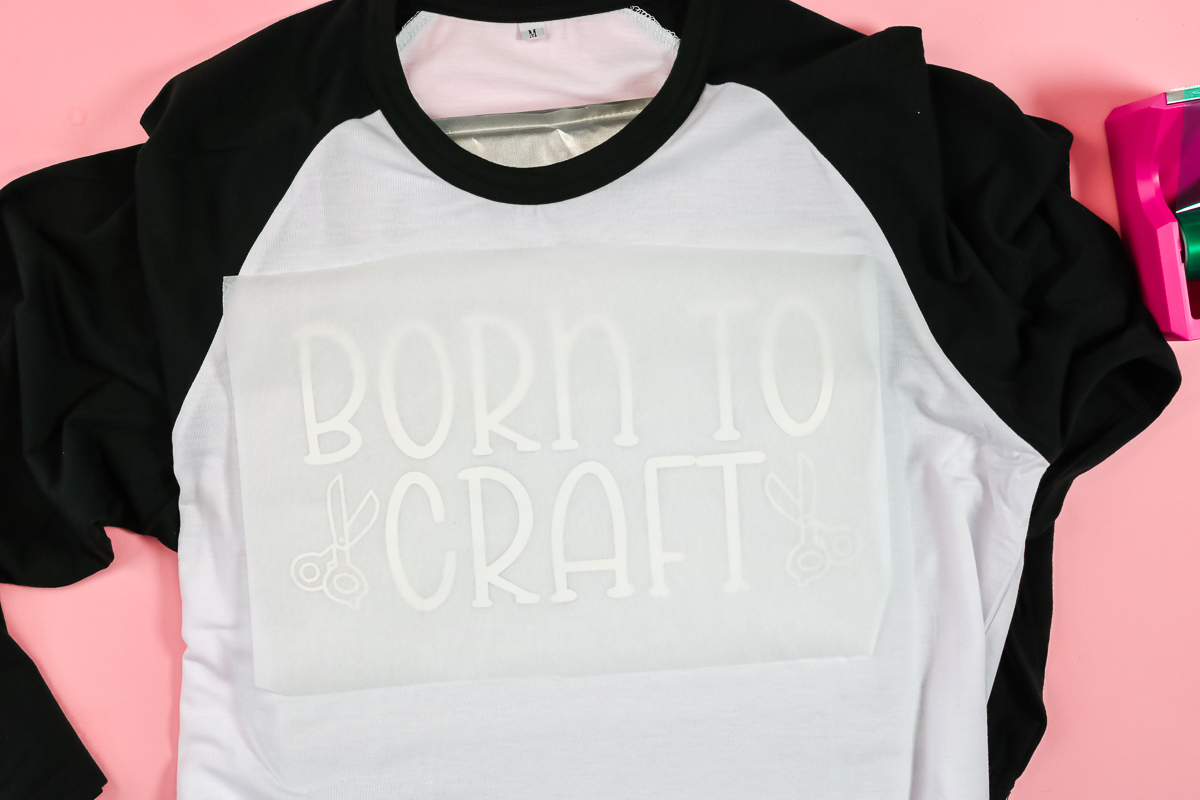
Cover it with a sheet of protective paper and press at 400 degrees for 60 seconds. You do want medium to heavy pressure. The Cricut Easy Press should work as long as you press down as it’s heating.
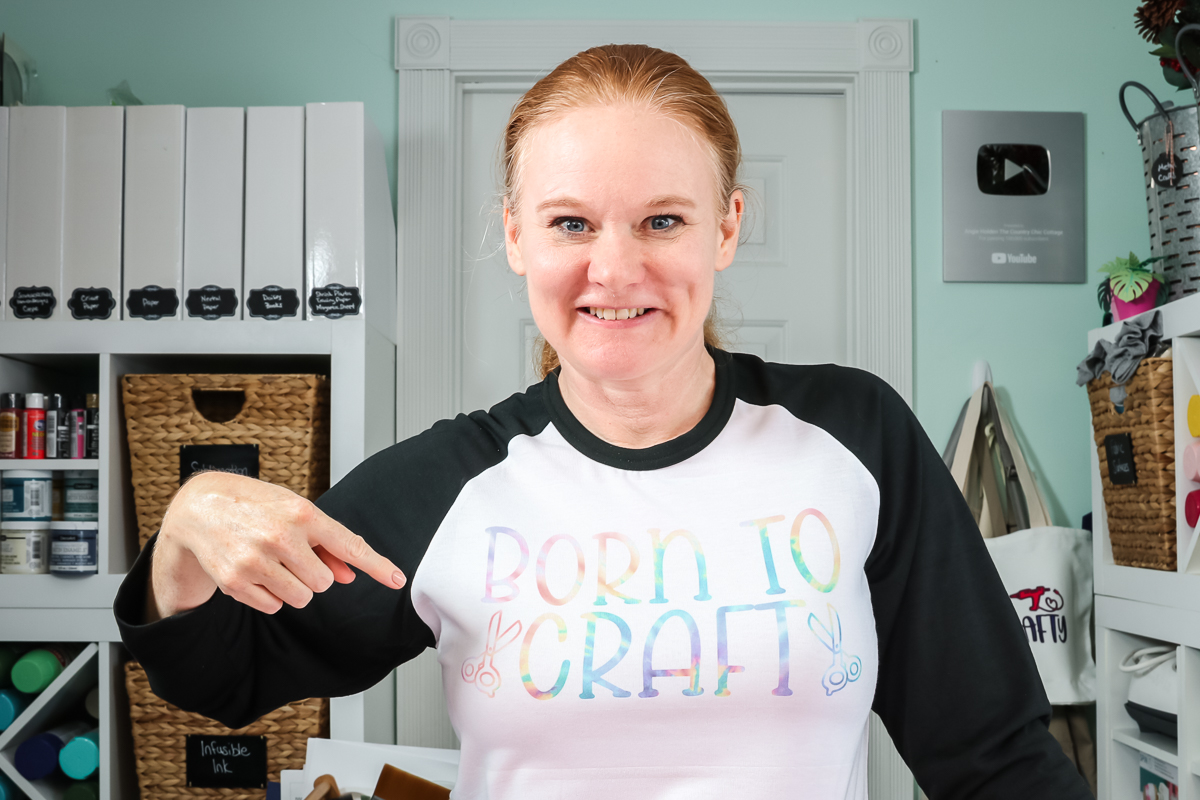
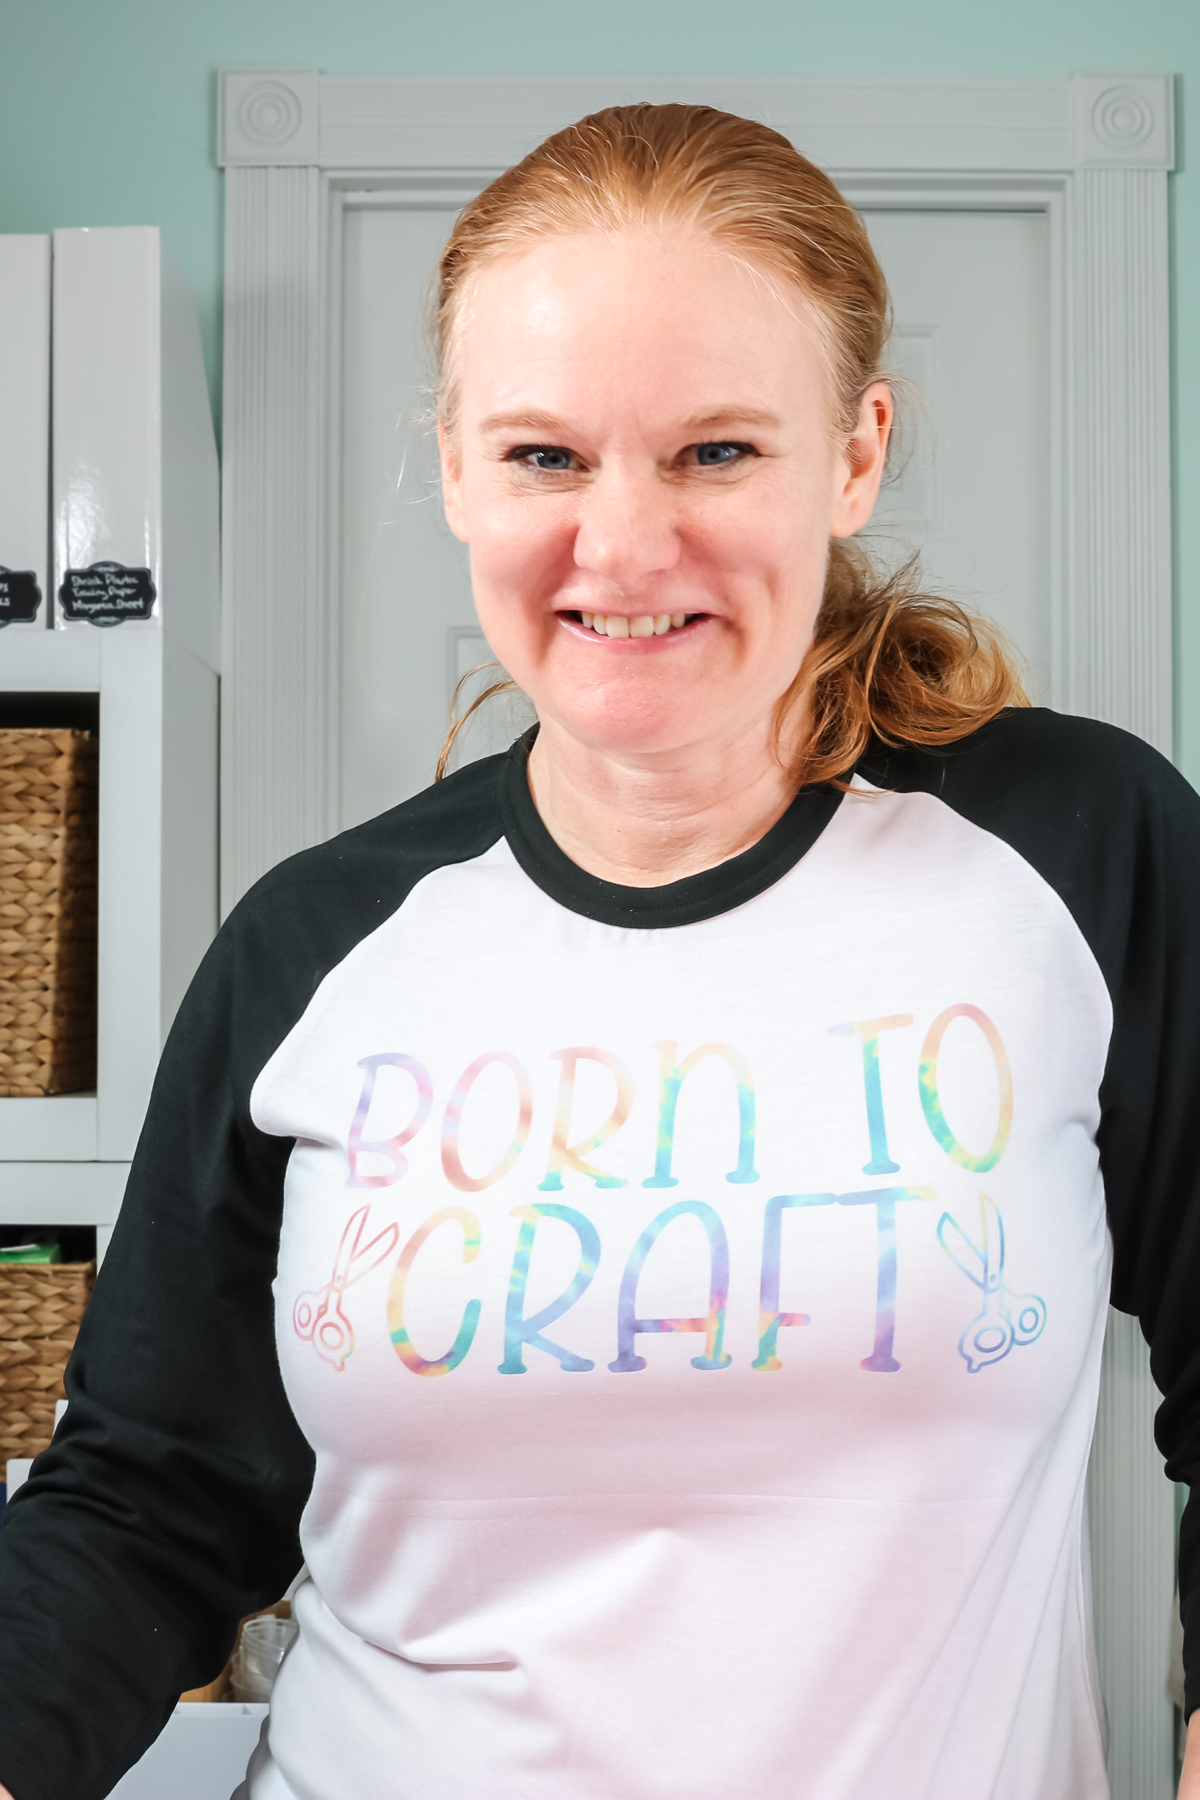
Cricut Sublimation Results
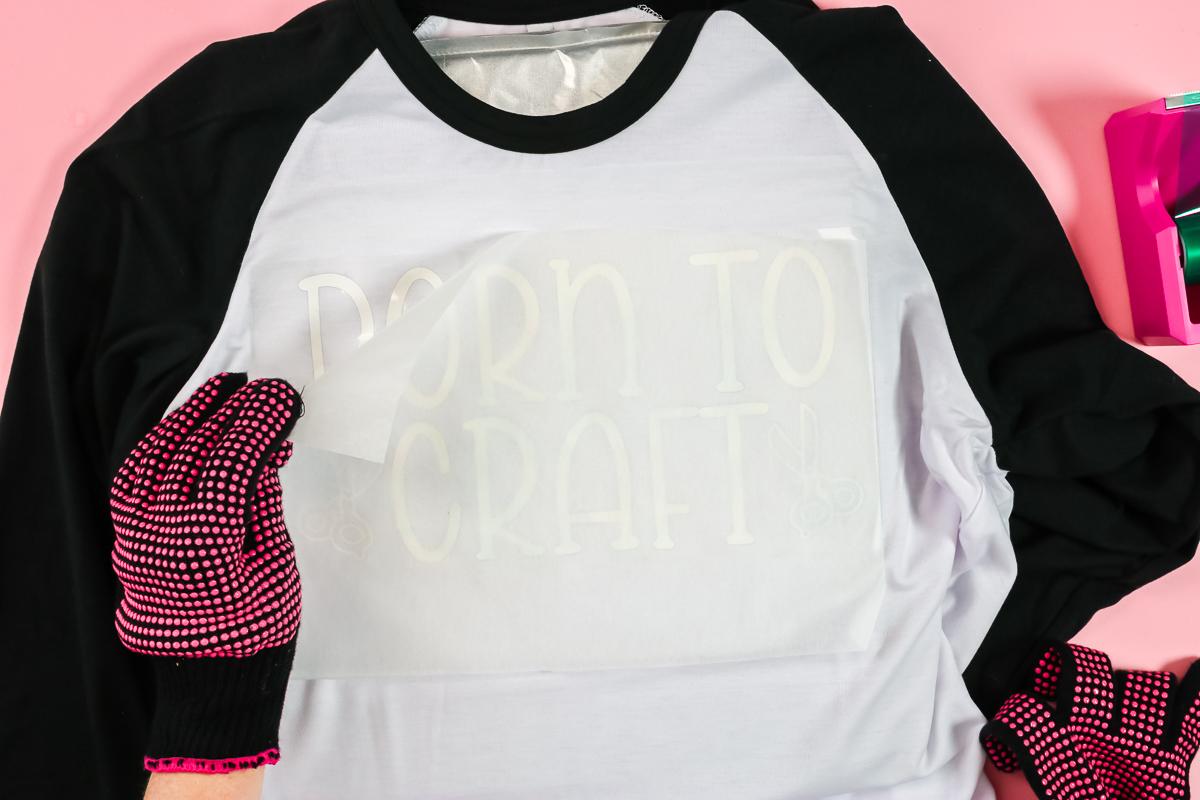
After pressing, you can remove the sheet while it’s still hot. Just peel back the masking and remove everything from your shirt. Then admire your gorgeous design all with WalaSub sublimation sheets.
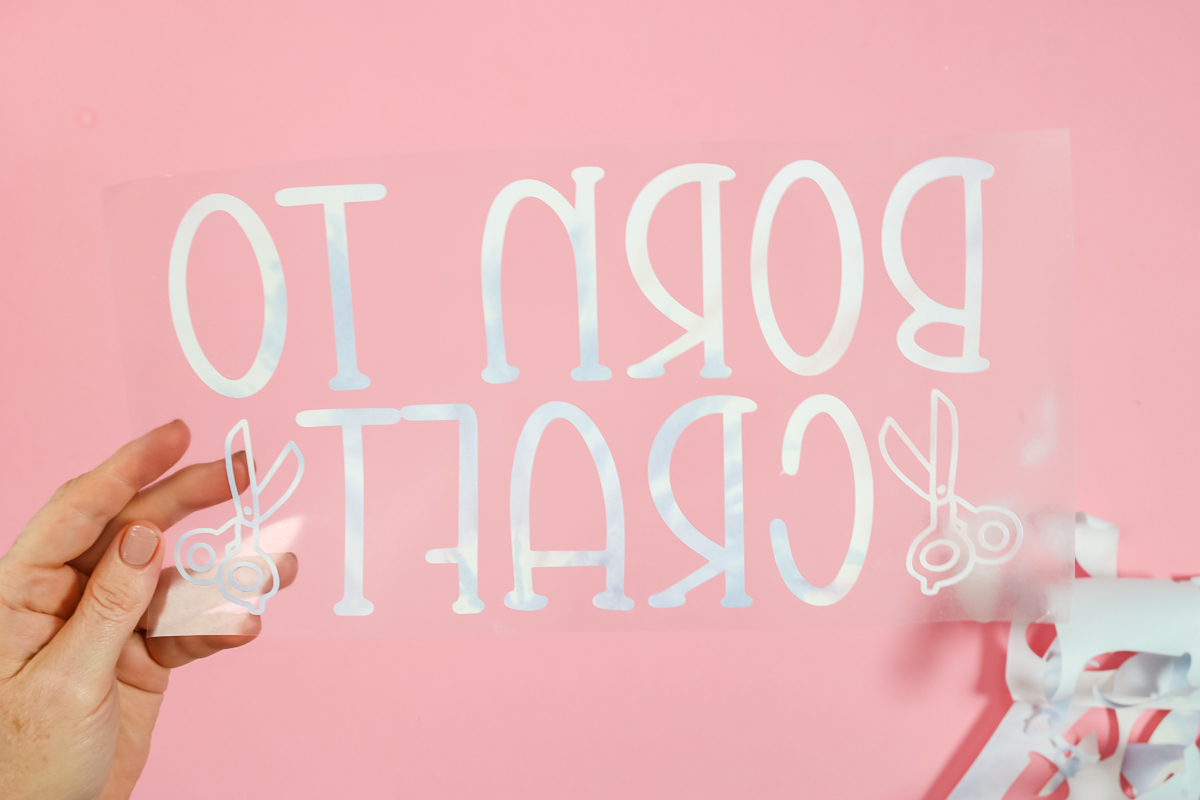
I did want you to notice just how much that color changes. Here is the sheet before pressing and you can see how muted the colors are and how bright they are when we’re done. Do not be scared when you pull out the WalaSub sublimation sheets and the colors are super muted because they will really pop after pressing, but they are muted when printed. It’s similar to sublimation print in that way.

I really think you can see just how easy it is to use the sheets to do your sublimation crafting. Hopefully, that explained everything you ever wanted to know about WalaSub sublimation sheets.
Give this idea for Cricut sublimation a try for yourself. I really think that you are going to love the results!

So, what will you make with this Cricut sublimation technique? Maybe a shirt like this one or a mug instead? I think you will love experimenting with sublimation using your Cricut machine.
Love this Cricut sublimation project and want more ideas? Try the links below as well!

Paint your own denim jacket with a stencil and Testors Craft Fabric Spray Paint.
Learn how to cut flocked heat transfer vinyl with any Cricut machine for all of your projects.

Learn to use vinyl and your Cricut to screen print on a variety of materials.

Grab your Cricut machine and start etching glass with this easy to follow tutorial.
Ready to print the instructions for these sublimation sheets? Just use the card below!
Cricut Sublimation with WalaSub Sheets
These sublimation sheets are perfect for those that don’t have a sublimation printer but want to try the craft!
Materials
- WalaSub Sublimation Sheets choose option that comes with Siser EasyMask
- Cricut Machine any Cricut machine will cut these
- Weeding Hook or Tweezers
- Light Grip Mat
- Heat Resistant Tape
- Artesprix Protective Paper
- Pressing Pillow
- EasyPress or Heat Press
- Lint Roller
- Scraper
- Scissors or Paper Trimmer
- Shirt must have at least 65% polyester content in order to work with sublimation
- Born to Craft Design
Instructions
Adding Mask
-
First, flip the sheet over to the back. You want it to be ink-side down on the table. Apply the Siser Easy Mask to the back of the WalaSub sub sheet. I find it is easiest to start applying it on one side. Then press it with the scraper to remove any bubbles from your application while keeping it as straight as possible.
-
Once you’ve applied the mask to the back, trim away all the excess white around the outside edge as well as any excess masking off the edges. You can trim that either with a paper cutter or a pair of scissors. The WalaSub sublimation sheets are about 11 x 12 inches once you trim off the white area around the outer edge. I ended up with an 11 x 11.5 inch sheet as I did trim a bit extra.
Putting on the Cricut Mat
Cutting on a Cricut
-
Be sure to mirror the cut in Cricut Design Space. I’m using “everyday iron-on” as my setting and the fine point blade is loaded into my machine. You do want a kiss cut on this product so you want the ink side to be cut but the mask to stay in one piece. Then just let your machine cut the design from the sheet. Once it’s done cutting, just remove the mat from the machine. Peel back the mat from the material before weeding the sheet.
Weeding WalaSub Sheets
-
Once you remove the sheet from the mat, you can cut away any excess to use on another project. Then start removing all excess with your hands. I would recommend doing this with your hands if you can, and not using weeding tools.
-
After you remove everything from the outside, start peeling off the centers of any letters or designs. For super small details, you might have to use a pair of tweezers or a weeding hook to dig those out. Just be careful not to scratch the ink on the design itself.
Pressing on a Shirt
-
I went ahead and added a pressing pillow as well as a piece of protective paper to the inside of my shirt. The pressing pillow helps eliminate any press marks that can get on your polyester shirts. This is a 95% polyester shirt. Remember you do need something with a polyester coating in order for the Cricut sublimation sheets to react.
-
I went ahead and pre-pressed the shirt for a few seconds and lint rolled over the top to remove any debris.
-
Then just add your design ink-side down onto your shirt. The Siser Easy Mask is sticky so it should hold it into place. If you feel like it’s going to move, go ahead and add some heat tape in order to keep it from moving in your press.
-
Cover it with a sheet of protective paper and press at 400 degrees for 60 seconds. You do want medium to heavy pressure. The Cricut Easy Press should work as long as you press down as it’s heating.
Cricut Sublimation Results
-
After pressing, you can remove the sheet while it’s still hot. Just peel back the masking and remove everything from your shirt. Then admire your gorgeous design all with WalaSub sublimation sheets.