
This post and photos may contain Amazon or other affiliate links. If you purchase something through any link, I may receive a small commission at no extra charge to you. Any supplies used may be given to me free of charge, however, all projects and opinions are my own.

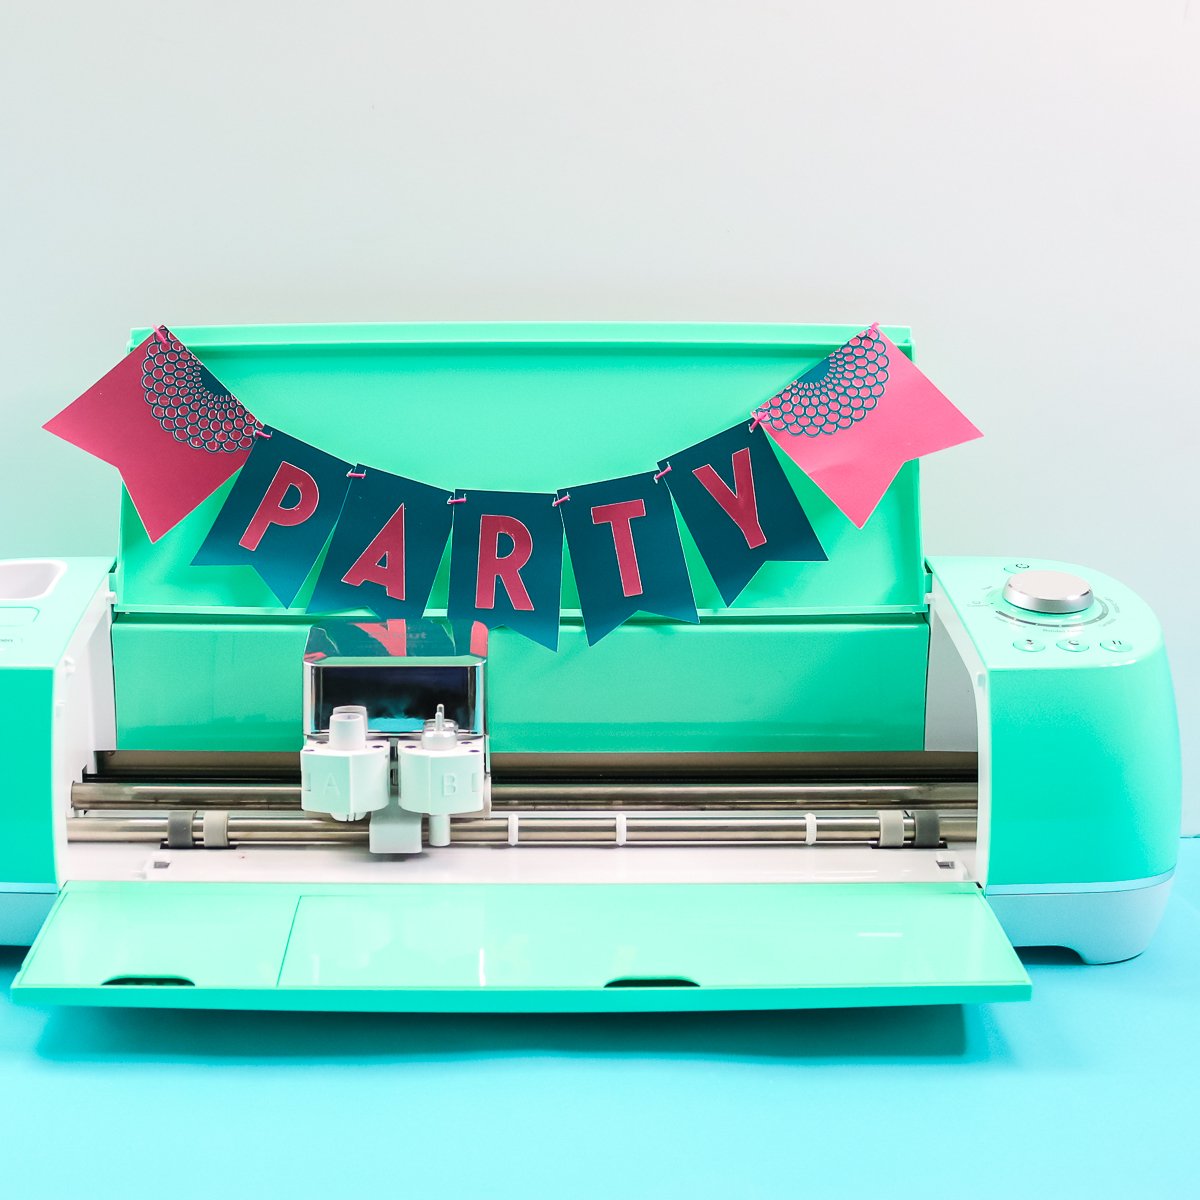
I thought an easy Cricut banner might be a great project for beginners. However, even if you are an experienced Cricut user, you may need my tips for making paper banners as well. So, follow along below as I show you have to make an easy paper banner with any Cricut machine. Then use this idea to make banners for just about any occasion or party.

Cricut Banner
I am going to show you how I made the party banner, however, you can customize this for any occasion. Change up the design and paper to make it perfect for the party you are hosting. You can even change the size to fit anything from the top of a cake to a photo backdrop and more.
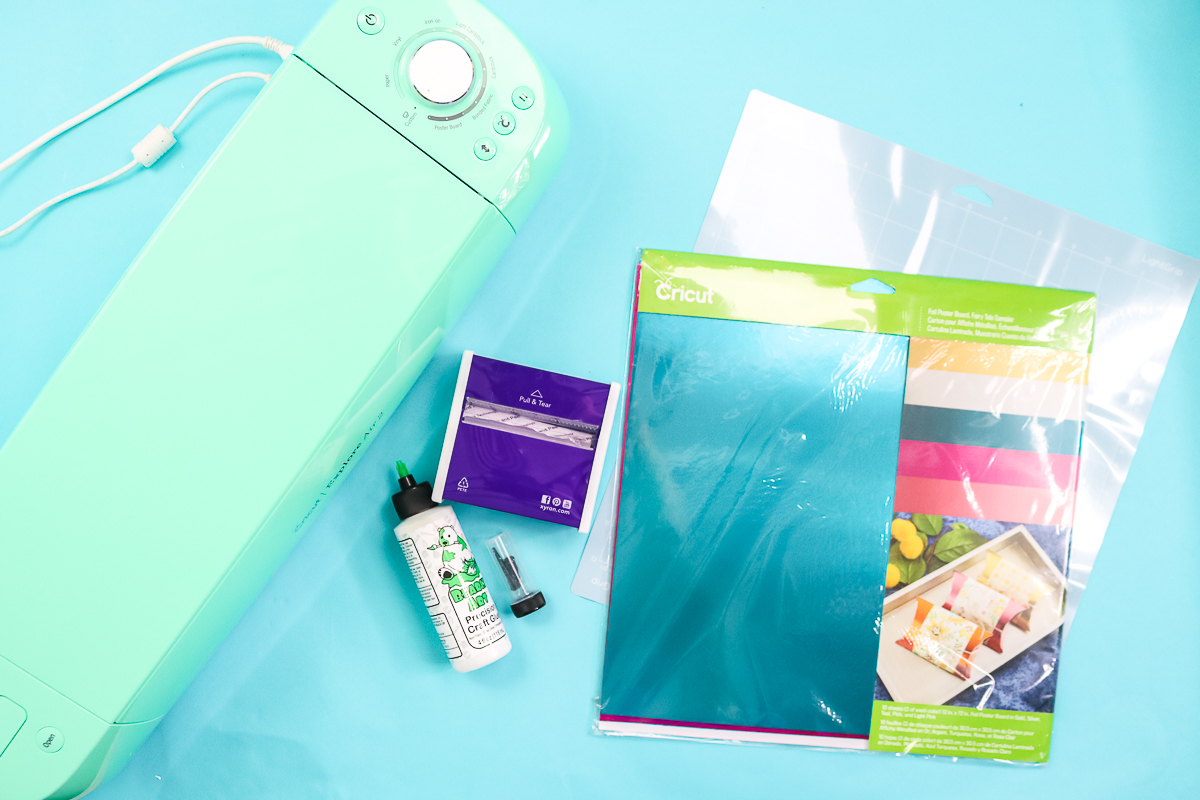
Supplies needed:
How to Make an Easy Paper Banner
Now that you have your supplies, it is time to make a banner from paper using your Cricut. You can actually follow along in the video below as I design the banner and put it together.
Can’t watch the video or missed some of the steps? You can also follow along with the steps below.
Using Cricut Design Space for Designing a Banner
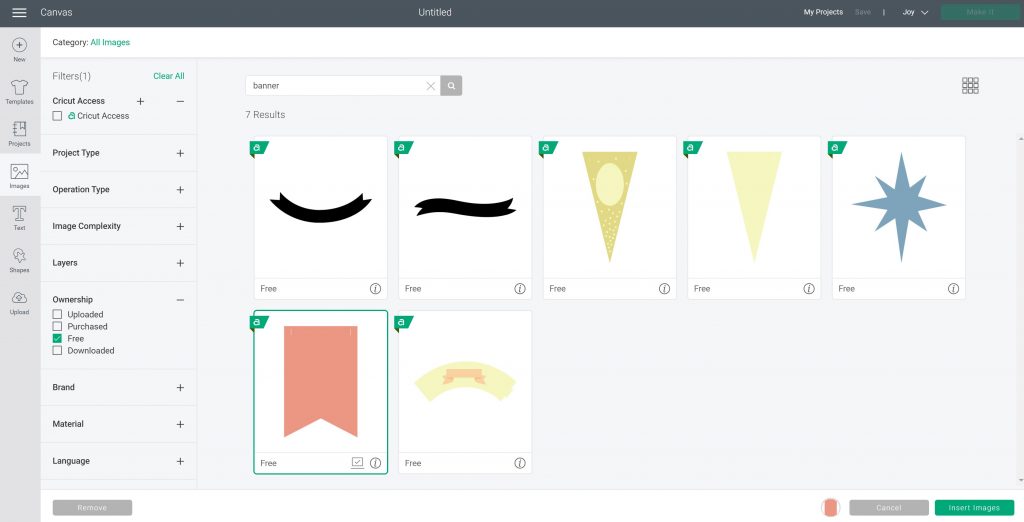
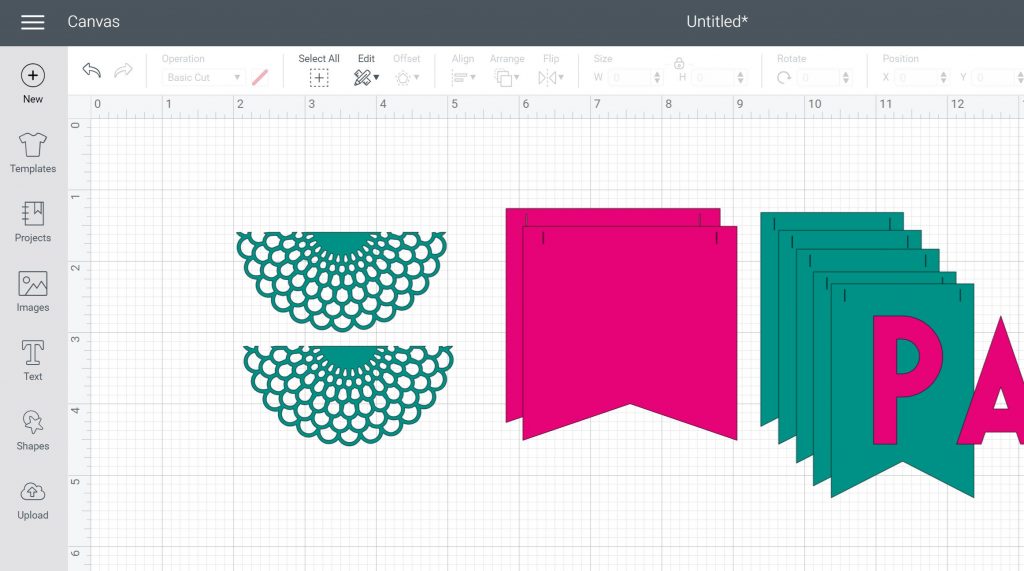
You will need to design your banner first in Cricut Design Space. I am using all free shapes for my banner so that you can make this even if you don’t have Cricut Access. You can, of course, choose different shapes if you would like for this project.
Banner Flags
Start by clicking images and typing “banner” in the search bar. Use the filters on the left to find just those images that are free. Pick the banner flag and insert onto your canvas.
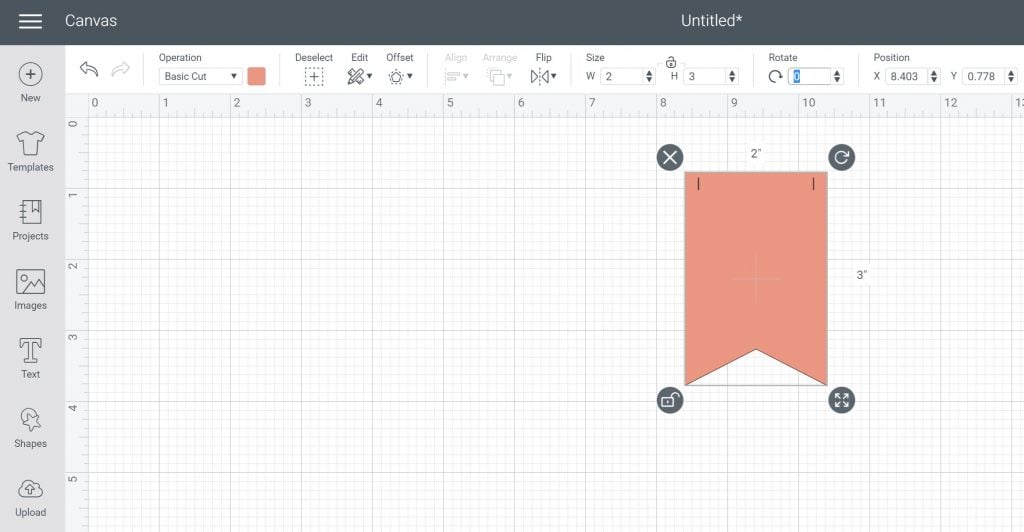
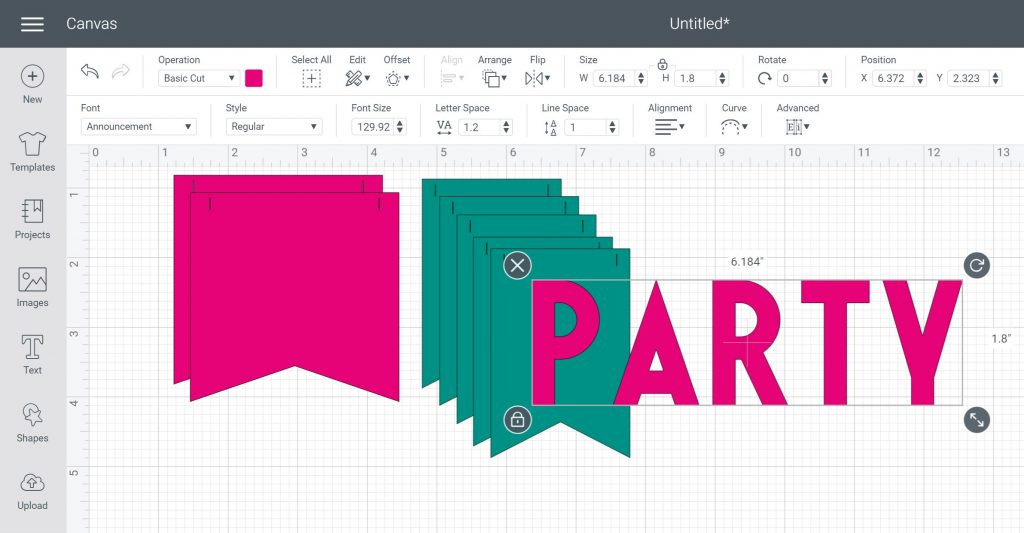
Resize the banner flags. I made the ones for my letters 2 x 3 inches. Then I made one larger for each end that is 3 x 3 inches. Use the unlock button on the size to type in the custom numbers.
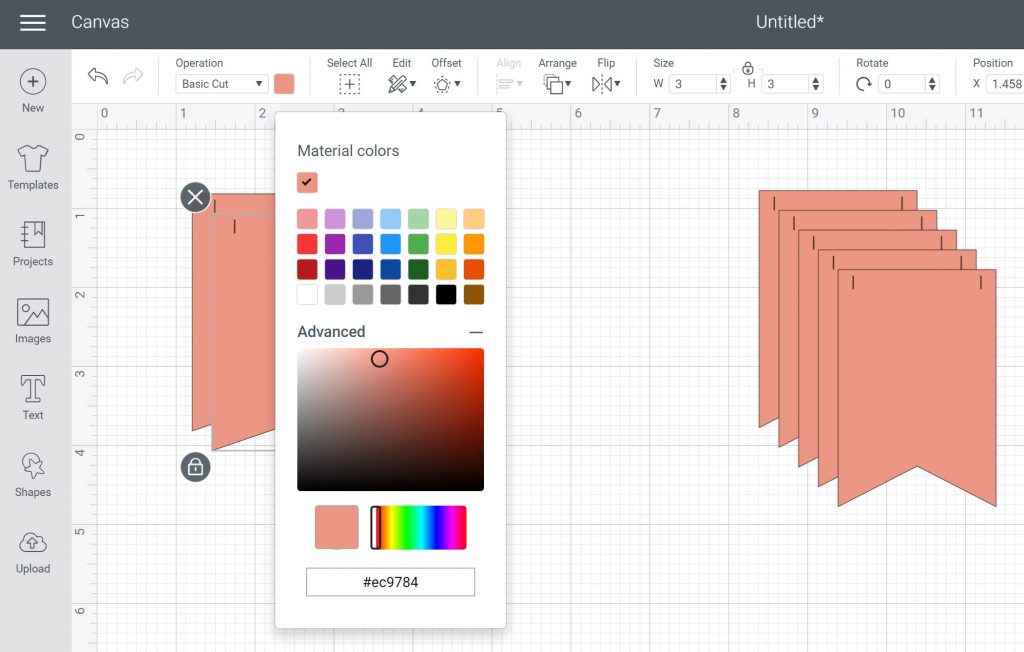
You can then change the colors of your flags to match your material colors in order to visualize your project. You can even pull down the “advanced” area on the colors to pick just about any color you can imagine. This is also a great way to not get confused on material colors when it is time to cut your project.
Adding Text
Then click text and type the text of your choice. You can then pick any font that you want. If you go to the font pull-down, you can see all of your options. The System fonts are those on your computer so all of those would be free. You can also click “Cricut” and then filter by “my fonts” to see Cricut fonts that you have purchased or that are free. Then just pick the one you like.
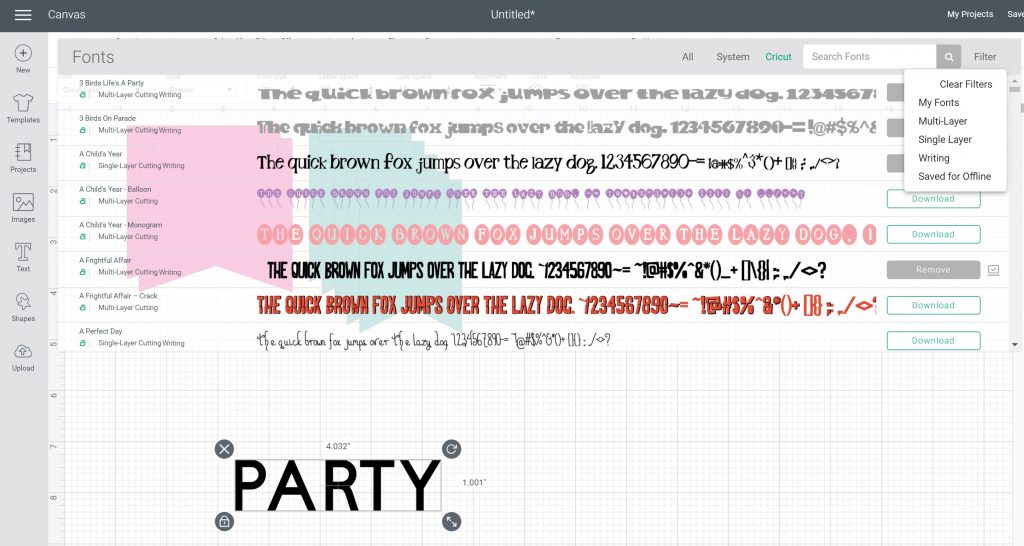
I ended up using the font Announcement and then sized it to where it looked good on my flags. You will also want it to change the color to the material you will be using.
Adding Embellishments
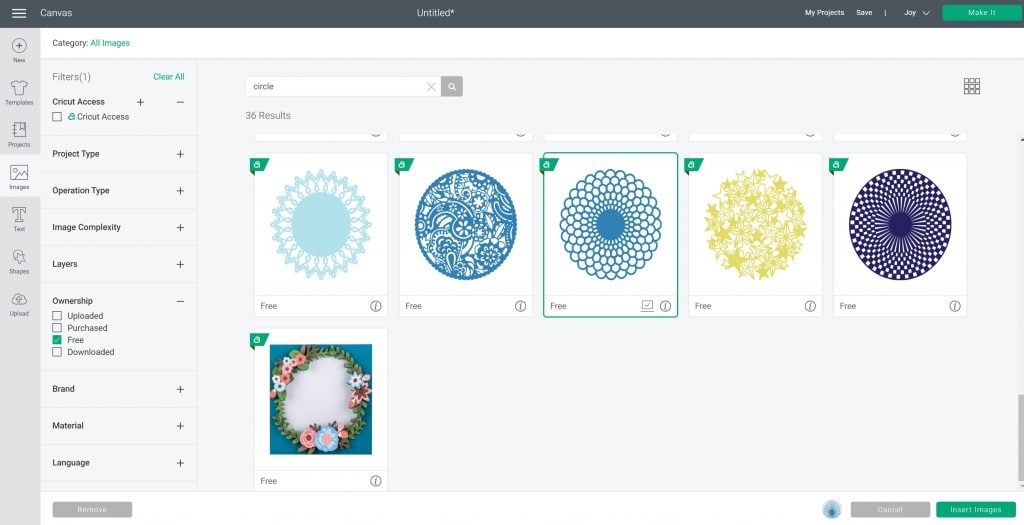
I also added a fun embellishment to the flags on the ends but this is completely up to you. I just searched images for circle and again filtered for free images. I choose the doily and inserted it onto my canvas. Resize your doily to 3 inches wide to match the banner flag.
Slicing the image in half is perfect for adding to the top of a banner. Just draw a square and put it approximately over the top of the doily. Then pick both the doily and the square and click slice.
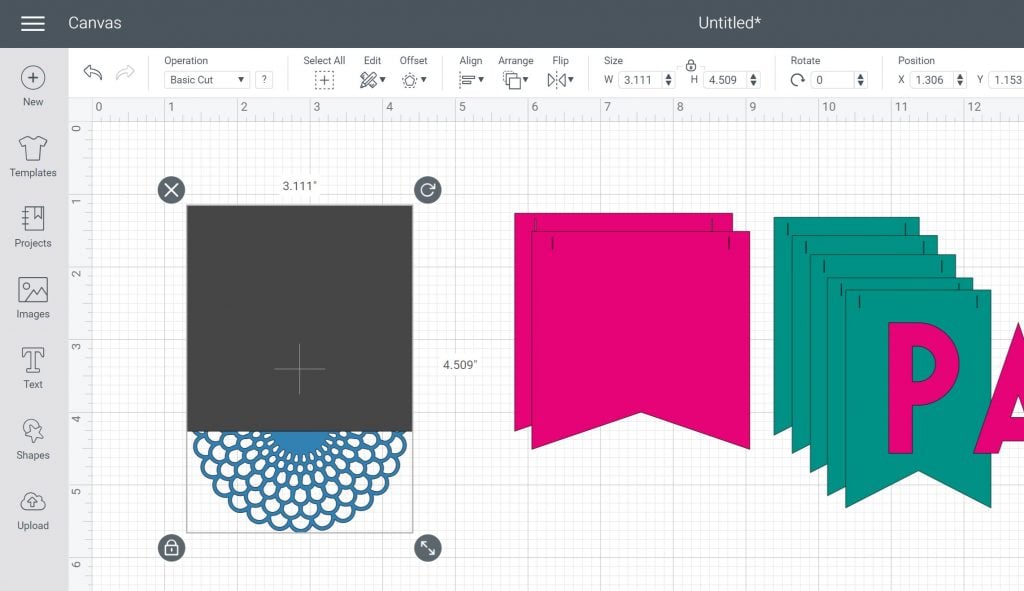
You can then delete everything off except for the bottom half of the doily shape. You will want to duplicate that once and change the color of both to match your banner. Now it is time to cut!
Cutting Banner Pieces with a Cricut
Now you can click make it and you will see two sheets with all of your pieces laid out. NOTE: Be sure to choose the machine you will be using to cut before clicking make it.
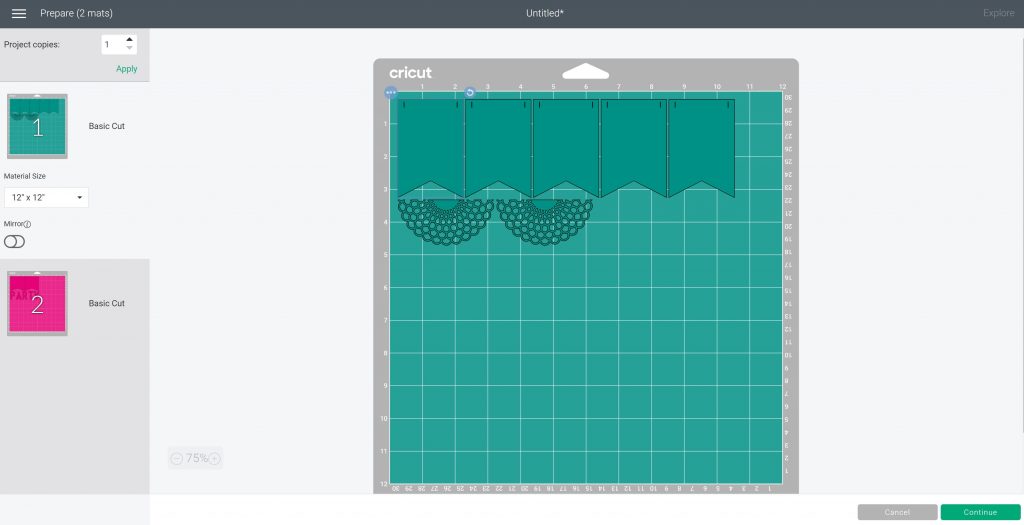
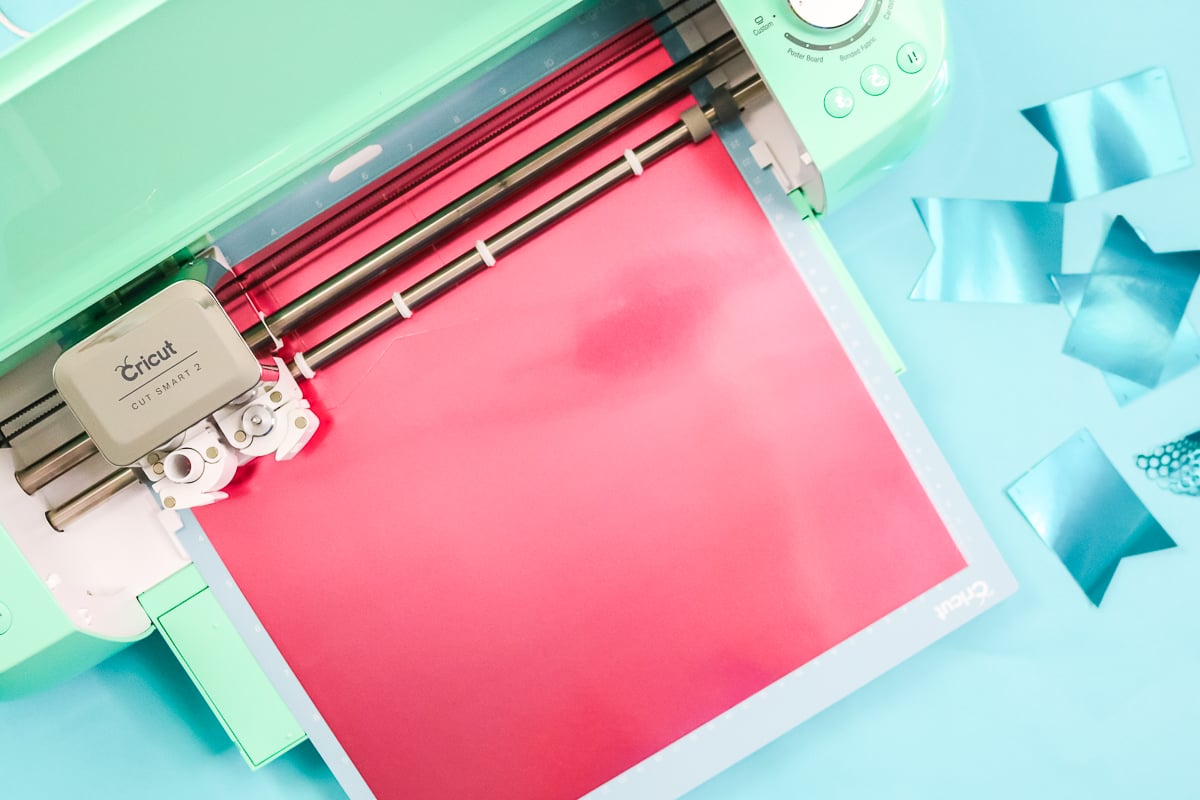
Click continue and choose your material. I am using the foil poster board so I turned my Explore to custom and picked foil poster board from the list. Be sure to pick the material that matches what you are cutting then cut both sheets of paper.

TIP: When you are left with small bits and pieces on your mat, use a spatula or scraper to remove them and discard.

Then you can continue cutting your pieces for your Cricut banner.
Assembling Banner
Once you have all of your pieces cut, be sure to remove all small scraps of paper. You may also want to take a weeding tool and run it along the slits in the banner flags. They are super small and you want to make sure they are completely open before continuing.

The use some type of glue to put your letters and embellishments onto each of the flags.

Thread your needle onto the twine to make it a bit easier then string each flag in order onto your twine.

Then your Cricut banner is ready to hang anywhere that you would like!
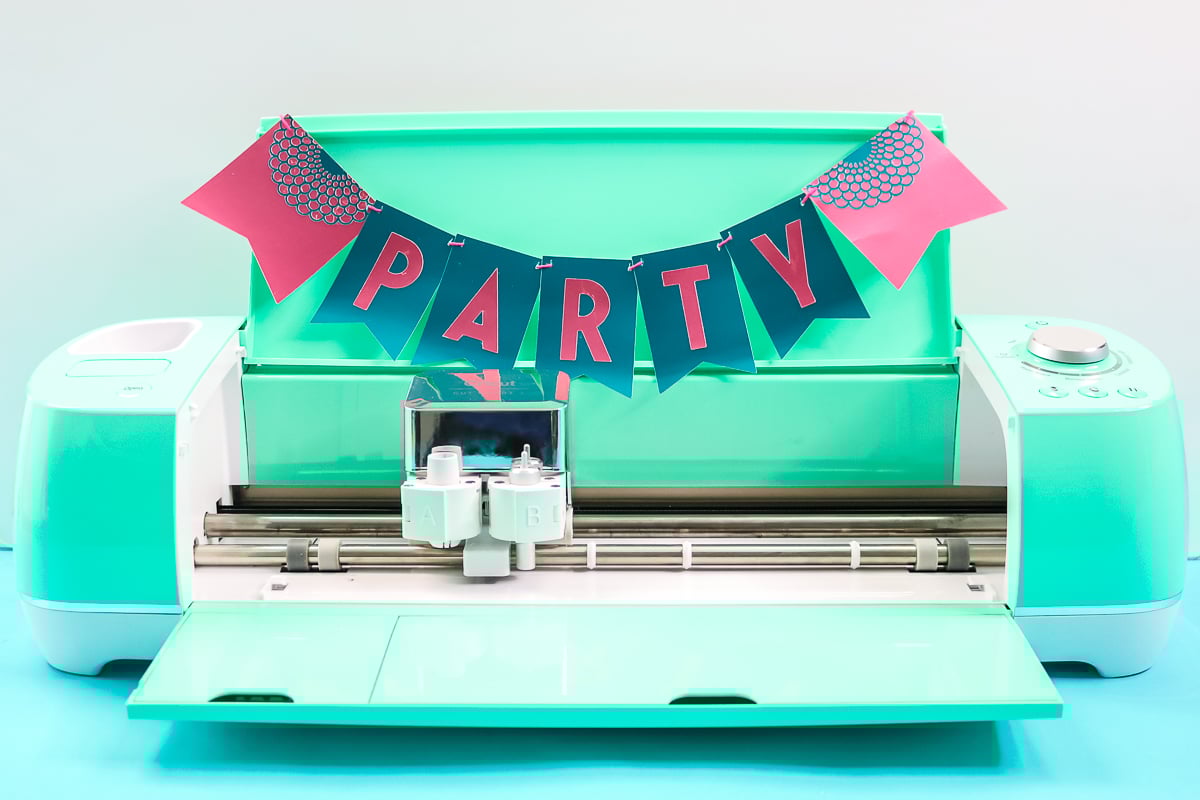
Be sure to leave enough extra twine on both ends for hanging. Otherwise, customize this project to fit your event and have fun!
I hope this helps you with an easy project idea that even a Cricut beginner can make. This should help to boost your confidence for your next project and help you to learn more about Design Space and your machine.

So, grab your supplies and make a Cricut banner today. I know you will love the results!

Love this Cricut project and want more ideas? Try the links below as well!
Add special details to a wedding picture frame using your Cricut machine and a dollar store frame.

Add flowers and Cricut vinyl to a wood door hanger that will look great on your door.
Make this constellation craft with Cricut Infusible Ink and use in your home or give as a gift.
Make Cricut labels on printable vinyl for an easy way to organize any space.
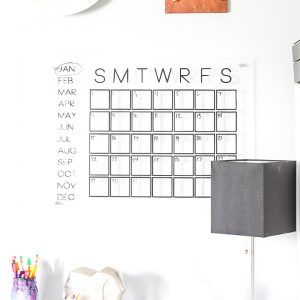
Make a calendar with your Cricut machine to organize your home or office!
You can also print the instructions for this project using the card below!

Making a Cricut Banner
This easy DIY project is perfect for those just getting started with their Cricut and can be used for any occasion!
Supplies
- Cricut machine any Cricut machine will work for this tutorial
- LightGrip Cricut Mat
- Cardstock (I am using the foil poster board from Cricut.)
- Glue (You can try a Xyron Sticker Maker or Bearly Art glue.)
- Spatula or Scraper
- Weeding tools (optional)
- Twine or ribbon
- Large needle
- Scissors
Instructions
Using Cricut Design Space for Designing a Banner
-
You will need to design your banner first in Cricut Design Space. I am using all free shapes for my banner so that you can make this even if you don’t have Cricut Access. You can, of course, choose different shapes if you would like for this project.
Banner Flags
-
Start by clicking images and typing “banner” in the search bar. Use the filters on the left to find just those images that are free. Pick the banner flag and insert onto your canvas.
-
Resize the banner flags. I made the ones for my letters 2 x 3 inches. Then I made one larger for each end that is 3 x 3 inches. Use the unlock button on the size to type in the custom numbers.
-
You can then change the colors of your flags to match your material colors in order to visualize your project. You can even pull down the “advanced” area on the colors to pick just about any color you can imagine. This is also a great way to not get confused on material colors when it is time to cut your project.
Adding Text
-
Then click text and type the text of your choice. You can then pick any font that you want. If you go to the font pull-down, you can see all of your options. The System fonts are those on your computer so all of those would be free. You can also click “Cricut” and then filter by “my fonts” to see Cricut fonts that you have purchased or that are free. Then just pick the one you like.
-
I ended up using the font Announcement and then sized it to where it looked good on my flags. You will also want it to change the color to the material you will be using.
Adding Embellishments
-
I also added a fun embellishment to the flags on the ends but this is completely up to you. I just searched images for circle and again filtered for free images. I choose the doily and inserted it onto my canvas. Resize your doily to 3 inches wide to match the banner flag.
-
Slicing the image in half is perfect for adding to the top of a banner. Just draw a square and put it approximately over the top of the doily. Then pick both the doily and the square and click slice.
-
You can then delete everything off except for the bottom half of the doily shape. You will want to duplicate that once and change the color of both to match your banner. Now it is time to cut!
Cutting Banner Pieces with a Cricut
-
Now you can click make it and you will see two sheets with all of your pieces laid out. NOTE: Be sure to choose the machine you will be using to cut before clicking make it.
-
Click continue and choose your material. I am using the foil poster board so I turned my Explore to custom and picked foil poster board from the list. Be sure to pick the material that matches what you are cutting then cut both sheets of paper.
-
TIP: When you are left with small bits and pieces on your mat, use a spatula or scraper to remove them and discard.
-
Then you can continue cutting your pieces for your Cricut banner.
Assembling Banner
-
Once you have all of your pieces cut, be sure to remove all small scraps of paper. You may also want to take a weeding tool and run it along the slits in the banner flags. They are super small and you want to make sure they are completely open before continuing.
-
The use some type of glue to put your letters and embellishments onto each of the flags.
-
Thread your needle onto the twine to make it a bit easier then string each flag in order onto your twine.
GET OUR CRICUT BEGINNER’S GUIDE!
EVERYTHING YOU WANT TO KNOW ABOUT CRICUT DESIGN SPACE IN A FREE PRINTABLE GUIDE!
You have Successfully Subscribed!