
This post and photos may contain Amazon or other affiliate links. If you purchase something through any link, I may receive a small commission at no extra charge to you. Any supplies used may be given to me free of charge, however, all projects and opinions are my own.
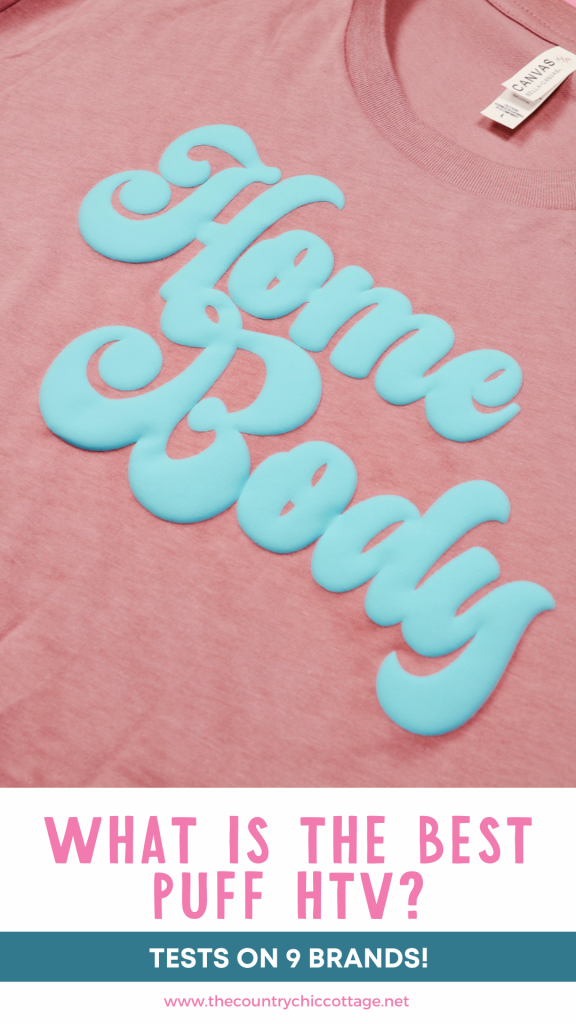
Puff HTV is a fun way to add texture to your projects. Today I am testing different options to find out if Siser Puff vinyl is the best on the market. I am comparing nine different brands of Puff HTV to see which ones perform well with different heat presses.
If you’re trying to decide which heat press is right for you, my Heat Press Roadmap course is a great place to start.

You can watch me test all of these different puff HTV brands by pressing play on the video below.
What is Puff HTV
Puff HTV is a heat transfer vinyl that puffs up when heat and pressure are applied. Puff HTV is different than regular HTV. Make sure you follow the instructions for your specific brand.
I really want to know if Siser Puff vinyl is the best option which has led me to this test today. The best puff HTV may vary depending on the heat press you have and the project you’re making. Keep reading to find out which puff vinyl works the best.
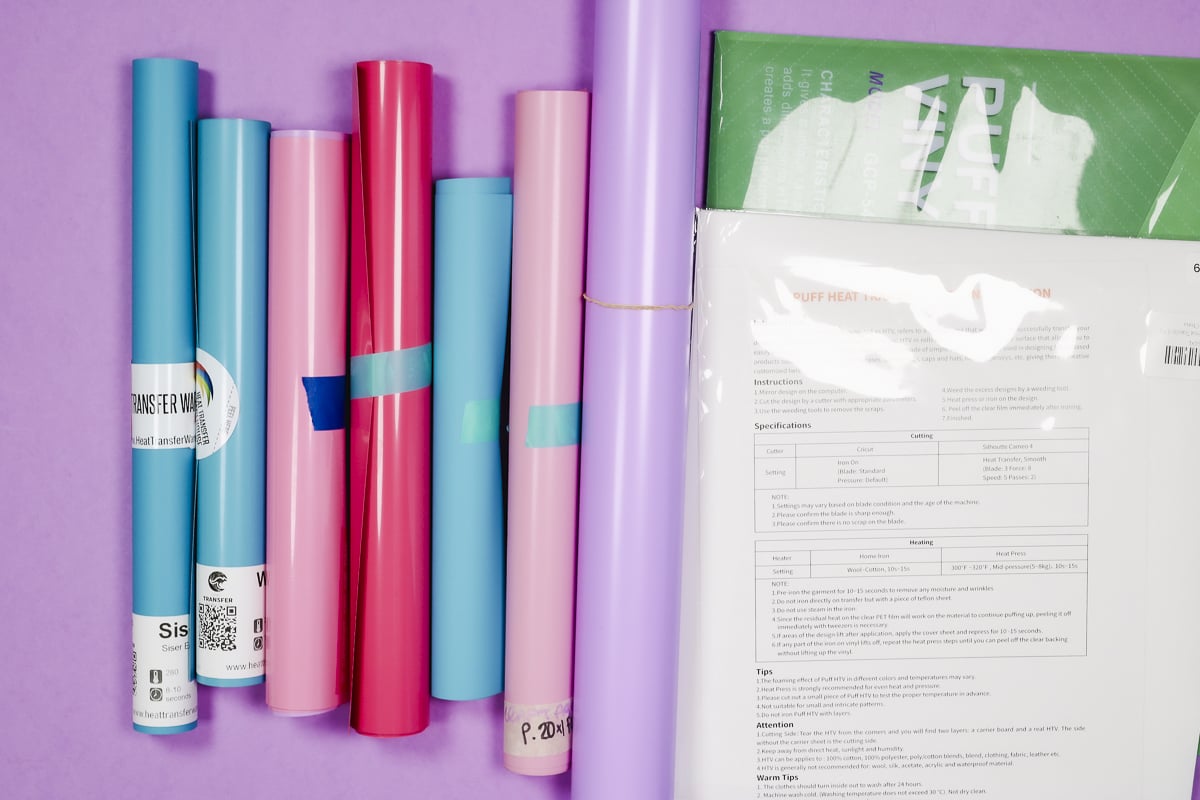
Supplies Used:
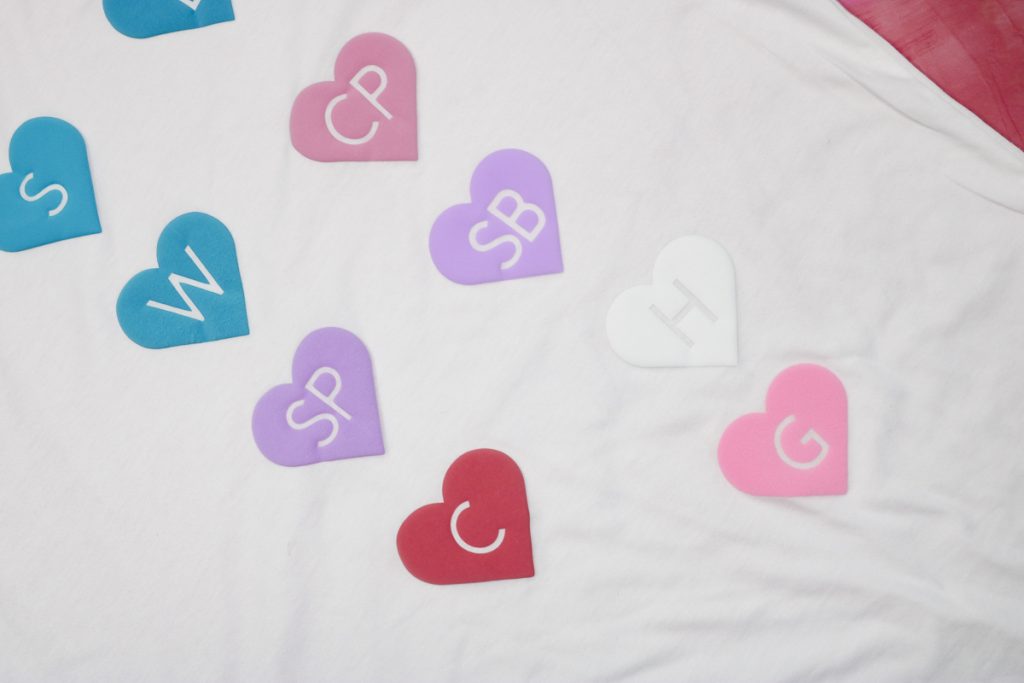
Brands of Puff HTV Used:
Other Supplies Used:
How to Use Puff HTV
The goal with Puff HTV is to get a smooth, puffed-up design. I am testing these nine different Puff HTV materials with a regular heat press, the Cricut Autopress, and an EasyPress to find the best Puff HTV and the best method for application. I will also be doing a laundry test to see how all of these hold up in the wash.
The process for cutting Puff HTV is similar for all of the brands I’m testing today. I will show you the process for one and repeat the process for the following materials.
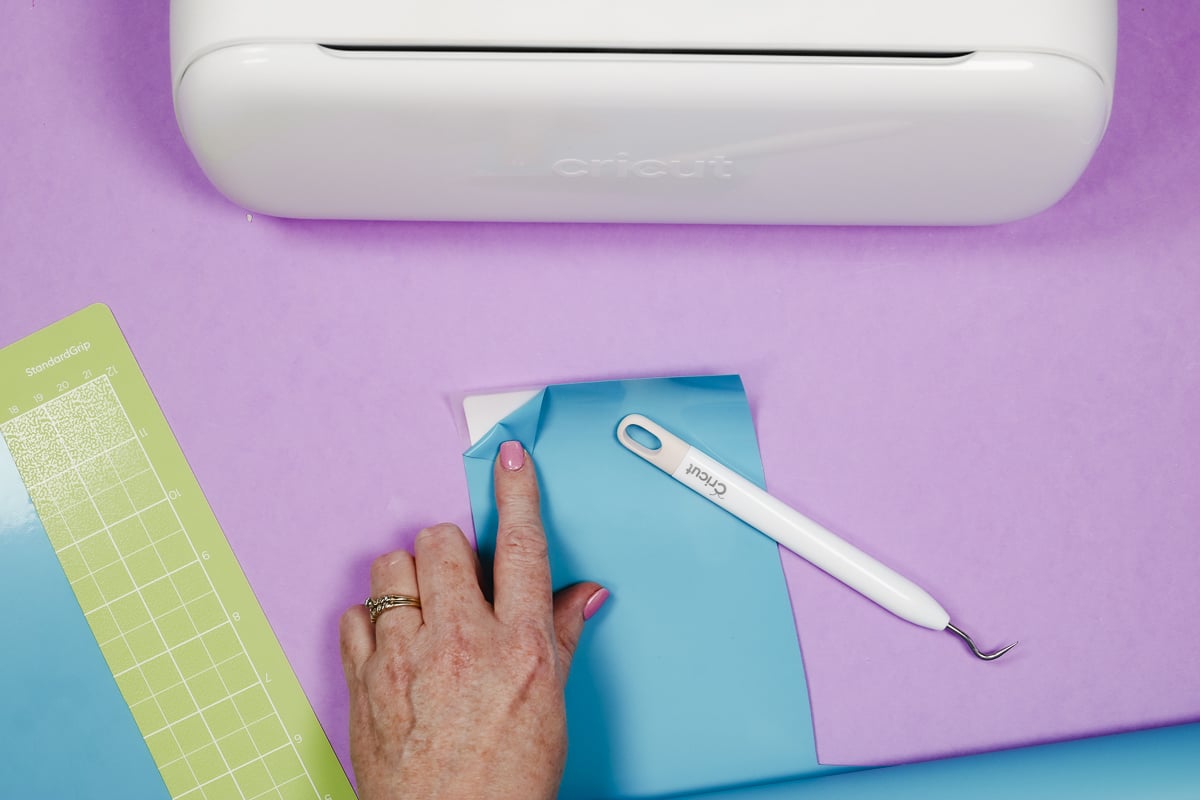
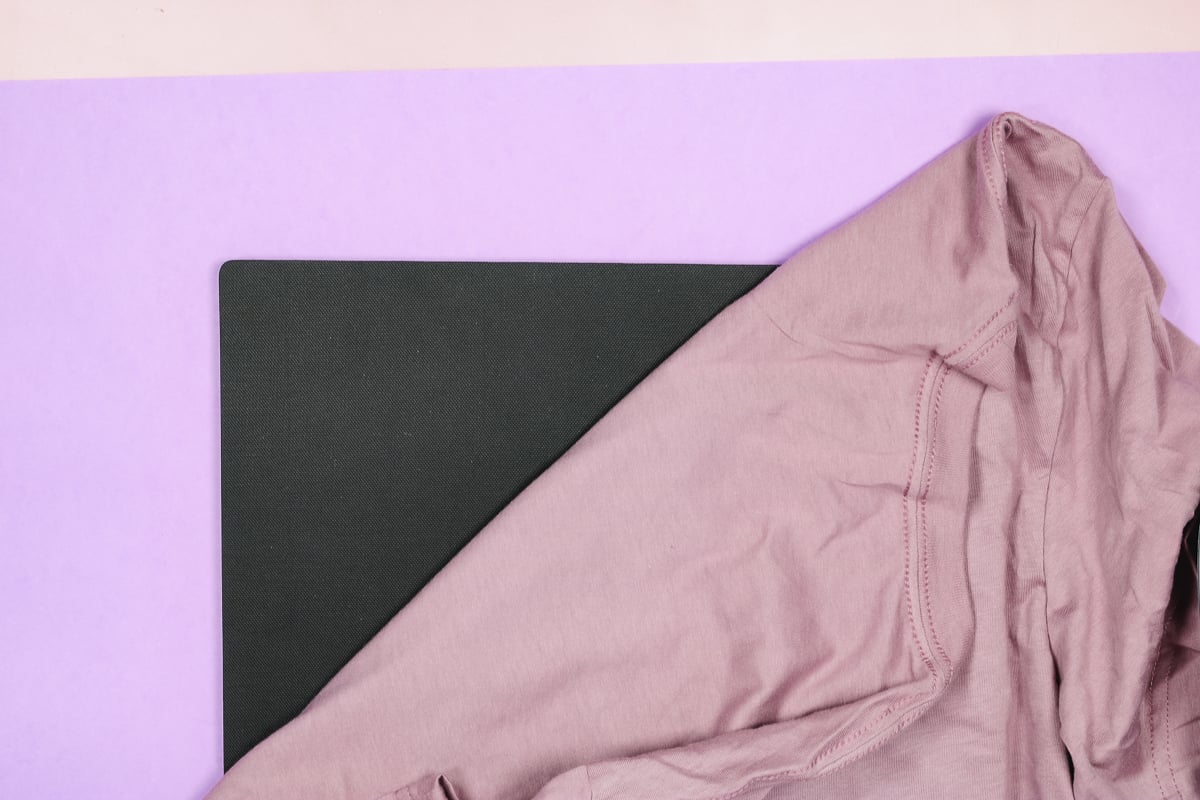
Step 1: Place Puff Vinyl on the Cutting Mat
When you cut regular HTV, you place the material shiny side down on the cutting mat and make sure the design is mirrored. With puff vinyl, the shiny side can be the adhesive side, the back of the material. In most cases, when cutting puff vinyl you’ll place it shiny side up and matte side down.
If you’re not sure which side of your material is the top, you can peel up the corner a little bit. The side that has the carrier sheet is the side you will put down on the mat.
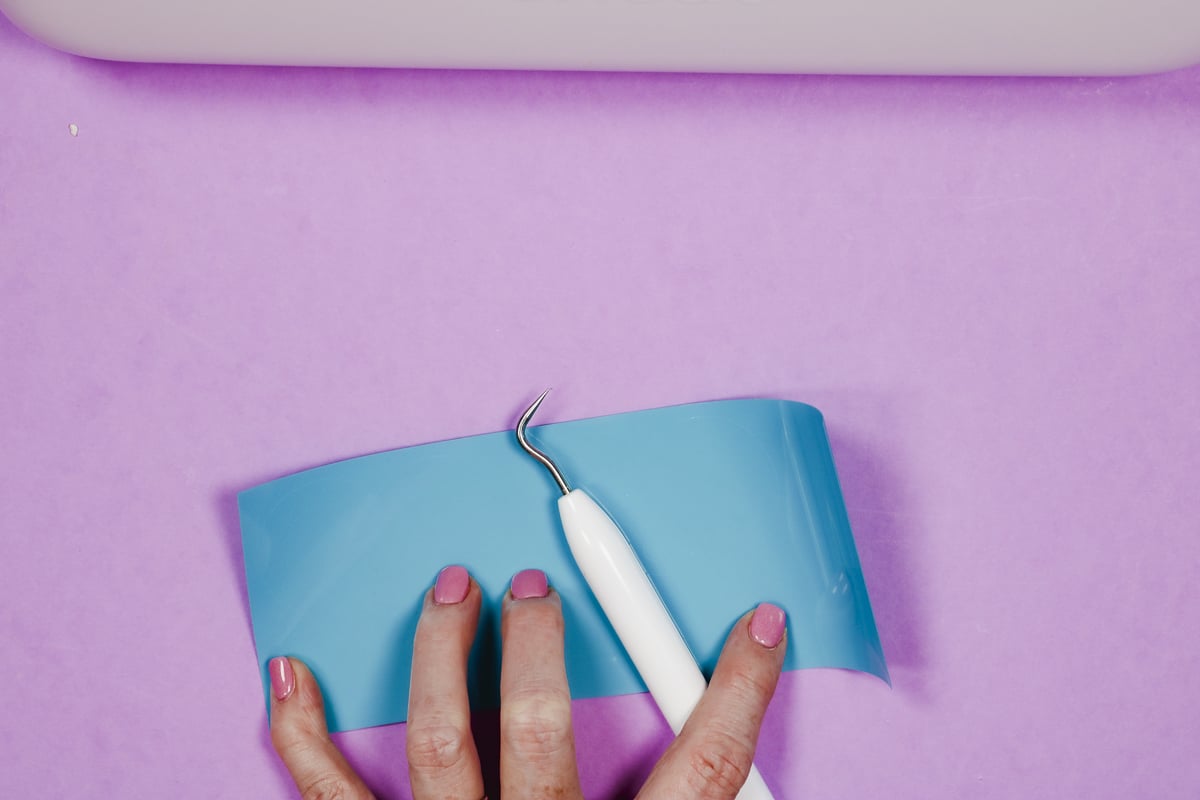
Step 2: Use Brayer to Press Siser Puff Vinyl onto Mat
My experience with Siser puff vinyl is that it doesn’t like to stick to the mat very well. I initially tried using the blue mat and even using the brayer it didn’t stick down well.
I changed to the green mat and used the brayer to stick the puff vinyl down and it stuck really well to the green mat.
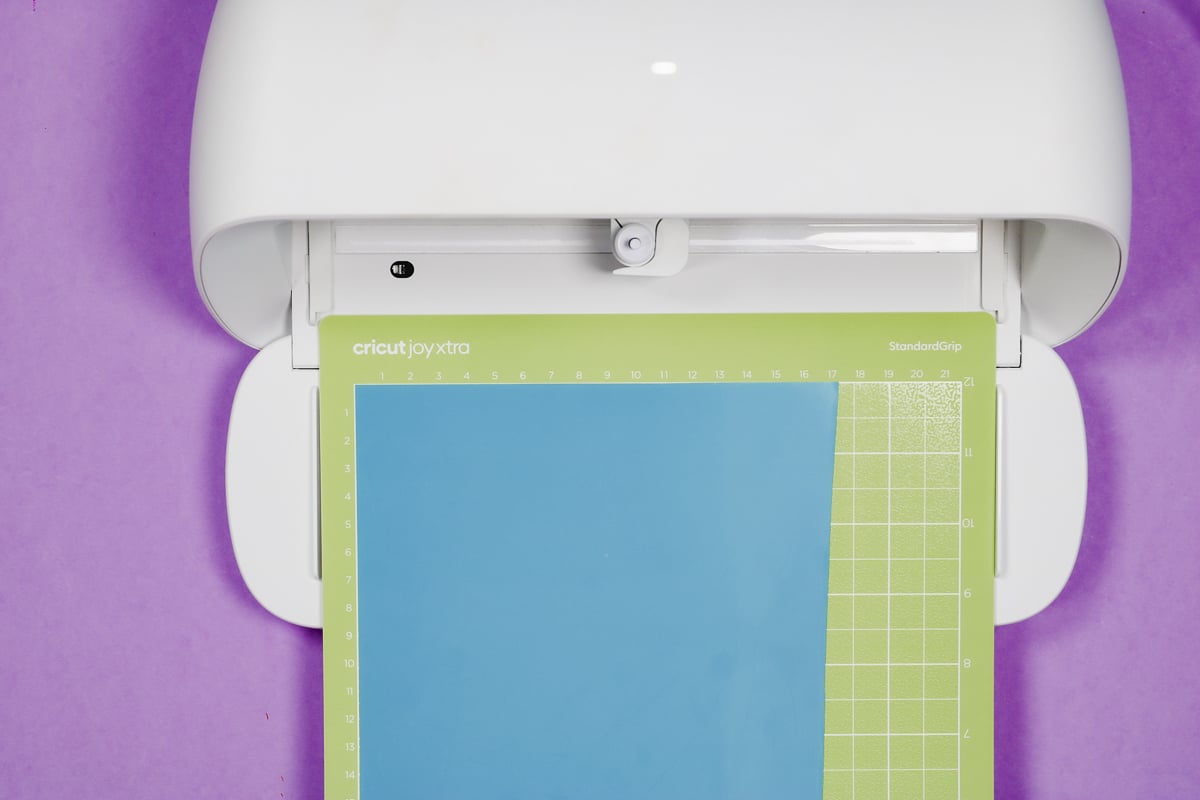
Step 3: Cut the Design from Puff HTV
With the design ready in Cricut Design Space, click Make. Select On Mat and then make sure all mats are mirrored.
I had success using the Everyday Iron-on setting for all of these different puff HTV materials. The puff vinyl before it’s pressed isn’t any thicker than regular HTV.
I always recommend doing a test cut the first time you use a new material.
If the Everyday Iron-on setting doesn’t work, you could try a setting for a thicker material like Holographic or Glitter Iron-on, those may work better.
Load the mat into your Cricut machine and press Cut.
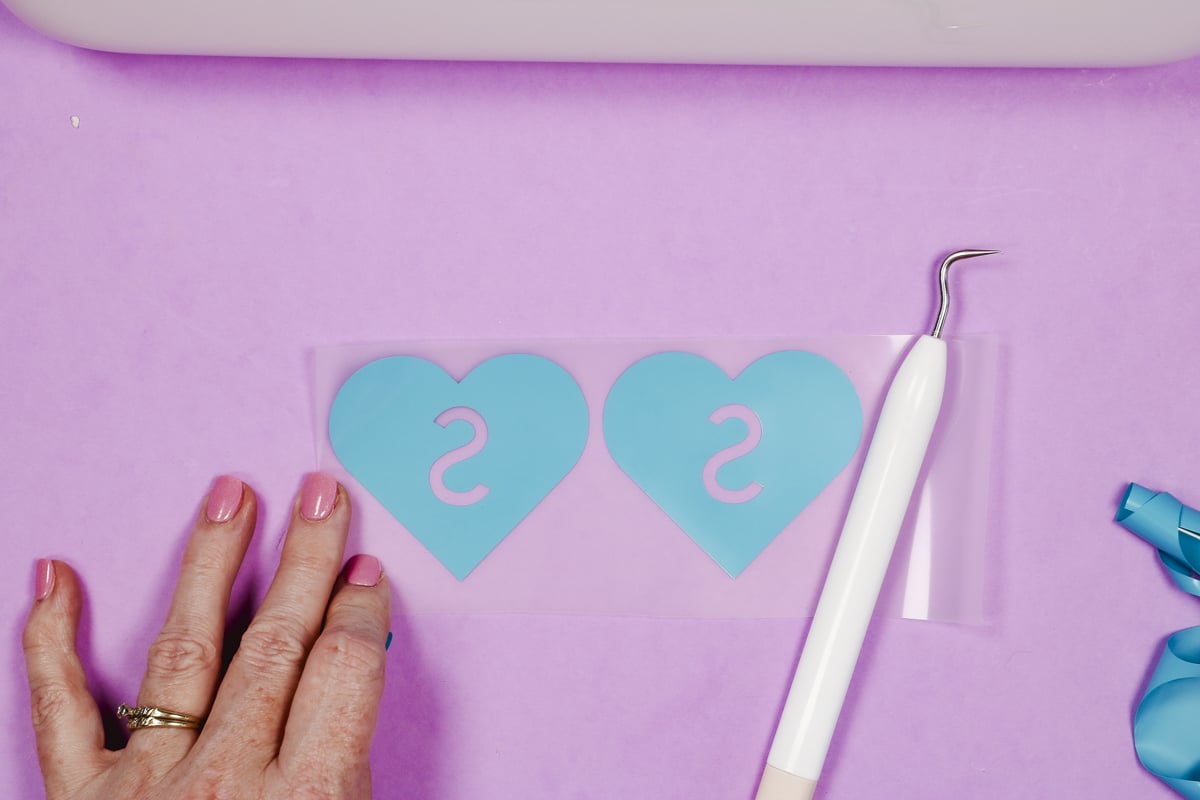
Step 4: Weed Siser Puff Vinyl
When the design is done cutting, unload the mat and remove the material from the mat. Next, we need to weed out all of the excess material. This includes the material on the outside of the design and all of the inside pieces.
The Everyday Iron-on setting worked perfectly with my machine and the Siser Puff vinyl. When the weeding is done we’re ready to press.
I followed the same steps for all of the other Puff HTV materials and the Everyday Iron-on cut setting worked for all of them on my machine.
Note – Check every material before cutting so you don’t confuse the front and the back. In my experiment, some were shiny side down and others were shiny side up.
Step 5: Press Siser Puff Vinyl onto Shirt
I am using a cotton t-shirt for this test because some of the puff vinyl materials I’m using today say they work better on cotton fabric. Preheat the shirt to remove any wrinkles and moisture.
The different materials have different pressing temperatures and times. Make sure you find the right settings for your material. It may sound weird but some brands had different settings for different colors. Make sure you double check each material you’re using.
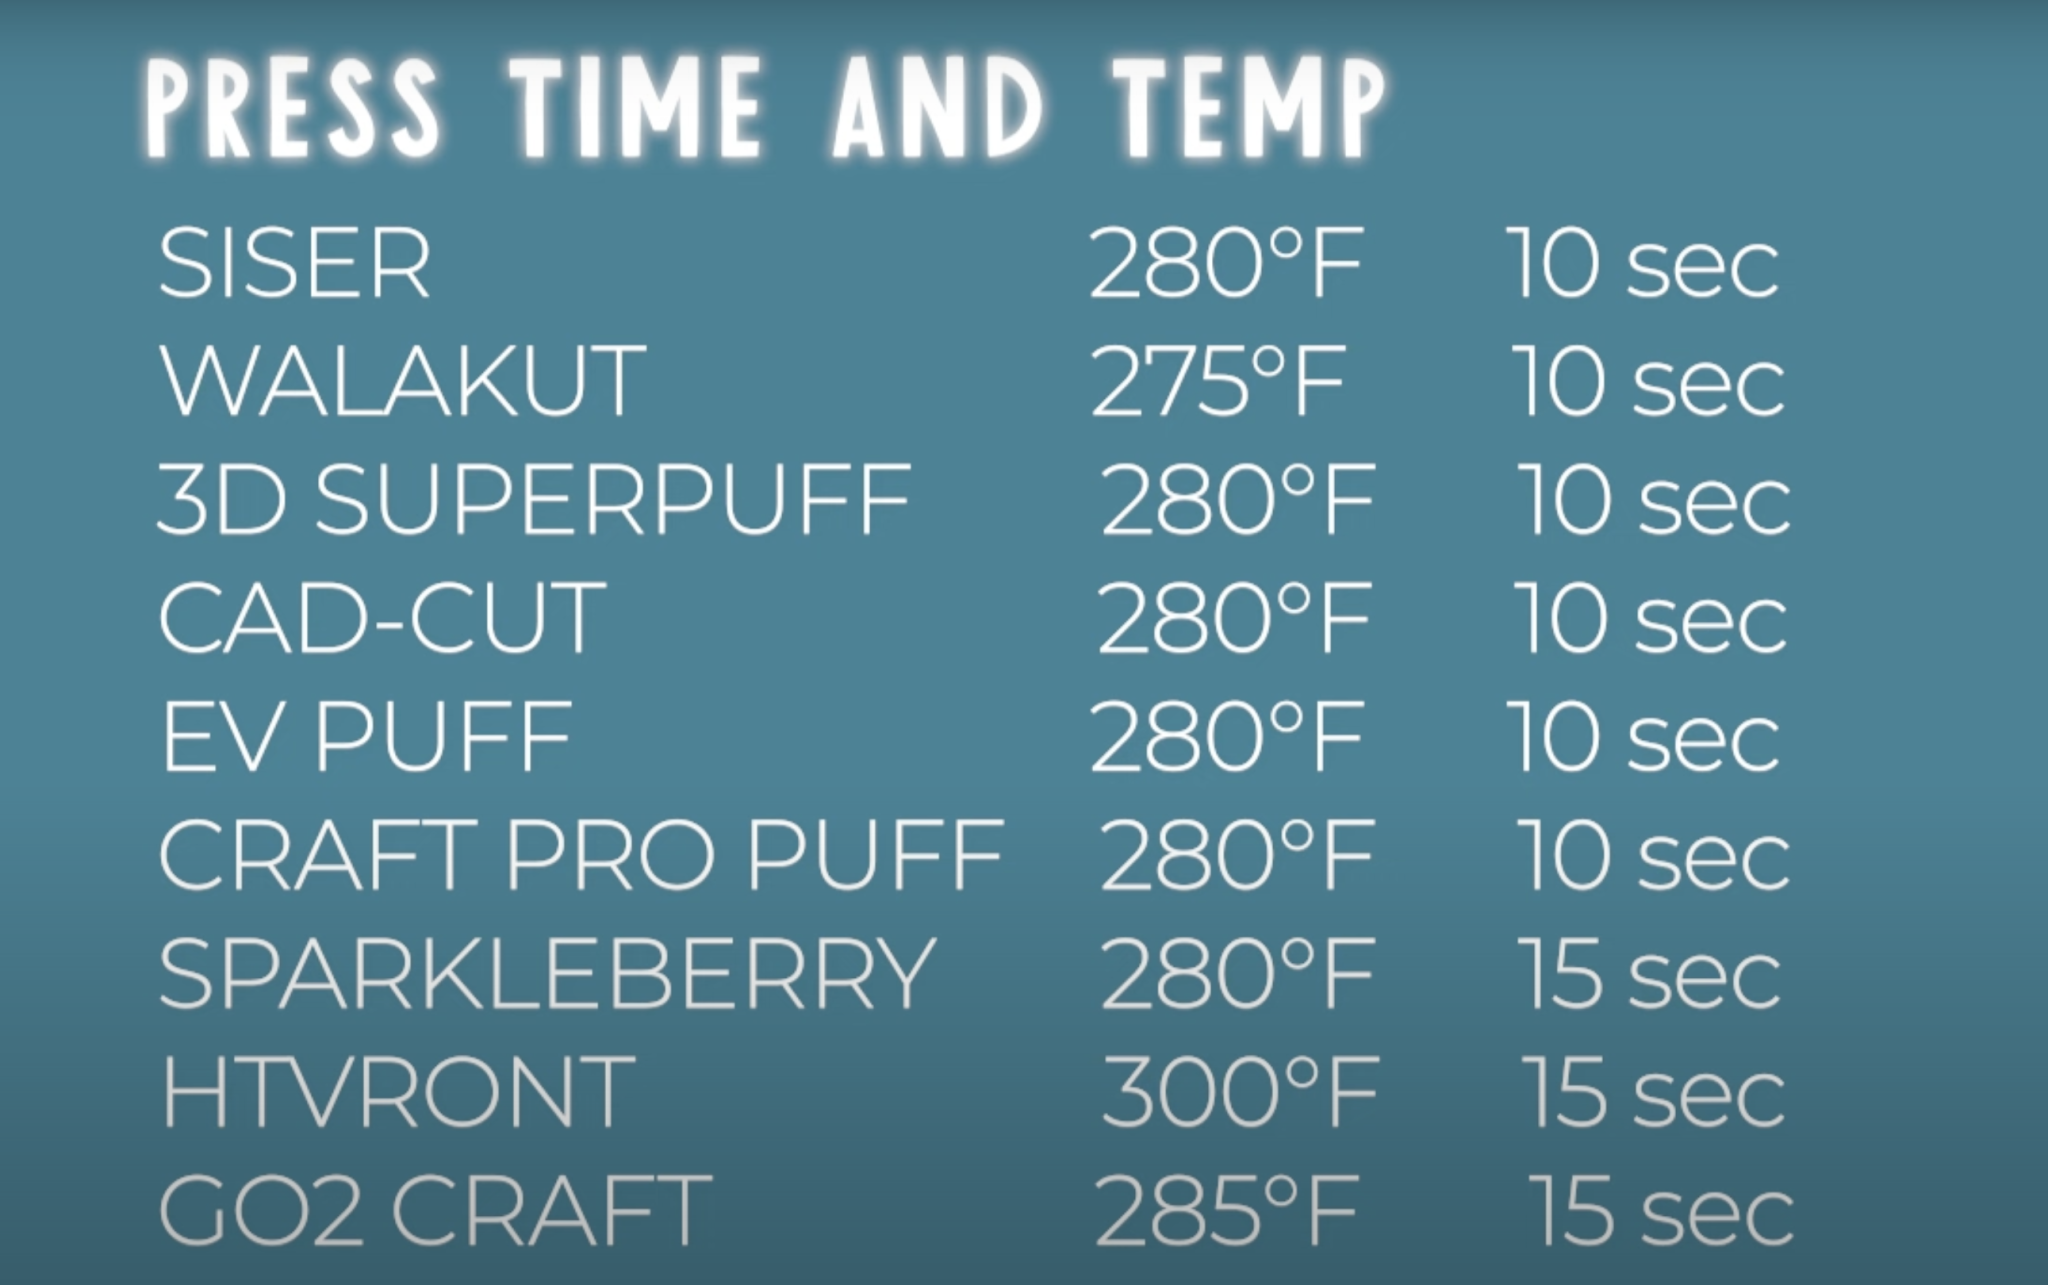
All of the Puff vinyl materials I tested call for firm pressure. I am testing them all with a regular heat press first. When I find a few that work well, I will test them with other presses at the bottom of this post.
Be sure to pre-heat your shirt. This will remove any moisture and get the fabric hot for a better puff.
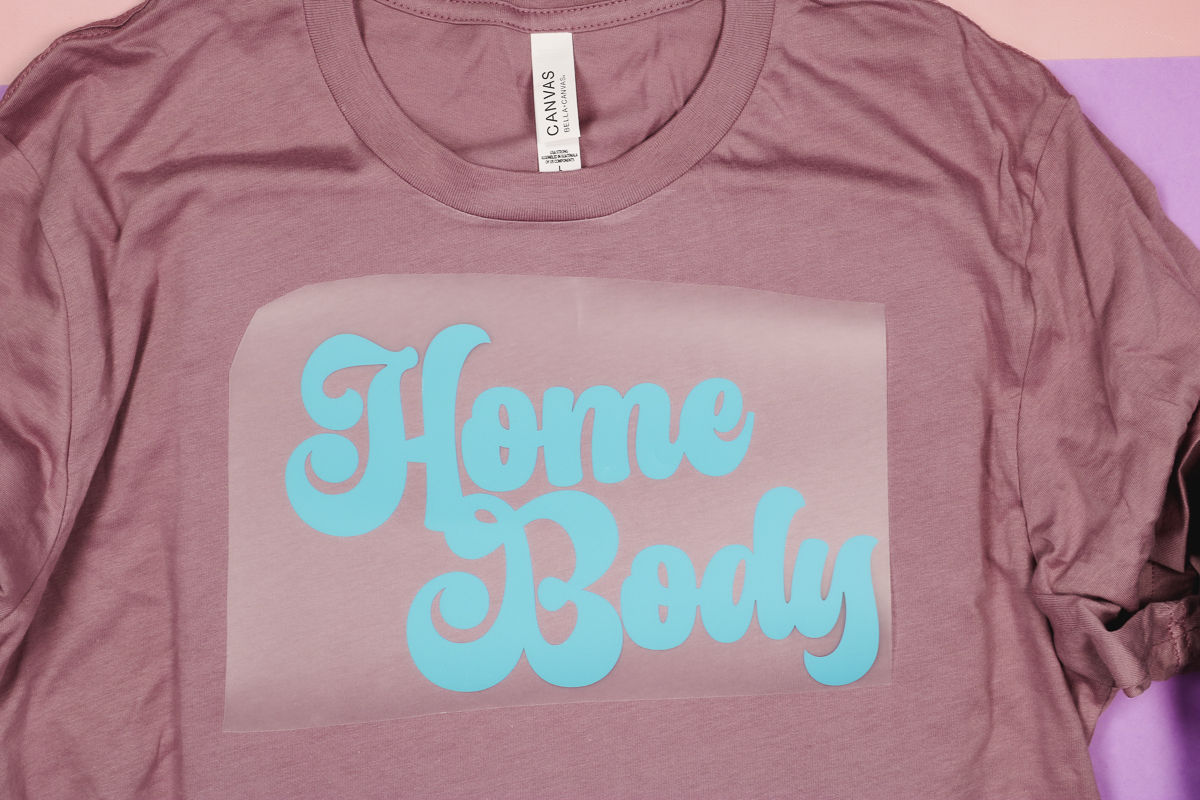
Locate the print on your shirt and place the shirt in your press. The carrier sheet will protect the vinyl. Press for the full-time at the full temperature and lift the press when it’s done.
Step 6: Check The Puff
The great thing about puff HTV is that the carrier sheet basically removes itself. Because the HTV puffs up the carrier sheet can easily be removed while it’s hot.
If the HTV did not stick to the fabric or you didn’t get the puff you were looking for, you can try pressing again using parchment or butcher paper to protect the vinyl.
I’ve had mixed results doing a second press but it’s worth trying if you’ve already ruined your blank.
Comparing Different Puff HTV Brands
I followed the same process for all the different brands so I could find the best puff HTV out there. When it comes to puff HTV, I want the vinyl to be puffed up and smooth to the touch without any lines in the puff.
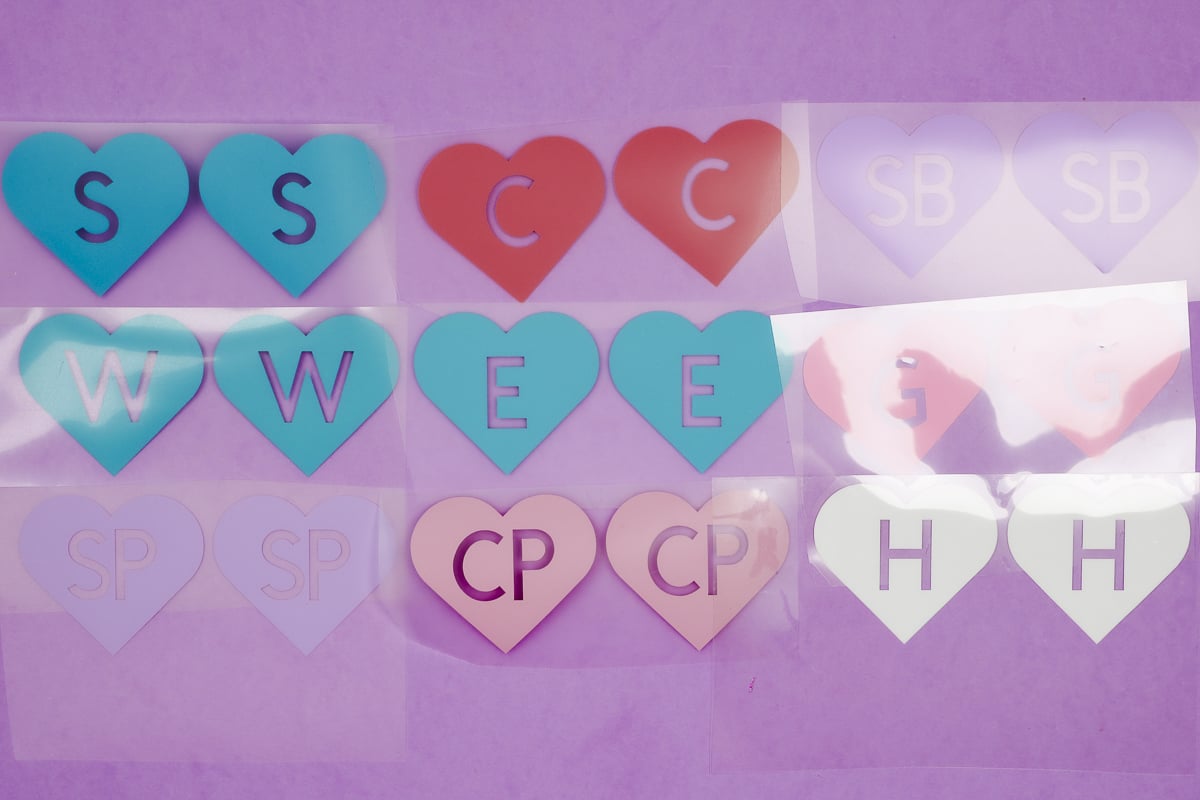
Brands that Puffed Well
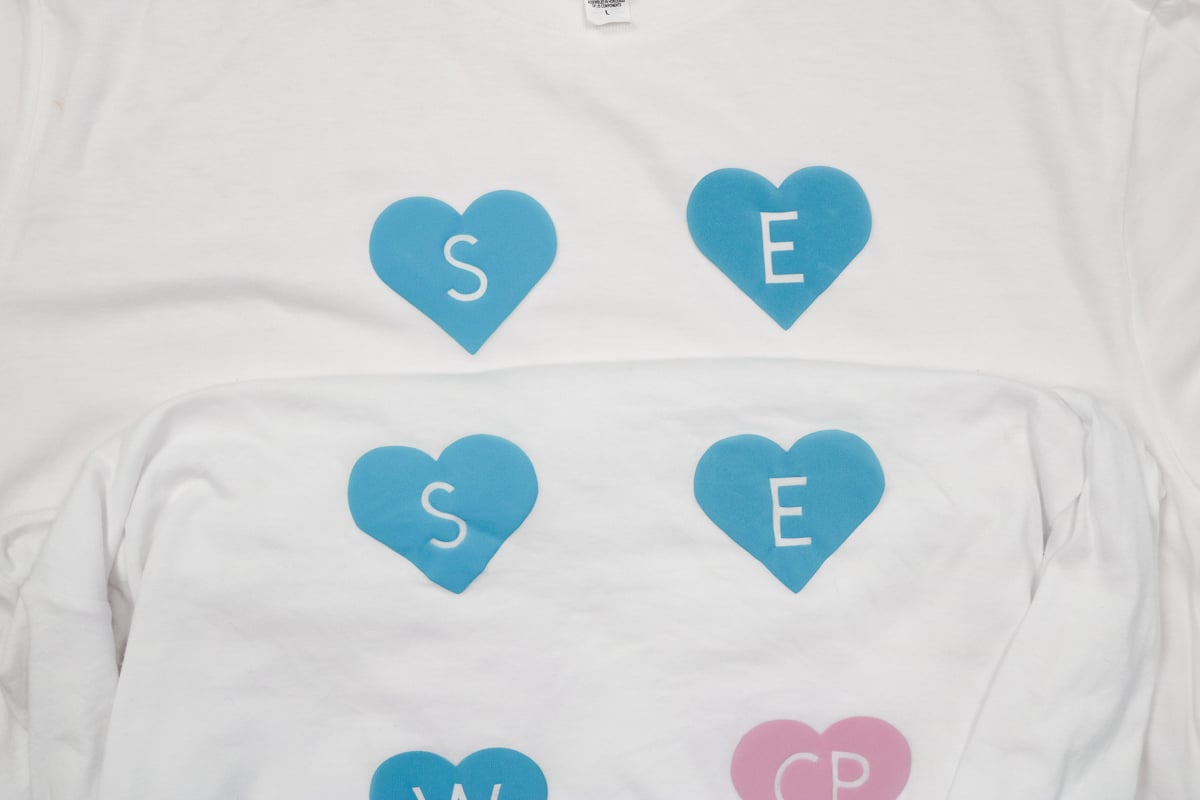
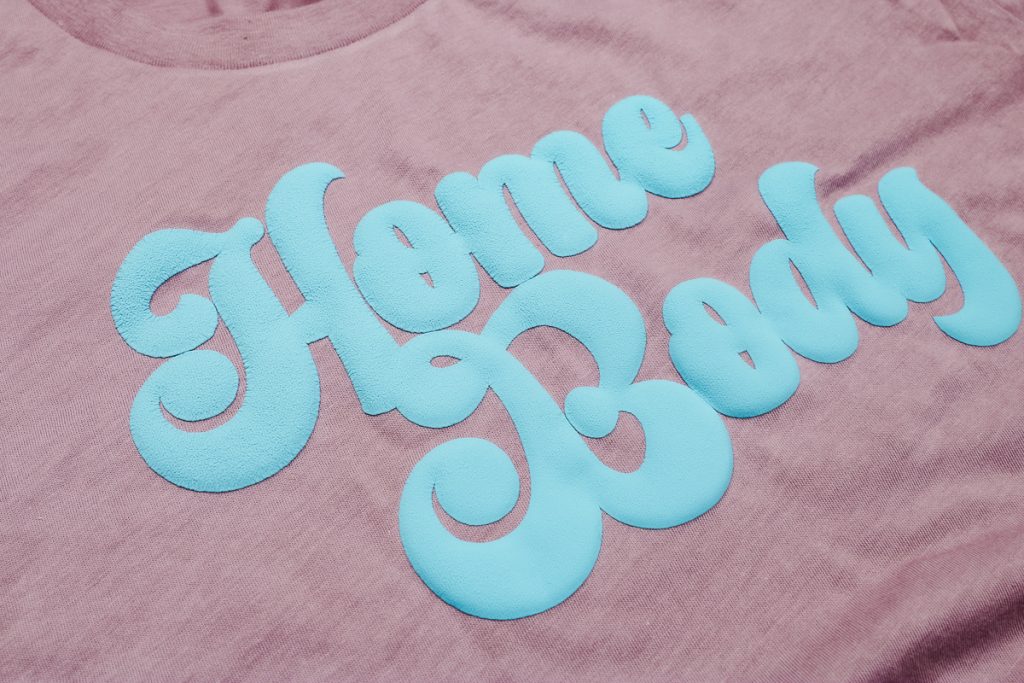
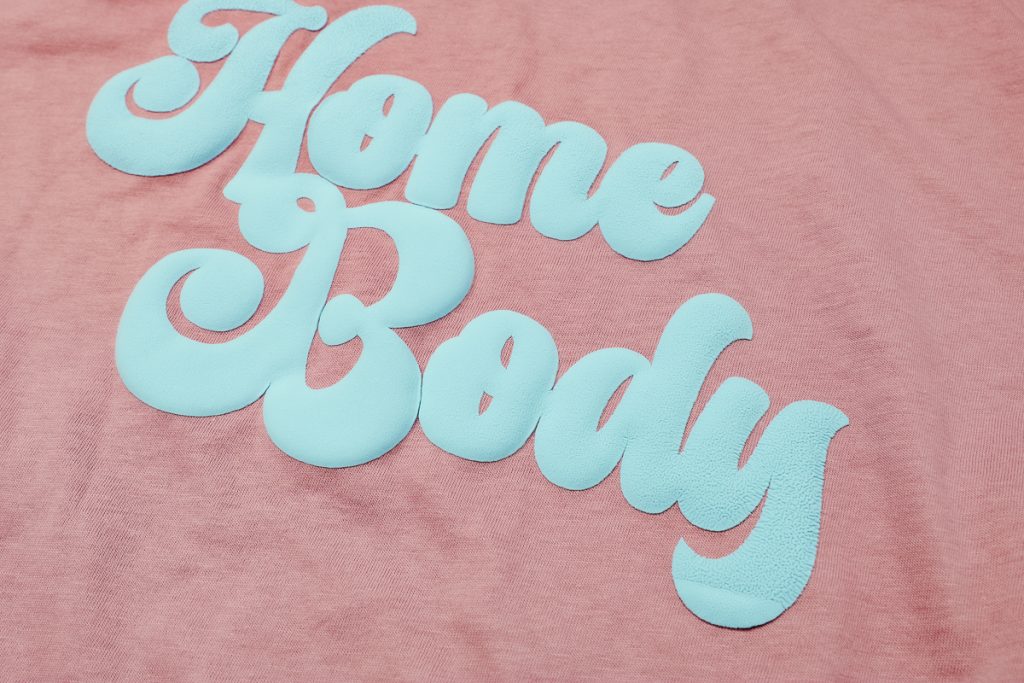
Siser Puff Vinyl
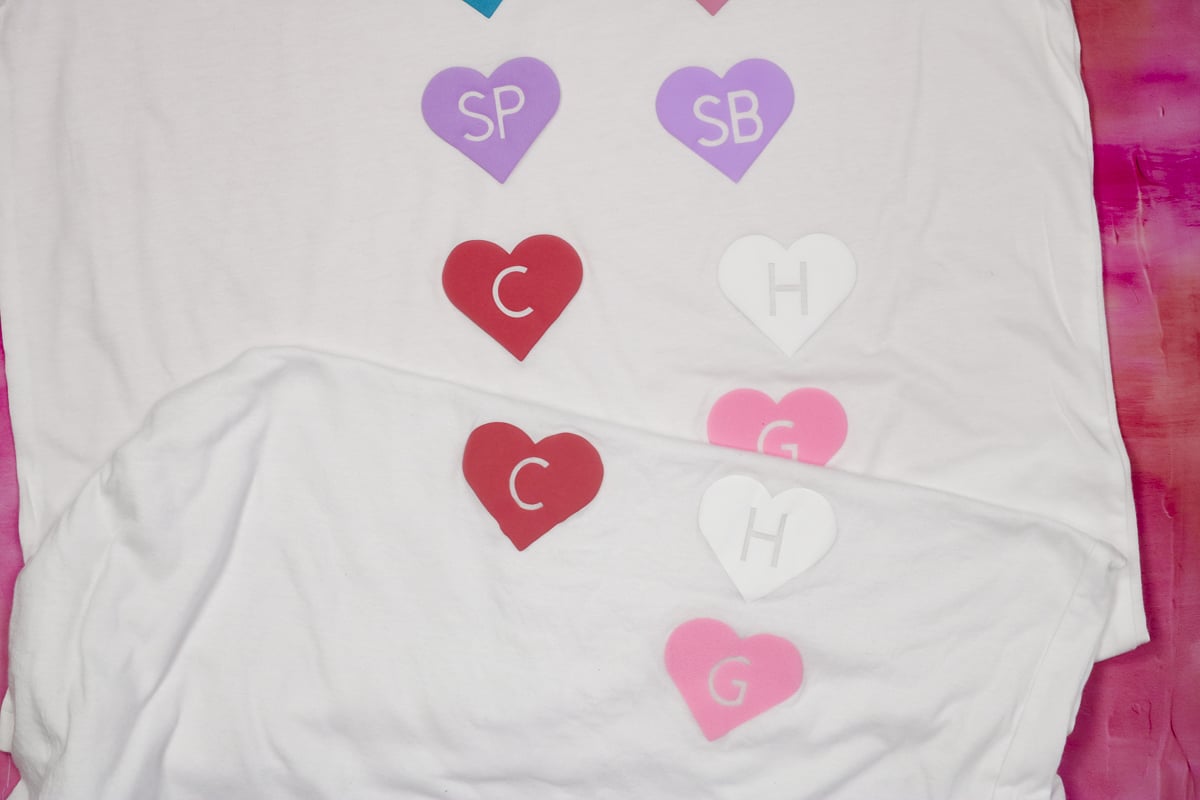
The Siser brand (S heart on the shirt) gave me all of the things I was looking for. I love how it puffs up and it looks and feels really good.
EV Puff from Expressions Vinyl
The EV Puff from Expressions (E on the shirt) also performed well. It puffs up and is smooth to the touch.
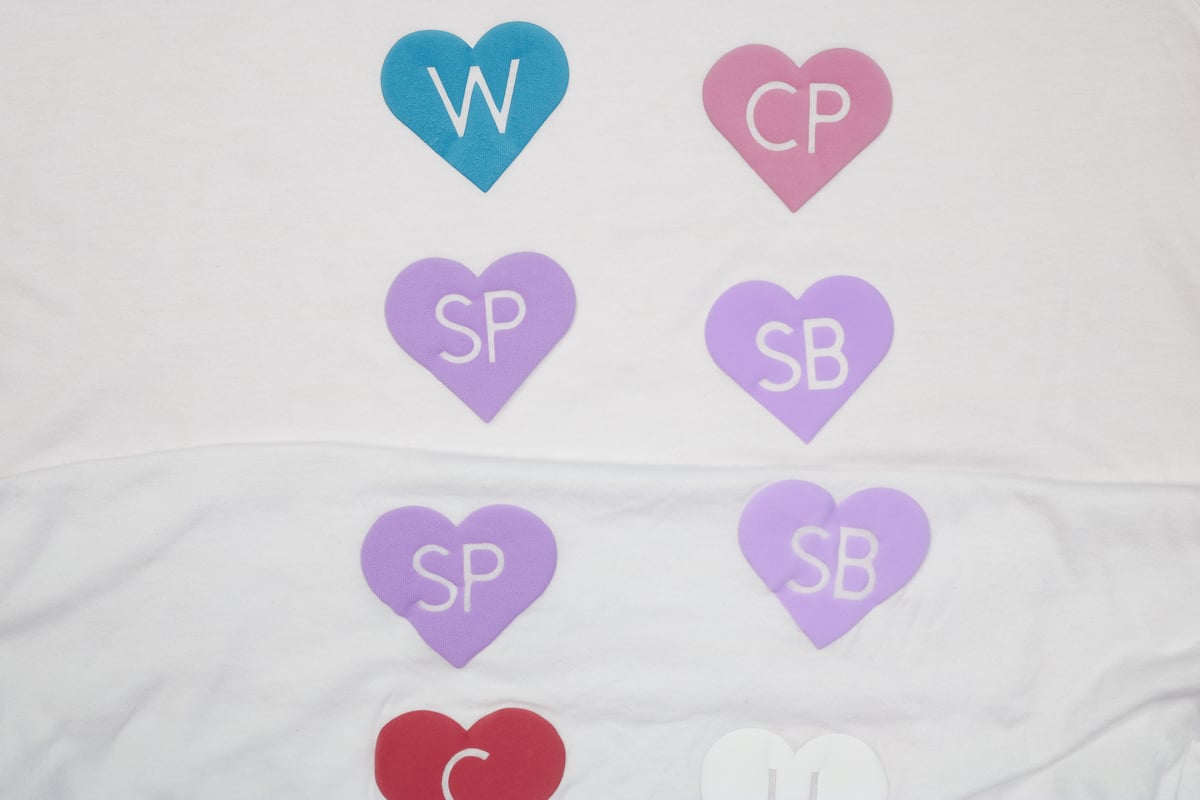
Sparkleberry
The Sparkleberry Puff (SB on the shirt) has a good puff and is very smooth.
CAD-CUT from Stahls
CAD-CUT (C on the shirt) is similar to the others that performed well after pressing. The puff is good and the surface is smooth.
Puff Vinyl Brands that Didn’t Perform Well
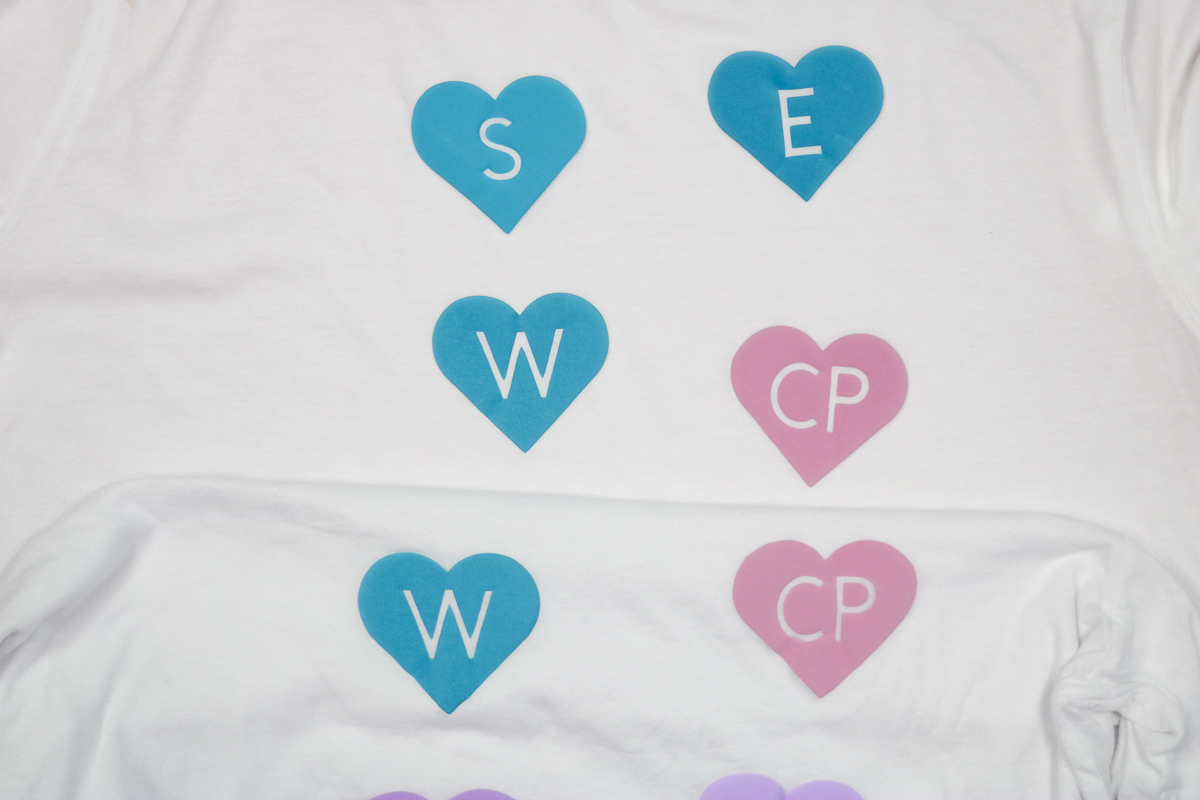
WALAKut Puff
For me, the WALAKut Puff (W on the shirt) was very inconsistent. Sometimes it did well and other times it had a rough texture.
Craft Pro Puff
The Craft Pro Puff from Heat Press Nation (CP on the shirt) puffed up well but has a rough surface. I don’t like how it feels on the shirt.
Superpuff
Superpuff from Vinyl and Todd (SP on the shirt) is also very rough to the touch. It puffs up great but I don’t like how it feels.
HTVRont and Go2 Craft
Both of these brands (H and G on the shirt) were purchased on Amazon and did not perform well for me. They don’t puff up well and are rough on the surface. I wouldn’t use them again.
Comparing Puff Vinyl Before and After Washing
I wanted to test all of these through the laundry to see if they would crack or look flatter. I washed the shirt multiple times following the recommended process. Wait 24 hours before washing. Wash in cold water, inside out, and hang to dry.
Let’s look at how each brand performed after multiple washes.
Siser Puff Vinyl
The Siser puff vinyl looks the exact same even after multiple laundry cycles. No cracking and the puff still looks and feels great.
EV Puff
After just a couple of washes, the EV Puff from Expressions has a little crack on the side. Since it didn’t hold up I’ve removed it from my list of brands I’d recommend.
WALAKut and Craft Pro
I didn’t like these when I pressed them. They laundered fine but I didn’t like them before they were washed so I still wouldn’t recommend them.
Superpuff
The Superpuff was rough when I initially pressed it and it doesn’t look great after washing.
Sparkleberry
The Sparkleberry puff pressed really well and washed well. I didn’t notice any visible cracking and I am a fan.
CAD-CUT
CAD-CUT washed pretty well but there is a little bit of cracking so I eliminated that one from my list.
HTVRont and Go2 Craft
These two had already been eliminated because they didn’t puff up well and were rough on the surface. I didn’t notice any difference after washing but I am not a fan of them.
My Favorite Puff Vinyl
My two favorite puff HTV brands are Siser and Sparkleberry. They both puff up really well and feel nice and smooth on the surface. Siser puff vinyl wins for my very favorite because it’s readily available, comes in a lot of colors including metallics, and is easy to use.
Can You Use an Autopress or EasyPress with Siser Puff Vinyl?
Now that I’ve decided on the best puff vinyl I want to see how Siser puff vinyl performs with an Autopress and the EasyPress.
Step 1: Get the Right Equipment
The most important thing is a firm mat. I would not use the EasyPress mat or the mat that comes in the Autopress. I am using the Heat-resistant Mat from Artisprix.
To ensure you’re getting firm pressure across the entire design, I recommend using a press that is larger than the design you’re adding to your project.
Step 2: Preheat Shirt and Mat
I have my press set to 280 degrees for 10 seconds. Preheat the fabric to remove any moisture and wrinkles. This process will also get the mat hot which will help with the puffing process.
Step 3: Locate the Design on the Shirt
Locate the puff vinyl where you want it on your shirt and you’re ready to press.
Step 4: Press with Firm Pressure
Here is where things can get tricky using an Autopress or the EasyPress. You need to press down with really firm pressure the entire time you’re pressing.
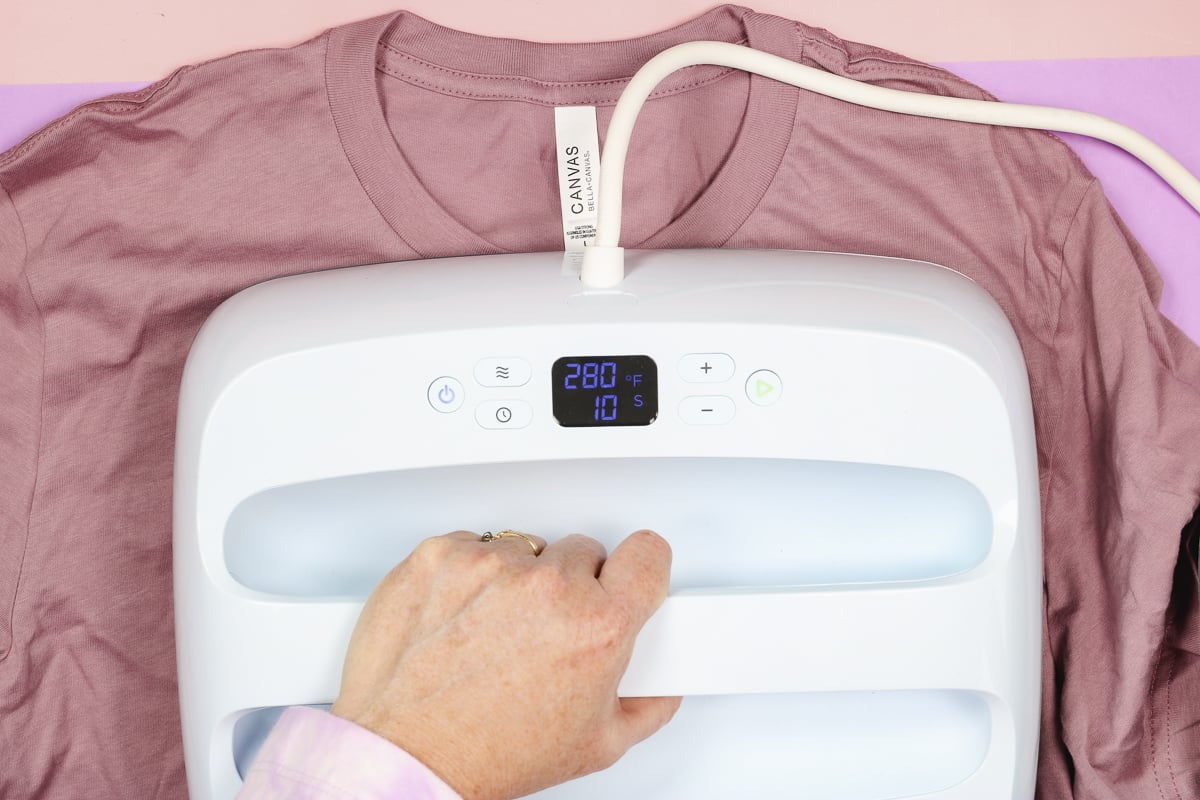
I am pressing at 280 degrees for 10 seconds as recommended by the manufacturer. I pressed down as hard as I could for the full 10 seconds. When the time is up, lift the press straight up and the carrier sheet should peel off easily.
Review and Compare the Finished Product
I chose this design because it has some intricate cuts. Puff is not recommended for intricate designs because you can lose detail as the vinyl puffs up.
The Siser Puff Vinyl performed well with the regular heat press just like it did my test.
I used the same time and temperature and then tested other settings with the Autopress and could not get a consistent result.
There were areas that puffed and were smooth and other areas that didn’t puff up and had a rough feel. Even pressing twice didn’t result in a puffed up smooth surface.
I tried the EasyPress next and unfortunately had the same results. It does puff up but I couldn’t get a consistent smooth surface.
I would not recommend using an Autopress or EasyPress for puff HTV. For the best results, choose a traditional heat press where you can adjust the pressure to a very heavy presure.
You may be able to make adjustments, figure out a way to add more presure to the EasyPress but aside from standing on it I’m not sure how I could apply more pressure. I was pressing down very hard.
If you don’t have a traditional heat press where you can apply heavy pressure, you will need to do a lot of testing to figure out if you can get the results you want.
Can Puff HTV Be Layered?
I have tried a few different ways of layering puff vinyl and have failed miserably every time. I will keep trying and if I find a method that works I will do a video on it. For now, I am sticking to one color of puff HTV and making sure my design is not too intricate.
Which Puff HTV is Best?
In my testing, Siser Puff Vinyl was the clear winner. It cut easily, was easy to weed, and the results are great when I used a traditional heat press with very firm pressure. I was also happy with how well it held up after washing.
Plus, Siser Puff vinyl is readily available and comes in a lot of color options.
Remember that the texture of the Siser Puff vinyl should be very smooth. You shouldn’t see any lines in the vinyl.
I hope I’ve answered any questions you have about using Siser Puff vinyl. If you have any additional questions leave them in the comments below.