This post and photos may contain Amazon or other affiliate links. If you purchase something through any link, I may receive a small commission at no extra charge to you. Any supplies used may be given to me free of charge, however, all projects and opinions are my own.
Have you seen the new sublimation sheets on the market? Today I’m going to teach you how to use Hydro Sublimation Sheets on tapered tumblers. Make sure you read the entire process before beginning, these sublimation sheets are unlike other sublimation products you’ve used. You’ll likely be surprised at the process.
I’m using a sublimation oven for my projects today. Learn more about sublimation ovens and which one is right for you in my comparison post.
You can watch me test these materials on a variety of different blanks to see how they perform and if they are worth it or not by pressing play on the video below.
What are Hydro Sublimation Sheets?
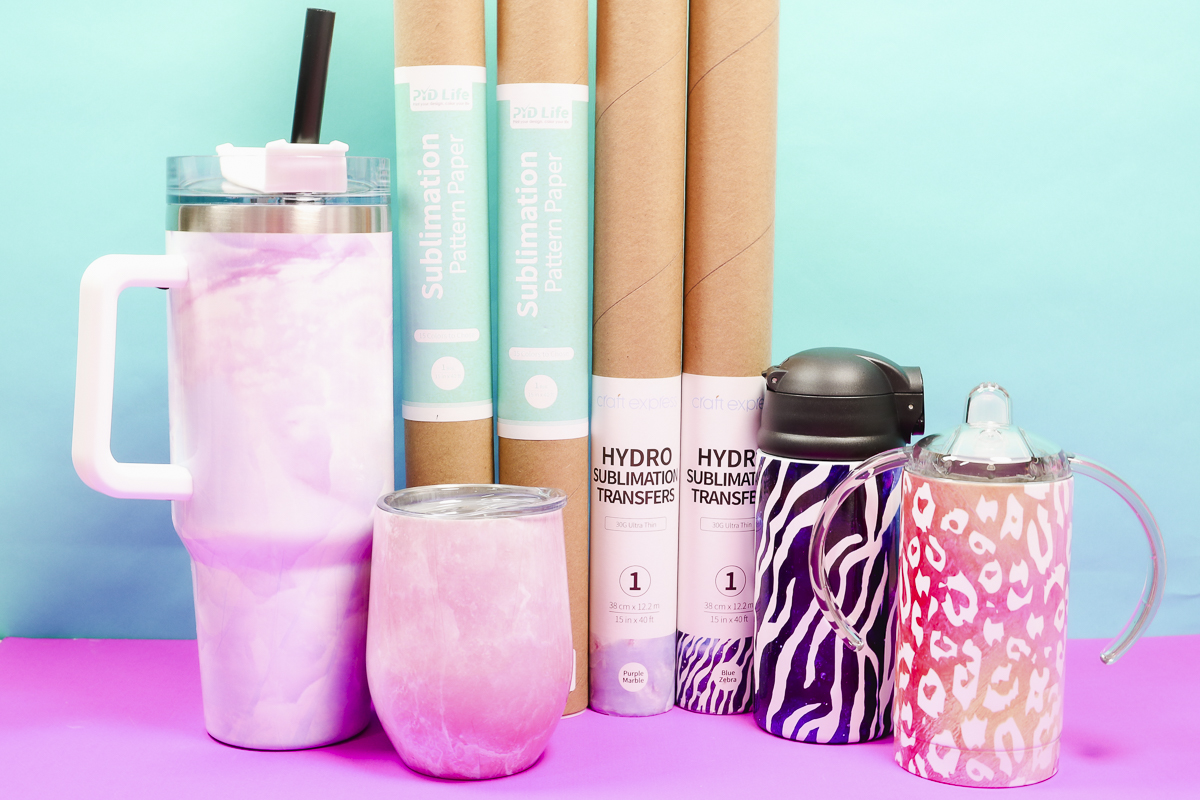
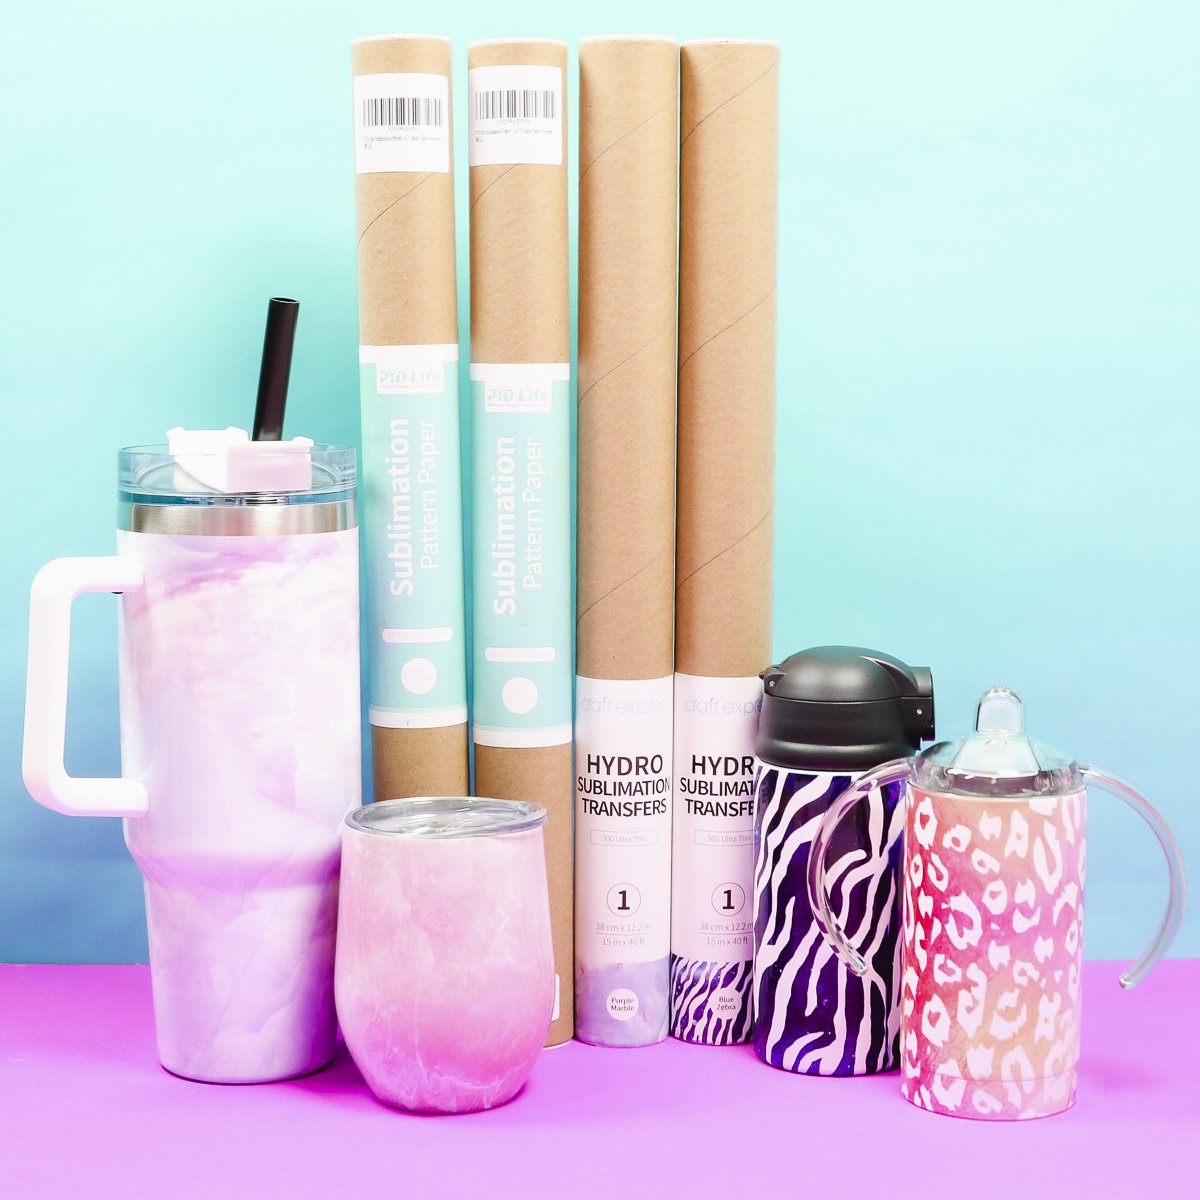
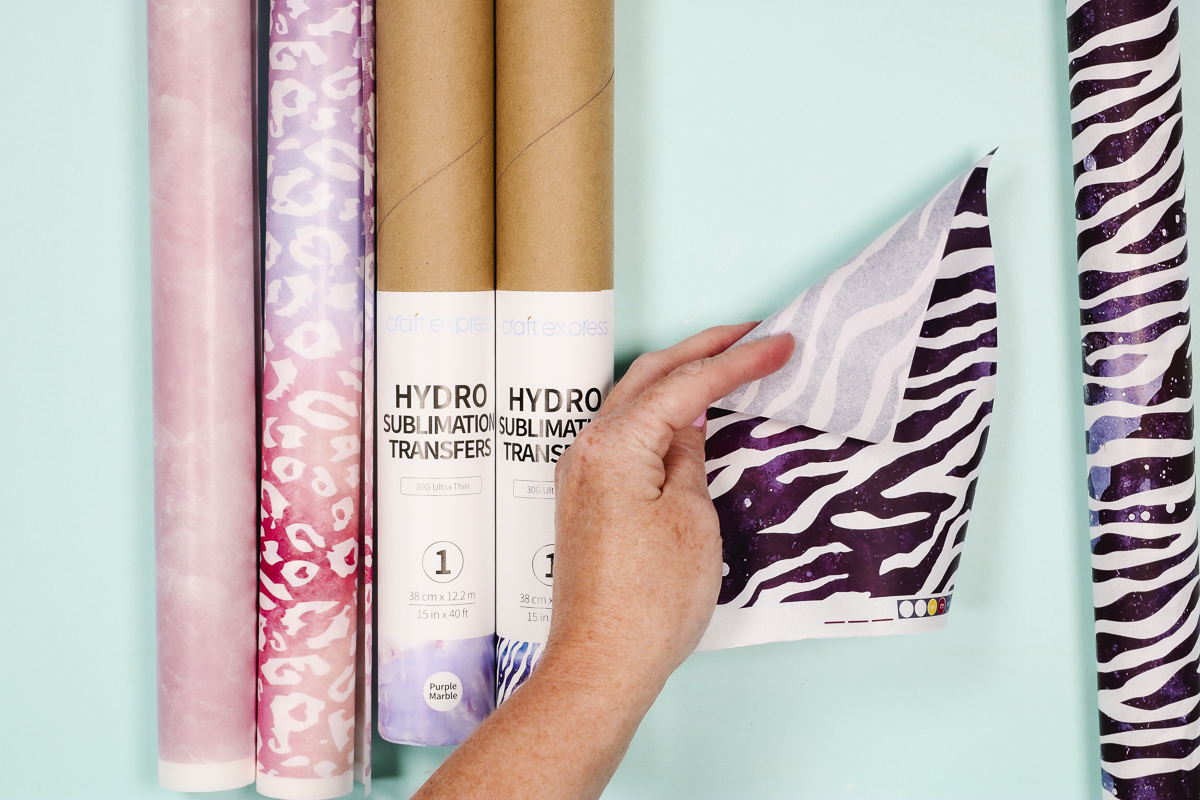
This new sublimation material is called Hydro Sublimation Sheets by Craft Express and Sublimation Pattern Paper by PYD Life. This material is similar to Infusible Ink except it is thin like tissue paper.
Because it is thin it’s supposed to be easier to use for full-wrap designs on blanks that are tapered or have curves to work around.
These materials come on a roll. The version from Craft Express is 40 feet long and 15 inches wide.
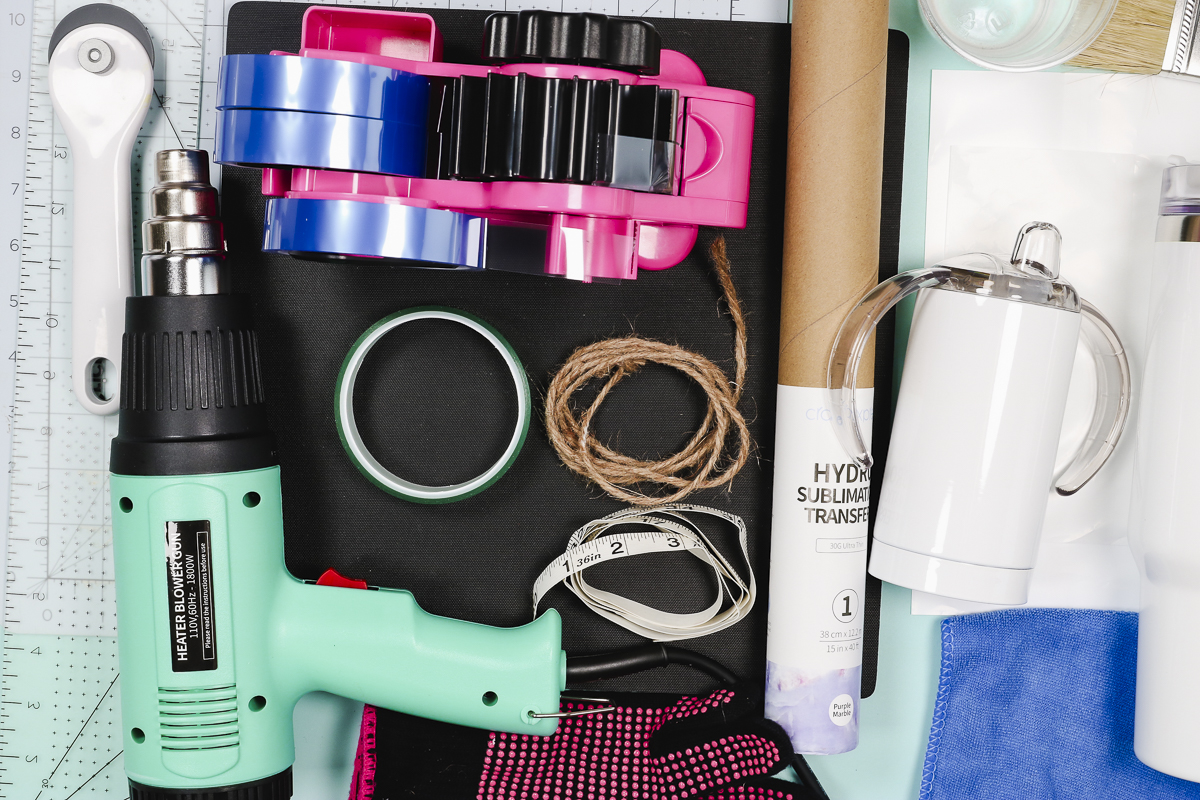
Supplies Used
How to Use Hydro Sublimation Sheets
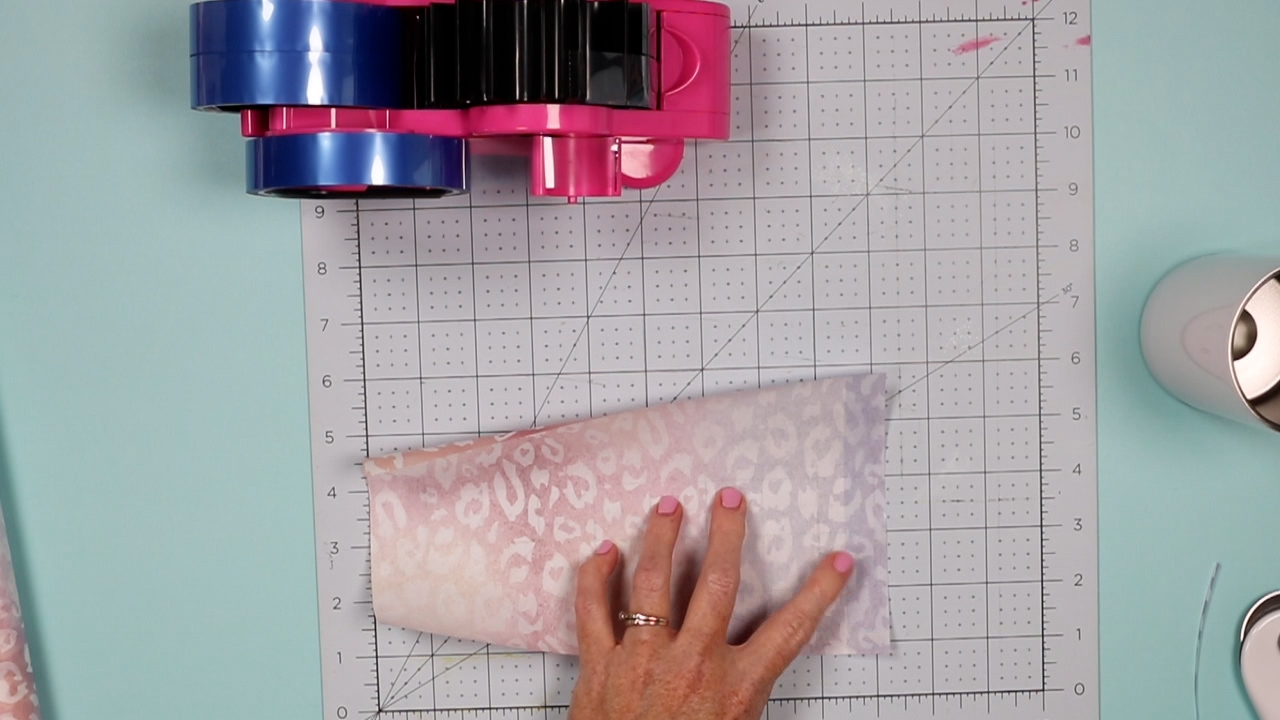
The first thing we need to do is cut the sheets to the correct size. This material is very delicate. It’s much thinner than regular paper or Infusible Ink sheets.
I like to use a rotary cutter, self-healing mat, and ruler to cut the material, so the blade doesn’t catch on the material and tear it.
Step 1: Measure the Blank
Before you measure the blank remove everything that can’t go into the oven. This includes the handle on the Stanley dupe tumbler.
You definitely don’t want to go through the process of getting the sublimation sheet located perfectly and then have something melt in the oven.
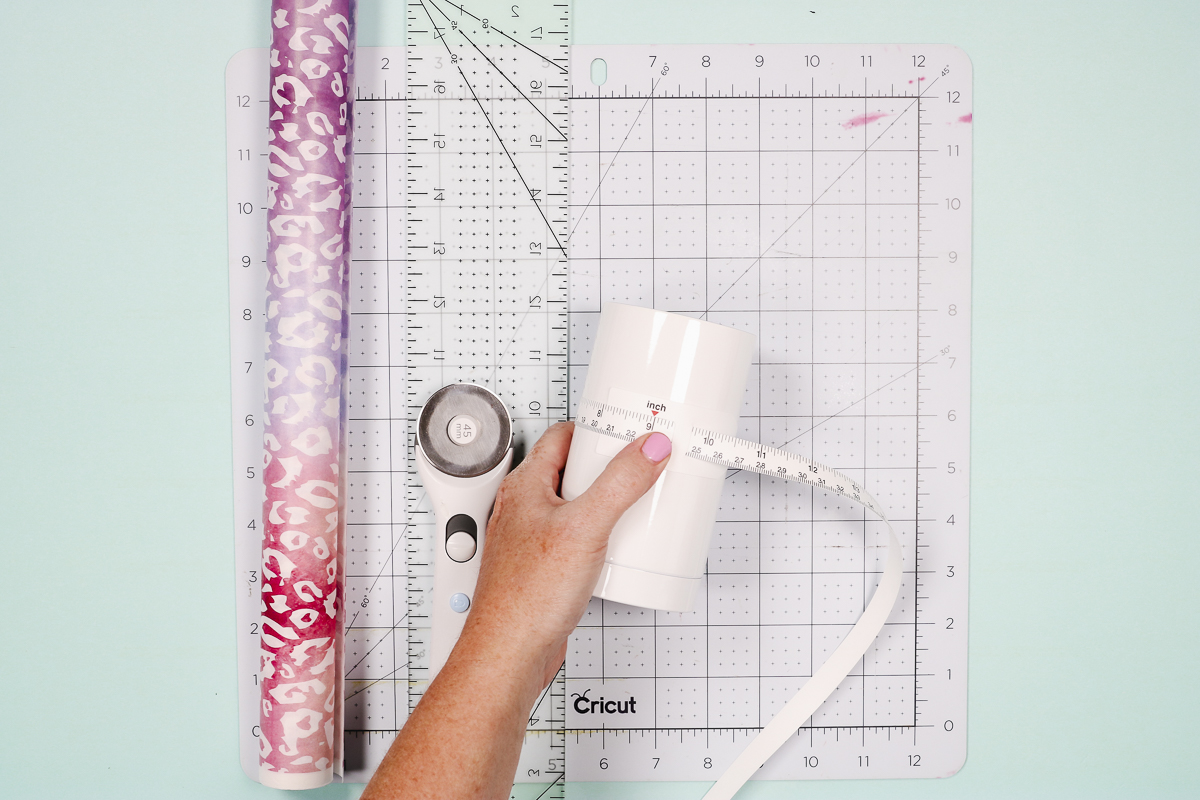
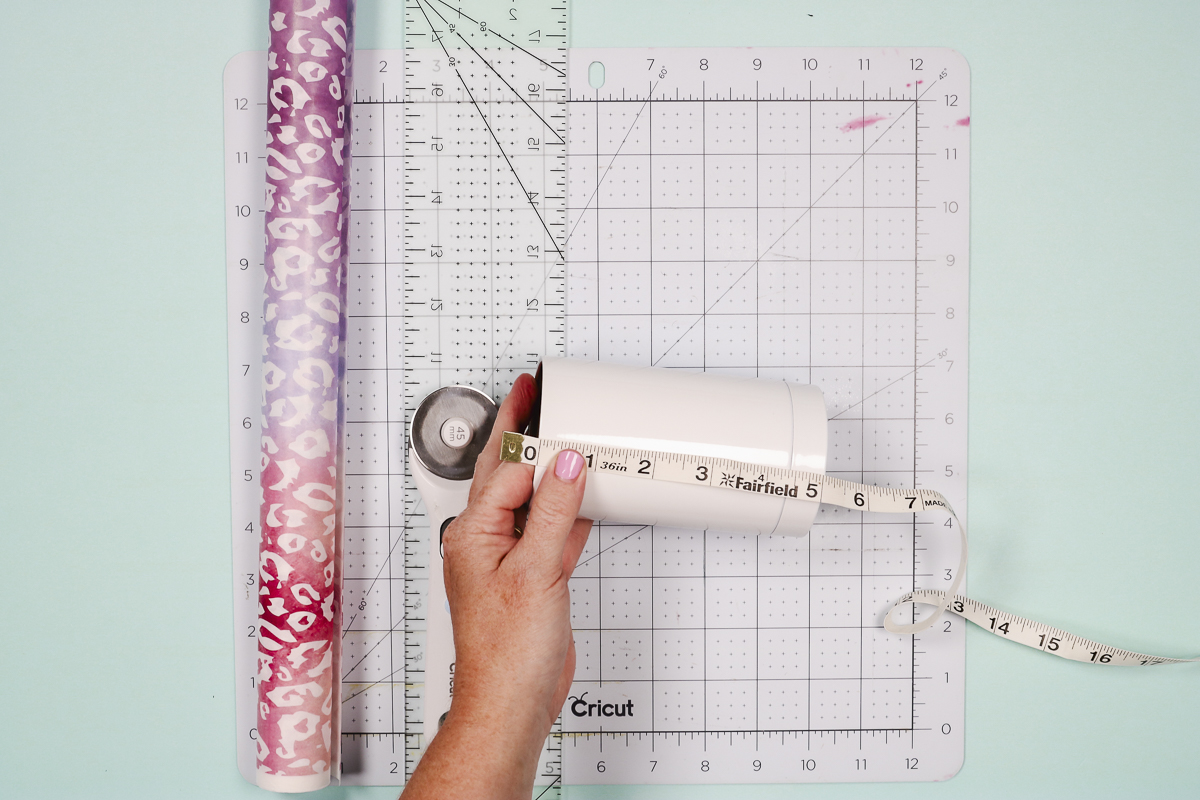
We want to cut the material to the widest part of the blank. I really like this ruler that slides around the blank. Simply pull it tight to see exactly how wide the blank is.
To measure the length of the blank, I prefer to use a flexible sewing ruler. Since the blanks I’m using today taper and bulge it’s good to have a tape measure that gets in and around all the curves.
This makes sure you get the entire length of the blank measured and don’t cut the material too short.
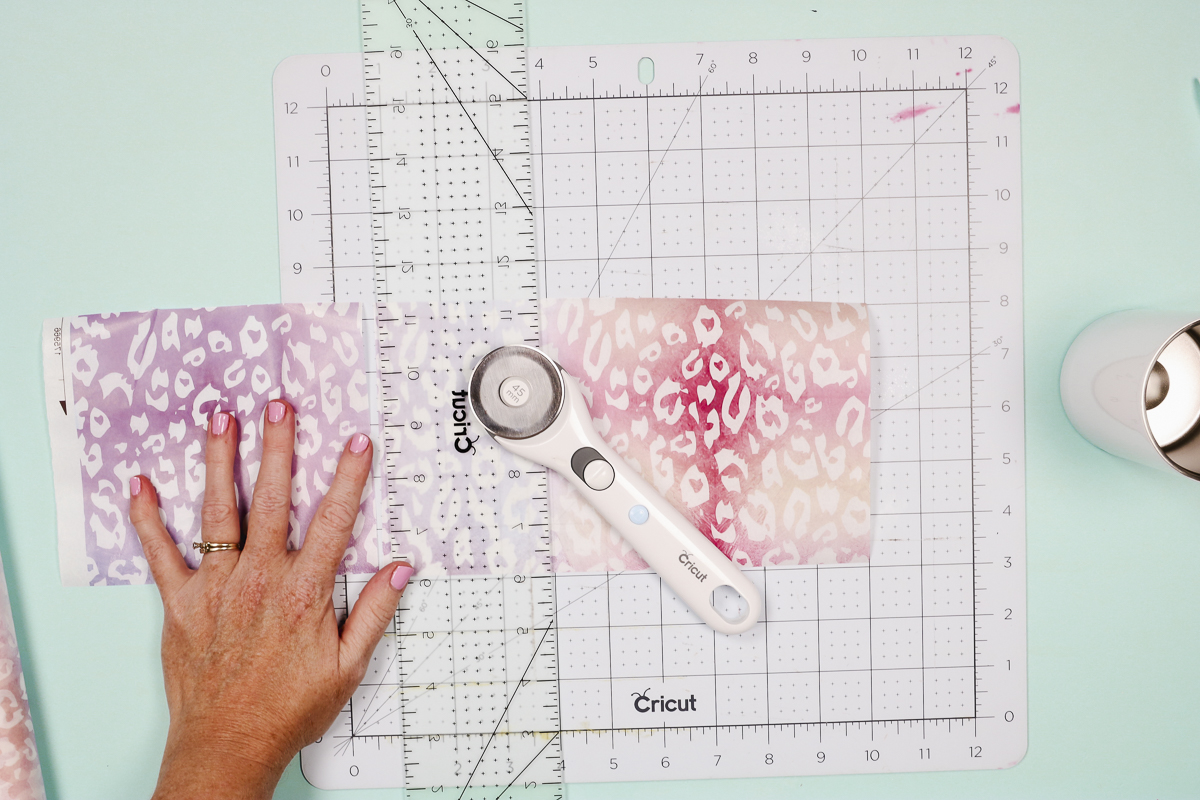
Step 2: Trim Material to Size
For my first project, I’m using the sublimation water bottle. This blank is straight which should make it the easiest to start with.
The width of the water bottle is about 9 inches, and the height is about 5 inches.
I like to cut my material slightly larger than the blank itself, so I am going to cut this about 9.25 inches by 5.25 inches.
Because the material is so thin you can see the lines from the cutting mat right through it which makes it easy to cut to the right size.
Line up the ruler and then use the rotary cutter to cut a nice straight line.
If your material has a white end, make sure you cut that off before measuring so you don’t cut it too short when that is trimmed off.
Step 3: Add Heat Resistant Tape to Hydro Sublimation Sheet
Now we are to the portion of this sublimation project where everything I’ve told you before about sublimation and moisture goes right out the window.
With all these materials, there is a right side and a wrong side. You can see the pattern through both sides of the material. The brighter side is the side you want against the sublimation blank, the dull side will face out.
This is a trick I use when I am doing full-wrap designs with regular sublimation prints. On the back side of one edge of the print, add a piece of heat-resistant tape right along the edge. This will allow you to overlap the print without having the sublimation ink bleed through.
Step 4: Clean Sublimation Blank
Next, we need to make sure the sublimation blank is clean. I like to use a lint-free cloth and some rubbing alcohol to make sure all dirt and other debris are removed before adding the print.
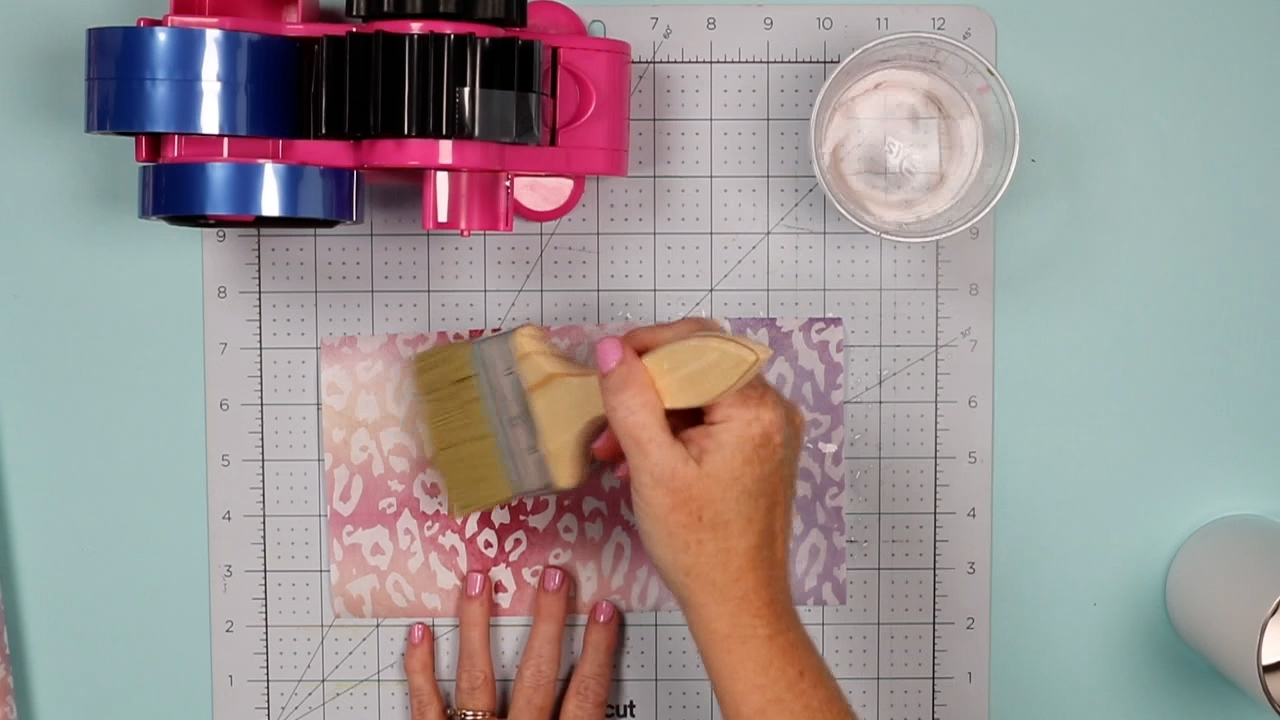
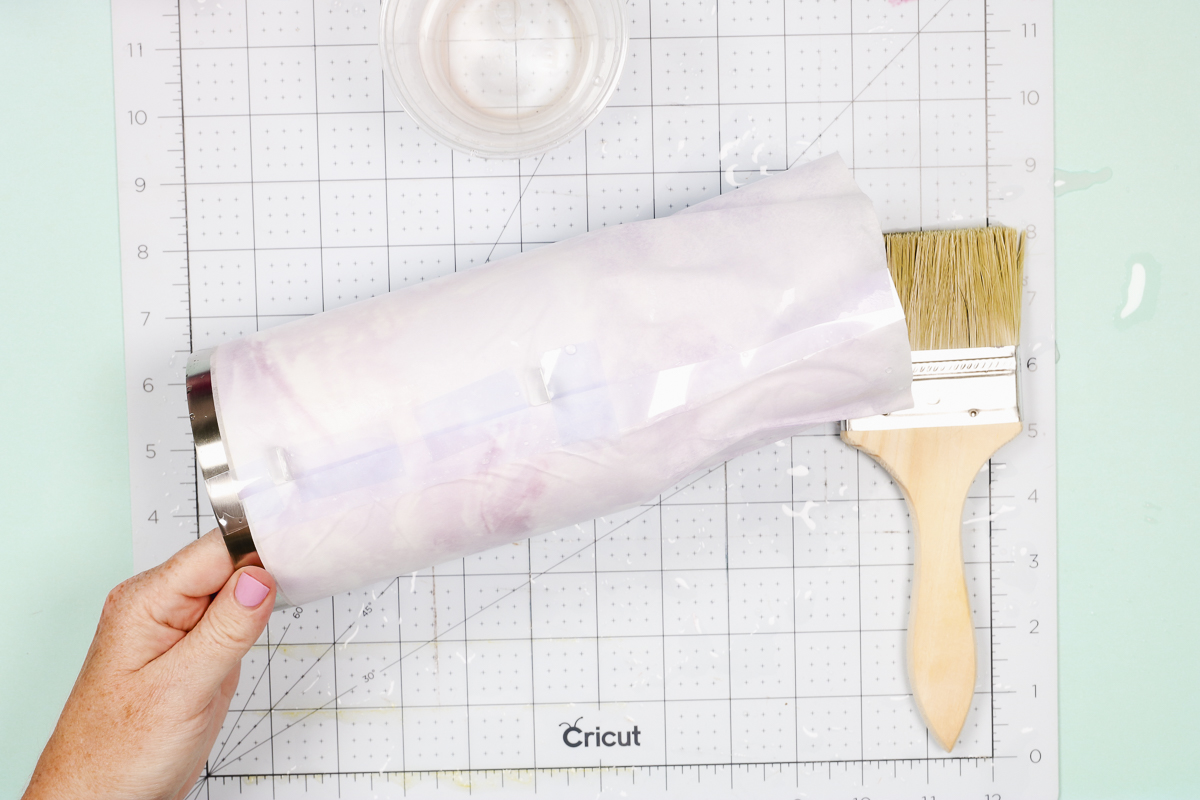
Step 5: Add Water to Hydro Sublimation Sheets
Lay the Hydro Sublimation sheet flat on your surface and using a paint brush apply water to the entire surface. This material is called Hydro sublimation transfers for a reason, they use water to help form the sheet to the blank.
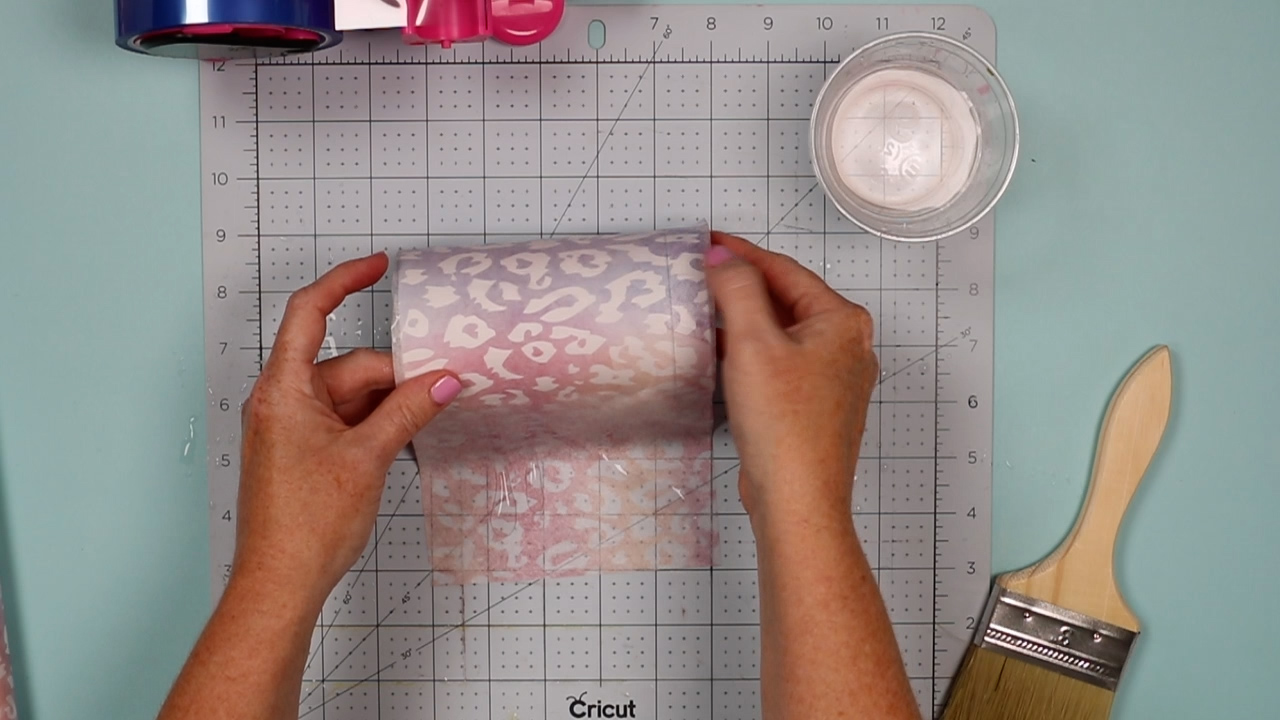
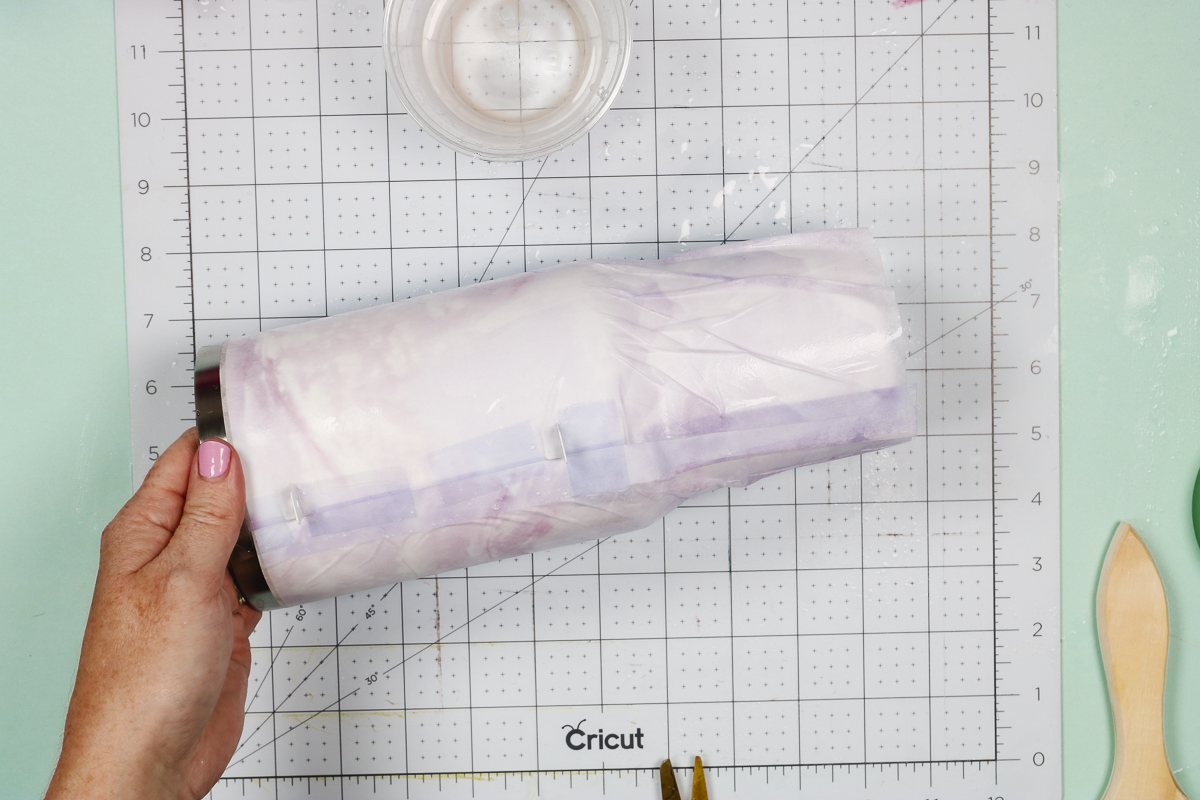
Step 6: Apply Hydro Sublimation Sheet to Tumbler
Starting with the edge of the sublimation sheet that has the tape applied line up the sheet with the widest part of the blank. This material is delicate so be gentle, but we want to pull the material and roll the tumbler to apply the sublimation sheet without any wrinkles.
If you’re having any issue with the material not lying flat, you can add more water to the back to make it more pliable. Continue to straighten and adjust the material as needed until it is located perfectly all the way around the blank.
Step 7: Use Water to Remove Wrinkles
If you notice wrinkles as you work around your blank, use water and a paintbrush to smooth them out. This is especially important if your blank has any grooves or tapers.

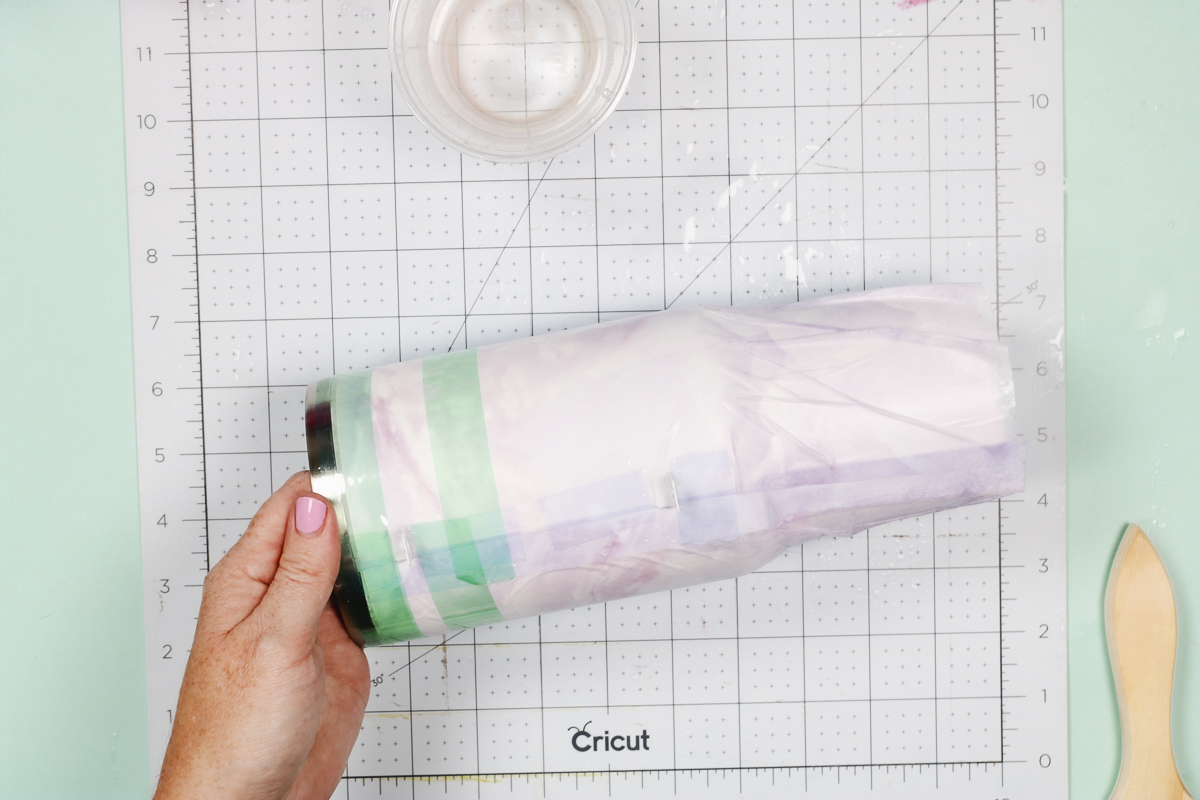
Step 8: Tape Hydro Sublimation Sheet into Place
I found that the heat-resistant tape doesn’t stick well to the wet sublimation sheet, but it does stick well to itself. Add a piece of tape to the seam at both the top and bottom and wrap it over the edge to stick it to the tumbler.
From here I use a stretchy heat-resistant tape to wrap all the way around the blank at the top and the bottom. Start by sticking the tape to the piece we added already and then pull the tape tight as you wrap it all the way around and stick it back to itself on the end.

Repeat this process for the other end of the blank.
If your blank begins to taper or has a step like this little sippy cup has, wrap the whole area with tape to ensure the Hydro Sublimation Sheet is fully in contact with the blank.
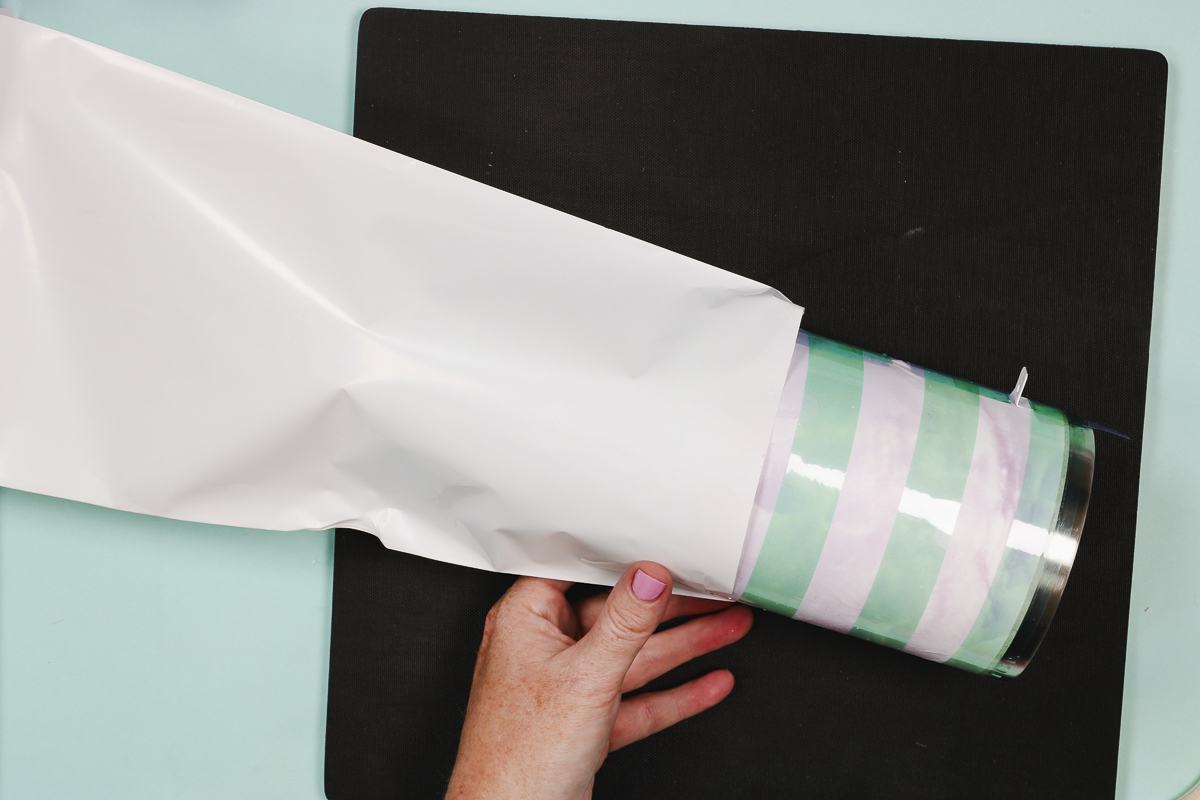
Step 9: Add Sublimation Shrink Sleeve
Because we are using a sublimation oven for this project, we will need to use a sublimation shrink sleeve.
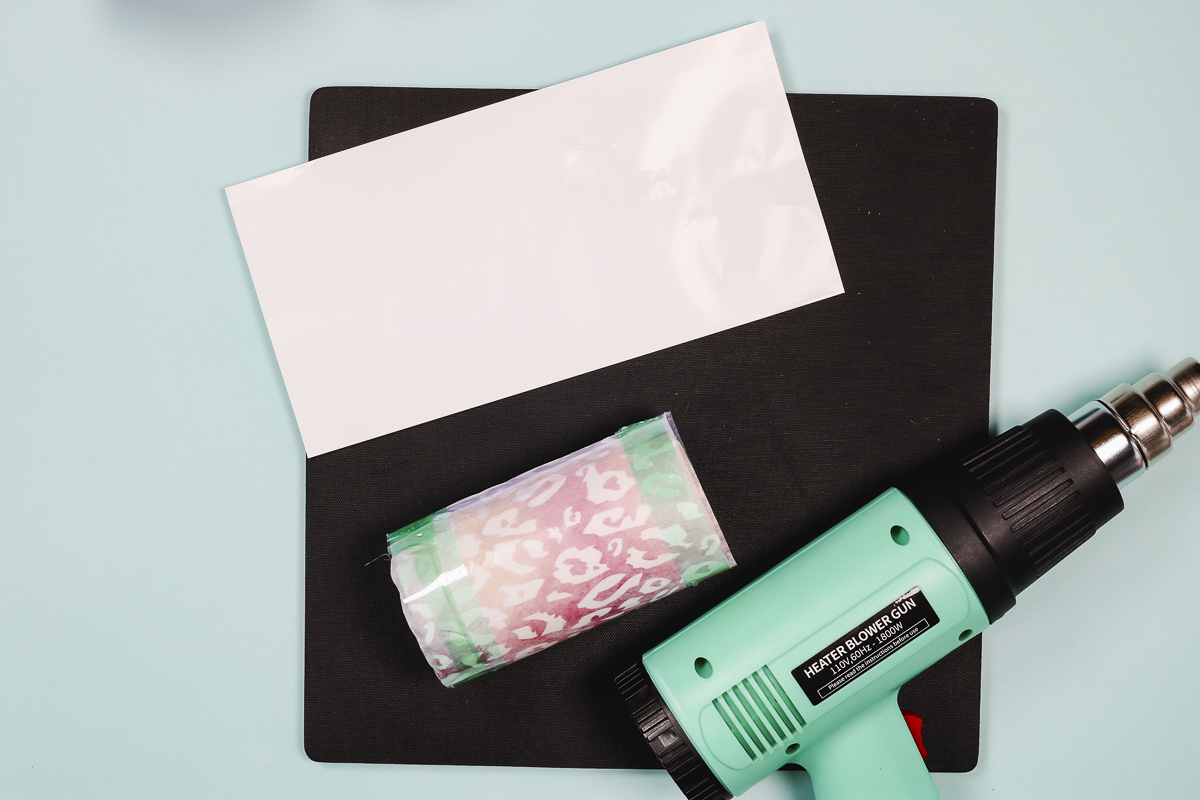
Yes, the Hydro Sublimation Sheet is still wet. We need to be careful when adding it to the shrink sleeve because it is fairly delicate when it’s wet and we don’t want to waste all our hard work.
When the blank is inside use a heat gun to shrink the sleeve until everything shrinks tight and there are no bubbles or wrinkles.
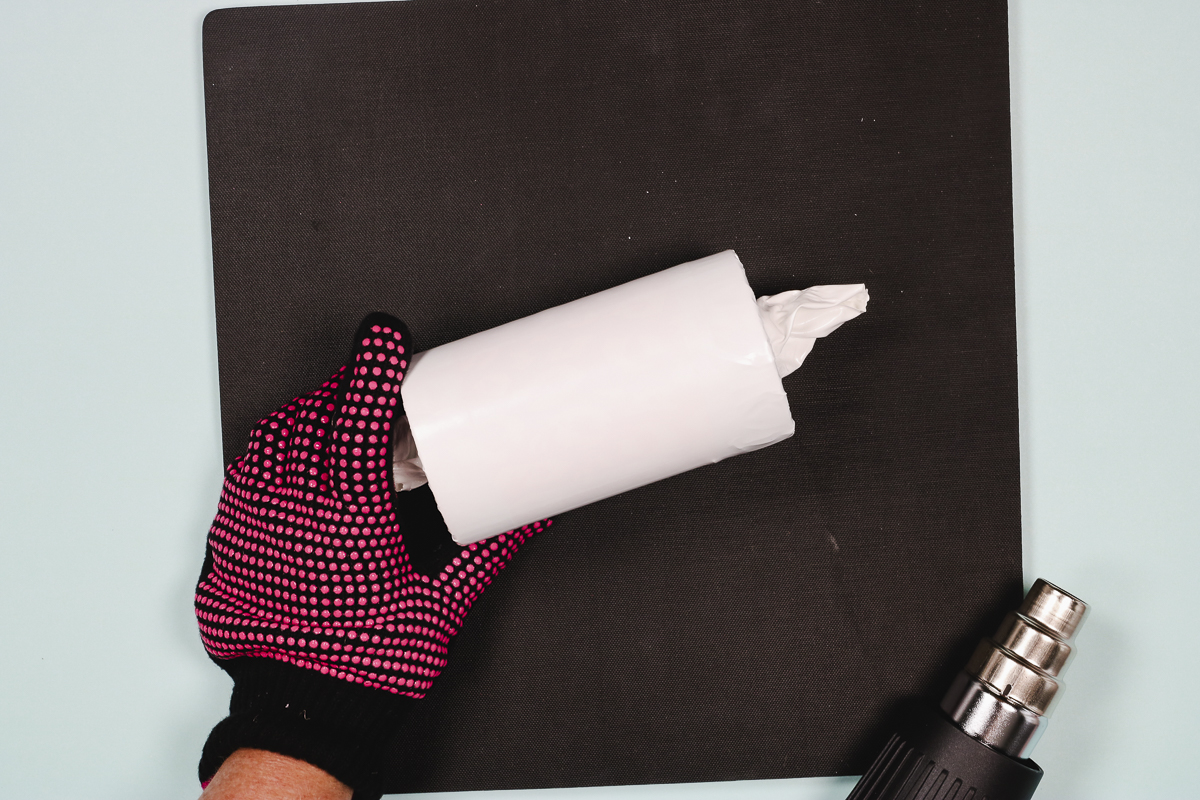
Step 10: Bake in Oven
The time and temperature for Hydro sublimation sheets are the same as it is for regular sublimation. Find the time and temperature for whatever sublimation blank you’re using and bake for the full time.
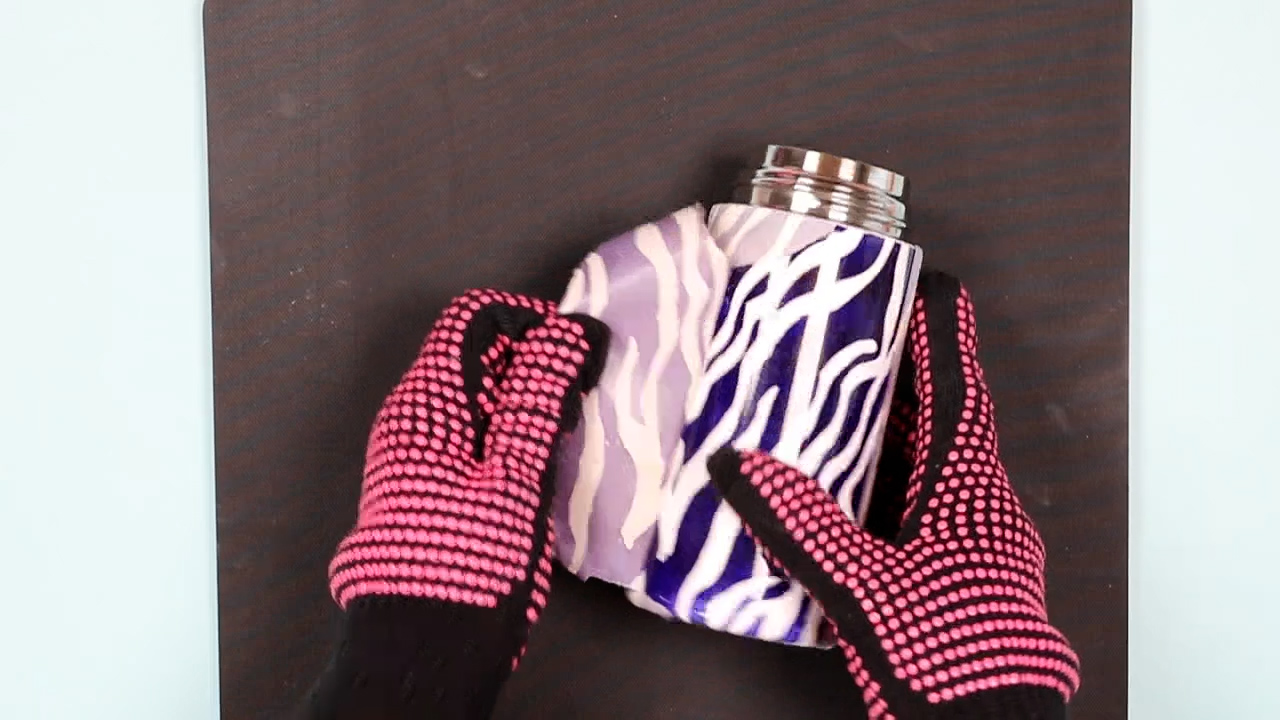
Step 11: Remove Hydro Sublimation Sheets
Once the time is up, use your heat-resistant gloves to remove the blank and then remove the shrink wrap while it’s hot so it removes more easily. Remove the tape and the sublimation sheet and your tumbler is finished.
When it’s completely cool, you can add back the lid, straw, handle, or anything you removed before adding the sublimation sheet.
Tips for Using on Tapered Tumblers
Working with tapers can get a bit tricky! Try these tips for best results.
Tip #1: Measure and Cut for the Widest Portion
For blanks like this Stanley 40oz tumbler dupe, we want to begin by measuring the widest portion.
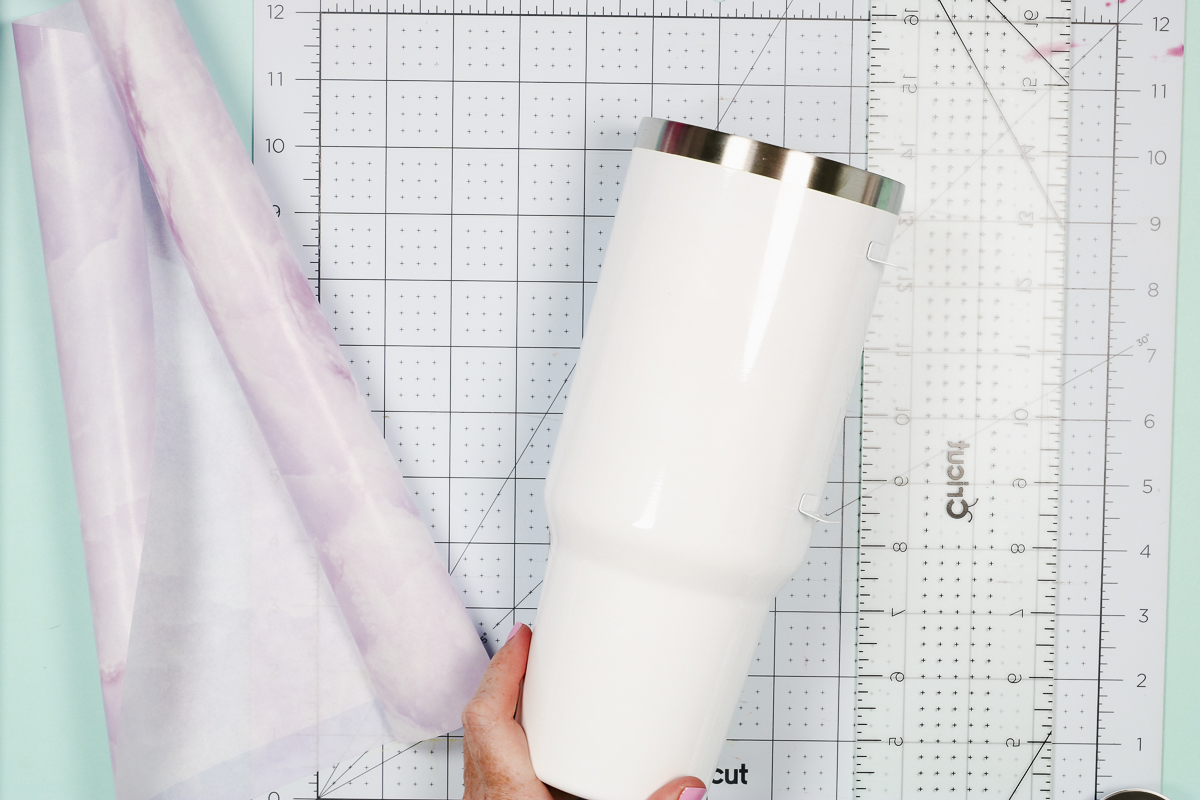
The process is the same, we want to clean the entire blank and then cut a piece of the Hydro Sublimation Sheets to fit the width and length of the entire tumbler.
Tip #2: Wrap the Straight Area First
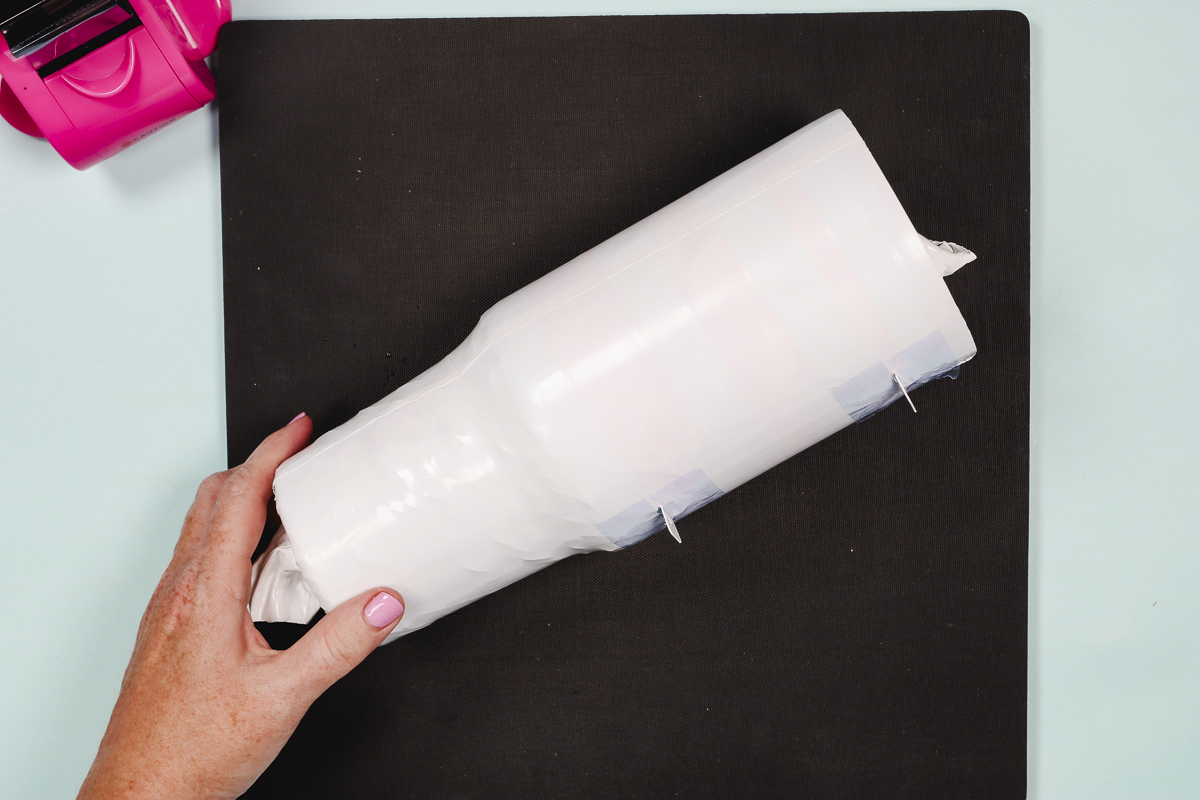
Prepare the sheet like we did the others and focus on the top. I like to start by pressing one edge right up against the handle area of the blank.
I’m going to smooth out the entire top portion. Tape the sublimation sheet into place and then move down to the bottom portion of the tumbler.
Tip #3: Use More Water on Tapered Areas
Having the top of the tumbler straight and secured does make wrapping the bottom a little easier. I found there is some trial and error in getting the tapered portion just right.
I like to use the paintbrush and water to really get the bottom portion wet until it begins to form around the curves. The wetter the paper is, the easier it is to form it around areas that curve.
There will be wrinkles. Because the material is wider than the surface that material has to go somewhere. You will see the wrinkles in the finished product. This is more noticeable in some designs than others.
Tip #4: Use Heat Tape to Secure Sublimation Sheets
I am going to tape the top portion the same way I did the other tumbler. I am adding additional rows of tape above and below where the brackets for the handles are.
For the bottom, tapered portion I am going to tape the entire area. Leave the tape on the roll and start it at a slight angle so you wrap it all the way down pulling tightly as you go.
This is why I like the stretchy tape, it really allows me to secure the sublimation sheet tightly to the blank.
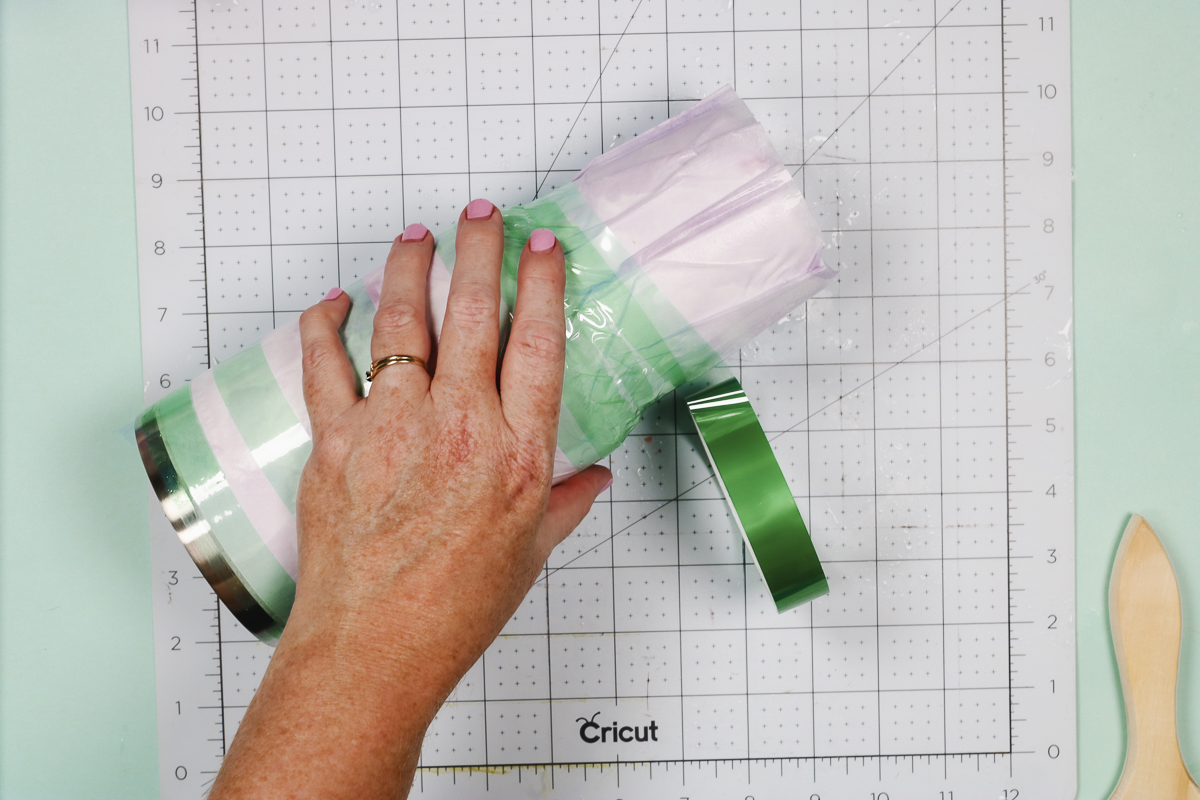
Once it’s all taped into place use your hands to really squeeze the sheet into place.
I’ve found that the top of these tumblers do well almost every time but the bottom takes some practice to get it right.
Now that the hydro sublimation sheet is in place we’ll add the shrink wrap the same way we did the other one making sure to cut slits for the brackets and taping the sleeve back into place.
Tip #5: Add Twine as Additional Pressure
I added twine to my supply list and it’s an important step for blanks like this one. After adding the shrink sleeve and heating it to shrink it into place, it’s time to add the twine.
I am using regular twine and I am wrapping it multiple times very tightly right in the curve of the tumbler.
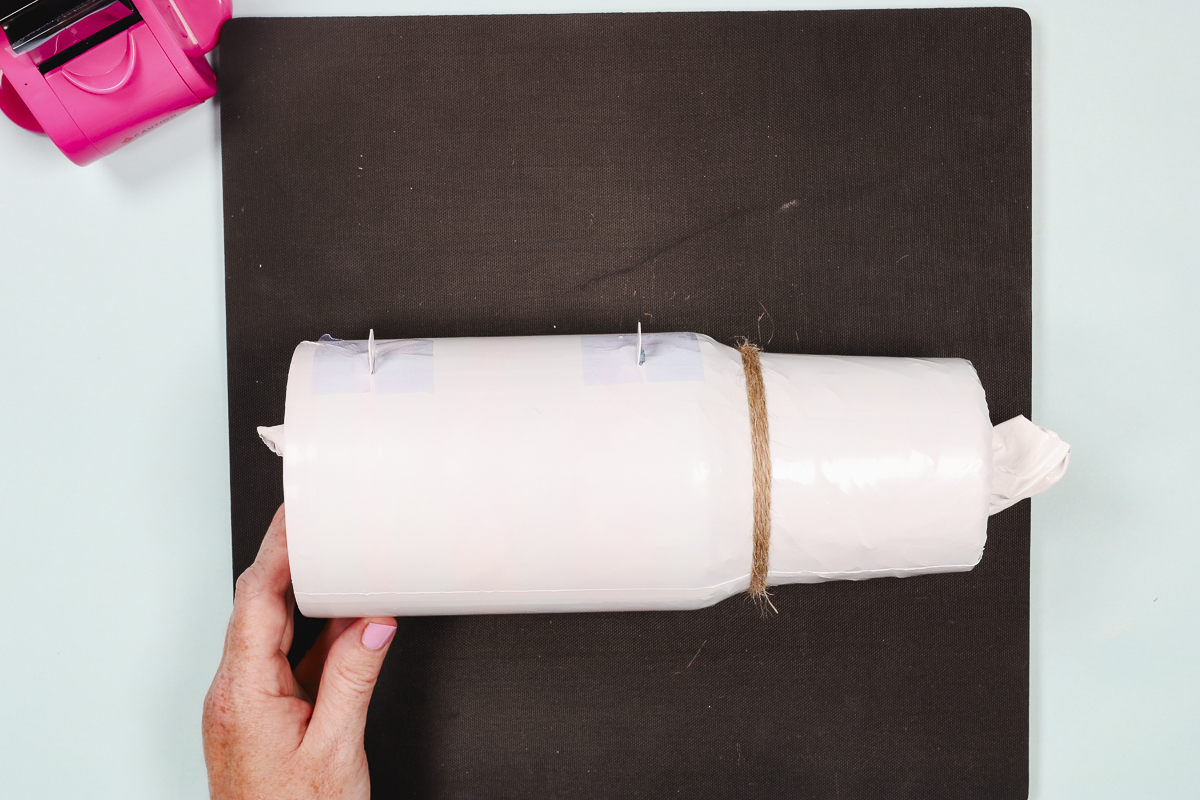
Using twine really helps get the best results. I wrapped it about three times and then tied it very tightly. Trim the ends and then add to the sublimation oven for the time and temp for your specific blank.
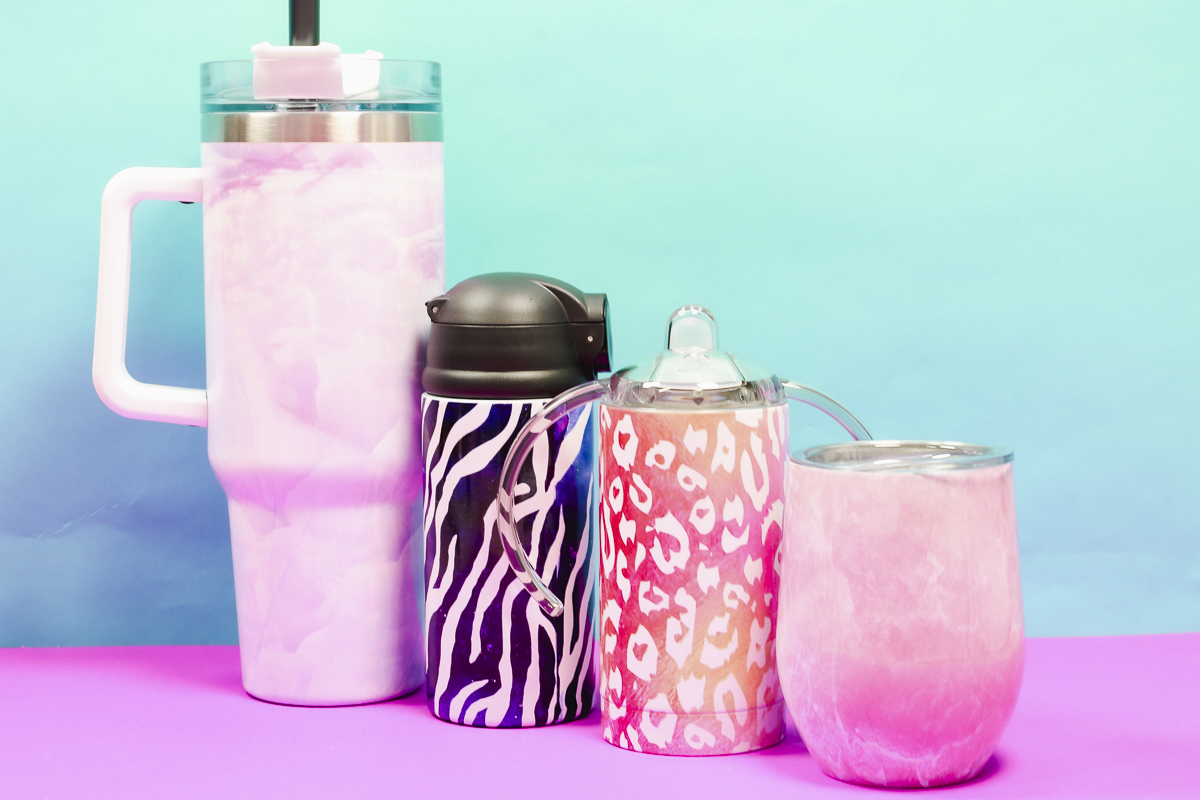
Hydro Sublimation Sheets vs. Sublimation Pattern Paper
Now that I’ve tested both materials, we can look at both closely. I didn’t notice any difference in how either the Craft Express or PYD Life versions performed. I think it’ll come down to which one has the pattern you want to use for your project.
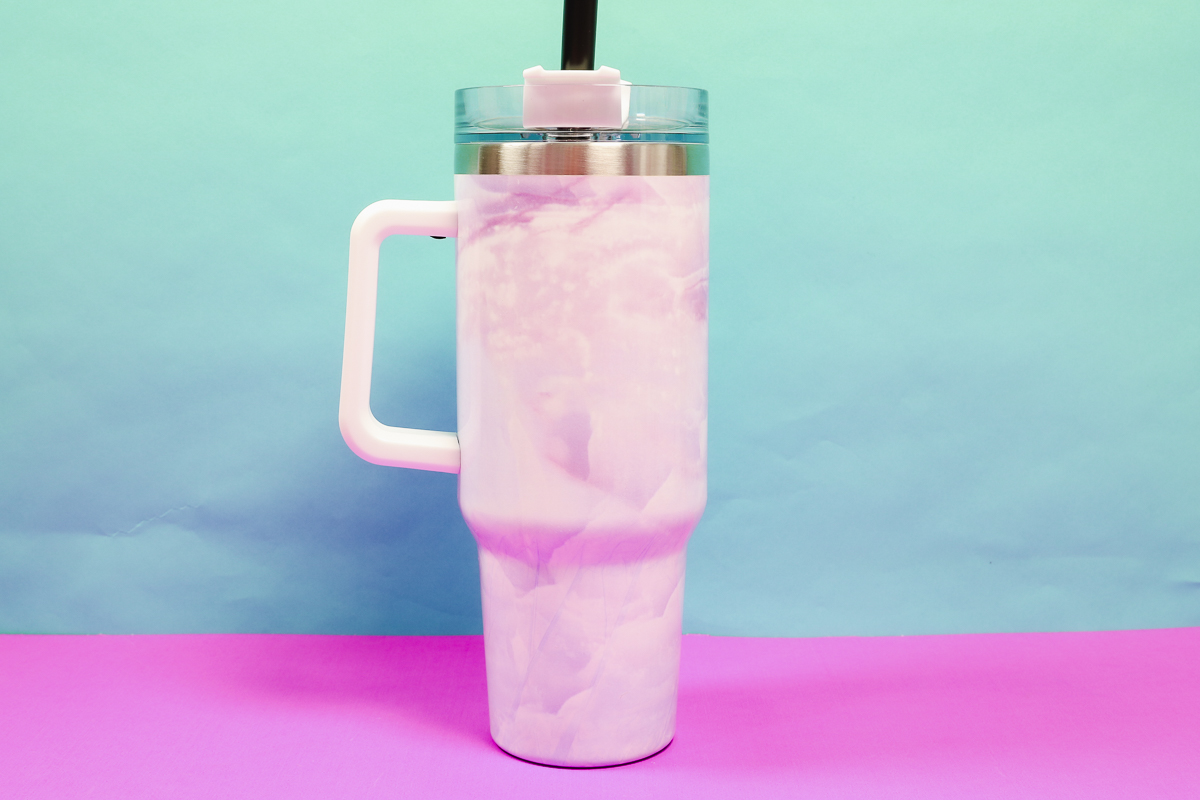
Craft Express Purple Marble
Here you can see the Craft Express Sublimation Pattern Paper Purple Marble. You can see the seam under the handle and down in the bottom where the paper was wrinkled you can see the wrinkles, but the marble print helps hide the wrinkles well.
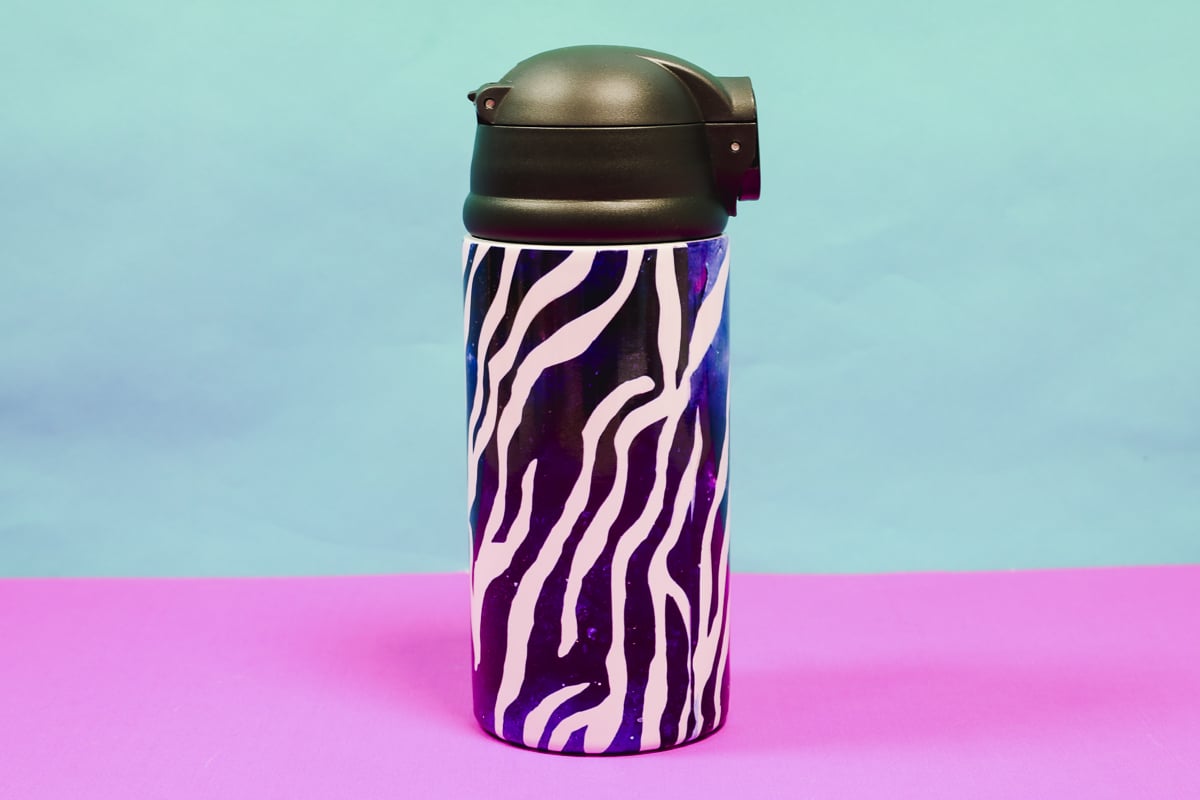
Craft Express Blue Zebra
This design turned out beautifully. The pattern lines up really well and the seam is essentially invisible. Because this blank is pretty straight there isn’t wrinkling, and this just turned out beautifully.
PYD Life Purple Leopard
On this material, the seam looks really good but because the two colors meet at the seam you can tell where the seam is.
Here at the bottom where it steps down slightly in size, the seam looks amazing. I was really impressed with the way this one turned out.

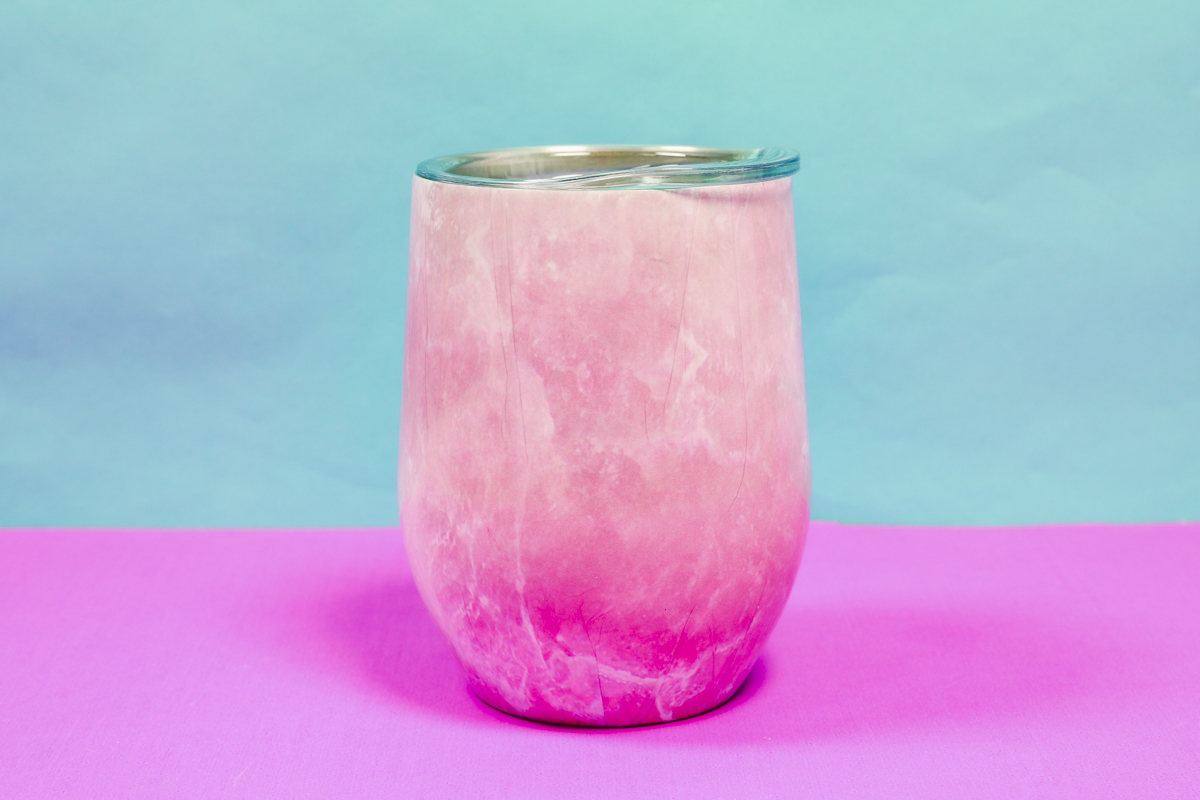
PYD Life Pink Marble
This design is also from PYD Life and is called Pink Marble. I wanted to test a sublimation blank with this material that didn’t have a straight side anywhere.
These wine tumblers have curves and taper in multiple places. You can see where the wrinkling is in the finished product.
I ended up taping the entire surface of this tumbler with the stretchy green tape because it wasn’t straight anywhere.
Hydro Sublimation Sheets FAQ
Let’s answer some of the questions I’ve seen come up about this new product.
Can I Cut Hydro Sublimation Sheets with My Cricut?
I don’t think cutting this material would a Cricut would work very well. It is really thin so it can’t be cut like Infusible Ink can. If you want to add a name or something to your project, I would use heat-resistant vinyl and put it on the blank before wrapping it with the hydro sublimation sheets.
Then you would add the shrink wrap and bake in the oven for the full time. Remove the blank from the oven and peel back the shrink sleeve, sublimation sheet, and vinyl to reveal a white area that the vinyl had covered up.
Why Do I Need to Use Twine?
I know people are going to wonder why they need to use twine.
Here you can see a tumbler I made without the twine. You can see here where the wide portion tapers to the narrow area that it did not sublimate well at all.
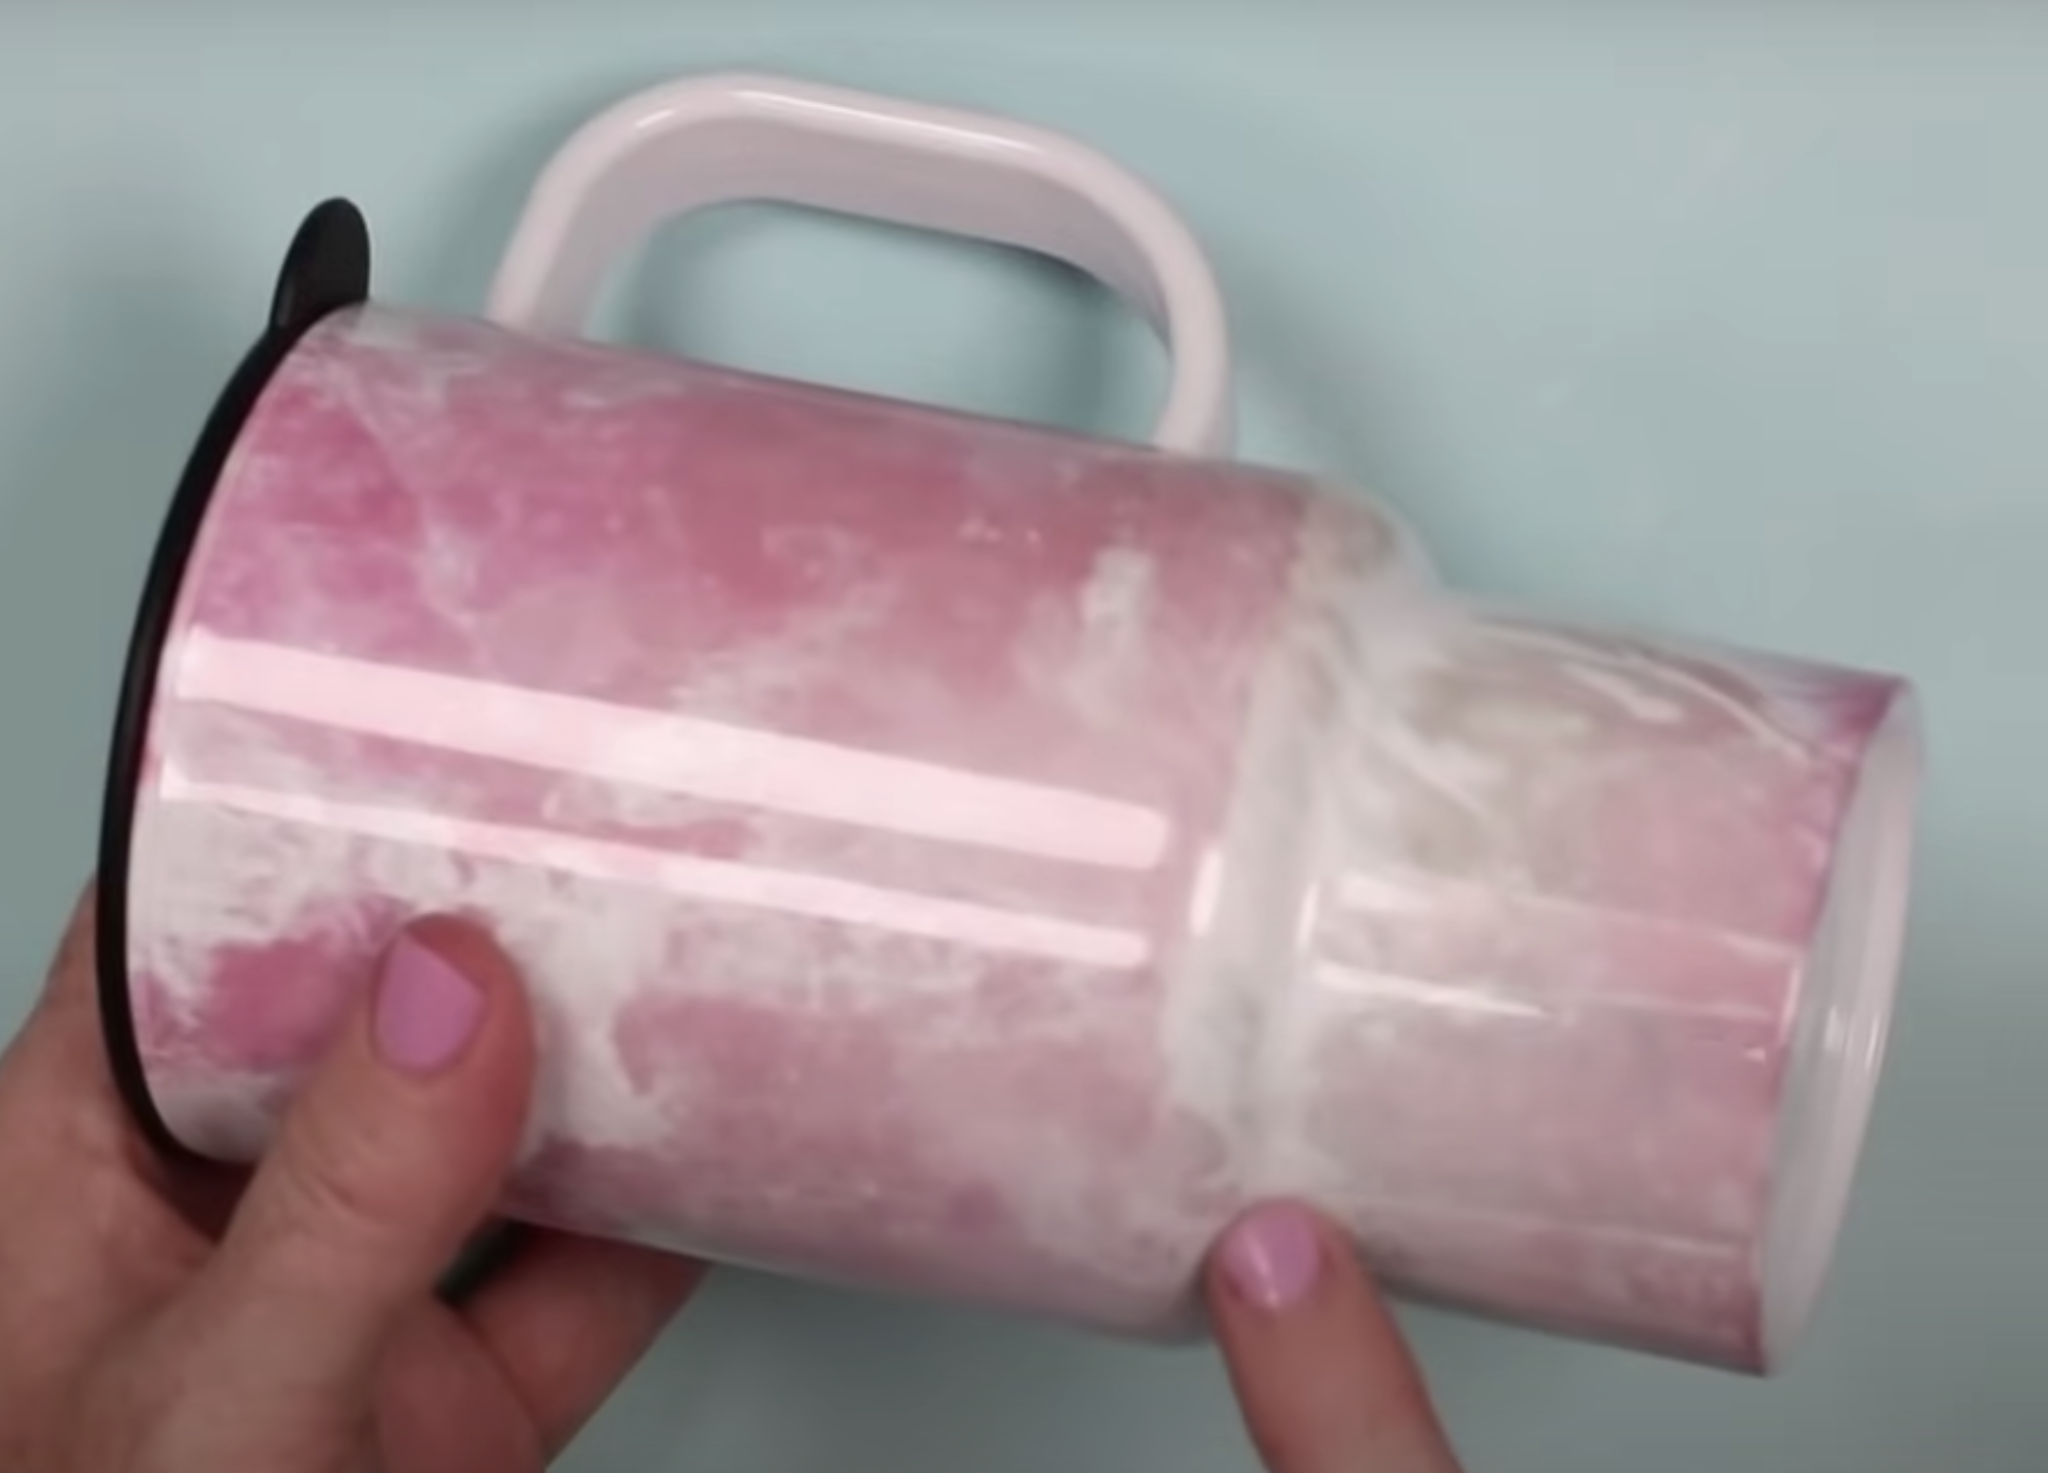
I tested a few different options and adding the twine definitely made the biggest difference. Make sure you tie it really tight to get the best sublimation possible in that area.
How Do I Prevent Wrinkles?
The best part of these Hydro Sublimation Sheets is that the bottoms look really good. Anything that has a straight side looks amazing. You’ll love how easy it is to do a full wrap using these materials.
If your sublimation blank has curves or tapers, you will have wrinkles. I haven’t found any way around those. Depending on the pattern you choose the wrinkles can hardly be seen. On some, you can barely see any wrinkles at all.
If you are not a fan of the wrinkles on your tumblers, these may not be the right products for you.
Can I Only Use this on Hard Surfaces?
I tested this on different hard surfaces but in my research, I did see where someone used it on different blanks, including shirts.
I don’t think you need to wet the sheets if you’re using them on different materials like fabric. You would need to cut out your design using scissors and then would need to make sure you cover it with protective paper like you do other sublimation designs.
I do think unless you want a square background or something you may be better off using a sublimation print or Infusible Ink.
Hydro Sublimation Sheets Review
Now that you’ve seen the results on different blanks, let’s talk about if it’s worth it or not.
I know there are some people who can do a full wrap on curved and tapered blanks and I think it is an art. It is not something I’ve been very good at.
If you’re looking for a product that makes it easier to do full wraps on blanks that aren’t perfectly straight, you should give this one a try. If you’re using tapered blanks, you will need to be okay with a wrinkle-looking effect after it’s sublimated.
Anywhere that has straight sides turns out perfect, you could however get something similar with sublimation prints or Infusible Ink.
I also really like how well this material did on the sippy cup where the top and the bottom meet. With a regular sublimation paper, there would have likely been some white around the little indent. With the hydro sublimation sheets, I was able to push the material into that indention and get a perfect-looking tumbler.
I hope I’ve answered any questions you have about Hydro Sublimation Sheets. If you have any additional questions, feel free to leave them in the comments and I’ll be happy to answer them for you.