This post and photos may contain Amazon or other affiliate links. If you purchase something through any link, I may receive a small commission at no extra charge to you. Any supplies used may be given to me free of charge, however, all projects and opinions are my own.
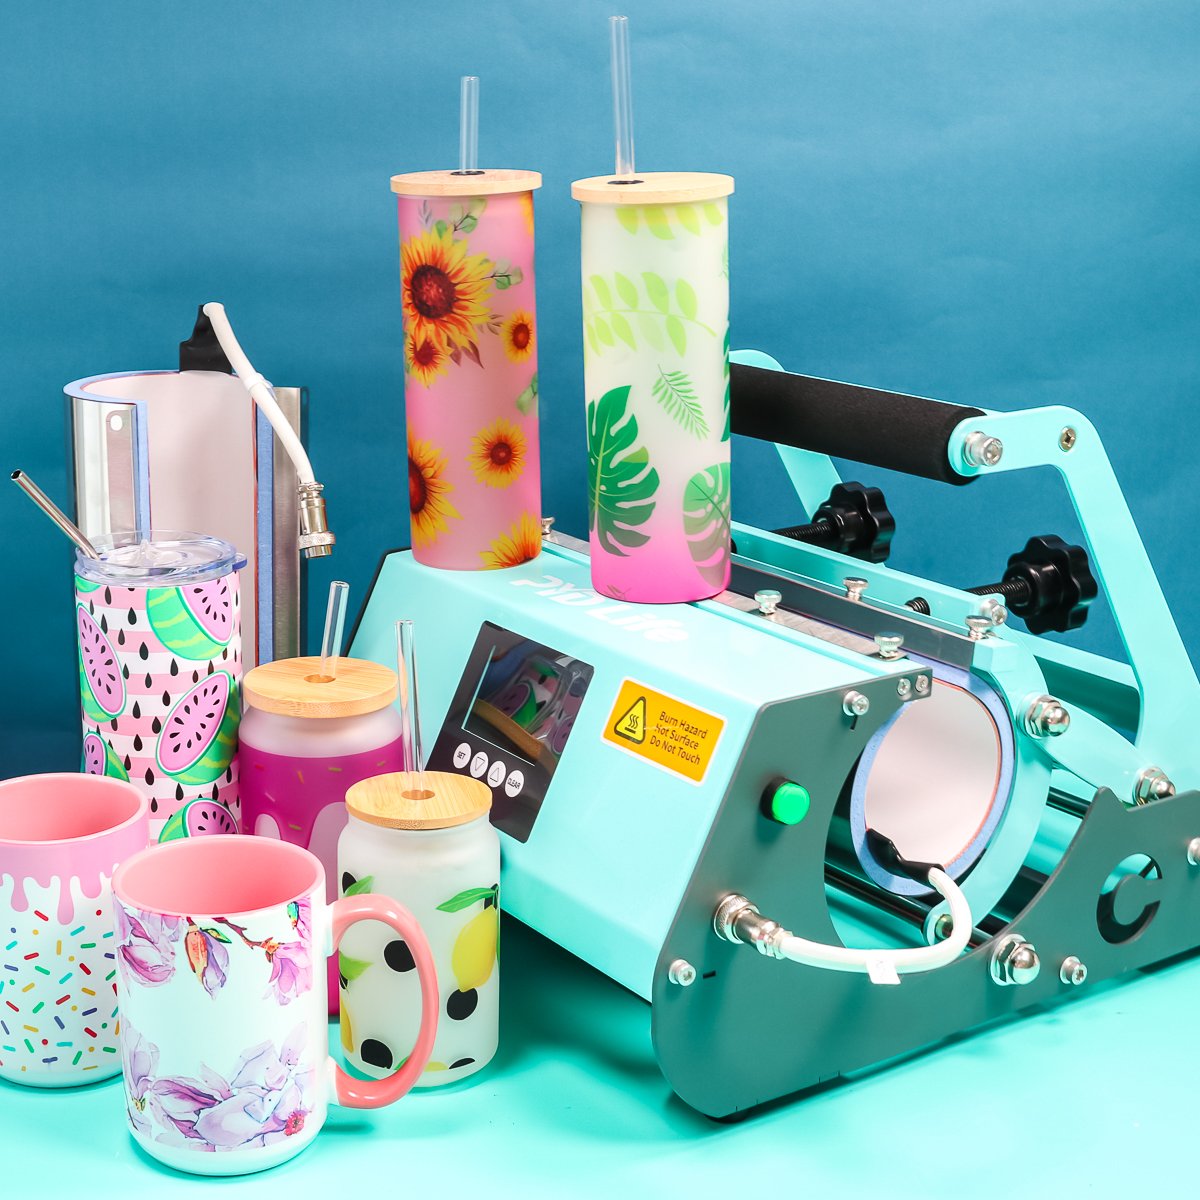
Are you ready to learn all about the 2 in 1 Tumbler Press from PYD Life? As new types of tumblers are gaining popularity I wanted to review a tumbler press that allowed for different-sized tumblers. Keep reading to learn all about the PYD Life 2 in 1 Tumbler Press!
Looking for my post about the one-size PYD Life Tumbler Press? Check it out here.
What is the 2 in 1 Tumbler Press from PYD Life?
The 2 in 1 Tumbler Press from PYD Life is just what it says, a 2 in 1 tumbler press. That means it comes with two different-sized coils. The interchangeable coils allow you to customize not only different sizes of tumblers, but also mugs, and any other type of blank you may have.
PYD Life has other types of tumbler presses too. They have a 9 in 1, 11 in 1, and a 7 in 1. You can find out more about each of those options on the PYD website if you’re interested in them. You can message them and they can help you find exactly what you need.
NOTE: This press was given to me free of charge, however, all projects and opinions are my own.
2 in 1 Tumbler Press Video Demo
You can actually watch me test out the 2-in-1 Tumbler Press with a variety of tumblers and mugs. Just press play on the video below to learn all about changing the coils and pressing tumblers and mugs with each coil size.
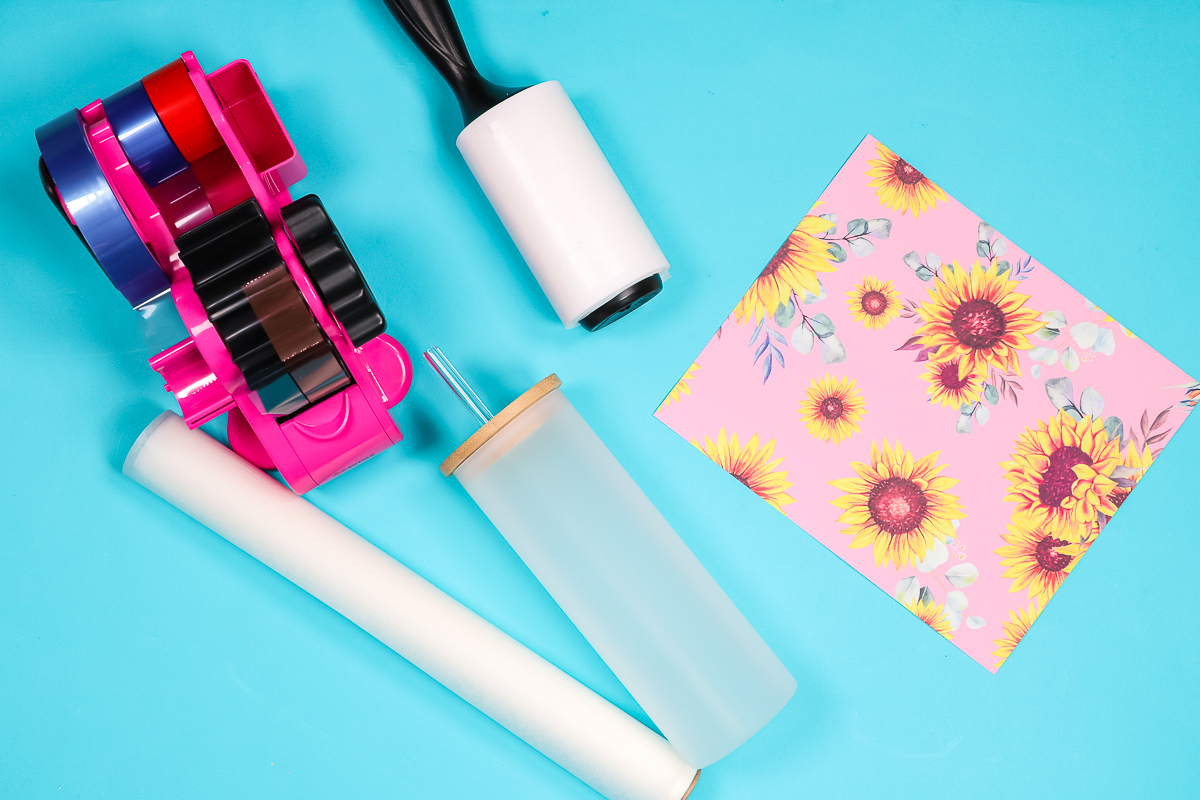
Supplies Used
Blanks Used
NOTE: All blanks must be sublimation blanks. They must have a sublimation coating to react with the sublimation prints that we are using to put on them.
Designs Used
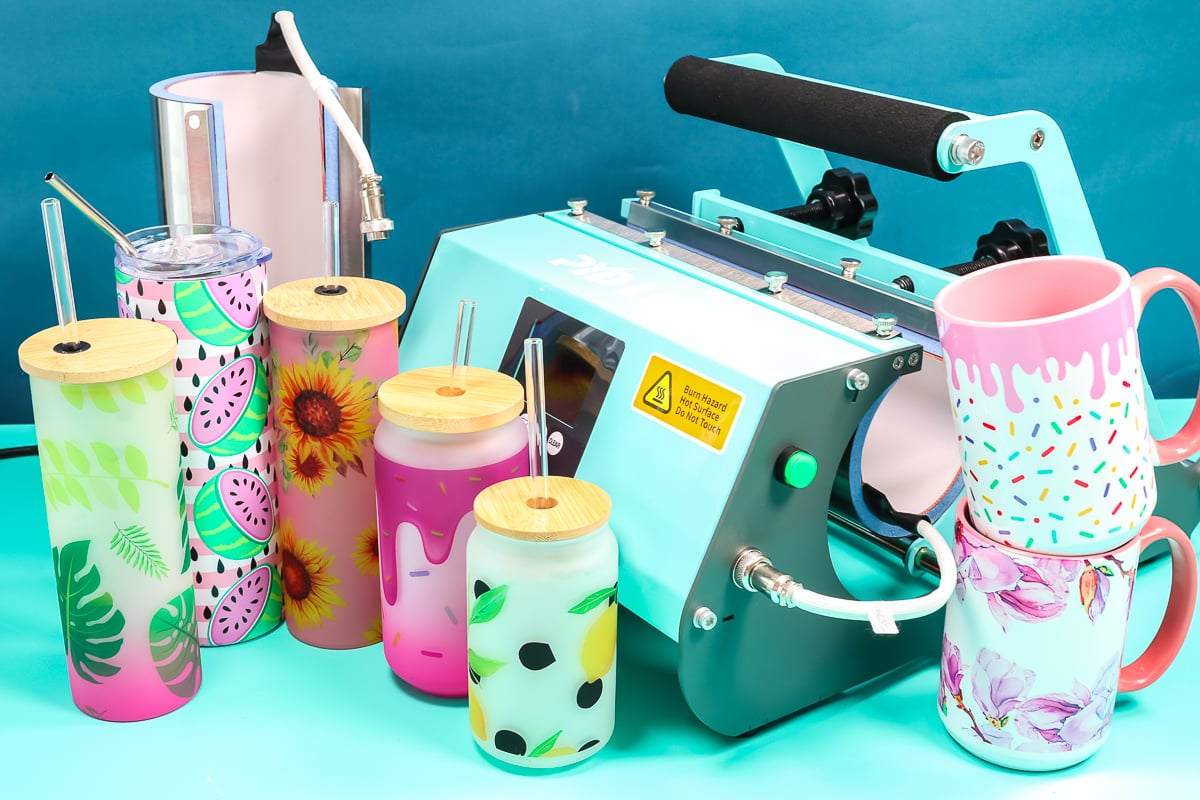
PYD Life 2 in 1 Tumbler Press
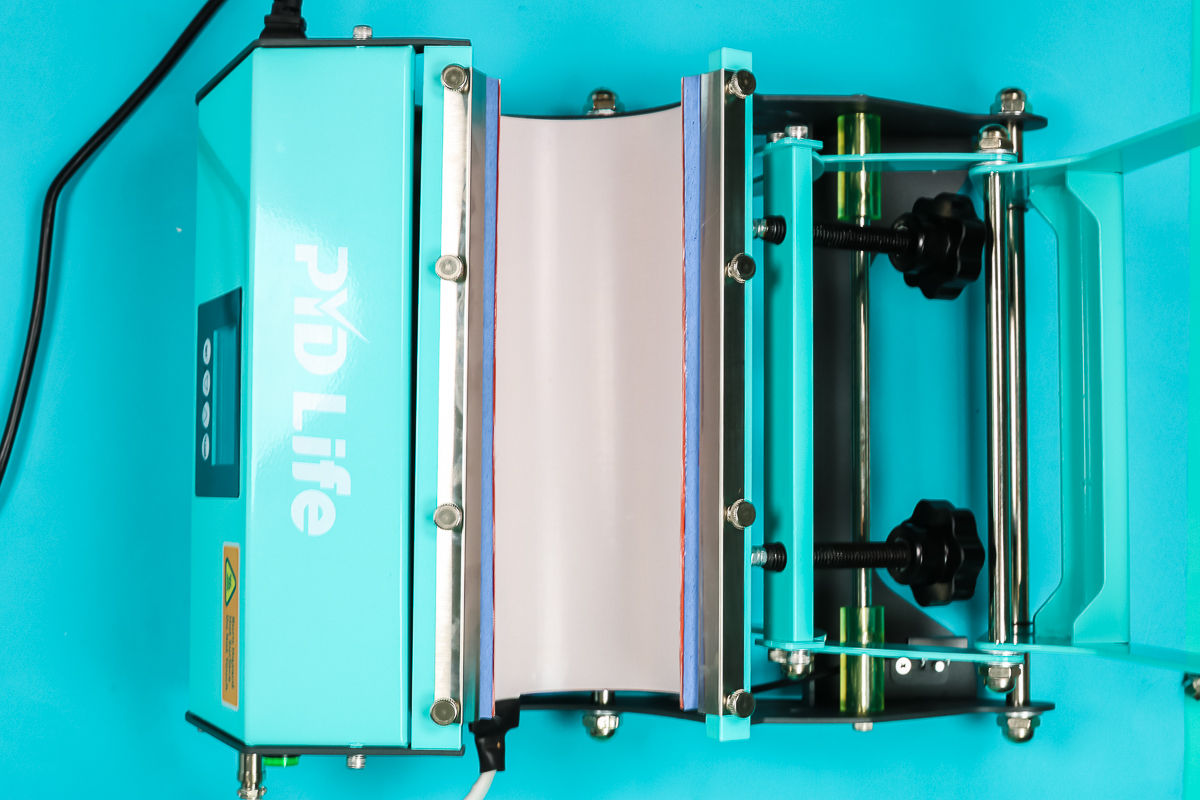
The 2 in 1 Tumbler Press is similar in operation to the other PVD Life tumbler press I reviewed here. The handle pulls back and it opens up the heating element so you can slide in your tumbler.
To adjust your tumbler press you’ll use the knobs on the back. Twisting them tighter will tighten the coil so it fits tightly around the tumbler. For smaller tumblers or mugs tighten the knobs and for larger tumblers and mugs loosen them.
You will want to make sure you’re using the right size coil to allow for a nice snug fit around your project. There will be a gap when the heating element is closed. This means in order to get a complete press you’ll need to rotate your tumbler when the timer stops and press it again for the full time.
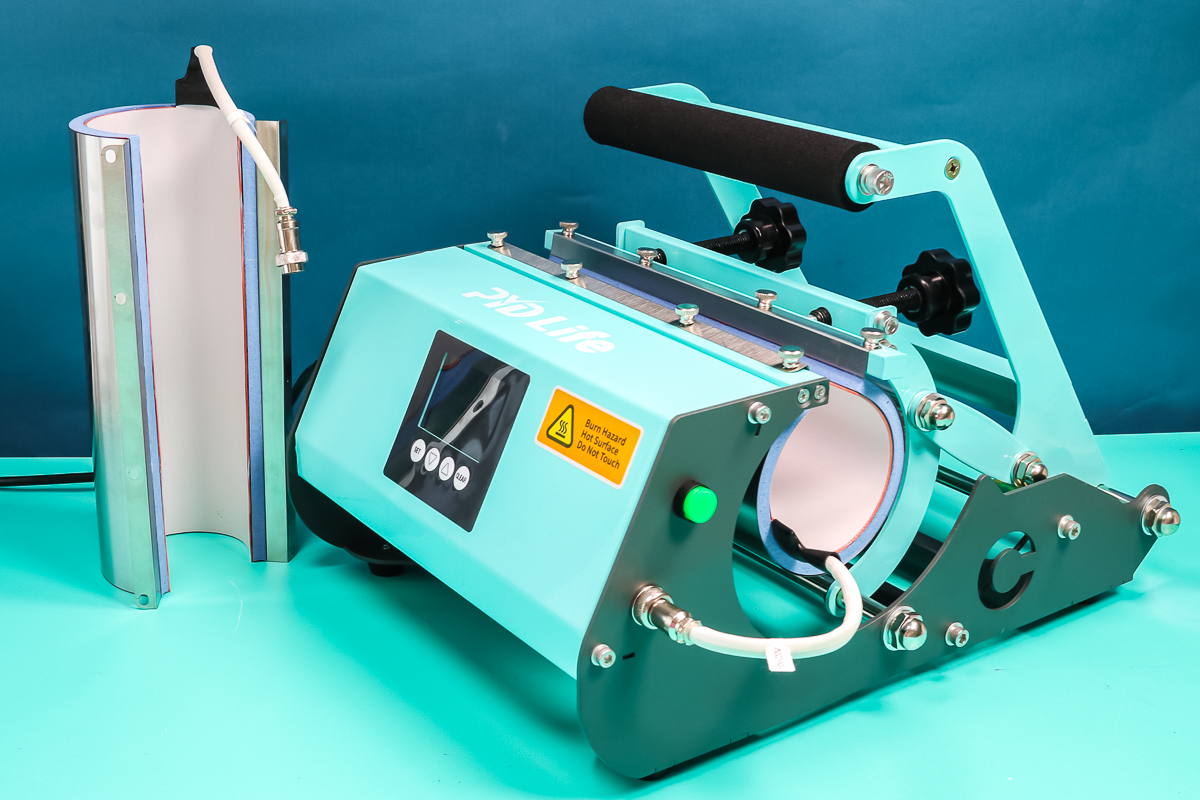
What’s Included in the Box?
Inside the box, you’ll find the tumbler press itself with one of the coils already installed. Mine had the small coil installed and the larger coil in the box. You will also find a user manual that will tell you how to use your 2-in-1 Tumbler Press along with a cord to plug it in. There is also an Allen Wrench and a few extra bolts.
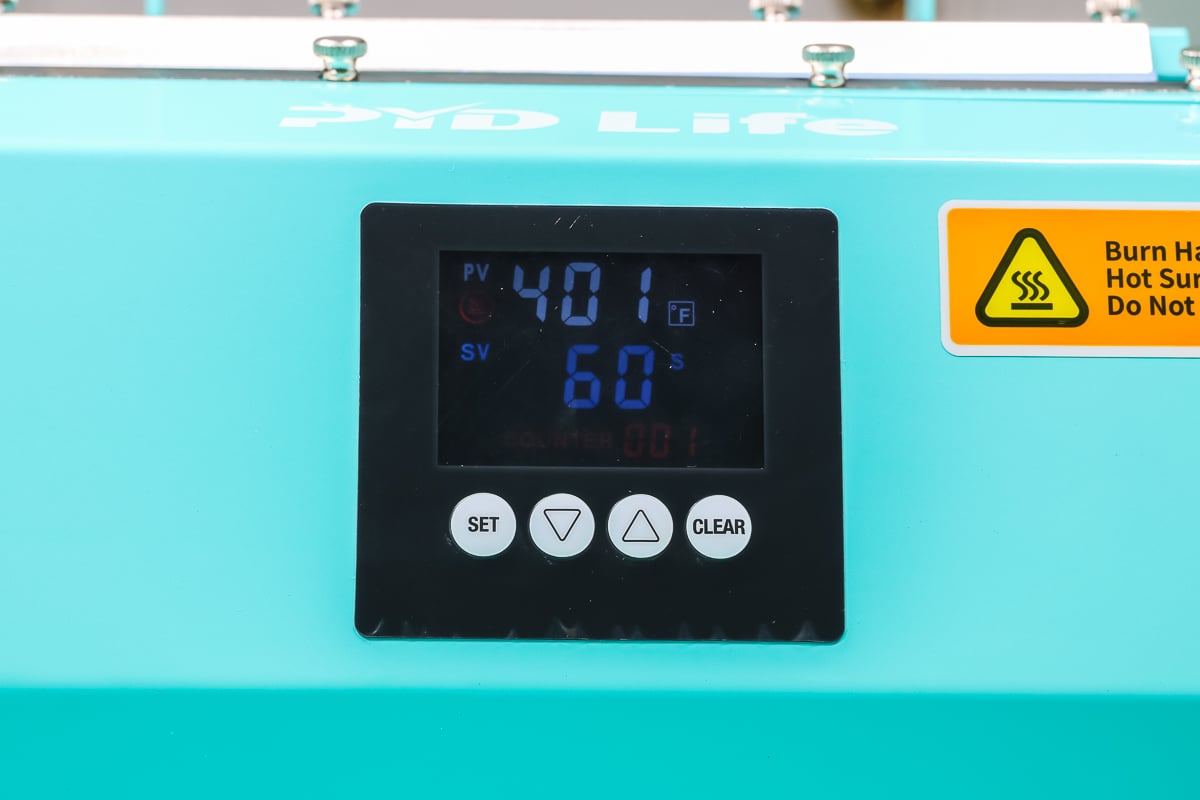
2 in 1 Tumbler Press Control Panel
You can use the control panel to set the time and temperature. First, add the plug to one side of the tumbler press and plug it into the wall. You will find the green start button on the other side.
Fahrenheit or Celsius
Once you turn the machine on, it will indicate either “F” or “C” for Fahrenheit or Celsius. If you want to change that, follow the instructions below.
- Press and hold the “set” button for 5 seconds.
- Use the up and down arrows to switch between F and C.
- Press and hold “set” for 5 more seconds.
Set the Time and Temperature
You can adjust the temperature and timer settings to what your project calls for on the control panel. Be sure to find the correct time and temperature for your blank on the manufacturer’s instructions. Here is how to alter those:
- Press the set button. (No need to hold it down just press and release.)
- SP will display on the top along with your temperature on the bottom. Use the arrow buttons to increase or decrease the temperature. The maximum for this press is 482 degrees F.
- Press the set button again to confirm the temperature.
- St will display across the top along with the time your press is set for. Use the arrow buttons to increase or decrease the time. The maximum time is 999 seconds.
- Press set once more when you are done. Your press will start heating up to the set time.
How to Change the Heating Elements
WARNING: Always make sure your tumbler press is cool before changing the heating elements.
After the heat press is cooled off, you can change the coils out. This will allow you to use the right size coil for your project.
To change out this heating element, we’re going to:
- Unplug the machine before starting the process of changing the coils.
- Loosen the screws. I find it easier to have the handle closed to loosen the screws.
- Loosen all the screws on the existing coil, and then slide it out. (Your tumbler press does come with extra screws. If you lose a couple you’ll be fine. Just don’t lose too many.)
- To slide out the element, open that handle up and then just sort of lift it out.
- Disconnect the coil on the side with the start button by twisting the nut.
- Set that heating coil aside.
- Then, add the other coil, slipping it into the press.
- Take the cord on the new coil and connect it next to the start button. Tighten the nut on the cord.
- There are a variety of screw holes on the press itself. You want to align it with the holes in the heating element.
- Start on the handle side and add the screws through the element and into the holes. Get them about hand tight.
- Line up the other side. Again, depending on the heating element, it may be better to have the handle closed.
- Line up the holes on this side and then add the screws.
- Once you have all the screws in, you want to go through each one and make sure they’re tight. Just hand tight is fine, you don’t need to use any tools.
- Plug it in, and heat it up.
Prepping Blanks for Your Tumbler Press
- Remove the top, straw, and anything else that may melt.
- Clean the tumbler well. You can use a lint roller or a lint-free cloth and rubbing alcohol. If you use rubbing alcohol make sure you’re surface is completely dry before putting it into your press.
- Trim your sublimation print to size.
- If you’re wrapping your whole tumbler make sure you’re lining it up and wrapping it nice and tight.
- Add heat-resistant tape along the edges of sublimation paper to make sure it’s stuck down well everywhere.
- Add protective paper to protect your tumbler press from any ink that may leak.
- Tape your protective paper into place as well.
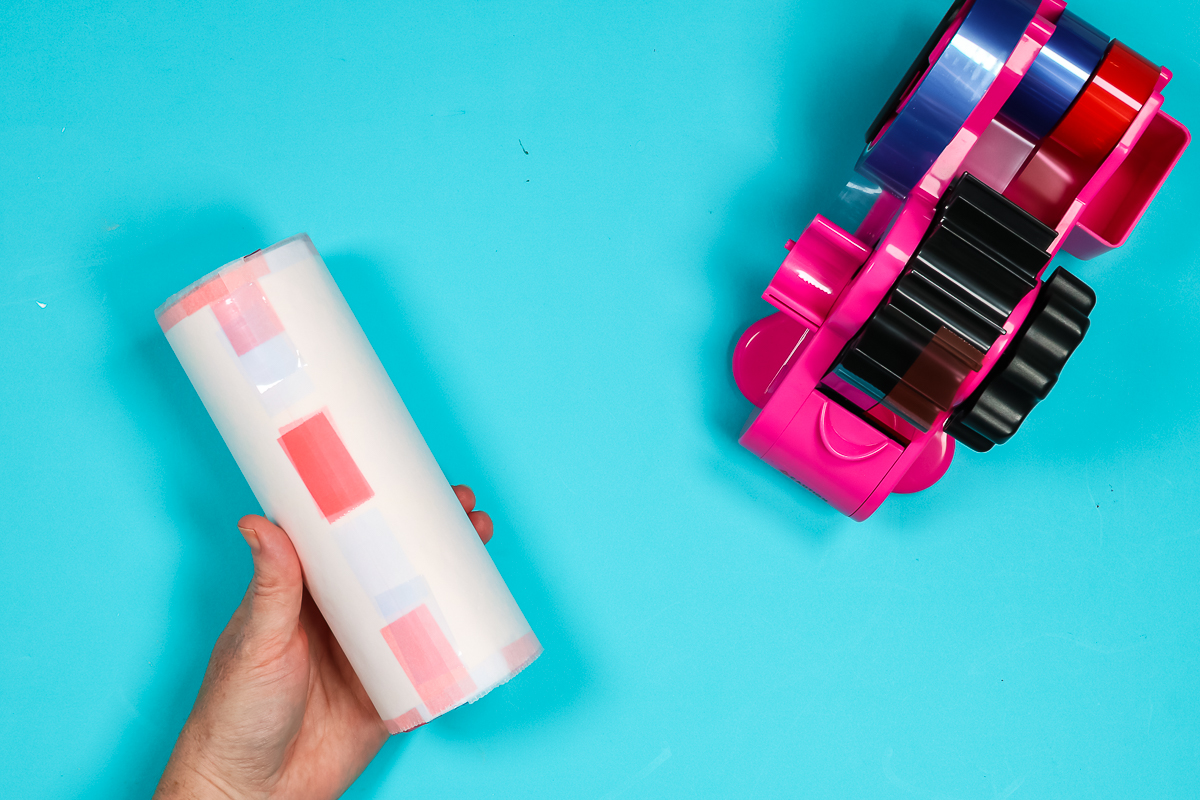
TIPS: To get your wrap straight, set your tumbler (or mug) on your work surface and wrap it around. If the print touches the work surface all the way around, you will know it’s straight. Also, be sure to pull it really tight as you wrap and add more tape than you think you need. I add tape along the seam as well as all the way around the top and bottom.
Pressing Your Sublimation Blanks
Once you have everything taped down you’ll slide your tumbler (or mug) into the tumbler press. I like to place mine with the seam lined up with the open part of the tumbler press. This makes it easy to know how far to rotate the tumbler before pressing it the second time.
NOTE: You can add two mugs or small tumblers to this press at one time.
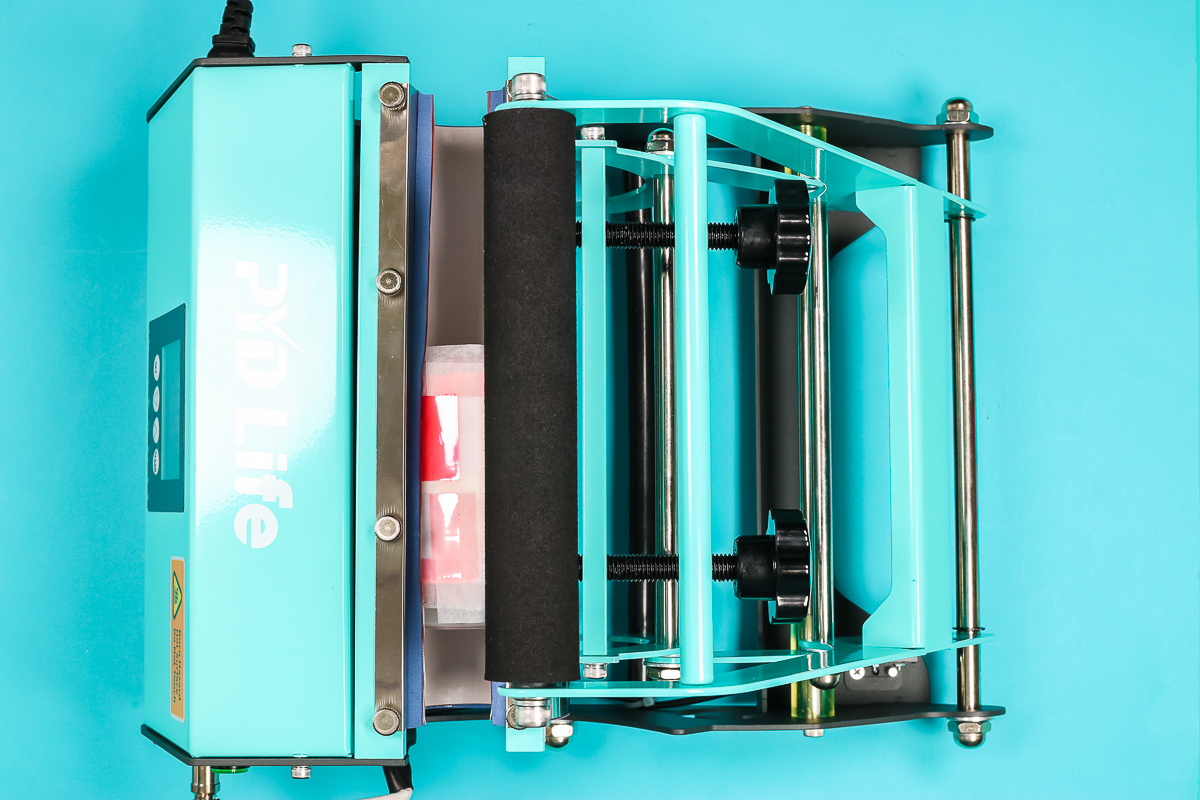
Once your tumbler has been pressed for the full length of time you will rotate the tumbler 180 degrees and then press again for the full length of time. If you’re pressing a mug you can skip the second press.
To remove the finished tumbler, you’ll open the 2 in 1 Tumbler Press and slide the tumbler out. This will be the same process with a mug. Your tumbler/mug will be very hot. Make sure you’re using heat-resistant gloves and place your tumbler onto a heat-safe surface. Allow it to cool.
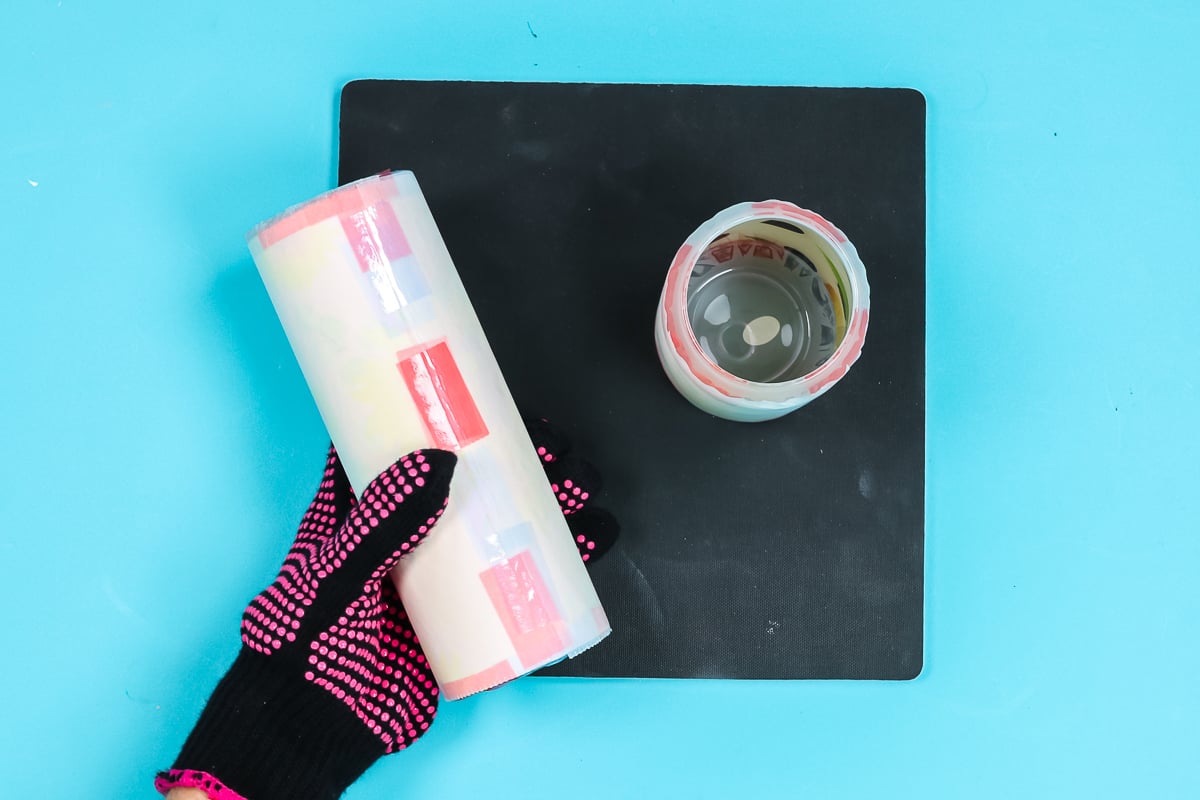
Finishing Your Sublimation Tumblers or Mugs
After your tumbler has cooled you can remove the protective and sublimation paper. Look at the gorgeous design on that glass tumbler. The reveal portion is my favorite! Mugs and tumblers made with sublimation are permanent as soon as you remove everything from the surface. There is no need to add any sealer or do any other operation.

Final Thoughts on the 2 in 1 Tumbler Press
Now that I’ve used the press and made all this stuff, what do I think?
- I do like a press for tumblers. It may not make sense for you if you’re only wanting to make one or two a year. If you don’t think you’ll be making many tumblers, there are less expensive options, like using a convection oven. If you think you’re going to make more than that or to sell, I really think a tumbler press is a good investment. A tumbler press makes tumblers and even mugs quick and super easy to make.
- I do like that I can change this one out. I feel like the glass tumblers are getting super popular and they are definitely way too skinny for the other tumbler press I had. That one was just for the 20 ounces blanks. With the 2 coil sizes, I am able to make a variety of sizes of tumblers and mugs.
- I’m happy to report that even when the tumbler press had come to temperature the front and back portions remained cool to the touch. However, the heating element inside will be hot. Make sure you’re always wearing heat-resistant gloves when your hands are near the heating element.
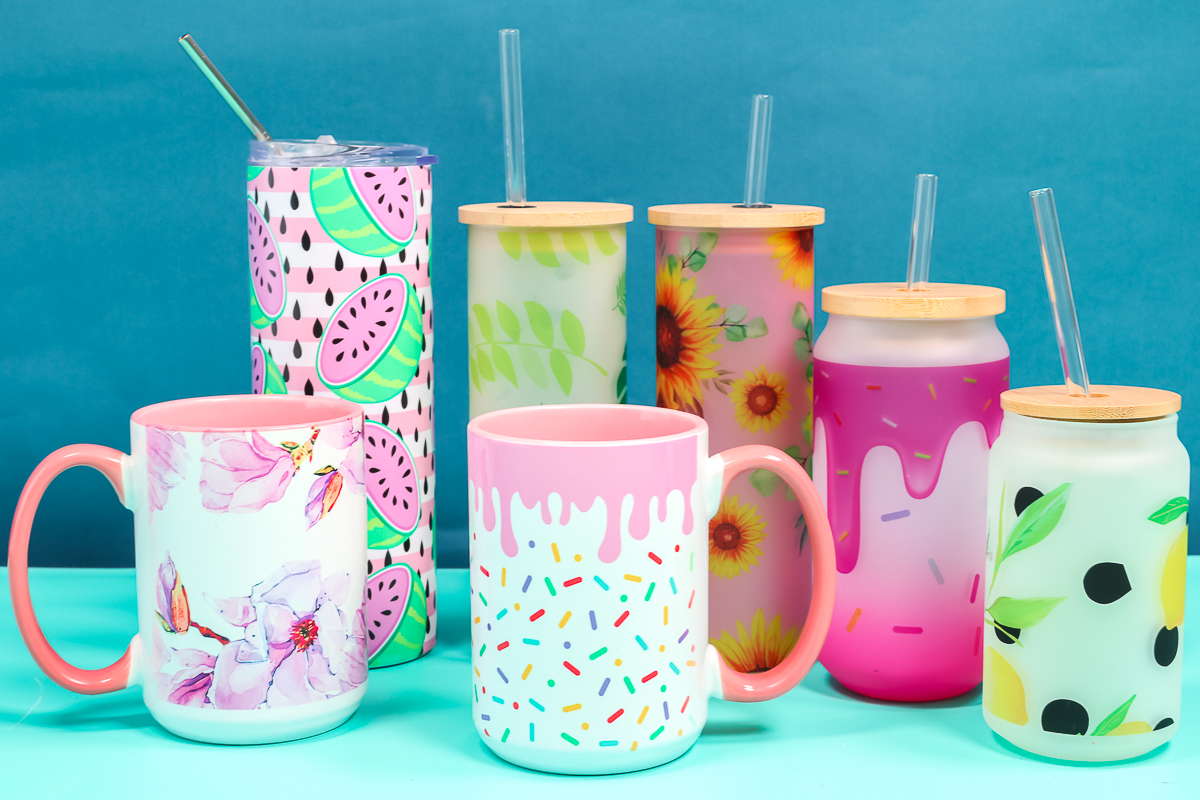
- Overall, I think it did an amazing job on every single project I had. Which is the true test of a press for me! I would say on the mugs, I would keep the design a little further away from the handle. I wasn’t exactly sure how far to keep it away but I think I would go a little bit further away with the design on the handle with the larger mug. Otherwise, I love the projects I made!

Model Comparison
This new design has a control panel on the front instead of on the side, and I like that. It makes it a little bit smaller and more compact. Not as big and bulky, with the control panel hanging off the side. I did like that feature of this new design.
This design also doesn’t have double adjustments. There were adjustment knobs in the back and the front on my other tumbler press and four knobs to adjust could be a little tricky. I like the two-knob adjustment versus the four-knob. I give the improvements they’ve made to the press two thumbs up.
Tumbler Press FAQ’s
Here are the answers to some typical questions on tumbler presses!
How do you press a sublimation tumbler?
You should always research the instructions for your specific blank. The manufacturer should list the time and temperature you should use when pressing their tumbler.
Can you heat press a tumbler in a mug press?
You can, I have done a variety here. I will say using a mug press to make custom tumblers can be a bit more difficult than using a tumbler press and you’re more limited on sizes.
Can you sublimate tumblers in a regular oven?
You should never use your regular oven for sublimation or Infusible Ink projects. Both products turn into a gas when heated which is not food safe. You can use a small convection oven that you ONLY use for crafts and not for food.
Will Cricut make a tumbler press?
I’m not sure if anyone knows the answer to that question. They’ve released a lot of awesome products to use with sublimation but the Cricut Mug Press is relatively new so I don’t expect a tumbler press any time soon.
So, are you considering the 2 in 1 Tumbler Press from PYD Life for your sublimation crafting? I think it would be a great addition for those of you that plan to do a lot of tumblers in a wide variety of sizes!