
This post and photos may contain Amazon or other affiliate links. If you purchase something through any link, I may receive a small commission at no extra charge to you. Any supplies used may be given to me free of charge, however, all projects and opinions are my own.
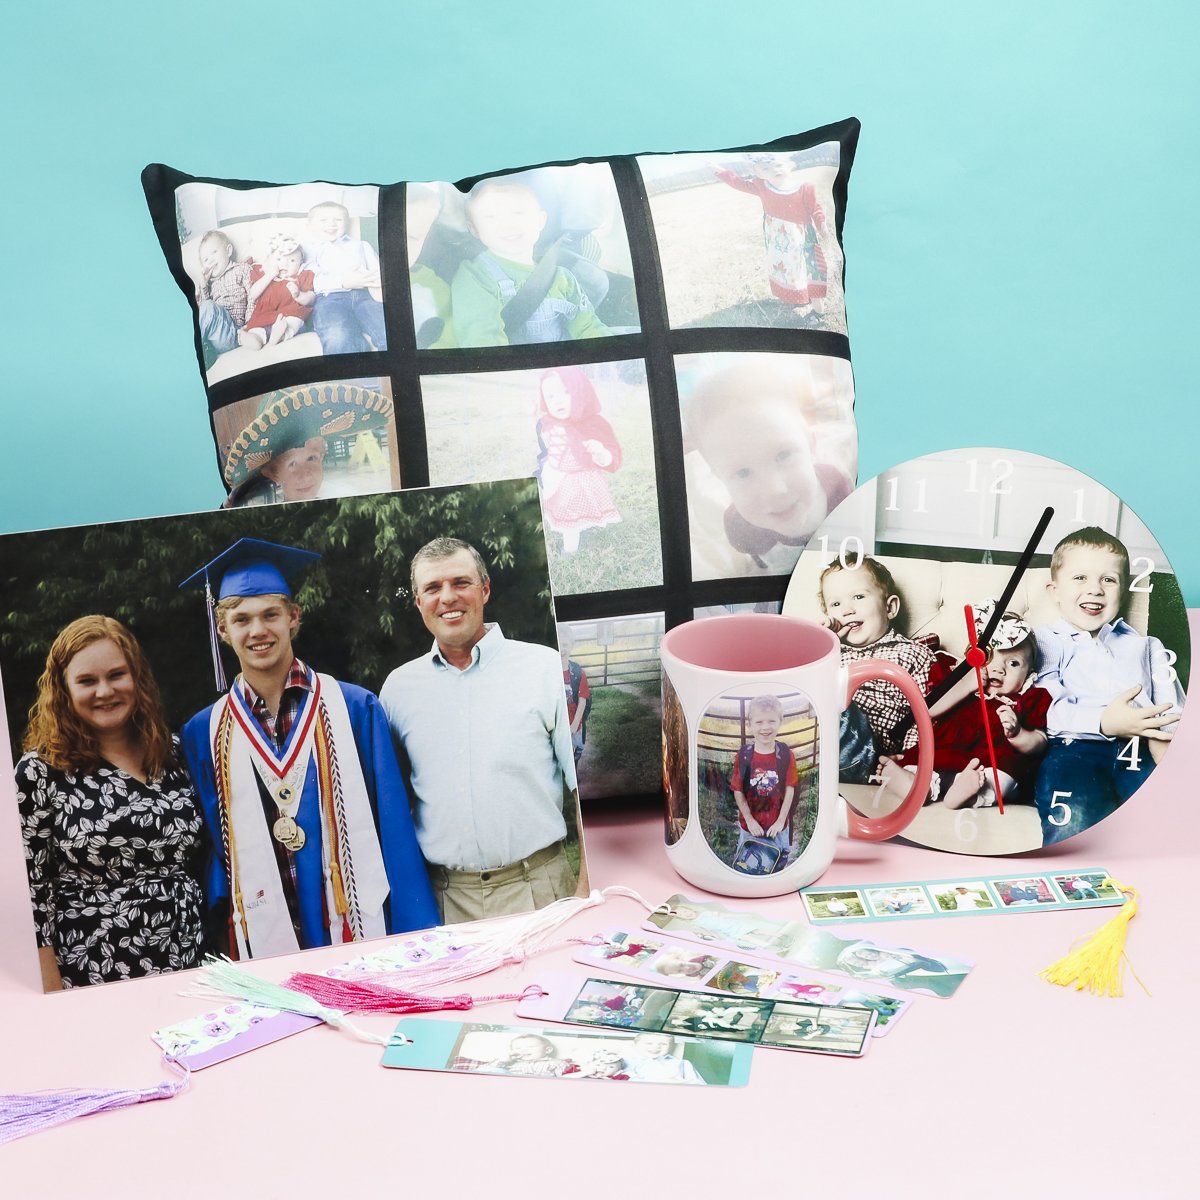
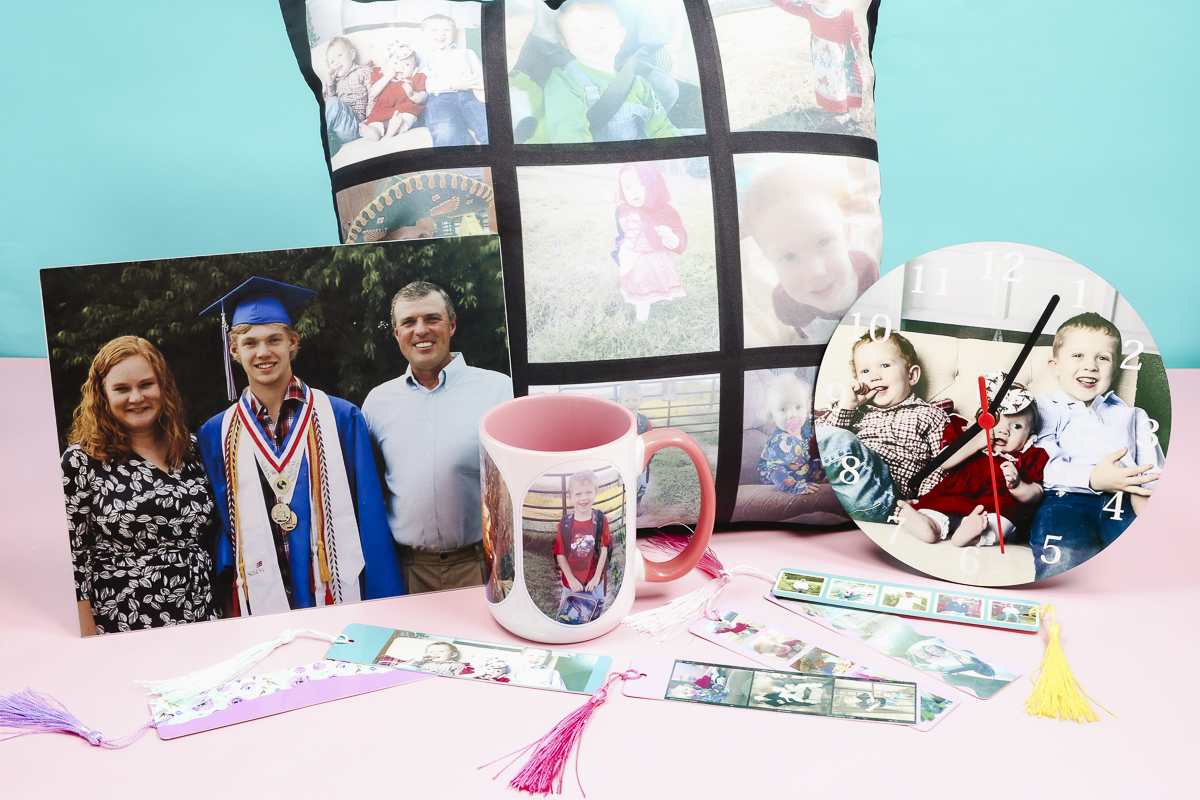
Are you looking for the perfect to give for almost any occasion? Today I’m going to show you how to make five different photo sublimation gifts using 8.5″ x 11″ or smaller sublimation prints, EasyPress, and Mug Press.
My goal with these projects is to show you that there are a variety of different projects you can make with EasyPress and standard printer-sized prints.
If you’re new to sublimation, my Sublimation Beginner’s Guide is a great place to learn the ropes.
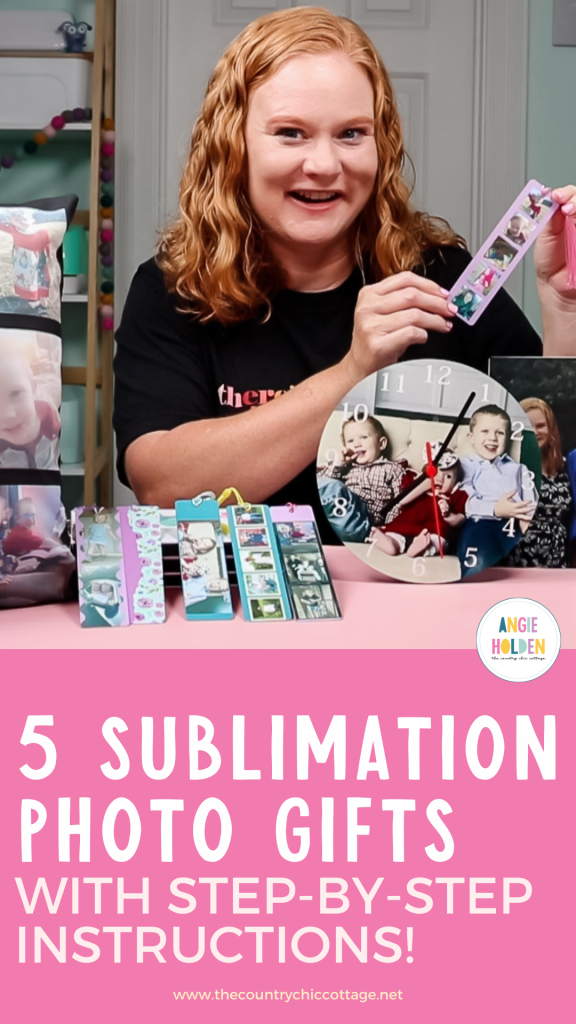
You can watch me make all of these photo sublimation gift projects by pressing play on the video below:
I love these projects because there is something for everyone and some of them are very unique. I’ve found that creating custom photo templates is easiest in Canva and I have a template in Canva that works with all of these different blanks.
Supplies Used
Blanks used:
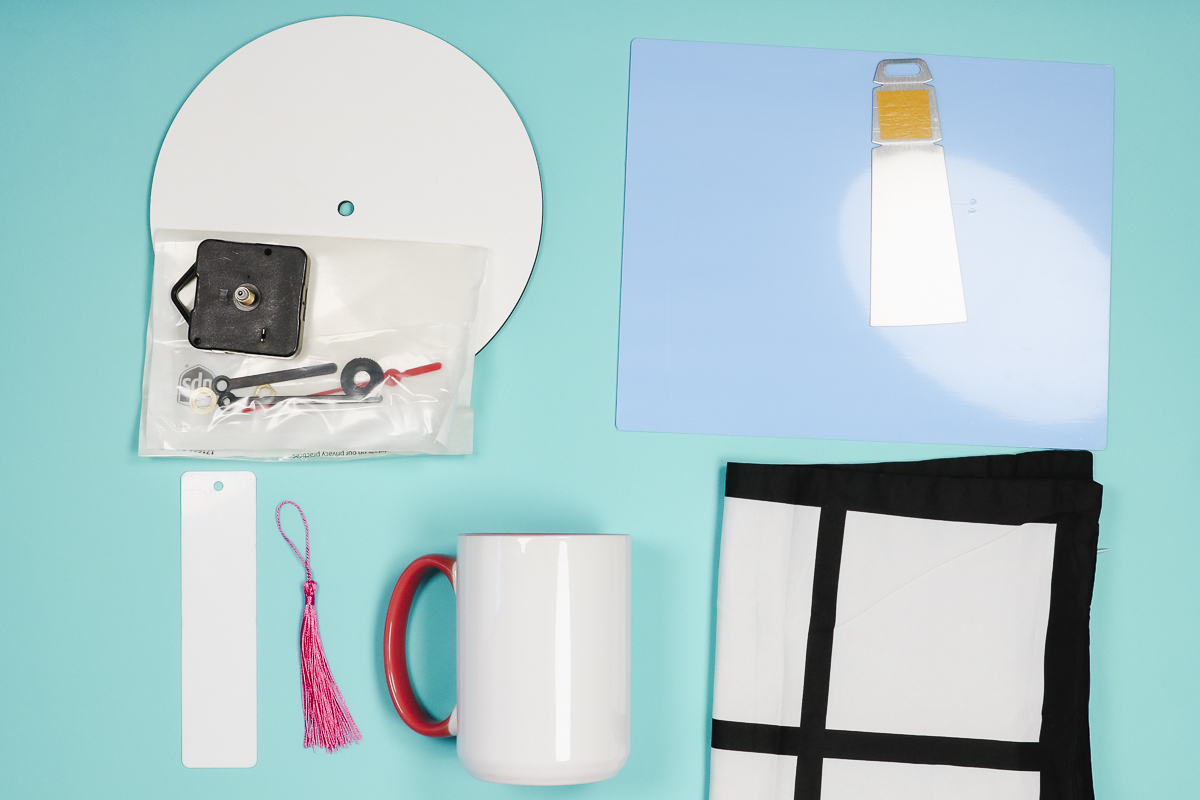
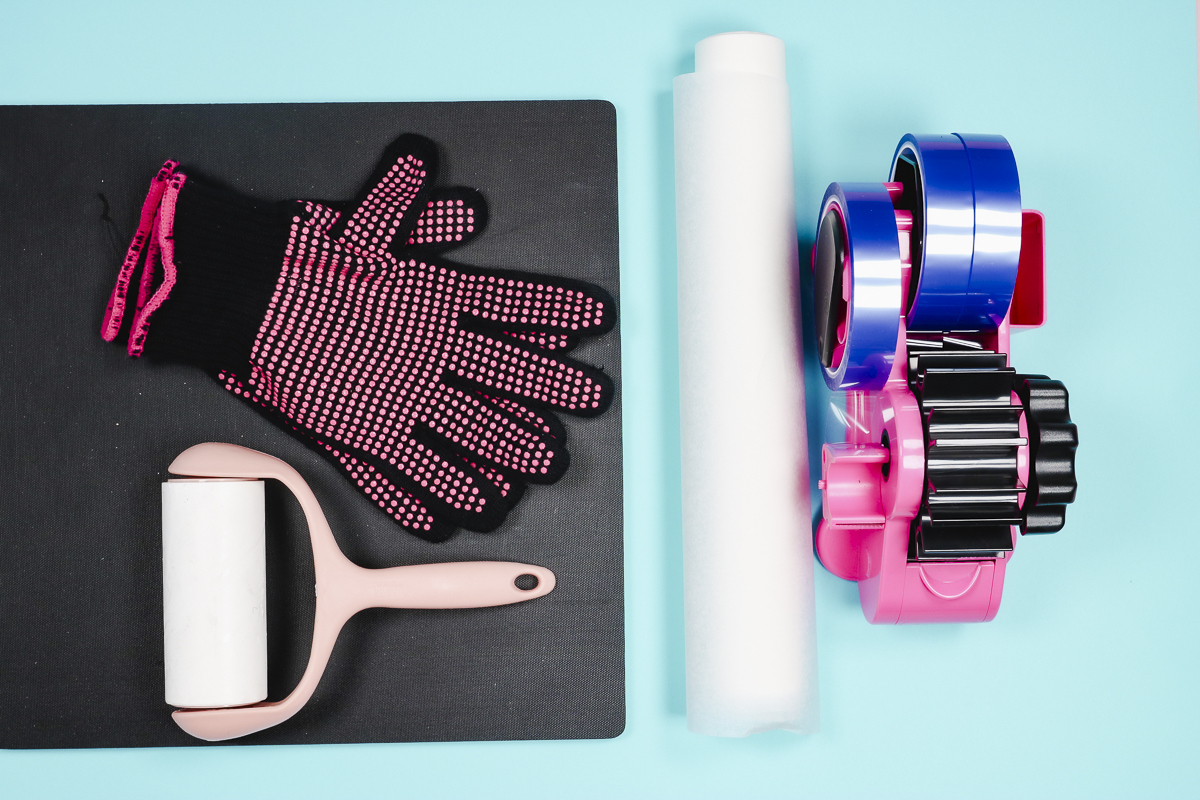
Other supplies:
How to Use Canva Templates
Let’s take a look at how to use the Canva templates for your projects.
In this post, I am going to show you how to make a photo mug with a unique template that I think you’ll like. You’ll also learn how to make metal sublimation bookmarks and a sublimation photo panel with a metal finish. The sublimation clock is the most unique blank I’m using today and you’re going to love how it looks with a photo on it.
The last gift idea is the photo sublimation pillow. I would call this the most challenging project out of all of them today. That being said, if I can do it so can you. Follow the steps in this tutorial and you’ll be able to make any of these sublimation photo gifts today.
Step 1: Adding Photos to Templates
Before we can make these projects we need a sublimation print. A sublimation print is sublimation ink printed onto sublimation paper through a sublimation printer.
My Canva template is set up for each of the different blanks that I’m using today. Click on the link in the supply list above to get started.
When you open the template, you’ll see that some of the templates have shapes that have a cloud design on them. This is where you’ll drag and drop the photo you want to use and they’ll be sized to fit right inside the frame.
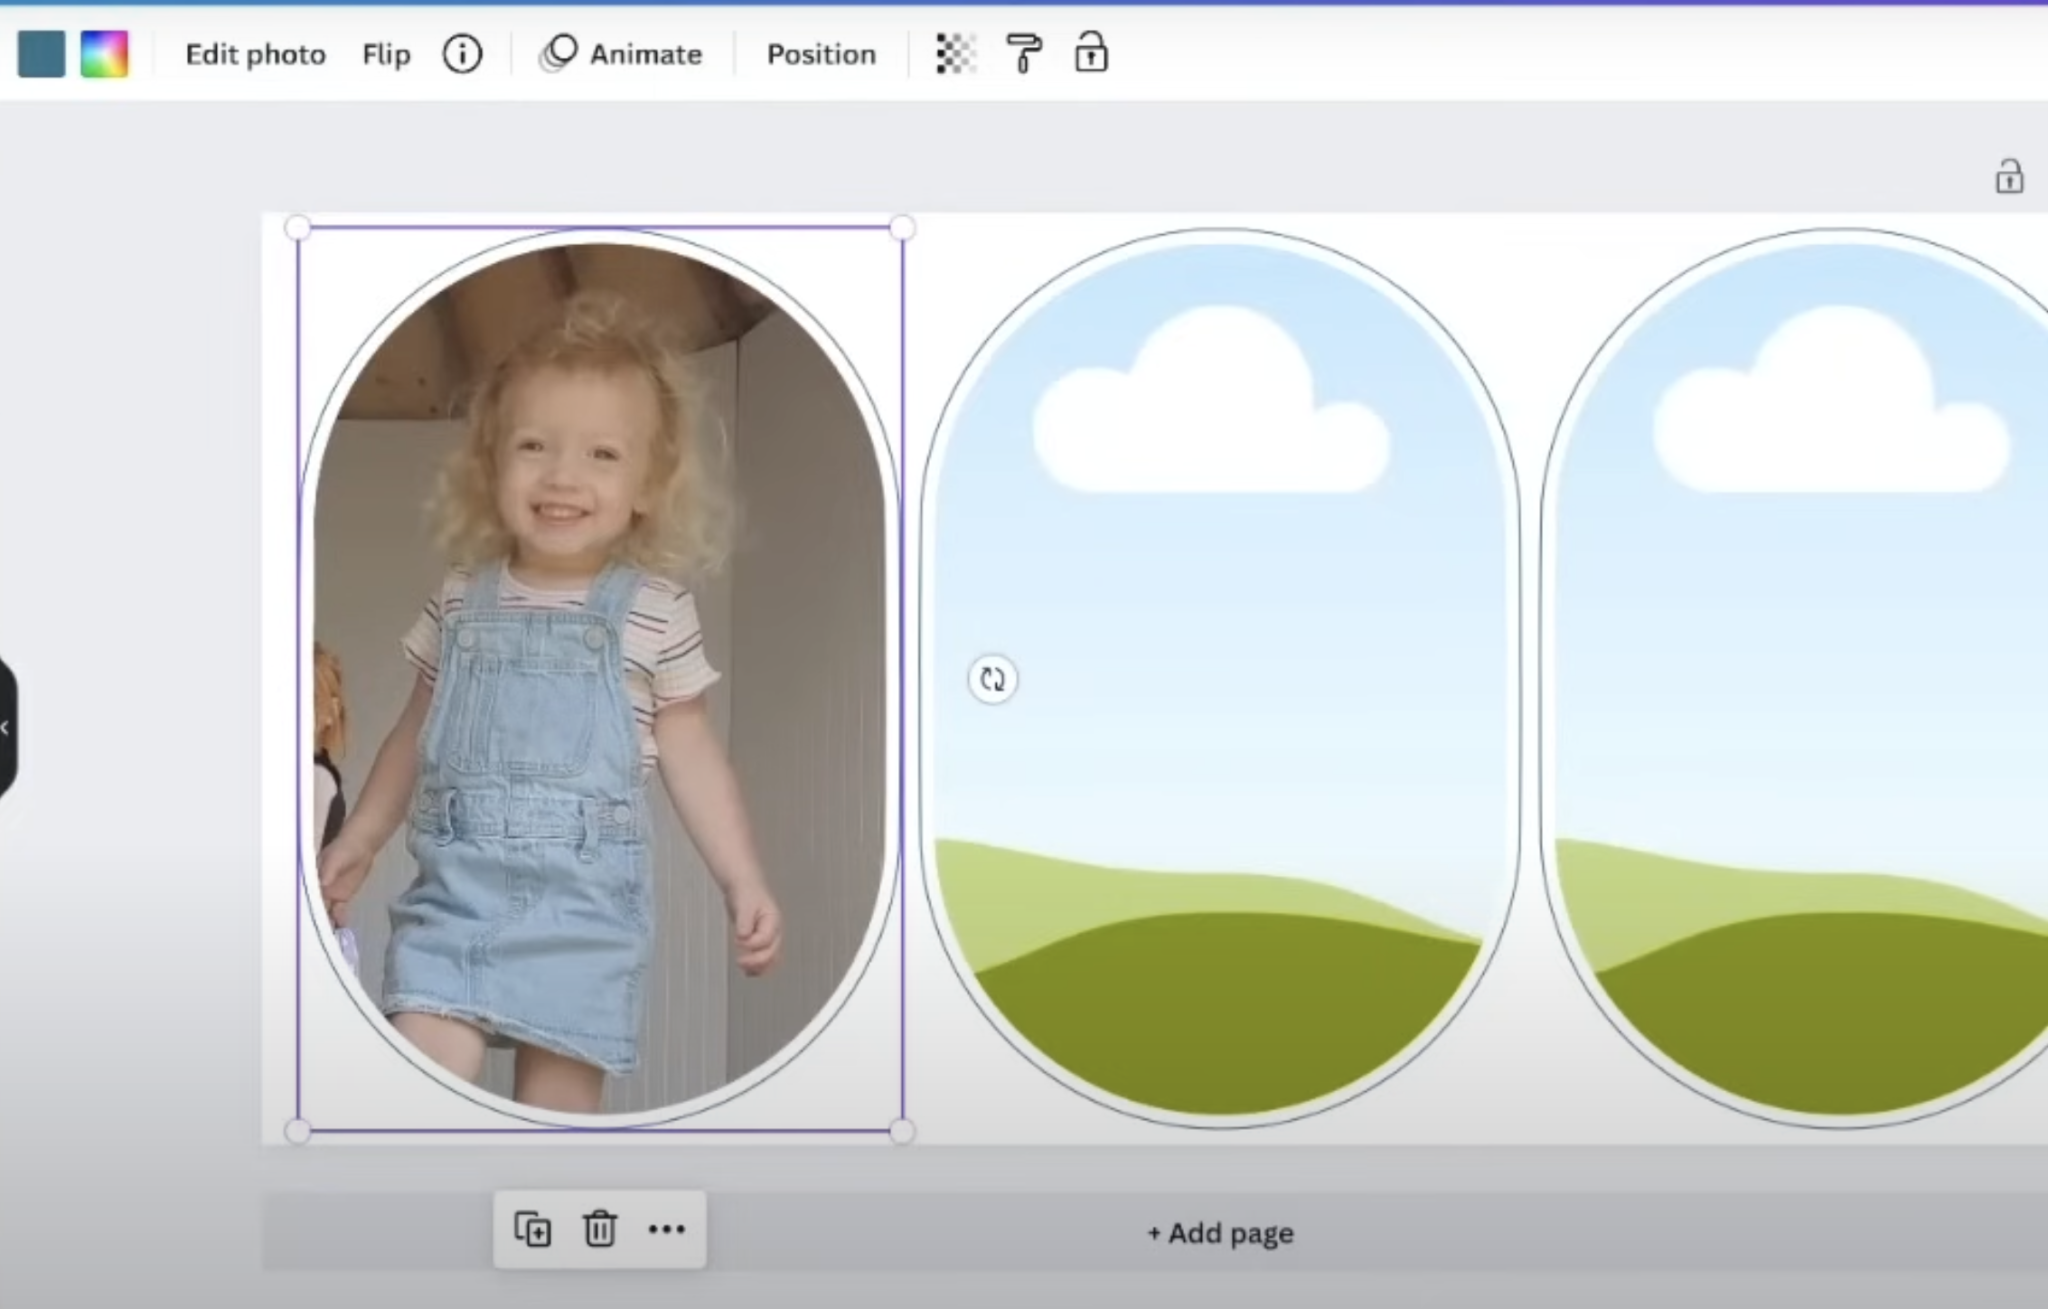
To resize the photo or move it within the frame, double-click the photo and you can alter the photo however you want.
Repeat this process for each of the templates you want to use.
As you’re looking through the templates, you may notice that one template doesn’t have the cloud design. This is the template for the 8×10 photo panel. For this project I want the photo to take up the entire panel.
For this template, drag and drop the photo onto the template and then resize it so it covers the entire screen and is located how you want it on the template.
Step 2: Customize Templates in Canva
Adding photos to the template isn’t the only customization that you can do.
As an example, if you don’t like the background color I used you can change the color to anything you would like. Use the color picker to choose a color from the photo or even type in a specific color code.
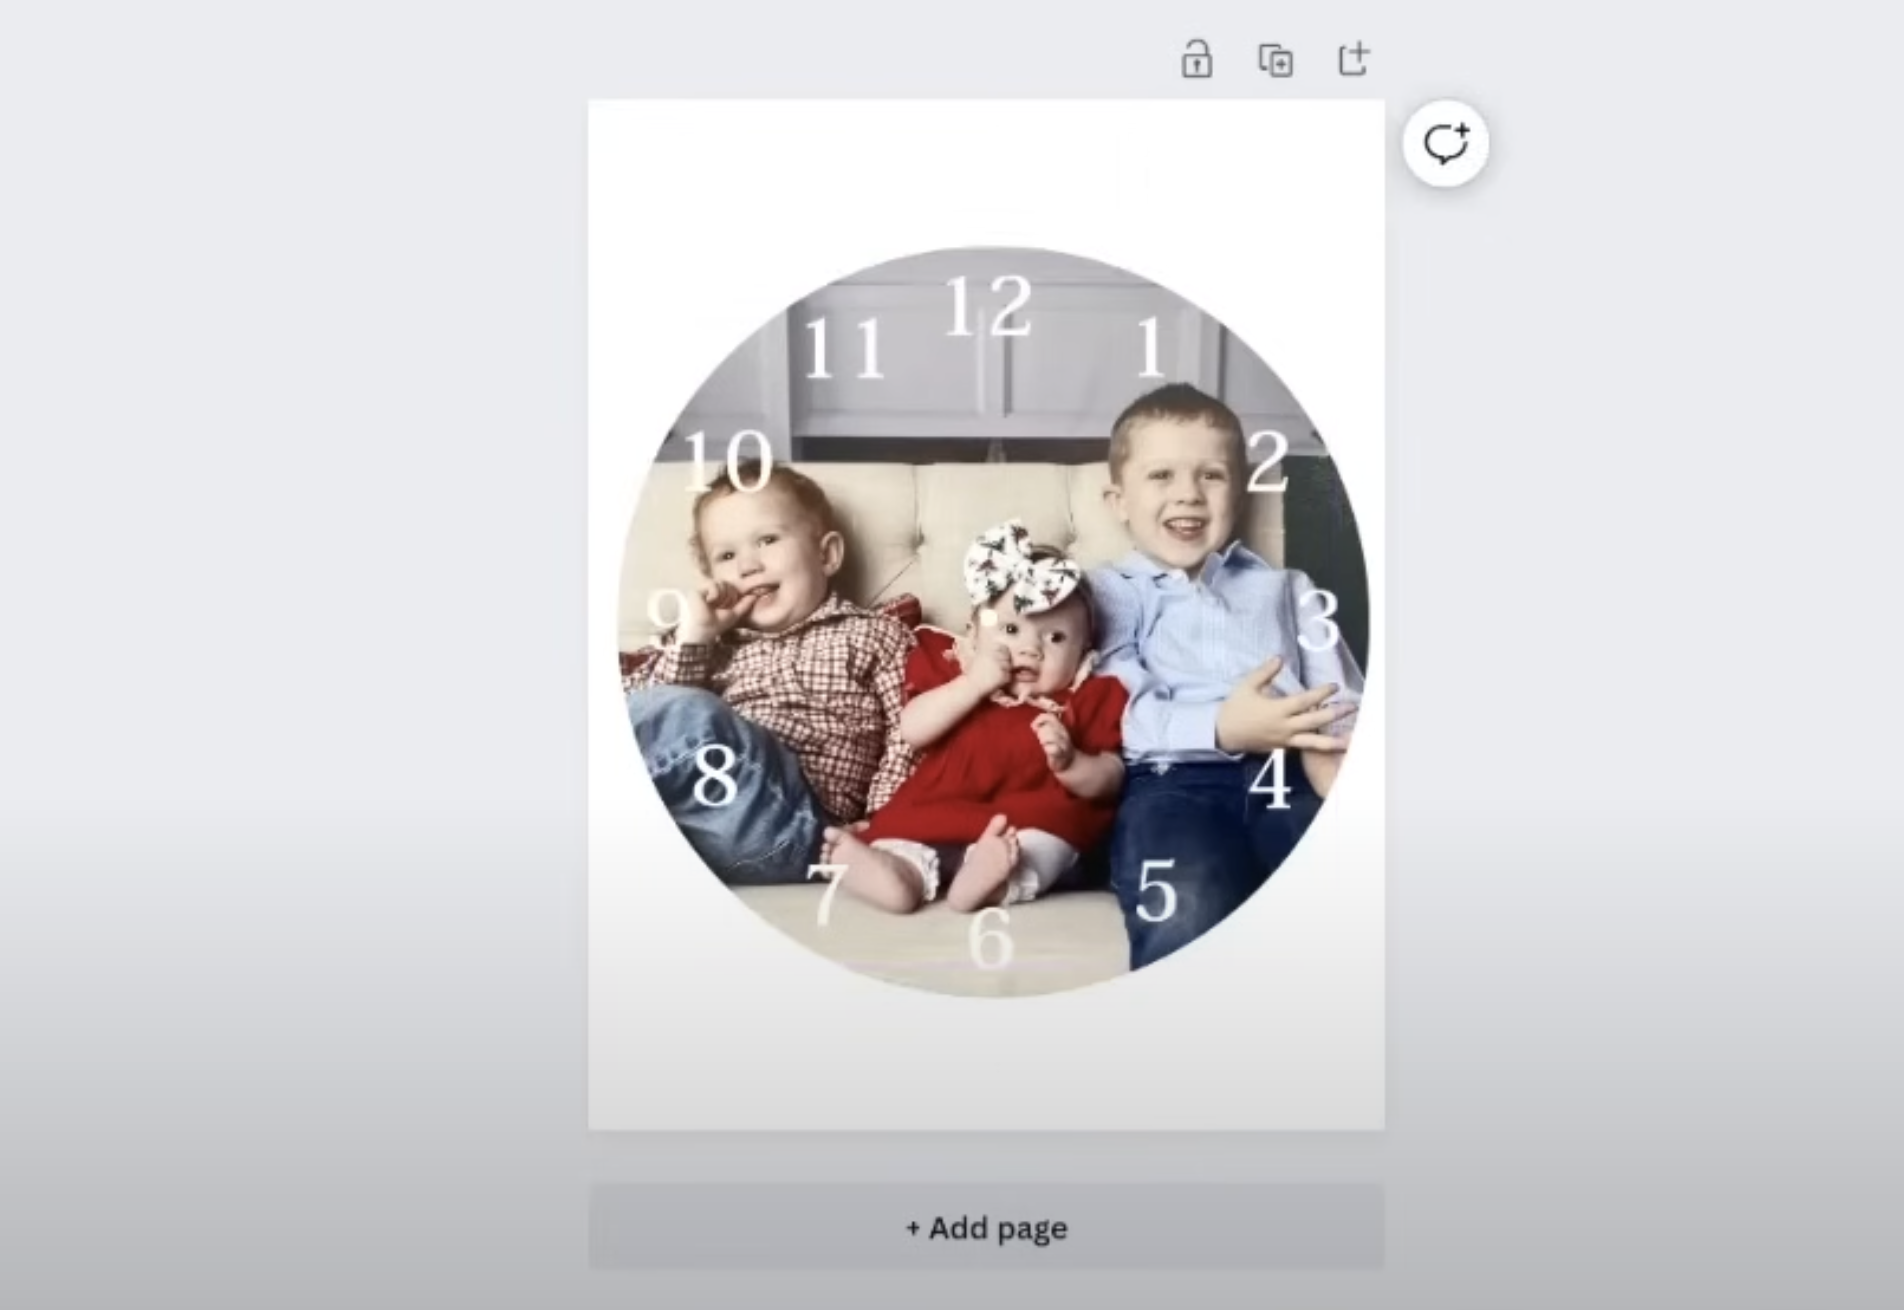
The clock template can be a little tricky since it has the numbers on it. Drag and drop the photo to the very left-hand side of the circle and it will fill in the background.
Double-click the photo on the left-hand side if you want to resize or move the photos at all.
If you want to change the color of the numbers you can do that at this time as well.
Step 3: Download Templates from Canva
Once you’re done with the template you’re working on you’ll need to download the file. You cannot print directly from Canva so you need to download the file to your device.
When using Sawgrass printers, I prefer to download the file as a PNG. This will also work with Epson printers but it’s the best option I’ve found for Sawgrass printers.
When using my converted Epson EcoTank or Epson F170, I prefer to use a PDF for Print file type.
Make sure you choose PDF for Print and download the file to your computer. You can use either file type for all three printers but these options are the ones I’ve found work best for me.
How to Print Sublimation Designs
Now that we have the files downloaded it’s time to print them. We do need to make sure that we have the print sized the exact same as the size it was designed because in the template it was sized correctly for the blanks.
How to Print to a Sawgrass Printer
If you have a Sawgrass printer you can use either Print Manager or PrintMate to print.
Using Sawgrass Print Manager
If you’re using Print Manager you’ll begin by right-clicking and then choosing Open Local File. Locate the file on your computer and select it.
When it’s pulled up, adjust the settings. Select the surface you’re putting it on. Make sure it’s mirrored, select Best Quality, and double-check that it is the same size as you designed it.
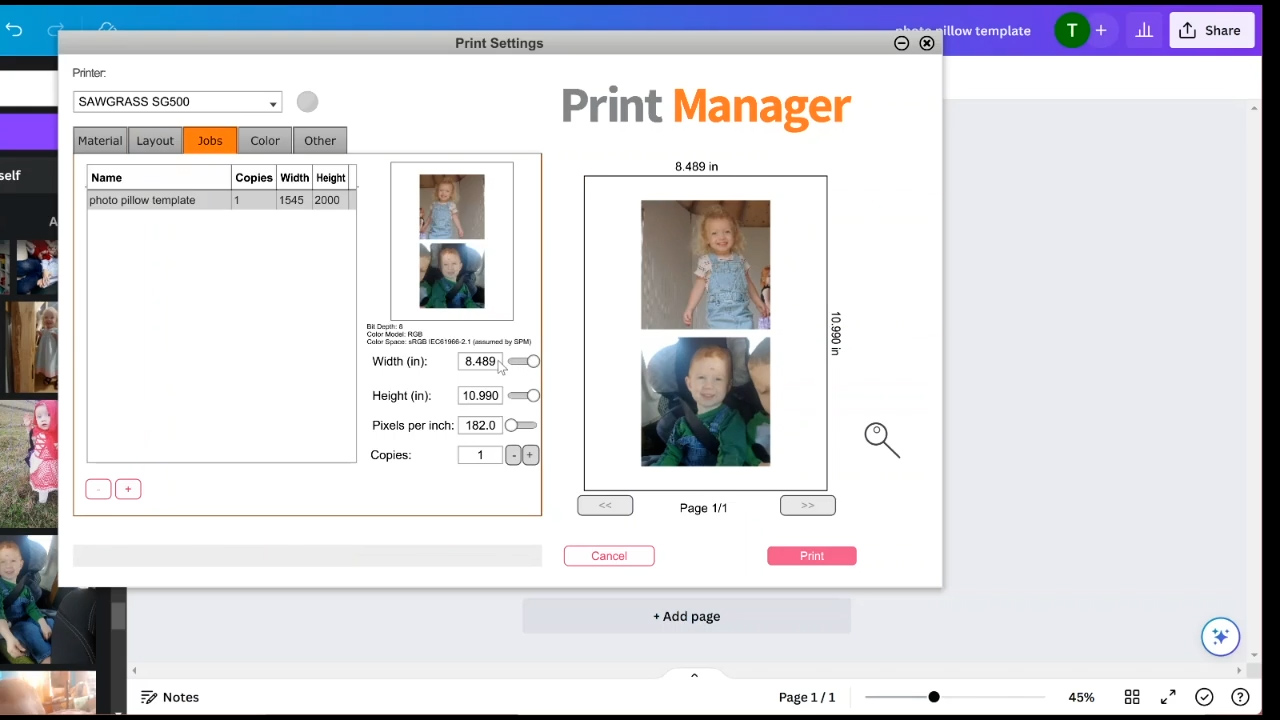
I select Preserve Layout from Designer and then from the Jobs tab and ensure the size is correct. If the size is not correct, fix that here. For the bookmarks, pillow, and clock my templates are designed on 8.5″ x 11″ paper.
Make sure the screen says 8.5″ x 11″ so it’s not resizing when printing.
You can also change the color management and things like that if needed. Then print the design.
For the mug and the photo panel select Preserve Layout from Designer. Confirm the size is correct in the Jobs screen and make any adjustments needed.
Using Sawgrass PrintMate
Another option when printing to a Sawgrass printer is the PrintMate program. PrintMate is a newer software and it makes printing even easier.
Click Add Files and locate the file on your computer. Select the file and then check the height and width and ensure it’s the same that you used in Canva.
If it hasn’t loaded correctly, you can adjust the size right here. For the print settings, they have some presets that you can choose and it will adjust the settings for you.
I always confirm that everything looks correct before printing. Under color management, since I’m printing photos, I would select the Photographic setting and then print it to your Sawgrass printer.
How to Print to Epson EcoTank Printers
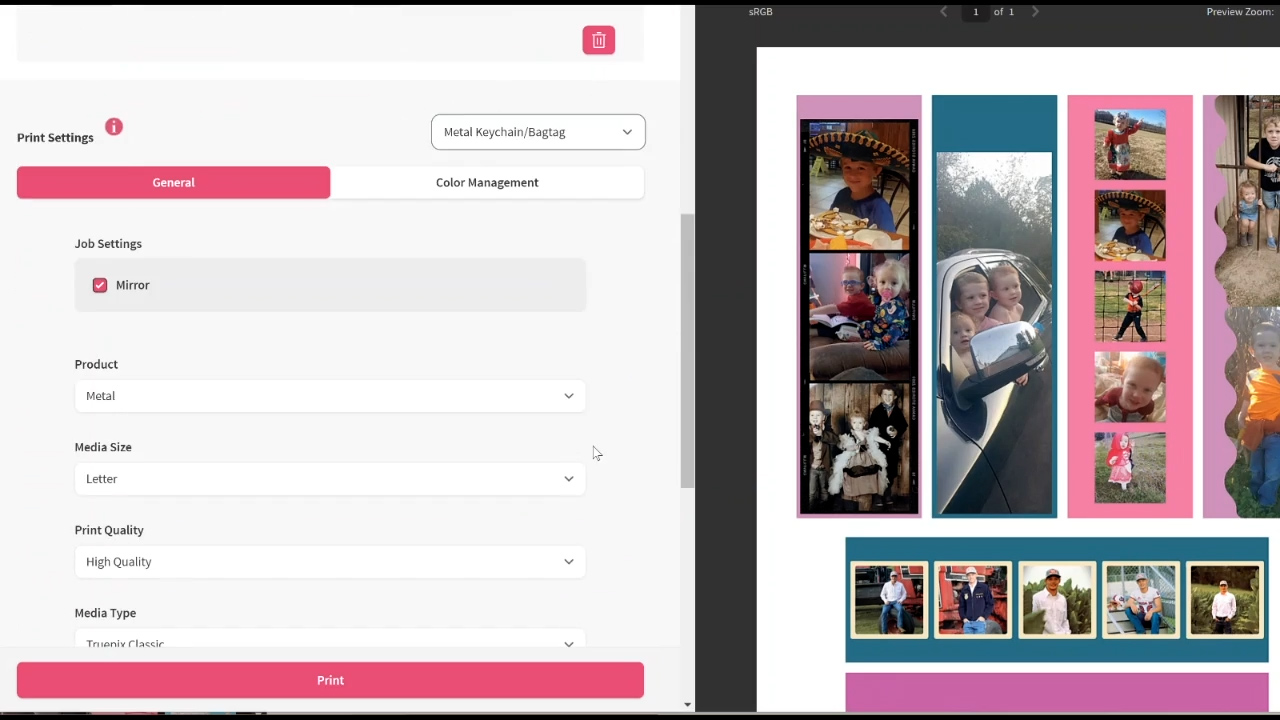
If you’re printing to an Epson EcoTank printer you’ll need to choose your settings. For Paper Type, I prefer to choose a Matte Paper option and then select Best Quality. Turn off High Speed or Bidirectional and turn on Mirror.
Depending on how you’re printing and your system you may see a few different options.
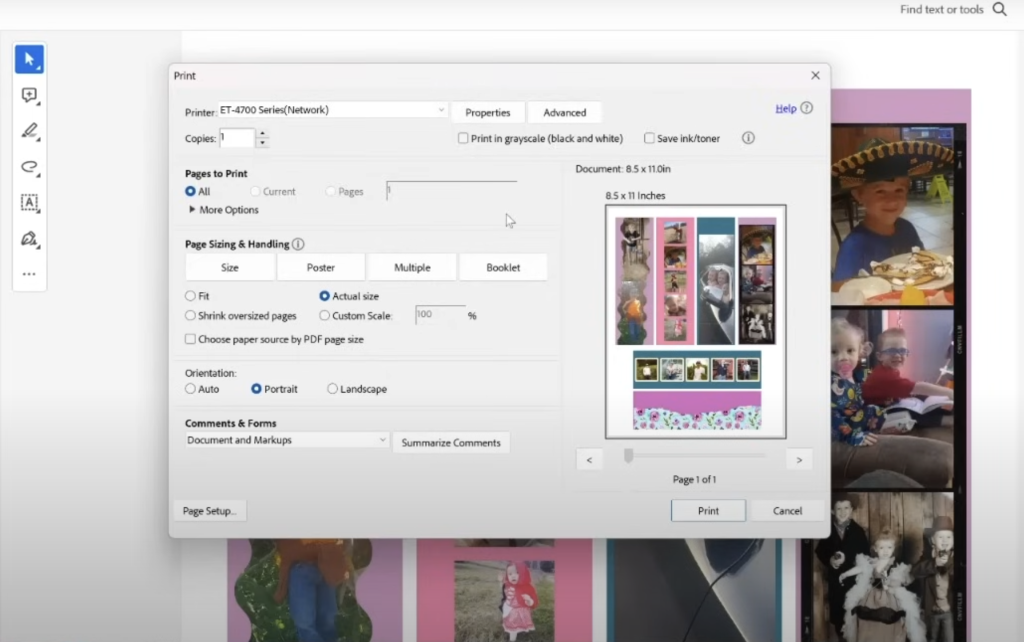
Ensure that you have the size either set to Actual Size or that Zoom is at 100%. Either of these options will print the design exactly the size you saved it as.
For Color Correction, you can choose to do it manually or with ICC profiles. Choose which option you want to use and then click Print.
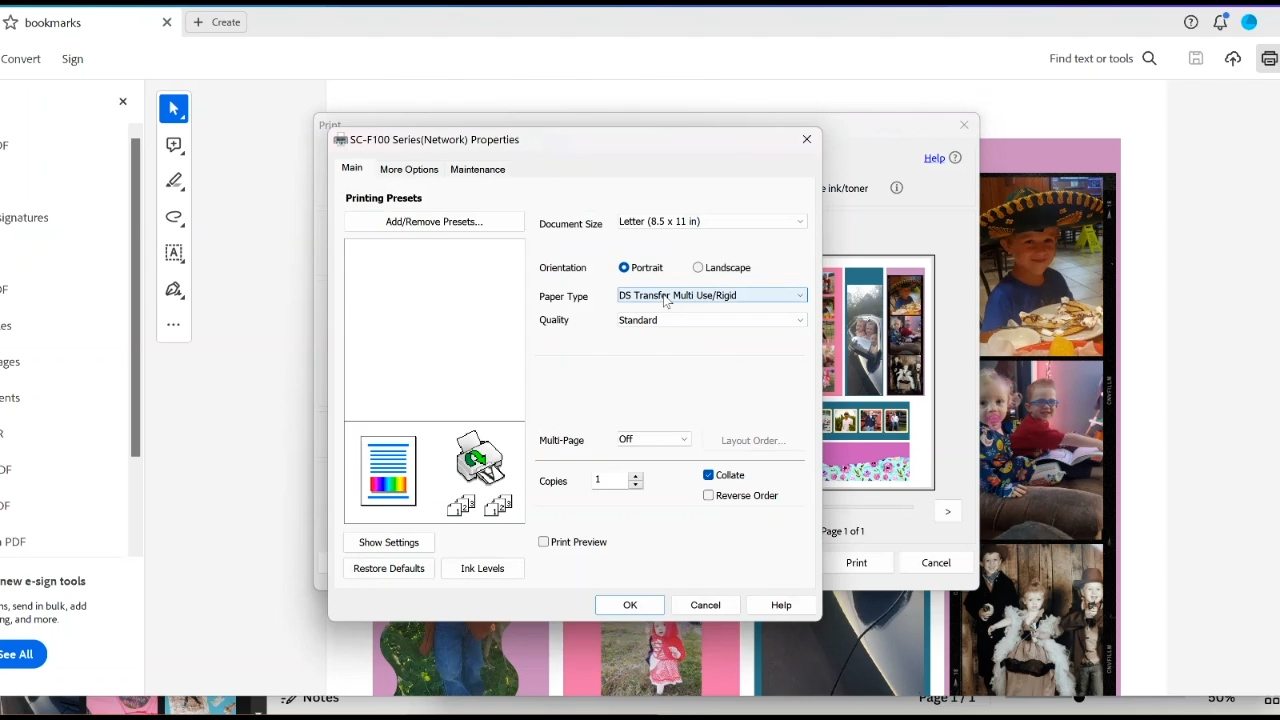
How to Print with Epson F170 Sublimation Printers
Printing to the Epson F170 is very similar to printing to an Epson EcoTank.
The biggest difference is that you have the option of either Textile or Rigid. What you choose will depend on the blank you’re using. If you’re using a textile or polyester fabric, choose Textile. If you’re using something rigid like metal, hardboard, or ceramic, choose Rigid.
After that, click Best Quality, turn Bidirectional off, and turn Mirror on. Make sure you’re printing full size like we did with the EcoTank.
You should not need any color correction with the Epson F170 so you’re ready to print.
Reviewing Sublimation Prints for Correct Size
Now that I have all of my sublimation designs printed let’s look at each one.
For the pillow designs, I printed two photos per page. My pillow blank needs nine total photos so I had to print several sheets for that project.
I printed several bookmark designs onto one sheet of paper because they are small. These bookmarks came in a bulk pack so I am going to make several different ones.
For the mug project, I printed the design onto an 8.5″ x 11″ sheet of paper. You can purchase mug-sized sublimation paper to save paper, I didn’t do that this time.
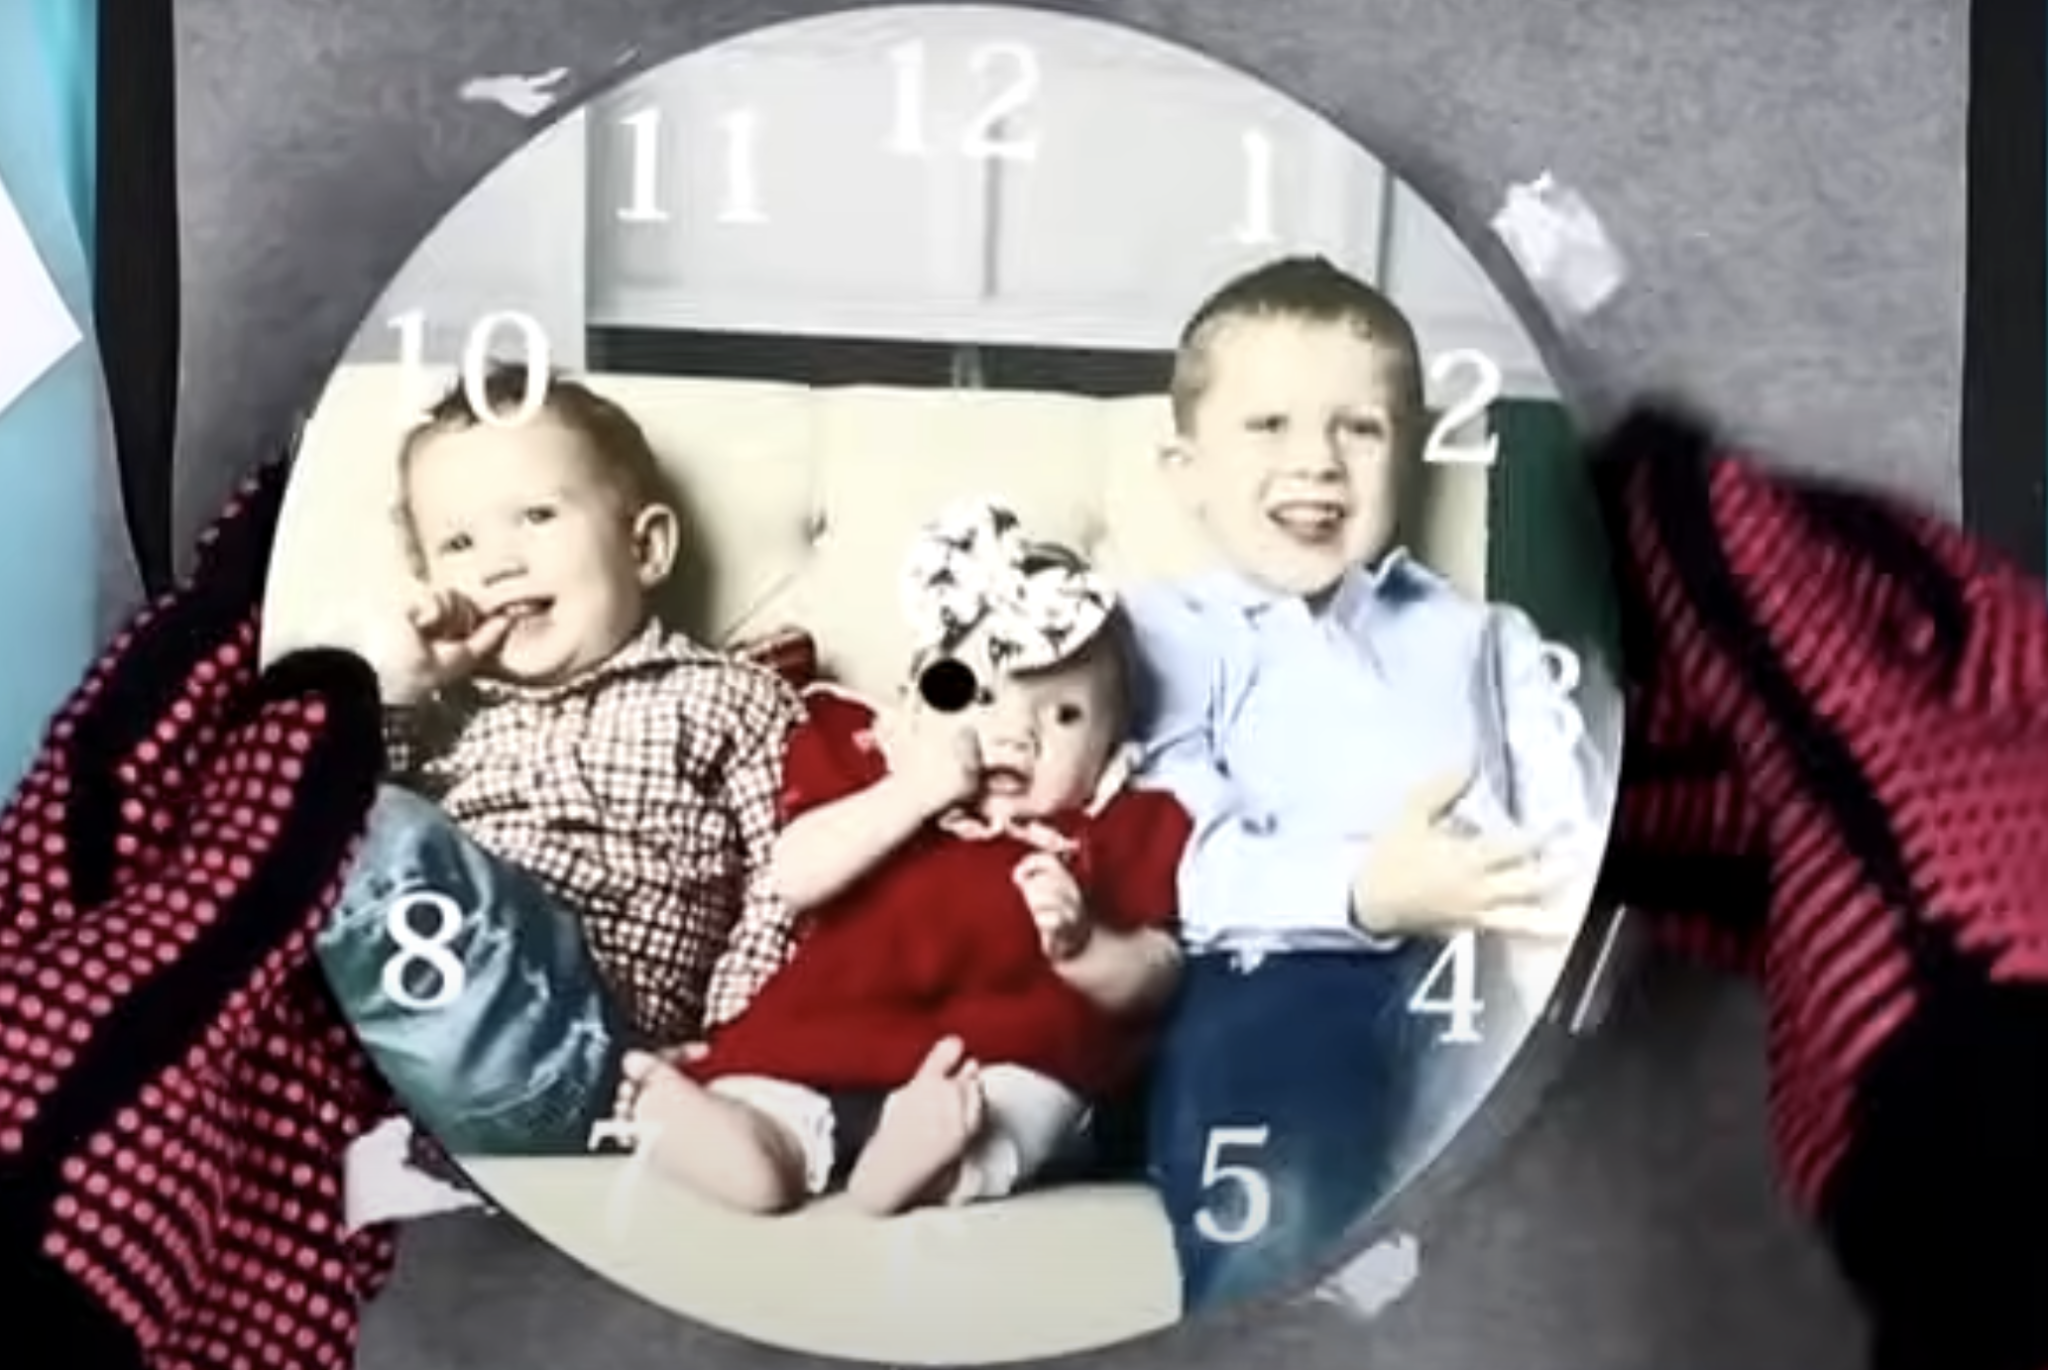
For the clock, I printed the design on 8.5″ x 11″ sublimation paper. This design is the easiest one to tell the design is mirrored. You can see that numbers are mirrored so I know it’s printed correctly.
For the photo panel, the image is 8″ x 10″. It is also printed onto 8.5″ x 11″ sublimation paper and mirrored.
To reduce the likelihood of ruining a sublimation blank I would check the measurements of each print and make sure it is correct for the blank you’re putting it on.
Note – if you are not using the exact same listing that I am your sizing could be different. Triple-check the measurements. You don’t want to waste sublimation blanks.
The squares on my sublimation pillow cover are 4.5″ x 4.5″. If you purchase a different pillow cover the dimensions may be different so make sure you measure each square before printing and pressing.
Prepare Sublimation Blanks
Next, we need to prepare the sublimation blanks.
Step 1: Remove Protective Film
The first thing I like to do is check them to ensure they don’t have any type of protective film on them. The bookmarks and the photo panels all have a protective film so I removed those from both sides.
If you’re using blanks that are different than mine, make sure you check them really well for protective film. If you heat up the blank with a protective film on it, you can ruin the blank.
Step 2: Preheat Sublimation Blank
When working with sublimation, even with my EasyPress, I prefer to use a firmer heat-resistant mat like the Artesprix mat.
I am really cautious when it comes to sublimation blanks. I do everything possible to ensure the print sublimates correctly.
If there is an enemy to sublimation it’s moisture. Preheating the blanks removes moisture and is a really important step that you don’t want to skip. I am going to preheat all of the blanks except the mug. It probably isn’t necessary to preheat a metal blank but I am going to anyway.
With hardboard and fabric blanks, you must preheat the blanks to remove moisture. I add protective paper to the bottom and top of the blank and press it for about half the actual pressing time at the full temperature. If you notice a lot of steam, I would press longer until the steam decreases or is gone.
With fabric blanks, you’ll also want to use the preheat time to remove any wrinkles so they don’t impact the final design.
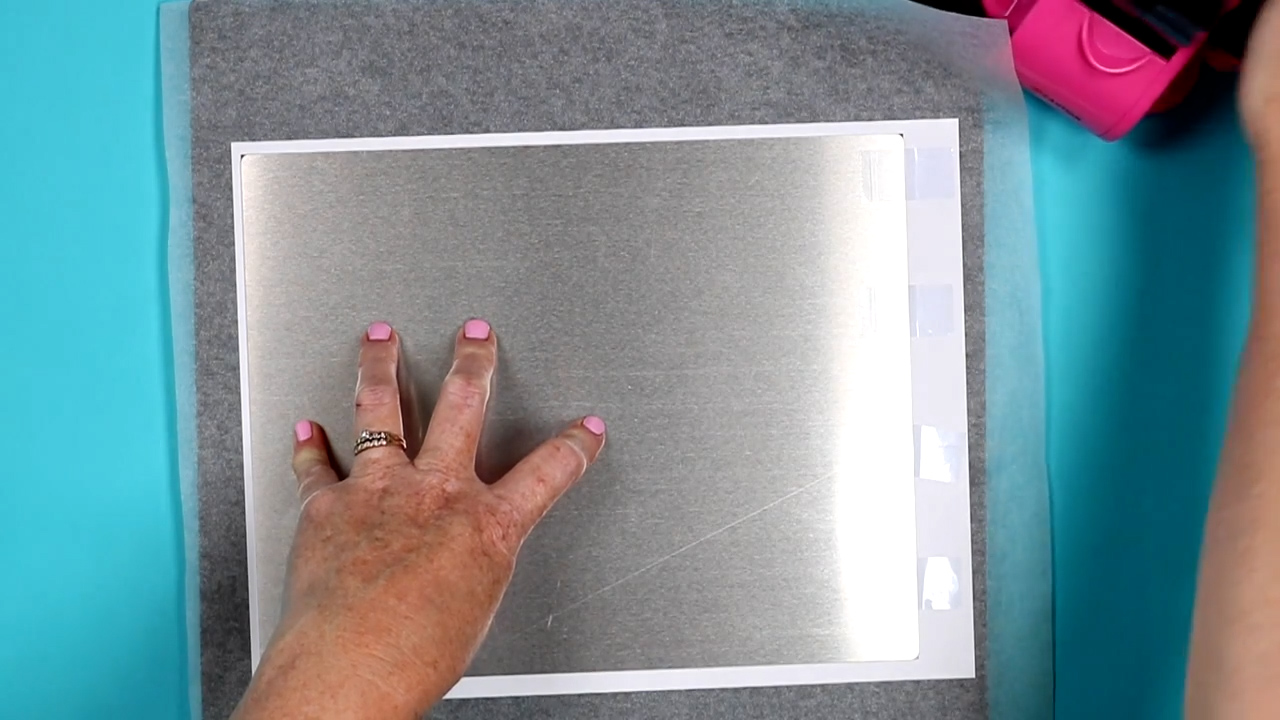
The photo panel I’m using does look the same on the front and back. You’ll want to make sure you don’t mix up the front and back. The front of this one has a coating on it that allows for sublimation. On the back, it is marked ChromaLuxe. Make sure that the marking is on the back and you should be fine.
Step 3: Clean Sublimation Blanks
The last step for preparing sublimation blanks is to make sure they are clean.
I like to use a lint roller to clean blanks, both cloth and rigid. If you feel like your rigid blank needs a little more cleaning you can use a lint-free cloth and rubbing alcohol.
How to Make Sublimation Bookmarks
The first project we’re going to make today is the sublimation bookmarks.
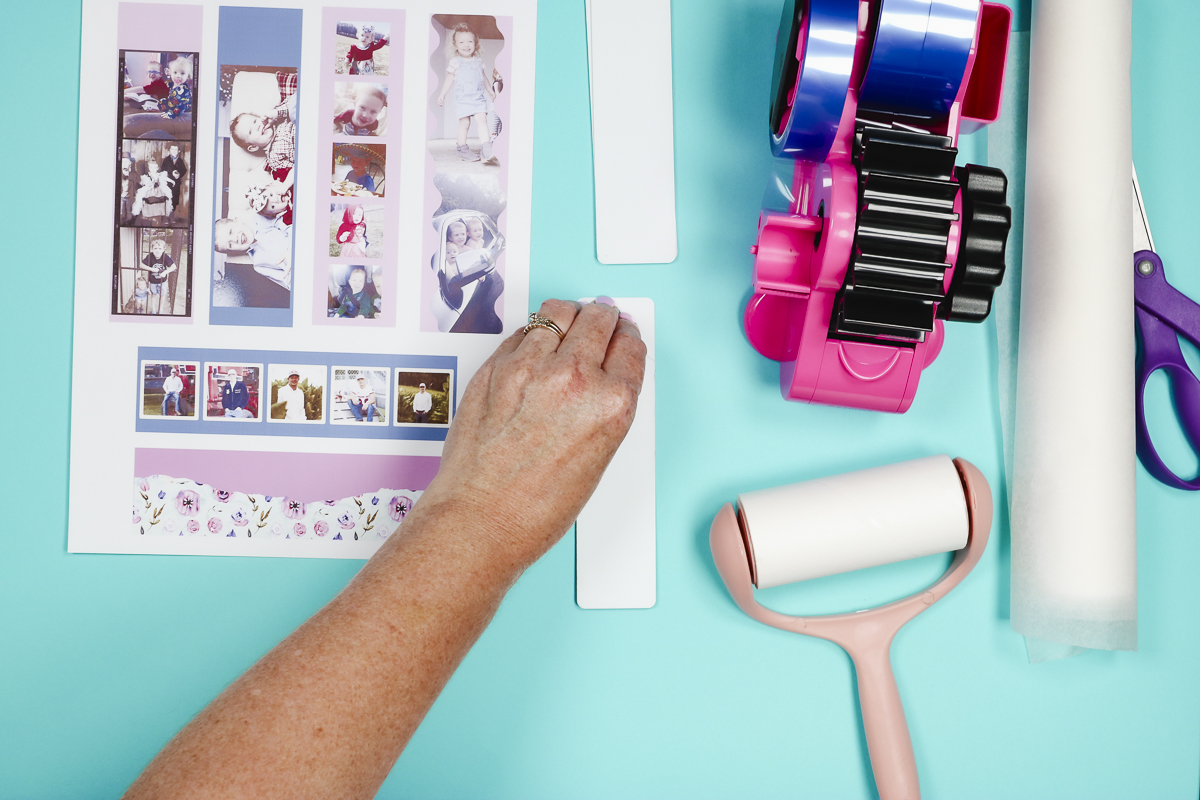
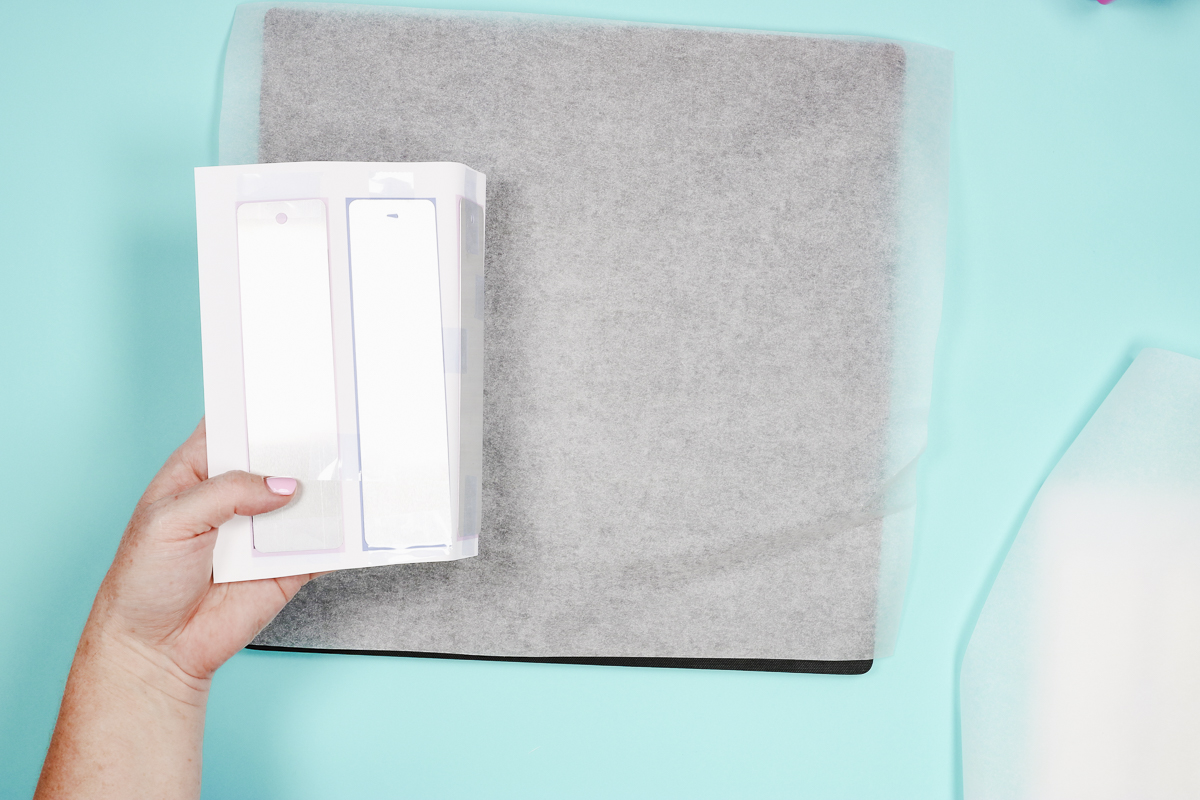
Step 1: Locate Print on Sublimation Bookmark
This bookmark blank is metal and has a white side that is the side you want to sublimate on. Place the bookmark, white side down on the sublimation print.
I made my bookmark sublimation template slightly oversized. This allows me to use the edge of the print to help locate the design.
Use heat-resistant tape to hold it in place. If your sublimation bookmark has a hole in the top, that will be the top. Make sure you locate the design correctly.
Repeat the process for however many bookmarks you’re going to sublimate and it’s time to press.

Step 2: Press Sublimation Print onto Sublimation Blank
I am pressing multiple bookmarks at once. Because they are the same thickness I can press them at the same time. You wouldn’t want to mix different blanks as that can result in uneven pressure and prints not sublimating correctly.
Place a sheet of protective paper on the heat-resistant mat and then place the bookmarks on top with the sublimation paper facing up.
Top with another sheet of protective paper and then press for the recommended time and temperature.
My sublimation bookmarks call for a temperature of 390 degrees for 60 seconds. Check the time and temperature in your product listing if you’re using a different blank.
Place the EasyPress on top making sure to cover the entire surface and press down with medium pressure.
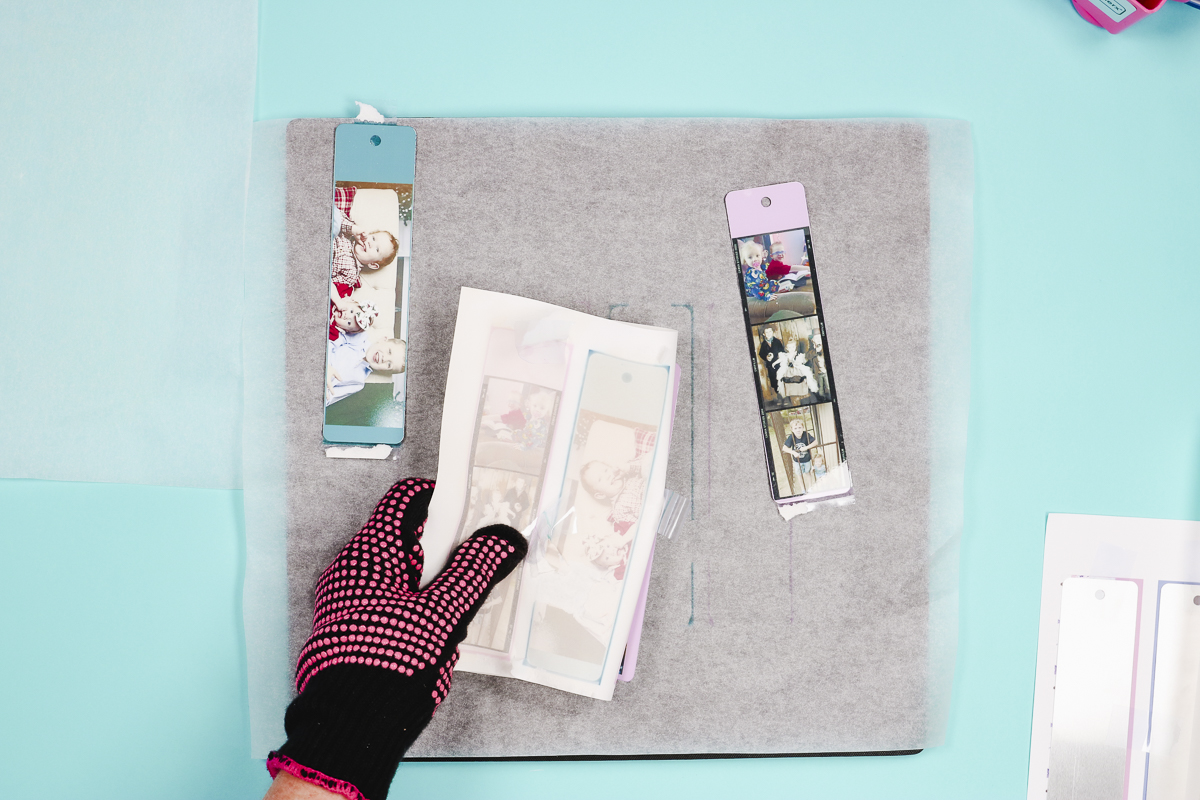
Start the timer and when the time is up lift the EasyPress straight up, and using heat-resistant gloves peel back the protective paper and sublimation print while it’s still hot.
Step 3: Reveal Finished Sublimation Bookmark
Here you can see all the finished sublimation bookmarks I made today. There are a variety of different templates that allow you to add a single photo, multiple photos, and even one that doesn’t have a photo at all.
The tassels came with the sublimation bookmark blanks in a variety of colors so you can mix and match them to coordinate with the photos you’re using.
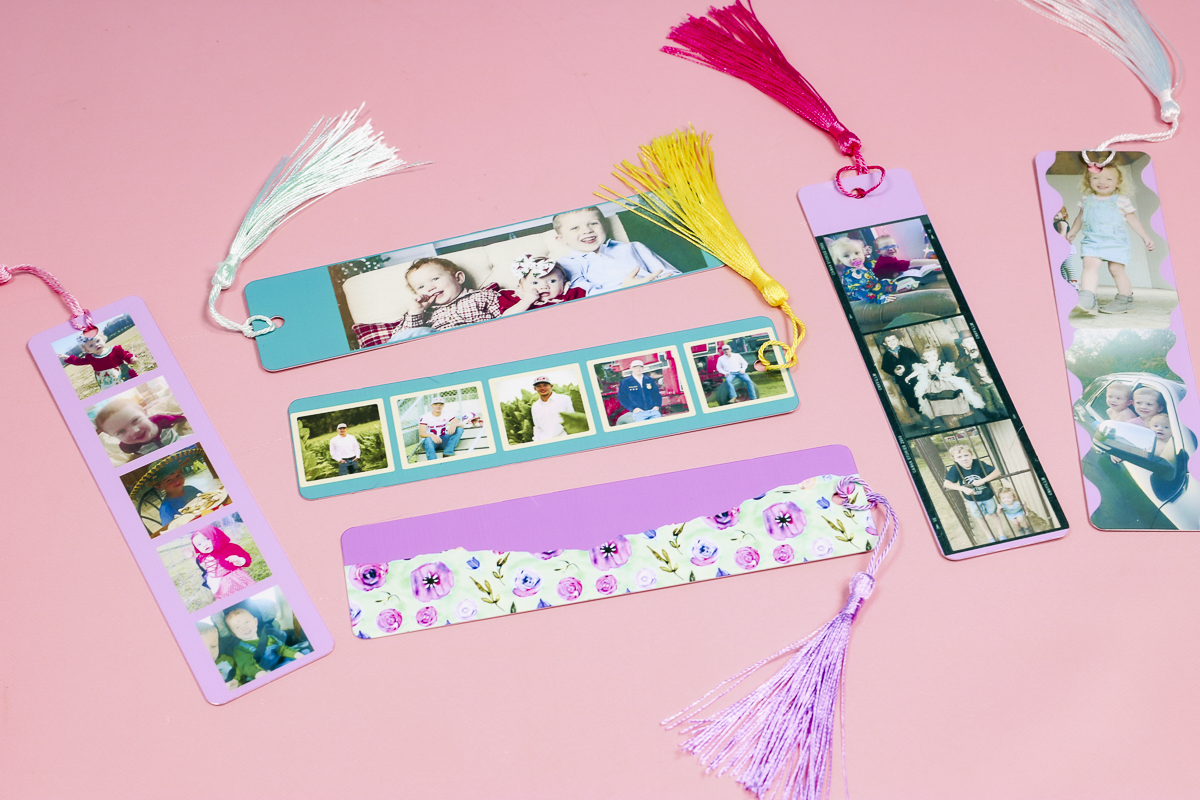
Bookmarks make perfect photo sublimation gifts. They’re inexpensive and easy to personalize for anyone on your gifting list. Now that you know how to make your own you can make them for yourself, family members, and even friends.
How to Make a Sublimation Clock
Our next photo sublimation gift is one of my favorites. The sublimation clock is one of the most unique sublimation gifts I’m going to show you today.
I did end up using a microfiber cloth and rubbing alcohol to get the surface really clean. Use rubbing alcohol, not water. Rubbing alcohol dries very quickly but you need to make sure it’s dry before you add the sublimation print.
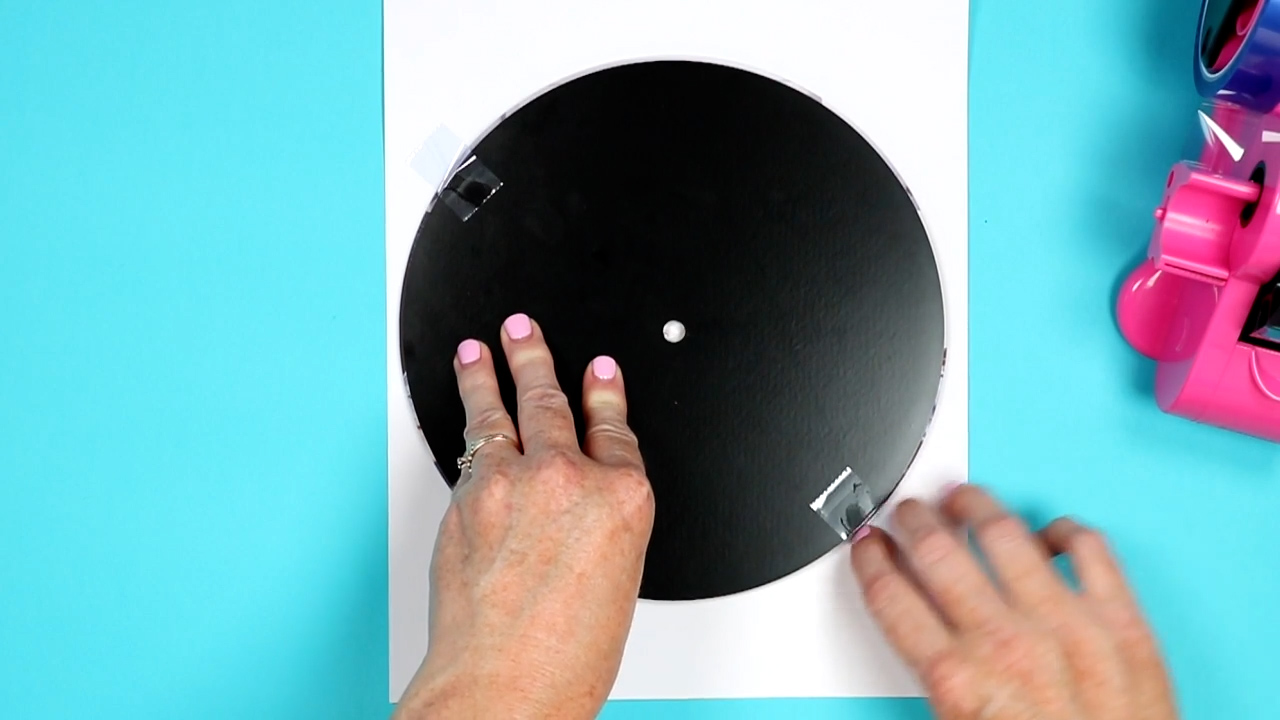
Step 1: Add Sublimation Print to Clock Blank
The next step is adding the sublimation print. The white side of the clock is the side you sublimate on and the black is the back. Add the sublimation print to the clock like we did the bookmarks.
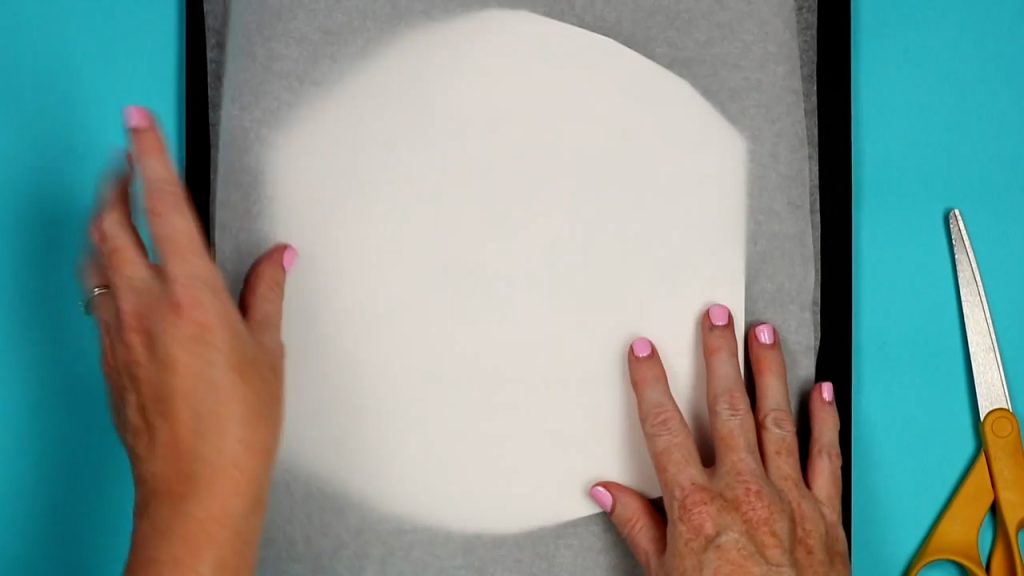
This template is slightly oversized so make sure you can see equal amounts of the print all the way around the blank.
Use heat-resistant tape to hold it in place. I like to over-tape on blanks like this so there is no chance the print moves during the pressing process.
Step 2: Press Sublimation Photo onto the Sublimation Clock
The pressing process is similar to the bookmark. On the bottom, we have the heat-resistant mat and then a sheet of protective paper on it. Next, add the sublimation clock with the print on top. Place another sheet of protective paper on top.
Make sure the EasyPress covers the clock completely and press for 70 seconds at 360 degrees.
Step 3: Reveal Finished Sublimation Photo Clock
When the timer goes off on the EasyPress, lift the press straight up and check the print while it’s still hot.
I like to do the peek test on blanks that are a little more expensive. To do the peek test, with heat-resistant gloves I gently lift one area and make sure that the sublimation looks good. If it doesn’t you can lay it back down and press again without messing up the blank.
My peek test looks good so I am going to remove the sublimation print and allow the clock to cool before assembling it.
Step 4: Assemble the Sublimation Photo Clock
Now that the clock is cool we can assemble it. Press the clock mechanism onto the back of the clock through the hole in the clock. It is important to align the hole on the mechanism with the 12 on the clock so it can hang correctly.
Next, we’ll apply the gold washer and the gold nut to the stem sticking out of the clock. Tighten the nut to hold it in place making sure everything is lined up.
Press the hour hand onto the stem sticking out the front of the clock then the minute hand and last add the second hand and that finishes the front of the clock.
With all the hands in place, add the batteries to the mechanism and position the hands at the correct time.
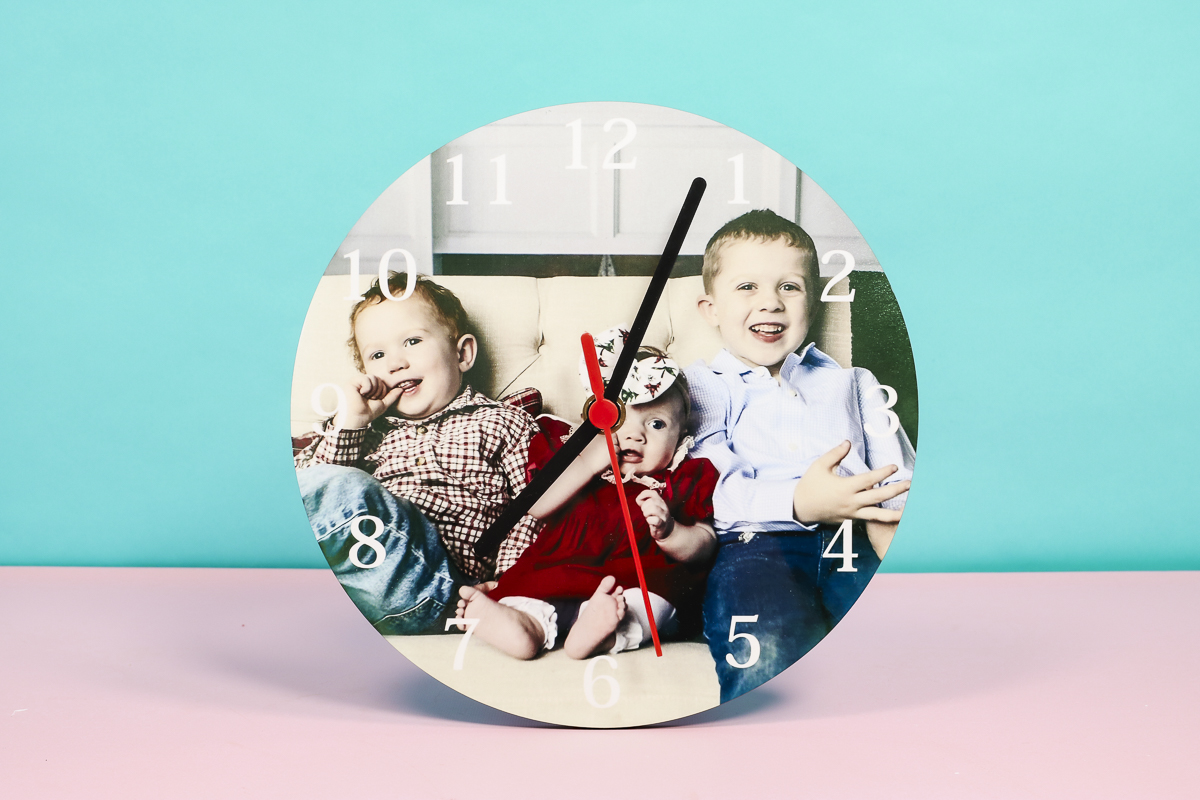
Didn’t this clock turn out perfectly? When it comes to a unique photo sublimation gift I think this clock may be the best.
For the next sublimation photo gift idea, we’re going to make a metal photo panel. This photo panel is different because it has a metal finish unlike a lot of others that have a white sublimation coating.
Step 1: Locate Sublimation Print onto Photo Panel
After you clean your surface it’s time to locate the print on the photo panel. For this project, I sized the photo the same size as the photo panel. The front and the back look similar so make sure that the ChromaLuxe brand sticker is on the back.
Because the print is the same size as the photo panel take your time lining it up exactly how you want it. I am using a lot of tape to hold it in place.
Step 2: Press Sublimation Print onto Metal Photo Panel
Set up the sublimation sandwich like we did for the other sublimation photo gift ideas. Start with the heat-resistant mat and cover it with protective paper. Add the photo panel with the sublimation print facing up and cover it with protective paper.
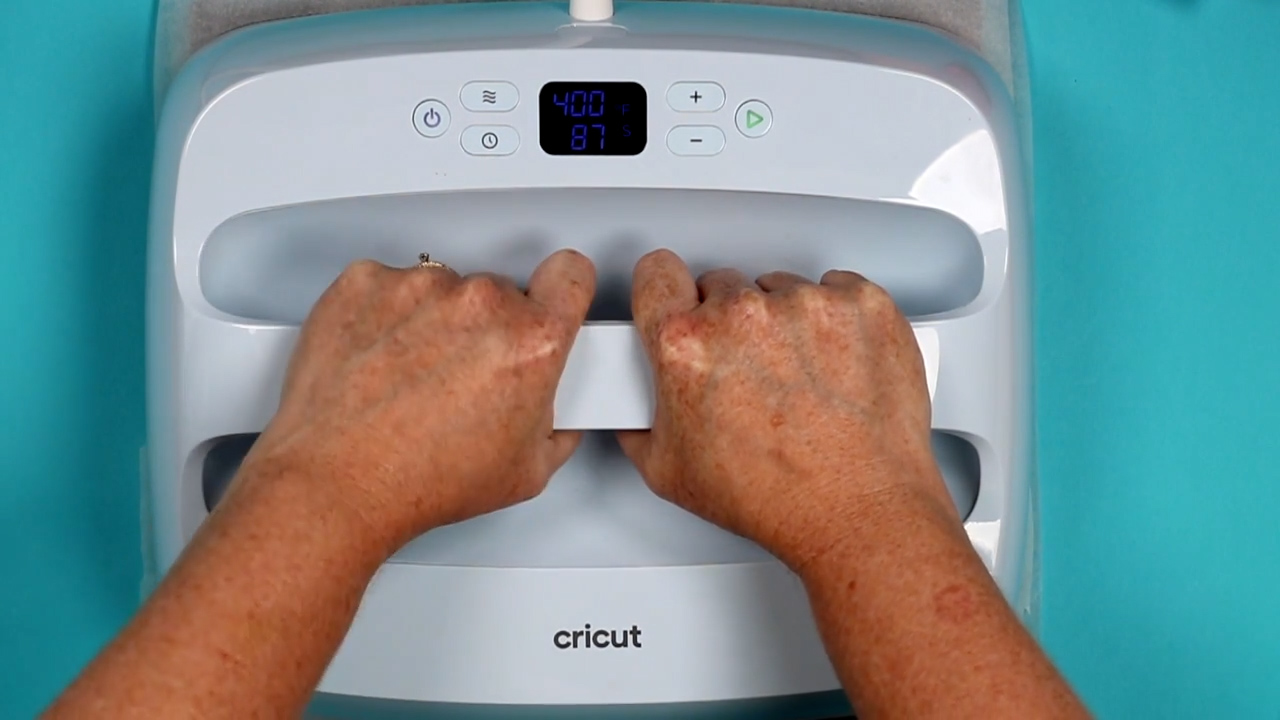
I am using my larger EasyPress so I can cover the entire surface at once. This blank calls for a temperature of 400 degrees for 90 seconds. Press down with medium pressure for the entire time and when the time is up, lift the press straight up.
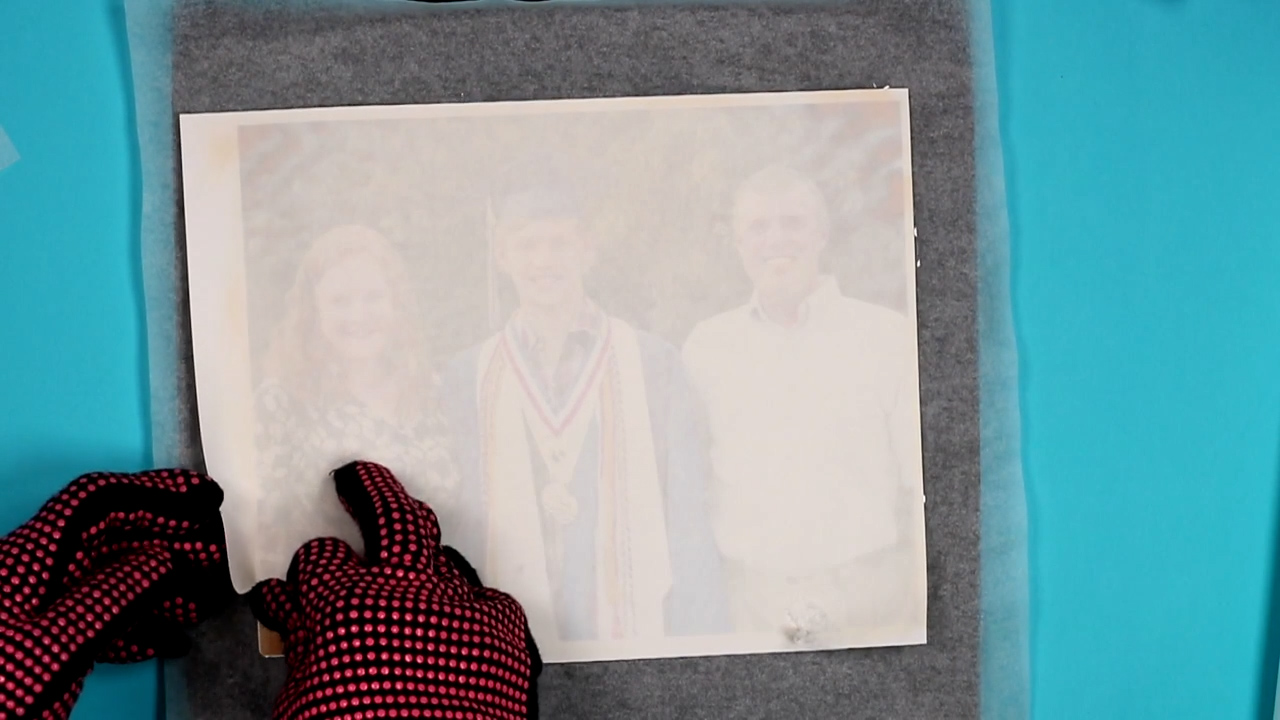
Step 3: Do a Peek Test to Check Print Results
Like we did with the clock I am going to lift a small portion of the print to make sure the sublimation looks good. I do like to check in a couple of different places, especially if it’s the first time I’m testing a blank.
My sublimation print looks really good so I can remove the sublimation print and reveal the finished product.
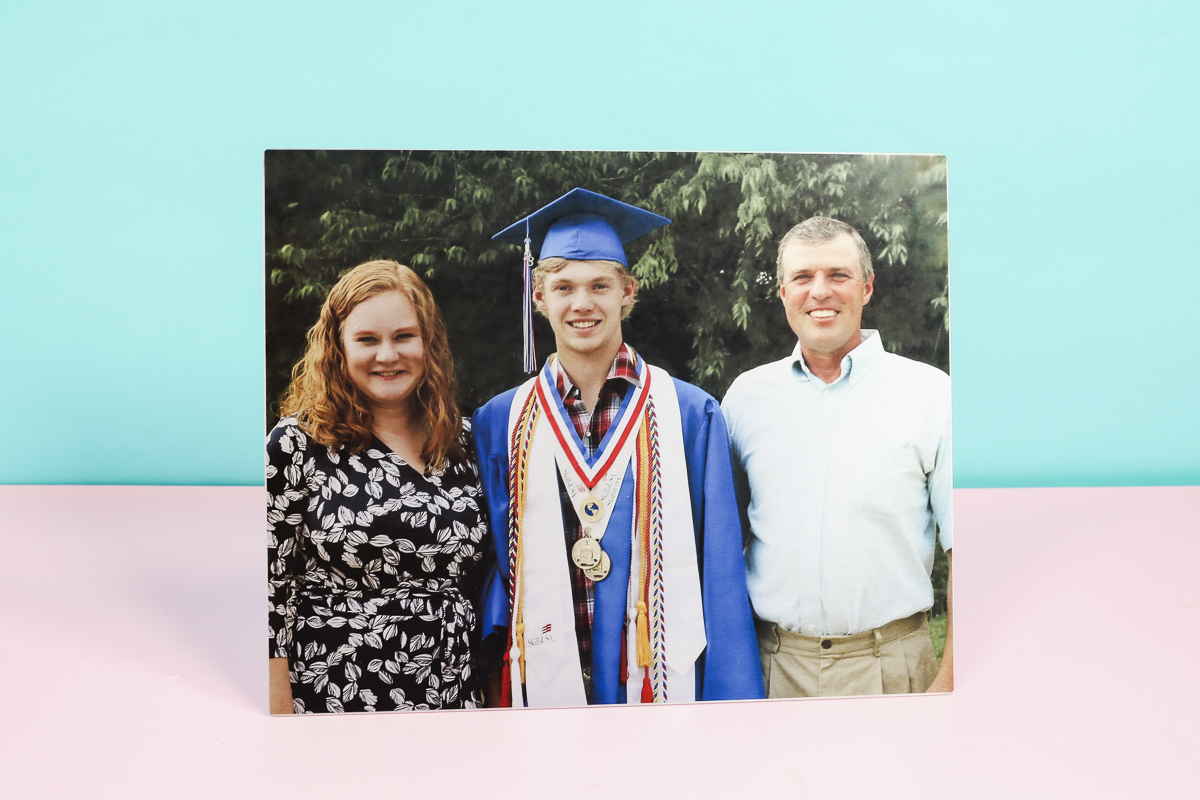
Step 4: Reveal the Finished Photo Sublimation Panel
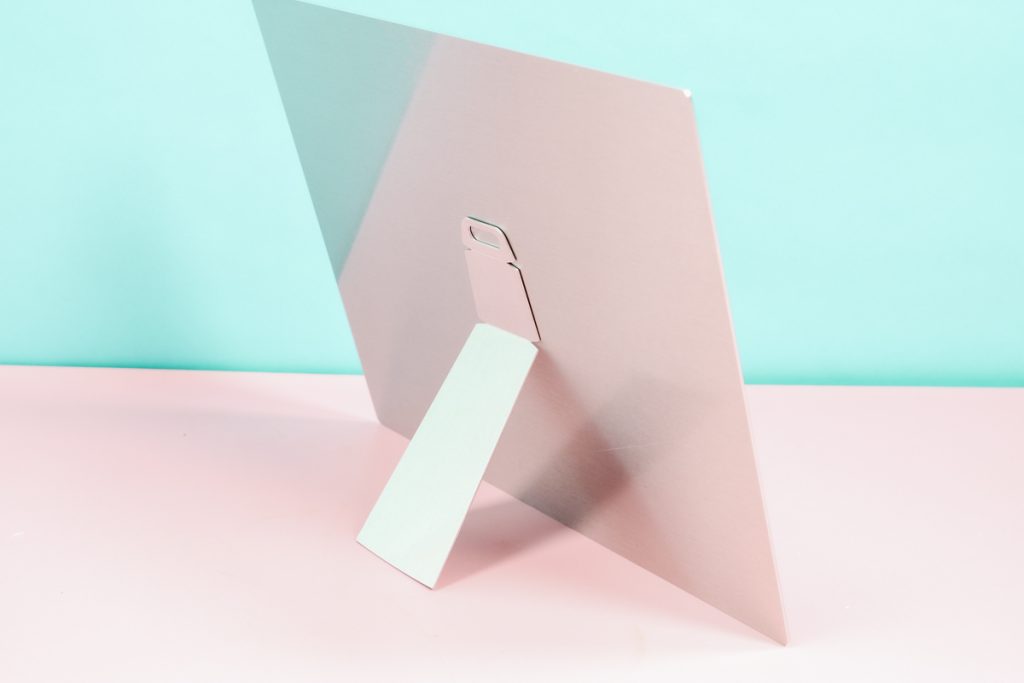
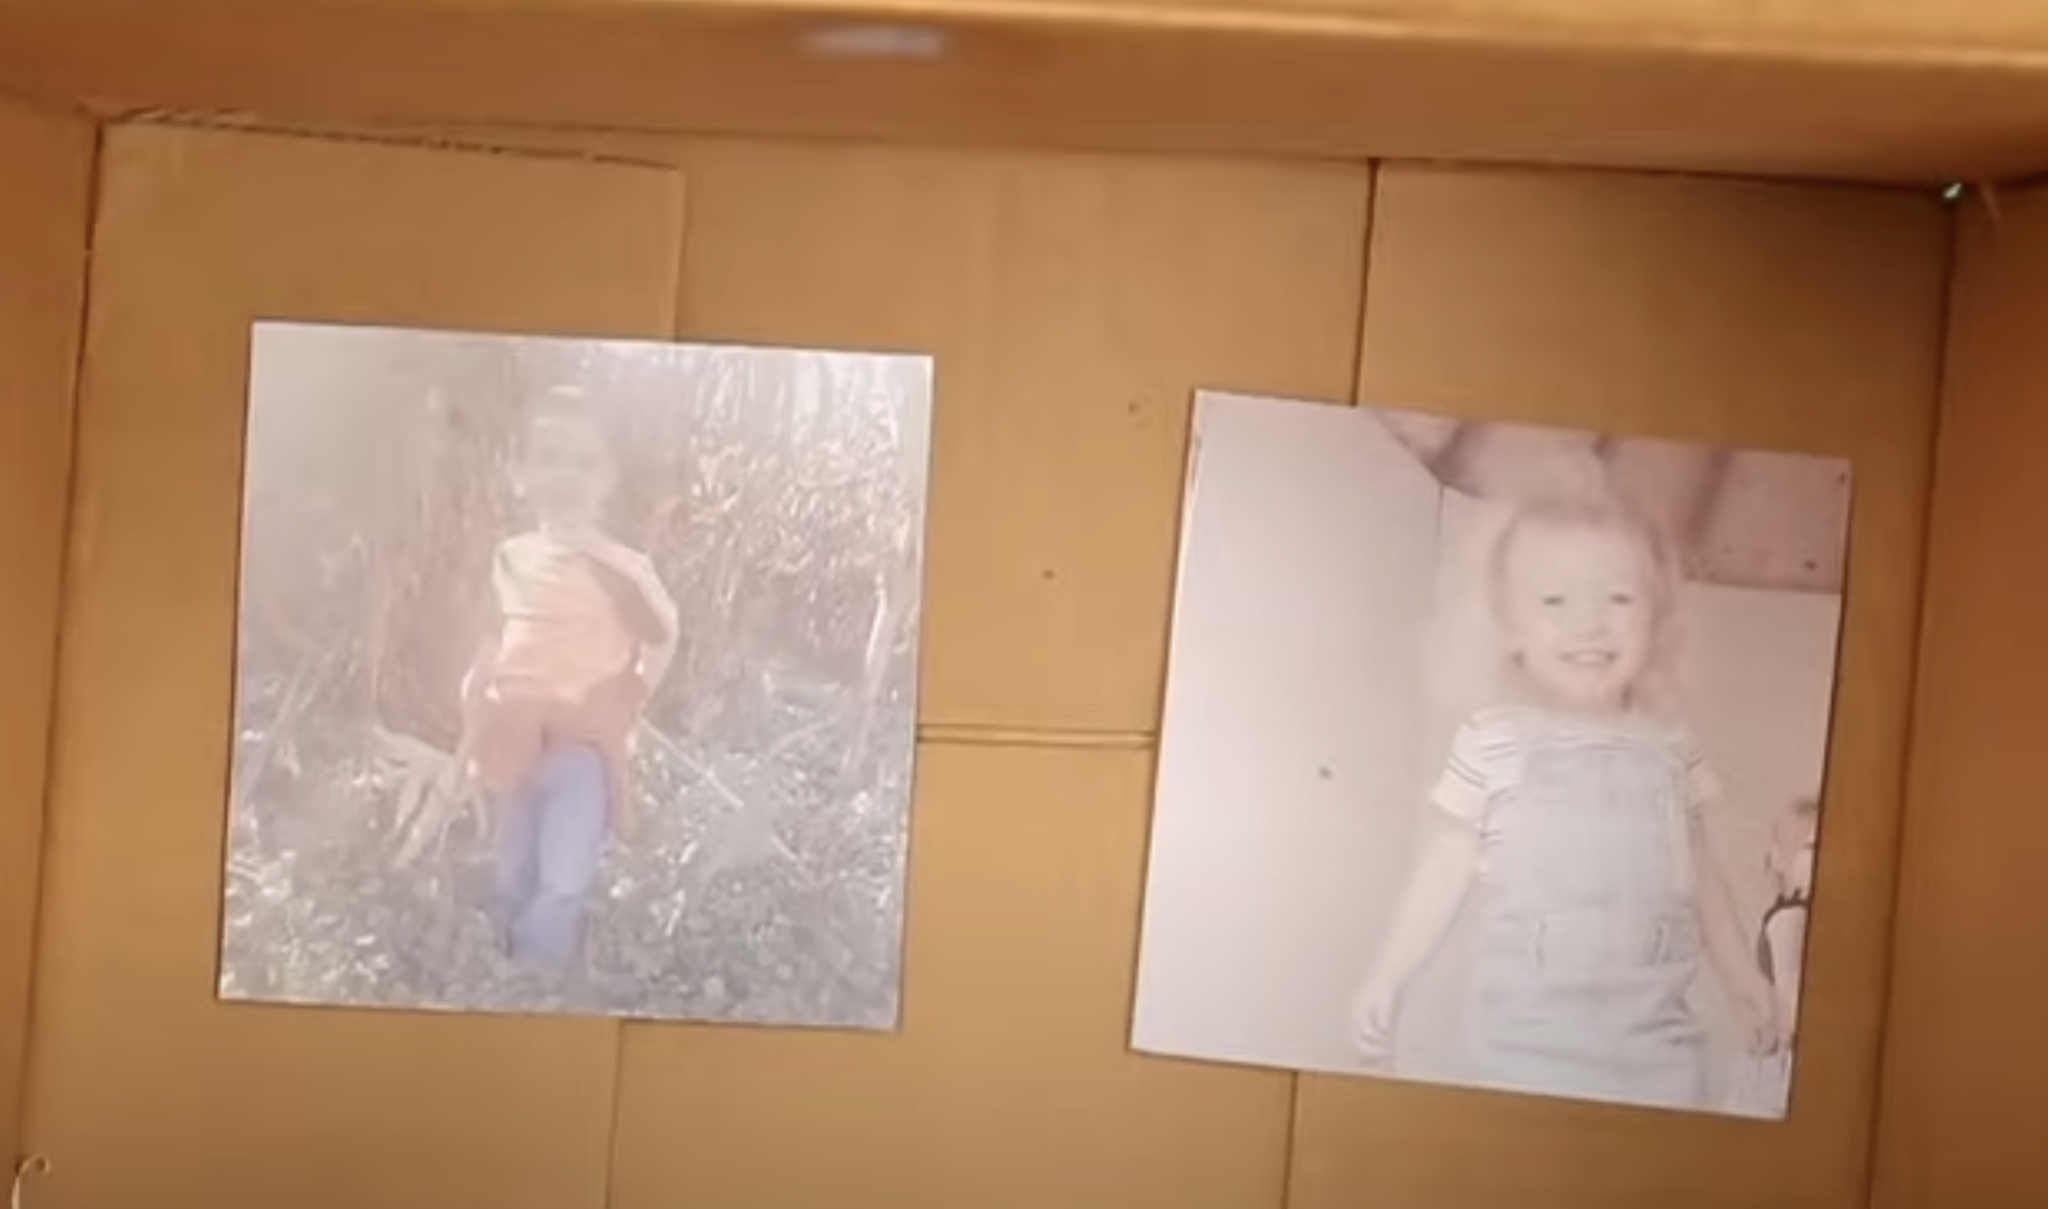
This project turned out perfectly. I love how the metallic finish gives a slightly different look than blanks that have a white sublimation coating. It has a shine to it that you don’t get with that white coating.

Step 5: Add Easel to the Back of the Photo Panel
To finish the photo panel we need to add the easel that came with it to the back. The easel has an adhesive that sticks it to the photo panel. Before applying it to the panel you’ll want to line it up so it sits how you want it. The easel also has a hole in the top so you can use it to hang from the wall.
When I had things set up how I wanted I used a pencil to trace around the top of the easel so I could locate it exactly where I wanted. Peel back the liner, covering the adhesive, and stick it to the back of the photo panel. Hold it down for a few seconds to let the adhesive adhere and you’re ready to stand it up however you would like.
If you want to hang the photo panel, I’d let the adhesive adhere for a few hours before hanging to ensure it stays stuck down well.
How to Make a Photo Panel Sublimation Pillowcase
The next photo sublimation gift idea I have for you today is the photo panel sublimation pillowcase.
This is the most difficult project we’re going to make today. I don’t think it’s hard and you can definitely make one but you will want to read through all the steps before you begin to make sure you have everything ready.
Step 1: Preheat the Entire Surface
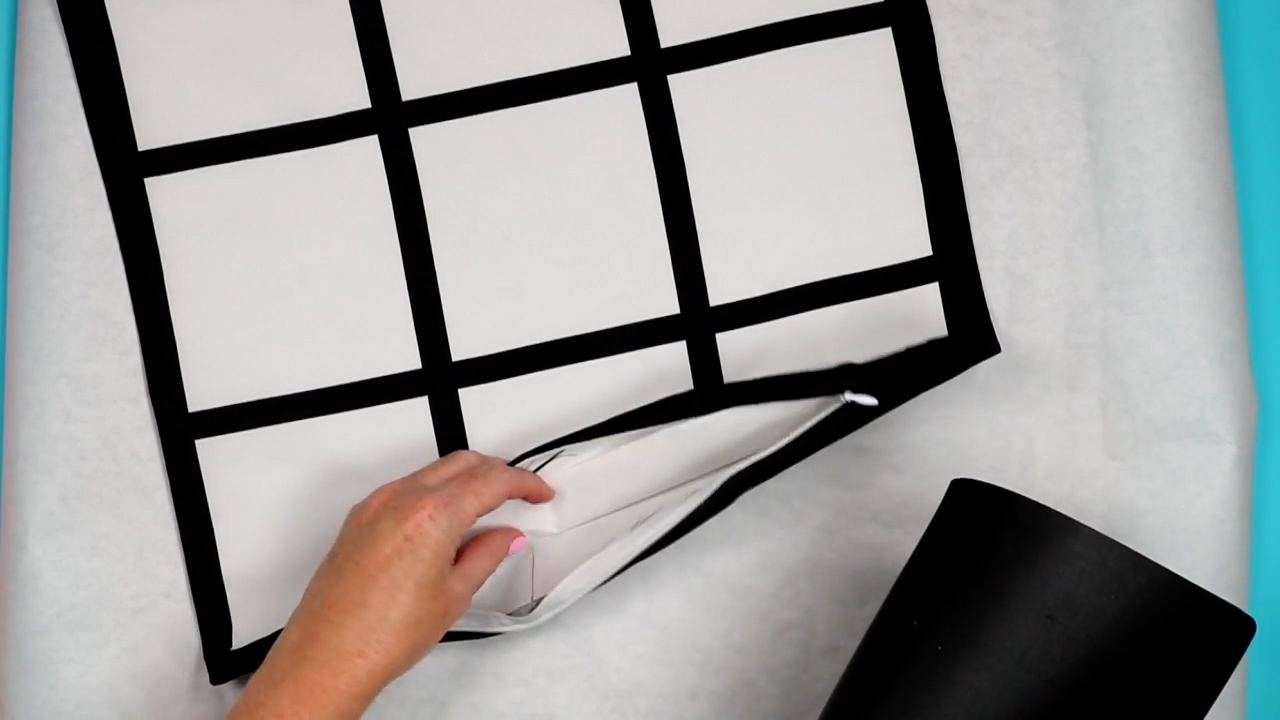
The sublimation pillowcase I used has white photo panels that we can sublimate and black trim around all of those panels. Unfortunately, the black fabric transfers when heat is applied.
I actually ruined my large EasyPress mat because the black transferred to the mat while I was preheating the fabric.
Note – if you are able I do think watching the video for this portion of the tutorial is helpful so you can see the exact process.
You will need a lot of protective paper for this project. Cut the protective paper to the exact size of the pillowcase. To preheat the pillow cover, I placed two pieces of protective paper inside the cover to prevent color transfer from the black fabric.
For the preheat, I have my EasyPress set to 360 degrees and I’m pressing for about 10 seconds for each area. Make sure you have the whole surface of the pillowcase covered with protective paper because we don’t want to move that.
You’ll notice there is some black color that has transferred to the protective paper. You’ll need to replace the paper every time because that color can transfer to the white areas ruining your blank.
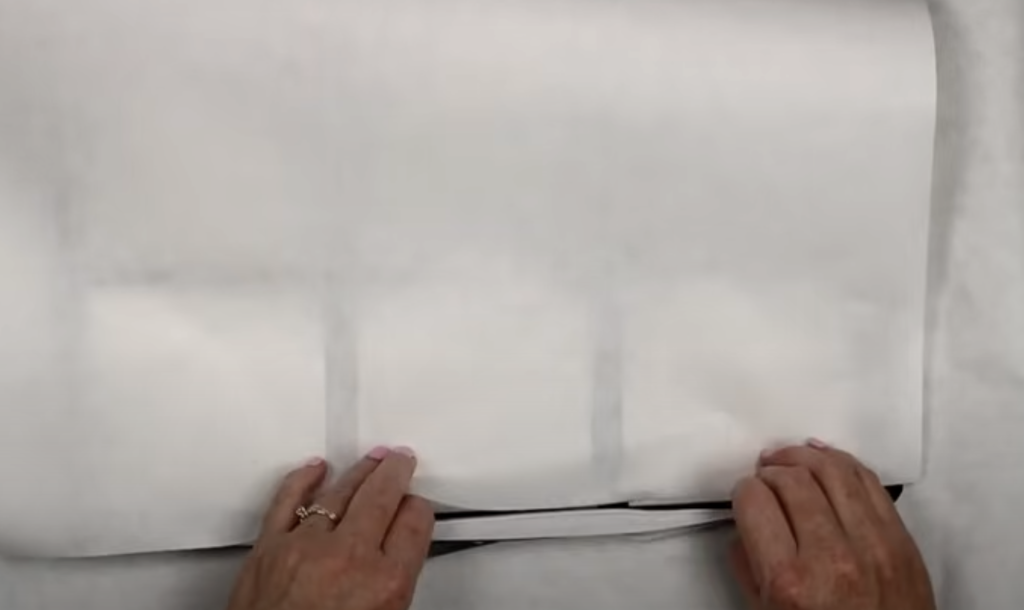
I found that flipping the zipper out helped me get close to that edge so I could remove the moisture from the whole blank. If your zipper won’t stay turned out use some heat-resistant tape to hold it into place.
Step 2: Lint Roll the Entire Pillow Cover
My pillow cover was very linty. I used approximately six sheets from my lint roller to clean the pillow. I did find that the white areas had less lint but it was hard to lint roll only those areas so I cleaned the entire surface.
Make sure and track the areas that you’re cleaning so you get every section cleaned well.
Step 3: Add Adhesive to Sublimation Prints
When I first tested this sublimation pillow cover, I used heat-resistant tape and it left marks where the tape was. Instead of tape, I am using a product called DyeTrans Pro Spray. It is an adhesive spray that will hold the sublimation print in place while you press.
I trimmed all of my images to be exactly the same size as the sublimation squares on the pillowcase.
Shake the adhesive really well and then spray a light coat over the printed side of your sublimation print. I put the prints inside a box to prevent the adhesive from getting on my surface or anything else.
Spray each print, set it aside, and allow it to dry until it’s tacky. You don’t want the adhesive to be wet when you put it on the pillow cover.
Step 4: Prepare Sublimation Pillowcase for Pressing
Now that we have pre-pressed and cleaned the surface we can prepare the pillow cover for pressing.
I am using multiple heat-resistant mats for this project. Under the pillow cover, I have a large EasyPress Mat and then inside the pillow cover, between the two sheets of protective paper, I have two more mats.
The goal is to decrease the amount of heat that gets to the back of the pillow cover. The back of my first pillow cover was really discolored during the pressing process which ruined that blank.
Inside the pillow cover my layer looks like this:
- Protective Paper
- 12×12 EasyPress Mat
- Artesprix Heat-resistant Pad
- Protective Paper
The top piece of protective paper will protect the heat-resistant mats inside the pillow cover and the heat-resistant mats will help reduce the heat that makes it to the bottom of the pillow cover. That bottom sheet of protective paper will protect the bottom of the Artesprix pad from any color that may transfer from the bottom of the pillow cover.
Make sure everything is lying flat inside the pillow cover and then we’re ready to start pressing.
Step 5: Press Sublimation Pillowcase
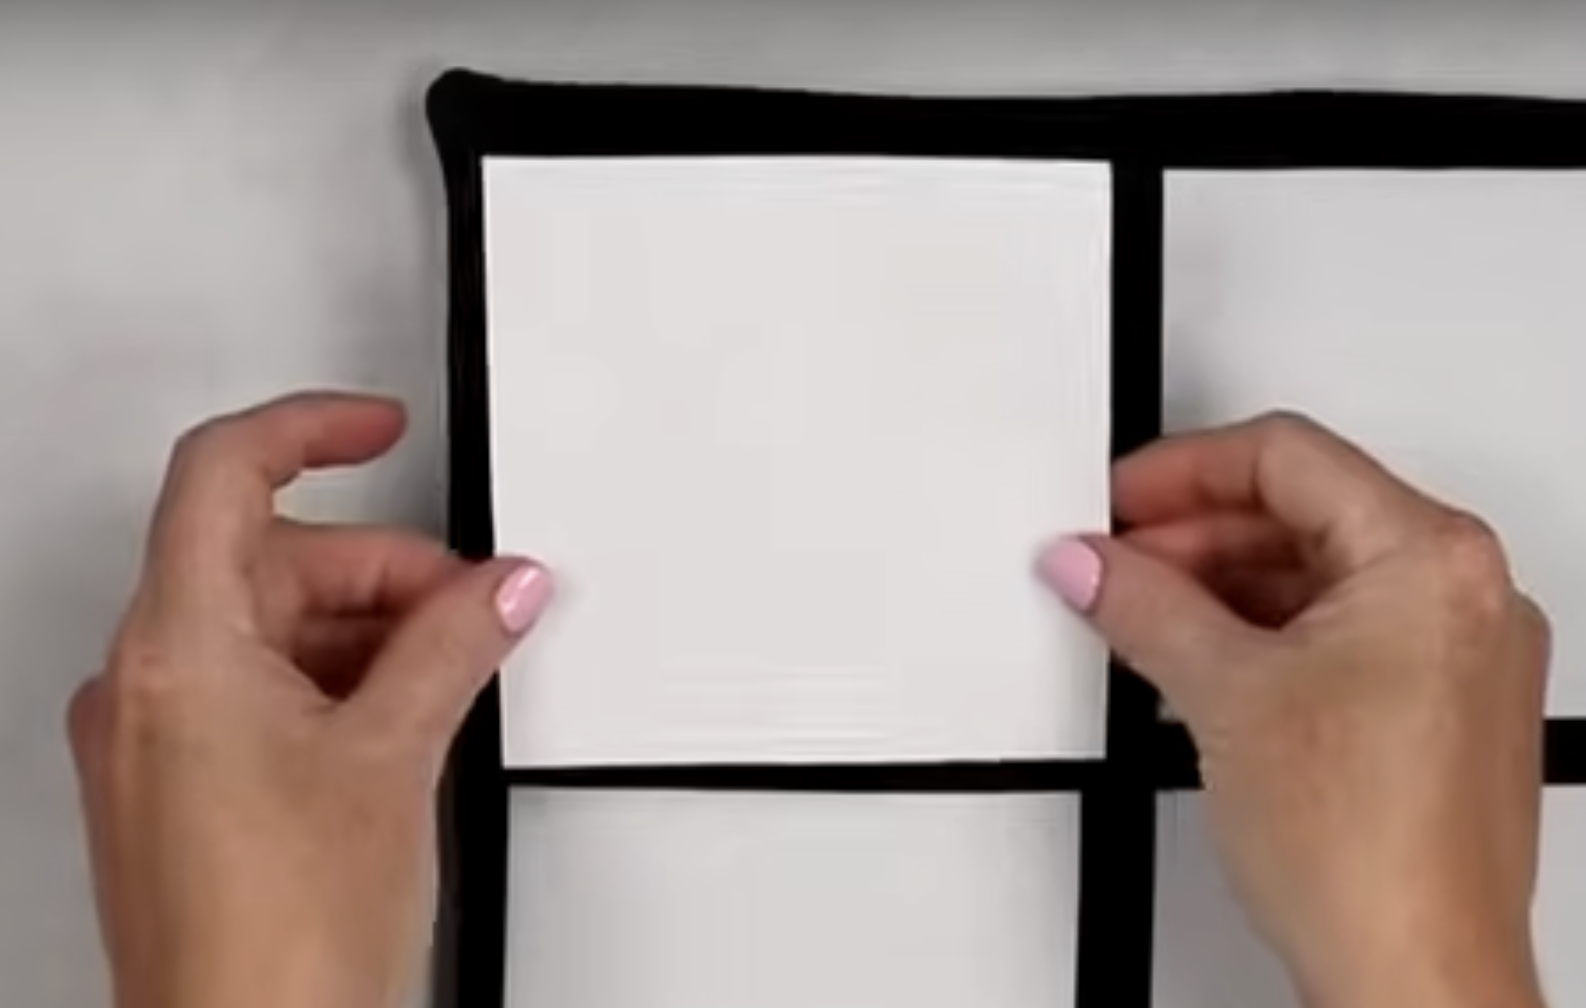
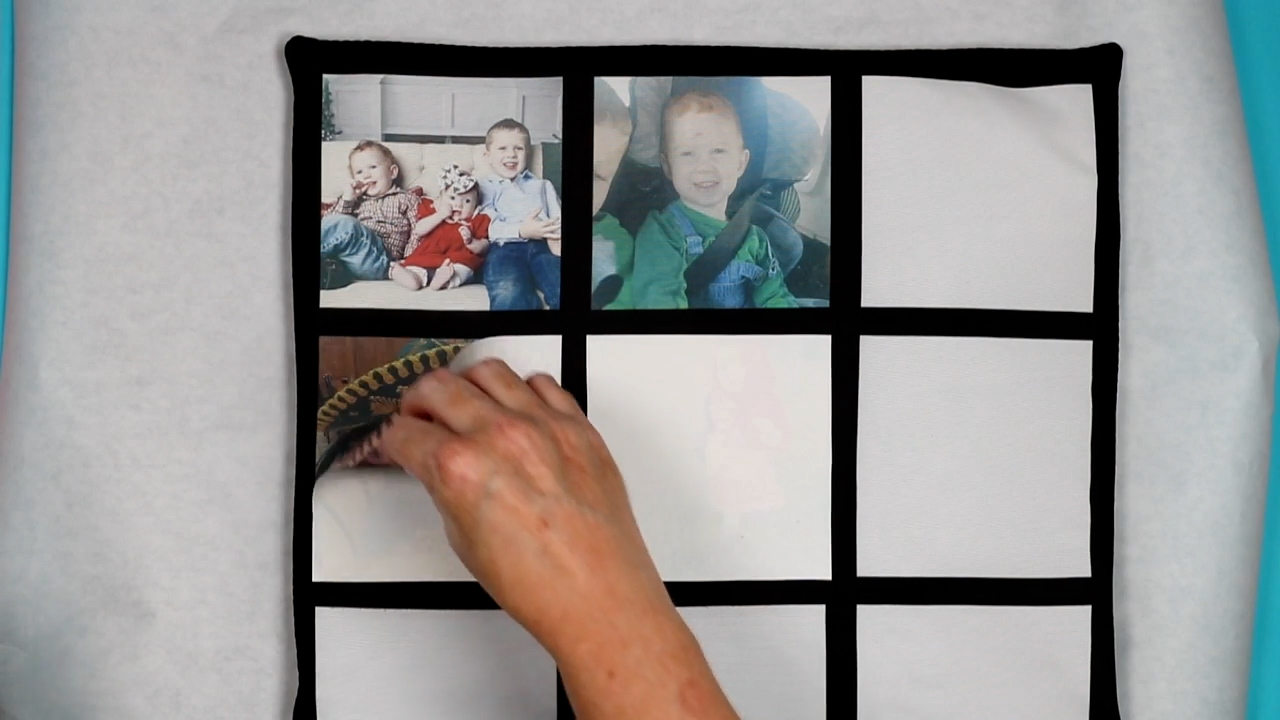
I am working on one section at a time. My EasyPress allows me to press four squares at once so I am placing sublimation prints on four squares. Align the prints carefully so they fit exactly within the squares. If it’s not perfect, lift it up, readjust it, and press it down into place.
Next, we want to cover any area that will be under the EasyPress with protective paper. Press this section for 60 seconds at 360 degrees with medium pressure.
When the time is up, lift the EasyPress straight up and remove the protective paper. You will throw away the protective paper and lift up each sublimation print. There is no adhesive on the fabric or anything, it stays on the paper and doesn’t transfer. The prints look perfect and there are no marks from the tape.
Now we’re going to move onto the next area. I am pressing my project in multiple sections because I wanted to show you that this can be done even with a smaller press. If you have a larger heat press you can press the whole surface at one time.
To press the next area, reach inside the pillow cover and move the two mats over so they’re under the area that needs to be sublimated.
Repeat the process and avoid getting any heat on the areas that are already sublimated. Add the prints and make sure you cover the whole area with protective paper.
Press for the full-time and continue to repeat as needed to finish the whole pillow cover.
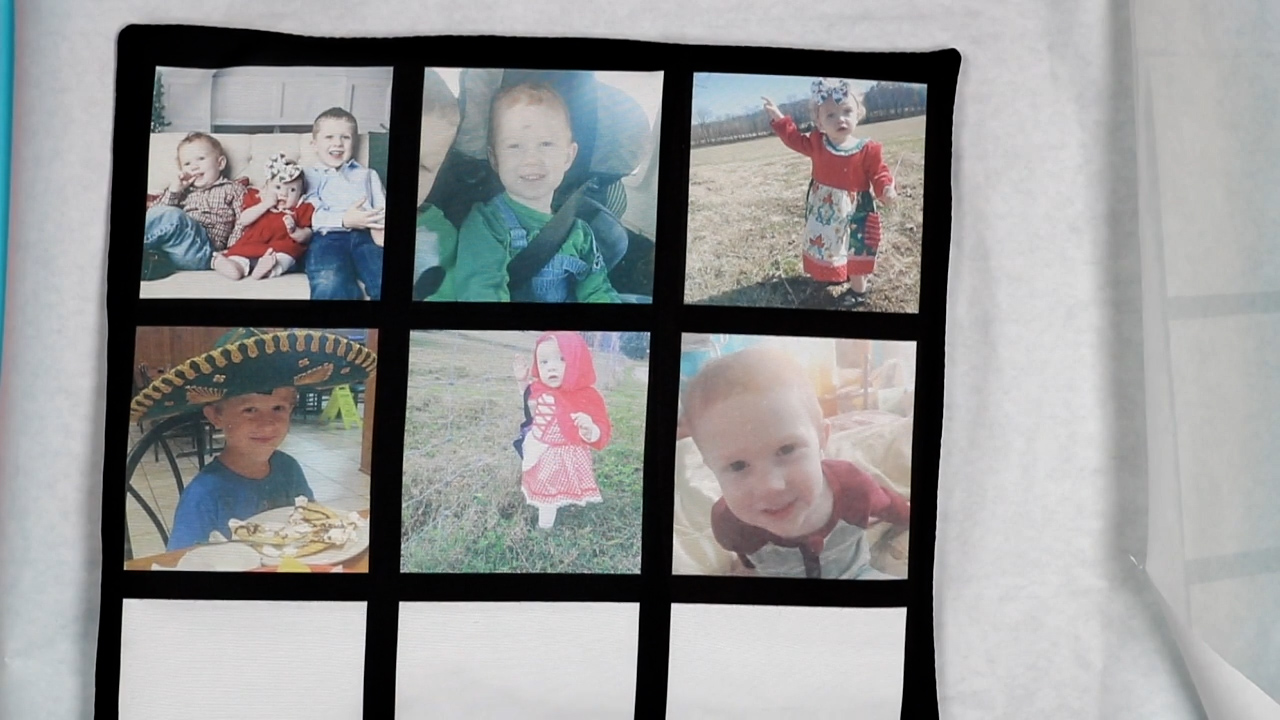
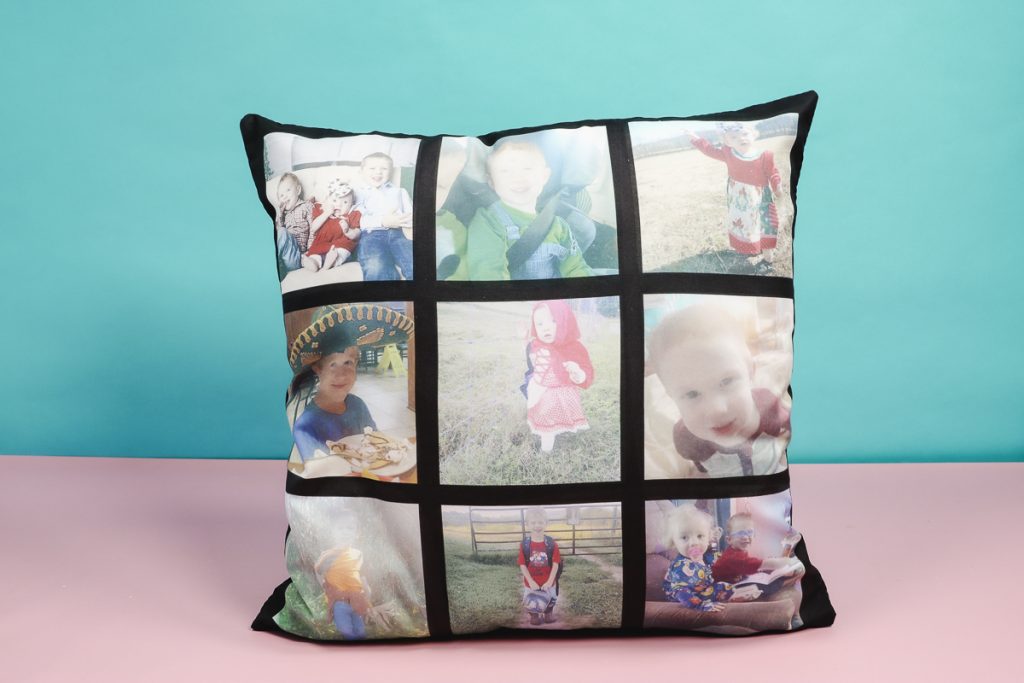
I love how this sublimation pillowcase turned out. I did want to point out that on a couple of the prints, I got a little heavy-handed on the adhesive and they ended up with a few dots. Outside of that, it looks amazing.
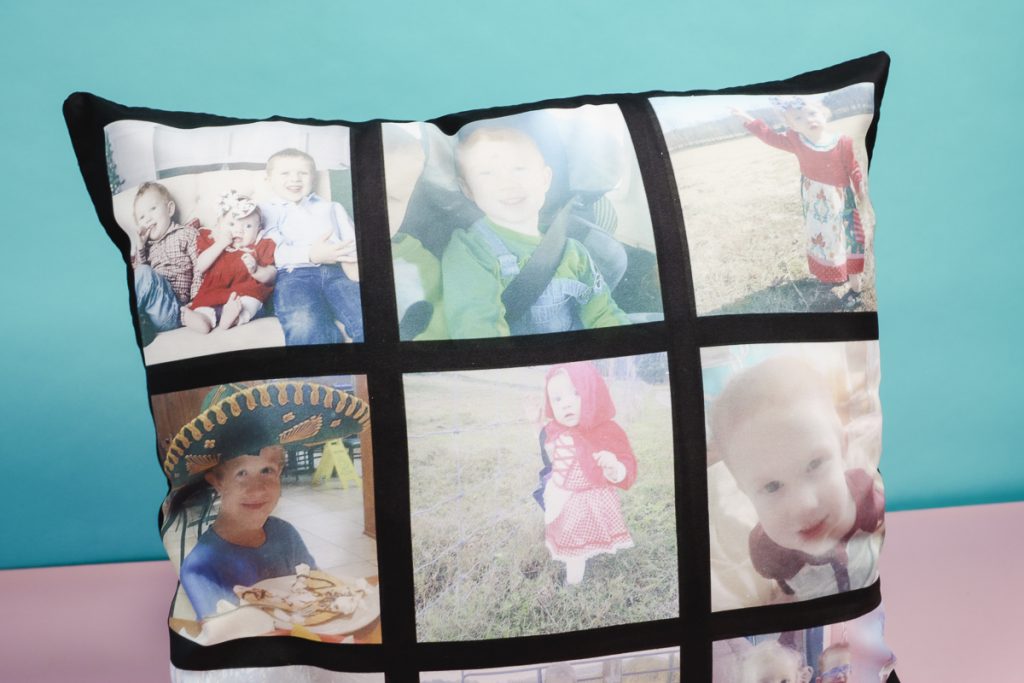
Adding the mats and the inside of the pillowcover helped a lot. I didn’t ruin another EasyPress Mat and the black fabric on the back isn’t discolored. This photo sublimation gift does take a while to get right. You’ll want to follow all of the steps I’ve laid out here for the best results.
I have found these types of sublimation blanks, both blankets and pillowcases tend to have issues with the black fading when heat is applied. You’ll want to take your time so you get it right because, while I would consider it a labor of love, they are amazing and would make an incredible gift.
How to Make a Photo Sublimation Mug
For my next photo sublimation gift idea, I am going to use my Cricut Mug Press.
Step 1: Trim Sublimation Print to Fit Mug
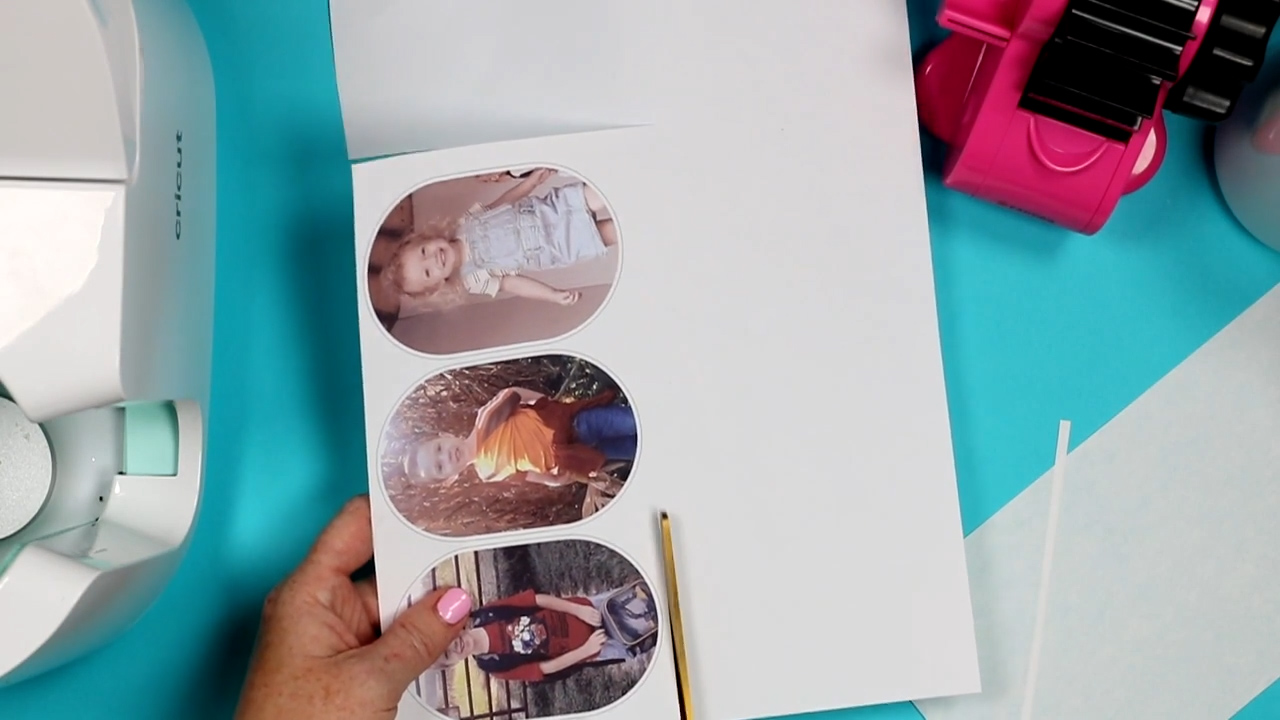
I printed my design on sublimation paper and trimmed it so that as I wrap it around the mug it is centered from top to bottom.
I recommend trimming from only one edge so you know you have one very straight edge. Having a straight edge helps you line your print up with the edge of the mug. The mug I’m using today has a beveled bottom edge so I am making sure that my print does not get down in that area.
I also trimmed the sublimation paper on each end an equal distance from the photo to help locate the design on the mug.
Step 2: Clean the Sublimation Mug
I am using a lint roller to clean my mug. You can also use a microfiber cloth and rubbing alcohol to clean the surface. You want to make sure the mug is free from all lint, dust, hair, and other debris.
Step 3: Locate the Design on Mug
My design is trimmed equally on the top and bottom and side to side. To locate the design I am flipping the mug upside down and the print upside down. This will allow me to use the surface as a guide to help locate the design.

I also made sure the ends were an equal distance away from the handle. How far the design is from the handle will depend on the size of your design.
If you’re using the Cricut Mug Press, you need to make sure the design is at least half an inch away from the handle on both sides.
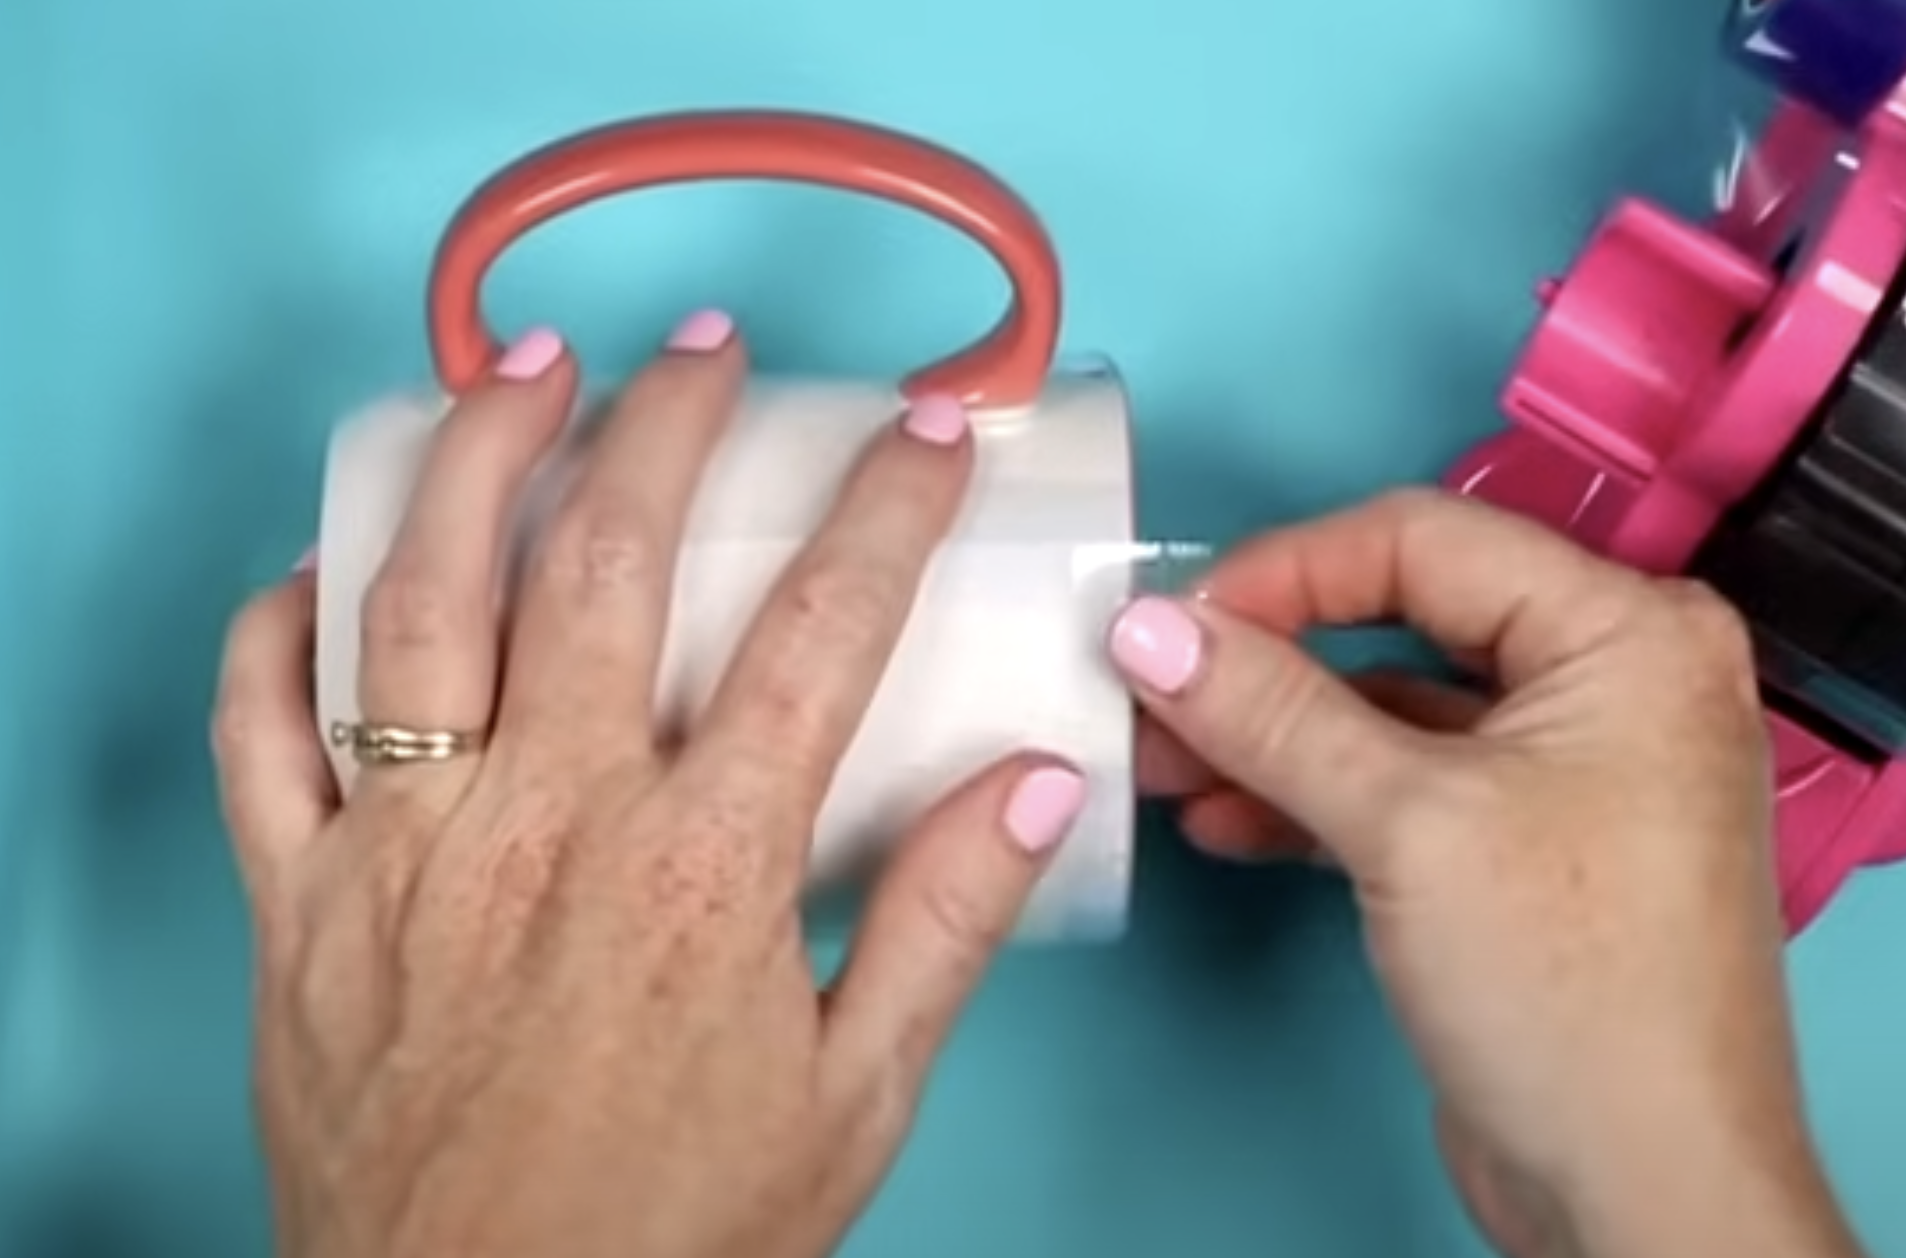
Step 4: Tape Sublimation Print in Place
With the design in place, tape one end with heat-resistant tape to hold it in place while you double-check the placement. When you’re happy with the placement, pull the print tight and tape the other end in place.
I tend to be an over-taper. I use a lot of tape because I think it makes a better final project.
Tape it around the top. Press it down onto the print and then over the lip of the mug. If at this point your print is loose anywhere I would remove the whole print and start over. You may need to reprint your design but that is a better option than wasting a sublimation blank.
I recommend taping the bottom of the mug, especially if you’re using the larger-sized mug. When using the larger mug size that fits in the mug press I worry about the print getting caught and wrinkled in the press.
Tape all the way around the bottom of the print, like you did the top.
Step 6: Add Protective Paper
When using sublimation prints, I like to add protective paper around the mug. This protects the inside of the mug press from any ink transfer. Trim the protective paper so it covers the sublimation print. Tape the protective paper similar to how you taped the print.
Step 7: Press Sublimation Print onto Mug
Now you’re ready to press. Make sure the mug press is preheated and then add the mug to the press and make sure the handle is centered in the opening.
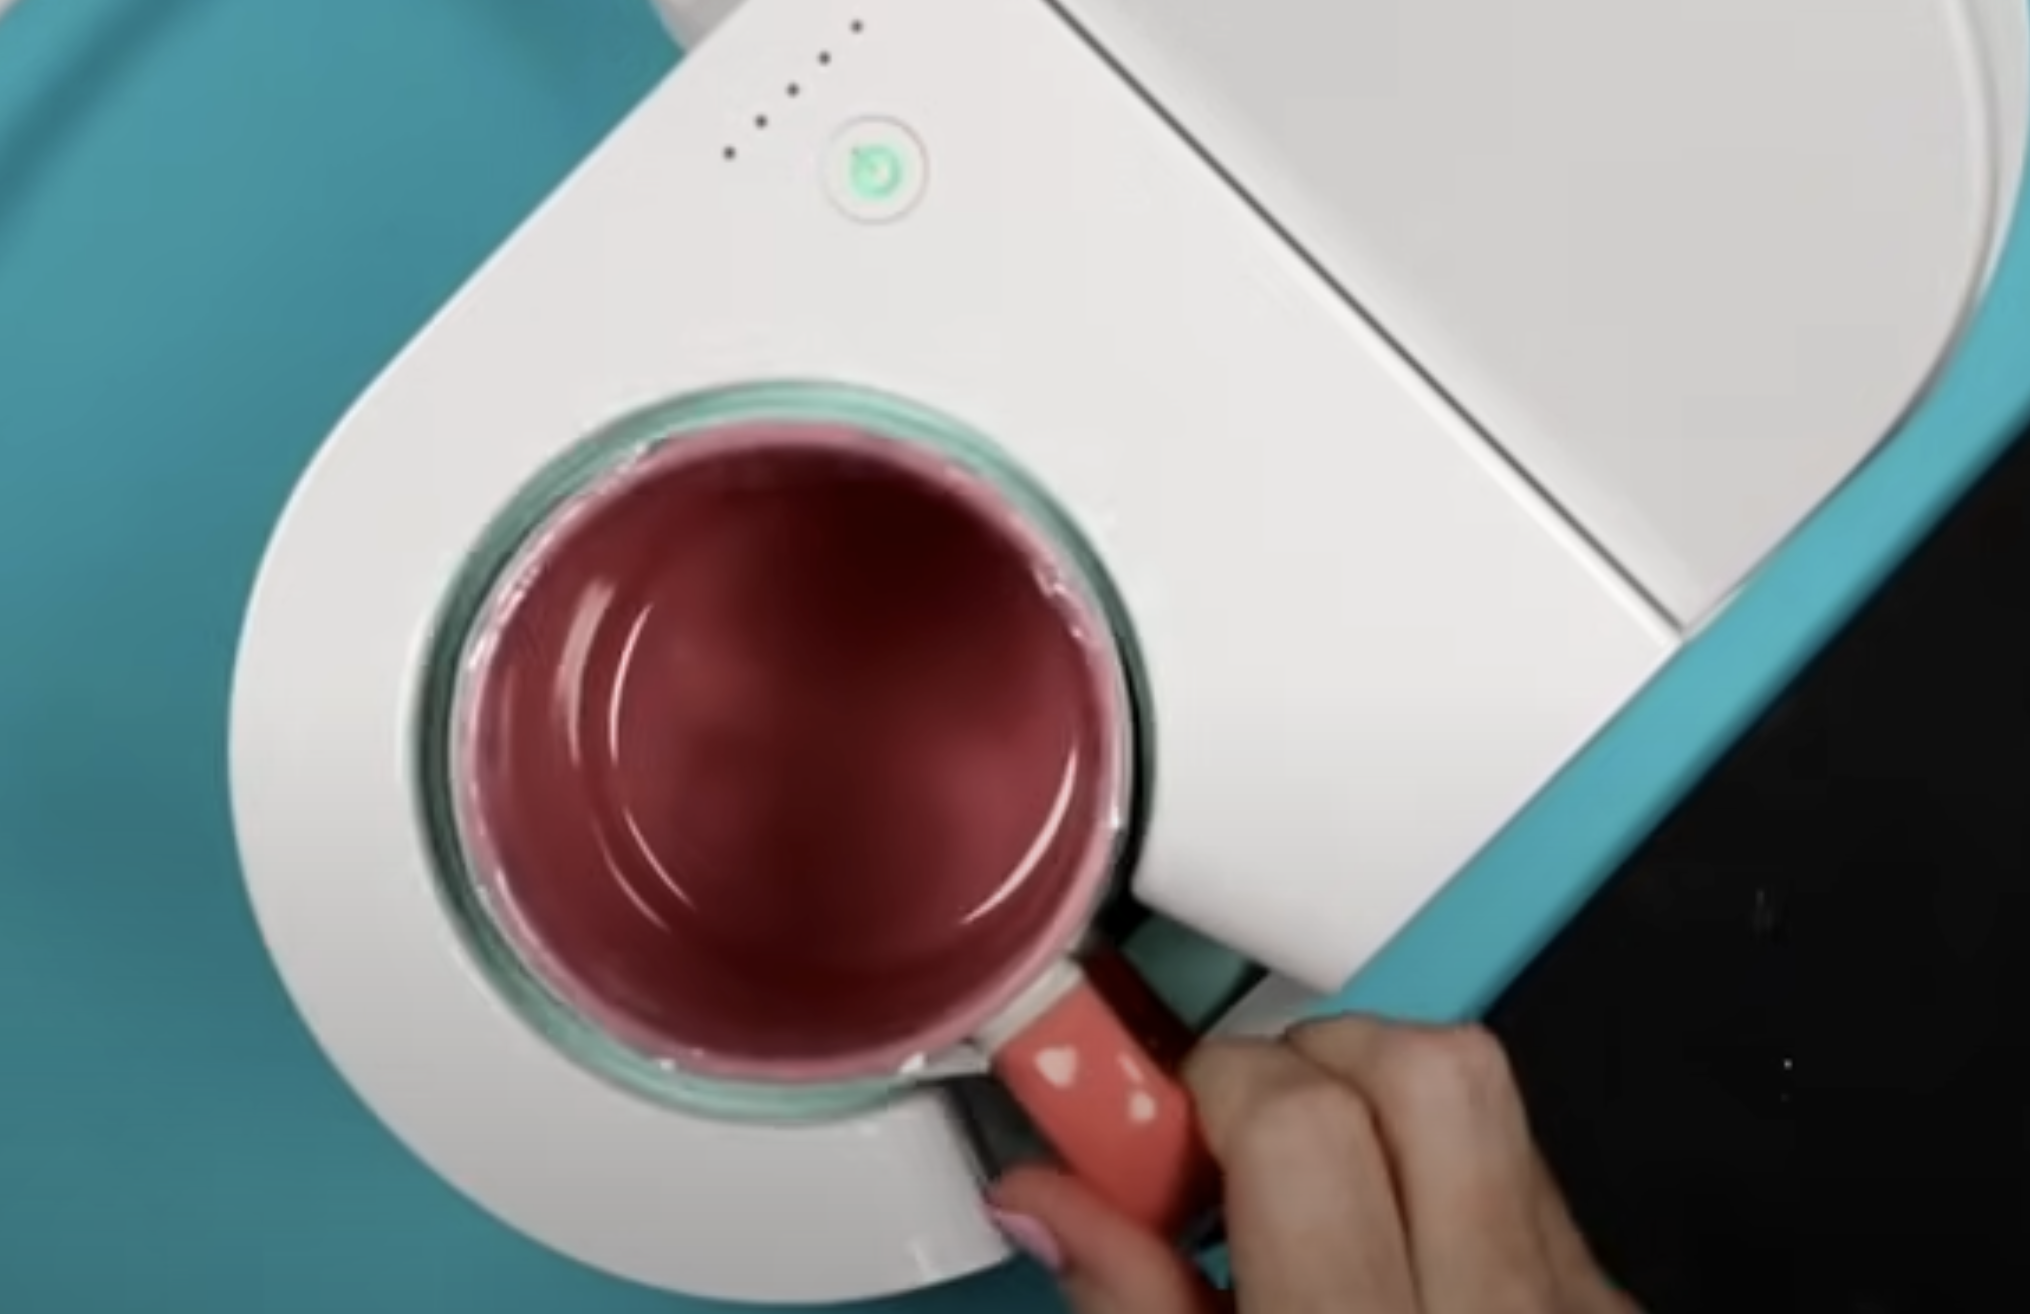
Press the lever all the way down and you’ll see the lights on the top of the press start to light up.
When the time is up the press will beep. Lift the handle and remove the mug. The handle will not get hot but the inside of the mug press and inside of the mug will get hot. Only touch the handle.
Move the mug to a heat-resistant mat and remove the print.
Step 8: Remove Sublimation Print From the Mug
I like to remove sublimation prints while they’re still hot. I’ve found things release easier when they’re hot. Use something like a weeding hook to lift the tape and pull back the butcher paper.
Before you remove the sublimation print look at the whole image. When using sublimation on drinkware you can usually see the design through the back of the paper. This is a good way to ensure your sublimation print is going to look good when you remove the paper.
This tip is especially helpful when using a sublimation oven if you’re not sure the time or temperature is correct. The next step is to peel back the sublimation print and reveal your adorable sublimation photo mug.
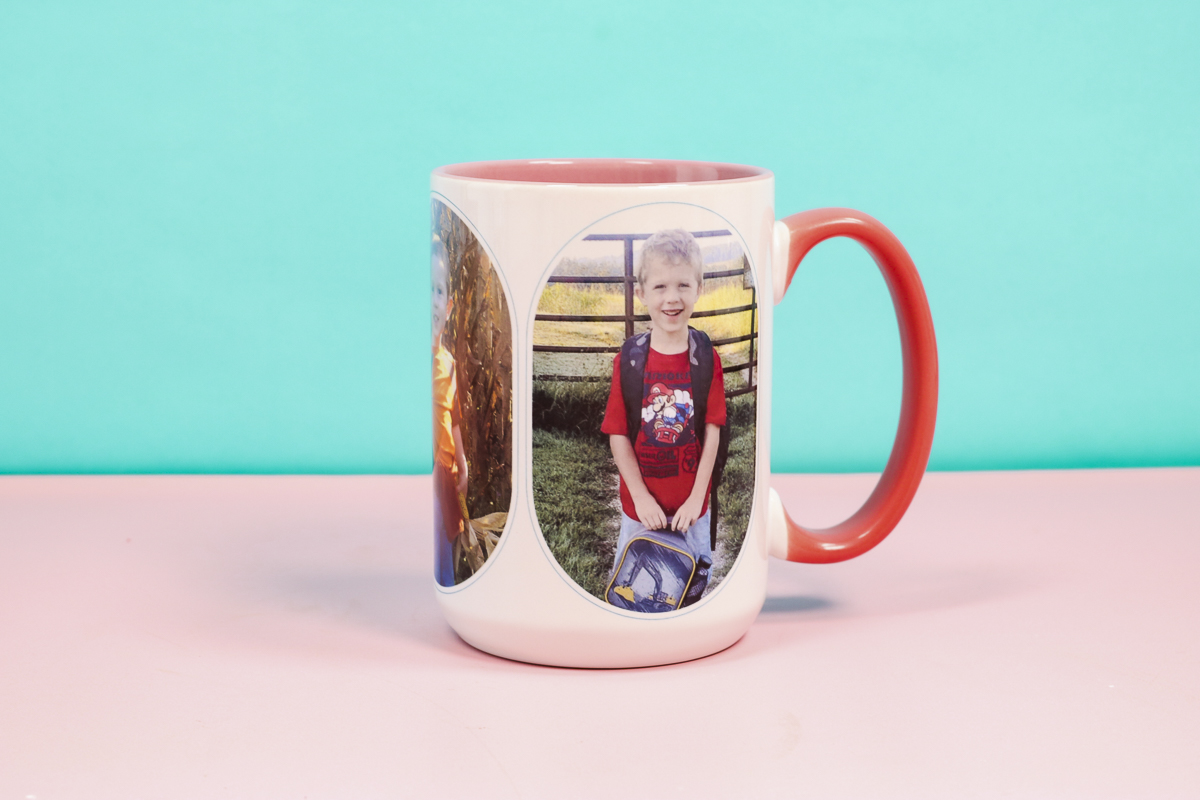
The frames on this design are a fun added touch to the design. The mug will still be warm after you remove the print. Allow it to cool completely before handling too much
I hope you’ve enjoyed learning how to make all of these photo sublimation gifts. Personalized gifts are my favorite gifts to give.
Adding a photo to the gift makes it over-the-top personalized perfection.
If you have any additional questions about any of these projects, feel free to leave them in the comments and I’ll be happy to answer them for you.
The post 5 Photo Sublimation Gift Ideas with Instructions! appeared first on Patabook Home Improvements.