

This post and photos may contain Amazon or other affiliate links. If you purchase something through any link, I may receive a small commission at no extra charge to you. Any supplies used may be given to me free of charge, however, all projects and opinions are my own.
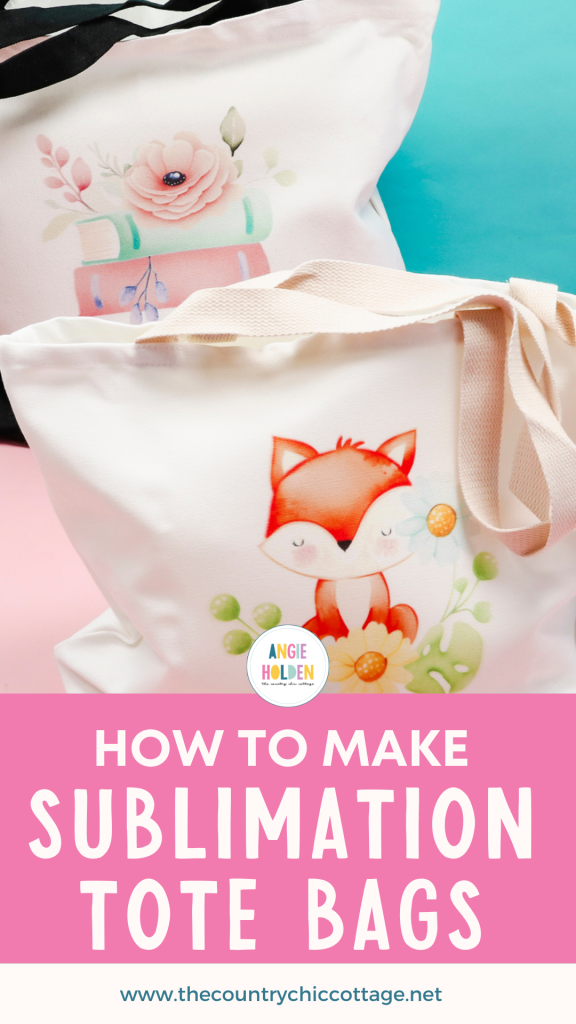
Today I’m going to teach you how to make a sublimation tote bag. If you’re looking to make the perfect customized gift or a tote bag for yourself, you’re going to love how easy this process is.
When you’re first starting with sublimation, you need to make sure you have all the right supplies. Learn what you should have on hand before you begin sublimating by reading my Sublimation Beginner’s Guide post.
You can watch me make both of these tote bags and learn my best tips by pressing play on the video below.
How to Make Sublimation Tote Bags
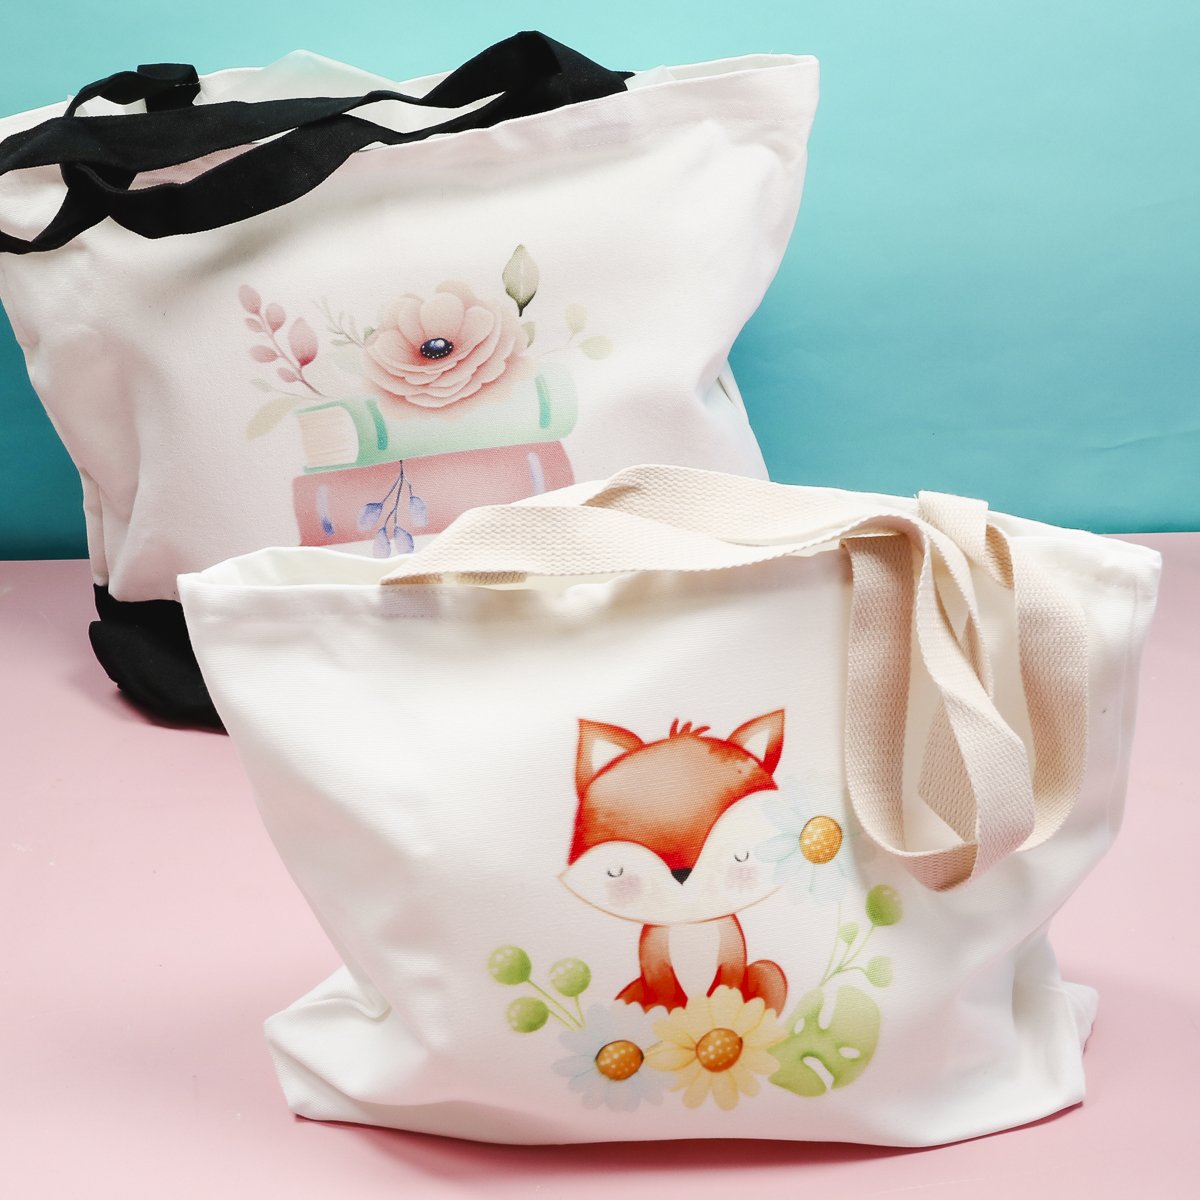
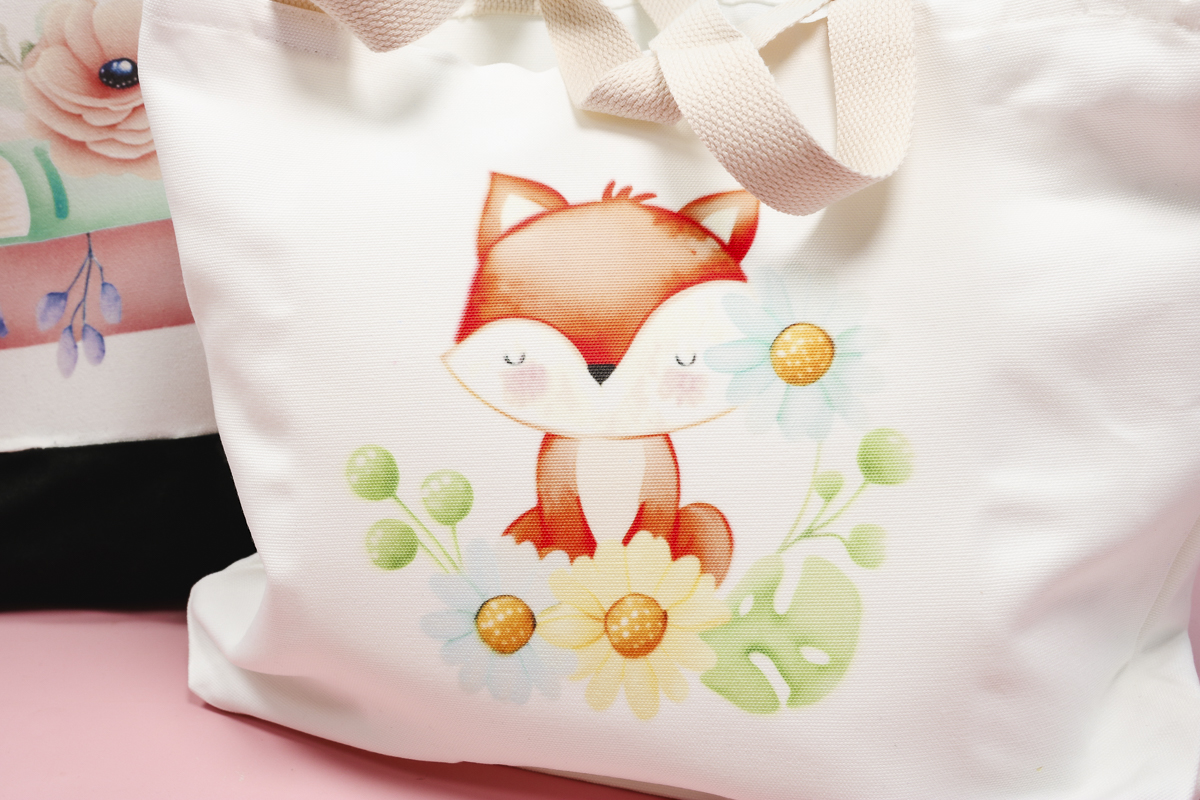
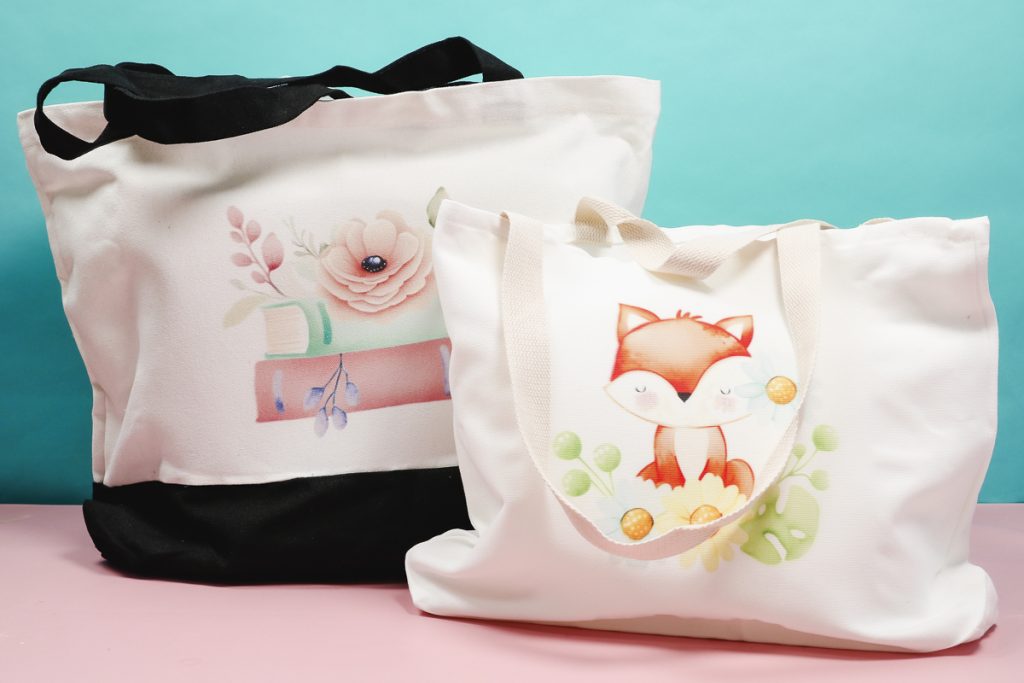
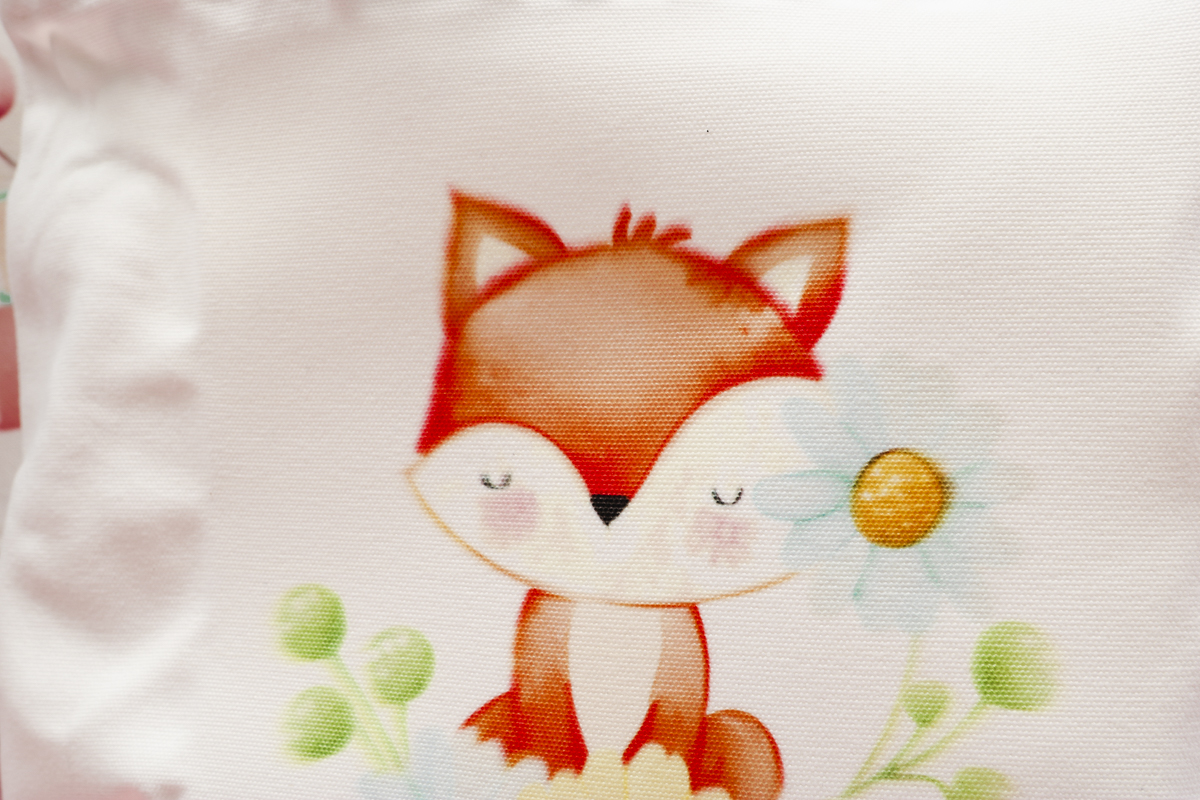
Today I’m going to teach you how to make two different sublimation tote bags. The first one has an adorable little fox sublimated on it and the other one has a beautiful floral book design. You can get both of these designs for free here.
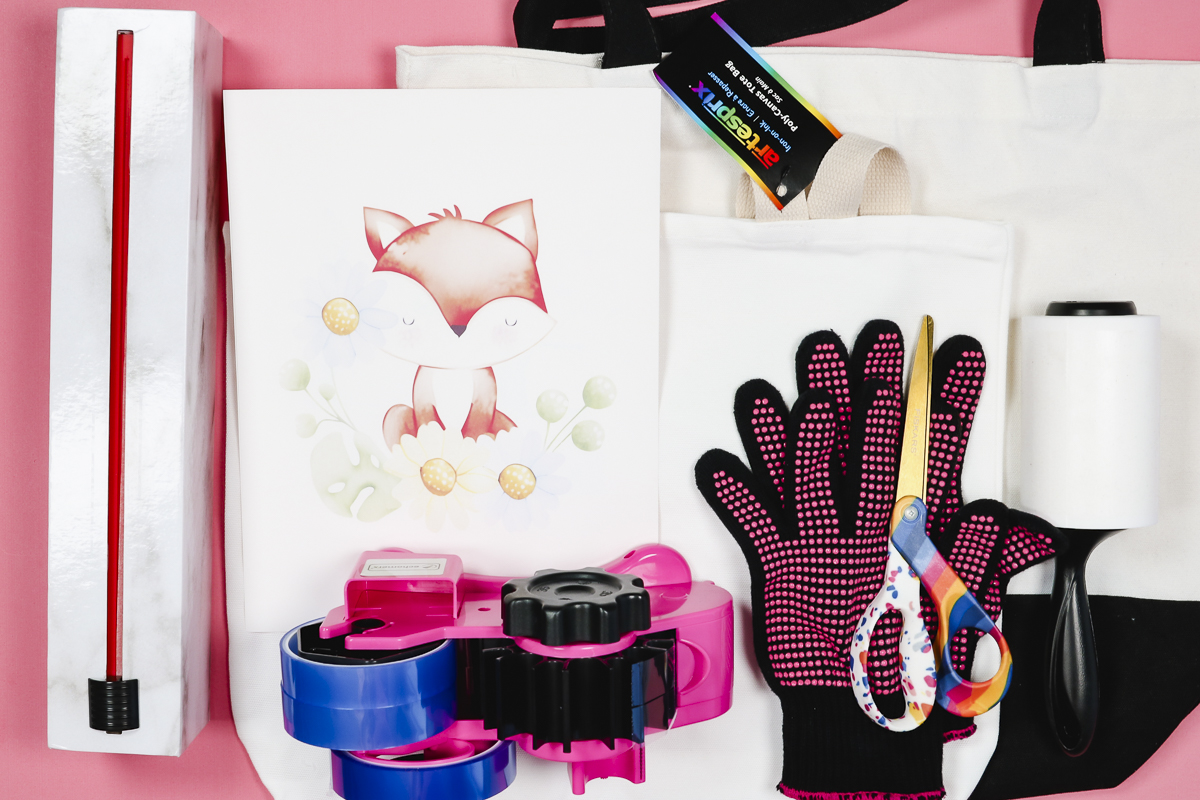
Supplies Used:
Step 1: Preheat Tote Bag
The first thing we’re going to do is preheat the fabric. Do not skip this step. You don’t need your heat press to be at full temperature but it should be hot enough to remove wrinkles and moisture from the bag.
I am pressing the Artisprix tote bag first and it calls for a temperature of 400 degrees for 45 seconds. You’ll want to use the settings that your specific tote bag calls for. If your bag doesn’t have instructions, I would start with a temperature of 385 degrees and press for 55 seconds. That is a good general rule for sublimation tote bags.
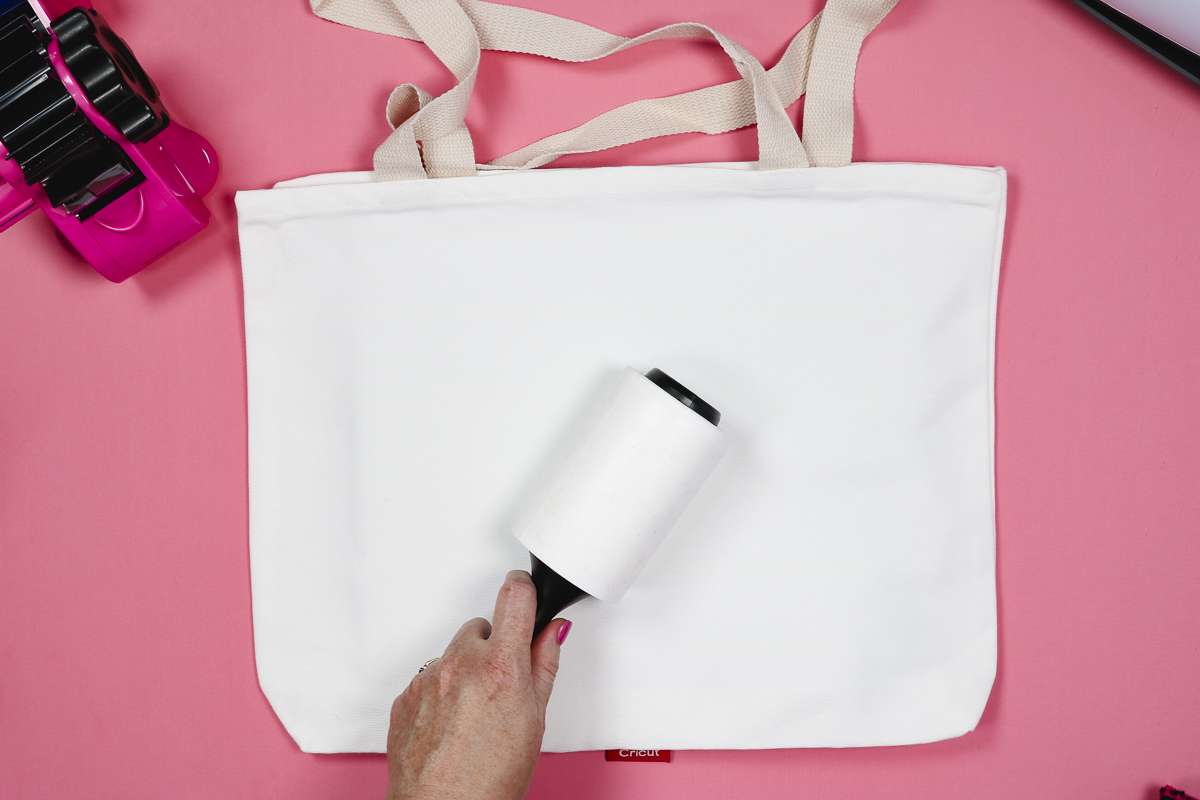
Step 2: Lint Roll
While the bag is cooling down after the pre-press lint roll the entire surface to remove any hair, dust, or other debris.
Step 3: Add Pressing Pillows
For this tote bag, I am placing the bag on top of the EasyPress Mat.
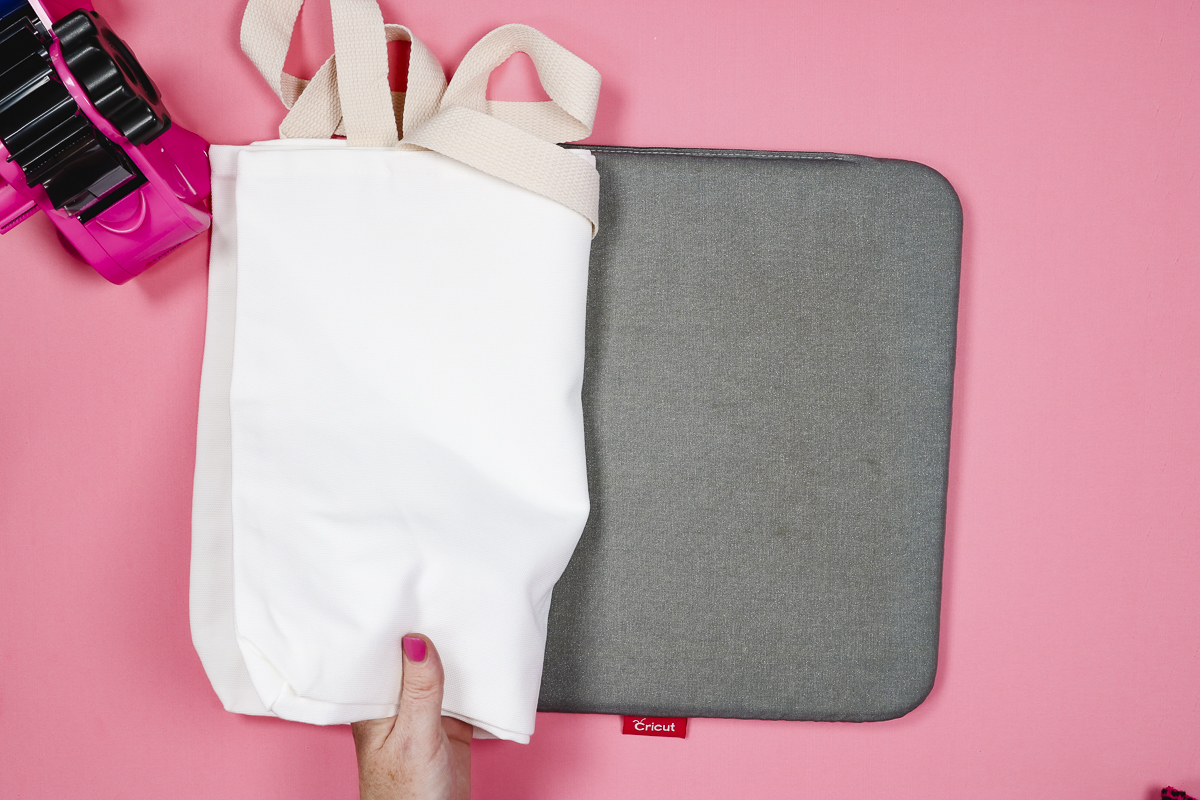
Next, we want to add something inside the tote bag for pressing. If you don’t have an additional pressing pillow or foam, you can place your EasyPress Mat inside the tote.
I like to use this pressing foam. I purchase it on a roll so I can cut it to the size I need. This foam is heat-resistant and reusable. I trim my foam so it is slightly smaller than the sublimation paper but larger than the design. This will help reduce any press marks from the paper.
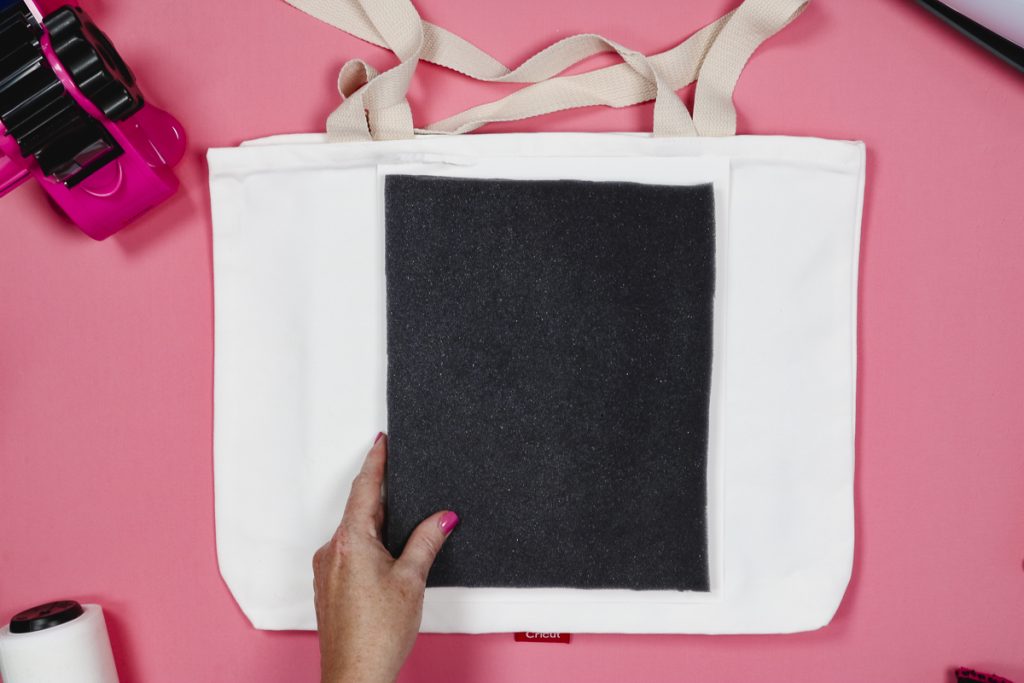
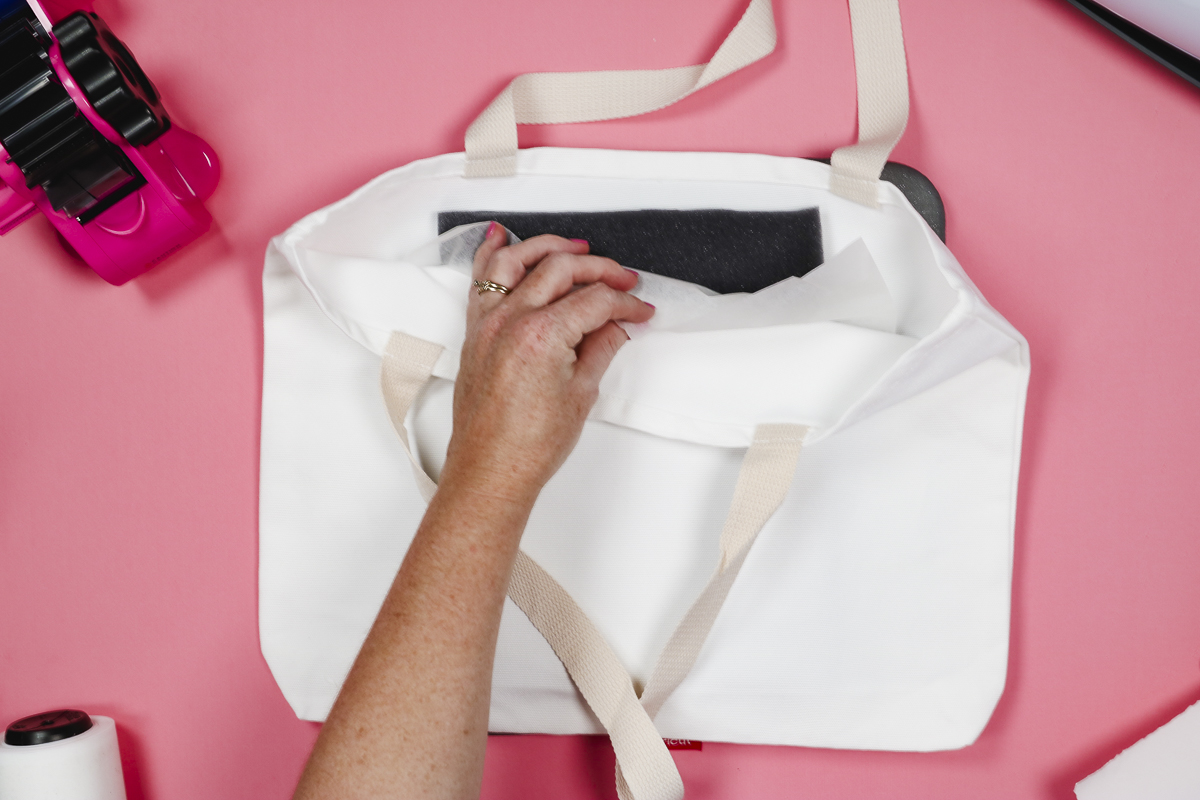
Center the pressing foam where you want the sublimation print to be and then cover the foam with protective paper. Adding the pressing foam inside the tote bag lifts the pressing area away from any seams that may interfere with getting equal pressure on the sublimation print.
I left the EasyPress Mat under the tote for extra protection on my surface. If you only have one pressing form, place it inside the bag and cover it with protective paper.
Step 4: Prepare Sublimation Print
Now we’re going to prepare our sublimation print. A sublimation print is sublimation ink, printed onto sublimation paper, from a sublimation printer.
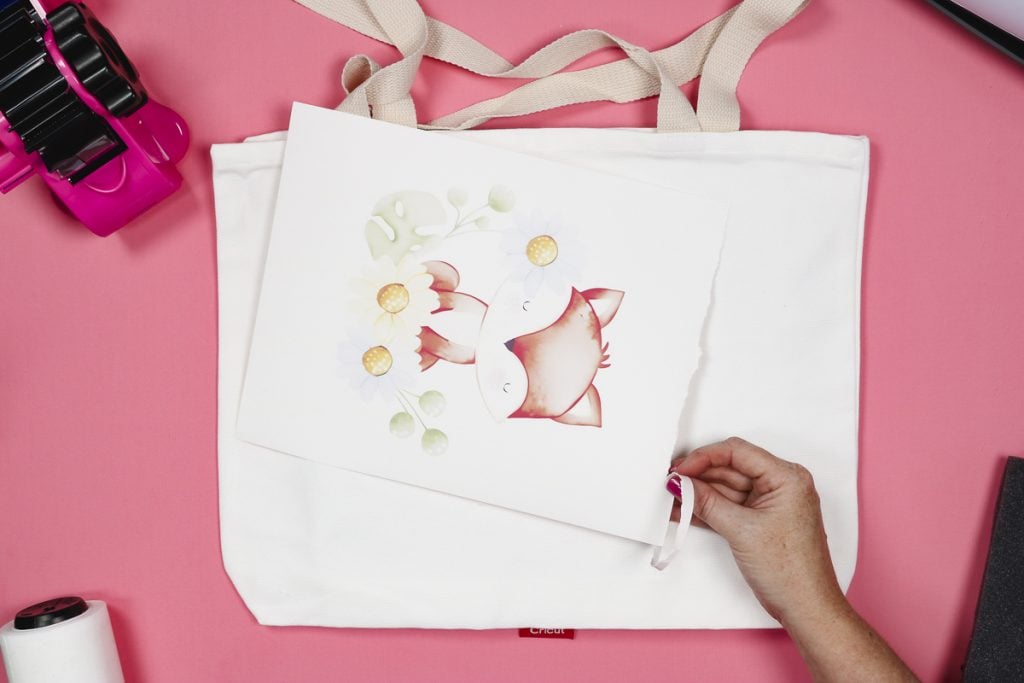
I like to tear the edges of my print to give it a feathered edge. This also helps reduce any chance of pressing marks. I want the edge to hang over the side of the pressing foam, so don’t tear off too much.
Step 5: Locate Sublimation Print
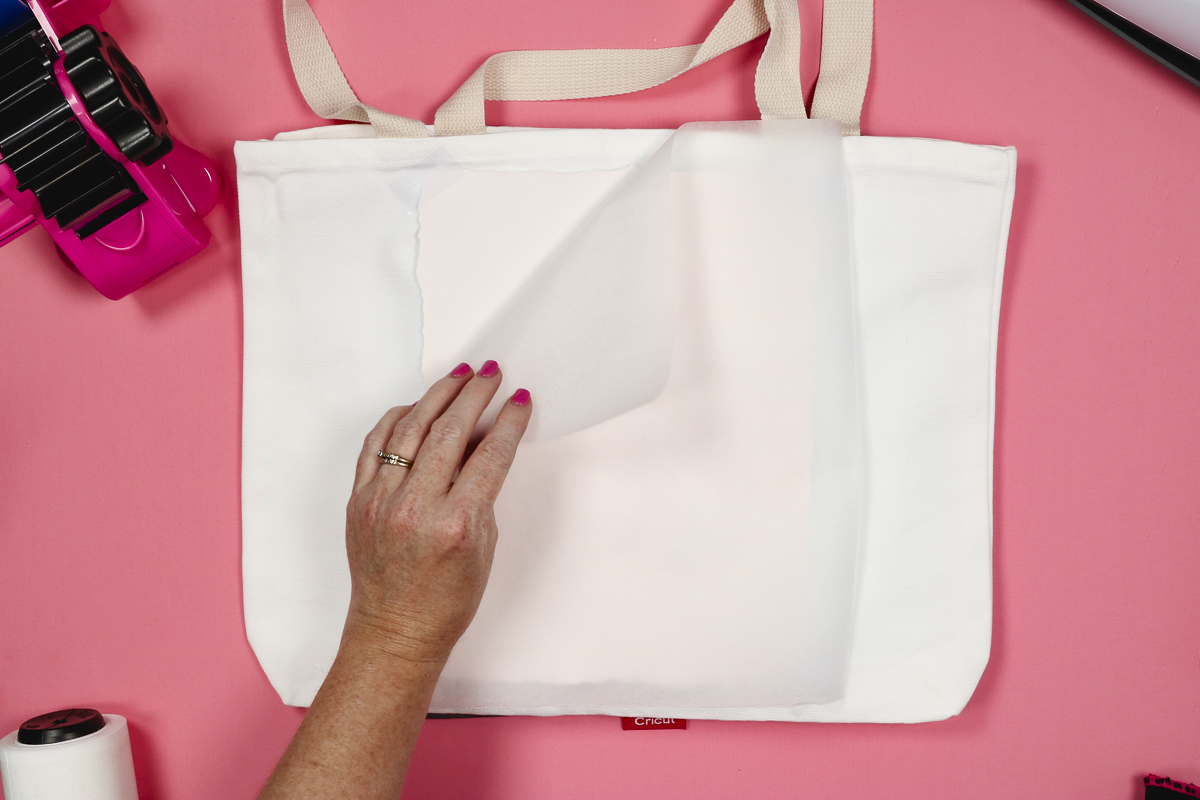
With the pressing foam inside the tote, we’re ready to locate our sublimation print. Make sure everything is flat and locate the design so the edges slightly overhang the edge of the foam.
When the print is located correctly, use heat-resistant tape to hold it in place.
I like to tape the very edges of the corners so the tape hangs off the foam as much as possible to help reduce pressing marks. Cover the design with protective paper to protect your heat source and it’s time to press.
Step 6: Press Tote Bag
I am using an EasyPress and applying enough pressure so that the foam is about halfway compressed. I would consider this about medium pressure and apply it for the entire time.
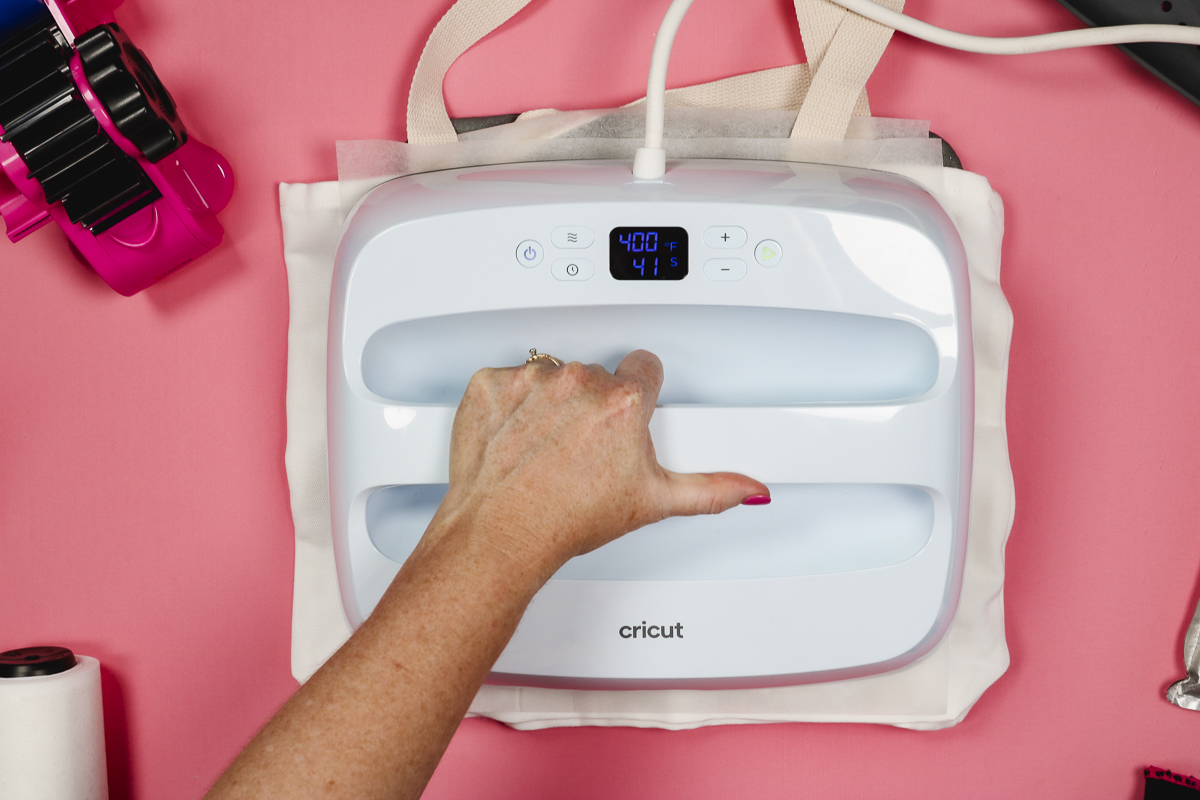
When the time is up, remove the press and the sublimation print. You can also remove all the pieces from inside the tote.
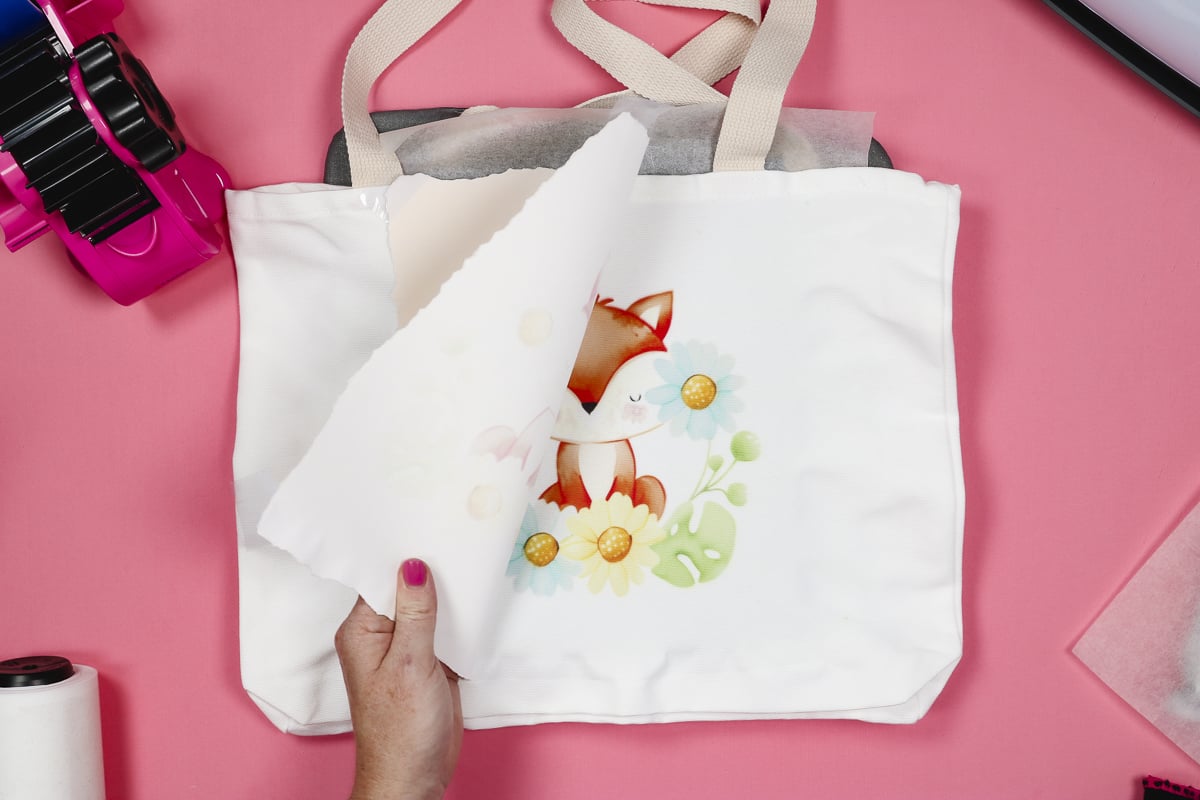
Finished Tote Bags
Here you can see how beautifully this tote turned out. The print sublimated perfectly onto this polyester fabric.
For the next tote bag, I added the EasyPress Mat to the inside of the tote to show you that you can make a sublimation tote bag without the pressing foam. The EasyPress Mat won’t compress like the foam does. Make sure you tear the edges of the print to reduce pressing marks.

You can see this design also sublimated perfectly on this tote bag. I didn’t see any pressing marks on this tote.
I really like these tote bags with the color on the bottom and the handles. It adds a little something extra. This bag is perfect for taking to the library or your favorite bookstore.
Sublimation Tote Bags FAQ
Here are the answers to a few common issues when sublimating tote bags.
How to Remove Puckering From Fabric
You may have noticed there is some puckering around the bottom of the tote bag around where the heat press was. This happens because we pressed down hard on the foam. The puckering is easy to remove.
Cover your sublimation design with protective paper to protect your heat source and then go around the edges to press out the puckering. Try to avoid going over the sublimated area.
If you have something like the EasyPress Mini, you can use that or even a household iron. Just continue to go over the areas until all the puckering is gone. It presses out easily.
Using a Pressing Pillow or EasyPress Mat
When making sublimation tote bags, you want to make sure you have a pressing pillow or pressing foam. If you have an EasyPress Mat, you can use that too. I have used both in this post to show that both make a great tote bag You want something that will lift the pressing area above the seams.
Using an EasyPress or a Heat Press
I am using my EasyPress today but you can do this same project with any type of heat press that goes up to 400 degrees Fahrenheit.
What Tote Bag is Best for Sublimation?
I am sublimating two different tote bags today. There are a wide variety of tote bags that you can sublimate onto. You’ll want a tote bag that is light in color and made out of polyester. 100% polyester is the best is the best option but 65% or more is what you’re looking for.
I like to choose tote bags that specifically say they’re for sublimation. Both of these are listed as a sublimation blank in the supply list above.
If you choose a tote bag that is made out of polyester but isn’t listed as sublimation, you’ll want to use caution. Some polyester bags (cheap reusable grocery bags, for example) can melt at the high temperature required for sublimation.
If you’re using an unknown tote bag, protect your heat press before pressing. Make sure your heat press is set to the temperature you need for sublimation and then cover the surface with a protective paper. Press for at least the full-time required for sublimation. If you see any melting at all, stop. There is no reason to waste your sublimation print.
Adding the protective paper will protect your press from a big mess, which trust me, you don’t want to deal with. Yes, you can sublimate polyester but not all polyester materials are the same and some cannot withstand the high heat.
Both of these tote bags are polyester and work perfectly for sublimation. Each has a wonderful canvas feel to it. I love that I can get the look and feel of canvas and also can sublimate them.
One Side or Both Sides
I only sublimated one side of these tote bags. If you wanted, you could add the same design to both sides or add a monogram or name to the other side.
Don’t Forget to Preheat
I wanted to show you this tote bag that I messed up. You can see that the design on this bag is blurry, especially around the edges. The mistake I made was that I didn’t preheat the tote for long enough.
Some blanks can shrink if you don’t preheat them for long enough. They can shrink with the sublimation print applied which means your fabric is moving while you’re pressing which causes blurring.
Make sure you’re preheating for long enough that any shrinking happens before you apply the sublimation print.
More Ideas
Now that you’ve seen how both of these tote bags turned out which one are you going to make first? I don’t think you can go wrong with either design, remember you can get them both for free here.
I made these tote bags for me to use but I want you to think of other ways to use them as well. These would make amazing gift bags. Imagine how happy the gift recipient would be to receive not only a gift from you but also a bag that they can use over and over again.
I hope I’ve answered any questions you have about making sublimation tote bags. If you have any additional questions, feel free to leave them in the comments and I’ll be happy to answer them for you.
The post How to Make a Sublimation Tote Bag appeared first on Patabook Home Improvements.