
This post and photos may contain Amazon or other affiliate links. If you purchase something through any link, I may receive a small commission at no extra charge to you. Any supplies used may be given to me free of charge, however, all projects and opinions are my own.
Today I’m going to teach you how to make a customized sublimation Stanley name plate that is perfect for adding a touch of personalization to your tumbler. If you’re not interested in engraving your favorite tumbler but want a bit of personalization, this project is perfect for you.
These sublimation name plates are a great beginner project. If you’re new to sublimation, my Beginner’s Guide is the perfect place to get started.

I’m testing three different sizes of Stanley name plate sublimation blanks today. You can add names or any other design element to the blanks which makes them perfect for holidays and gifting. You can watch me go through the whole process of creating these different name plates by pressing play on the video below.
How to Make Customized Sublimation Stanley Name Plates
To make our Stanley name plates I am using the online program Canva. You can create a free account that will allow you to use the template I created for these blanks.
The name plates I’m using are made to fit on the top of your Stanley tumbler and the hole goes around the straw. With three different sizes there’s sure to be one that is right for you.
Supplies Used

Step 1: Using the Free Stanley Name Plate Template
I’m going to teach you how to use the free Canva template that I used for my Stanley name plates. To begin, click here to get the free template. It will be emailed to you and then you can open it and it’ll take you right into Canva.
I have all of the different sizes on this one template. You can delete any size you don’t want or need.
How to Change Colors in Canva
If you haven’t used Canva before when you click on each individual layer or element, at the top of the screen you’ll see a color box.
Click on that box and you can adjust each of the colors to make the design look like you want it to. If the section you’ve clicked is a gradient, you can change all of the colors or just some of them. If you want it to be a solid color, you can click where it says Solid and choose any color and it will all be that color.
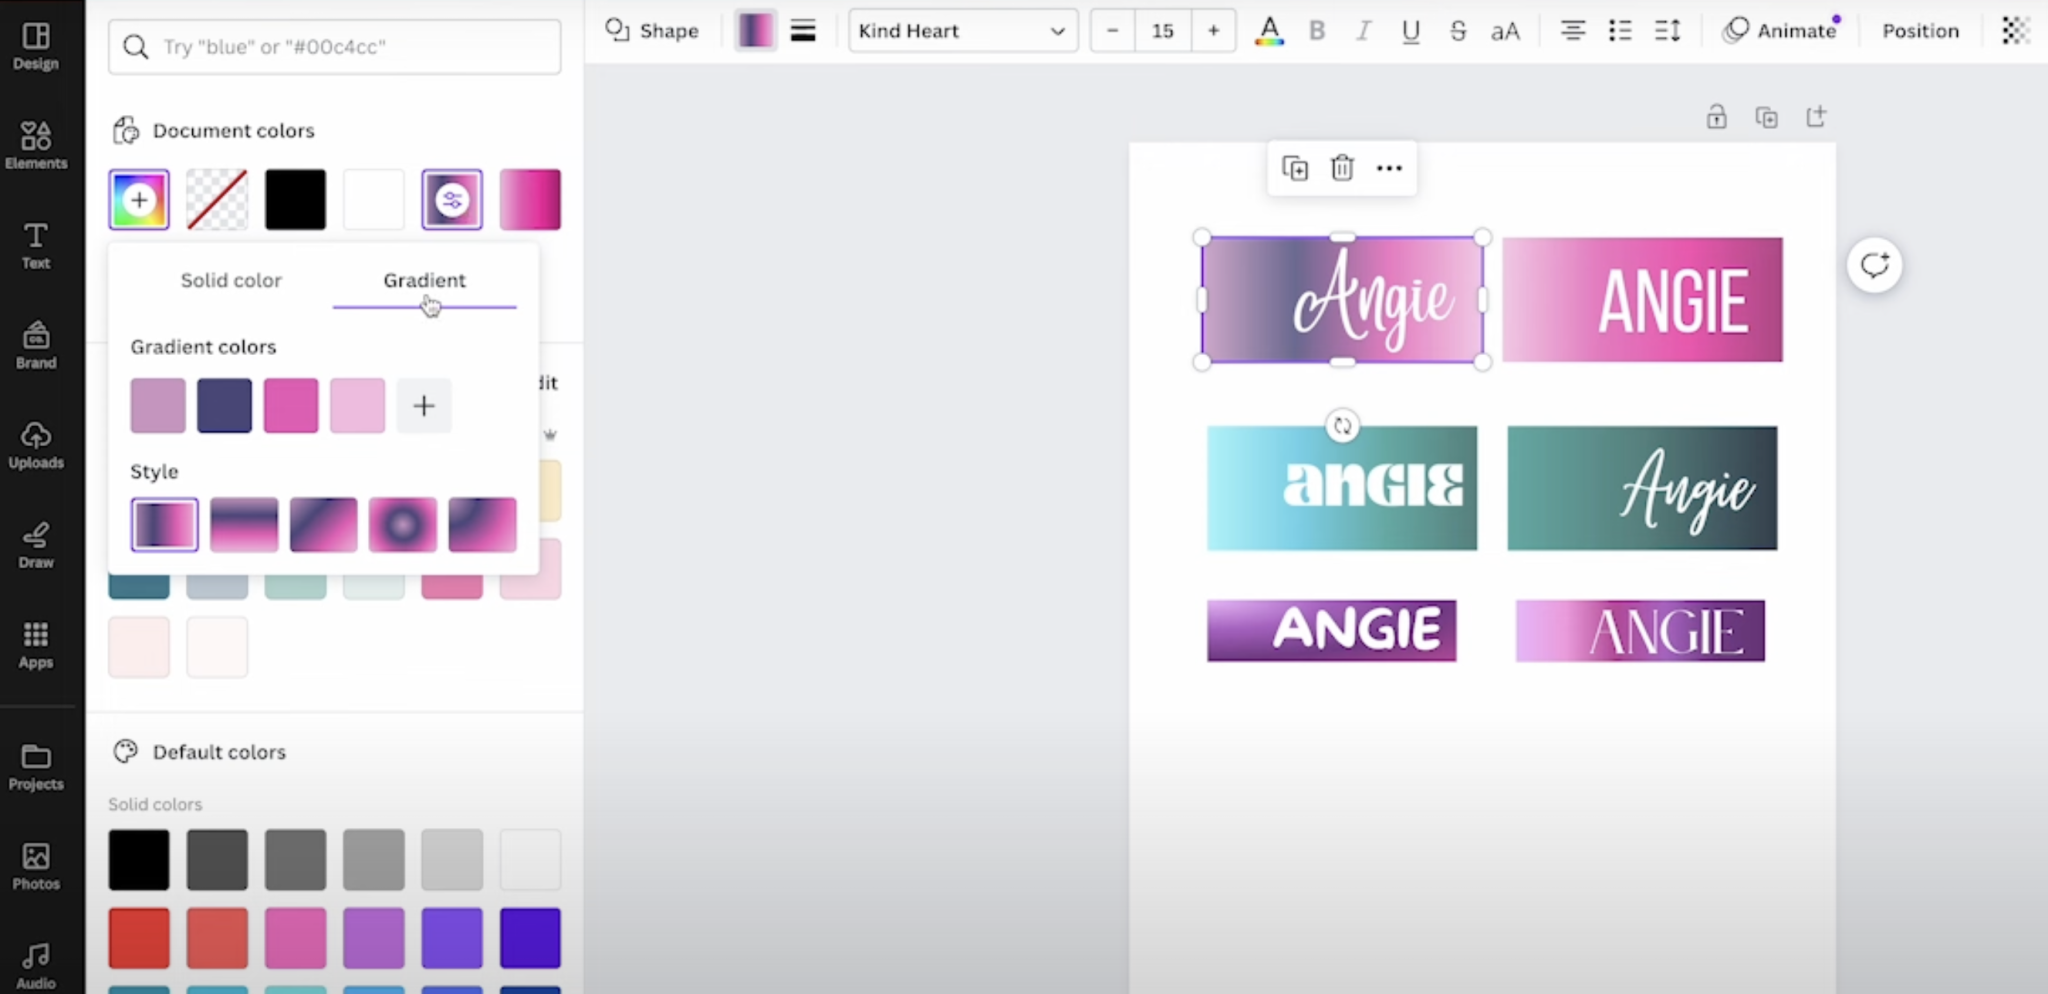
You can also add additional colors to your gradient by clicking the + box and adding more colors. To delete colors, click on the color and then the X in the corner. If you want to rearrange the colors, click and hold to move it where you want.
Below the Gradient colors, there is another line titled Style. Here you can click different styles to change the way the gradient is laid out.
How to Change Text in Canva
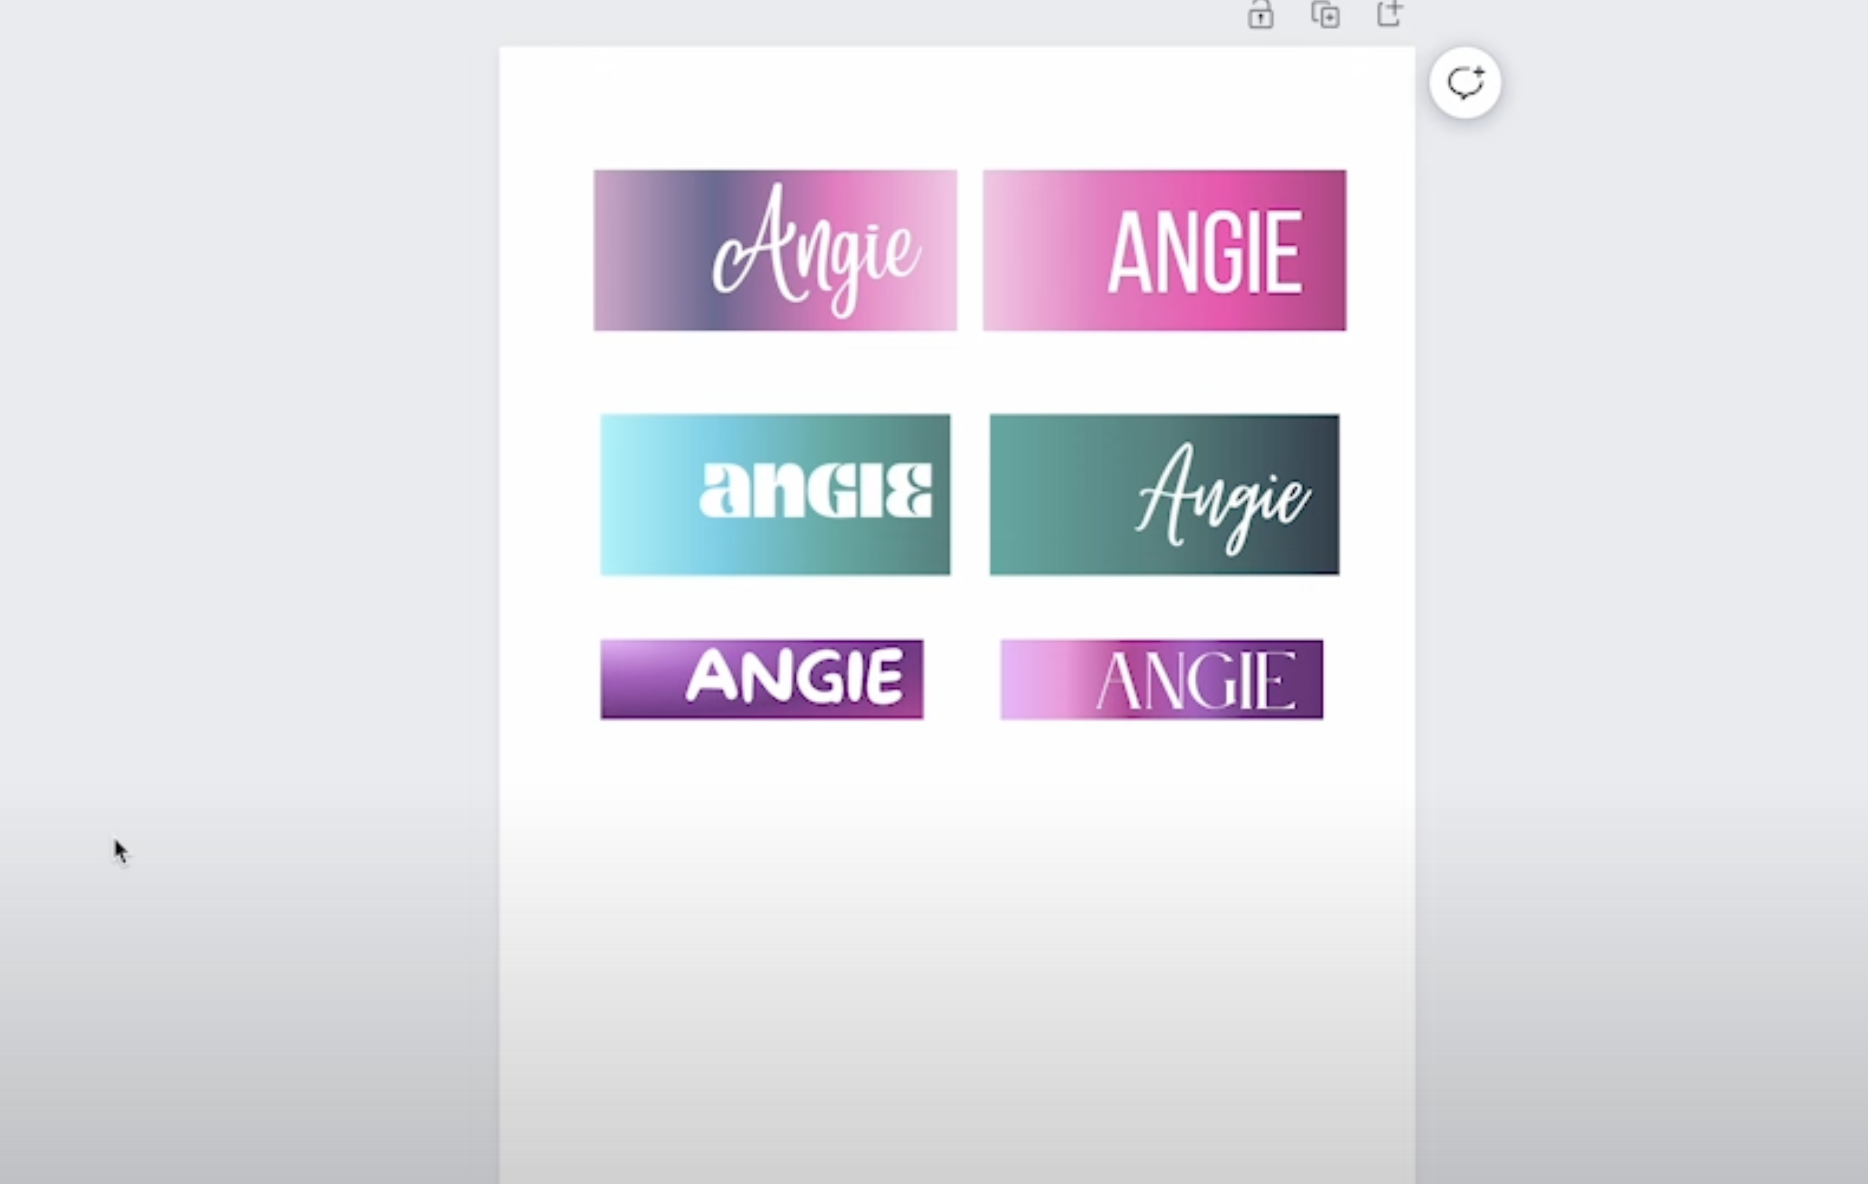
Once you have the colors set up how you want, you can change the text. The way I have the template set up you can click on the text and change the letters, color, and font if you want.
The font size, color, and style are all listed in the top toolbar and can be changed there.
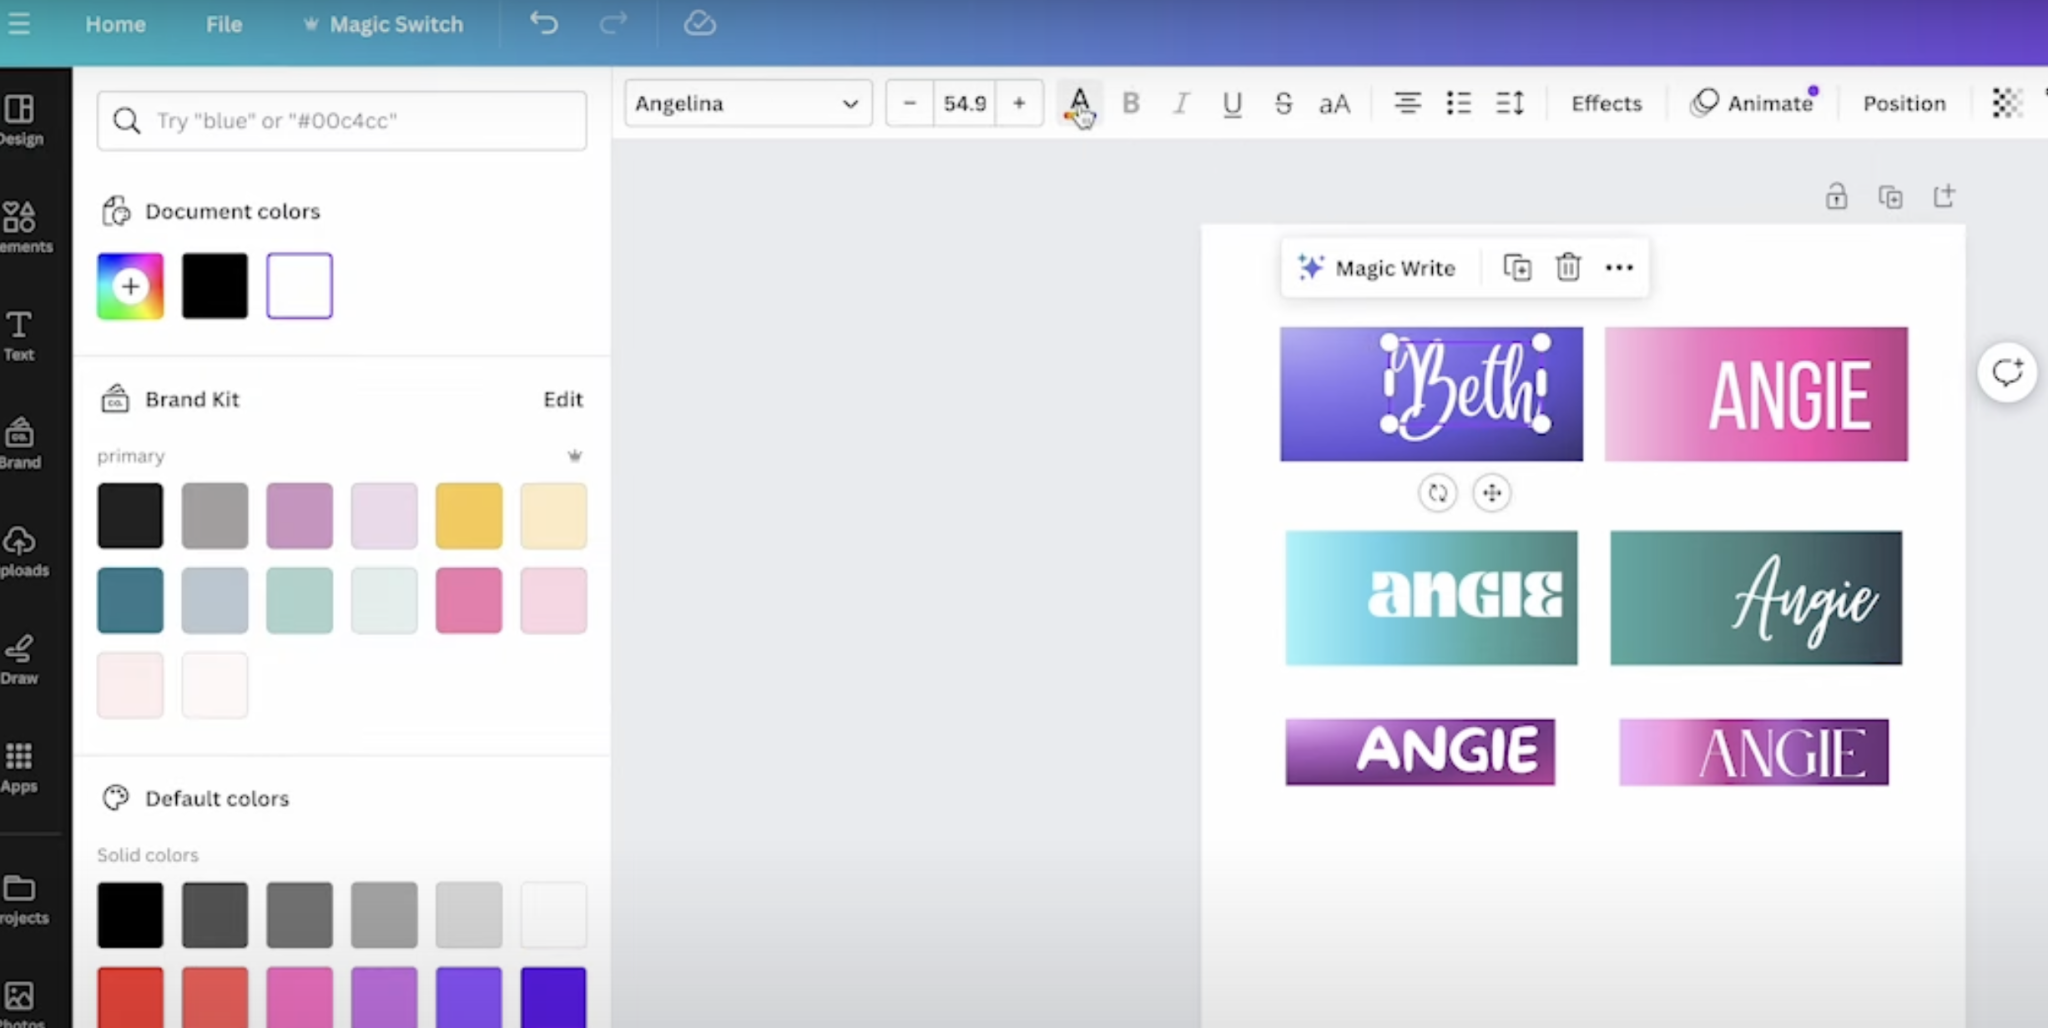
When adding text or other elements to the template make sure you leave room on the side for the straw hole. This may mean you need to make the font smaller if the name is longer than my name.
On the template, I included 6 different fonts so you can see how they look with the name you’re adding. If you like a font that is on a different name plate, you can drag it over to the name plate you want to add it to.
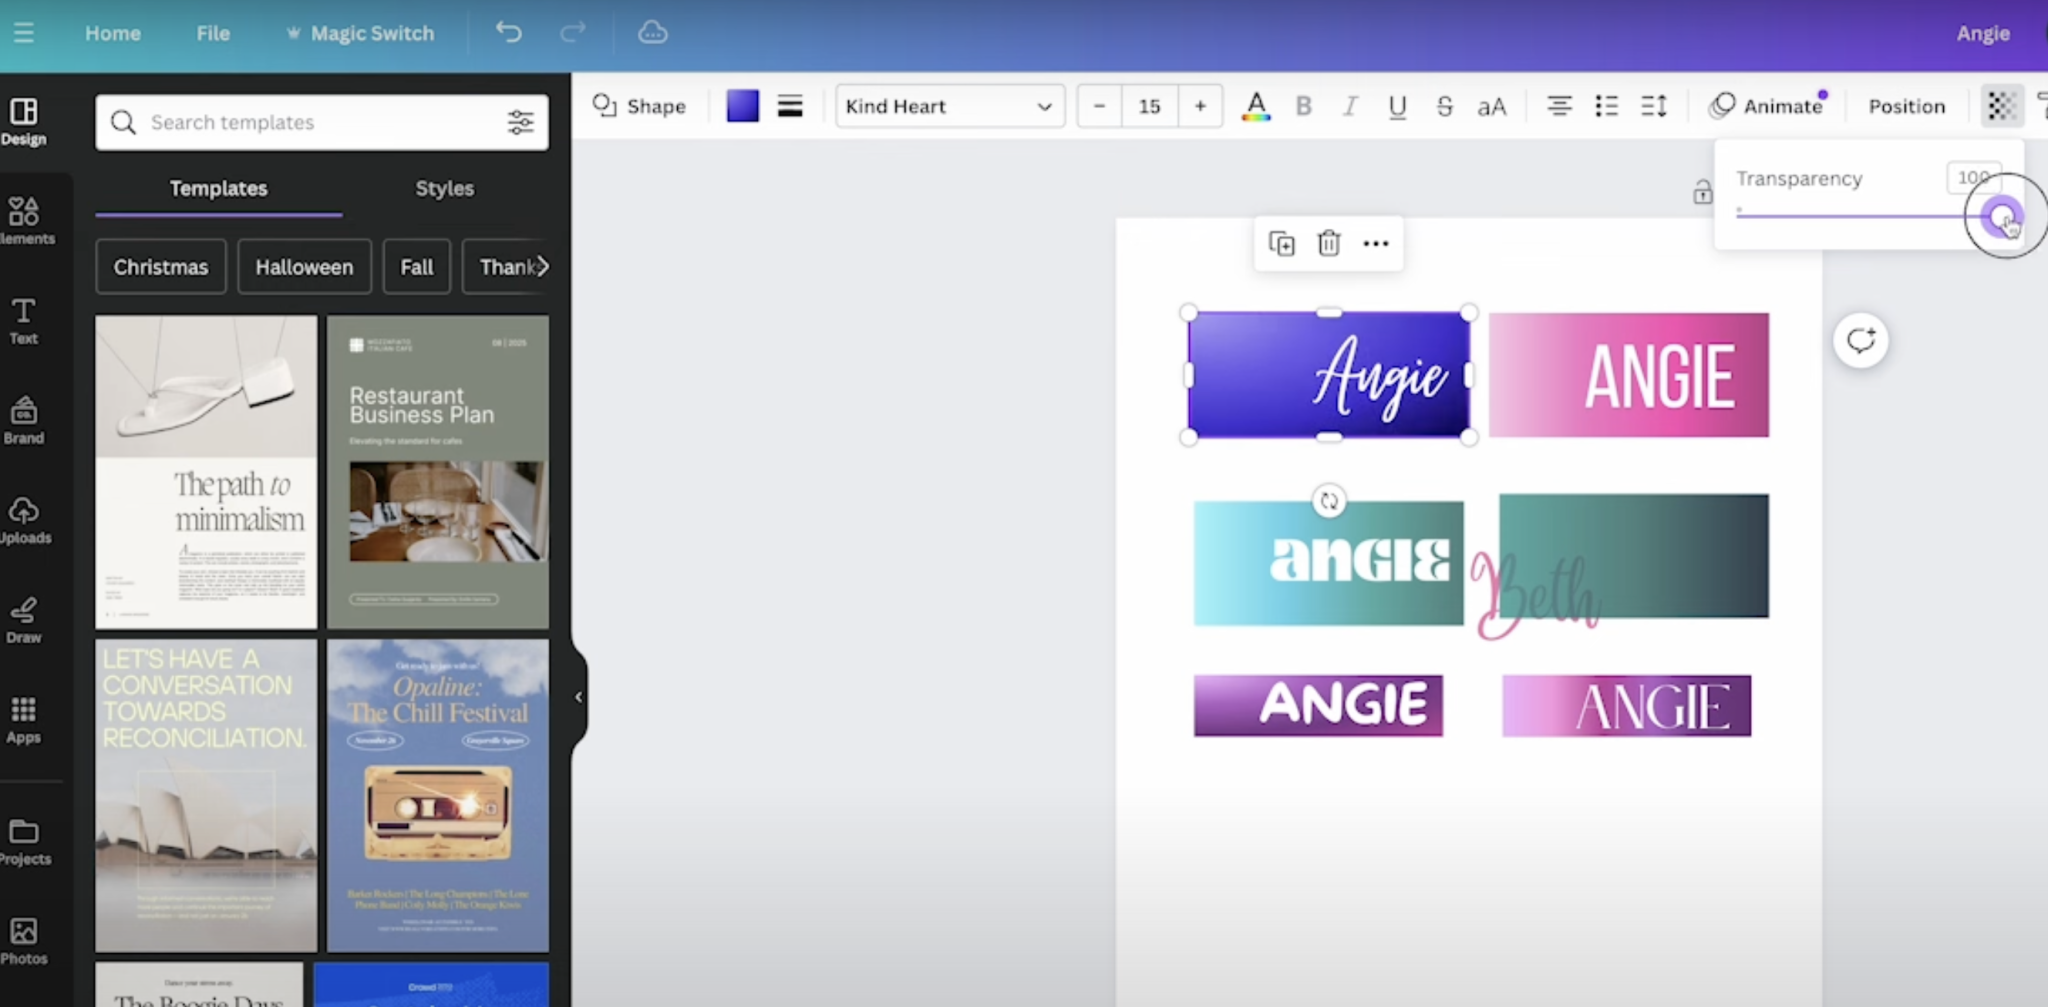
How to Change the Opacity
In this template, I have the opacity on the color set at less than 100%. If you want the colors to be lighter or darker, you can click on the transparency button in the top toolbar and adjust the slider there.
How to Add a Design to Your Canva Canvas
The last thing I’m going to show you today is how to use an uploaded image on your Stanley name plate. If you don’t want a gradient or solid color, you can choose to use a pattern instead. You could choose a pattern from within Canva or upload your own.
To upload your own, click Upload and then find the file on your computer. When it’s uploaded, you can then choose that file and drag it onto the canvas.
You’ll then, resize the pattern by using the sliders on each side to make it exactly the same size as the template you want to use.

You may be able to see why I didn’t choose to use a pattern for these name plates for my Stanley tumbler. I don’t feel like the name is readable on the pattern. A pattern would be a good choice if you’re not choosing to add a name to your name plate and just want a pop of color or a design.
When you have the design set up how you want, click Share in the upper right corner and then download the design as a PNG file to your computer. You cannot print directly from Canva.
Printing Sublimation Name Tag Designs
Now that the designs are ready and on your computer it’s time to print them out. Because of the type of sublimation blank we’re using today we do not want to mirror or flip our design.
You need a sublimation print for these projects. That is sublimation ink printed onto sublimation paper from a sublimation printer.
Step 2: Preparing Sublimation Name Tag Blanks
With the designs printed we’re ready to prepare the sublimation blanks. Now it’s time to prepare our sublimation blanks. Each of these sublimation Stanley name plates has a clear side and a white side.
Both sides of the sublimation blank have a protective film. Remove that from both sides.
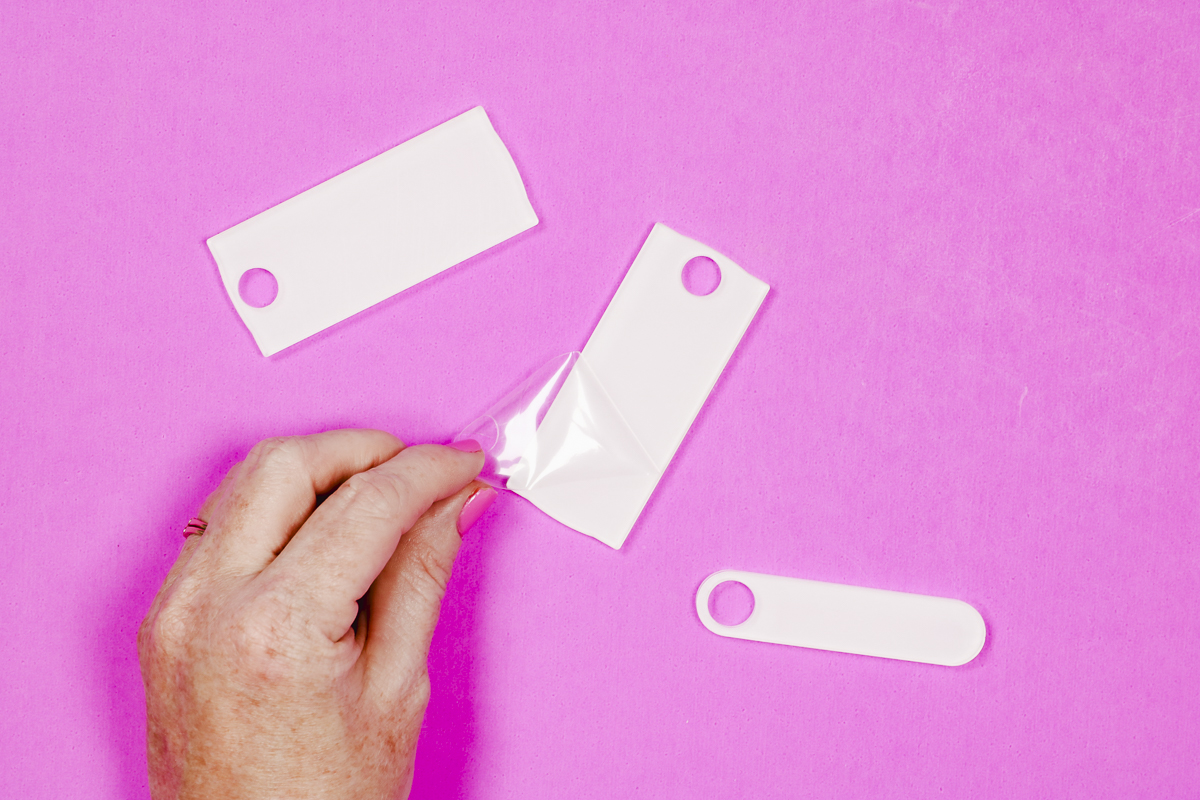
Next, we need to clean the blank. I am using a lint roller. You can also use a lint free cloth and rubbing alcohol to clean the blank.
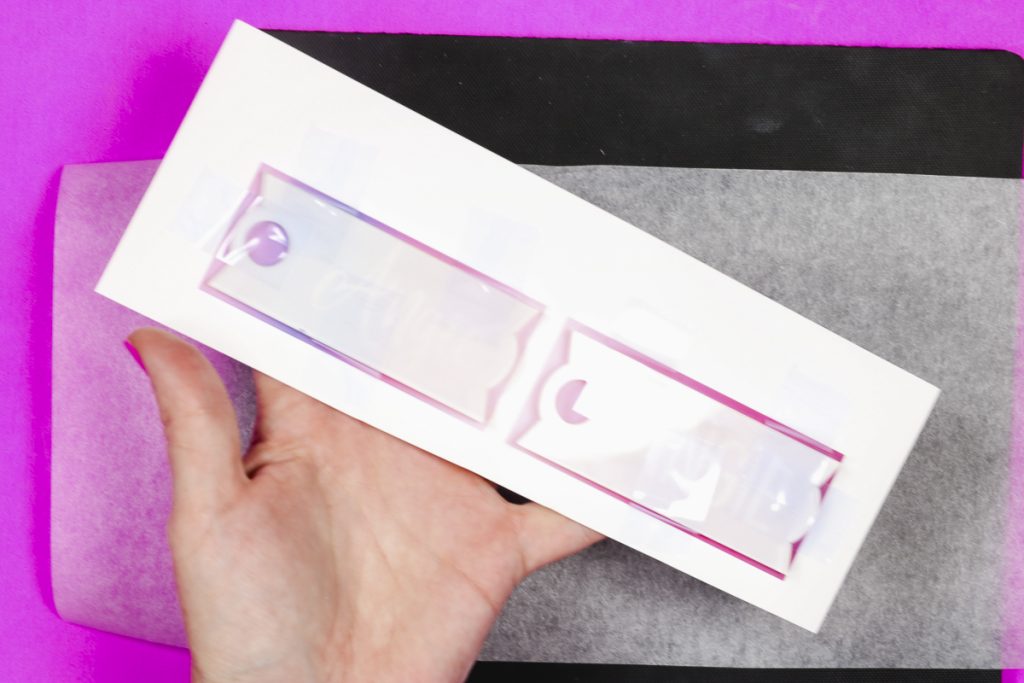
Step 3: Add Sublimation Prints to Stanley Name Plates
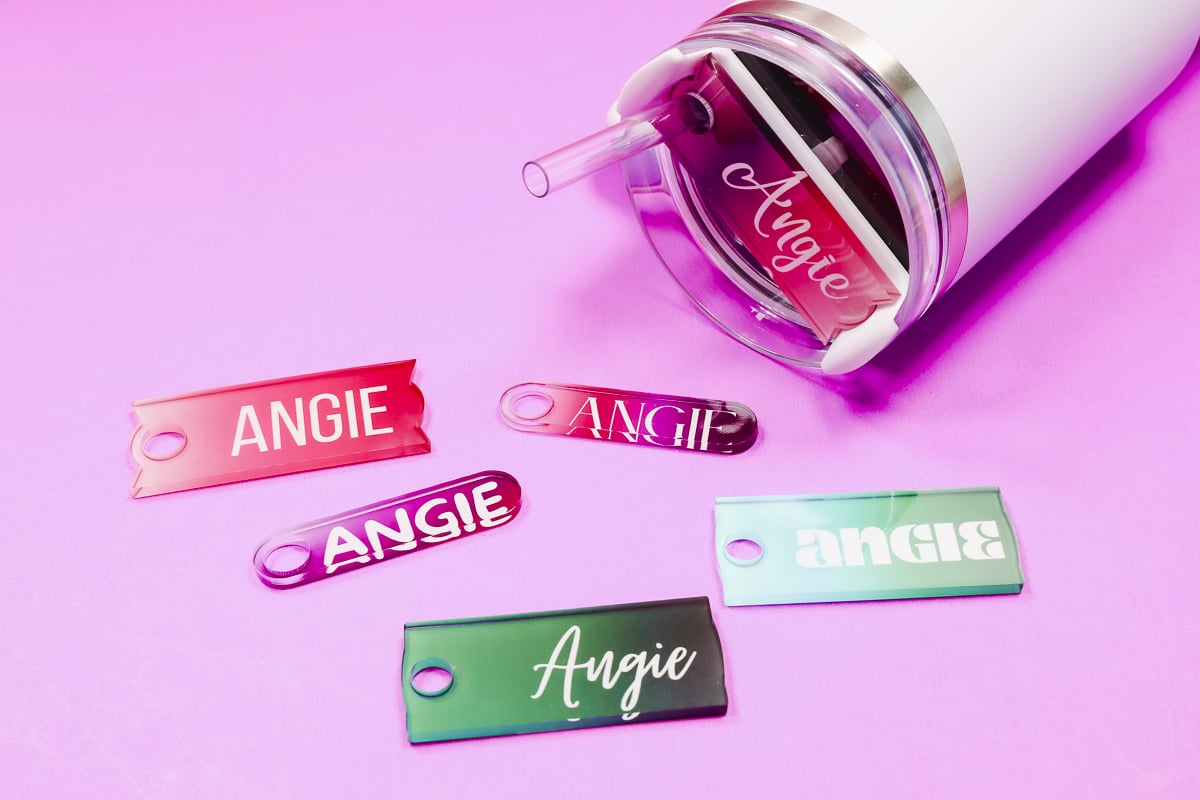
These Stanley name plates are slightly see-through. You can see the design through the name plate which makes it easier to locate the design.
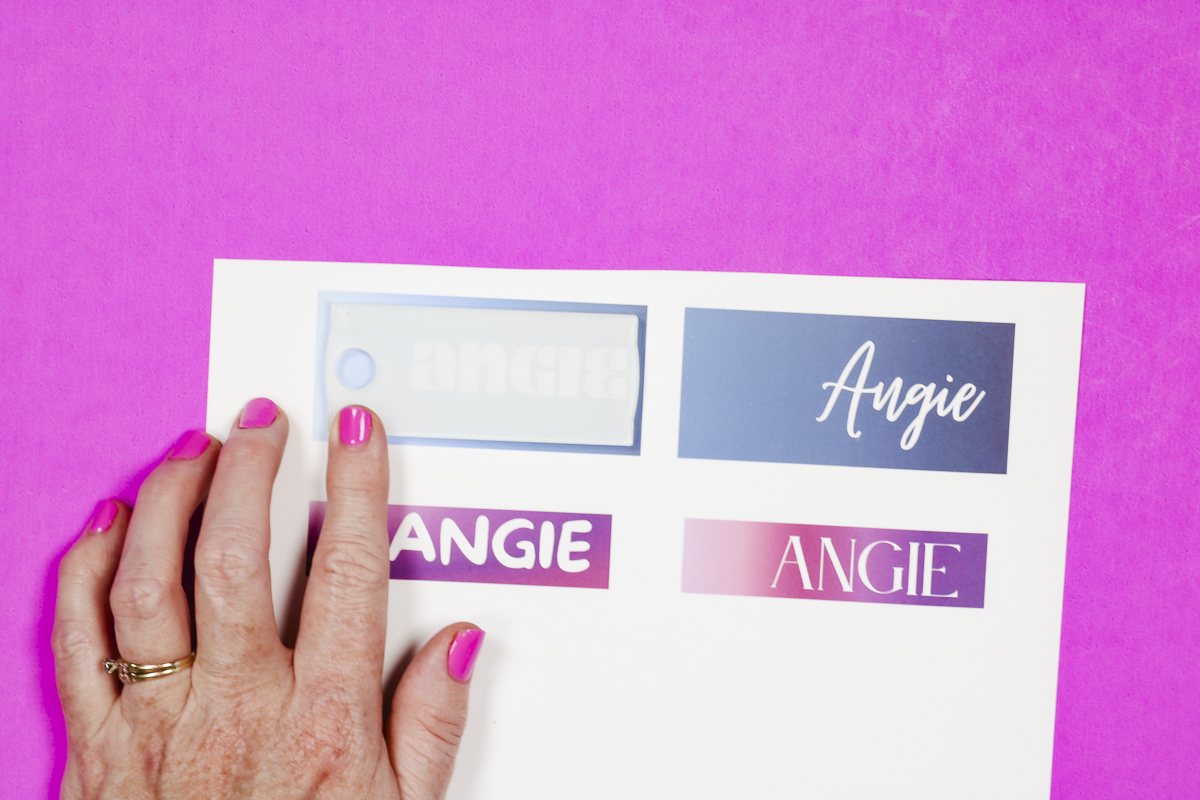
Use heat-resistant tape to hold the blank into place. I made my designs slightly larger than the blank itself so the entire surface will be sublimated.
Center the blank on the design so the print covers the entire surface. Make sure the white side is against the sublimation print.

These different sized Stanley name plates are approximately the same thickness but I am not going to risk them being off a little bit so I’ll be pressing each different size one at a time.
Step 4: Heat Press Sublimation Stanley Name Plates
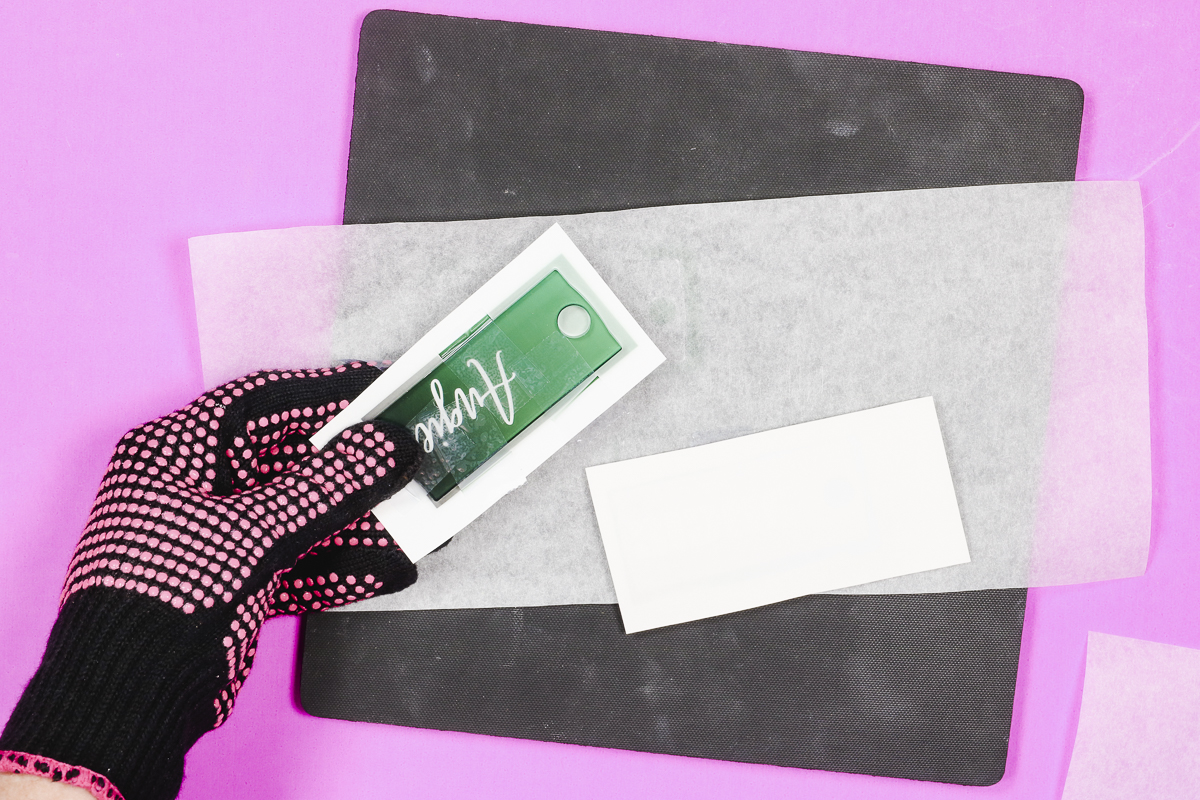
To press these name plates you want a firm heat-resistant surface. I am using my Artisprix heat resistant mat and EasyPress for this project.
Place a sheet of protective paper on the mat and then place the project blank side down on the protective paper and cover with another sheet of protective paper.

Set your heat press to 356 degrees Fahrenheit for 120 seconds and apply medium pressure for the entire time.
Lift the press straight up when the time is up and then, using heat-resistant gloves remove the sublimation name plate from the paper. They will be very hot so be careful. Repeat the process for each additional size of Stanley name plates.
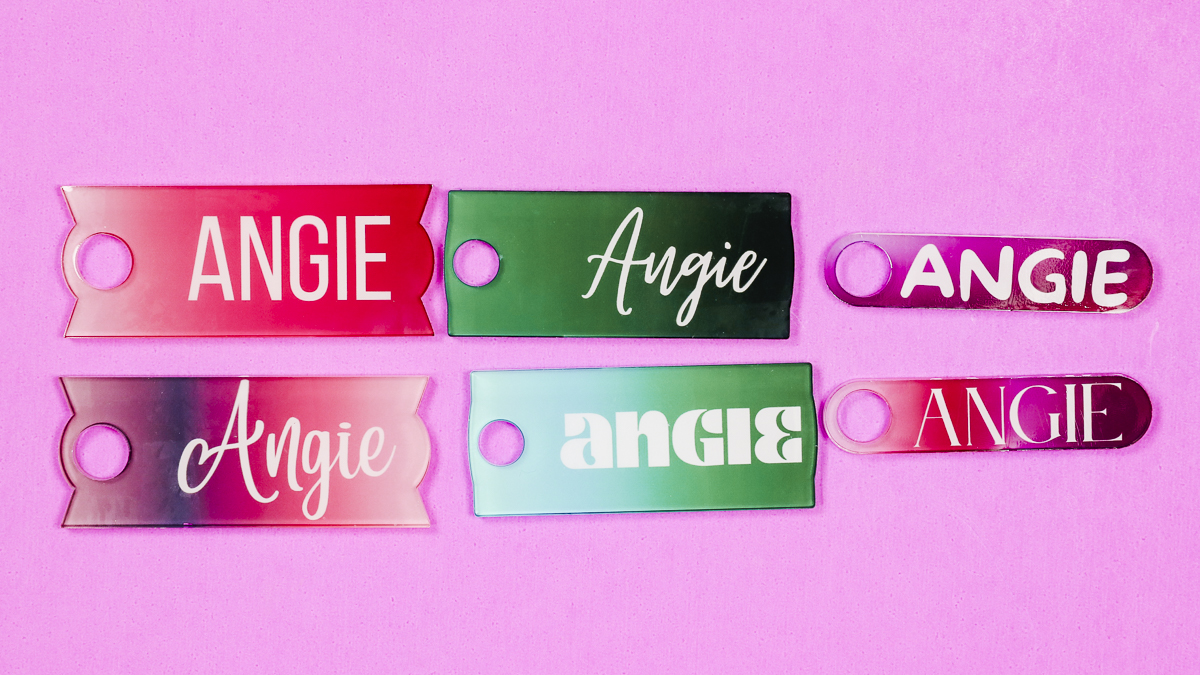
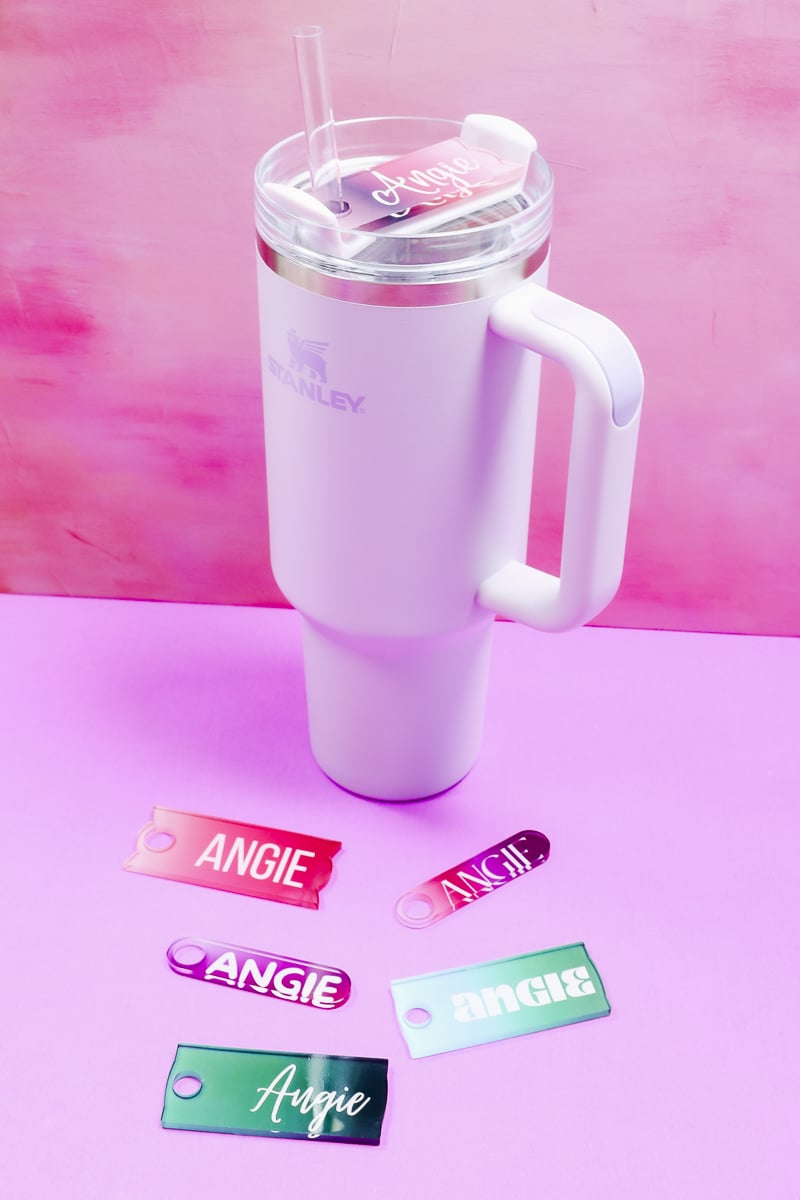
Sublimation Stanley Name Plates Results
Now that we have all the name plates sublimated let’s take a close look at how they turned out. I feel like all of these sublimated beautifully. The colors are vibrant and each one shows through the front really well.
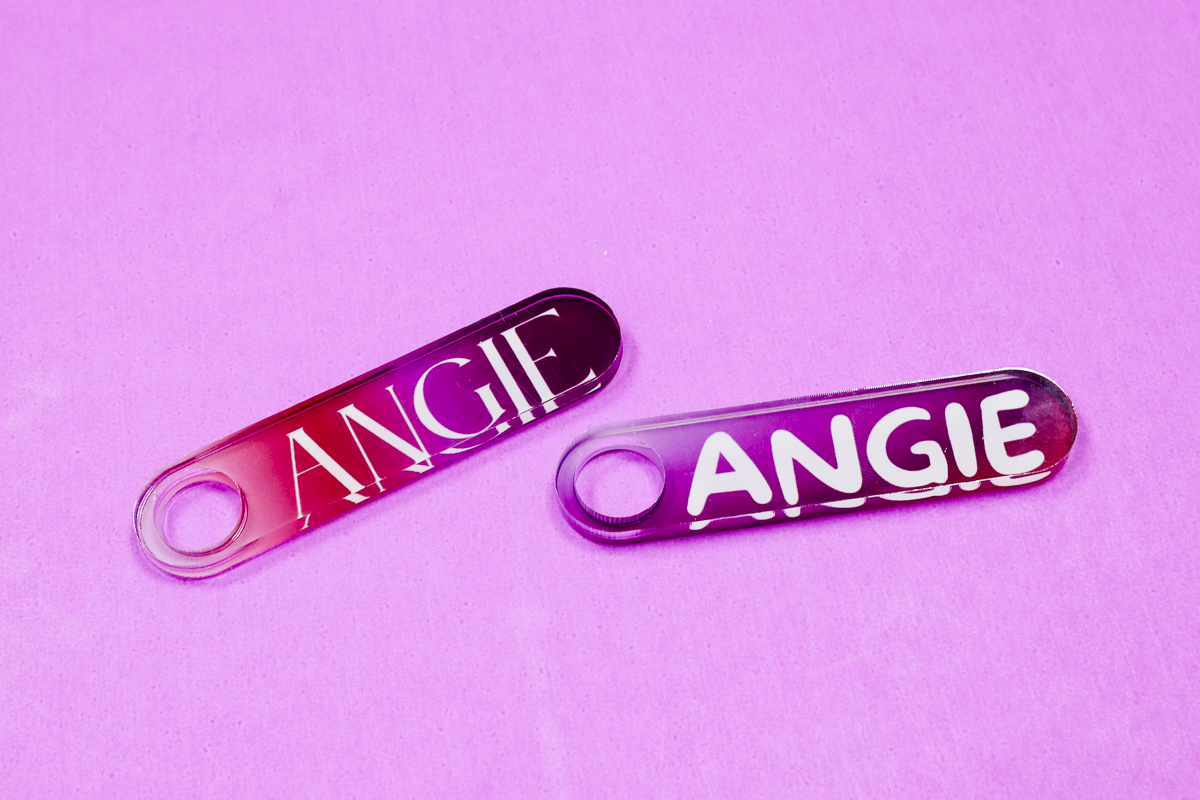
I did feel like the smaller Stanley name plates got soft under the heat. This can result in seeing markings from the tape. If you find tape marks on your finished product, I would recommend reducing the time a little bit and see if that helps.
The tape marks I got only showed up when I held them a certain way so even with those these name plates turned out beautifully.
If you have tape marks that are very visible and reducing time doesn’t help, I would recommend using DyeTrans Pro Spray to adhere the tags to the prints. This will eliminate the need for heat-resistant tape.
How to Apply Sublimation Name Plates to a Stanley Tumbler
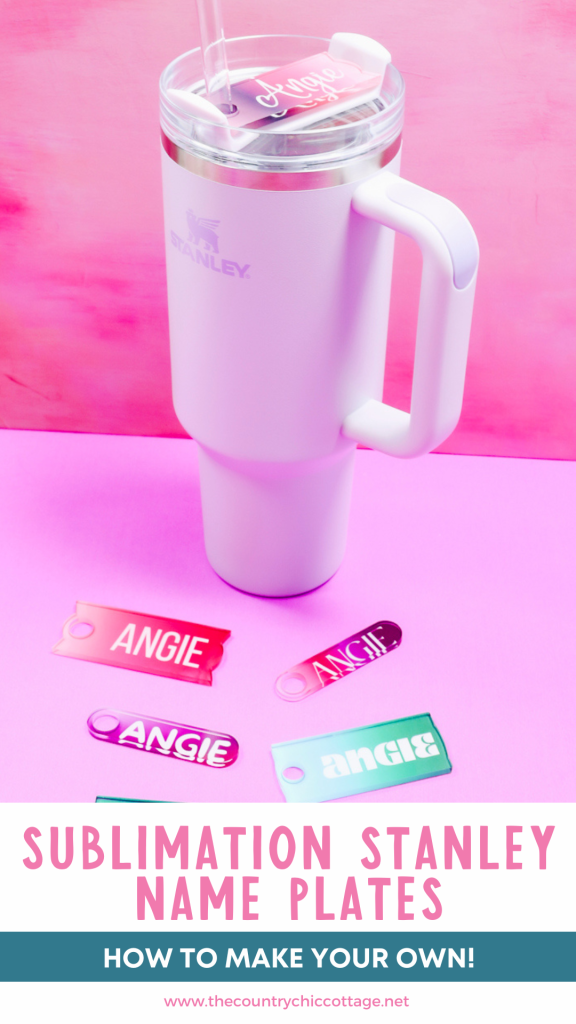
Now that our name plates are sublimated it’s time to add them to Stanley tumbler. Let’s start with the large size.
This large sublimation name plate is made to snap right into place on the top of your Stanley tumbler lid.
Fit the name plate over the straw and then snape it into place. This blank is made to fit the branded Stanley tumbler. If you have a different brand of tumbler, you may want to test the different options to see which one works best.
Both the Medium and Small sized Stanley name plate sublimation blanks fit the tumbler differently.

Using Adhesive for the Tumbler Name Plates
These blanks come with an adhesive that you can add to the back of the blank and use it to hold the name plate into place.
I will say, the adhesive was hit or miss for me. If you want to use this style of blank with the branded Stanley tumbler, you may want to try a different type of adhesive to see if you can get it to stay in place better.
If you’re using a different type of tumbler, these sizes may work for you.
I am really happy with how these Stanley name plates turned out. They’re all beautiful and sublimated really well.
Today I created a variety of different sublimation name plates with different colors and my name. That isn’t the only way to use these.
As I was thinking of different ways to use these, I thought they would be awesome for a bachelorette party weekend, bridal party gifts, teacher gifts, etc. You could also make yourself a collection of these for different seasons and holidays.
I was most happy with the large size and how it snapped right into place. If you have a different type of tumbler, I would do a little research to see if someone has found one that fits it well or order a few options and see how they fit your tumbler.
I hope I’ve answered any questions you had. If you have any additional questions about how to make sublimation Stanley name plates, feel free to leave them in the comments and I’ll be happy to answer them for you.
The post How to Make a Custom Sublimation Stanley Name Plate appeared first on Patabook Home Improvements.