This post and photos may contain Amazon or other affiliate links. If you purchase something through any link, I may receive a small commission at no extra charge to you. Any supplies used may be given to me free of charge, however, all projects and opinions are my own.
Are you new to sublimation and trying to figure out where to start? Today I’m going to teach you how to use Cricut Design Space for sublimation projects.
There are benefits and drawbacks to using Cricut Design Space to print your sublimation prints. I’m going to walk you through all of those and make a project so we can compare how the prints turn out.
If Design Space is new to you, learn all about it in my What is Design Space and How Does it Work article.
You can see me use Design Space to print out images for these keychains in the video below.
How to Use Cricut Design Space for Sublimation
If you aren’t already logged into Design Space, do that now. You can get Cricut Design Space here if you don’t already have it. The following tutorial will be on the version of Design Space for a MAC.
Step 1: Open a New Project
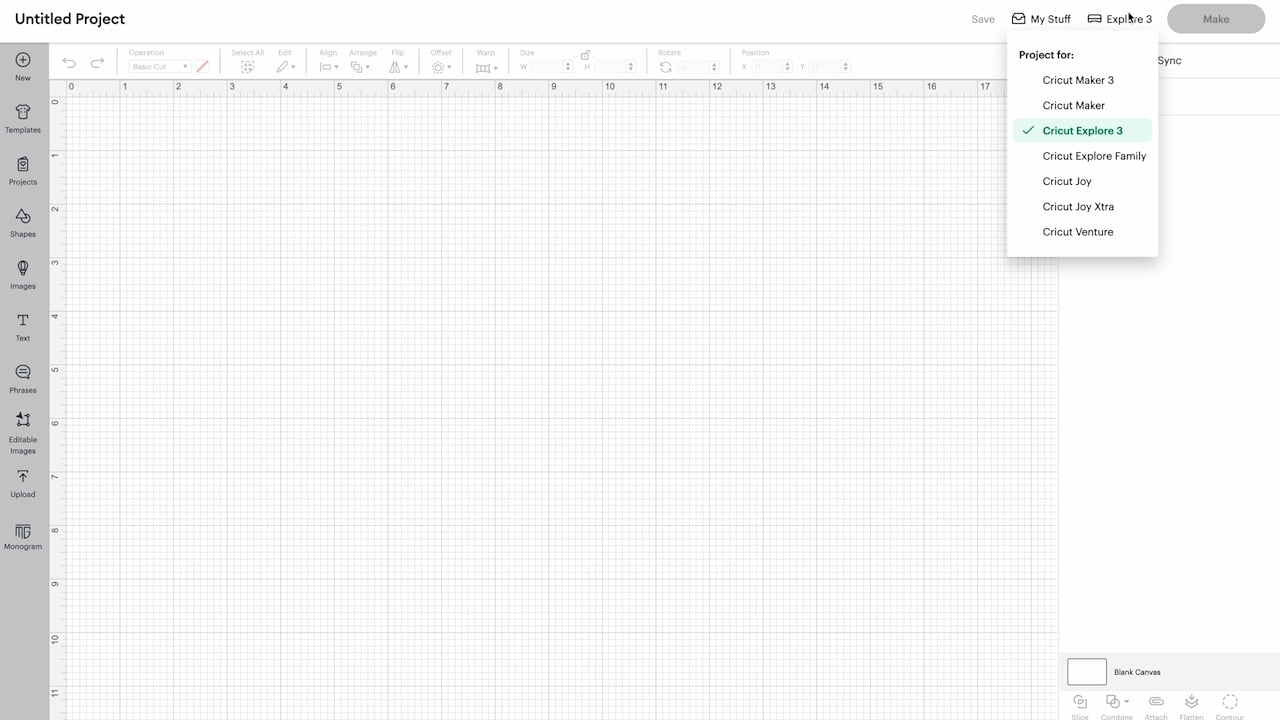
With Design Space open, click New Project and that will open a blank canvas.
Pick a machine type in the upper right hand corner. If your sublimation printer can print larger than 8.5 x 11, you’ll want to pick either an Explore, Maker, or Venture machine. If you can only print up to 8.5 x 11, you can choose the Joy Xtra or any of those other machines.
Step 2: Upload an Image in Design Space
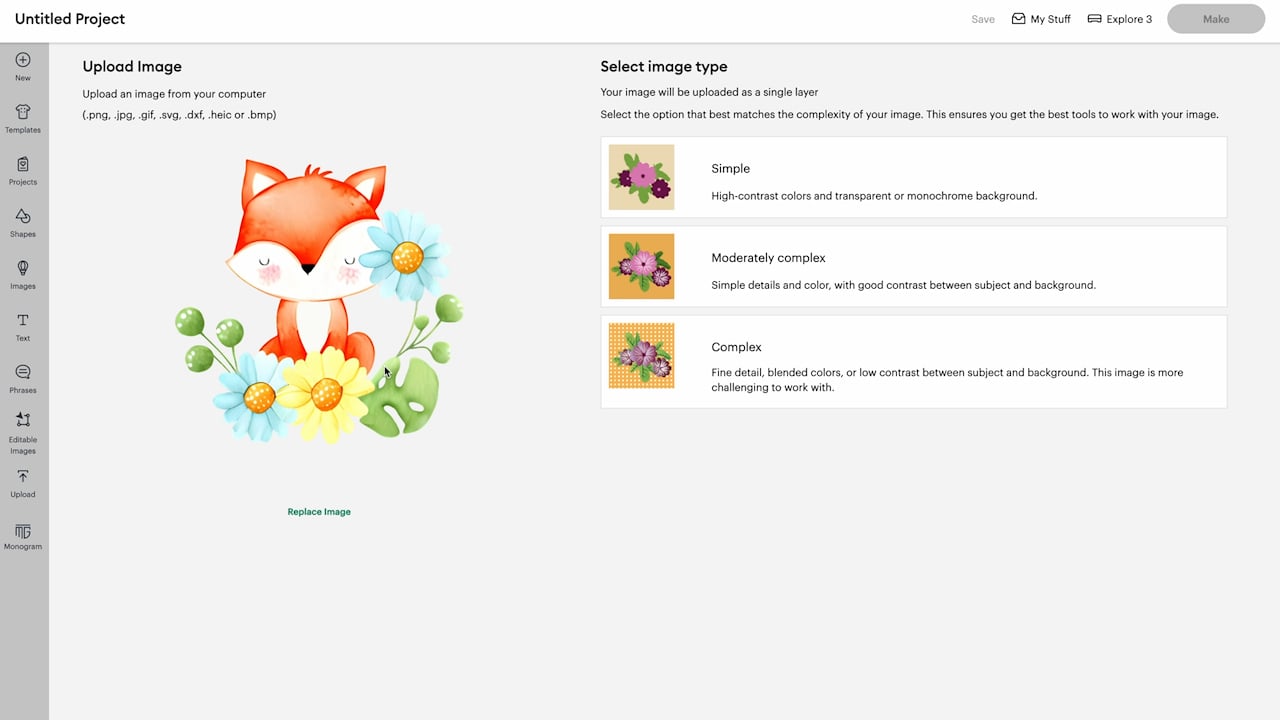
With the blank canvas open, click Upload on the left side of the canvas. Next, click Upload Image and then Browse to find the image on your computer. I am using this cute baby fox design, you can get it for free here.
I usually choose Complex for sublimation designs and like to use a PNG image when possible. Typically with a PNG image the background is already removed.
Optional: Remove Image Background
If you’re having issues with your image and how it is uploading, you may want to try uploading a different file type.
Click continue and check the background. If the background has a grey and white checked look, that means it’s already removed. If the background isn’t removed, you can use the background remover tools right within Design Space.
When the background of your image is white, you don’t need to worry about it because white doesn’t sublimate. If it’s a color, you will need to make sure and remove the whole background.
As a Cricut Access subscriber, there is an automatic background remover in Design Space you can use. If you don’t have Cricut Access, you can use the background remover and manually select the background to remove it.

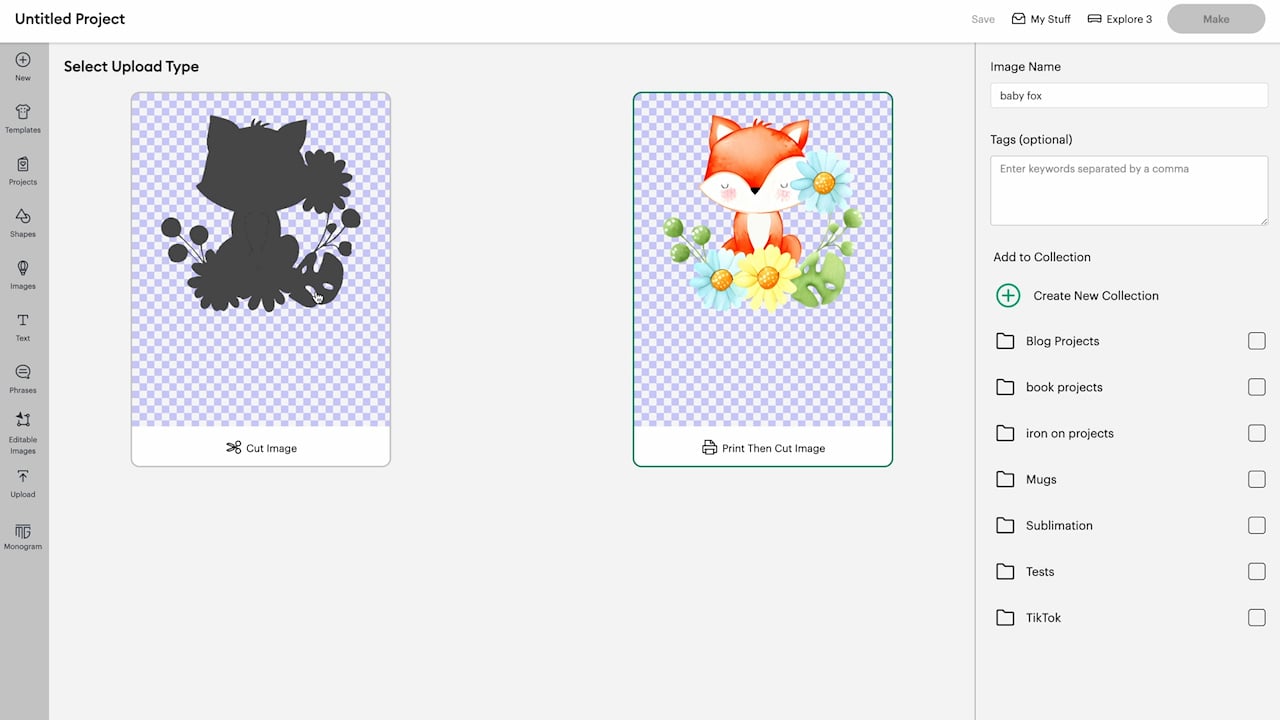
Click Apply and Continue, this will pull up two different options. You’ll see a cut image option and a Print Then Cut image option. For sublimation, we want to choose Print Then Cut.
I suggest looking at the cut image to ensure it looks correct. If you have random pieces floating around, make sure you go back and you delete those. If you have just a square image, for example, that may mean the background wasn’t removed.
Click Print Then Cut, name your image, and then click Upload.
Step 3: Add Image to Canvas
Finally, click Upload and the design will be added to your account. This process can take varying amounts of time depending on how large the image is. When the image has been uploaded, click the image and then click Add to Canvas.
With the image on your canvas, depending on how large your design is you may have an error in your layers panel. My image uploaded very large, larger than can be cut with any Cricut machine.
If you see a red triangle in the layers panel, that indicates an error and will need to be corrected before you move on to the printing portion of the process. We will discuss resizing below.

Step 4: Create a Template for Sublimation Prints
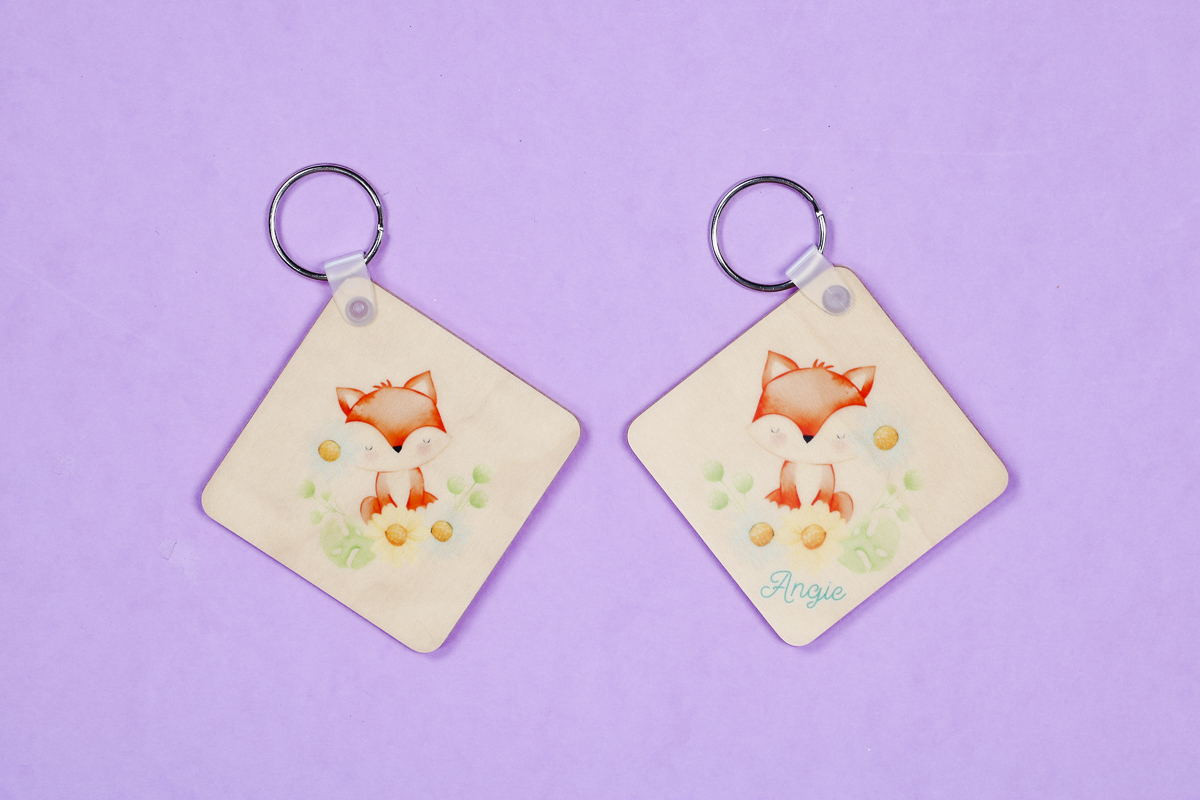
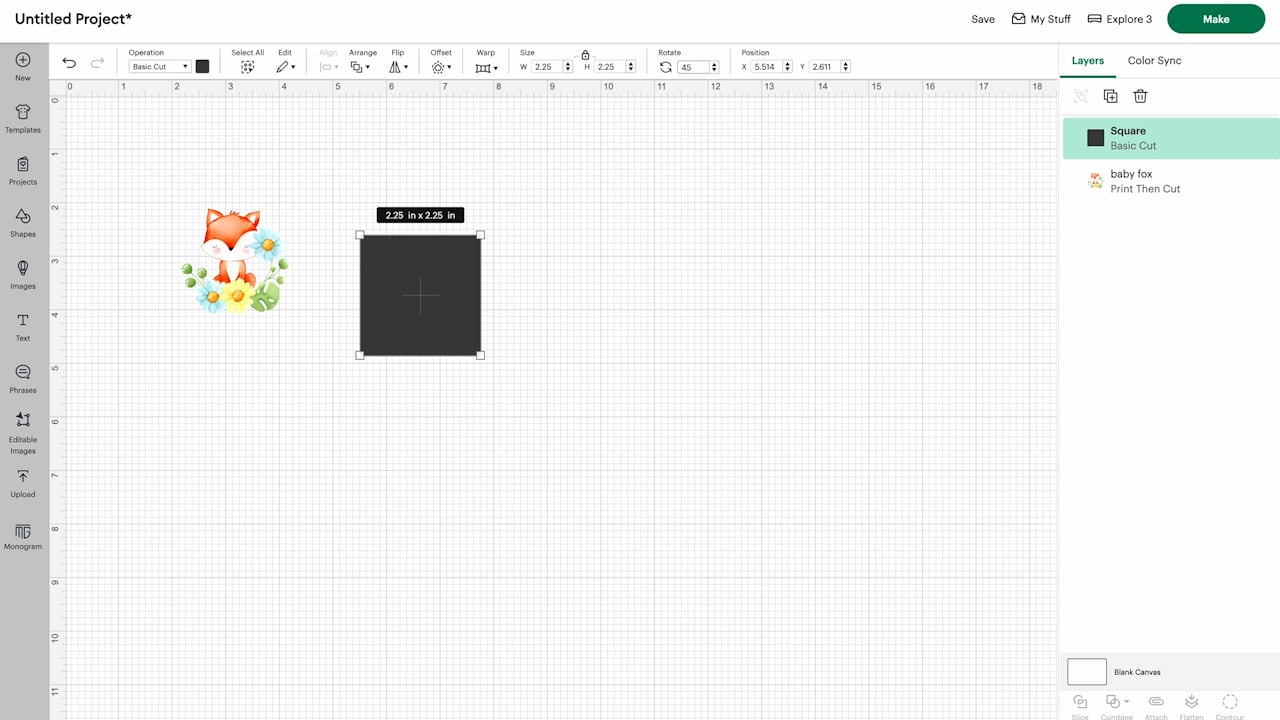
One of the benefits of using Design Space for sublimation is the ability to create a template or mock-up of your sublimation blank. Today I’m using a keychain sublimation blank that is a square shape approximately 2 1/4″ by 2 1/4″.
On the left side of the screen, you’ll see there is a shapes button. I am going to choose the square shape and resize it to the same size as my blank. Designs on the canvas can be resized in the upper toolbar or by clicking and dragging the design from the corner.
Resize to 2 1/4″ by 2 1/4″ and adjust the layers so it is the bottom layer. I like to change the color of my template to white which makes it easier to see the design on top of it.
Step 5: Resize Image to Fit on Template
Now that we have the template sized correctly it’s time to resize our design.
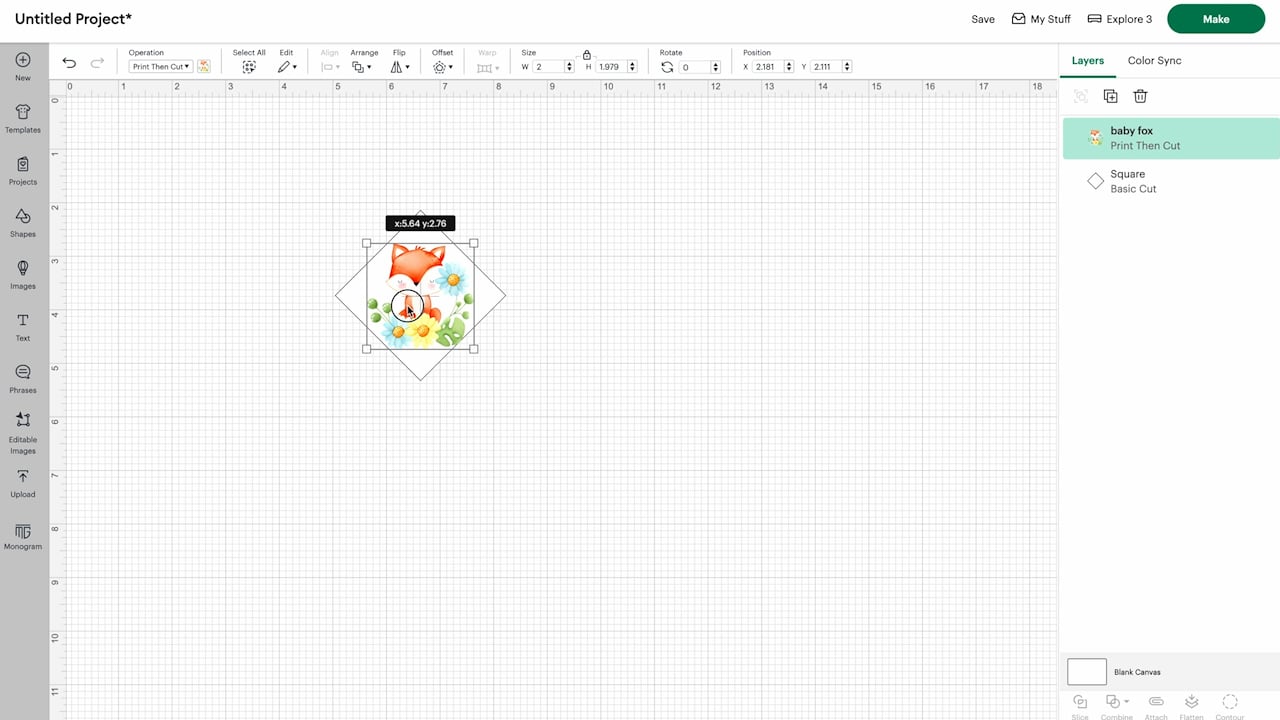
It’s important when resizing the design to make sure the image size is locked in the top toolbar. This will ensure all sides are resized uniformly so it doesn’t distort your image.
Because my keychain has a hole at one corner I am going to rotate the square to 45 degrees to make it easier to size my design correctly. With the template set up correctly, I can easily resize the design and see how it will look on the keychain.
Step 6: Customize with Text
Another benefit of creating sublimation designs within Design Space is that it’s easy to customize designs with text.
Click the text option on the left side of the canvas and type whatever you want it to say. As an example, I am adding my name. Once you have the text added, you can resize the text, change the color, or change the font in the top toolbar.
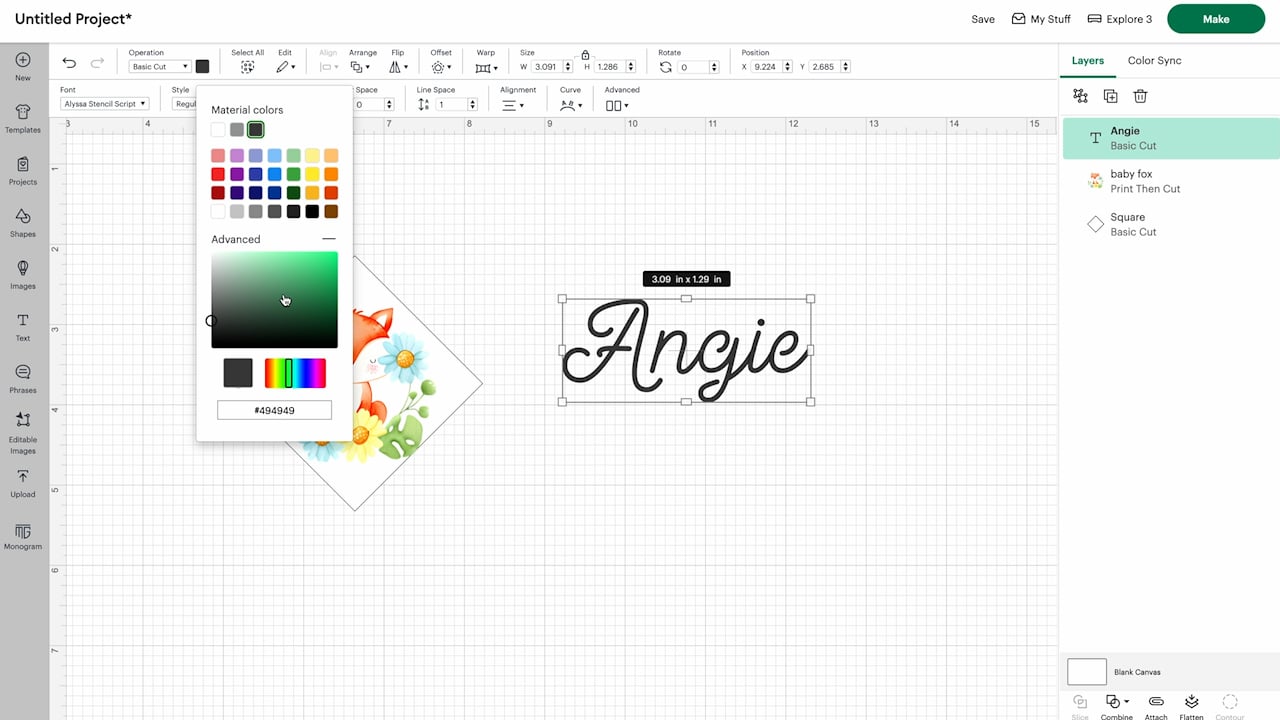
I chose a dark teal color for my font and chose to add it to the bottom of the design. If the font you choose is a script font, click the Combine tool in the layers panel and then click Unite. This will turn the text into a single image and remove any internal lines.
Step 7: Turn an Image Into a Printable Design
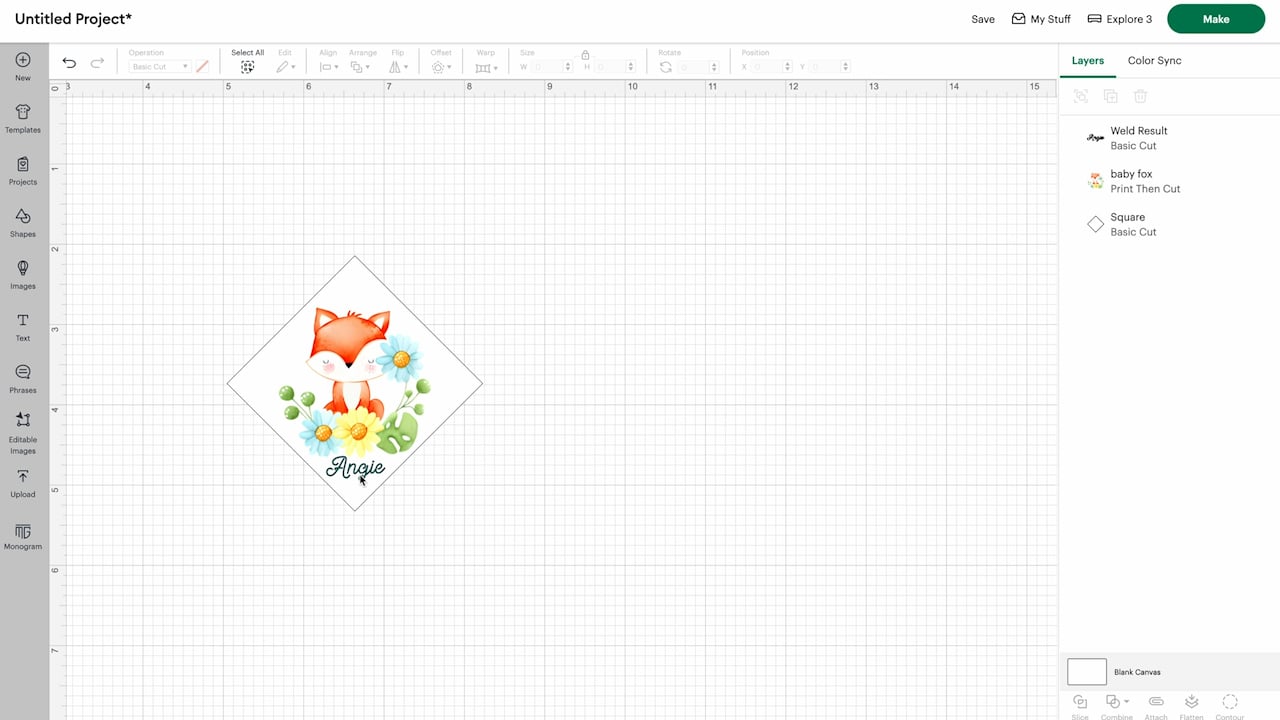
To turn the whole design into a Print Then Cut image vs. a cut image, we want to begin by deleting the template from the background. We don’t want to print that shape.
With the template removed, select all the other layers and then click Flatten in the layers panel. That one button turns the design into a Print Then Cut image that can be printed on any printer I choose including a sublimation printer.

I do not need to use the cut option for this project since I am printing it as a sublimation print.
If you’re using a product like Siser EasySubli, you may need to use the cut option to remove the background so you have no white background.
Step 8: Adjust Paper Size in Design Space
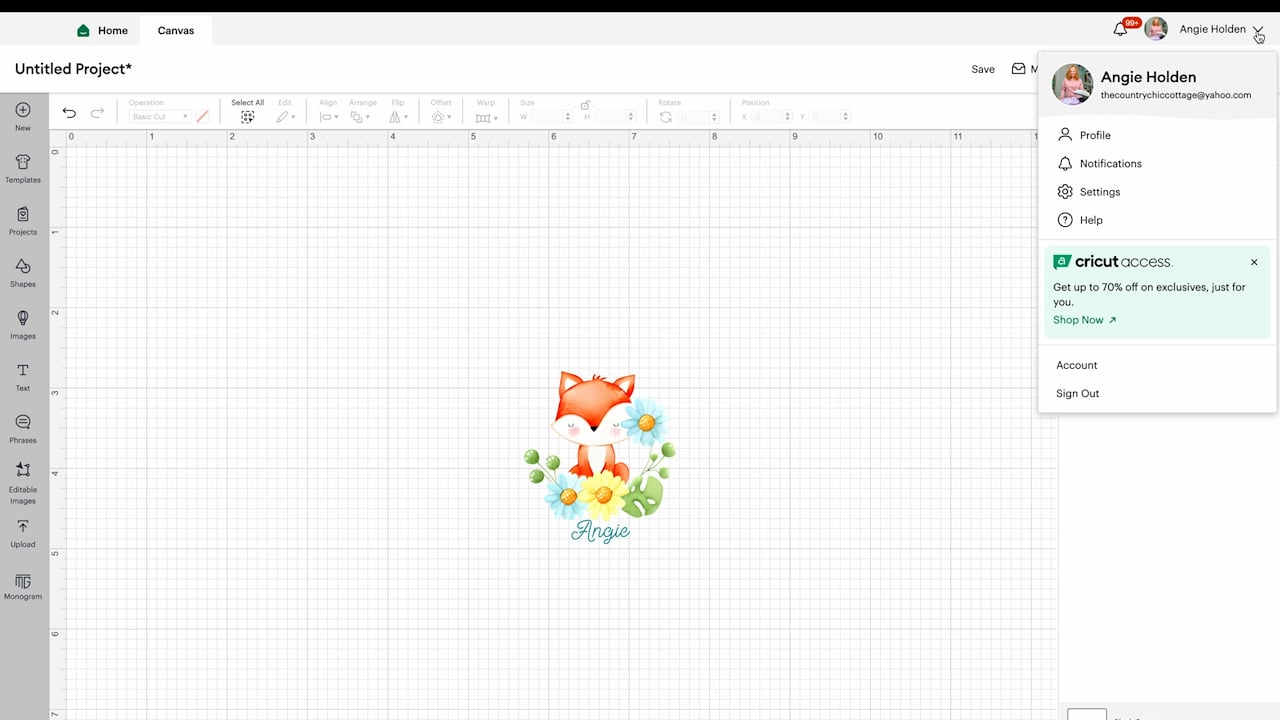
As a default, Design Space typically has the paper size set to 8.5″ by 11″. You can adjust the paper size if needed by clicking on your name and then click on Settings.
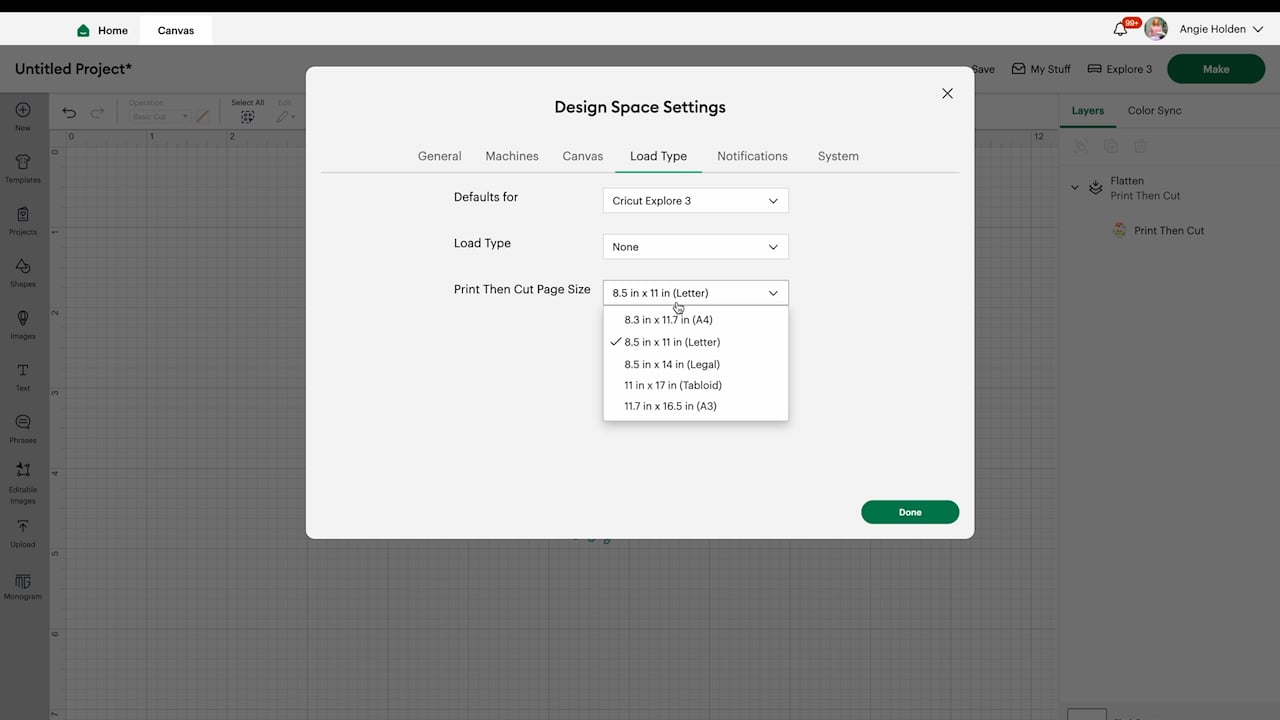
Click on Load Type and choose the paper size you want to use. I am using 8.5″ by 11″ paper today.
The sizes of paper you see here are the only paper sizes available within Design Space. That is one of the drawbacks of printing from Design Space. If you have custom-sized paper for mugs or longer paper that can be fed through a bypass tray, you cannot use them in Design Space.
Step 9: Print Sublimation Design from Cricut Design Space
With the paper size selected, click Done and then click Make.
From here you can increase the number of copies you want to print if needed. On the display screen, you’ll see there are black lines near the corners of the design.
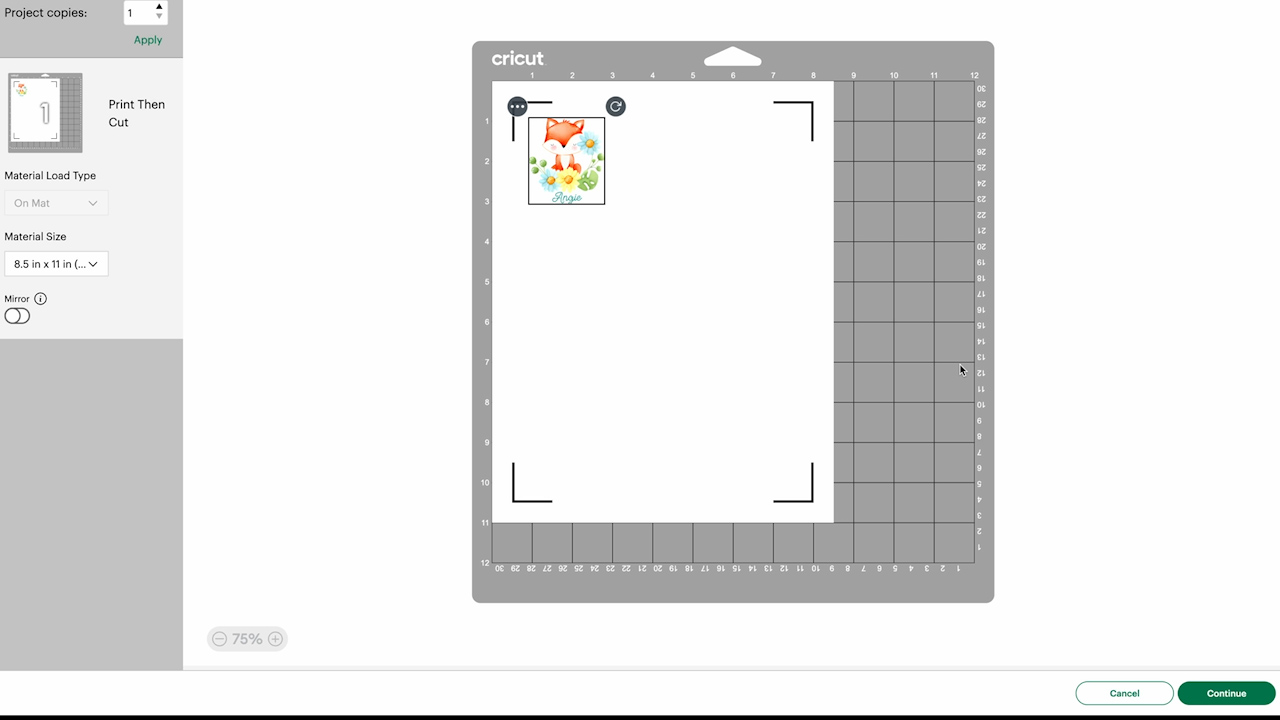
These are the registration marks and you cannot turn them off. The registration marks are for the Cricut machine to read so it knows where to cut. Even if you’re not cutting your design the registration marks will print.
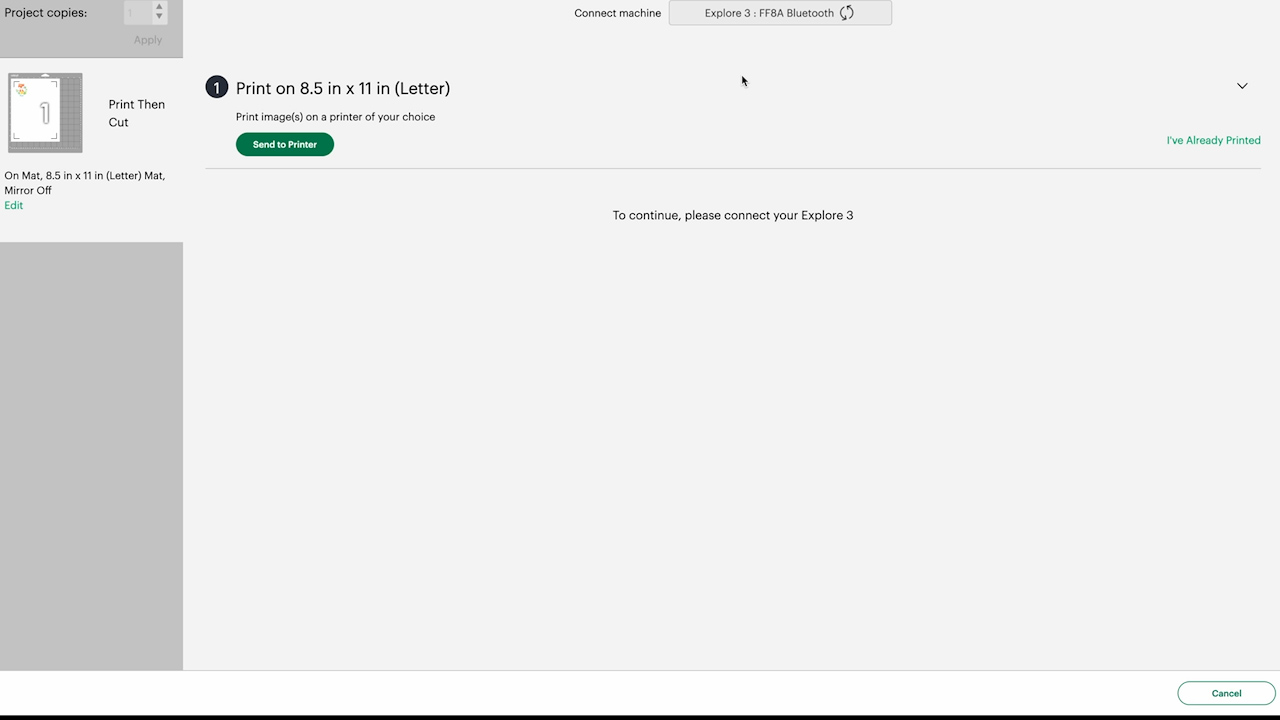
Click Continue and Design Space will try to connect to a Cricut machine. You don’t have to connect to a Cricut machine to print. That means you don’t have to have a Cricut machine to use Cricut Design Space for sublimation.
Step 10: Adjust Printer Settings
Click Send to Printer and choose the printer you’re using. I am using my Brother sublimation printer.
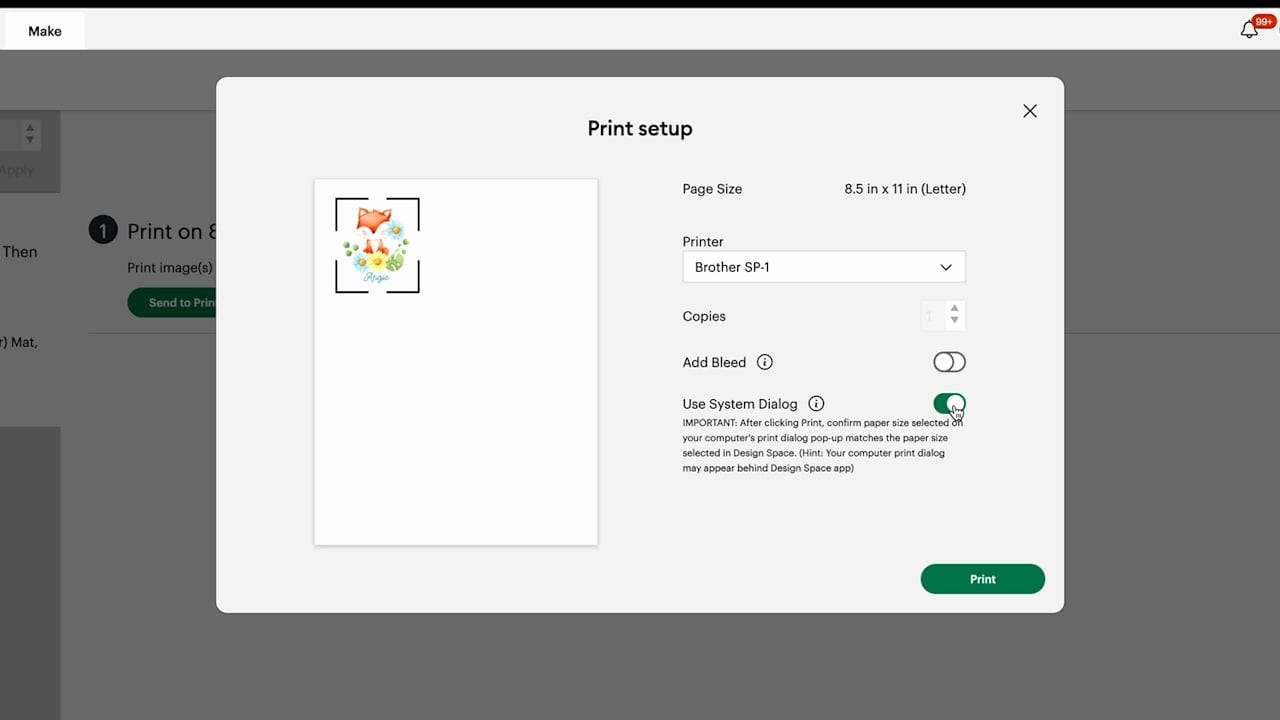
If you’re not cutting the image with your Cricut machine, always turn Bleed off. Your print will not turn out correctly if you leave the bleed on, the edges of the print will be blurry.
Click Use System Dialog and that will pull up the dialog box for your printer when you click Print. Within the printer system dialog choose the settings you usually use to print.
If you’re struggling with your print settings, my sublimation printer settings tutorial is a great resource to get help.
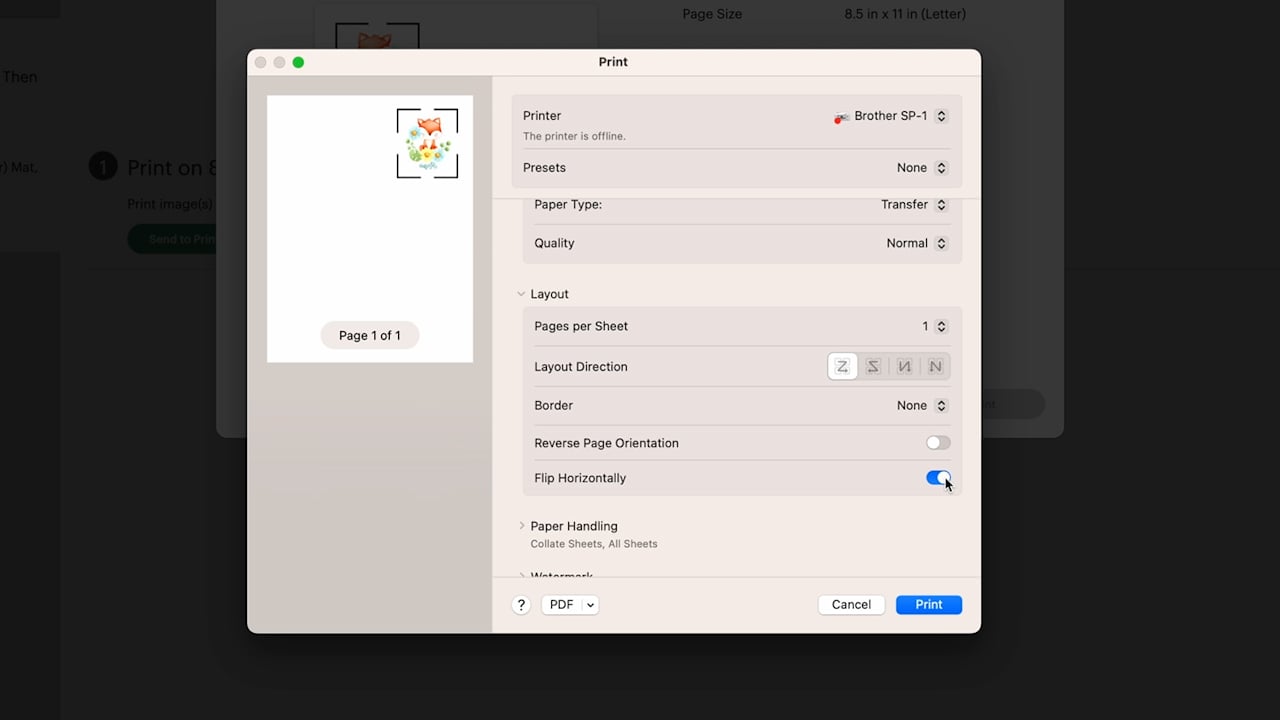
For the Brother sublimation printer, I chose Transfer as the paper type because that is the only option available. I selected Normal for Quality.
Don’t forget to mirror your image. Choose one place to mirror your design, either here in the printer settings or in Design Space, don’t do it in both places or your image will not be mirrored.
With all the print settings set, click Print.
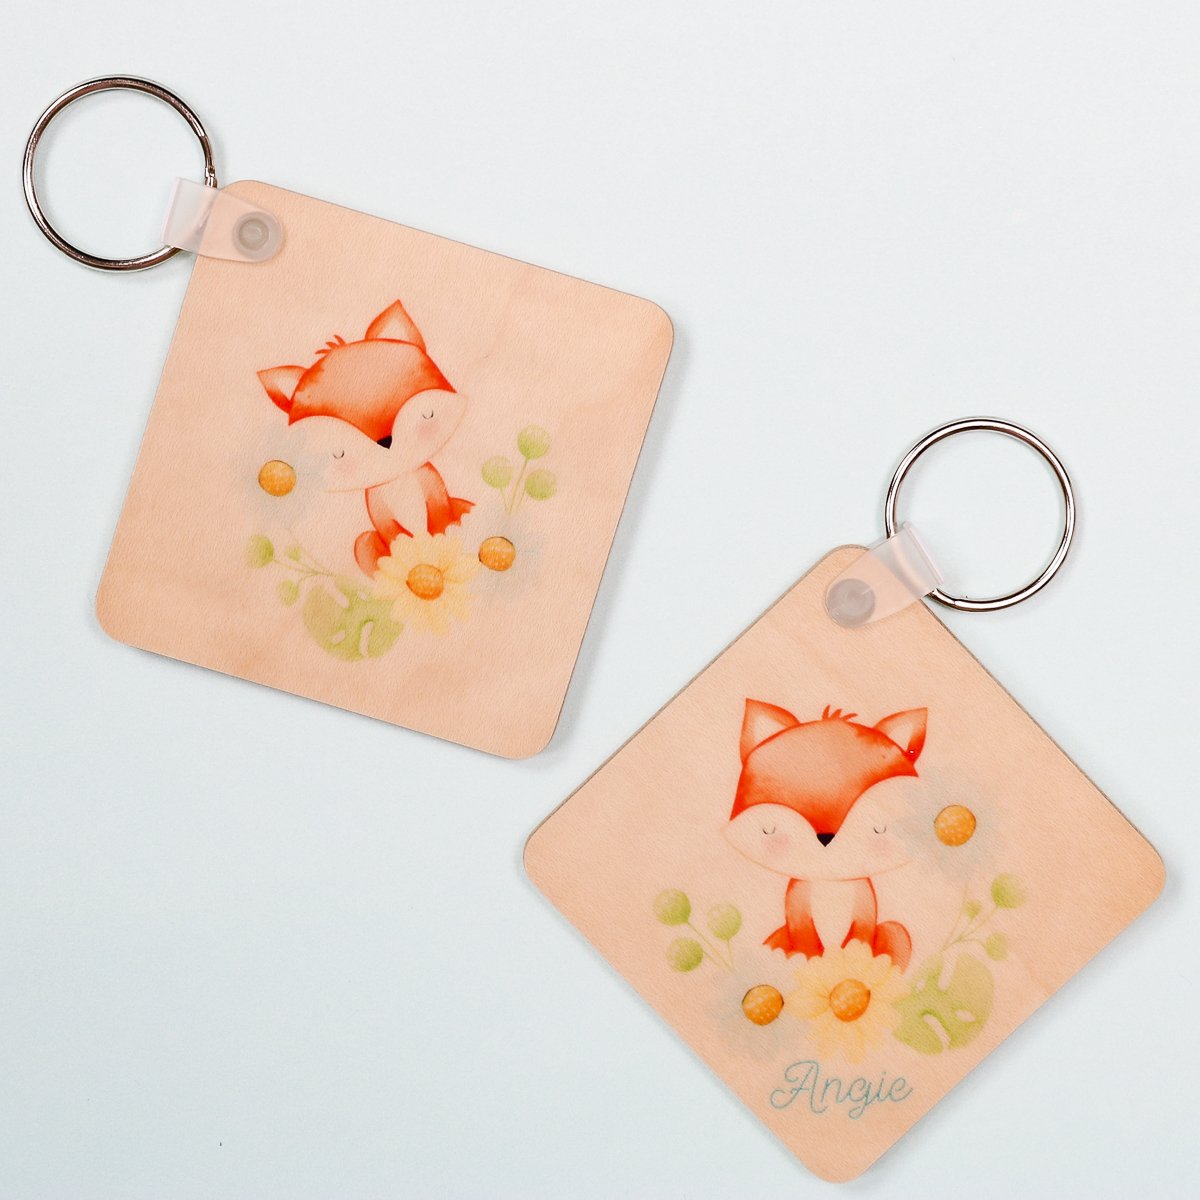
Making a Sublimation Keychain
Now that you have your print printed from Cricut Design Space, let’s take a look at using it to make a project.
Supplies Used:
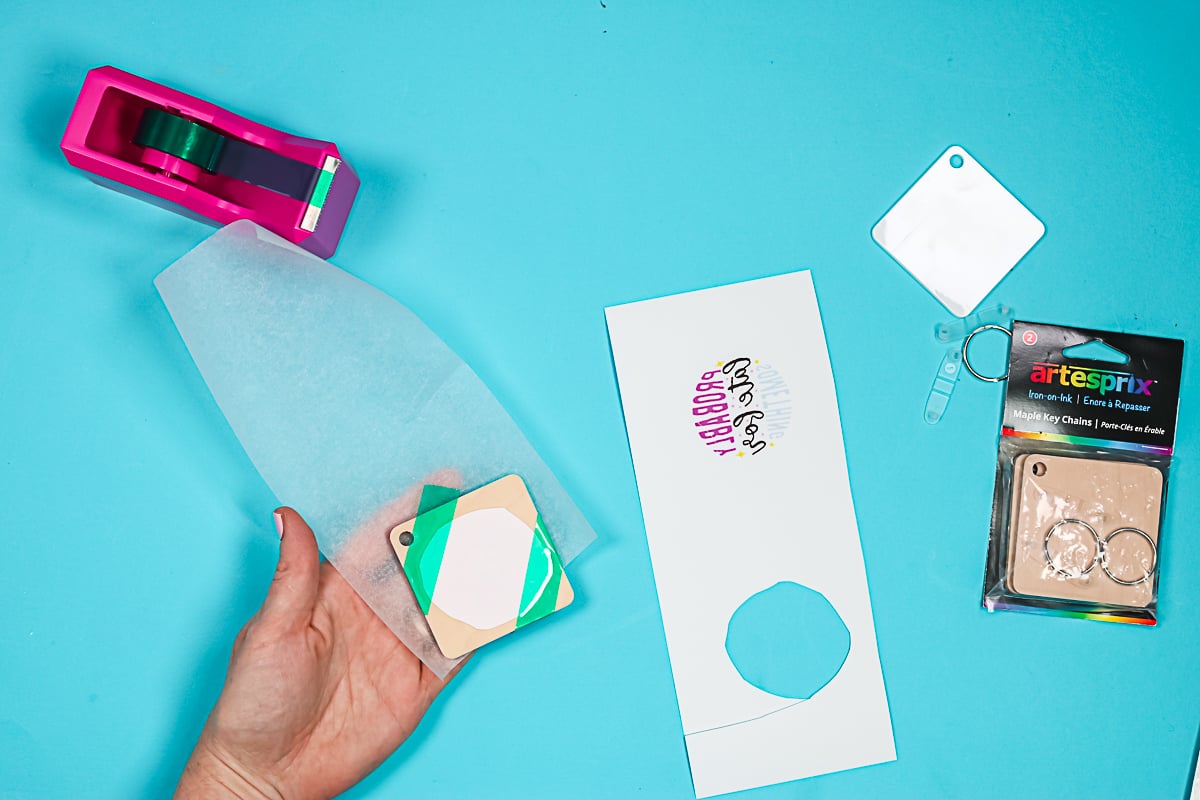
Step 1: Prepare Sublimation Print for Pressing
Before pressing we need to trim the design away from the registration marks. The registration marks are sublimation ink, they will transfer to the blank if heat is applied.

Step 2: Prepare the Blank
Clean the blank really well. I use a lint roller to remove any dust, hair, and other debris. Add the sublimation print and tape down well.
I prepared two blanks because I wanted to test how the print from Design Space compares to prints from other programs.
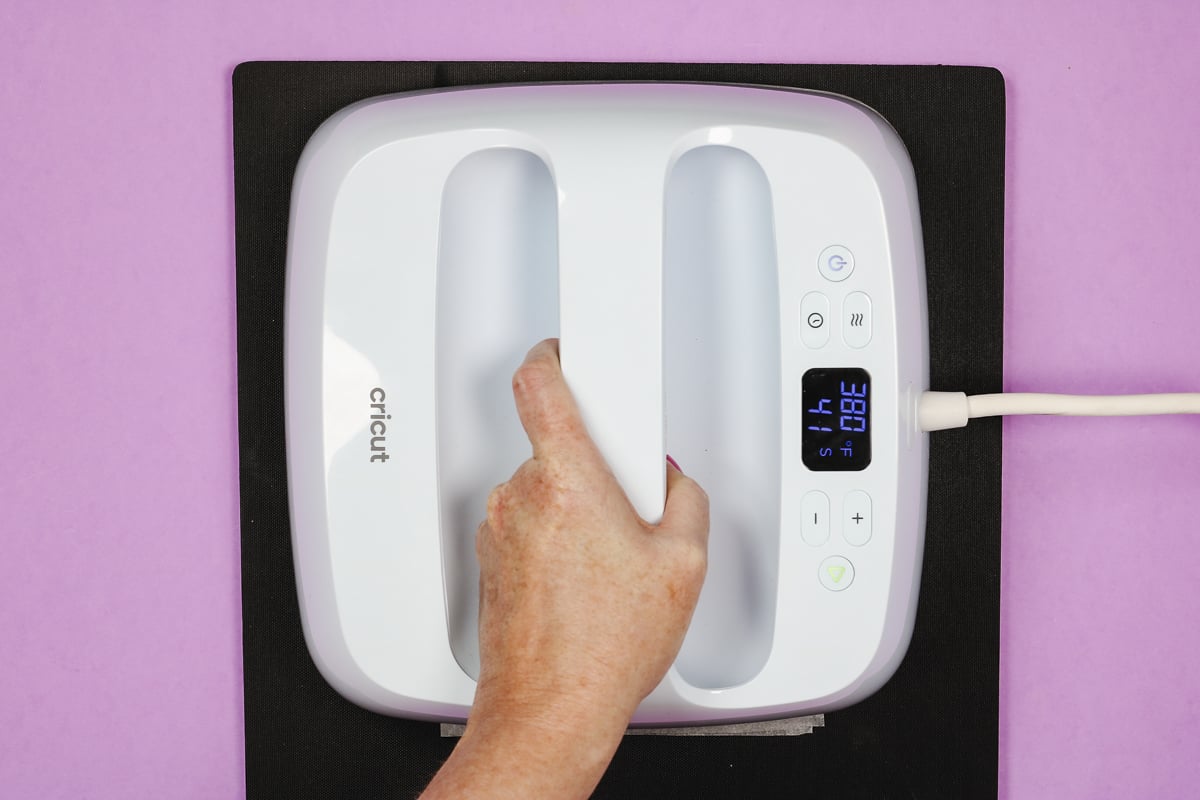
Step 3: Press
Add protective paper to the top and bottom of your blank and press. Be sure to press at the time and temperature recommended for the blank you are using. After pressing, remove the sublimation print and your project is complete!
Frequently Asked Questions
Let’s tackle some of the questions I often get about sublimation in Cricut Design Space.
Why Use Cricut Design Space to Print Sublimation Prints?
One of the main reasons you’d want to use Design Space to print your sublimation prints is familiarity. If you’re new to sublimation but know Design Space, it’s nice to have a program that you already know how to use.
Design Space is also great for quick projects. Resizing and customizing images is really easy in Design Space. Even though I know other programs I still often use Design Space for small sublimation projects.
Another reason to use Design Space is that with the newer Print Then Cut sizes available in Design Space you can print larger prints than ever before.
Can you export and print from another program?
It is not easy to export your design and print from another program. You can use the printer box to print to a PDF. However, this will still leave the registration marks on your printed file.
You can also make the background of your canvas plain white and do a screen shot to make an image. I DO NOT recommend this as it is often a very low quality print.
Comparing Cricut Design Space to Other Sublimation Prints
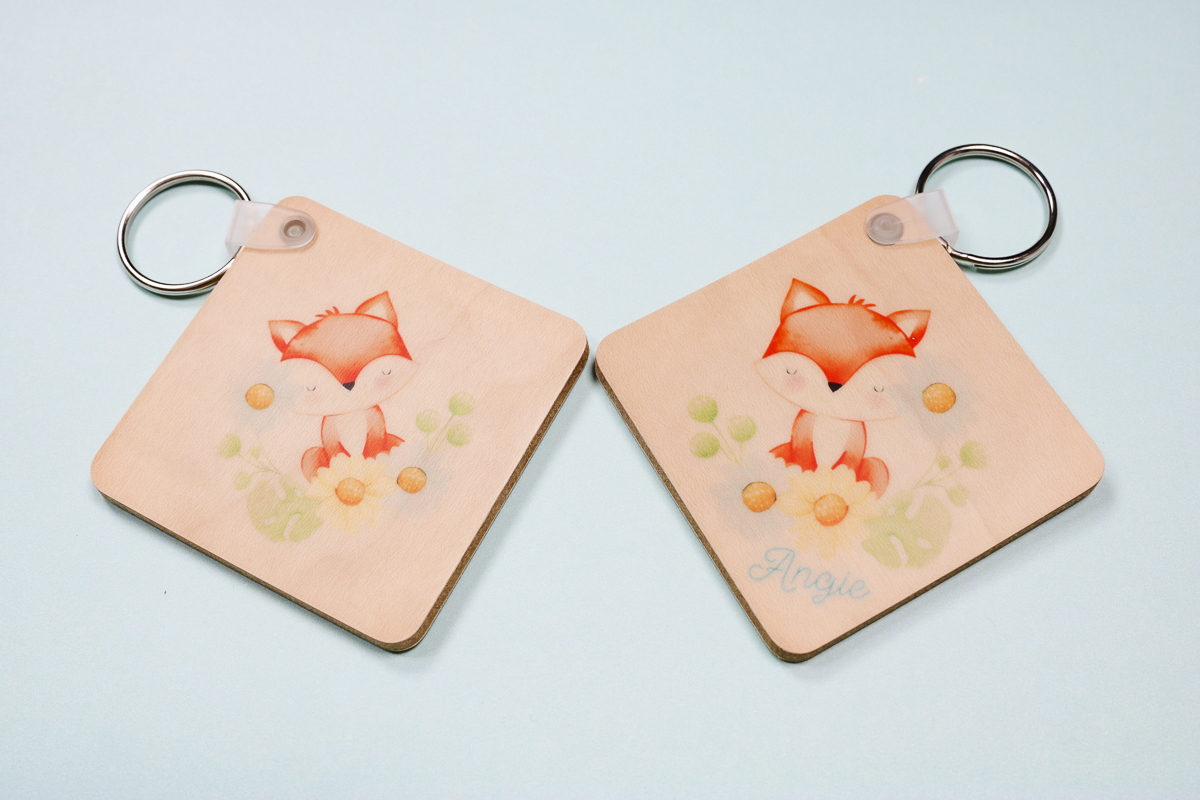
Using the Brother sublimation printer the prints look amazing both from Design Space and other programs. I don’t see any differences at all on the two projects after pressing. Both are vibrant and transferred beautifully.
I have heard of people having issues with the color when they print from Design Space. It appears those issues tend to relate to converted Epson EcoTank printers. Converted printers are known for having color issues so you may need to do more adjustments and testing when using a converted EcoTank.
The keychains I made today both turned out great. Using the Brother sublimation printer, the sublimation print from Cricut Design Space turned out perfectly. If you’re familiar with Design Space it can be a great option for sublimation beginners.
Would I choose Cricut Design Space?
I would not choose Design Space out of all the free programs available if you’ve never used it. If you’re just starting and have to learn a program anyway, I would select a different free program.
The program you choose to use may also be dictated by the sublimation printer you have. Some printers may not produce satisfactory prints through Design Space.
That being said, even though I know and use other programs I still use Cricut Design Space from time to time to create customized sublimation designs for smaller projects. The Brother sublimation printer worked really well printing through Design Space.
Can I Print Larger Than Design Space Allows?
If you need to print a design that is larger than your printer can print, you really only have one option and that is to divide the print up into multiple prints.
I am not a big fan of dividing up a sublimation print as it can be hard to piece them together and press them without having seams show. If your design has a white background and there are breaks in the design, it is easier to separate.
If you need to break up your design, check out my tutorial on making sublimation rugs. This tutorial will walk you through how to tile your image making it easier to print out correctly. I am using a different program because I find it easier to use than Design Spafe for these types of projects.
Can I Save Designs From Design Space to My Computer?
Another drawback of using Cricut Design Space for sublimation is that you cannot save your design from Design Space to your computer. If you created your design in Design Space, you’ll need to print from Design Space for the best results.
There are two hacks that you can try. The first hack is to click Send to Printer, Remove Bleed, click Use System Dialog if you’re on a Mac, and then choose the PDF option. If you’re on a PC when you click on Printer, you can choose Save to PDF.
Note – When you save a design from Design Space as a PDF to your computer it will include the registration marks.
The only other way to save a design is to do a screen grab. These photos don’t result in very high-quality prints so I don’t usually recommend this option. If you’re going to choose this option, you’ll want to make the image as large as it can be and turn off the grid on the canvas.
To turn off the grid by click Settings, select Canvas, and then select No Grid. With the grid removed, you’ll have a solid white background and can capture the screen and use that image like a photograph in another program.
Since this process requires using another program anyway, I would choose another program to create the project to ensure having high quality making it easier to use for sublimation projects.
I hope I answered any questions you have about using Cricut Design Space for sublimation. If you have any additional questions, feel free to leave them in the comments and I’ll be happy to answer them for you.