This post and photos may contain Amazon or other affiliate links. If you purchase something through any link, I may receive a small commission at no extra charge to you. Any supplies used may be given to me free of charge, however, all projects and opinions are my own.
Do you use fabric in your crafting? Are you looking for a way to cut intricate designs with a machine? Today I’m going to test how to cut fabric with a Glowforge Aura and see how well it works. I’m going to test different colors and weights of fabric to see how each one performs with different settings.
If you’re new to using a laser machine, my Glowforge Aura Complete Guide is a great place to start.
You can watch me test all of these different materials by pressing play on the video below.
Cutting Lightweight Fabric with a Glowforge Aura Laser Machine
First of all, yes you can cut fabric with a Glowforge Aura laser machine. There are different settings you’ll need to test with the different fabrics to find the right settings for the fabric you’re using.
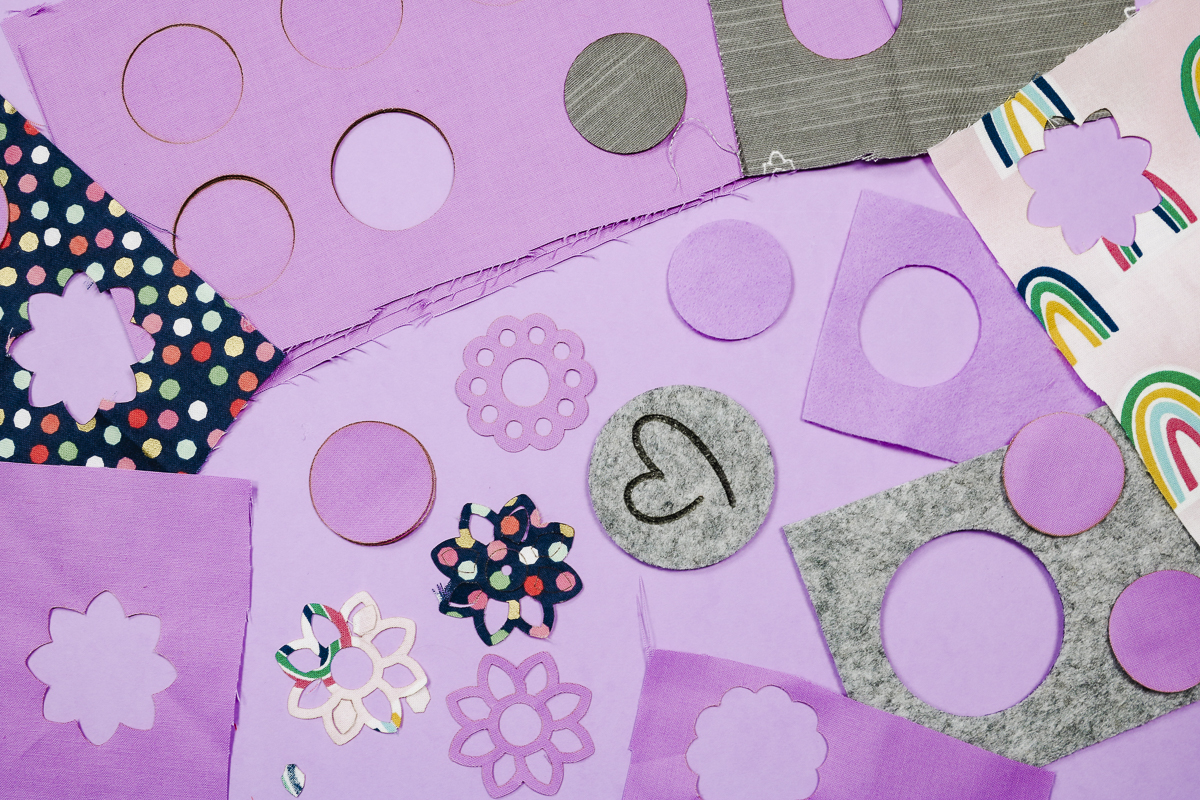
From thick felt to thin cotton, I’m going to test them all. I’m even going to try engraving on fabric today. I have a stack of fabric to run experiments on. I’m going to test how intricate I can get with the cuts and share what settings would work to get started with your Glowforge Aura and cutting fabric.
Step 1: Add Fabric to the Glowforge Aura
When you put fabric into the Glowforge Aura, it needs to be clean and dry. You also want to make sure it is flat, so iron it well to make sure there aren’t any wrinkles.
Because the Aura can blow the fabric around, if your fabric is very lightweight and if you’re doing a cut that needs to be in a precise location, you can use magnets to hold it in place. Another option is to make the fabric heavier by adding interfacing onto the back. This can add additional weight that can help hold it in place.
Because the Aura can blow the fabric around you’ll notice that I tend to stick with a single pass for the settings to get the best success.
Step 2: Cut Settings
Begin by going to app.glowforge.com. I am going to cut a circle to test the settings. If you want to use a different design, you can learn how to upload designs into Glowforge by reading my Upload and Trace in Glowforge tutorial.
With the circle added, I am going to adjust the settings. The settings I’m using for a single-layer plain cotton.
Settings for thin fabric:
- Speed = 20
- Power = 4
- Single pass
- Thickness = 0.05 inch
Click on Material Type and then click Use Unknown Material.

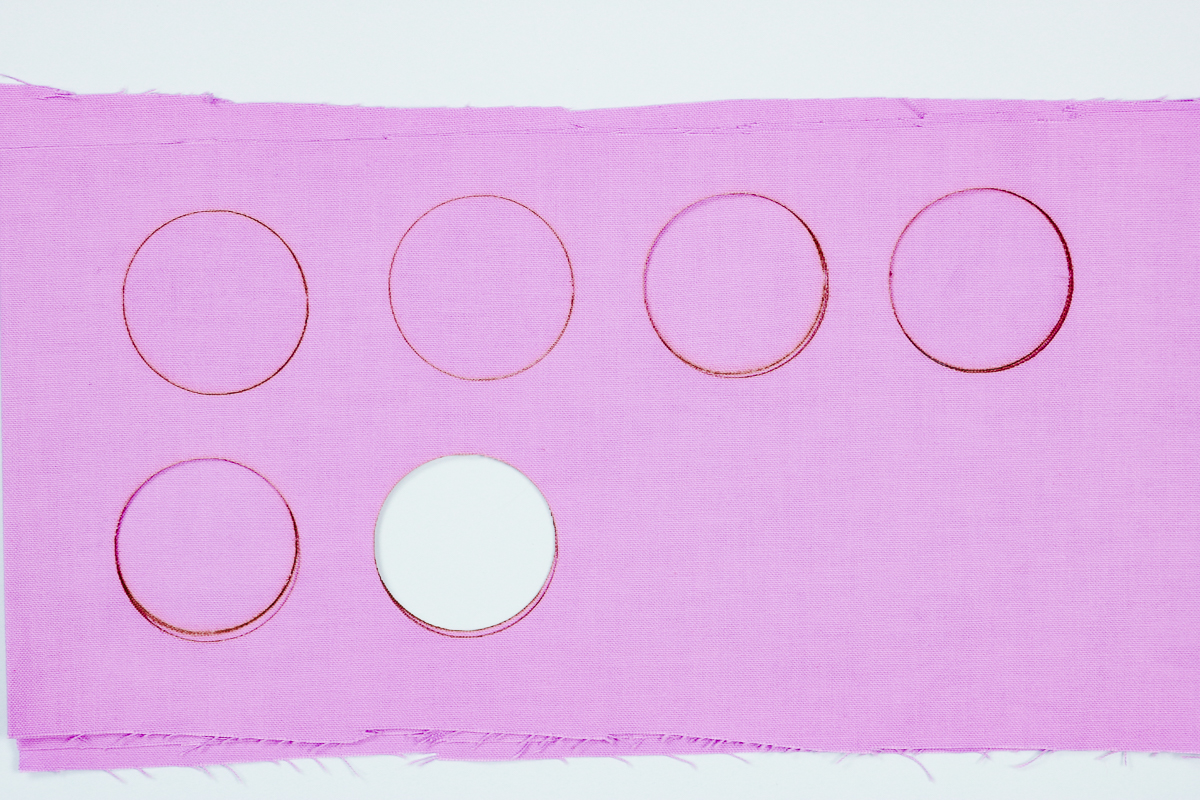
I tested a few different settings on this fabric shown above.
Speed of 30 and power of 4 with a material thickness of .05 did not cut all the way through. Speed 25, power of 4, and material thickness of .05 cut better but still had some pieces that were not cut all the way through. The speed 20 setting with a power of 4 and material thickness of .05 worked the best for this material.
Step 3: Cutting Fabric
Move the cut over the fabric shown on your computer screen and click Print.
On the Glowforge, click the flashing button, and watch it cut out your fabric. When the Aura is done cutting, wait for your computer to tell you it’s okay to open the lid and then remove the fabric.
Cutting Thicker Fabric and Felt with Glowforge Aura
Now, let’s see how thicker fabrics are cut with the Glowforge Aura. This grey fabric and light blue fabric with white are both heavier upholstery weight fabrics. You would follow the same steps as the lighter fabric above but the settings would need to change.
Settings for thicker fabrics:
- Speed = 30
- Power = 8
- Single pass
- Thickness = 0.05
With those settings, the grey fabric cut perfectly. When I tested a similar-weight fabric in a different color, it didn’t cut through. You may need to test your settings for not just different thicknesses but also different colors.
The purple fabric is a standard sheet of felt. I used those same settings and was very impressed with how well it cut felt. I love this machine for cutting felt.
How to Cut Multiple Layers of Fabric with Glowforge Aura
Now that I’ve learned a few things about cutting fabric with my Glowforge Aura, I wanted to see if I could cut multiple layers of fabric at once.
Step 1: Stack Fabric and Place in Machine
The fabric I’m testing is the purple lightweight fabric I used in my first tests above. To test this, I stacked 4 layers on top of each other and then ironed them together. I placed them inside my Glowforge Aura as a single package.
Step 2: Cut Settings
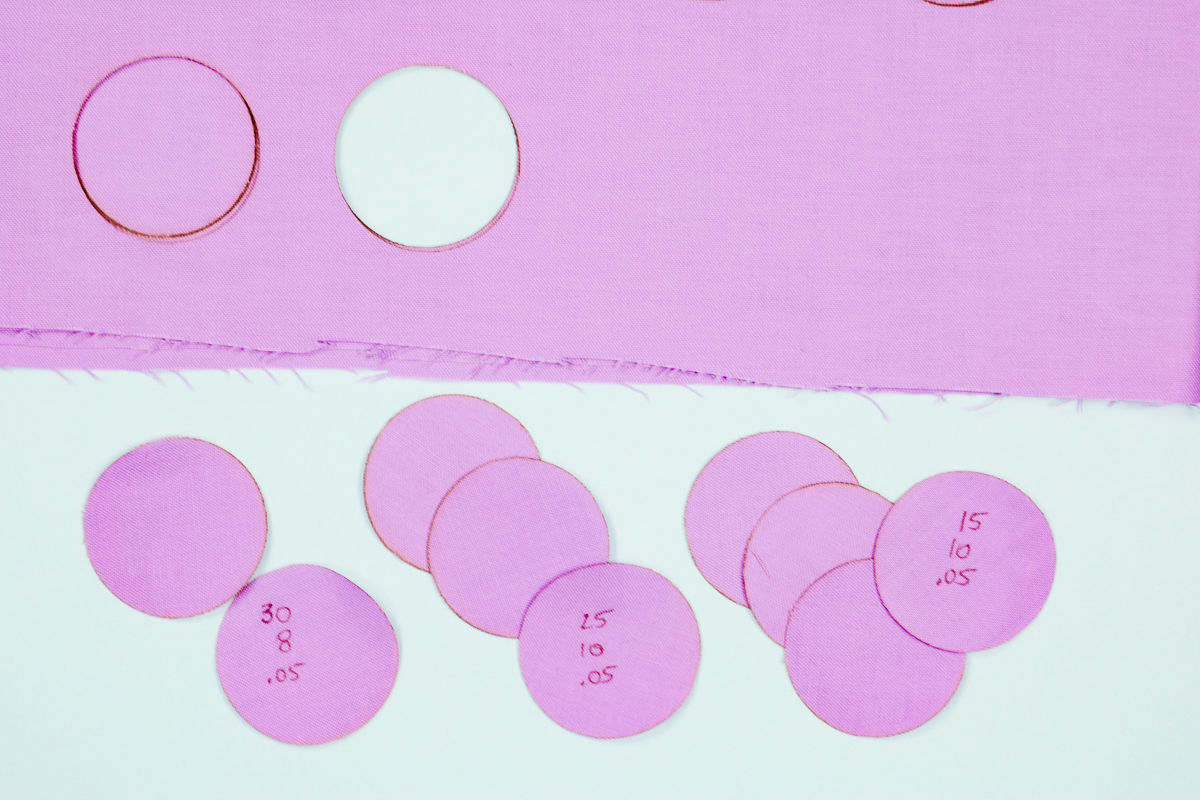
I tested a variety of different settings and as you can see I did have some success.
Settings for cutting layers:
- 2 layers: Speed 30, Power 8, Single pass, 0.05 material thickness
- 3 layers: Speed 25, Power 10, Single pass, 0.05 material thickness
- 4 layers: Speed 15, Power 10, Single pass, 0.05 material thickness
Now, just like single layers of fabric, these settings are a good starting point for different fabrics.
Engraving Fabric with a Glowforge Aura
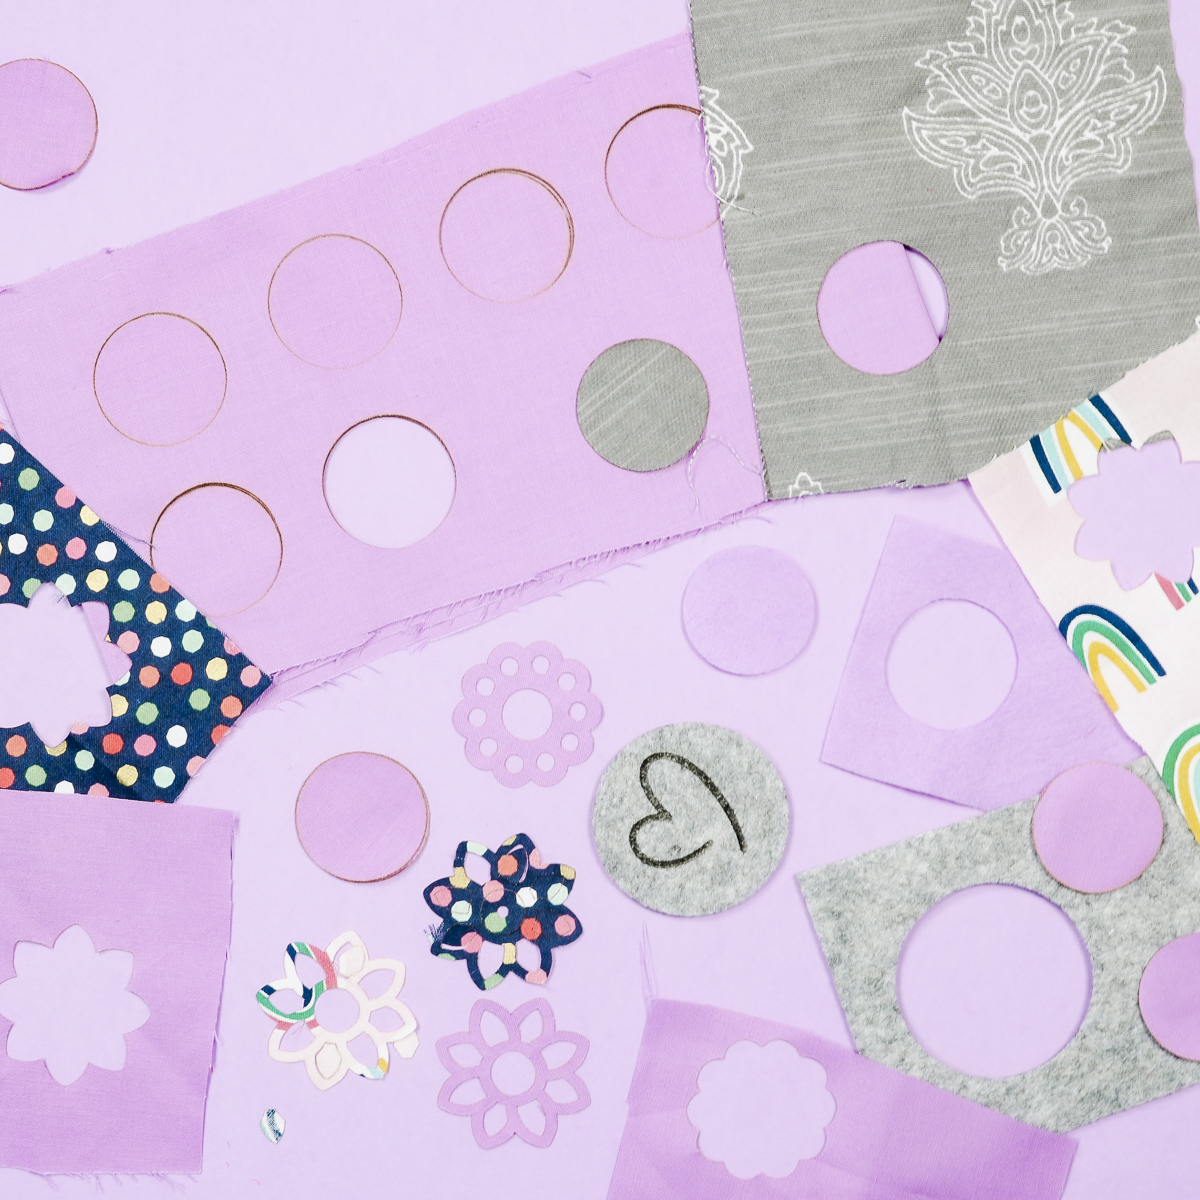
Now that I’ve tested cutting all these different fabrics I wanted to take it one step further and see if it’s possible to engrave on fabric. To test the engraving, I am using a really thick sheet of felt. I cut out a circle and then engraved a heart.
Repeat the same steps as the other types of fabric, however, the settings will need to change.
- For the cut settings, I used a Speed of 15, Power of 10, single pass, and material thickness of 0.05.
- The engraving settings I used were Speed of 86, Power of 3, and 270 lines per inch.
I do think I have mine a bit too deep because the fabric is very thin where it is engraved and that weakens the fabric.
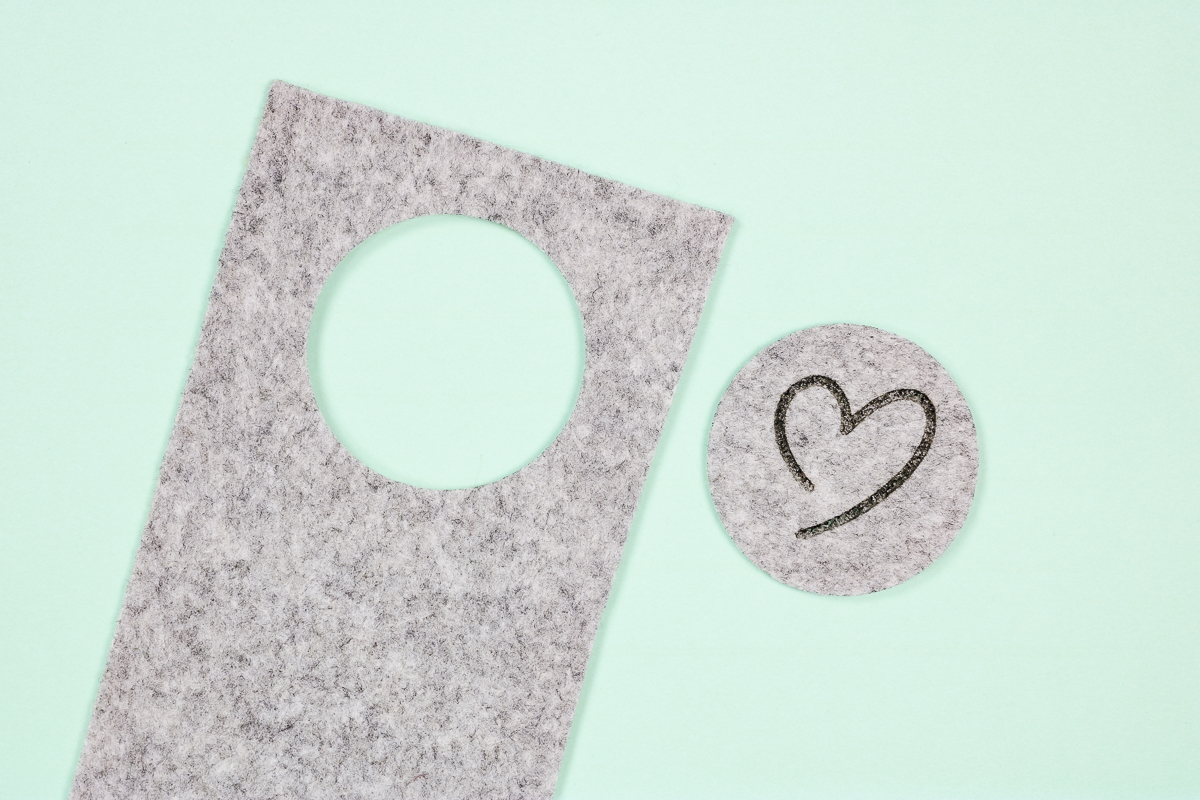
On the Glowforge Aura, engraving removes layers of the fabric so you need to be careful that you don’t have your settings set too deep or it can end up being a cut and go all the way through the fabric.
I wanted to try this out because I think there could definitely be applications when you might want to engrave a thicker fabric like this felt. I’m happy to report that it did work, you will want to test your settings before trying to do full sheets.
FAQ for Cutting Fabric with a Glowforge Aura
Now let’s take a look at some common questions and concerns you may have about this process.
Safety Precautions for Cutting Fabric with a Laser
I know it’s not fun to talk about safety in crafting but we’re going to do it anyway. The Glowforge Aura is a laser. Having a laser burn through fabric can be a fire hazard.
You should never leave your laser when you’re using it. You should also keep a fire extinguisher and fire blanket nearby in case you have a flare-up.
I tested all of these fabrics with my laser and had zero issues. Just because I didn’t have an issue doesn’t mean you won’t so please, make sure you are using all the precautions when working with any type of laser, including the Glowforge Aura.
How Intricate Can I Cut Fabric with Glowforge Aura?
Next, I wanted to test cutting this same fabric with a more intricate shape. Both of these shapes are more intricate than the plain circle and these cut settings worked well on both of them.
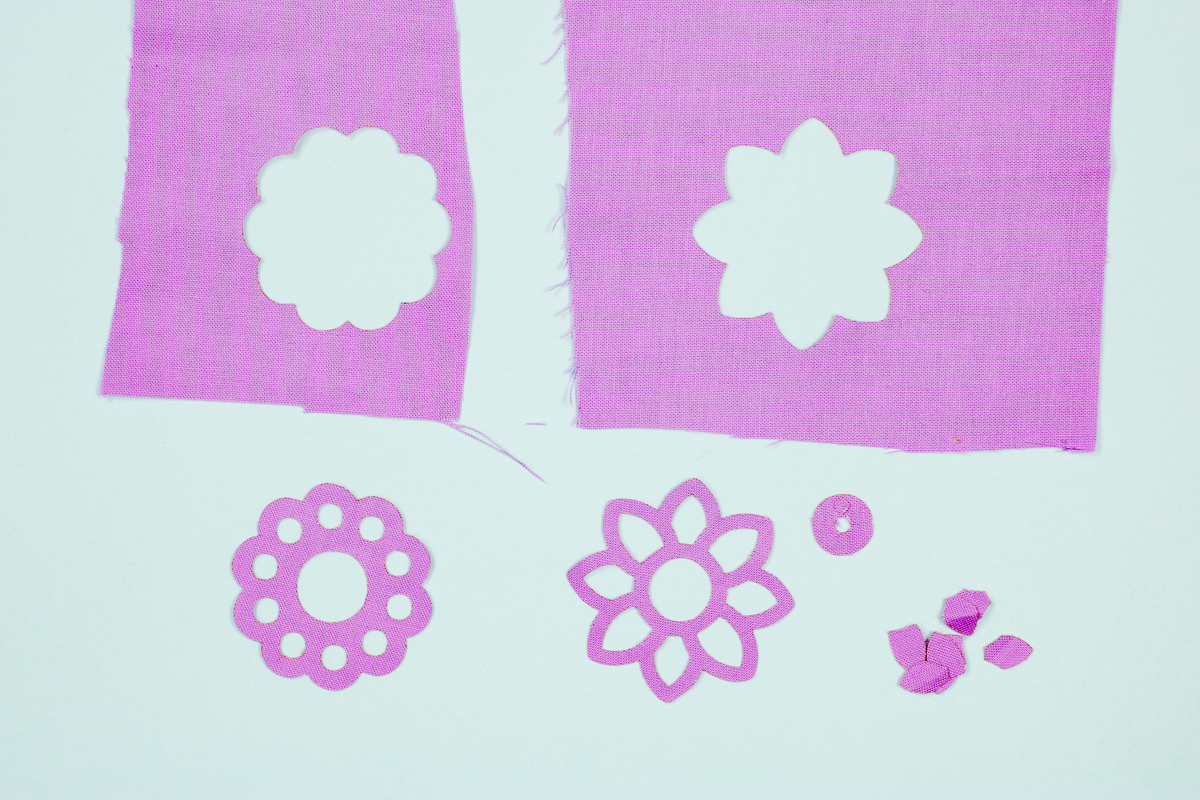
The shape itself is fairly small and the inside pieces are even smaller. Everything cut beautifully except the tiny little circle cut out from the inside small circle. That little piece is still connected and didn’t cut through cleanly. If you need to cut something that intricate, you’ll need to adjust your settings and do some testing.
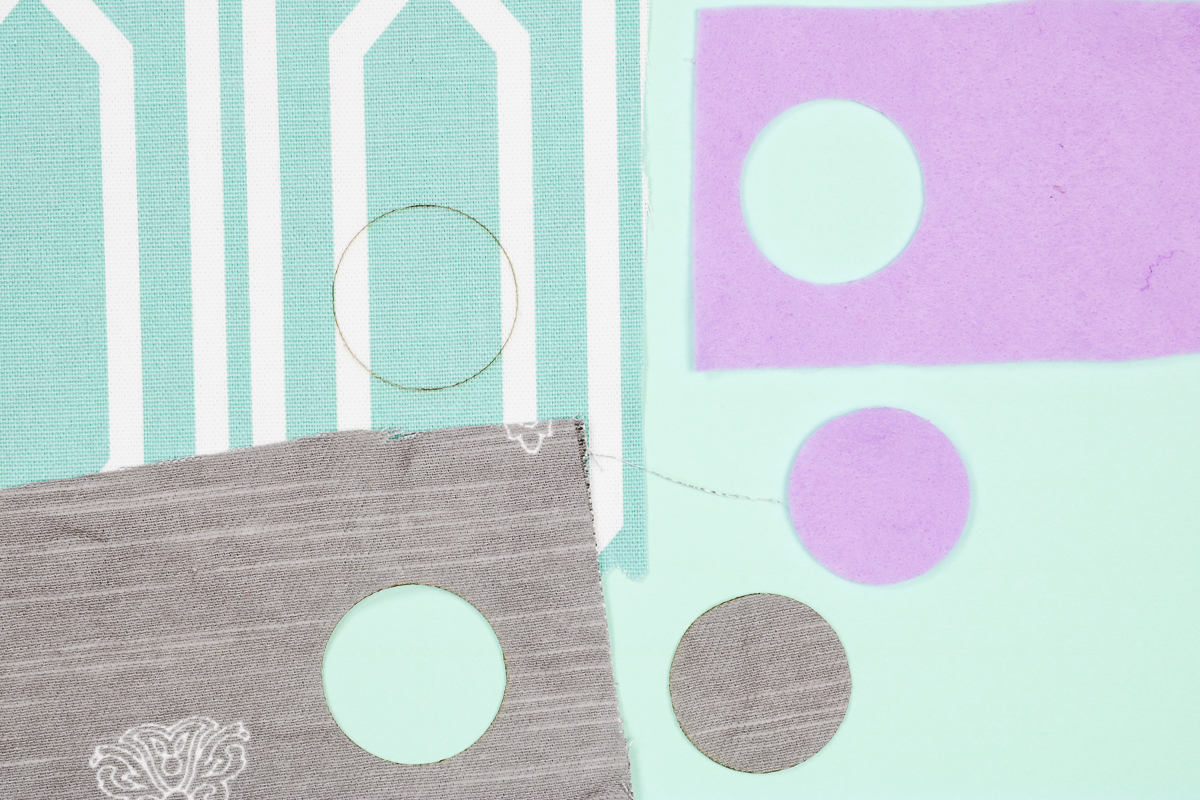
Does Fabric Color Matter?
Now, let’s talk about fabric color. When I experimented with the cut settings, I exclusively used the purple, light-weight cotton fabric. When I switched fabric colors, I had mixed results.
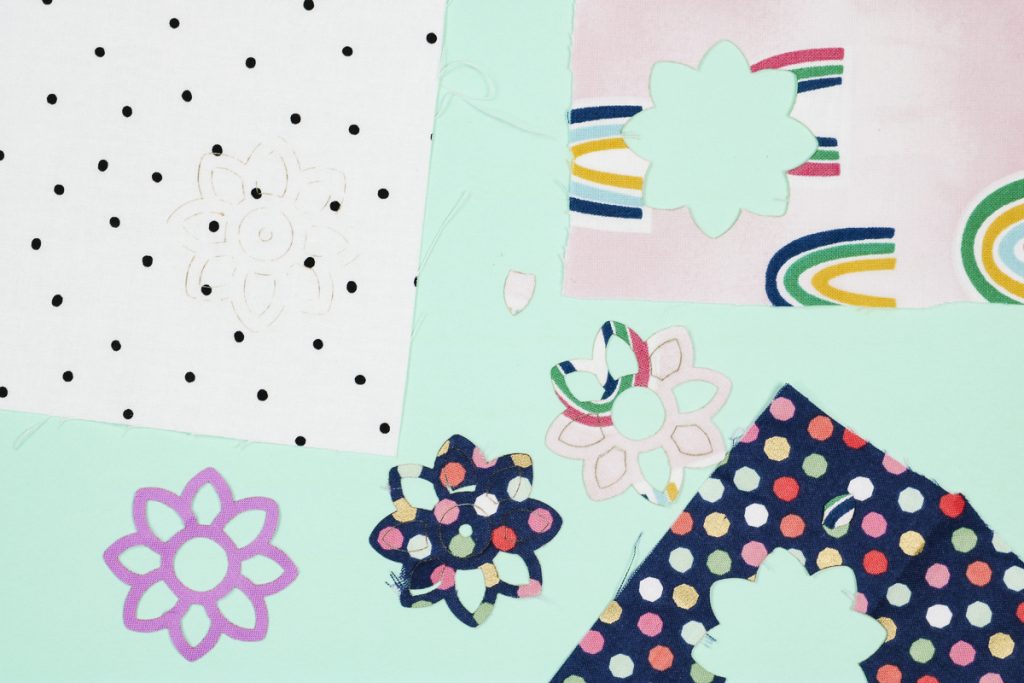
In the photo above, you can see that the purple design cut perfectly. The blue fabric with polka dots didn’t cut well. Some areas cut all the way through and other areas didn’t cut at all.
The light pink fabric did a little better but still has areas that didn’t cut through. The white fabric didn’t cut at all. A close look at the white fabric shows that the fabric burned where the laser hit it but didn’t cut through anywhere at all.
With a diode laser like the Glowforge Aura, you need to be careful using light colors as they won’t always work. With the other colors/patterns of fabric, you may need to adjust your material settings to get a clean cut. It is possible that some fabric you will not be able to cut at all.
What Can Affect How My Glowforge Aura Cuts Fabric?
There are a variety of different things that can affect how well your Glowforge Aura cuts fabric. The Glowforge Aura is a diode laser, it doesn’t work well with light-colored or white/clear items. This includes fabric.
It’s important to note that you will have to test your settings every time you change fabrics, even if it is the same weight but different colors, all of these things can affect how the laser cuts.
Do I need interfacing?
Today I am testing fabric that has nothing on the back. You can add interfacing to the back of the fabric to make the fabric slightly stiffer.
How to Adjust Cut Settings
I found that with heavier fabric it worked best to slow down the speed and increase the power. With thinner fabrics, I could increase the speed and decrease the power. These tips are what worked for me.
Pros and Cons of Cutting Fabric with a Glowforge
Now that we’ve learned that we can cut fabric with a Glowforge Aura what do I think about how it performs?
A few perks of cutting fabric with the Glowforge Aura is that the laser seals all the edges of the fabric. You won’t have to worry about the fabric fraying which makes it perfect for applique projects and other crafts.
Once you get the settings dialed in correctly, you can get clean cuts even on small intricate designs with the Glowforge.
Cutting Fabric with Glowforge Vs Cricut
I have been a fan of using my Cricut Maker for cutting fabric with the rotary blade since it first came out. Unfortunately, with the rotary blade small intricate cuts aren’t always possible.
Some of the cuts I was able to get with my Glowforge Aura I wouldn’t be able to do with my Maker. Intricate cuts with the Maker can also shorten the life of the mat because those tight turns can gouge the mat.
You also don’t have to worry about using a specific mat and having to replace it, there are no extra supplies required for cutting fabric with a laser.
Engraving on fabric is another feature you can do with the Glowforge that you can’t do with other cutting machines.
I really think these options are just the tip of the iceberg. As you get started cutting fabric with your Glowforge Aura, I’m sure you’ll think of a ton of different reasons to do it.
I hope I’ve answered any questions you have about cutting fabric with a Glowforge Aura. If you have any additional questions, feel free to leave them in the comments below and I’ll be happy to answer them for you.