This post and photos may contain Amazon or other affiliate links. If you purchase something through any link, I may receive a small commission at no extra charge to you. Any supplies used may be given to me free of charge, however, all projects and opinions are my own.
Today I’m going to show you how to do sublimation on BELLA+CANVAS with SubliTex. You know how much I love BELLA+CANVAS shirts but they don’t have a high polyester count which means they’re not great for sublimation.
Sometimes I also want to add beautifully detailed designs on a darker-colored fabric. SubliTex gives you the ability to add sublimation prints to both cotton and dark fabrics!
Are you new to sublimation? My sublimation printer comparison post will help you decide which sublimation printer is right for what you want to make.
Sublimation on BELLA+CANVAS Cotton with SubliTex
I get asked all the time how to sublimate on cotton fabric. Sublimation prints allow us the ability to create designs with detail that isn’t possible with HTV.
Because sublimation ink bonds to polyester fibers, not cotton, and cotton t-shirts are so comfortable, it’s not surprising that we want to know how we can combine sublimation and cotton fabrics.
You can watch me use SubliTex on BELLA+CANVAS cotton t-shirts by pressing play on the video below.
BELLA+CANVAS shirts are known for their soft cotton feel. Unfortunately, they lack the significant polyester count required for traditional sublimation.
I love experimenting with different techniques to see how I can use sublimation on cotton. I’ve sought out solutions that allow sublimation on both cotton fabrics and darker colors. This led me to try SubliTex from ChemicaUSA.
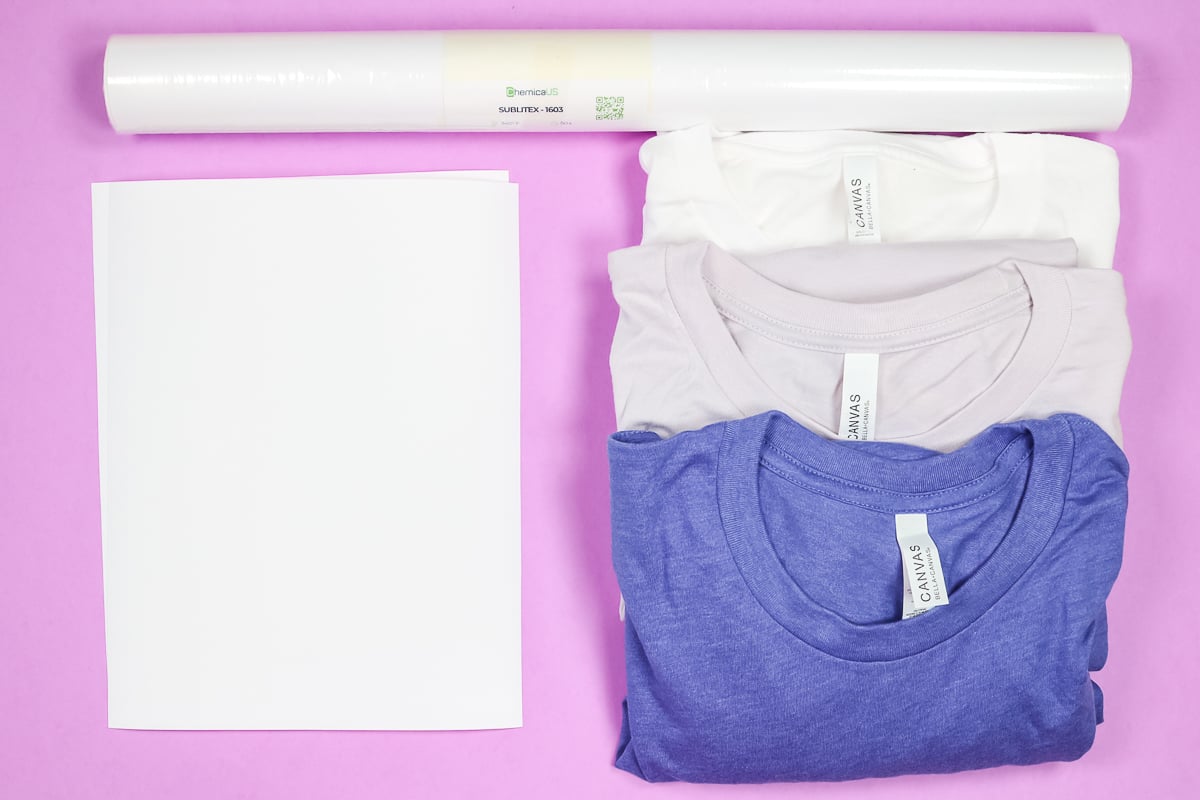
Supplies Used
Where to buy SubliTex:
What is SubliTex?
SubliTex is a printable heat transfer material that has a fabric-like texture on the front and a glossy, smooth back. You’ll print your design on the fabric feel side. The glossy, smooth back is the carrier sheet.
The SubliTex I purchased arrived as a roll. I cut mine down to 8.5″ x 11″ sheets to mimic the dimensions of a standard printer sheet.
To use SubliTex, you’ll print out your design on a sublimation printer and use your Cricut machine to cut out the design. I love any opportunity to combine my two favorite crafting methods – sublimation and Cricut.
How to Create Print Then Cut Designs
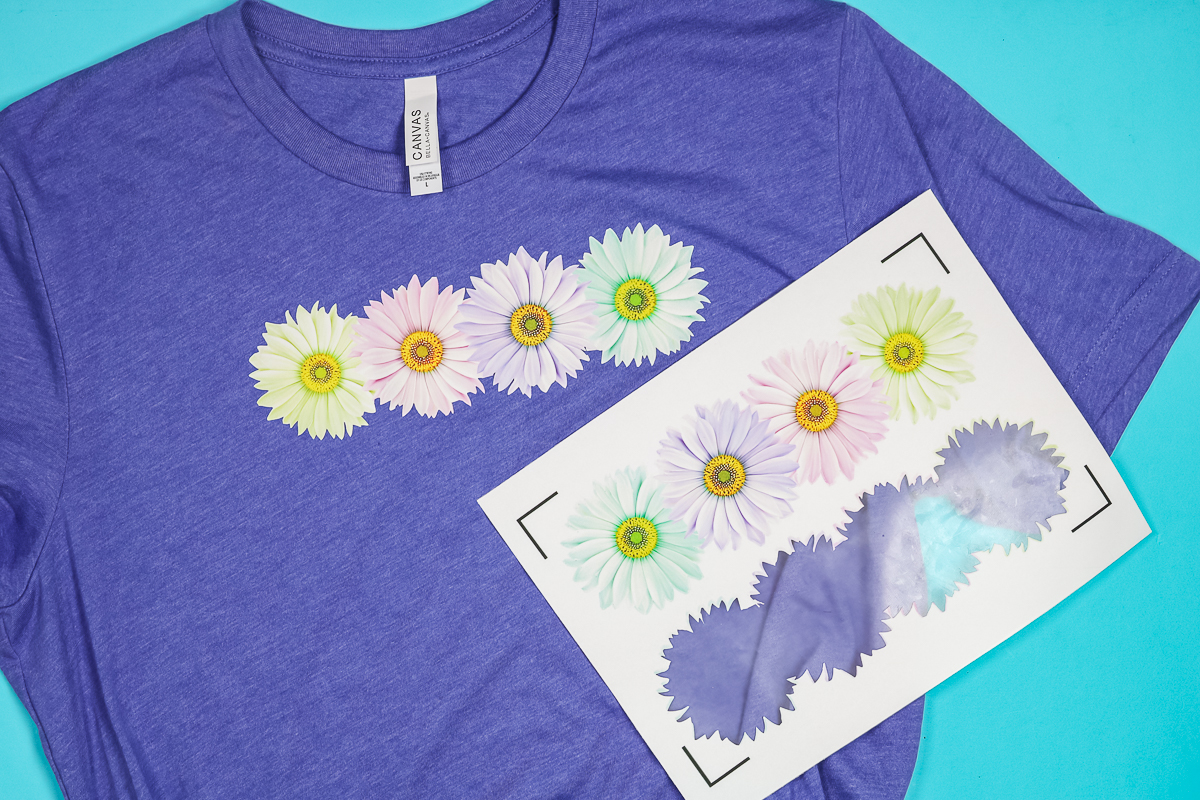
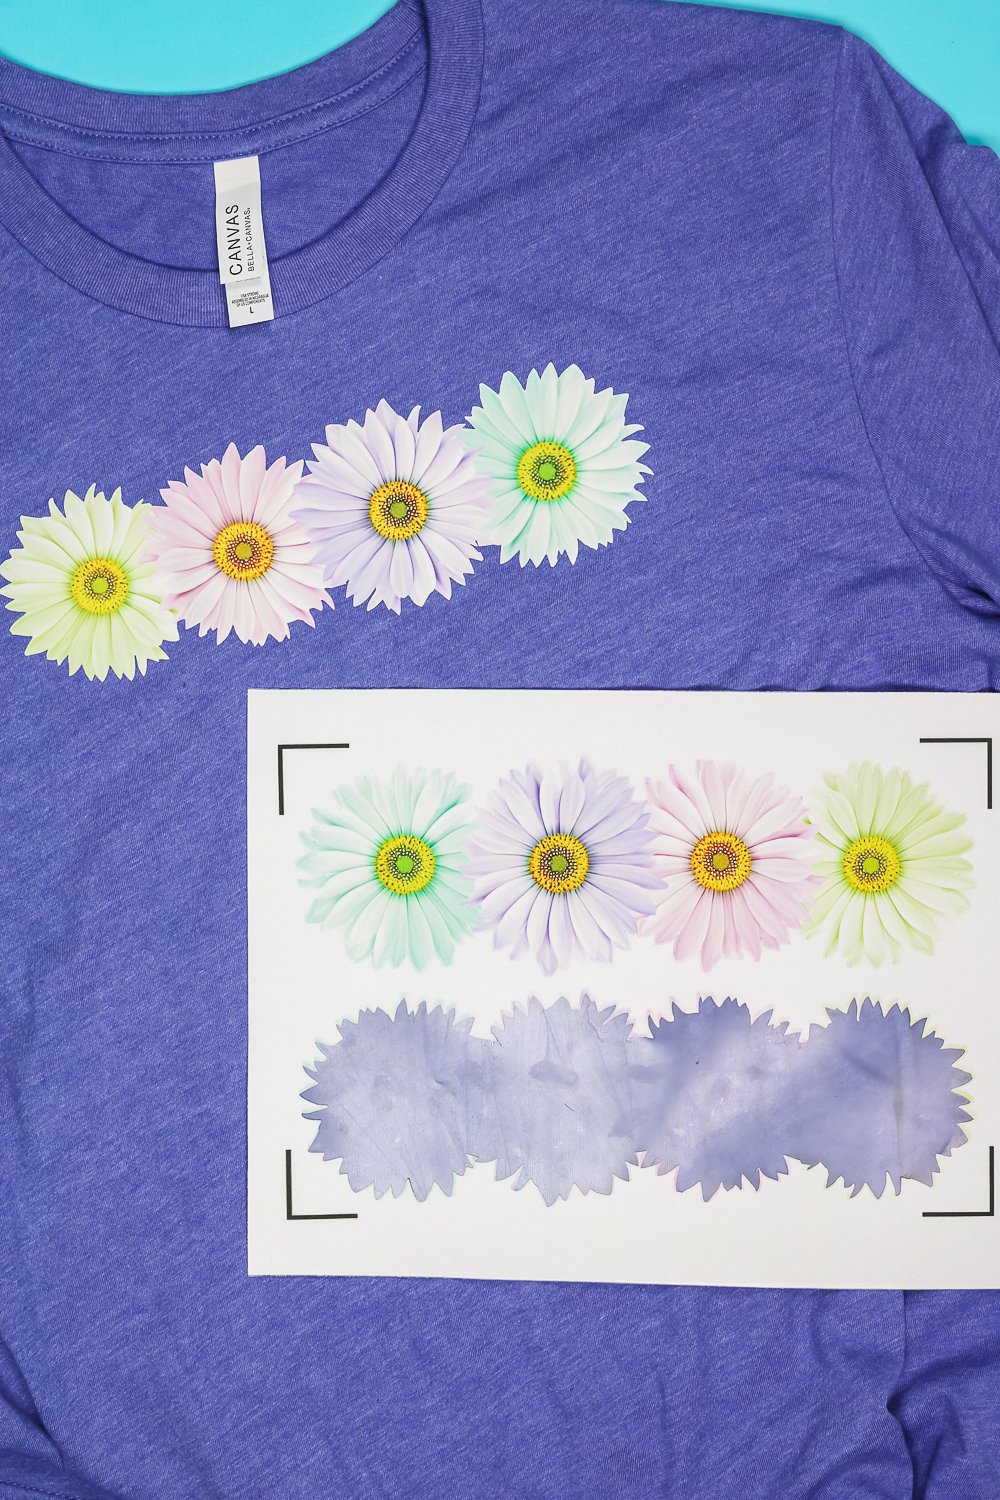
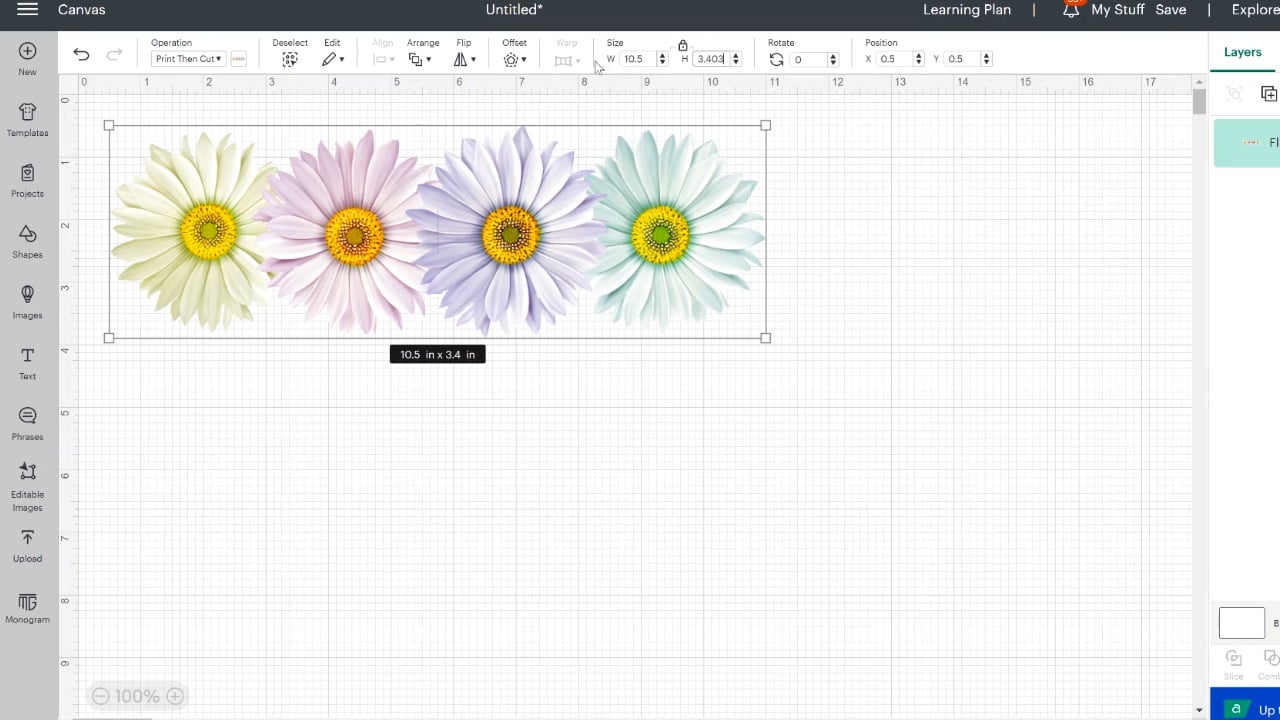
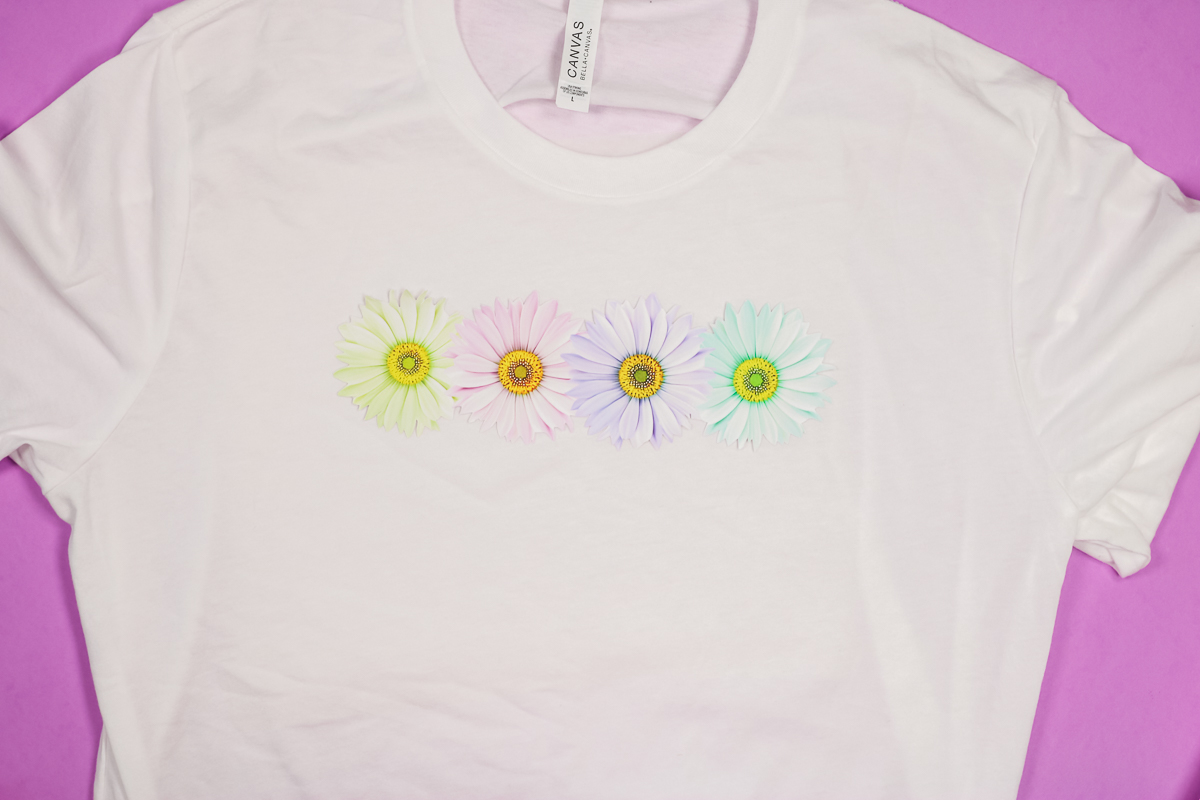
If you’ve ever done a Print Then Cut project in Design Space before, this process will be the same. I am using the free floral sublimation design you can get here.
Upload the design into Cricut Design Space and then size it to fit both your blank and whatever size you can print from your printer. I am using 8.5″ x 11″ paper so I need to ensure my design can be printed onto that size of paper.
I also want to use as much of the SubliTex material as I can without wasting any. For my design, I am printing two copies of the same image to use the whole sheet.
How to Get the Cleanest Cut on SubliTex
This particular design has some small cutouts in it. You actually can’t contour those out of a Print Then Cut design in Design Space. I don’t want my machine trying to cut them out of this material so I have a trick to show you to remove those.
Take your design on the canvas and duplicate it. Change one copy to a cut file and then contour out all of the small cuts.
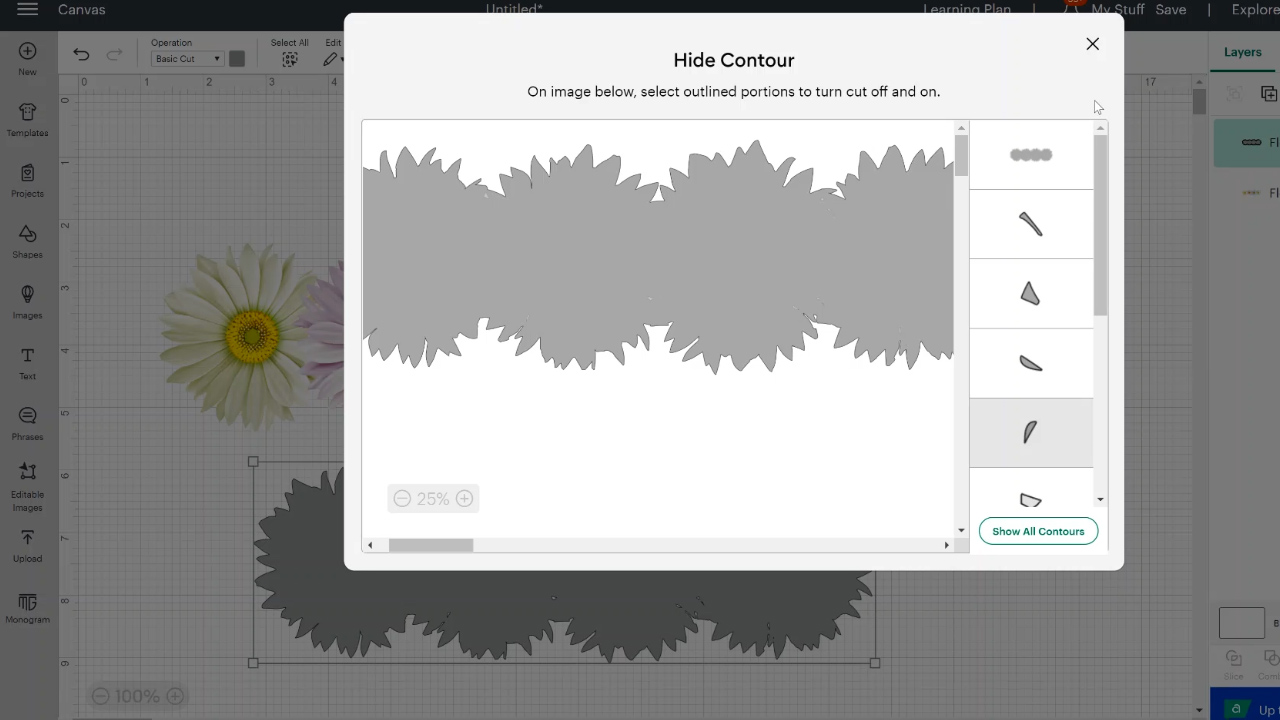
Change the color of that copy to white and then move that layer to the back.
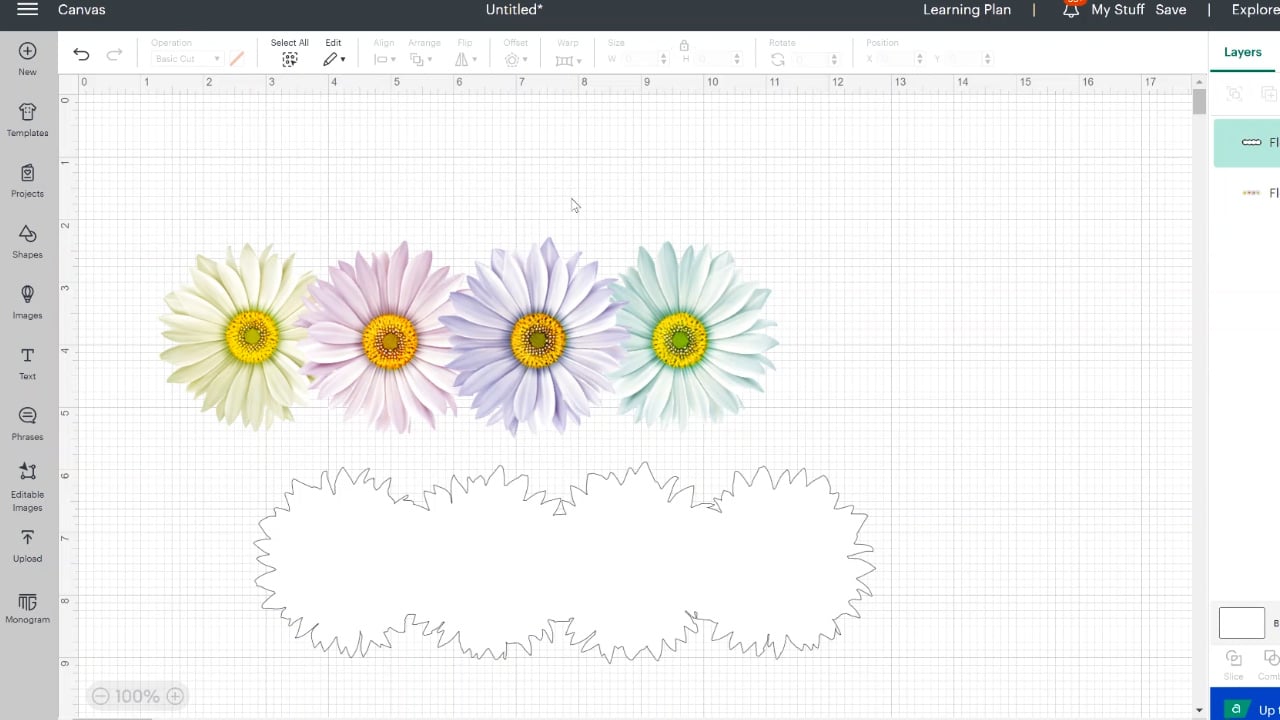
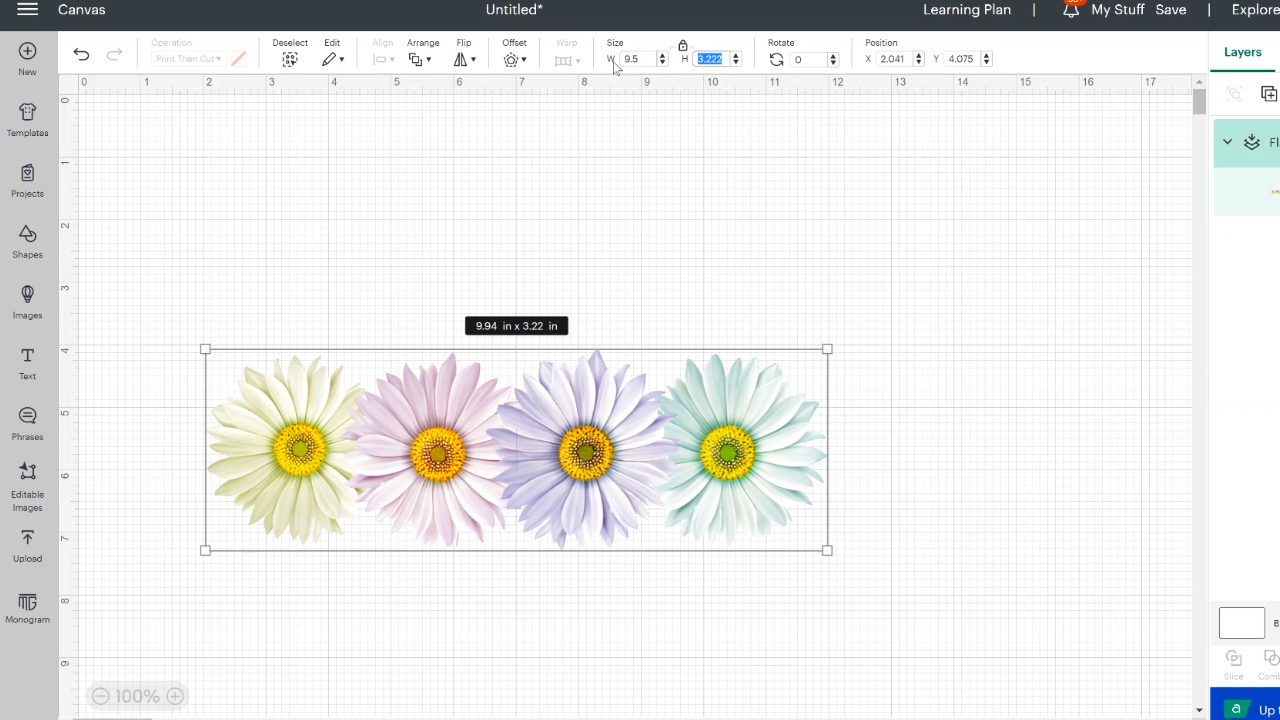
Now we want to select both layers and center them both vertically and horizontally. Flatten the layers and now those small cuts will disappear into the design and your machine will only cut out the outside of your print.
How to Print Sublimation Designs from Design Space
Now that we have our design set up the way we want, it’s time to send it to the printer. With this material, we do not need to mirror the design. We’ll be laying this design print side up onto our cotton fabric.
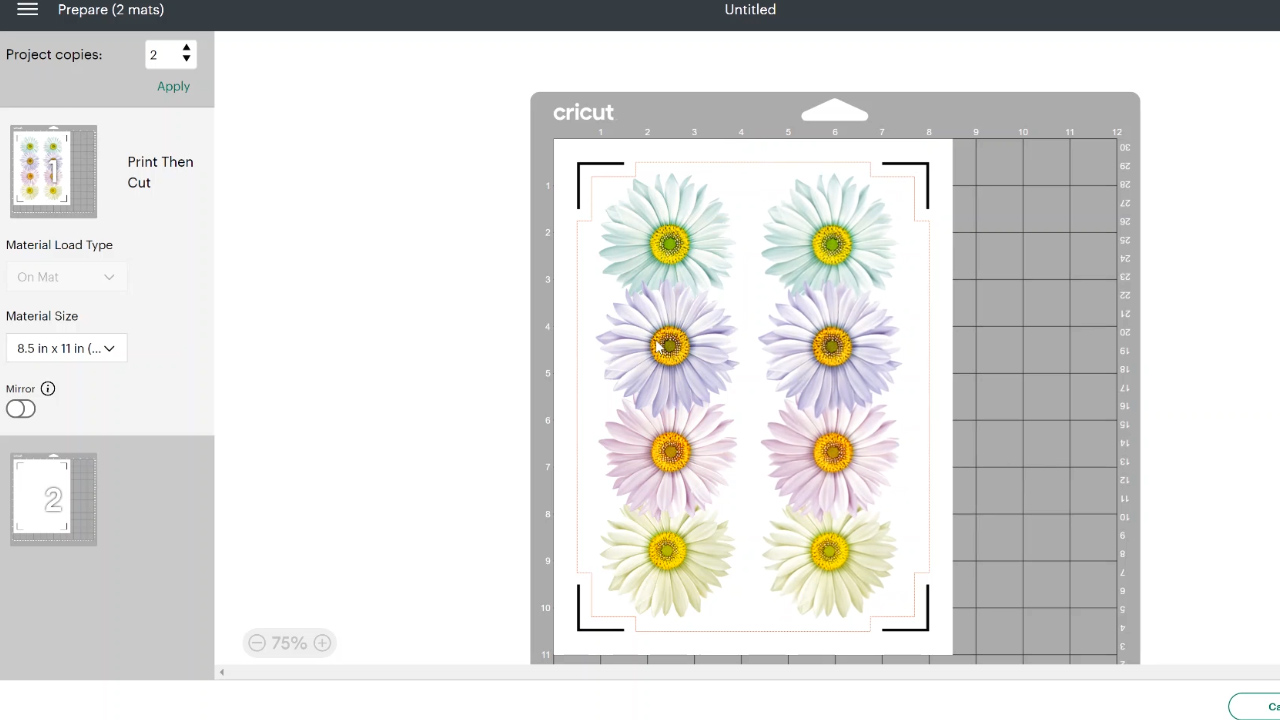
I am also selecting Add Bleed so I don’t have to worry about there being a white outline around the design. I use the system dialogue box so I can set all of the settings for my sublimation printer.
We want to print on the fabric feel side of the SubliTex material so load it into your sublimation printer appropriately. Today I am using my Sawgrass printer to print my design. I chose High Quality and Polyester for my settings.
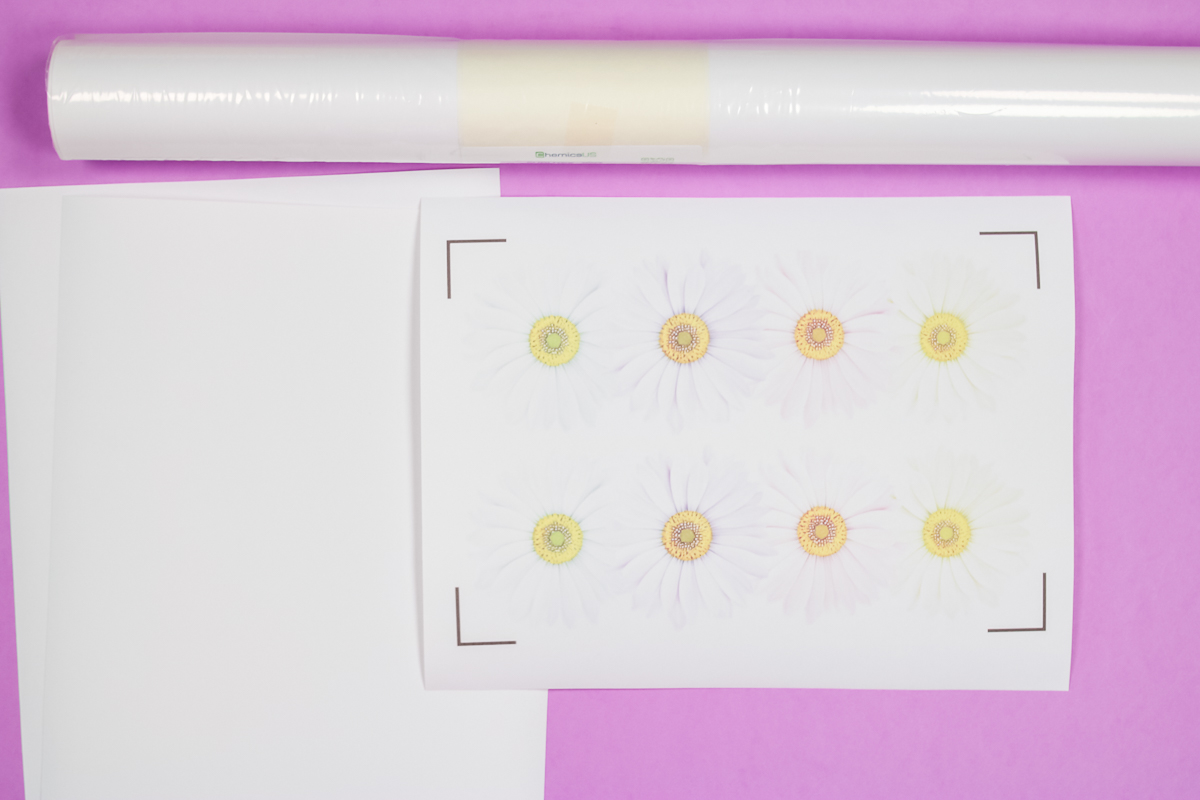
I’m really impressed with how dry the material was coming out of the printer. I thought it would be a little wet but it was completely dry.
Pre-Press SubliTex
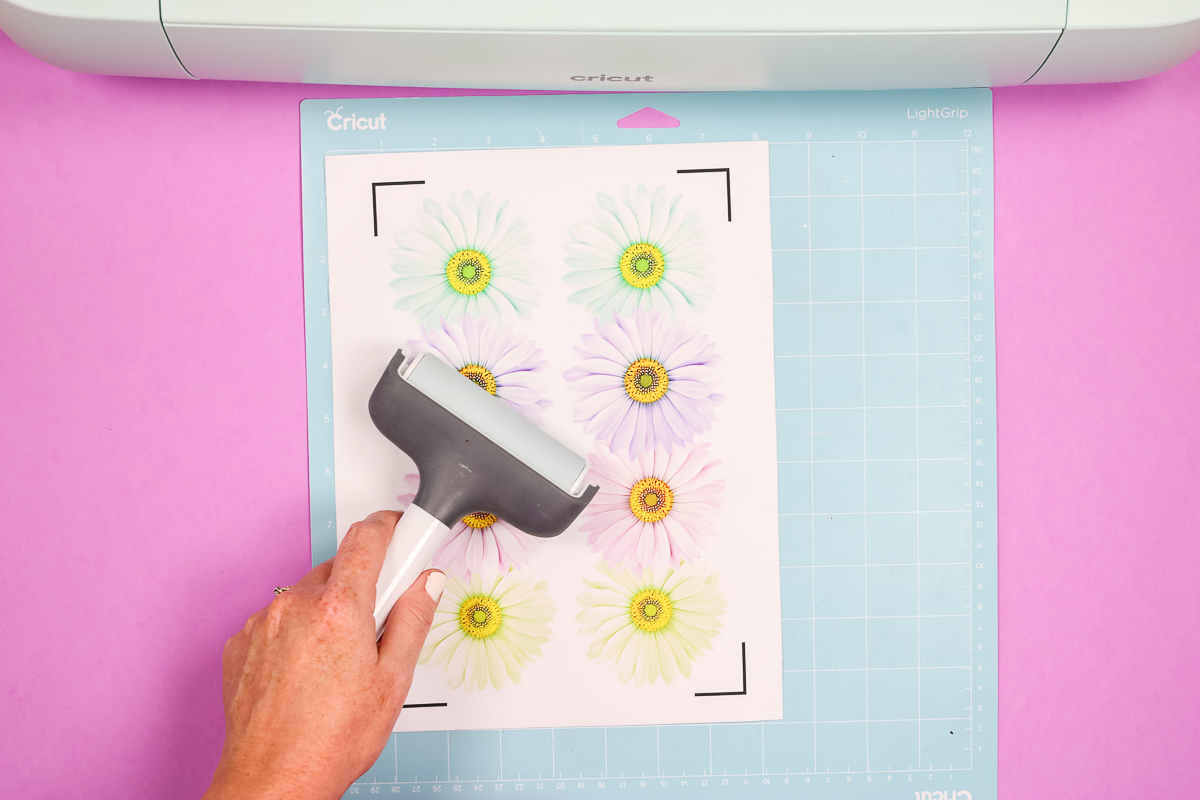
Before we take our print to the Cricut machine, we need to pre-press the design. This is a necessary step for the SubliTex material. Take your print to your heat press, I am using my Autopress because this material does call for medium pressure.
This is a sublimation print so we want to add protective paper to both the bottom and the top of the print. This will protect the heat press from any ink transfer. Press the print at 340 degrees for 50 seconds.
When the time is up you’ll notice that your design is much brighter/darker. You should be able to see all of the colors really well at this point. Now it’s time to cut out our design on our Cricut machine.
How to Cut SubliTex with Cricut Machines
All Cricut machines that can do Print Then Cut can cut the SubliTex material. I do recommend doing a test cut if this is your first time cutting SubliTex.
Place your print on a Cricut cutting mat and load it into your machine. Your machine will read the registration marks around the design and cut out the image.
I chose the Glitter HTV setting with more pressure because the material feels a little thicker than a regular HTV. I do recommend that you check your cut before unloading the material to make sure it’s cut all the way through.
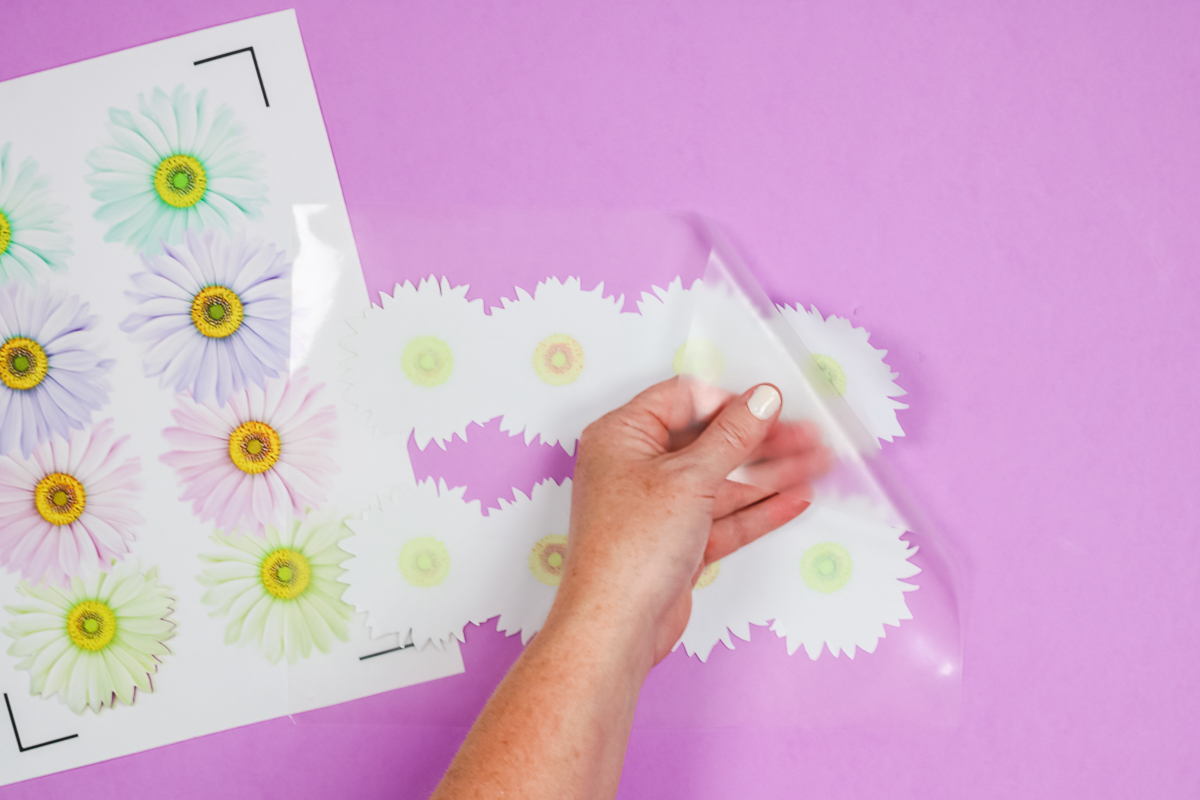
Weeding SubliTex
Weeding the SubliTex material is similar to other HTV materials. Depending on your design you can either lift the material off the carrier sheet with your hands or use a heat mask. They do recommend a strong grip heat mask for this material.
I had the best results using my weeding tool to remove the outer part of the SubliTex first.
This design has some close cuts around the petals. Take your time when weeding around those areas to ensure you don’t stretch out the material.
If you’re having a hard time weeding the material or getting it removed from the carrier sheet, I recommend applying some heat. I placed my SubliTex in the heat press and then hovered the heat plate over the material for a few seconds. I found that the warm material released more easily.
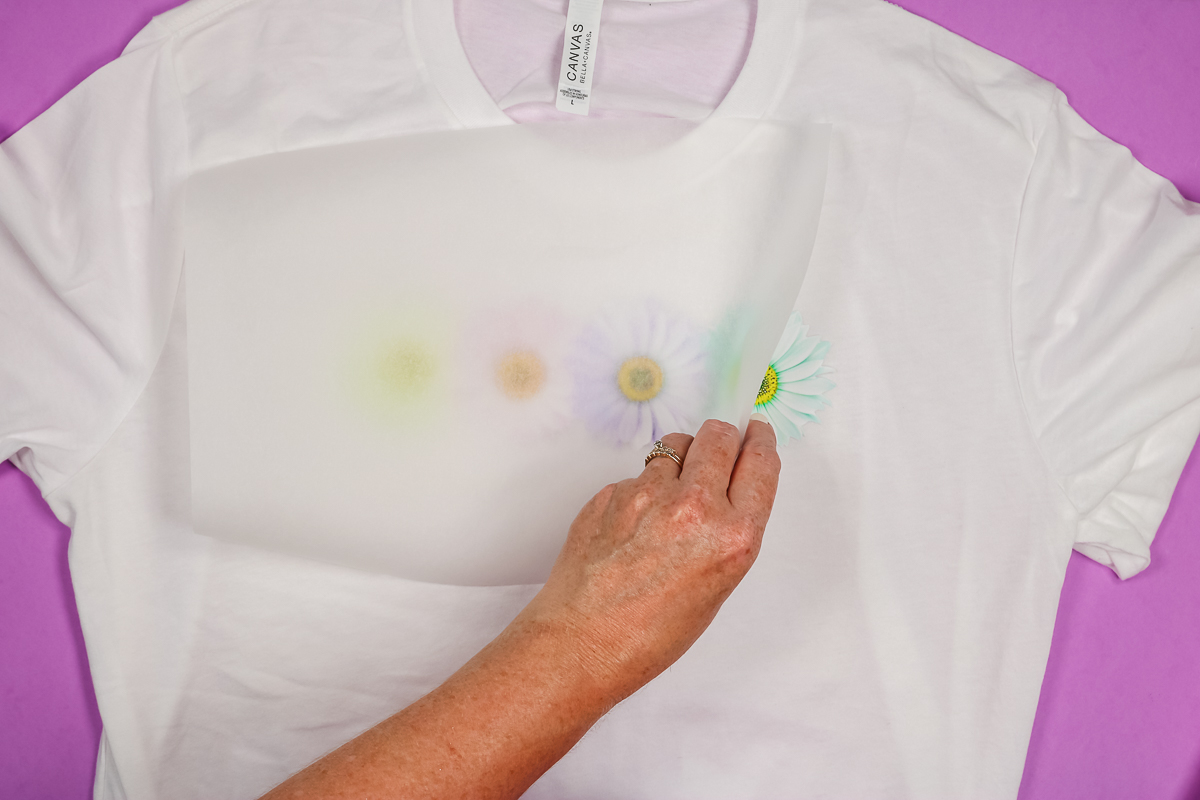
How to Apply Sublimation Onto BELLA+CANVAS with SubliTex
Before applying the SubliTex onto my BELLA+CANVAS cotton t-shirt we need to pre-press the fabric to remove any moisture. Just a few seconds of heat will remove moisture and any wrinkles.
Before applying the design to the shirt place a piece of protective paper inside the shirt. This will protect the back of the shirt from any possible sublimation ink transfer.
Next, we’ll lay out the design where we want it and then lay a piece of protective paper over the top. Press the design again for 50 seconds at 340 degrees.
You’ll notice that the colors do not become any darker or more vibrant after the second press. The first press is going to show you what your finished sublimation colors will be. After this second press, your project is complete!
Final Thoughts on Sublimation on BELLA+CANVAS with SubliTex
I am really impressed with how well I was able to add sublimation on BELLA+CANVAS cotton shirts with SubliTex. I tested the design on a variety of different colors and different fabric combinations. From 100% cotton to cotton/poly blends.
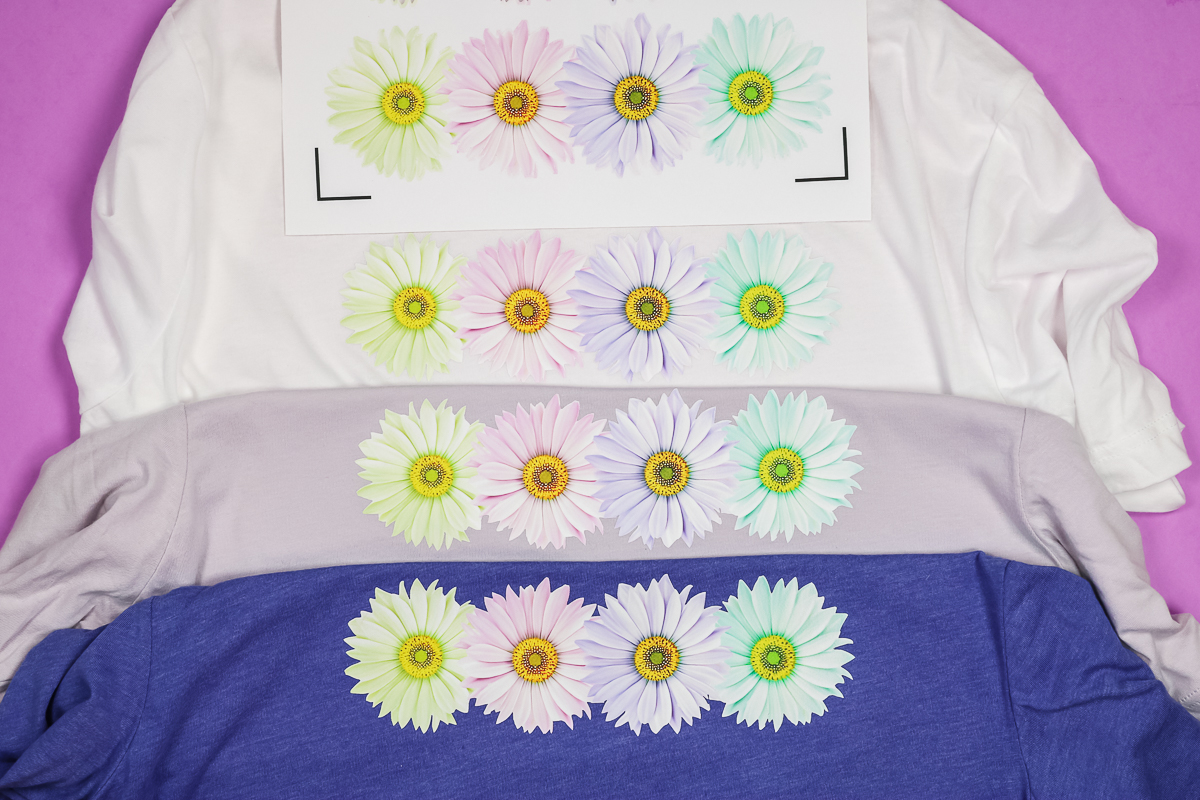
You can see that the prints themselves look identical on all the shirts and the original print. Once heat is applied the first time, you’ll know exactly what your image will look like.
While this material won’t replace sublimation as a whole, it does open up a whole new world of being able to add sublimation designs on dark-colored or cotton fabrics. In my testing, the material held up really well in the wash. Since I love BELLA+CANVAS cotton shirts, this is a winning combination for me.
Frequently Asked Questions About Sublimation on BELLA+CANVAS
Does SubliTex Infuse into the Fabric?
SubliTex is a sublimation material that sits on top of the fabric. It doesn’t infuse like normal sublimation ink. The sublimation ink actually infuses into the SubliTex material and then that material adheres to the fabric you’re using.
You can use SubliTex on any fabric. I’ve tested it on both cotton and cotton/poly blend BELLA+CANVAS shirts.
How does SubliTex on BELLA+CANVAS Cotton Shirts Hold Up in the Wash?
I’m really impressed with how well this material adheres to the different fabrics. It’s smooth and isn’t lifting anywhere. To really test this material, I washed it 5 times. I am really impressed with the results. I didn’t notice any fading and the adhesive sticks to the material really well.
Can I Iron SubliTex?
If you need to iron your BELLA+CANVAS shirt with SubliTex at any time, make sure you iron it from the inside of the shirt. Do not iron direction onto the SubliTex material.
Does SubliTex Work on Stretch Fabrics?
The one drawback of this material is that it doesn’t have any stretch to it. I would not use it on fabrics that have a lot of stretch as it won’t allow stretching after it is applied.
I hope I’ve answered any questions you have about sublimation on BELLA+CANVAS cotton shirts. If you have any other questions, leave them in the comments below and I’ll answer those for you.