
I have to admit that on Saturday, as I was working on the studio cabinets, I began to think I had make a serious mistake in deciding to add the gold leaf to my cabinets. My doubt had nothing to do with how it looks. I absolutely love how it looks. But my doubt was 100% because I thought I’d never get it finished. Day after day after day of working on taping off the outline, painting on adhesive, adding gold leaf, sealing the gold leaf, seemed never ending.
But I finally finished all 20 cabinet doors and drawer fronts for the mural wall. I didn’t finish them yesterday. I got up early (for me) and finished them this morning. 😀 I was so determined that the bulk of my work day today wasn’t going to be taken up, one more time, with gold leafing cabinets. So my only option was to get up early (at 5:00am!) and finish the last three drawers and two doors so that when I start my normal work hours this afternoon, I can finally move on to something else.
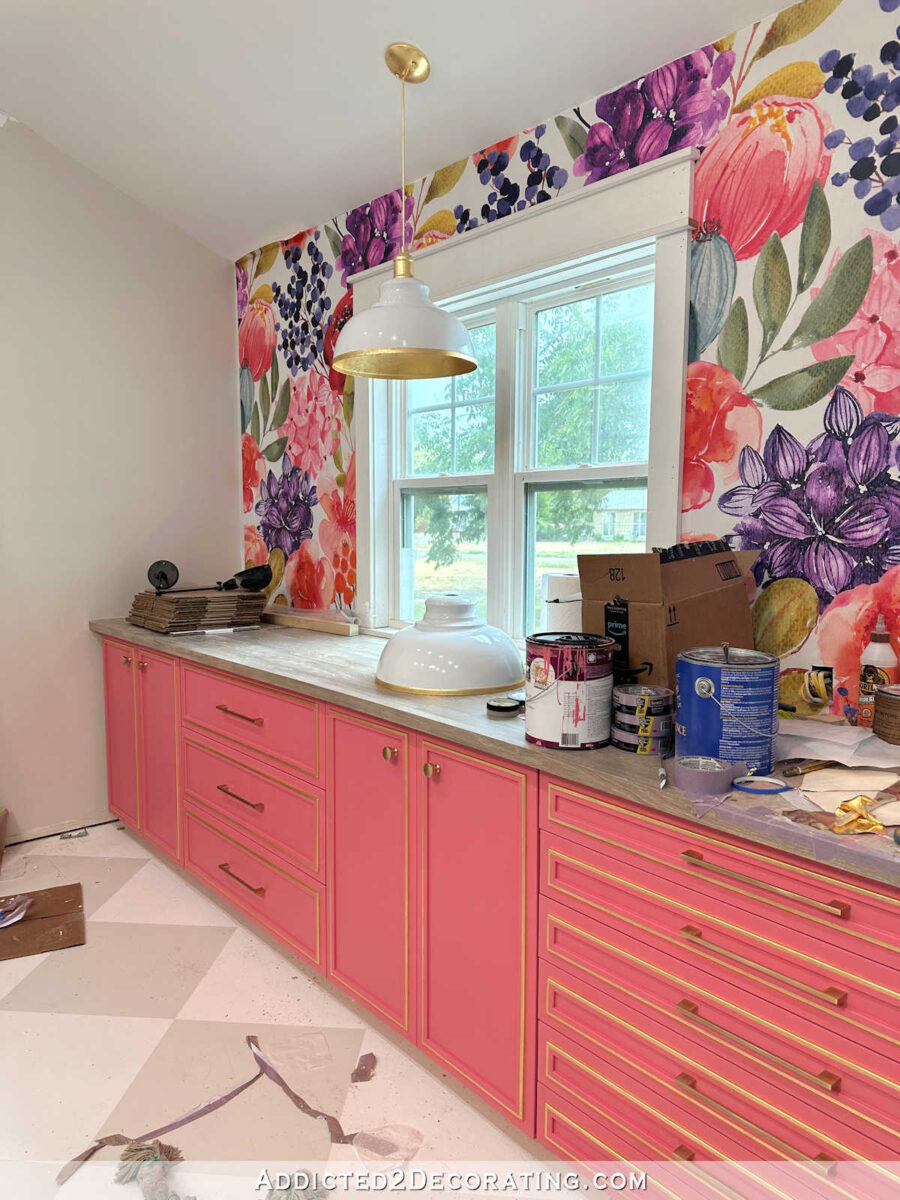
And now that it’s done, and all that work is in the rearview mirror, I can say that I’m so incredibly happy that I took the time to finish this detail on my cabinets. There’s nothing like a gold leaf cabinet detail on pink cabinets to add to that flowery, feminine look I’m aiming for in this room. Here’s how the cabinets look with all of the gold leaf finished…

I so wish that y’all could see these in person. They’re just so pretty and shiny.

I know that gold leaf accents on cabinets aren’t for everyone. I know some may think it’s garish, or I shouldn’t have wasted time on it since it’s just a studio. But this is for me, and I love it. And it’s hard for me to look at any room and think, “This is just a (enter name of utilitarian room), so I’ll just do the basics.” That’s just not how my mind works. I think any room can look special and custom and personalized, no matter how utilitarian the room is intended to be.

Since I just finished this morning, I didn’t have time to clean up the mess. There’s gold leaf all over the floor, and I’m sure there’s even still gold leaf floating through the air in there. 😀 It’s going to be quite a big job to get all of that cleaned up.

I seriously can’t stop looking at it. Even when I’m not working in the studio, I find myself walking in there several times just to stare at the cabinets and get a peek at that shimmery gold goodness.

I still have a few things to do in order to finish the inside of the cabinets. All of the cabinets and drawers need to be vacuumed out, and then I still need to wire the electrical outlets at the back of three of the cabinets. After that’s done, I can install the shelves, and start putting things away in the cabinets and drawers. I’m so excited about getting things organized!

And just look how perfect the lights look in here. (I still have to put the shade on the other one.) I had originally used gold spray paint on the shades and left the cords and canopies black. But that didn’t look quite right to me, so I went back and added gold leaf on the shade, a clear coat on the white part, and gold leaf on the canopy and cord. You can see those DIY detail here. I think they’re perfect for my studio now. I love how the gold leaf on the cabinets is repeated on the lights.
Unfortunately, photos will never do these cabinets justice. The gold leaf is just so pretty in person!

This room is definitely turning out to be the most “me” room in our home. I mean, that makes perfect sense, right? It’s the first and only room that I’ve designed and decorated in our home that’s all for me. I don’t have to share this room with anyone else, and I don’t have to worry about what Matt might think about how I’m decorating it. So naturally it’s the most me, and will, no doubt, end up being my favorite room in our home.

I still have several things to do to finish this wall. The first thing I want to do today is to fill these spaces where the cabinets meet the side walls. That will make the cabinets look completely finished.

In addition to that, I need to:
- Wire three outlets
- Install the four countertop grommet outlets
- Finish the countertop (the two missing laminate flooring pieces)
- Finish installing the mural on the edges
- Hang the other pendant light
- Paint/gold leaf the center wall sconce
- Wood fill, sand, caulk, prime, and paint the window trim
- Clean the windows
- Order and install the window shades
This room is taking forever, but I’m not going to cut corners just to get it done early. Creating the room is part of the fun!

Addicted 2 Decorating is where I share my DIY and decorating journey as I remodel and decorate the 1948 fixer upper that my husband, Matt, and I bought in 2013. Matt has M.S. and is unable to do physical work, so I do the majority of the work on the house by myself. You can learn more about me here.