This post and photos may contain Amazon or other affiliate links. If you purchase something through any link, I may receive a small commission at no extra charge to you. Any supplies used may be given to me free of charge, however, all projects and opinions are my own.
Have you seen the new Sawgrass PrintMate and DesignMate software programs? If you’re a Sawgrass printer user you’re probably familiar with Creative Studio and Print Manager. These new programs are not replacing Creative Studio and Print Manager. These new tools are here to enhance your design and printing experience.
Today we’ll explore the features of both PrintMate and DesignMate from Sawgrassand how they can elevate your sublimation projects.
If you’re still trying to decide which sublimation printer is right for you, my sublimation printer guide is a great place to start.
Sawgrass PrintMate and DesignMate
You can actually watch me walk through both programs and how to use them by pressing play on the video below. This software works with Sawgrass printers only. Get a bundle deal and get your own printer here!
Is Creative Studio Going Away?
IMPORTANT: PrintMate and DesignMate aren’t replacing Creative Studio and Print Manager. If you’re comfortable with the existing tools and prefer not to change, your workflow you can continue to use them without any issues.
Creative Studio is not going away. Current users can continue to use it. PrintMate and DesignMate will be offered to new people who purchase a Sawgrass printer.
PrintMate and DesignMate
Both PrintMate and DesignMate offer a variety of features that cater to different preferences and needs. As the name suggests, PrintMate focuses on the printing aspect. It allows you to send your designs to your Sawgrass printer with ease.
DesignMate, on the other hand, is a powerful design software that enables you to create stunning designs from scratch or modify existing templates.
Both software tools provide a user-friendly experience and a range of options to suit various projects. I’m going to walk you through both programs. First I’m going to show you how to create a design in DesignMate and then I’ll show you how to use PrintMate to print what we designed.
I’m also going to show you how to print a design that was created in another program with PrintMate in case you don’t want to design in DesignMate.
Getting Started with Sawgrass DesignMate
To begin your design journey with DesignMate, head to sawgrassexchange.sawgrassink.com. I do want to note that I have a pro account and I am logged in. If your free program looks different, that may be why.
Once you’re logged in, go to New Creation to design something new. To start a design, you need to select a product. These products are the templates for a standard sublimation of that size.
If I was to pick an 11-ounce ceramic mug, it would be a template for a standard 11-ounce ceramic mug. If I knew exactly the size of my mug, I would choose to open a custom canvas instead.

How Many Templates are in DesignMate?
DesignMate has templates divided into categories. You can use the categories, click All Products to scroll through everything they have, or search for a specific product.
DesignMate offers an extensive library of graphics, shapes, backgrounds, and fonts that you can customize your design. Whether you’re designing for a tumbler, mug, or any other sublimation blank, DesignMate empowers you to bring your ideas to life.
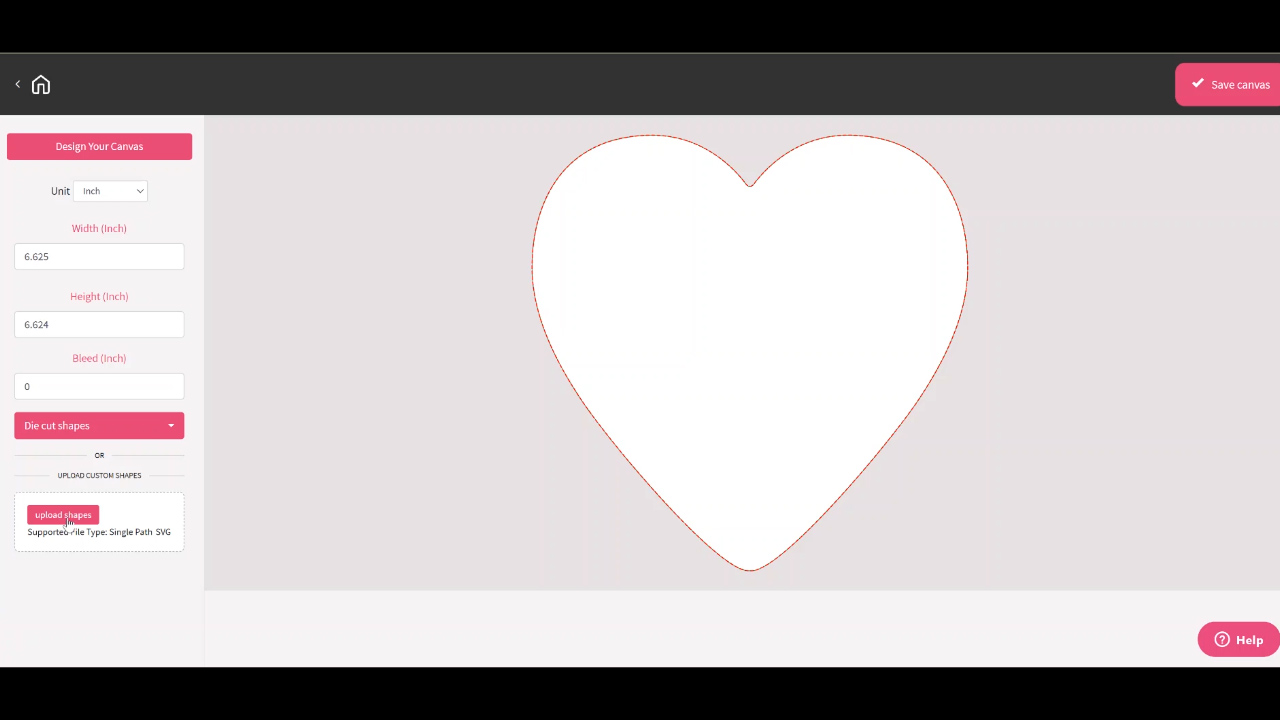
With Custom Canvas, you pick the unit of measurement and can dictate the size of your canvas. If I list 8.5″ x 11″, I could then add whatever design I wanted to that canvas.

DesignMate also has die-cut options that can be used as the canvas. You could use a heart, or other shapes, or even upload a custom shape if you have the template from a specific blank.
Create a Tumbler with DesignMate
I am going to use DesignMate to create a design that will fit on a 20-ounce skinny tumbler. Once you select a template you’ll see the design flat and the template itself behind it.
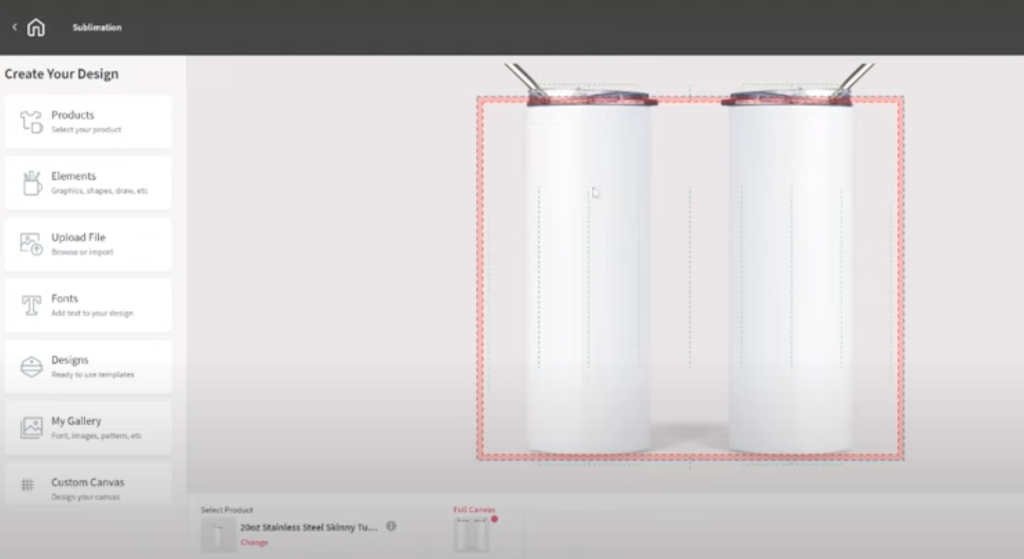
You can also at any time choose to change the template. I could choose to change it to a mug if I wanted to and that wouldn’t change the elements I added to the design.
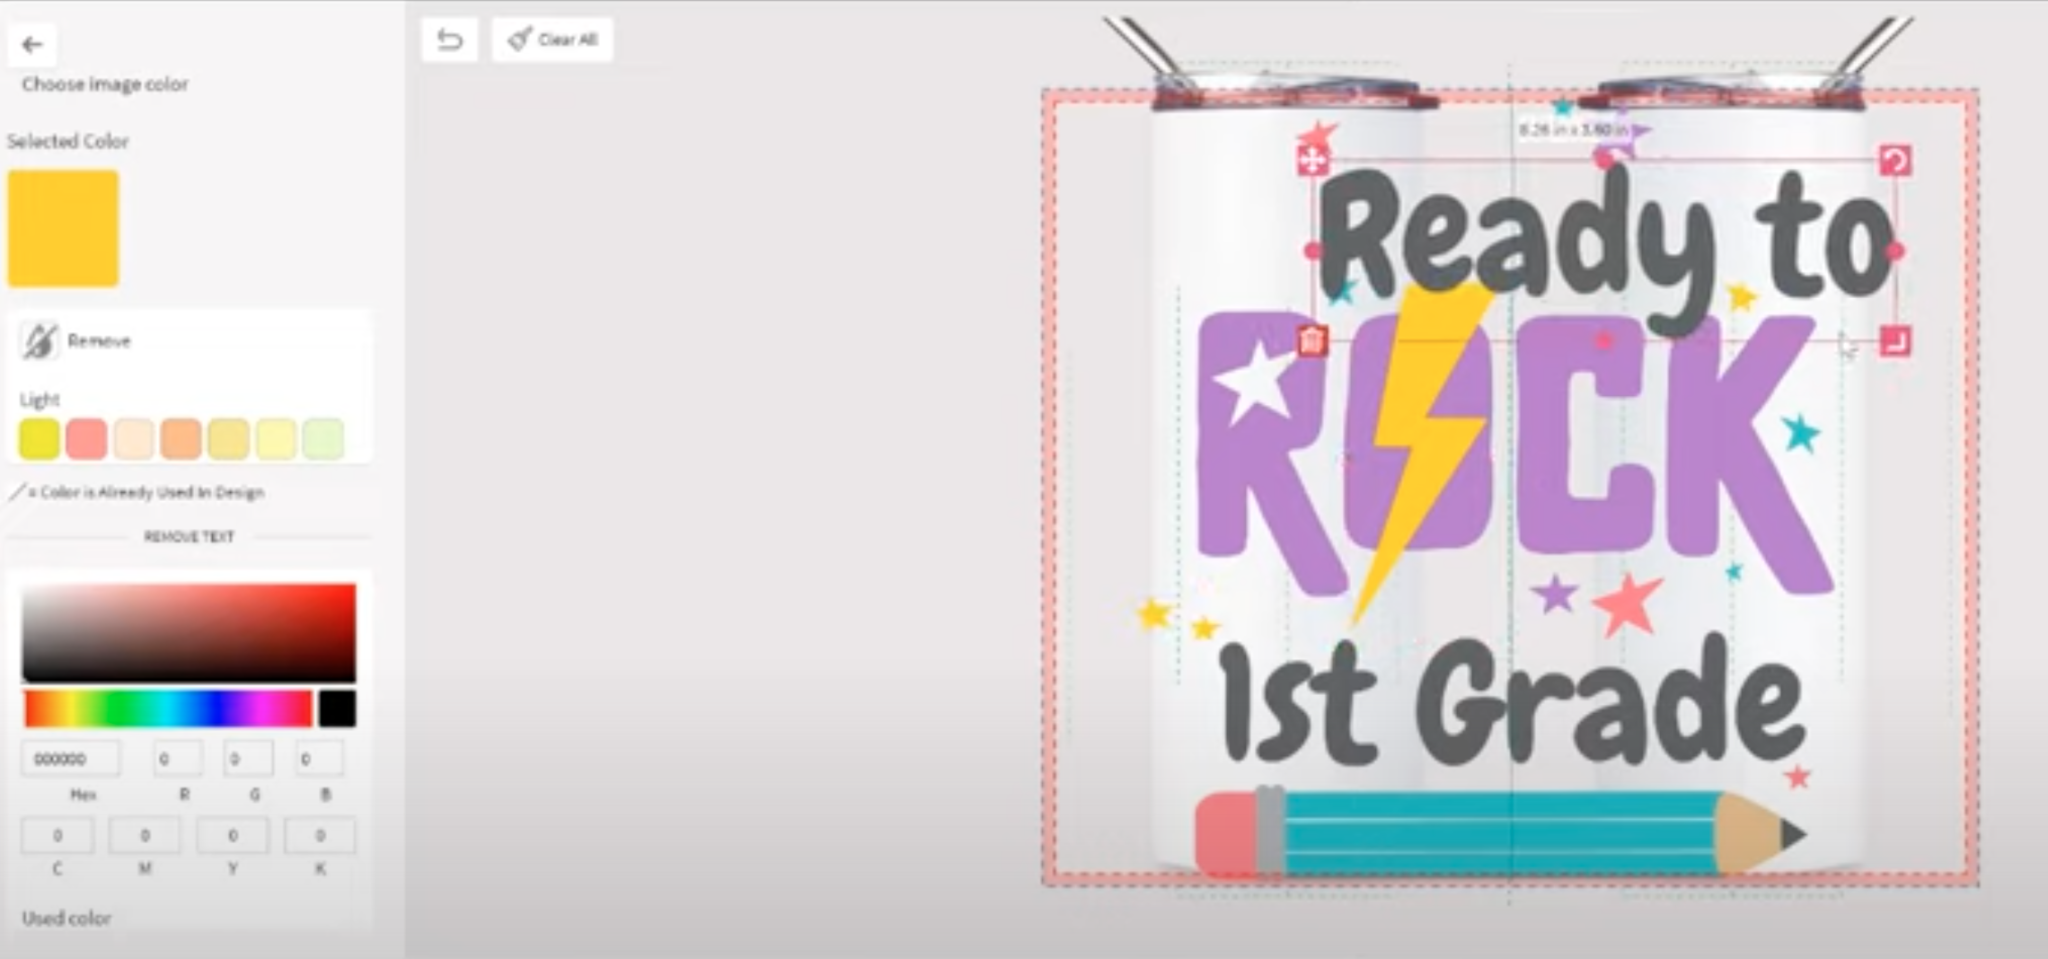
There are many different elements you can add—fonts, graphics, shapes, backgrounds, etc. I can filter the elements and as I select those elements they’re added to the design.
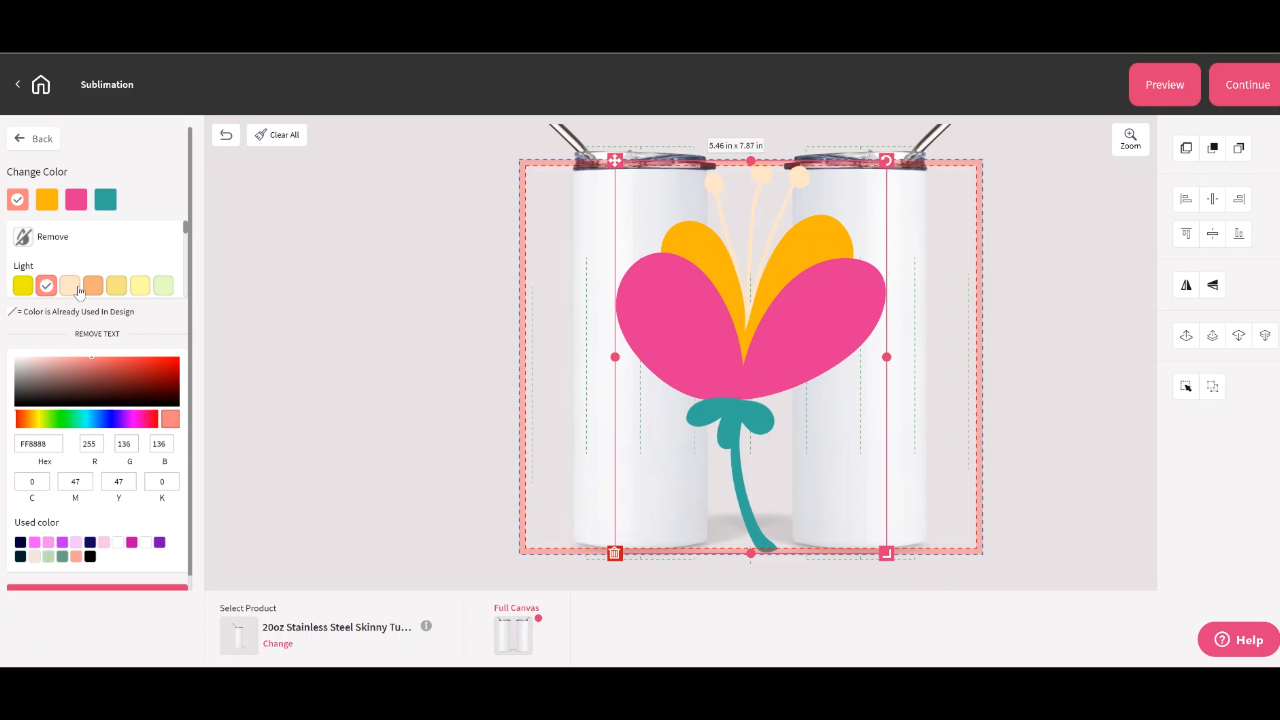
The great thing about all of these elements is that I can change the size, color, orientation, etc to fit the design I want to create. At any time, I can remove an element that is added to the design by clicking on the trash can in the lower lefthand corner.
Using Backgrounds and Text in DesignMate
Another option in elements is backgrounds. Included in backgrounds you’ll see solid colors and patterns. You can even upload your own backgrounds.
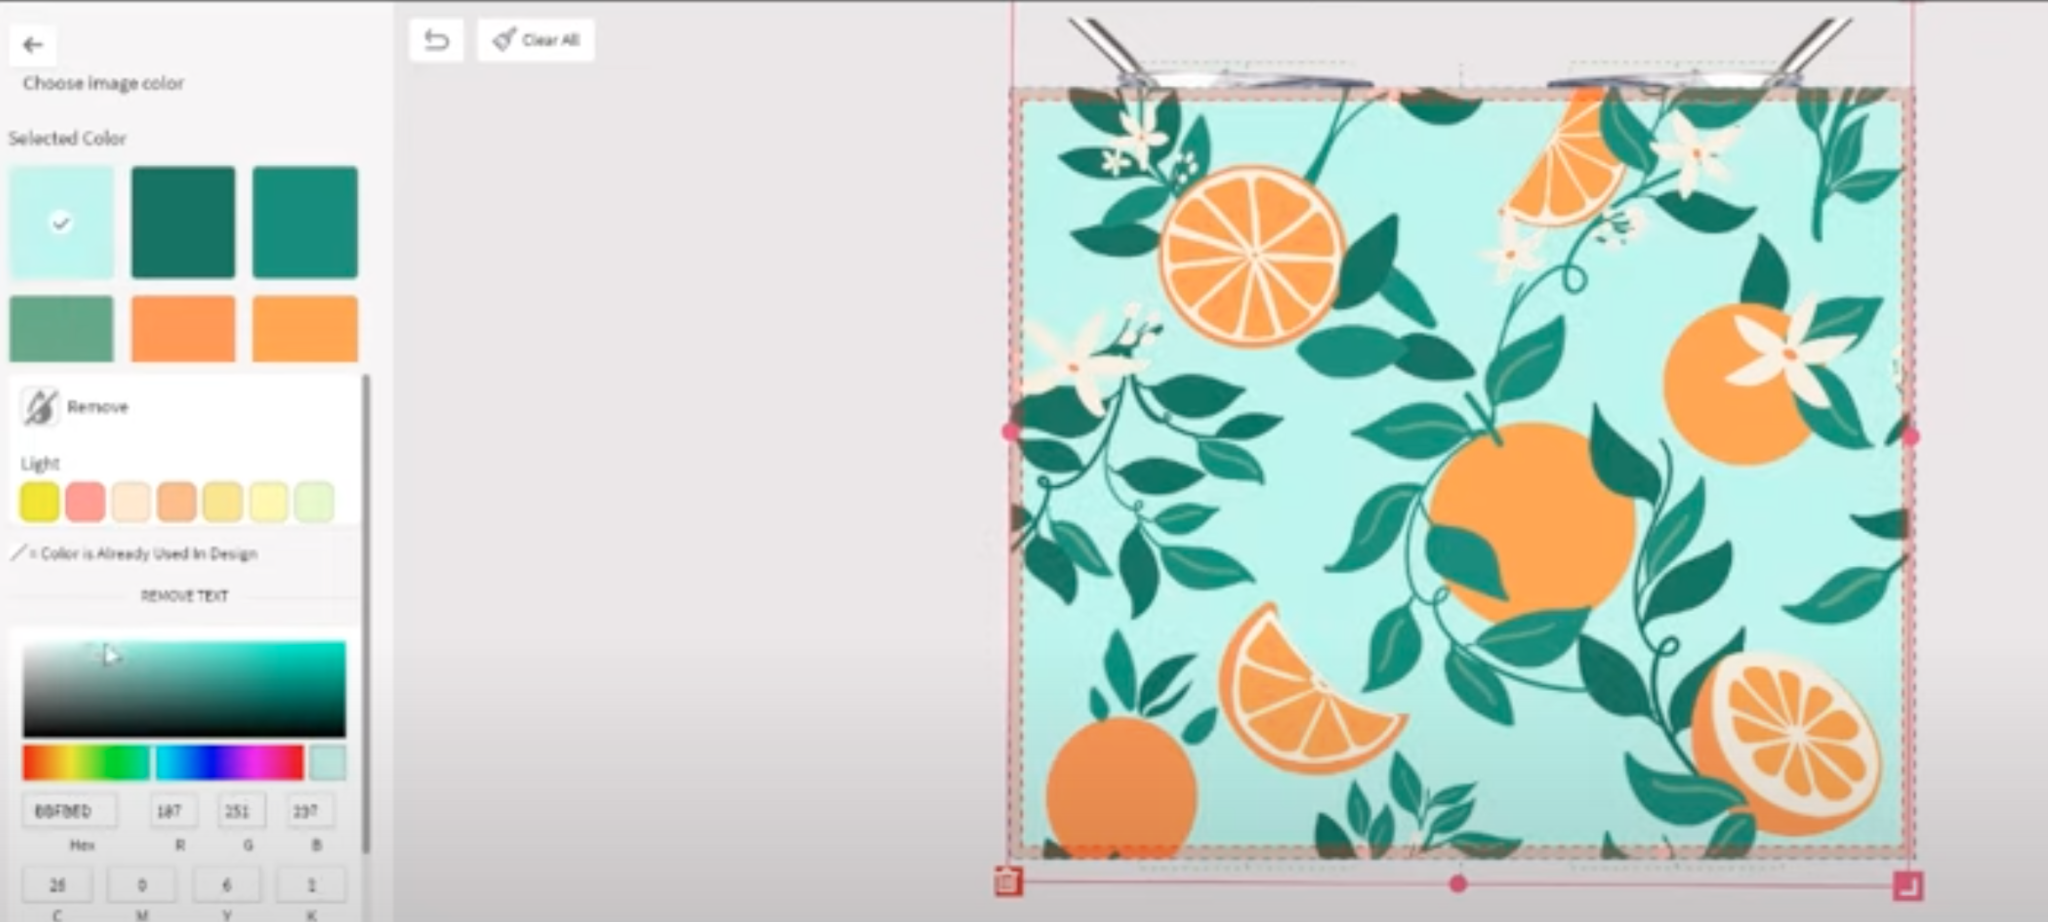
You can crop these backgrounds, remove colors or elements, adjust saturation, brightness, and contrast, and add text.
As you look at the bottom, you can see that I am on repeat pattern. If I selected Exact Fit, it will blow up the background. I can also choose scale fit and it will ensure the entire pattern is added to my tumbler.
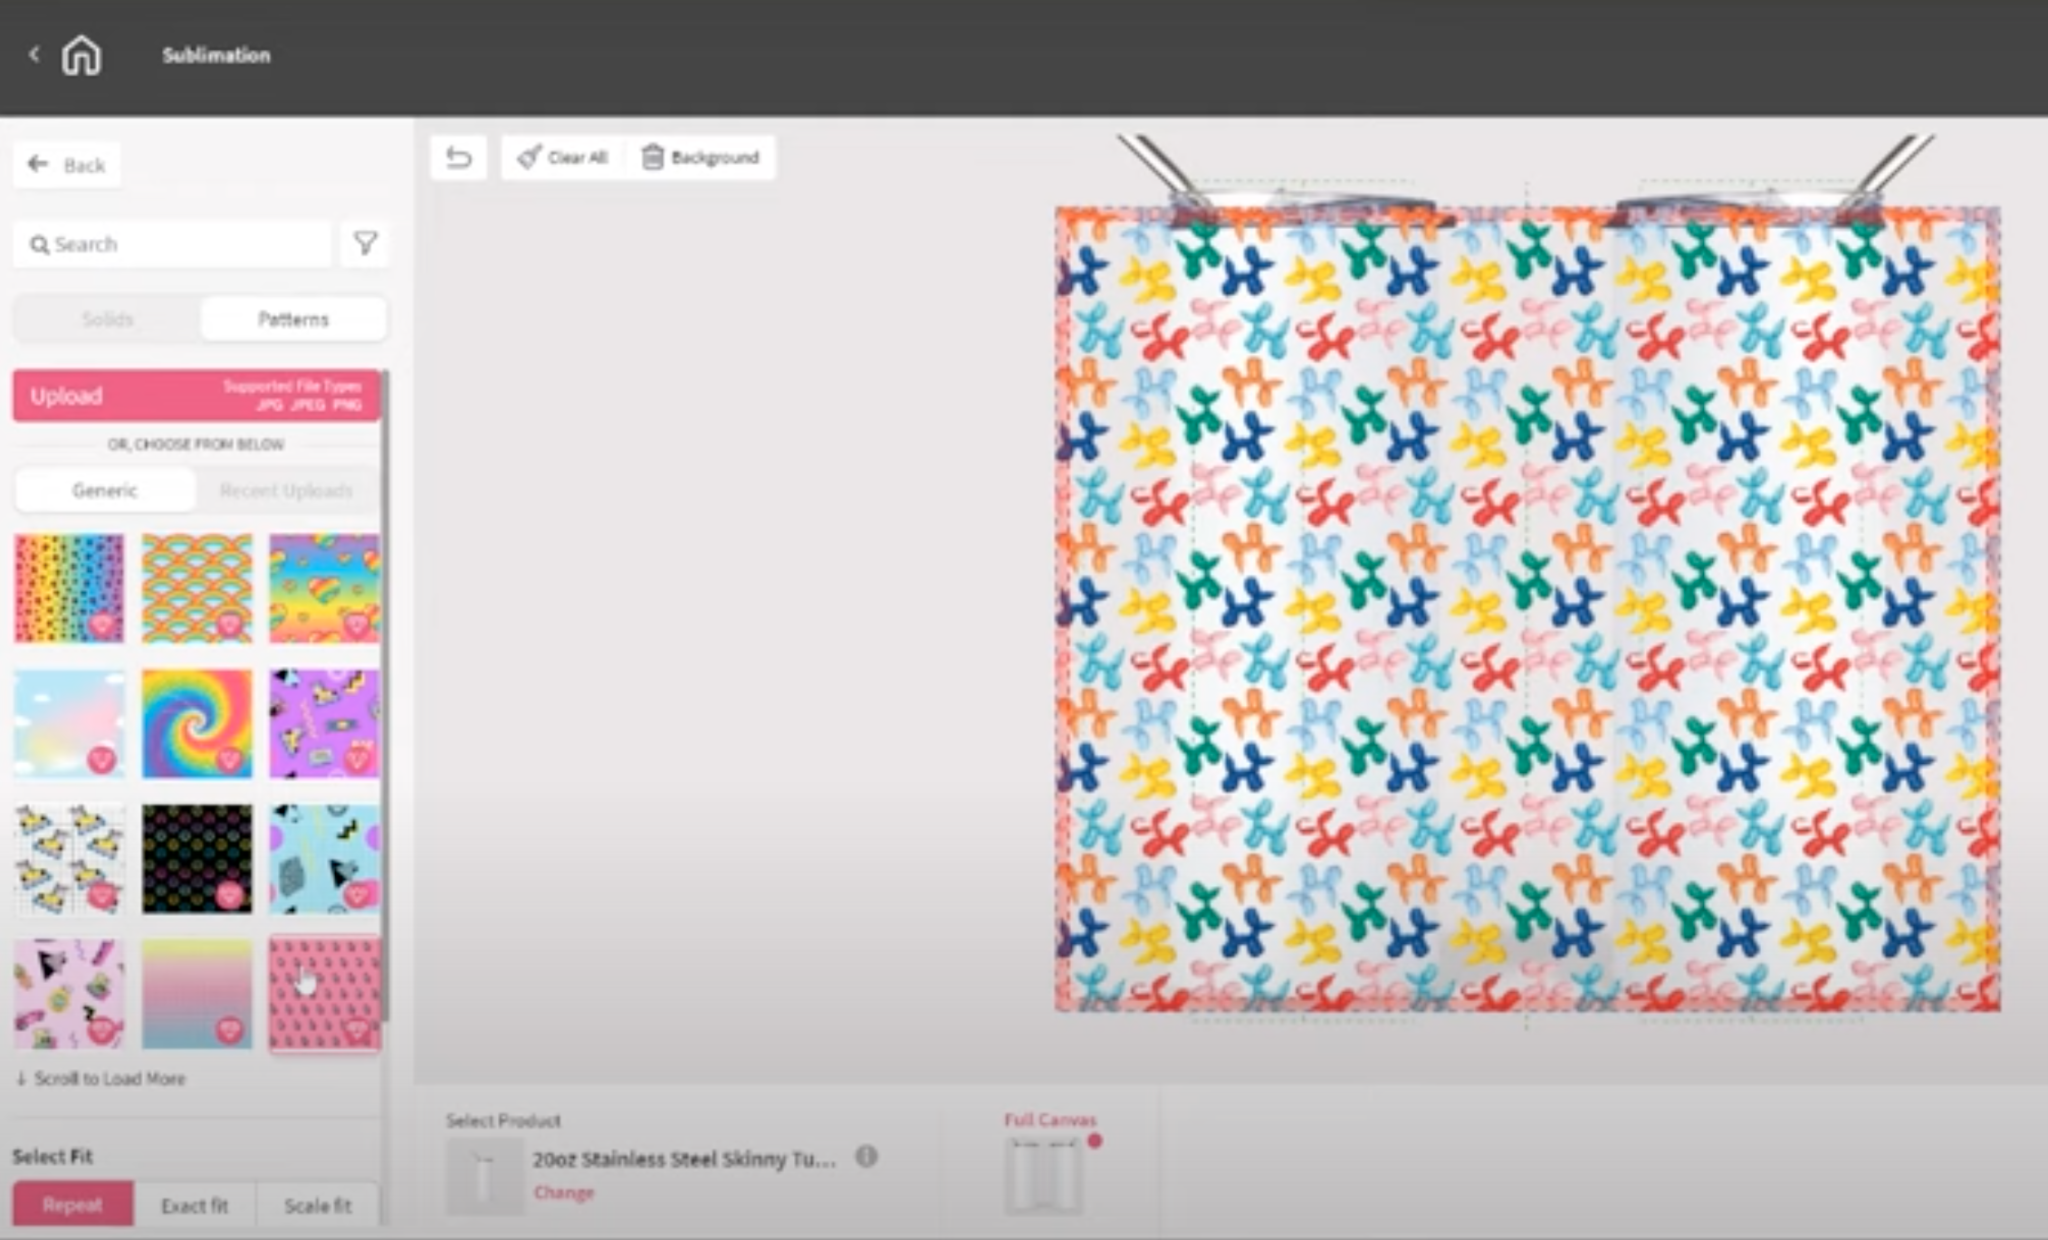
If your background design isn’t sized to your canvas, it will add white to the sides to fill the whole area.
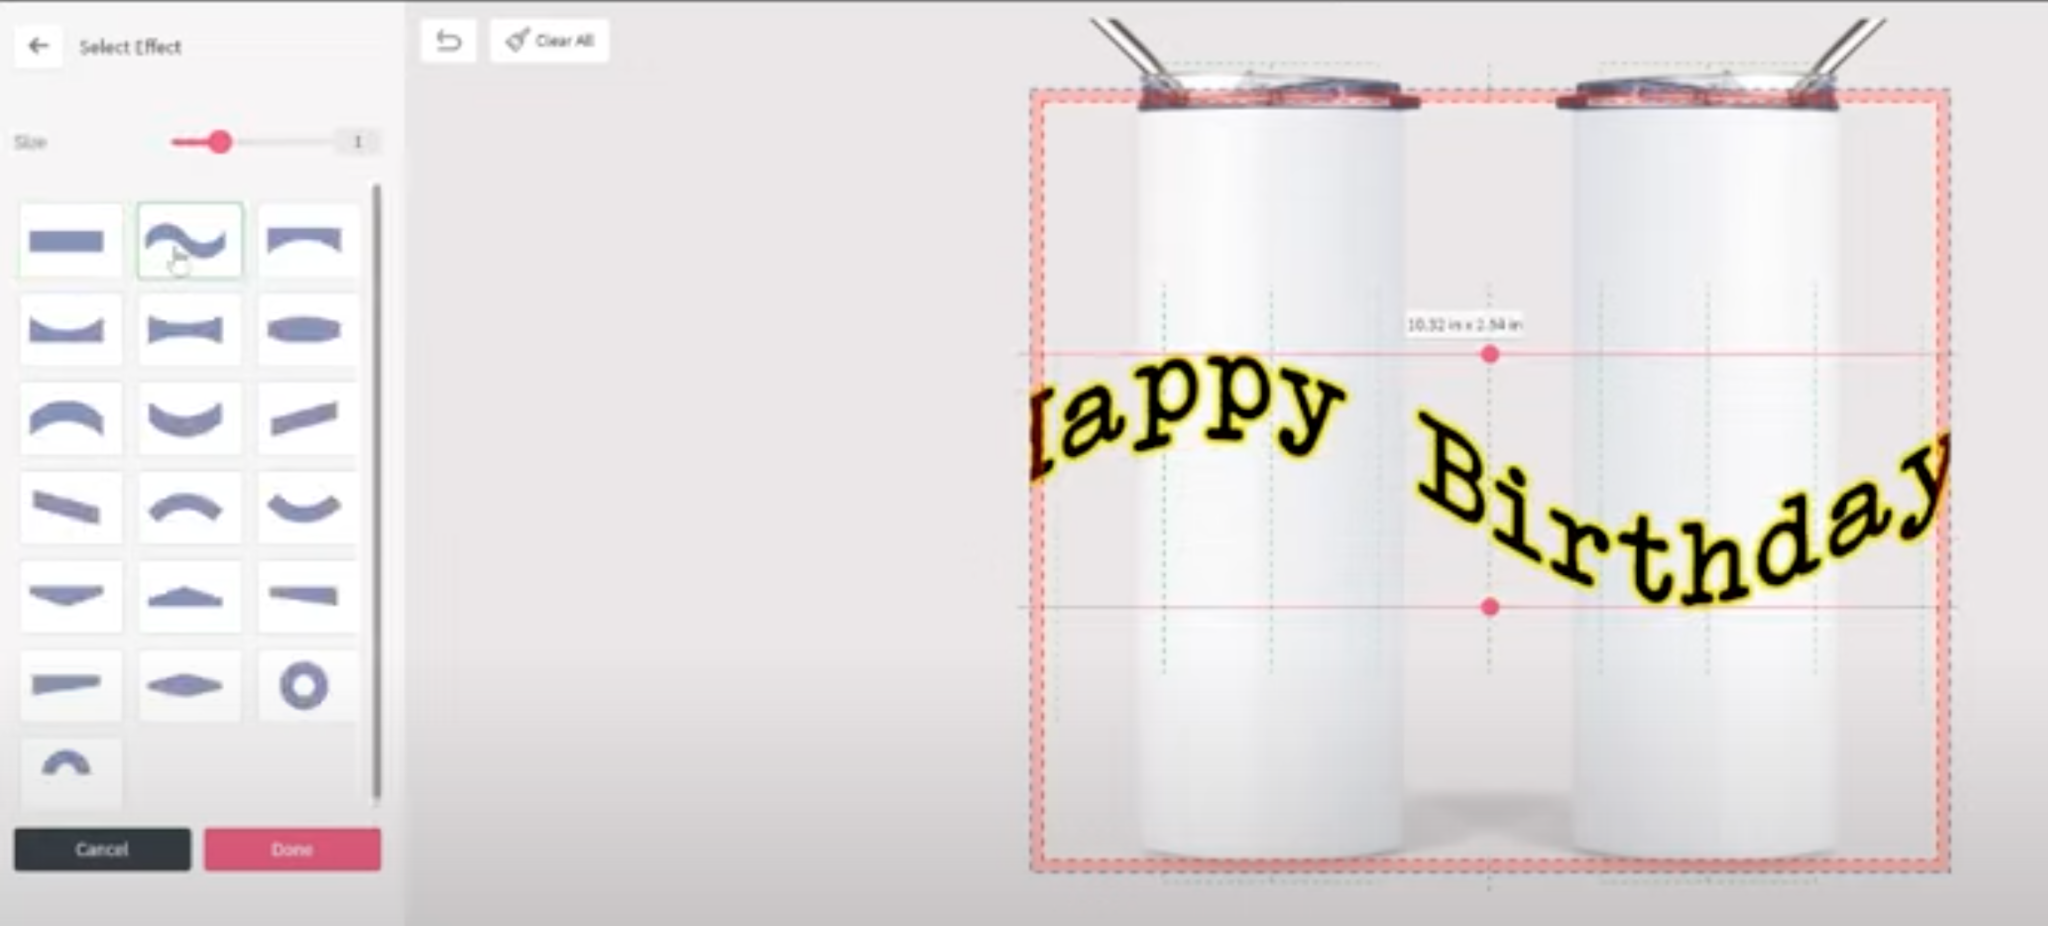
You can also add text by clicking Fonts. You can choose your font style, upload your own font, adjust letter spacing, change colors, outline it, etc.
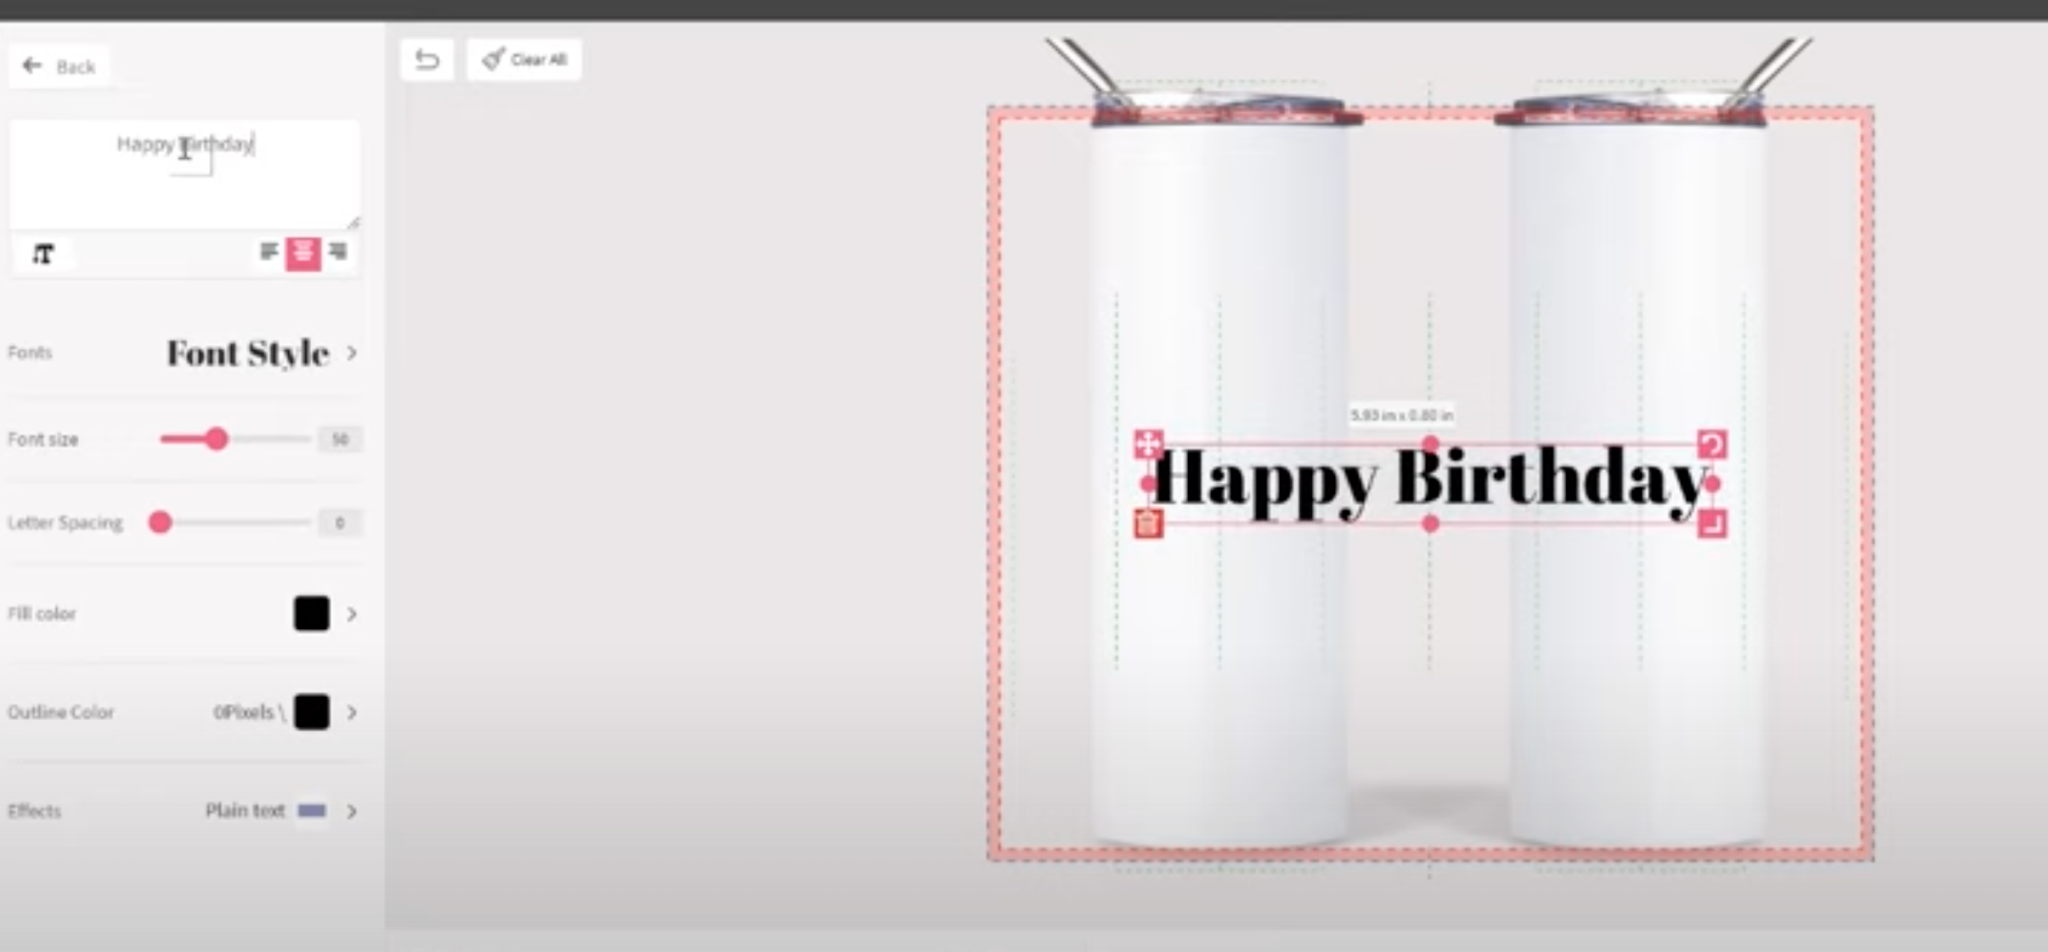
There are also effects like warp that are fun to use with text.
I love how much control I have in this program. Even with designs that are premade I can move around elements, change colors, add text, and more.
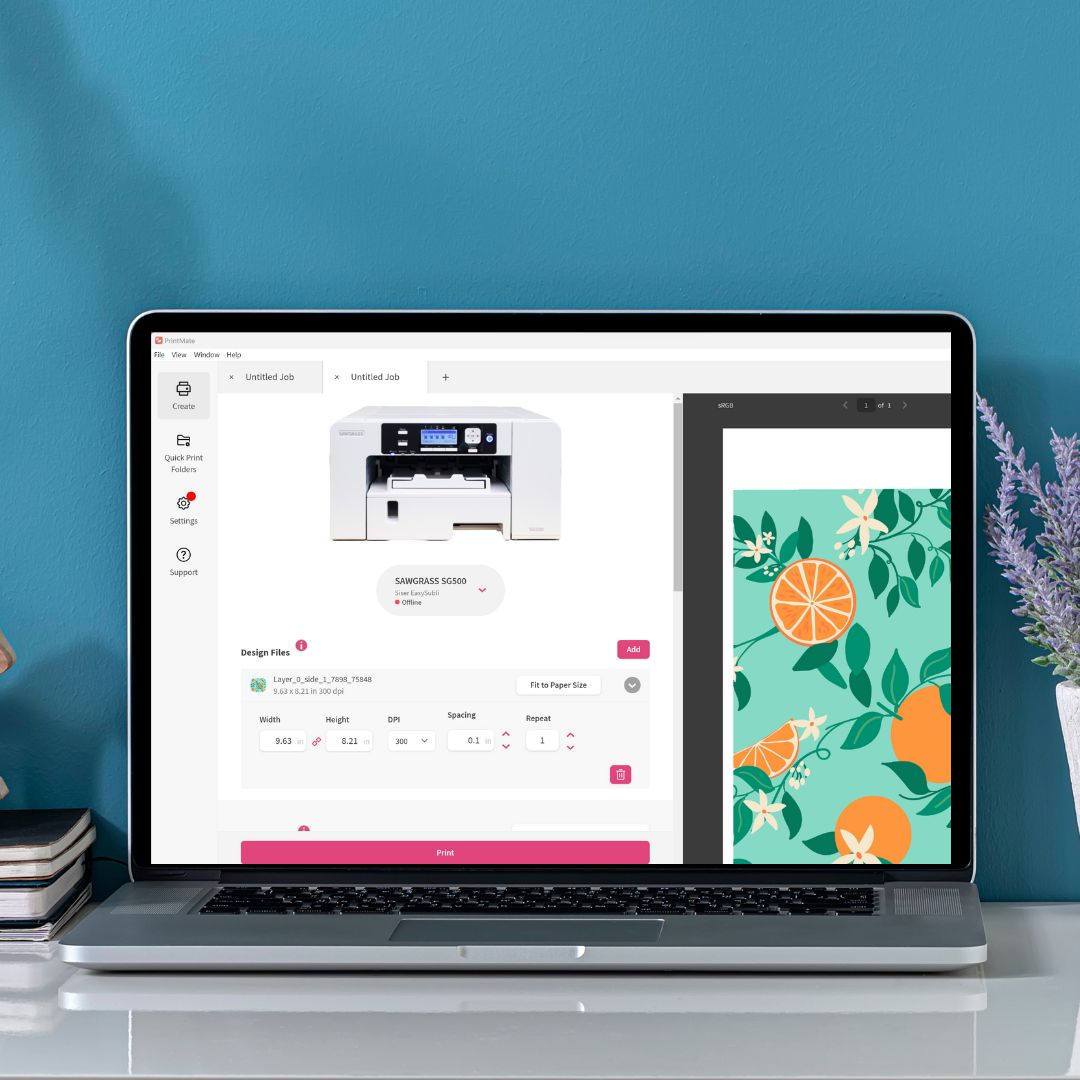
PrintMate: Bringing Your Designs to Life
Once you’ve perfected your design in DesignMate, it’s time to print using PrintMate. Click continue in DesignMate and it’ll send it right over to PrintMate. You need to make sure that your printer is hooked up and that your printer settings are right for the size of your design.
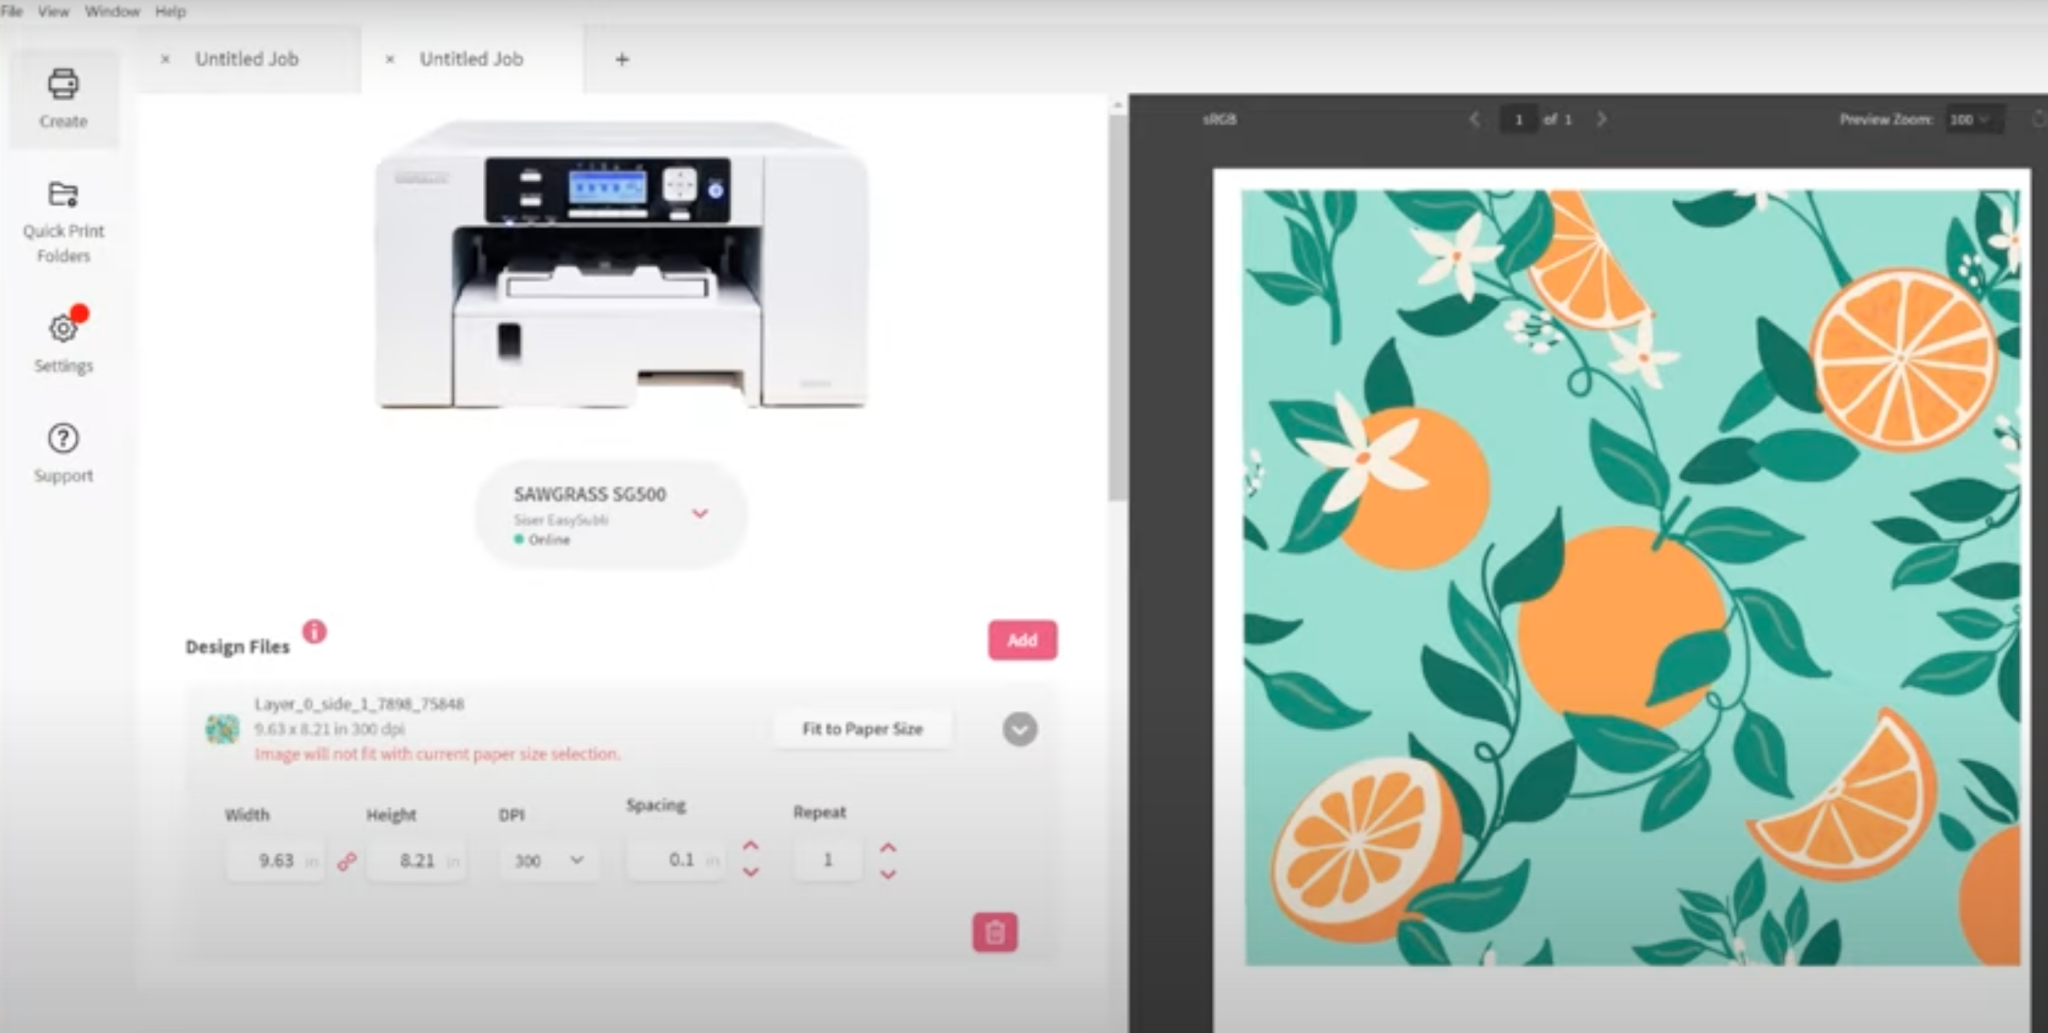
Just like in DesignMate there are a lot of options in PrintMate. If your image is small enough, you can duplicate the design to have it print multiple designs on one page. You can even adjust the spacing of your designs.
Presets in PrintMate
PrintMate simplifies the printing process by providing presets for different materials and products. This eliminates the guesswork and ensures your print comes out just right.

For instance, when I choose Stainless Steel Drinkware all of the settings are changed so they’re correct for that specific blank. I don’t have to go through all of the settings and hope I get them right.
You can change the settings if you want to or if you learn that you need to make adjustments but these presets are a perfect place to start.
Other Printer Settings
After selecting the correct preset there are other settings you can choose. For sublimation, we do want to mirror the image. You can add registration marks or add bleed. These registration marks are only for cutting with Silhouette machines.

For this project, the product is metal and the media size is letter. I am selecting high quality and Truepix Classic is the paper I’m using.
I chose landscape and I want to print all pages. You could also choose to print a file or change the number of copies. Up at the top for color management, I can go in here and make sure the Color Mode is Vibrant.
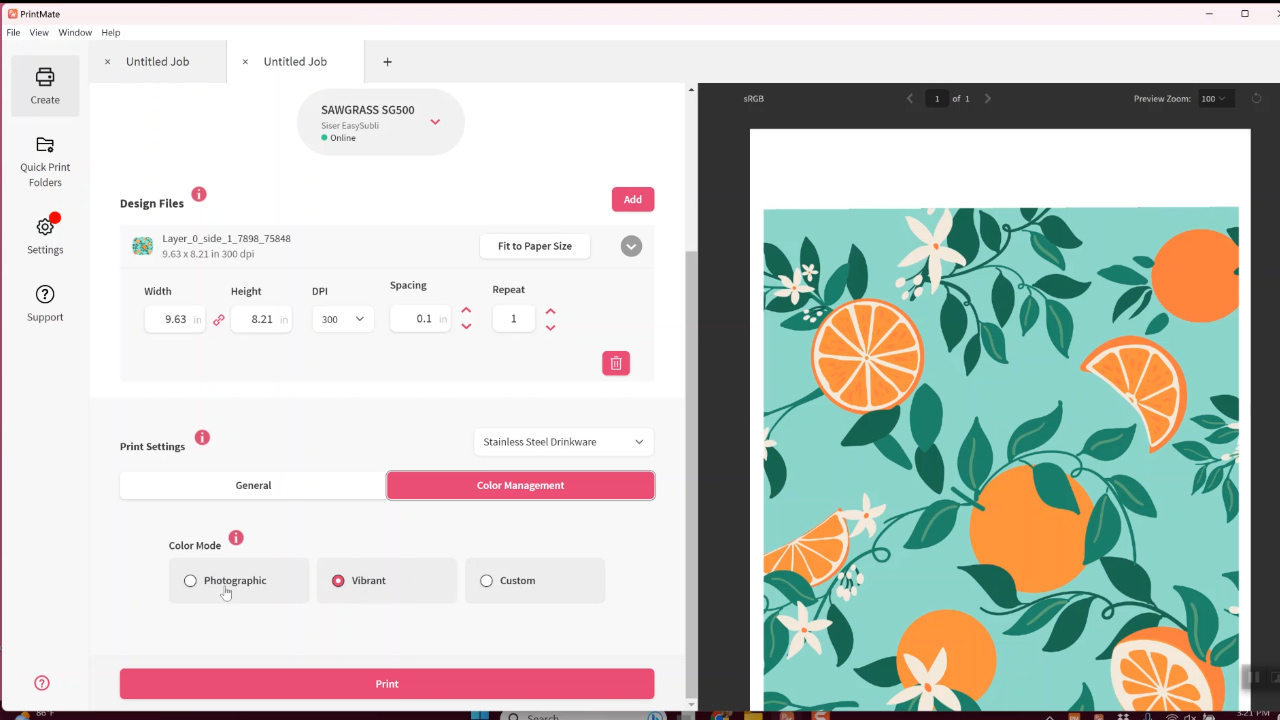
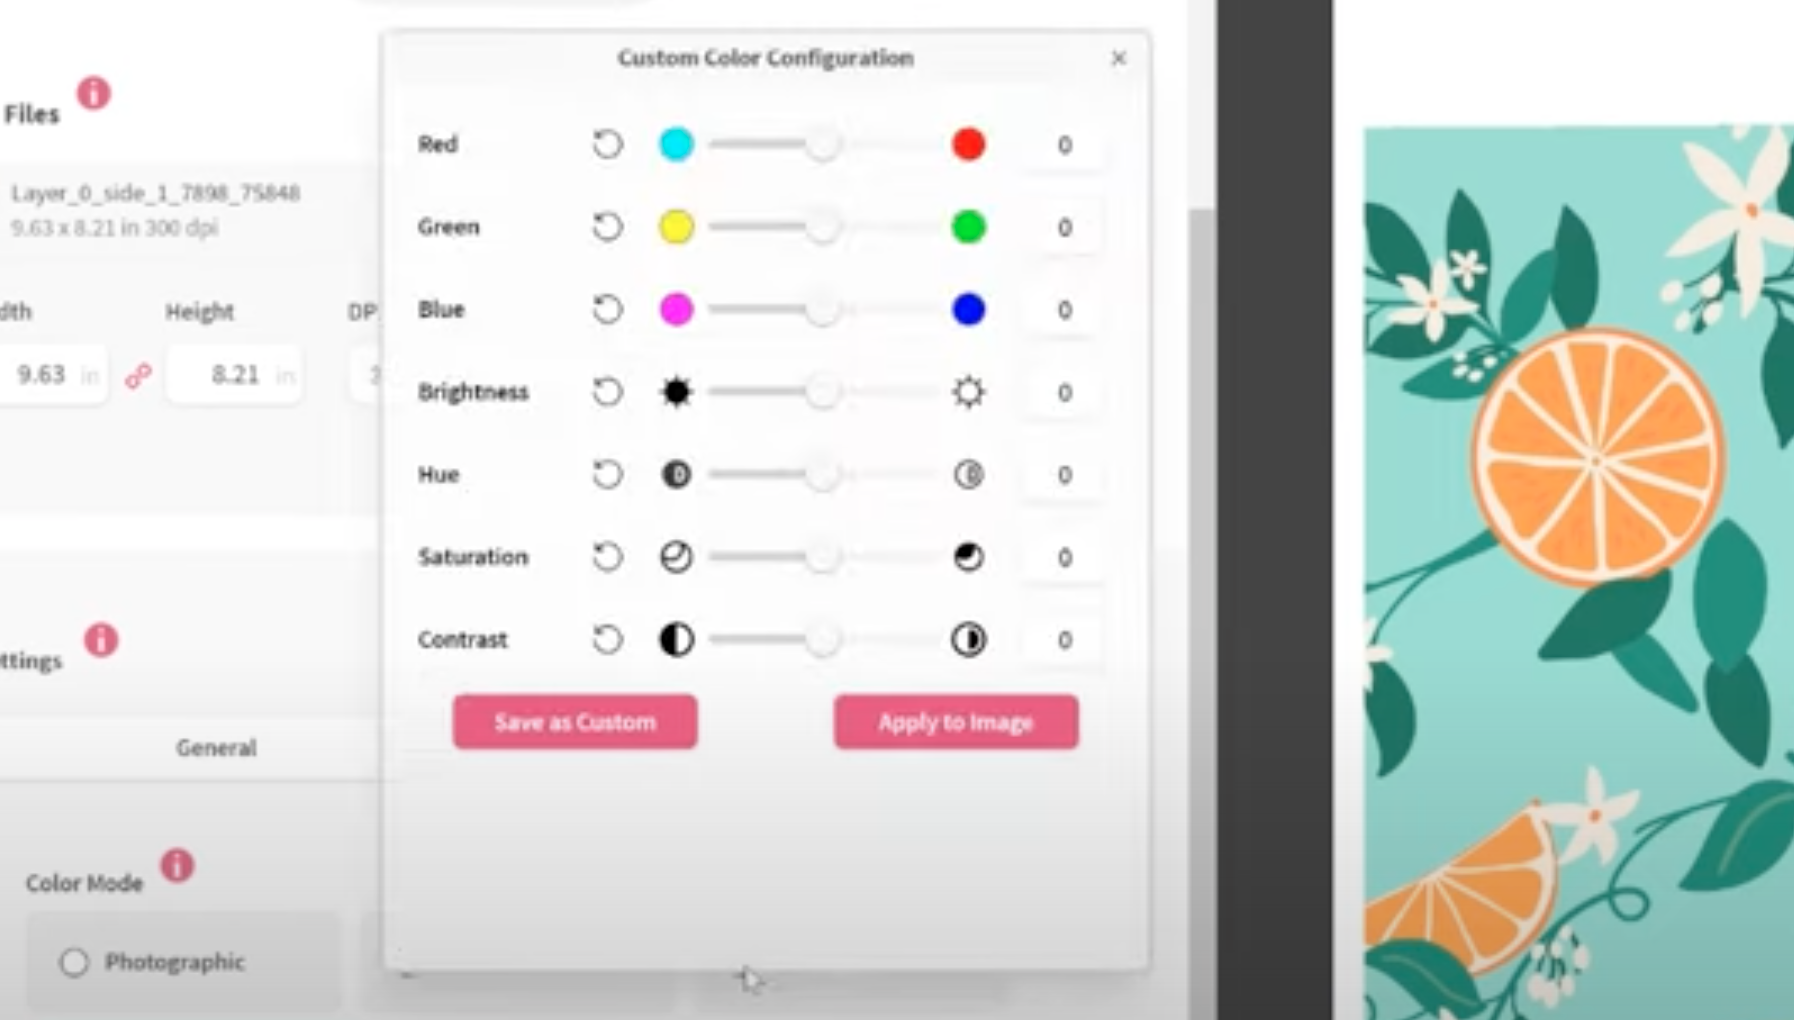
I use Vibrant for most print types I only use photographic for actual photographs.
You could also choose custom and play with the brightness, the hues, the colors, and things in this panel if you would like. I don’t do that. I don’t know if I’ve ever done that but you could if you would like.
Next, I’ll click print so I can print this on my Sawgrass printer.
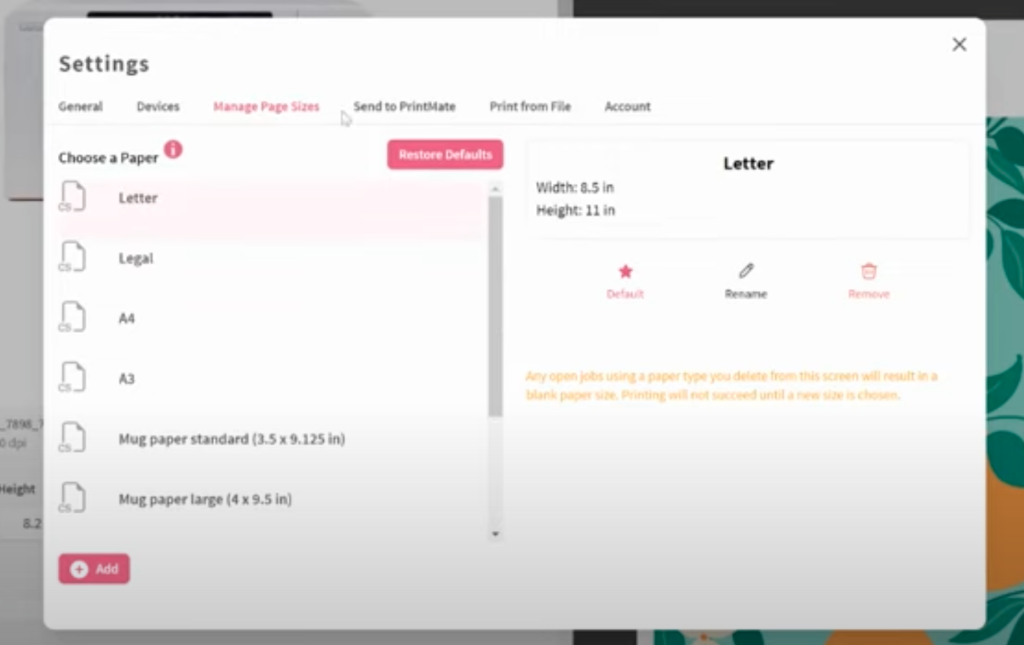
Adding Additional Paper Sizes
If you need to, you can add additional page sizes to your printer. For instance, if you have the bypass tray you can add large page sizes. If you have smaller sublimation paper for mugs, you can add those sizes too.
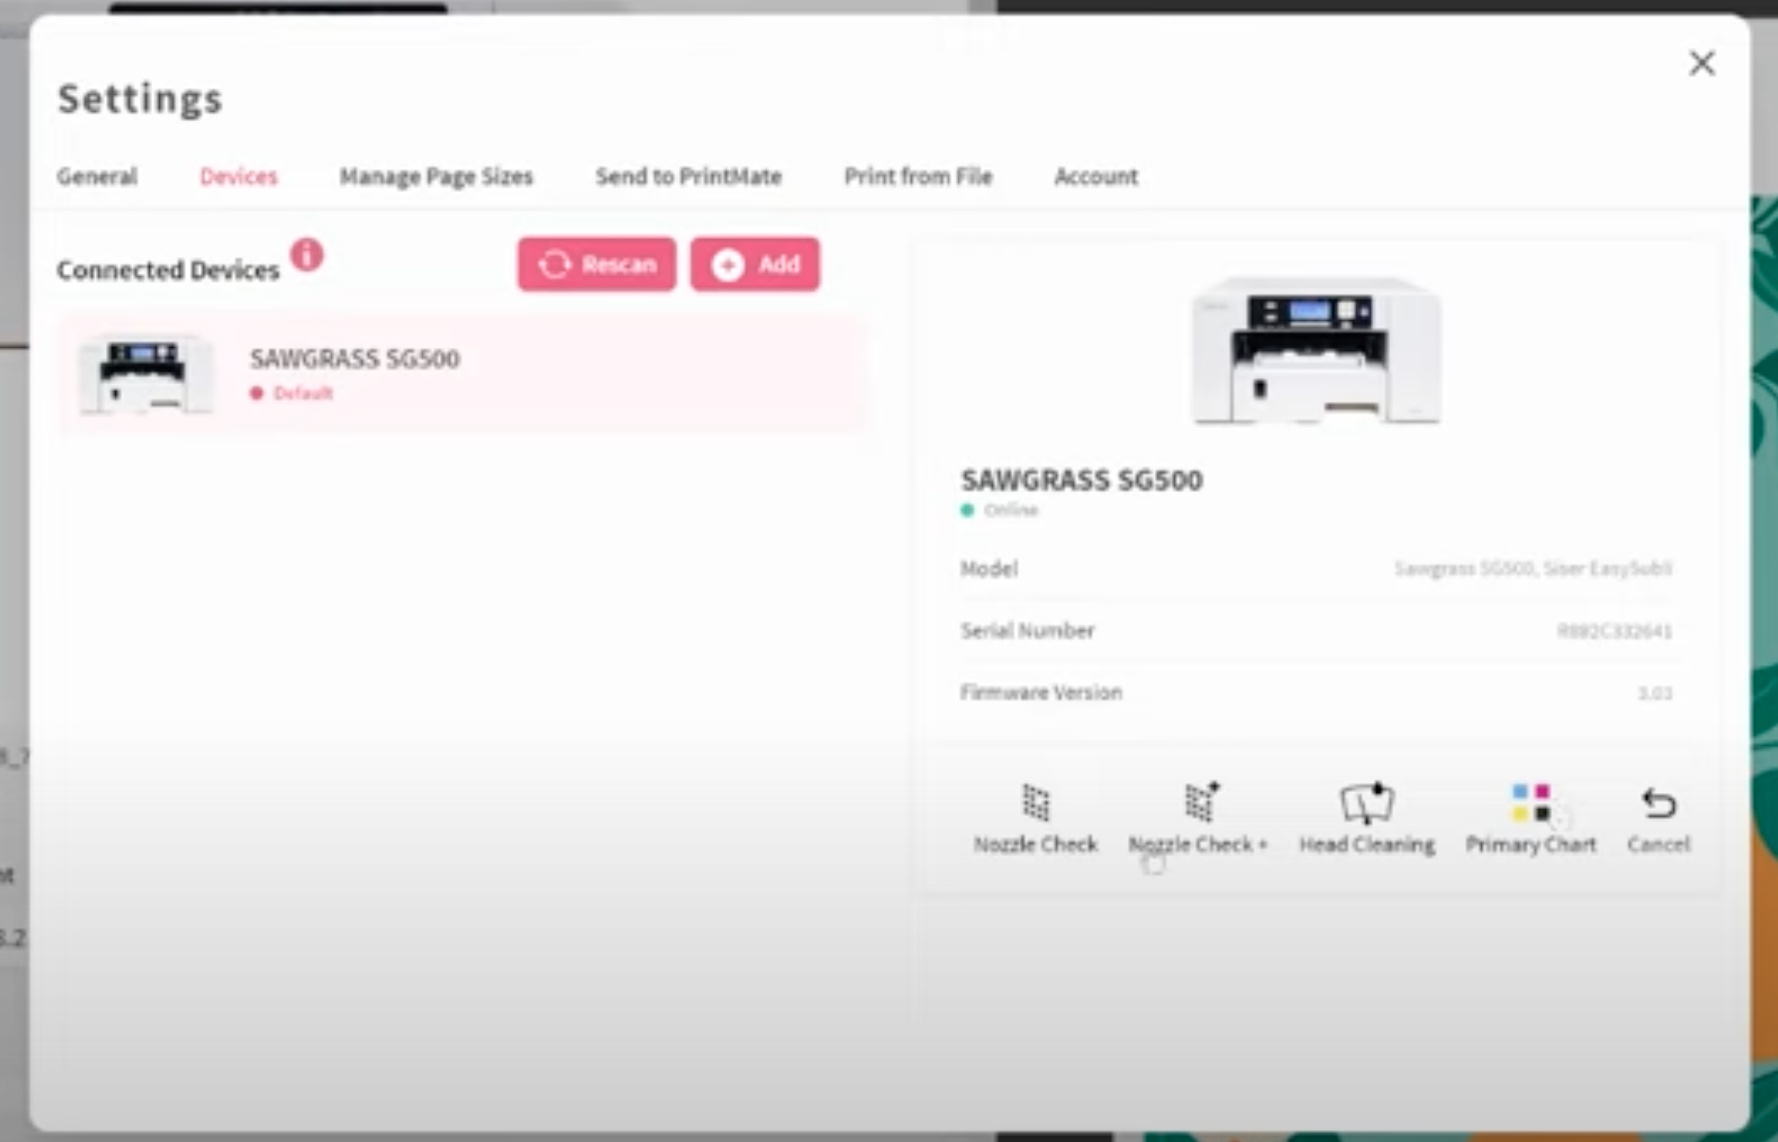
Also in devices, you can click printer utilities. This is where you’ll find things like your printer purge file, head cleanings, nozzle checks, and different things like that that you can run on your printer.
Now I have my print sized for a 20-ounce skinny tumbler and I am ready to sublimate at this point.
How to Print Designs from Another Program
If you’ve already created your design in another program you can still print via PrintMate.
Hit the plus in the upper corner and then click Add File to find the file on your computer. Once you do that, you’ll go through all the steps we did before to choose the correct printer settings. You can close out of your projects at any time but they do stay open until you close them in case you need to reprint them.
How to Select a Sawgrass Printer
If you’re in another program and you click to print, you will now choose the option to send to your Sawgrass printer and it will open up PrintMate if you’re using that program.
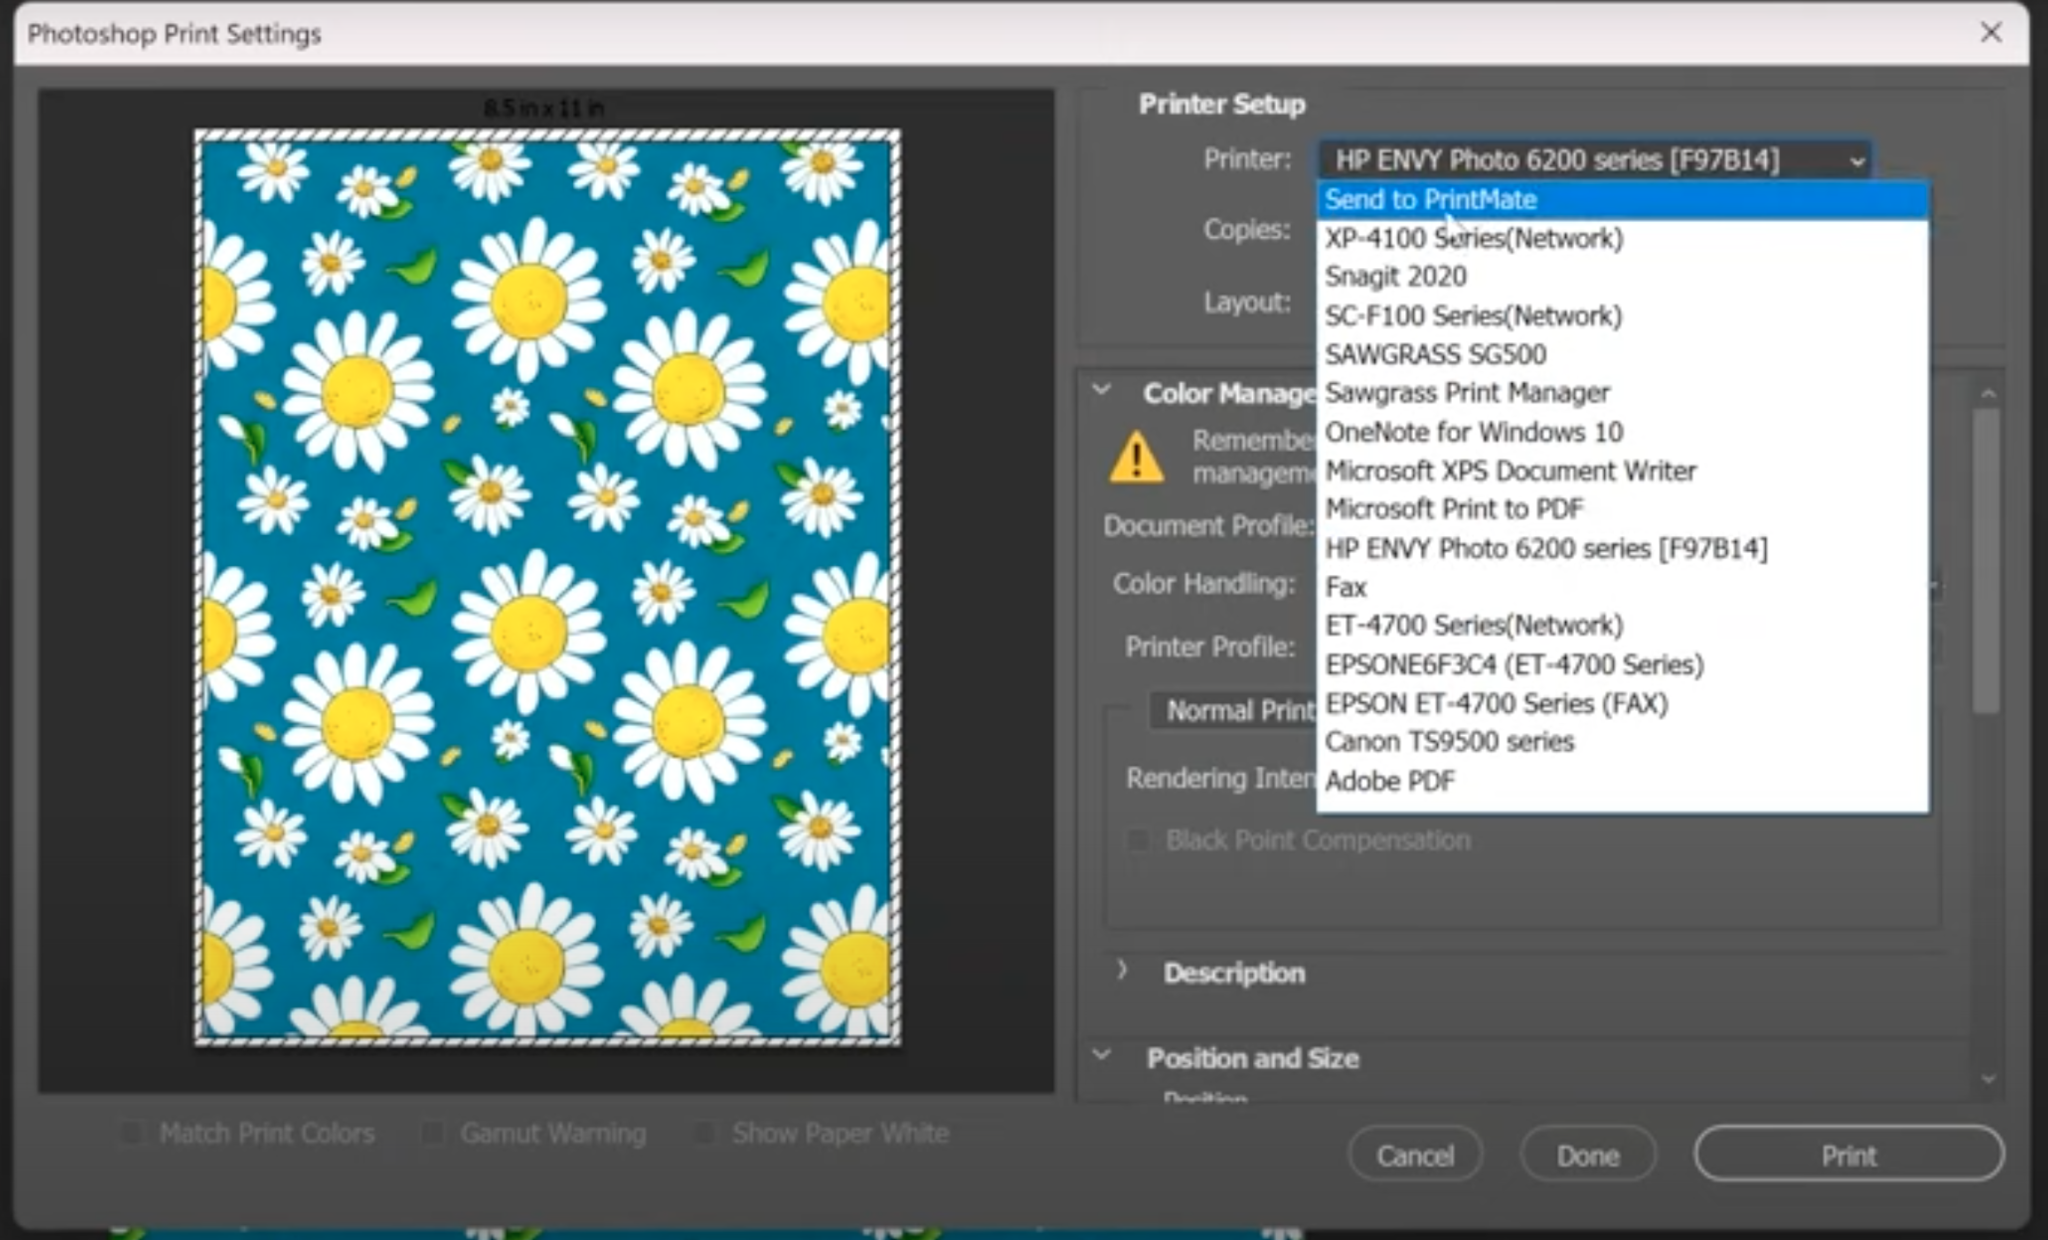
If you’re using Print Manager, there’s still the Sawgrass Print Manager option. However, if you download and start to use PrintMate, you’ll see the option that says Send to PrintMate and you’ll use that to open up PrintMate and then choose all those features like before.
Final Thoughts on Sawgrass PrintMate and DesignMate
In case you can’t tell, I am a massive fan of Sawgrass PrintMate and DesignMate. I love all of the features and how easy they are to use. There is a lot of design freedom with the ability to change fonts and colors. You can customize designs and patterns and even use shapes to make the perfect project.
I am also a big fan of the presets for different blanks. They make the printing process just as easy as the designing process.
I do have the paid version of DesignMate, you don’t have to have the paid version to use the program. I really like the designs they have and that they’re always adding new designs. It’s definitely worth trying out. PrintMate is always free to use for printing your designs.
I hope I’ve answered any questions you have about Sawgrass Printmate and DesignMate. If you have any additional questions, feel free to leave them in the comments and I’ll be happy to answer them for you.