This post and photos may contain Amazon or other affiliate links. If you purchase something through any link, I may receive a small commission at no extra charge to you. Any supplies used may be given to me free of charge, however, all projects and opinions are my own.
Do you struggle cutting vinyl with your Cricut? Small, intricate vinyl cuts with just about any Cricut machine can be frustrating if you don’t know what adjustments you should make.
Today I’m going to share my best tips and tricks for cutting vinyl with a Cricut machine, including making small cuts. You will be making small projects with ease after this tutorial!
If you’re brand new to Cricut, check out my one-hour crash course to get started.
How to Cut Vinyl with a Cricut Machine
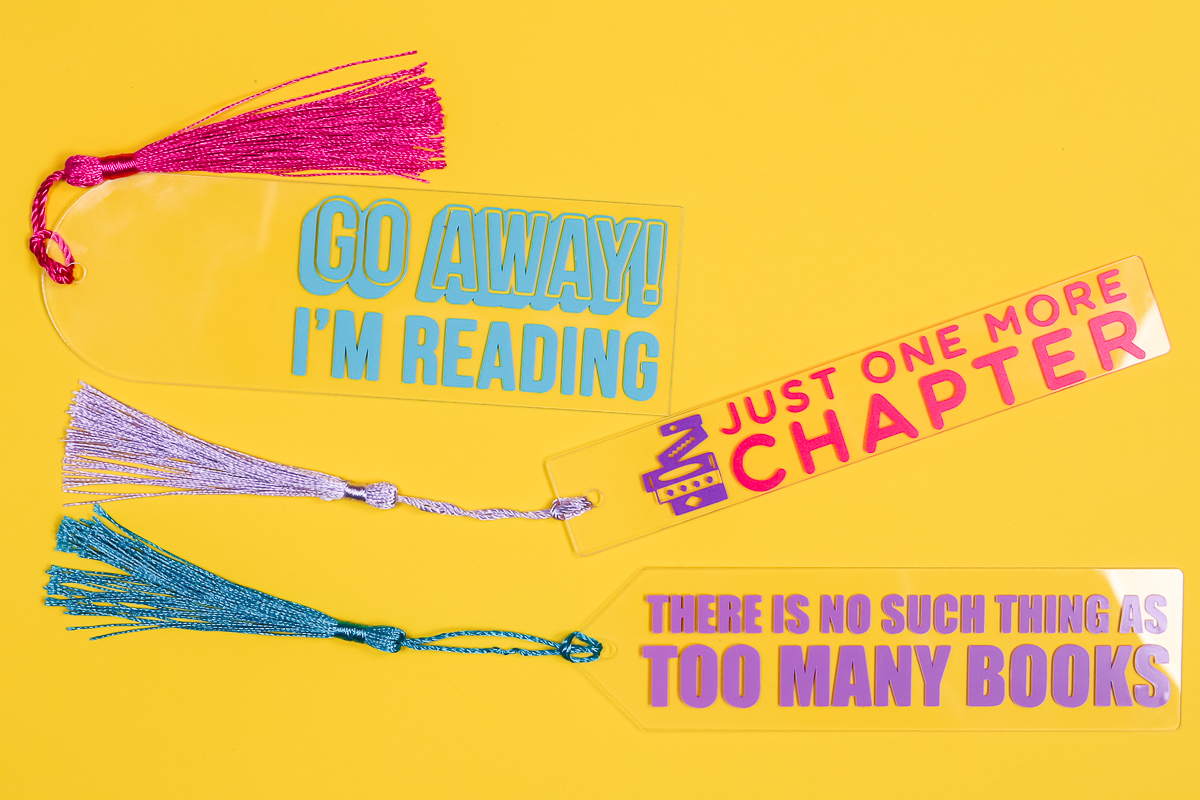
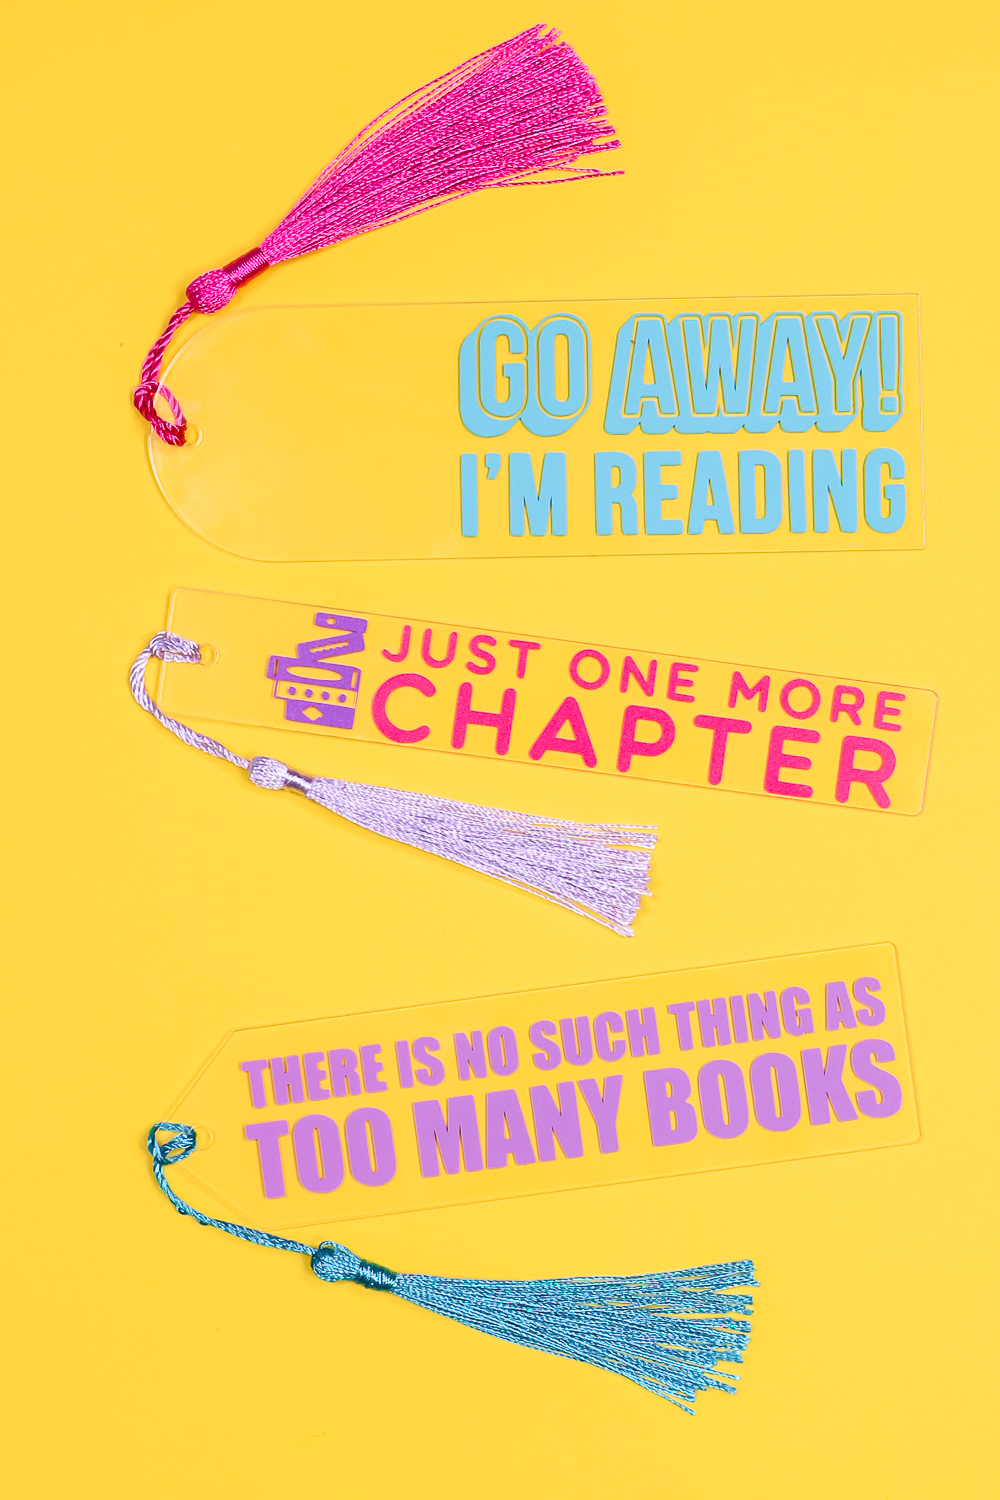
To show you the best way to make small cuts with a Cricut machine, I’m going to make some bookmarks as my example. This process will work with any project you’re making that involves small designs, thin lines, intricate cuts, etc.
You can actually watch me cut these designs and see all my best tips and tricks by pressing play on the video below.
Can’t watch the video or missed some of the steps? Just follow along below!
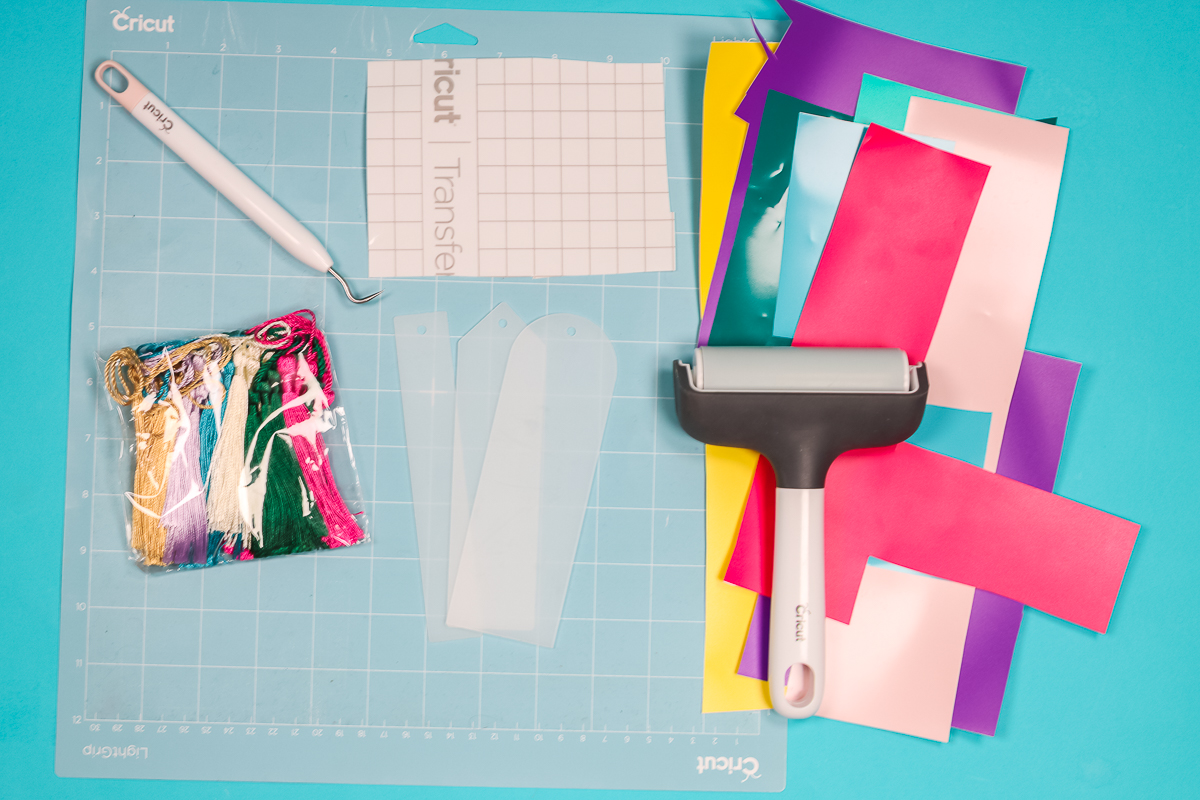
Supplies Needed:
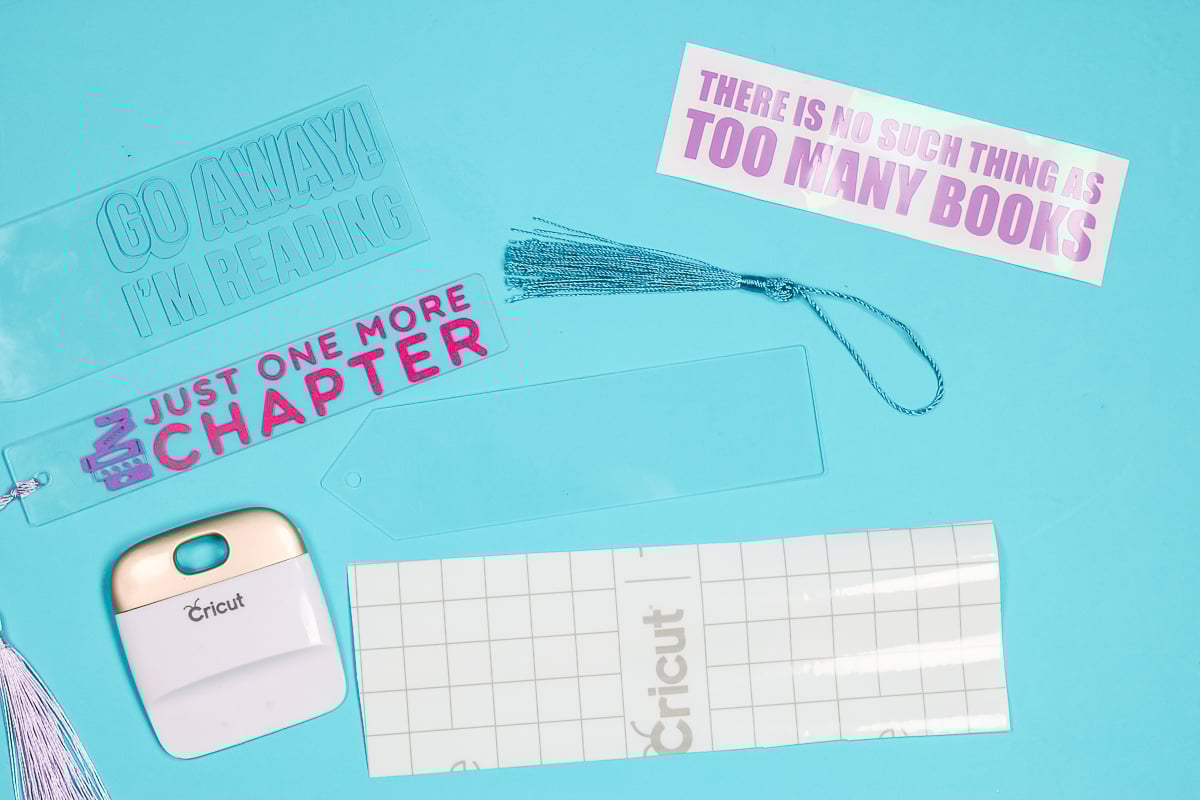
For my project today, I am making bookmarks. Your supply list may be slightly different if you’re making a different project.
NOTE: The bookmark kit I am using came with the tassels to finish them off. This kit is actually made for sublimation. I did not however like how they sublimated so I am using them with vinyl instead.
Tips and Tricks for Cutting Vinyl with a Cricut
If I’m cutting an image I know is small or includes intricate designs like swirls or thin lines, I follow these steps to make sure I get the best cuts every time.
Sticking Vinyl to Cutting Mat
The first thing you want to do when cutting vinyl with a Cricut machine is to make sure your material is stuck down on the mat really well.
Make sure your mat is clean and that there is no debris on the mat that could catch the blade and cause tearing to your material. I highly recommend using a brayer to make sure your material is stuck down really well. This will do wonders for your cuts.
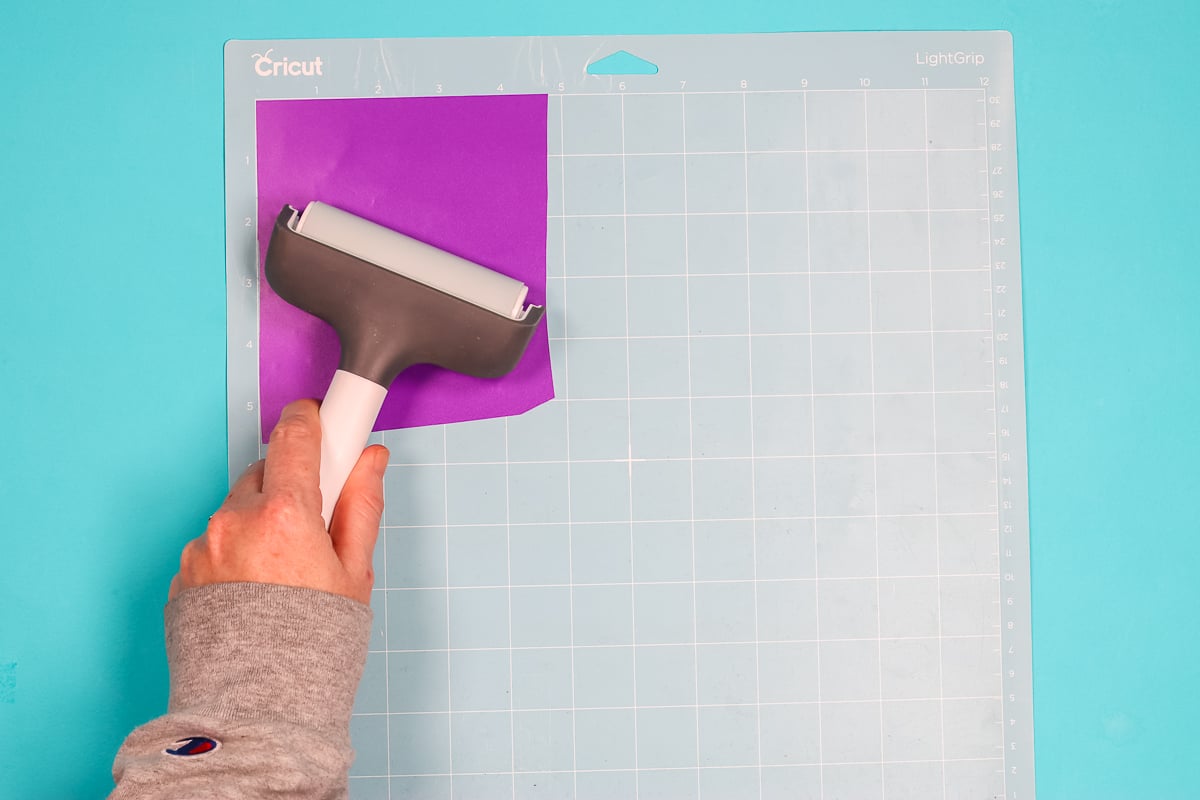
Most of the time a bad cut is actually the material not being stuck down to the mat well and doesn’t have anything to do with the blade itself. Having the material stuck down well will save you a lot of crafting headaches.
NOTE: You can also clean your mats to make them sticky again. See my post here for my favorite method!
Clean Your Blade
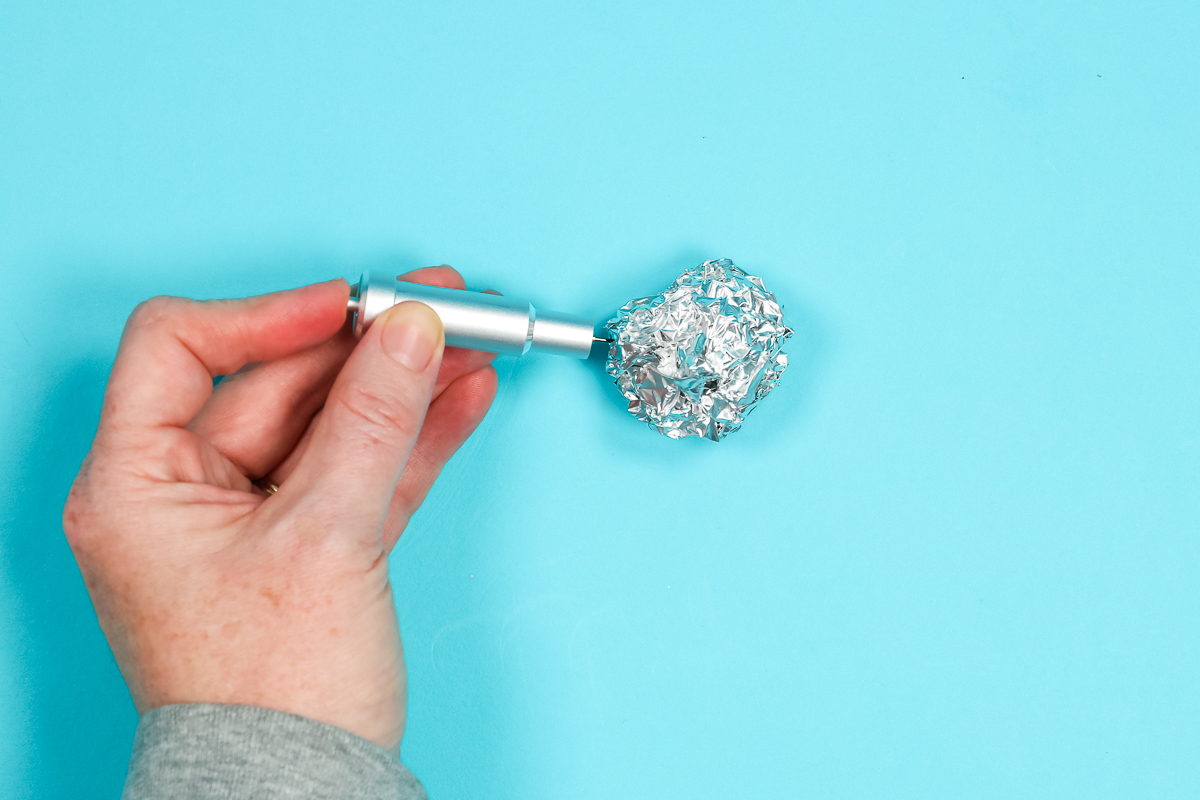
If you have your vinyl stuck down really well to a nice clean mat and are having issues with your cut, I would recommend cleaning your blade.
To clean your blade, I suggest poking the blade into a ball of aluminum foil. This does not sharpen your blade but it does clean the blade really well. To do this, press down on the plunger at the top of the blade housing and just poke the blade into the foil a few times.
If your blade gets stuck in the foil, you can get it out by pressing the plunger, putting it back in the housing, and releasing the plunger. This should allow you to just pull it back out of the foil.
Once your blade is clean, you can try your cut again.
As a last resort, you can change your blade. I don’t recommend this step unless you’ve tried everything else OR you notice your blade tip is broken or there is a visible chip in the blade. Cricut blades last a long time, usually making sure your material is stuck down to the mat well or cleaning the blade fixes the problem.
Check Your Cut Setting
My next recommendation is to test your cut setting. If you’re not getting clean cuts, changing the cut setting can help with that.
In the photo below, on the top row, I used the setting recommended for my material. I was using Cricut Premium Permanent Vinyl so I chose that setting. You can see I lost the inside of the R with that setting.
On the bottom row, I changed my setting to the Washi Sheet setting and then selected more pressure. Just by changing that setting, I was able to get the inside of my R to stay and a cleaner cut all the way across the design.
When using the Washi Sheet setting, I do recommend selecting more pressure and making sure Fast Mode is turned off.
If you’re using a machine that has a dial, you will need to turn the dial to Custom to get settings like the Washi Sheet setting.
I recommend always picking the cut setting that is closest to the material you’re using. I wouldn’t select the Washi Sheet setting if I was cutting glitter vinyl, it wouldn’t cut deep enough. Start with the setting for the material you’re using and then adjust from there.
Design Tips for Cutting Vinyl with a Cricut
What do you do if changing the settings isn’t enough to get a clean cut? Sometimes a design just doesn’t work when it’s sized so small. Let’s look at ways to adjust your image to work for the size of your project.
Contour Out Small Details
Unfortunately, some designs may just have too much detail to cut very small. This is where Contour comes in. Contour is one of my favorite features in Design Space, it can really help when dealing with small cuts.
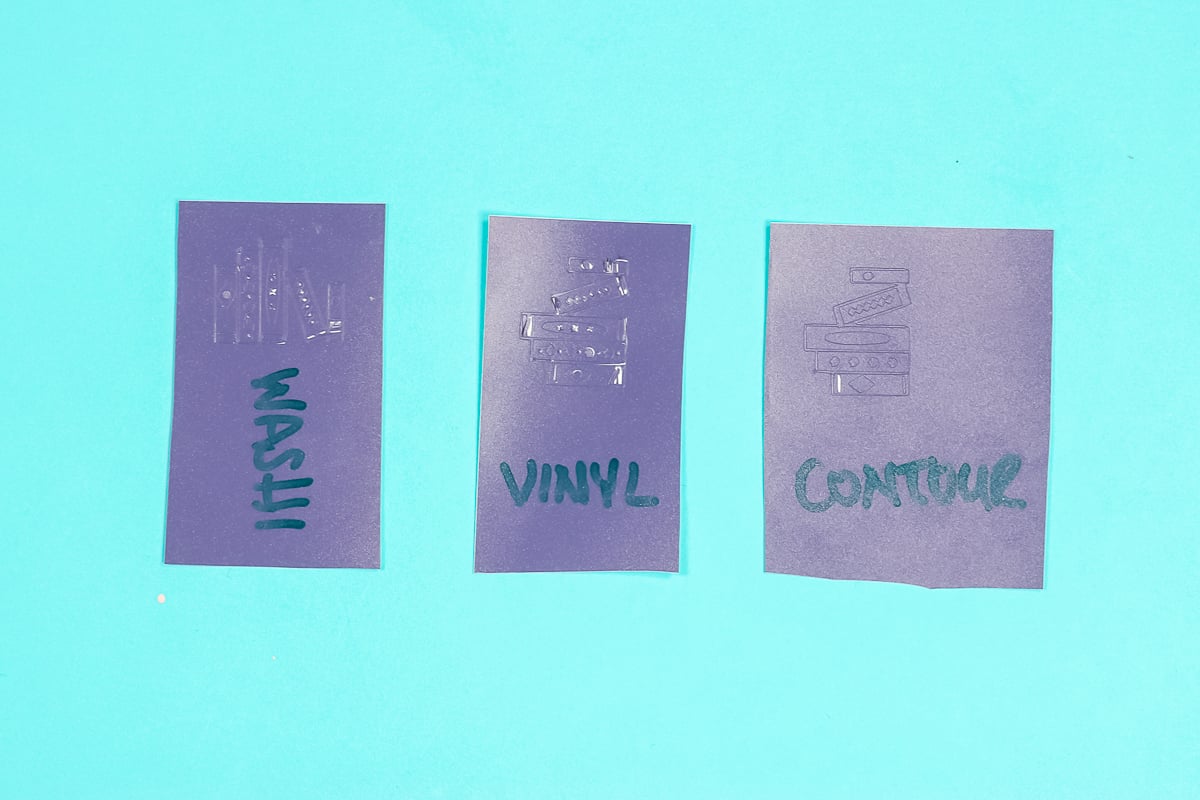
In the image above you can see how the different settings cut this stack of books. This design has a lot of detail and the vinyl setting just tore it up, it wasn’t usable at all.
Switching to the Washi setting, it did do a bit better. I am still missing a lot of the small pieces and the cut is not very good.
This image is a great example of an image that just has too much detail to be cut so small. What I like to do in these cases is to use the Contour feature in Design Space.
I use the Contour tool to remove some of the smallest pieces in the design. In this design, things like the small dots and insides of small shapes aren’t cutting well so I can use the Contour tool and just remove those pieces that I wouldn’t be able to weed anyway.
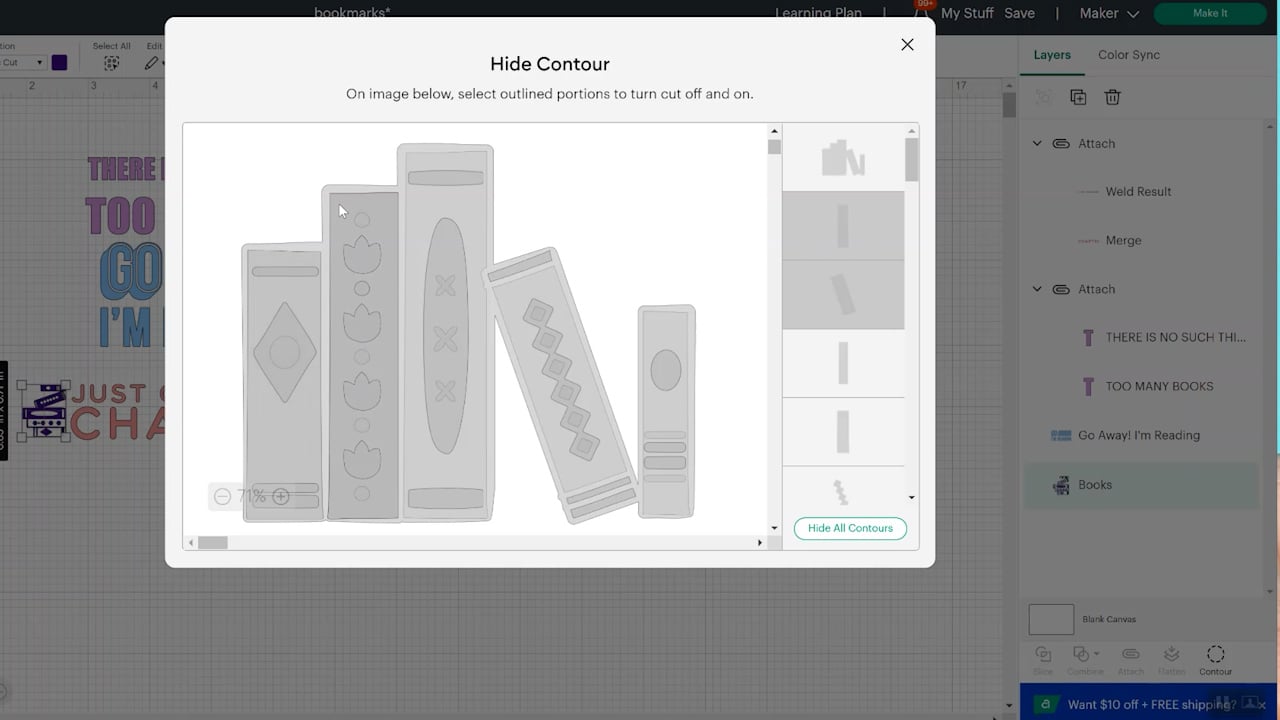
You can see in the image that the Contoured design still had one small piece that didn’t stay stuck down. You could go back in and contour out more pieces if you wanted. I’m okay with losing that one piece so I’m just going to use it. The overall cut is so much better than the other two options.
Choosing the Right Font
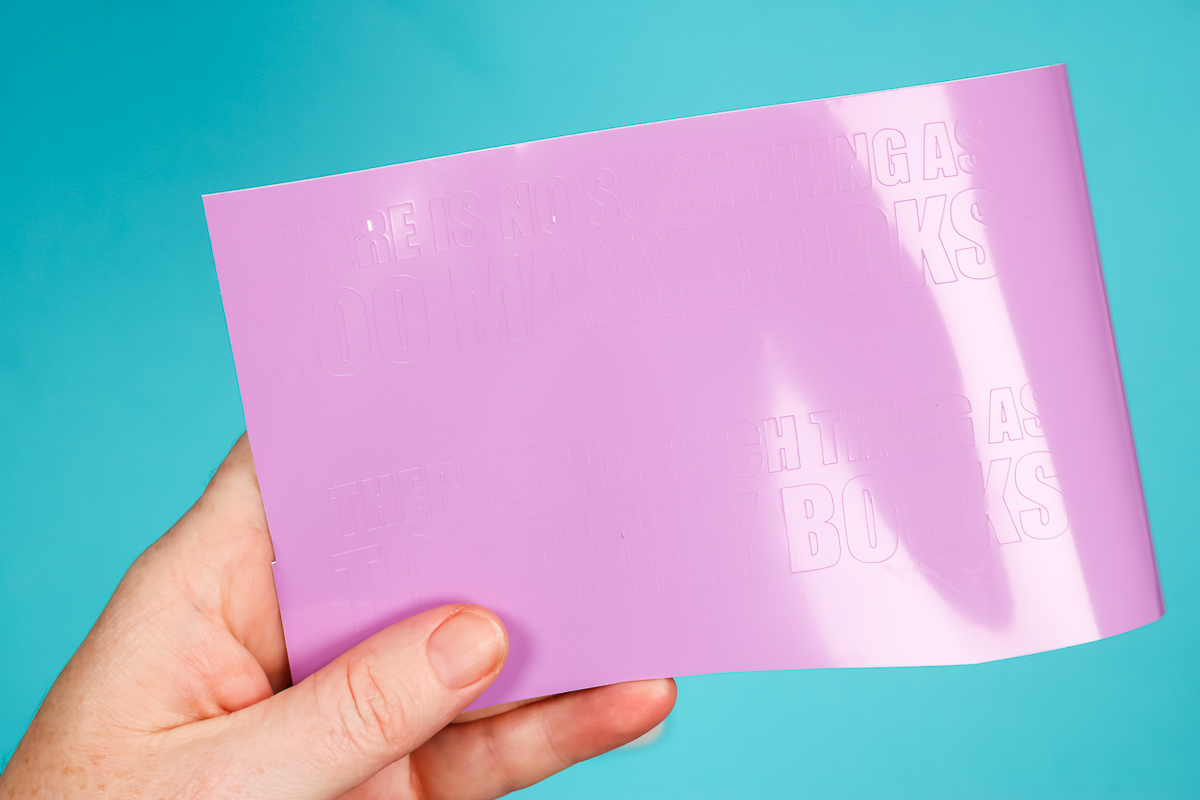
I do want to call out the importance of choosing a font that will work for the size of your project.
Fonts that have thin lines don’t work well when resized small. Those thin lines end up disappearing because the cut path of the Cricut will essentially just cut over the top of the previous cut when the line is so thin.
The best fonts to use when making a small design are thick, chunky fonts. You can see in the photo above that even small the Cricut machine has plenty of space to follow the cut path without the blade overlapping the cut lines.
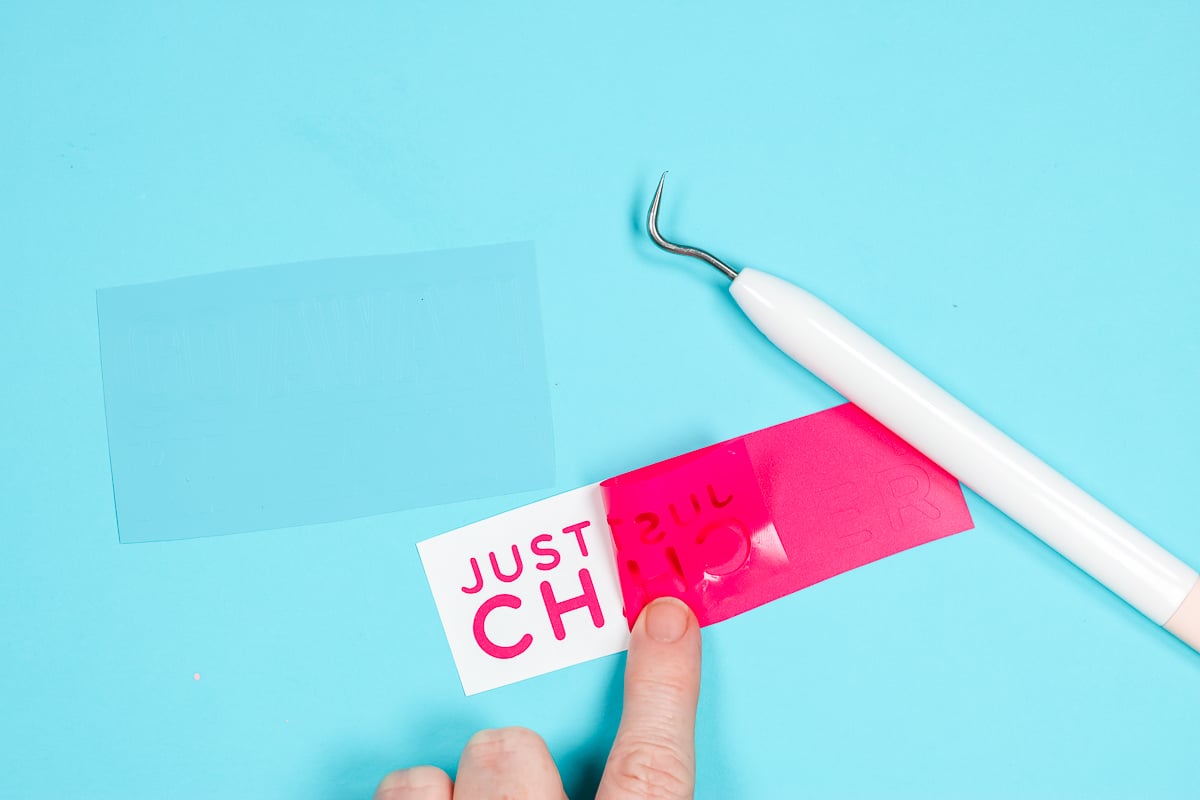
How to Weed Small Designs
When it comes to weeding small designs, I highly recommend you go slow. Even if everything seems to be weeding beautifully go slow to make sure the pieces of your design stay stuck down to the carrier sheet.
You may have to work your weeding tool around small letters or details to make sure they release from the vinyl you’re weeding away. Be patient, the smaller your design the more patient you will need to be.
Use a Weeding Box
If your design is large with a lot of small details a weeding box could be helpful. A weeding box helps decrease the amount of excess vinyl you’re dealing with. This helps decrease the chance that the excess vinyl sticks to your design and messes it up.
Learn more about weeding boxes and how to use them in my weeding box tutorial.
Reverse Weeding
An alternative to regular weeding is to use reverse weeding. This can be really helpful when working with small designs.
Reverse weeding is when you add Transfer Tape to the top of your vinyl before you’ve done any weeding at all.
Apply the Transfer Tape to the top of your design and burnish everything down really well with a scraper tool. You’ll then remove the backer material which will leave all of the vinyl on the Transfer Tape.
From here, you can use a weeding tool to remove all of the excess vinyl. Many people find this an easier option than traditional weeding, especially when dealing with really small cuts.
Traditional Weeding and Transfer Tape
For a more traditional transfer, you would add Transfer Tape to the top of a weeded vinyl design and then burnish the vinyl onto the Transfer Tape really well.
You’d then slowly peel back the liner making sure the vinyl is sticking to the Transfer Tape. If you’re new to using Transfer Tape, I have a post all about using vinyl and Transfer Tape that will help.
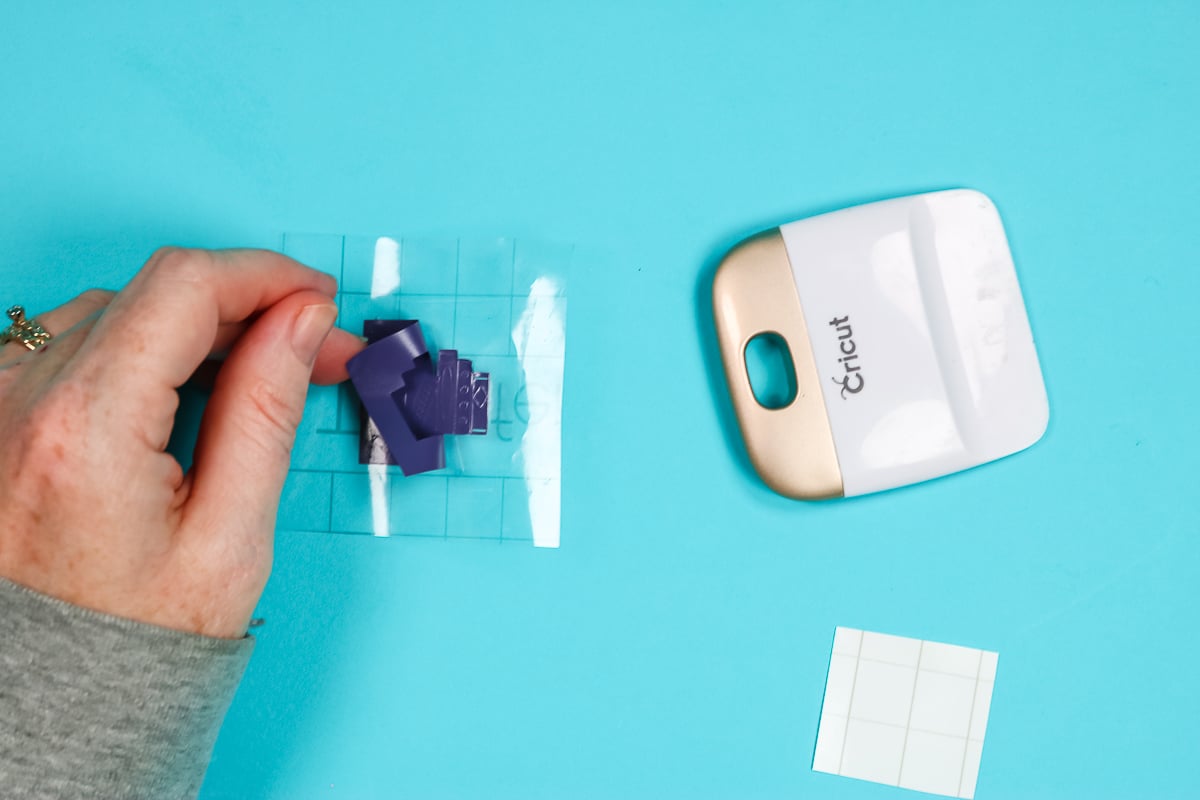
How to Apply Small Vinyl Cuts
Once you have your whole vinyl design stuck to the Transfer Tape it’s time to apply it to your blank.
Make sure the surface is clean, dust, hair, etc on the surface can create bumps and bubbles in your vinyl. Locate your design onto the surface (I’m using a clear acrylic bookmark) and burnish it down really well using your scraping tool.

Slowly peel back the transfer tape. I like to fold the transfer tape back onto itself going slowly making sure everything sticks.
Once the transfer tape is removed you can go over it again with the scraper tool. Burnish it well and make sure it’s stuck down everywhere. Now I can add the tassel and I have a finished bookmark ready for use or gifting.
Because I used permanent vinyl I will let this sit for 72 hours. This gives the adhesive time to adhere to the blank.
Final Thoughts on Cutting Vinyl with a Cricut Machine
Cutting vinyl with a Cricut machine is one of the most popular reasons people purchase a Cricut. With the right knowledge, it’s a fun process and results in great projects, even when using small, detailed designs.
I highly recommend doing a test cut before cutting out intricate designs and always taking your time and going slow. If you’re having trouble with your vinyl cuts, bookmark this page so you can come back and reference it.
I hope I’ve answered all your questions about cutting vinyl with a Cricut. Feel free to leave any additional questions in the comments and I’ll get those answered for you.