This post and photos may contain Amazon or other affiliate links. If you purchase something through any link, I may receive a small commission at no extra charge to you. Any supplies used may be given to me free of charge, however, all projects and opinions are my own.
Today, we’re going to talk about the Cricut AutoPress with sublimation. This is a part of a series all about the Cricut AutoPress. This machine is a big investment so I want to test it as much as possible before giving my final opinion. So, today I am making 10 different sublimation projects to see what will happen! You can also see my post on unboxing the AutoPress and its features here. Then I have a post here with 10 projects with HTV.
Cricut AutoPress with Sublimation
Click play on the video below to see me make all of these projects. Will all 10 work with the AutoPress? You can find out below!
Can’t watch the video or miss some of the steps? You can also follow along below!
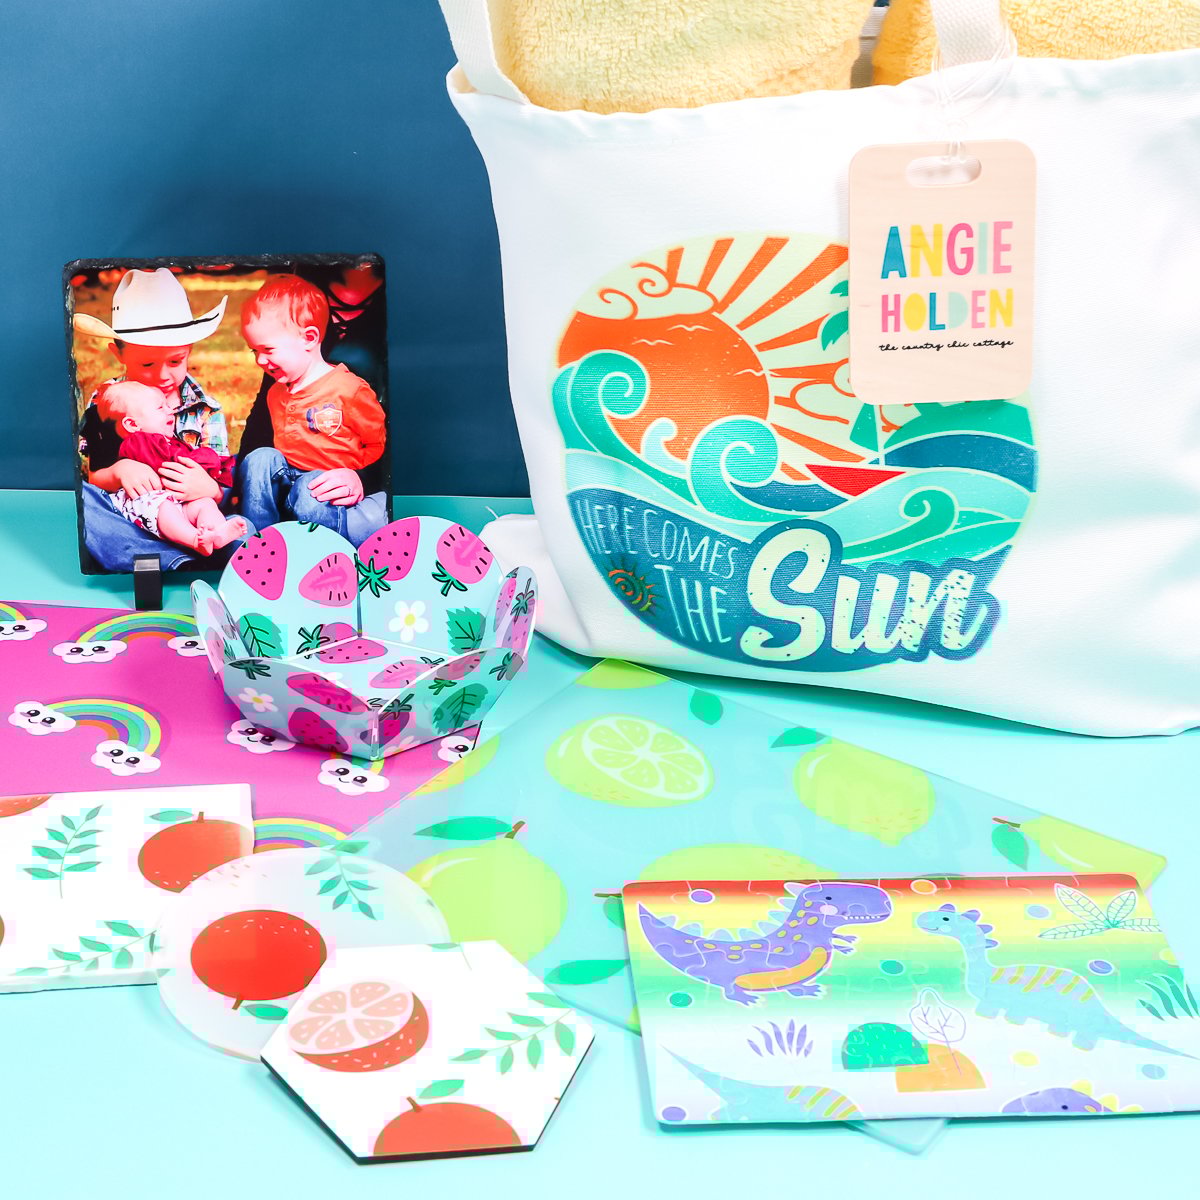
Supplies Used
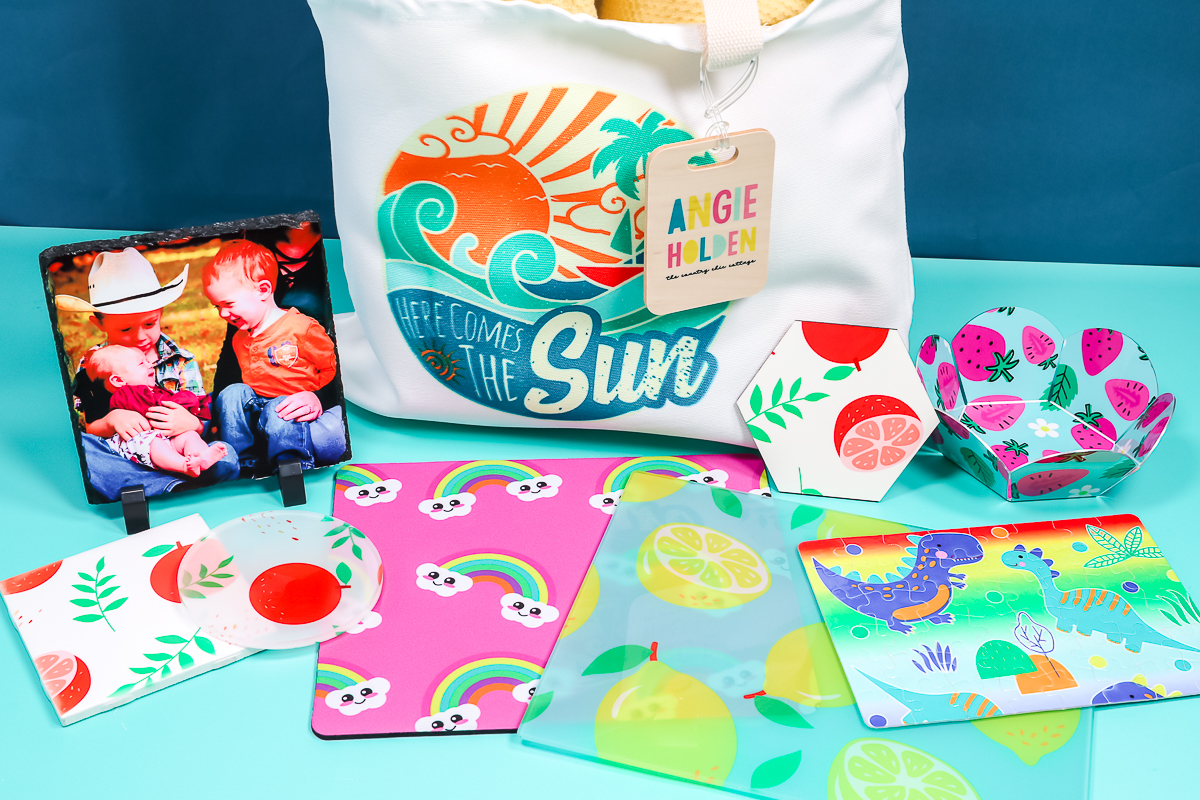
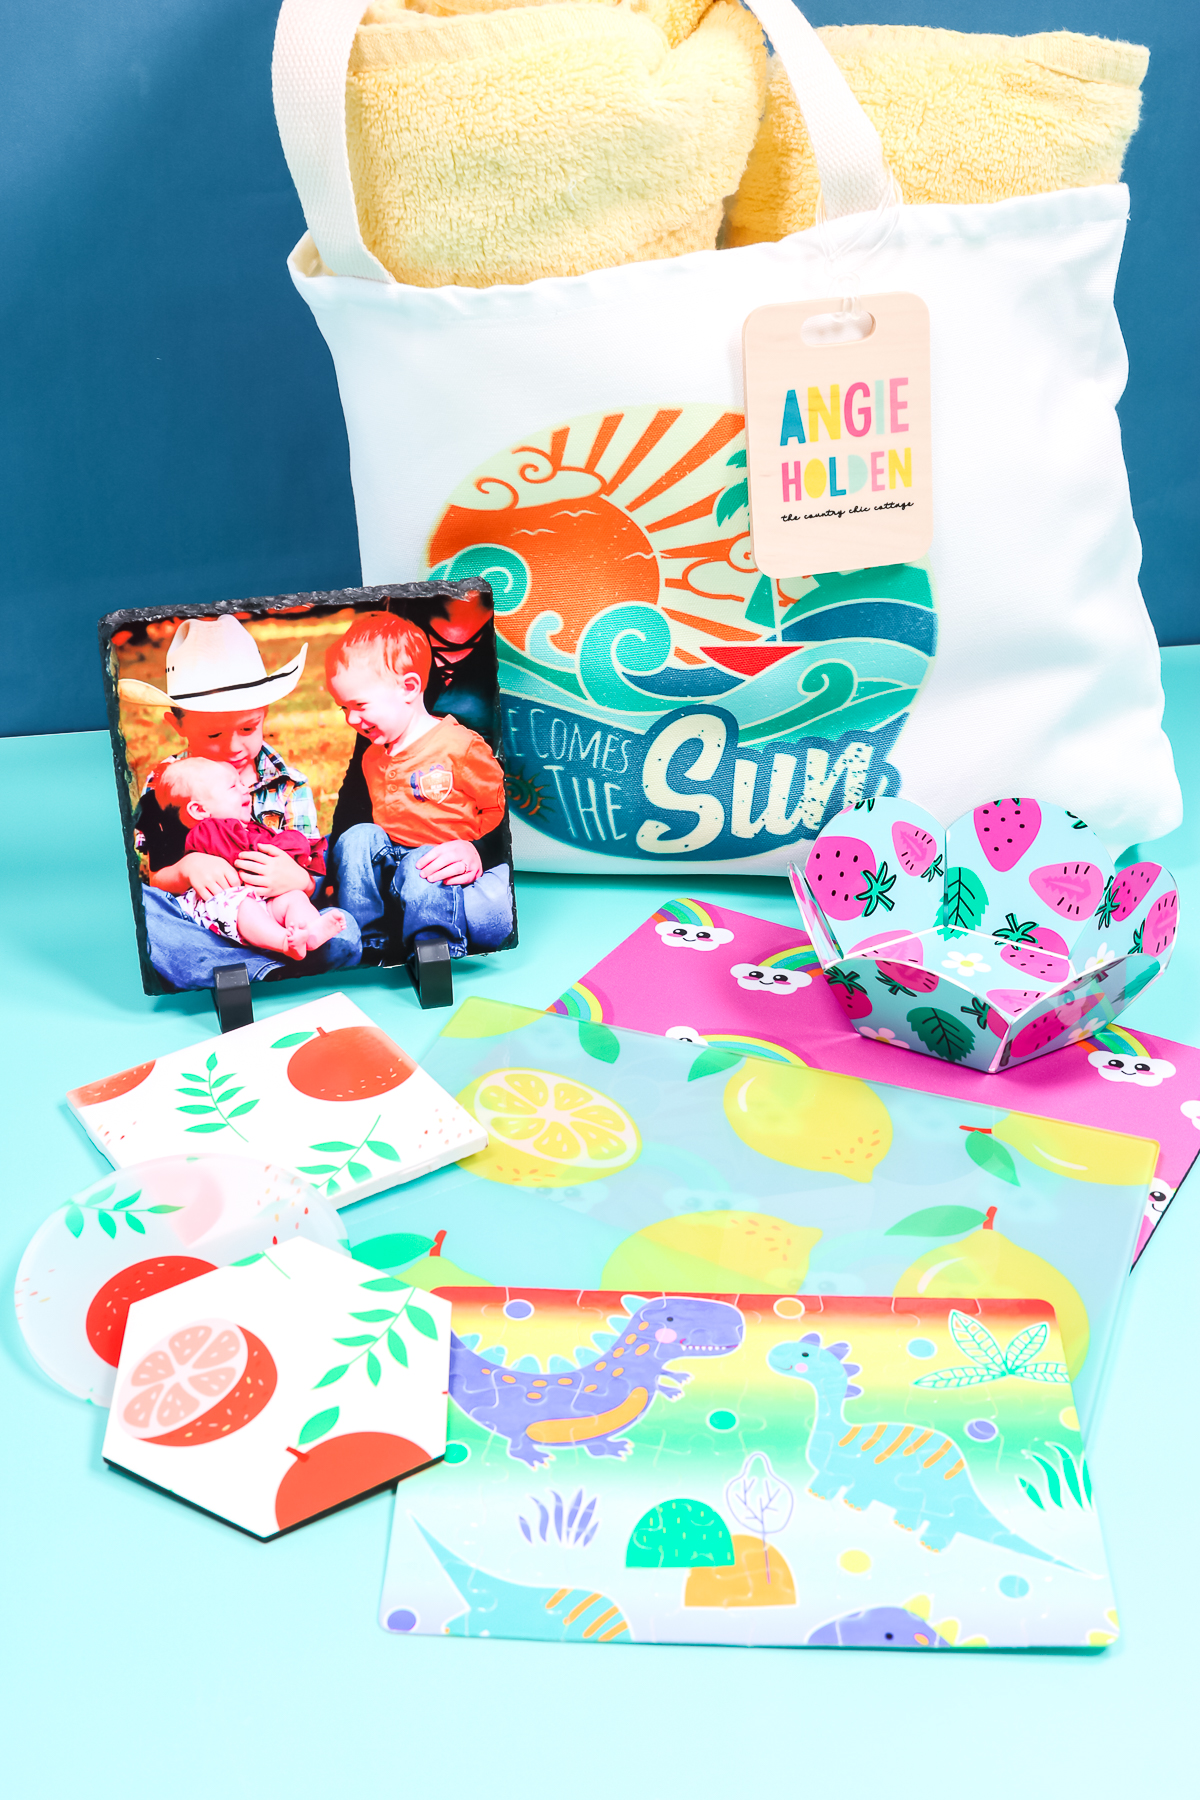
I tried to pick a wide variety of sublimation blanks and things that I did not use for HTV. These are also made out of a variety of materials including plastic, chipboard, slate, glass, acrylic, ceramic, canvas, and metal. Between all of these, we will find out if Cricut AutoPress with sublimation actually works!
NOTE: Not all of the extra items above are used with every blank. See my pressing notes for each blank below.
Blanks used:
Designs used:
Prepping Your Blanks
Regardless of the blank, you will want to be sure to clean well either with a lint roller or a lint-free cloth depending on the blank you’re using. You want to make sure to remove any lint or debris. For fabric blanks, you also want to make sure to pre-press.
For each of these, I’m going to use a sublimation print that is sublimation paper printed on a sublimation printer with sublimation ink installed. In all of these cases, I mirrored my print except for a couple. On the acrylic and the glass, you actually press the print to the back and it shows through the front.
Settings Used
Always follow the instructions that are for your sublimation blank. Wherever you purchase the blank, go to that listing first and see if they have any special instructions. What time and temperature do they recommend? Do they recommend any other equipment like a Nomex pad? Do they have any preheating instructions? Look at all of that before you begin your process. That will make you more successful with sublimation, no matter what press you use. If you can’t find instructions on the website, try our post here for other alternatives.
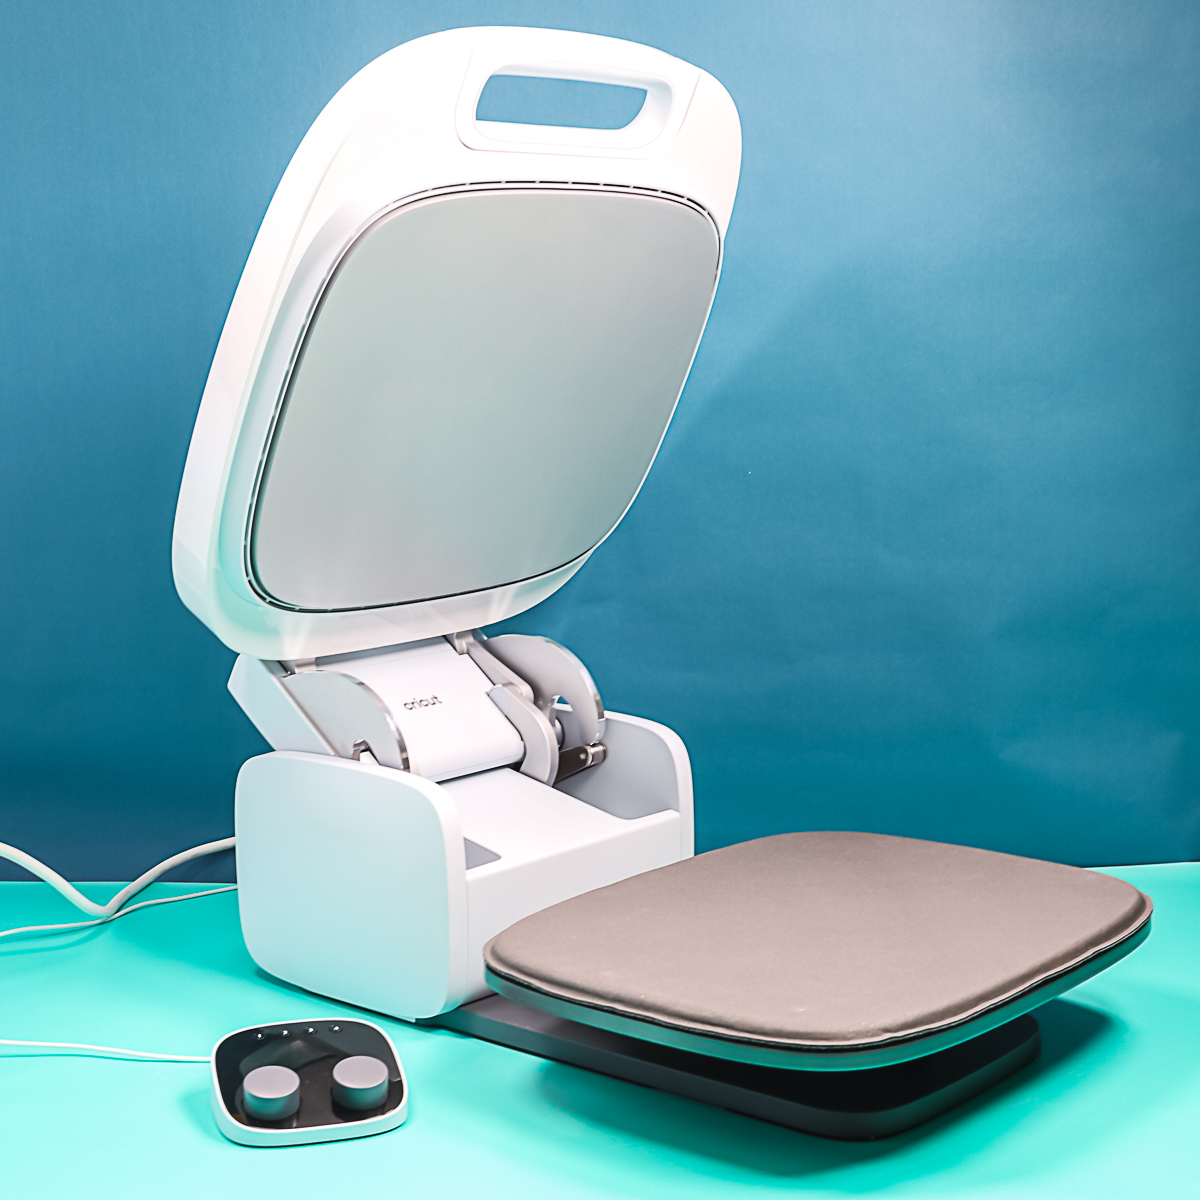
Pressing Sublimation Blanks with the Cricut AutoPress
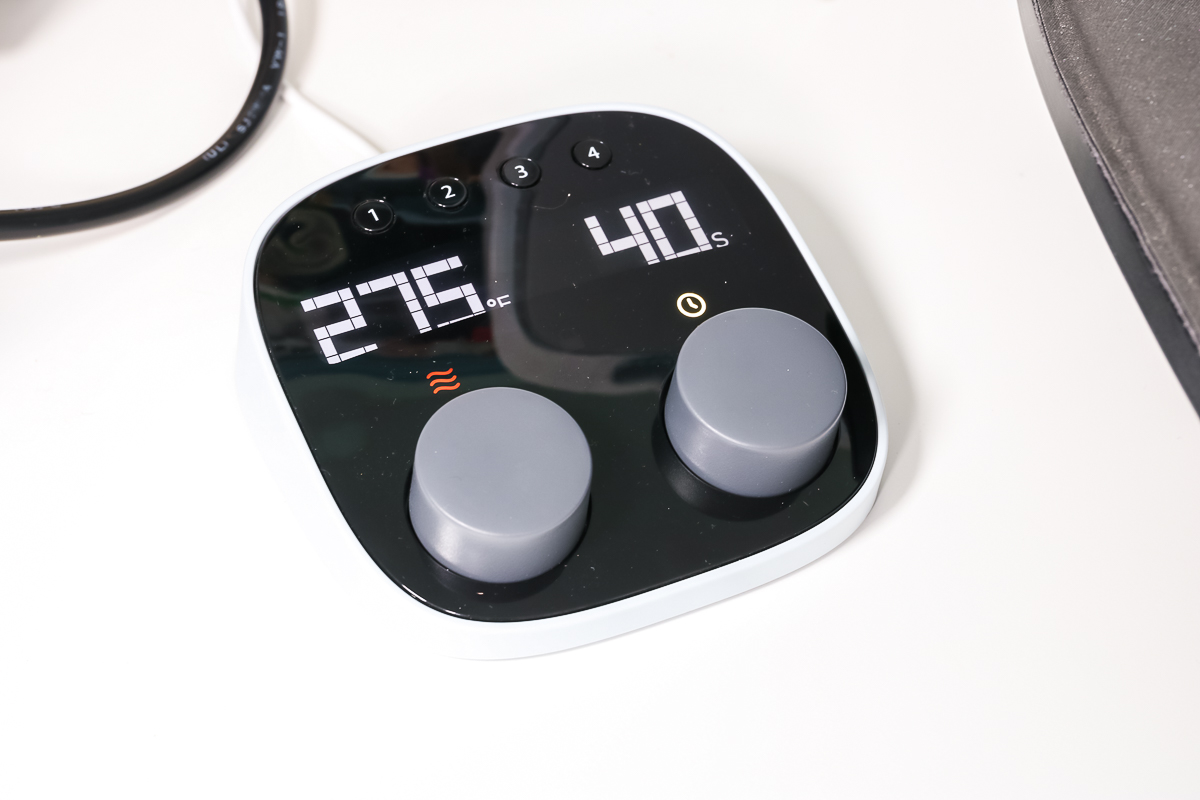
The Cricut AutoPress does take a while to heat up so be sure to turn it on and set your time and temperature. Use the dials on the control pod to set both then wait for the light to turn green before starting. Now let’s take a look at pressing each of these blanks!
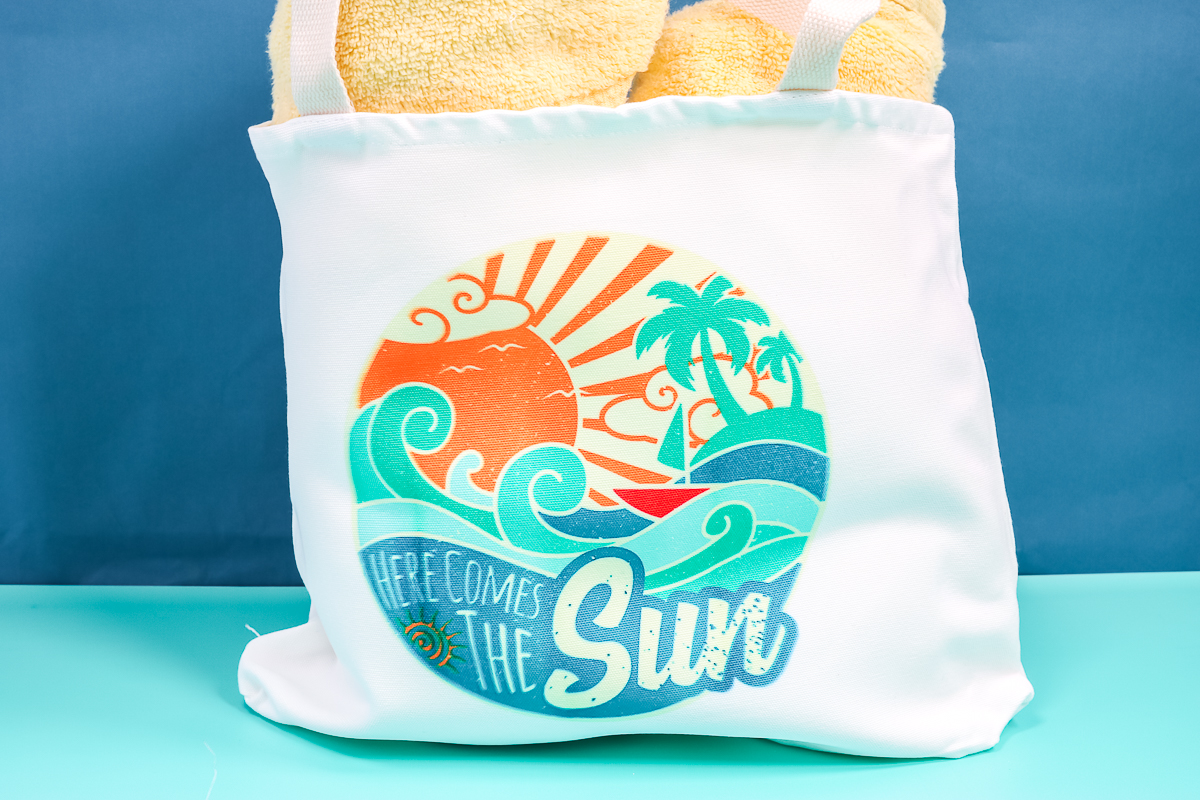
Sublimation Tote Bag
For this tote, I’m pressing at 400 degrees for 45 seconds. Preheat the blank to remove any moisture or wrinkles. Allow that to cool a few seconds, lint roll, put down the sublimation print, and tape it into place. I always use protective paper, both inside the tote as well as on the top. Because this tote has quite a few seams, you can either hang those off the sides of the AutoPress or put something like an EasyPress mat on the inside covered with some protective paper. Then press at 400 degrees for 45 seconds. Once that’s done, you’re ready to remove that sublimation print. Here is that sublimation tote bag with the sublimation print applied. You can see that the sublimation looks really, really great on this fabric tote bag.
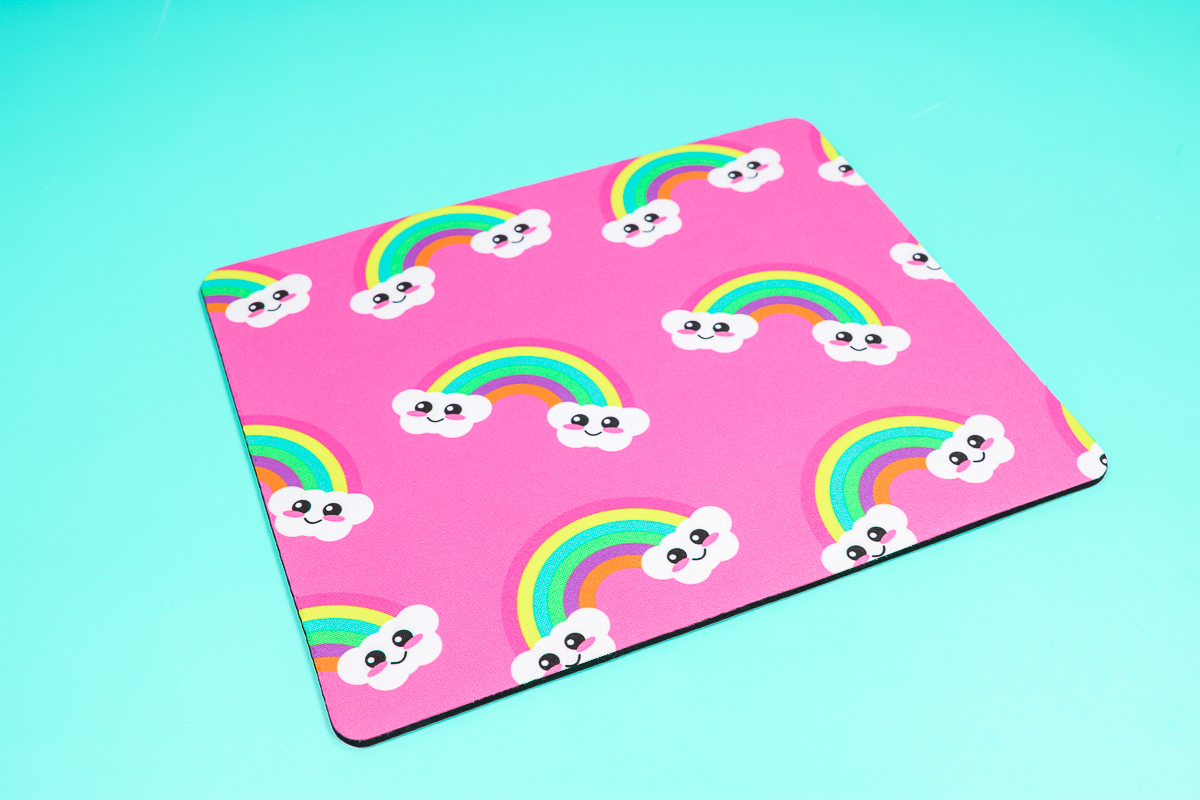
Sublimation Mouse Pad
For the mouse pad I’m pressing at 400 degrees for 60 seconds. For something like this mouse pad, I do like to make my print oversized. I like it to go extra around the edges. That means you want to be absolutely certain that you put protective paper underneath and on top of the mouse pad. Preheat, lint roll, add your print, then protective paper, and press at 400 degrees for 60 seconds. Then remove the sublimation print once it cools a bit. You can see that the sublimation looks great on it as well. The colors are bright and vibrant with no ghosting.
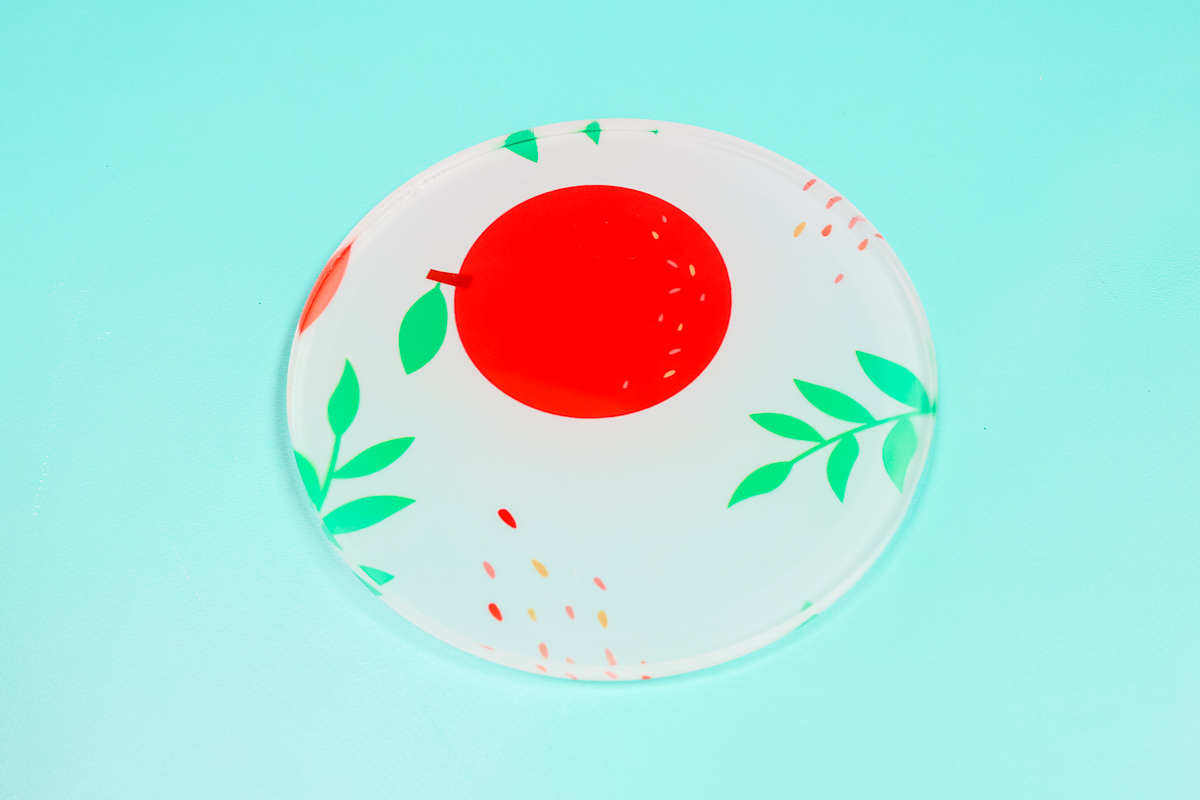
Sublimation Acrylic Round Coaster
Next is the acrylic round coaster and it presses at 400 degrees for 60 seconds. Again, with something like this, you don’t have to mirror because you are pressing from the back. Clean the coaster well and tape your print into place. Add it to the AutoPress with protective paper on the top and the bottom. Your sublimation print should be on top. Press for the full time at the correct temperature. Then, remove it, allow it to cool, and remove the sublimation print. Remember the sublimation print is on the frosted back on this one. This is what it looks like from the front. You can see the sublimation print through that clear acrylic. However, you can also see the background I have it on a bit through the frosting.
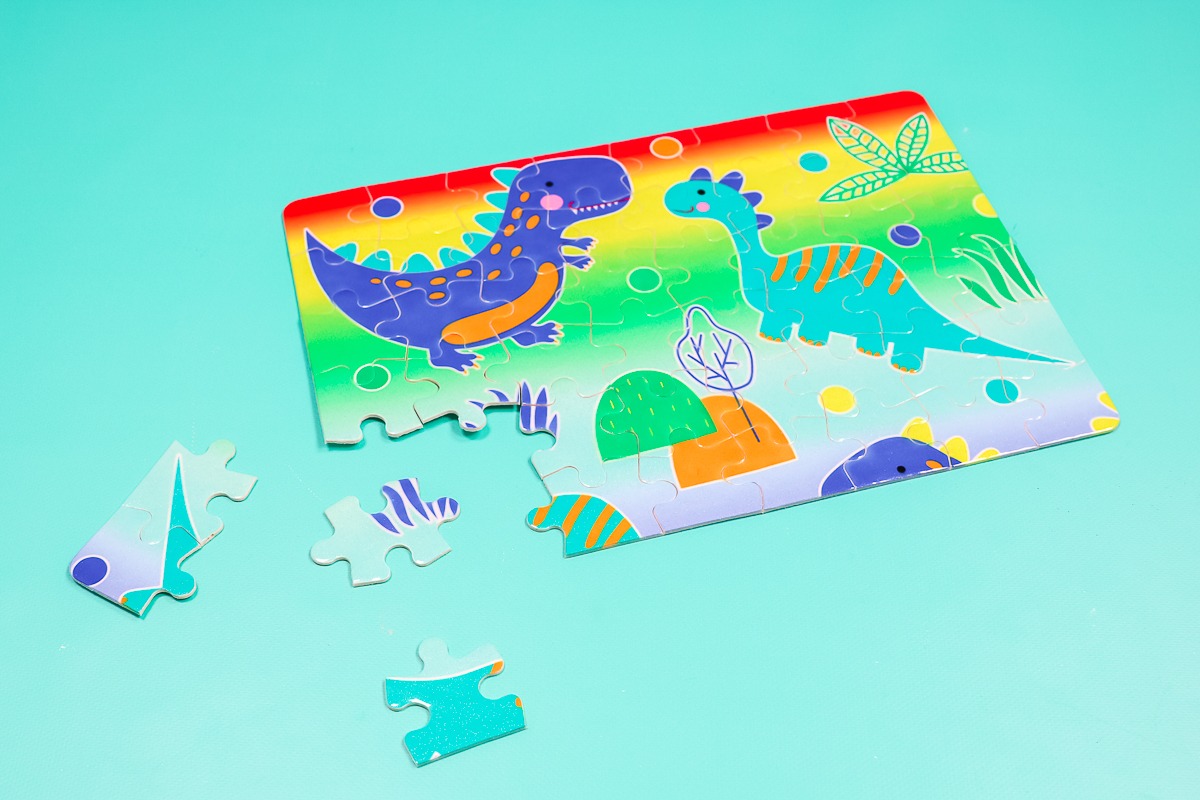
Sublimation Puzzle
For puzzles, clean them with a lint-free cloth and add a sublimation print with some tape. Press them at 380 degrees for 50 seconds. I did find for things like the puzzle that the Nomex pad under the sublimation project worked better than the pad that comes with the Cricut AutoPress. I found that the heat was more consistent because the Nomex pad does not give as much. Press the puzzle at the right temperature for the full time then remove it. I can remove my sublimation print after it’s cooled down a little bit. This is a chipboard puzzle with a dinosaur print and everything looks great. No fading around the edges or anything.
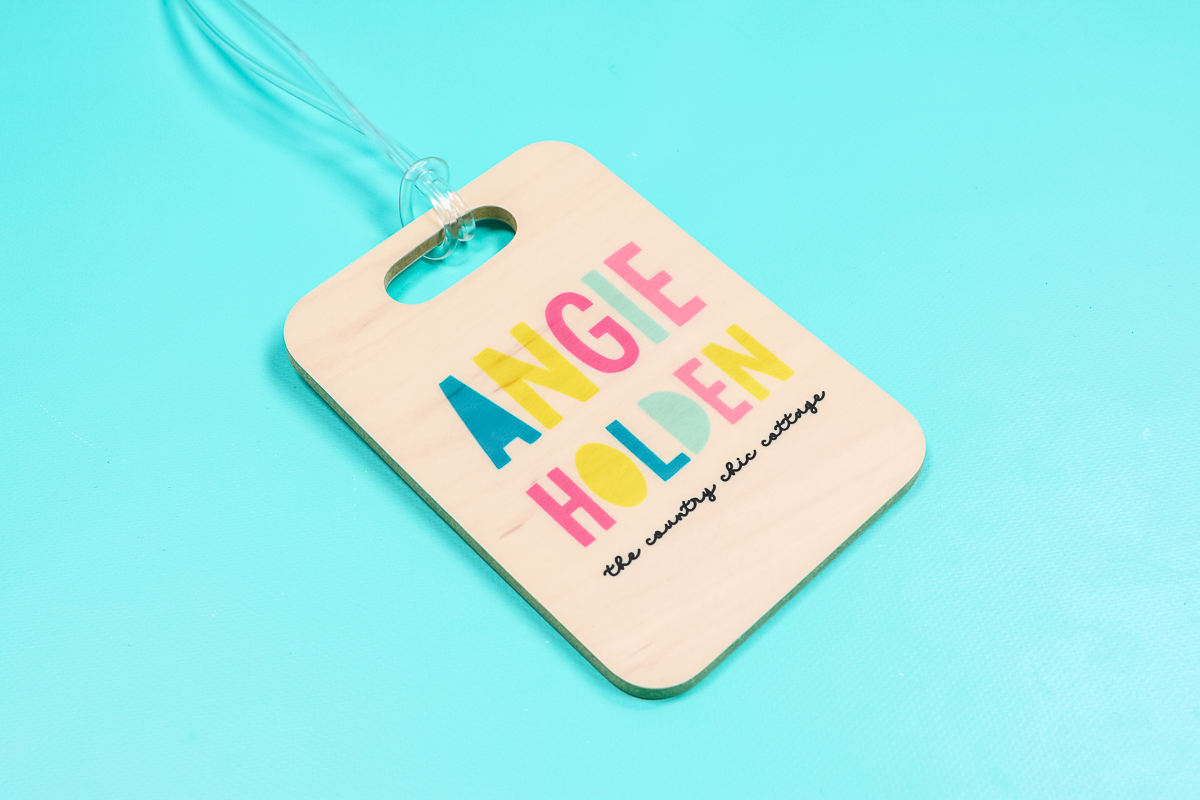
Sublimation Luggage Tag
For this bag tag, I’m going to add my logo. Clean the tag, put on a sublimation print with tape, add protective paper to the top and bottom, and press at 400 degrees for 60 seconds. Then, just remove it, allow it to cool, and you can take a look at your design. Here’s that bag tag and it looks great with no ghosting or anything like that.
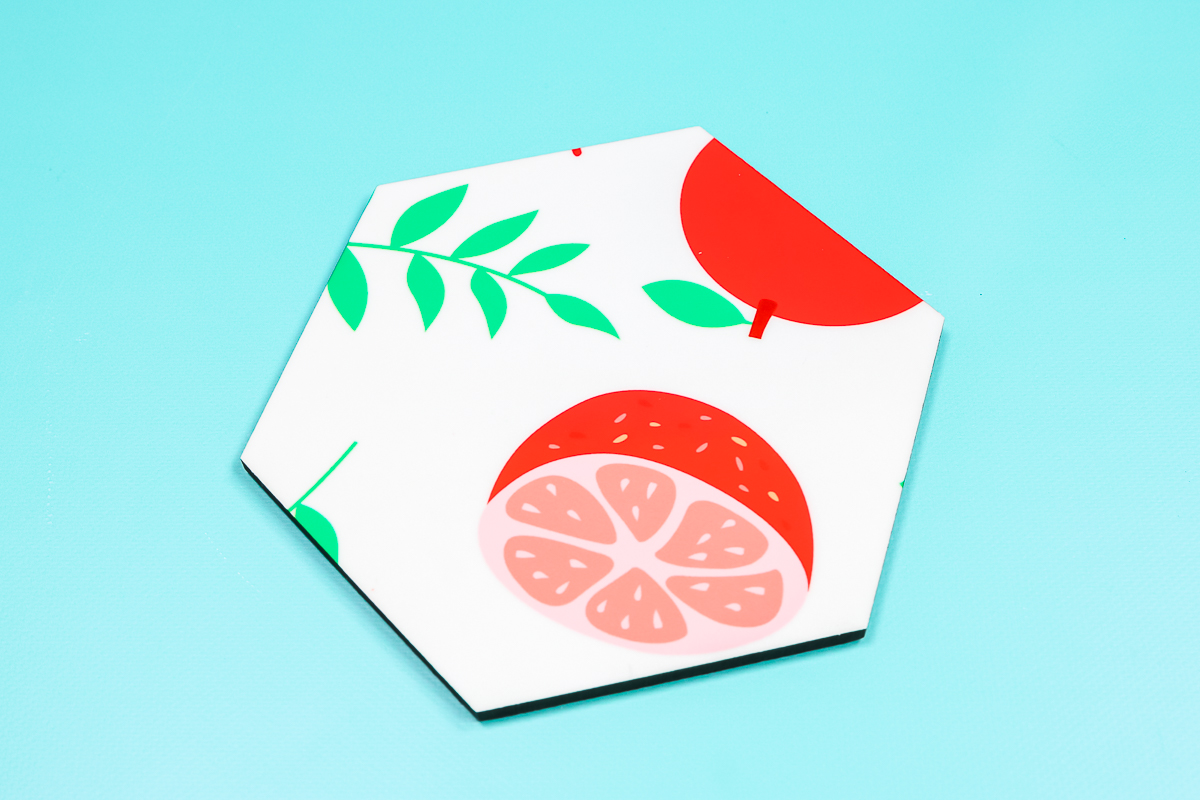
Sublimation Chipboard Coaster
This hex coaster calls for medium to firm pressure, so I am excited to see how this one turns out. I lint rolled the top, added my sublimation print with some tape, and added it to the AutoPress with protective paper on top and bottom. Press it at full time at the correct temperature and remove the sublimation print once it cools off a little. This one looks really great, even around the edges.
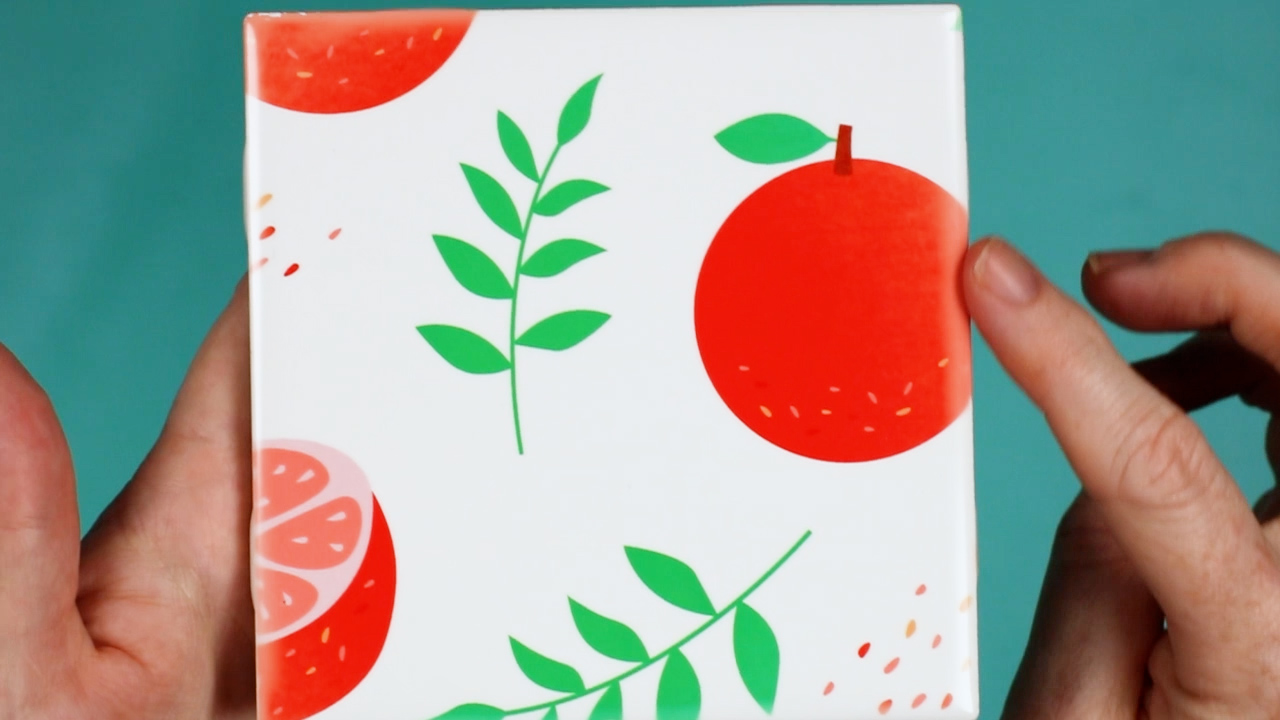
Sublimation Ceramic Tile
The ceramic tile does call for the Nomex pad on the bottom. I’ve added it to the Cricut AutoPress. Clean the ceramic tile and add a sublimation print with some tape. Put it into the AutoPress with protective paper on the top and bottom. This one also calls for a green pad across the top. The green pad helps distribute the heat evenly even if the surface might be a little uneven. Once this tile is done, remove it with heat-resistant gloves, allow it to cool, and peel back that sublimation print. With that same print, I have the sublimation tile. Remember that a regular tile will not work for this. You do need a sublimation tile. The print on this does look really great, but you may notice some fading around the edges. These tiles are beveled on the edge. I tend to get some fading no matter how I press them. Maybe I just need more practice or maybe they’ll always be like that, but I don’t think it indicates an issue with the Cricut AutoPress with sublimation.
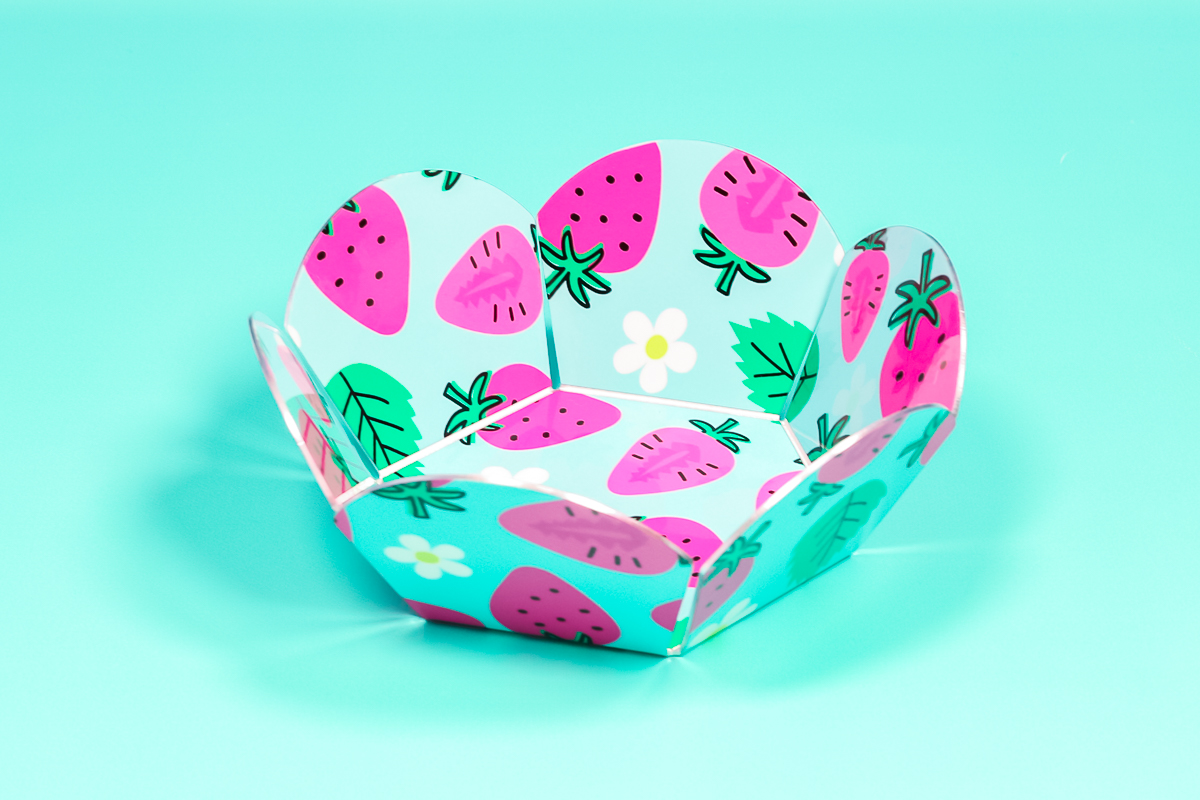
Sublimation Metal Bowl
Next, I’m going to do a metal piece. This one calls for the Nomex pad on the bottom, but it calls for it to be preheated. I will cycle the AutoPress a few times making sure the Nomex pad is hot. In this case, I’m doing the front and the back of this metal piece at one time. Clean both sides and add a sublimation print with tape to both sides. Once that Nomex pad is hot, press at 385 degrees for 120 seconds. Again, I added protective paper to the top and bottom. Press then remove the piece and allow to cool for a few minutes.
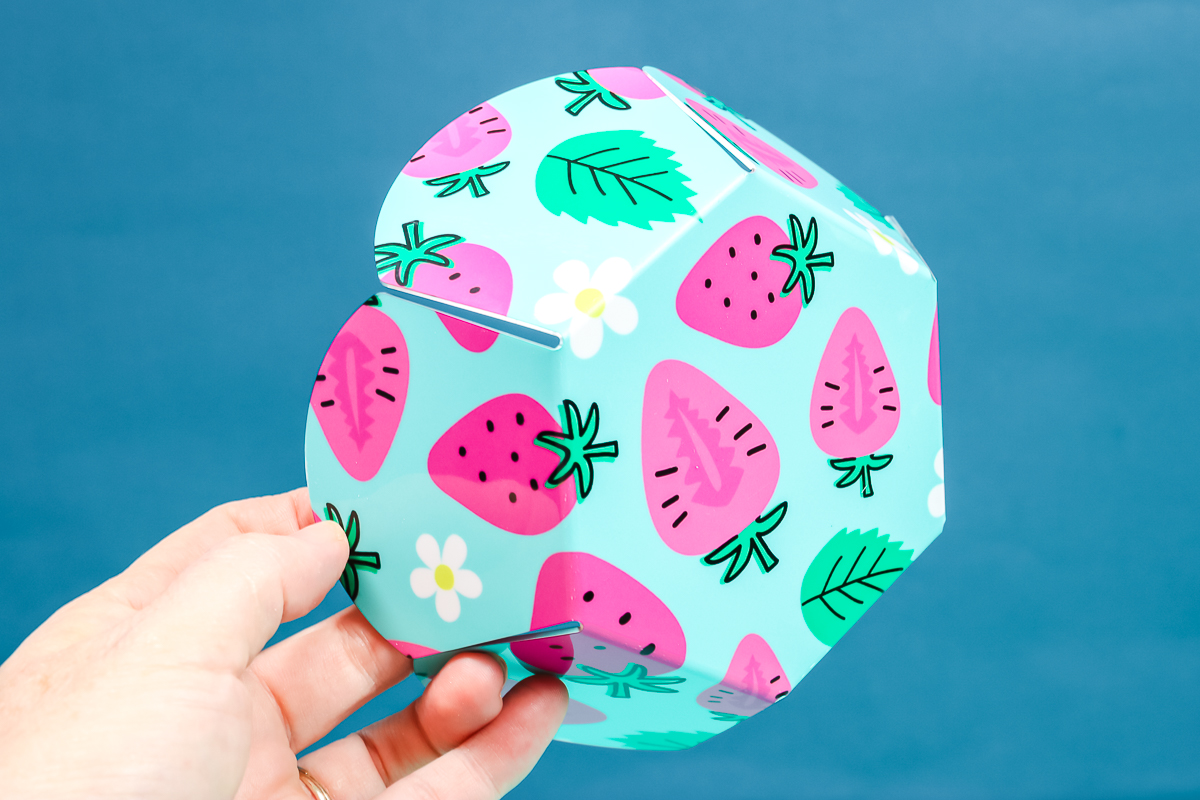
Let’s talk a little bit more about how to finish this one. Remove the sublimation print. Then bend each of the sides on the scoreline. Bend each leg up evenly until they touch. Then you have a little metal bowl that you can use in your home’s decor. You can see just how awesome the strawberry print is and how great it looks on this white metal blank that I pressed with the AutoPress.
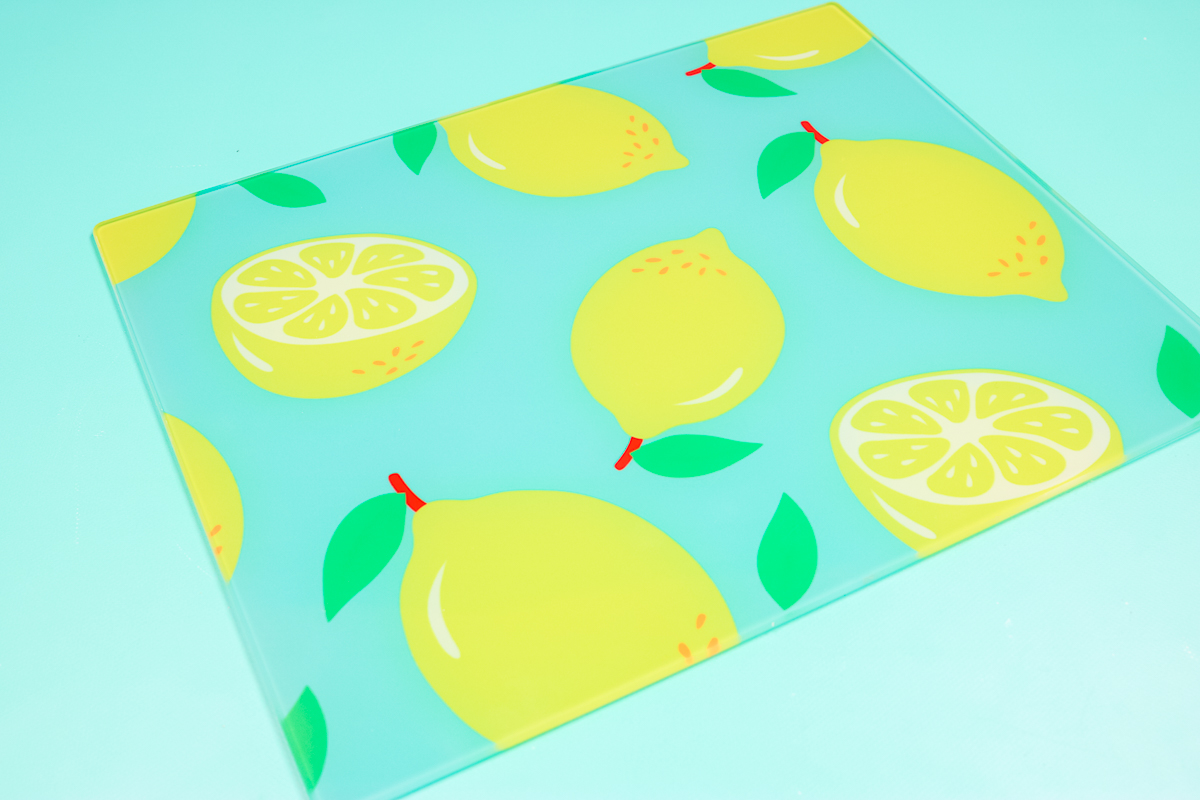
Sublimation Glass Cutting Board
This glass cutting board actually calls for heavy pressure. We’ll see what happens. I put my Nomex felt pad inside of the AutoPress. This one is 400 degrees for 5 minutes, so it does take a long time. You want to put your print on the white side. Again, you don’t have to mirror. It didn’t matter in my case, but you would not have to mirror because it is going to show through the front. Clean the surface and add your print with tape. In the press, you want your Nomex pad, protective paper, your sublimation print, your glass cutting board, more protective paper, and then press with your AutoPress. Yes, the sublimation print goes on the bottom. Press it at 400 degrees for 5 minutes, then remove it, allow it to cool, and remove your sublimation print.
Even though this one said it required heavy pressure, it looks amazing. You can slightly see through it. Remember, sublimation ink is translucent so you can see through it. I love this pattern and I love this glass cutting board.
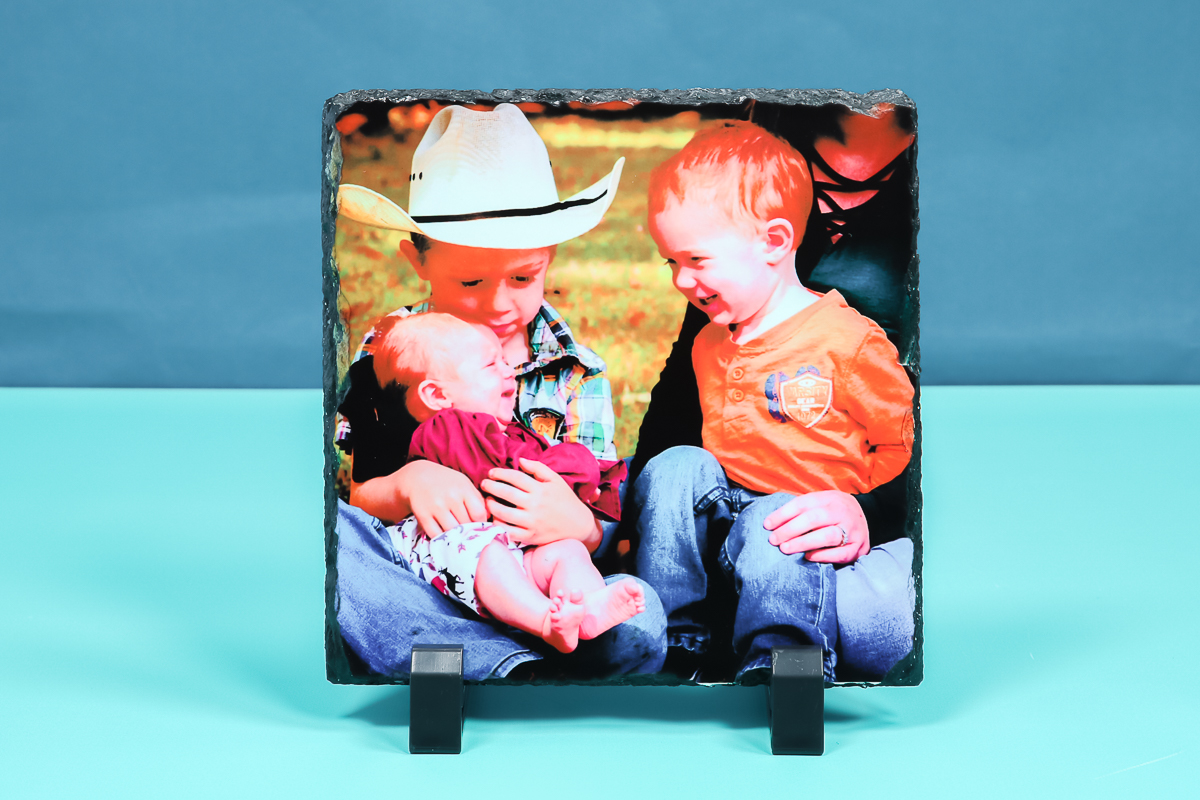
Sublimation Photo Slate
Finally, I have a slate sublimation blank. Slate is kind of tricky to sublimate, so we’ll see what happens. I am going to sublimate a photo to this. I’ve mirrored my design and put it on a clean slate sublimation blank with some tape. This one is 400 degrees for 8 minutes, and I will be using the green pad on top. It does call for medium pressure, so we will see how this works with the Cricut AutoPress. Once it is done pressing, remove it from the press and allow it to cool on a heat-resistant mat. These take a very long time to cool down.
Then remove the sublimation print as well as all of the tape. Sublimation on slate is one of the toughest things that you can do with sublimation. This one turned out great. The print turned out just like I imagined it. I did get a few white spots way at the bottom. That’s where I didn’t get my print exactly centered. I had it up a little bit too far. Otherwise, the print looks great. It looks even all the way across, which is something that’s hard to get with slate. The Cricut AutoPress did a great job with sublimation on a slate.
Nomex Pad versus AutoPress Pad
All of the projects did great, and I’m super impressed with the Cricut AutoPress with sublimation. I found the Nomex pad worked better than the pad that comes with the Cricut AutoPress for sublimation. I found with the AutoPress pad, it indented too much and it would leave the edges where the sublimation print was a little bit faded. If I used the Nomex pad, it’s firmer, so it didn’t indent as much when it pushed down. It held that sublimation blanks up more, and I got a better press. For me, I’ll probably use the Nomex pad on most of my sublimation within the Cricut AutoPress, except for maybe fabrics.
My Favorite Project
I actually didn’t think that the cutting board would work because it was with heavy pressure. and I was also unsure about the slate. I saved those until last, but they both turned out looking really good. And I couldn’t have asked for any better of a press with either one of those. I’m super impressed with that. The bowl is probably my favorite with the little strawberries. I love the strawberry print, and I love these metal blanks that can fold up into different shapes. I’ve used a couple of different varieties now, and they are one of my favorite things to sublimate. You can make a 3D object with sublimation and just a heat press.
What is your favorite sublimation project that I did? Was there anything that was missing that you thought you wanted to see from this video and didn’t get to see? Were you surprised by my Cricut AutoPress with sublimation results? I will be doing even more videos on the Cricut AutoPress, using it for different projects and different crafts so stay tuned!