This post and photos may contain Amazon or other affiliate links. If you purchase something through any link, I may receive a small commission at no extra charge to you. Any supplies used may be given to me free of charge, however, all projects and opinions are my own.
Sublimation printer settings are something that I get asked about a lot! Everyone seems to want to know about sublimation color correction. This time I’m going to do it a little bit differently. I have a past post where I talked about color correction and ICC profiles, and I get so many comments from people struggling with color and their sublimation printer. You really don’t understand the print settings. You don’t understand how to fix it. I’m here to help today. We are going to talk about manual color correction within your print settings and hopefully, this will help you to fix those colors for good!
Sublimation Printer Settings
You can click play on the video below and watch what I do to get my printer settings for sublimation. Then you can try to find these on your own computer to dial in what works best for your situation.
Can’t watch the video or miss some of the information? You can also follow along below.
Supplies Used
PC vs. Mac
I am going to use a PC for the information below. I am assuming that the settings are similar on Mac, but I don’t have one to show you. Also, I can’t answer any questions about how you do this on a Mac. Hopefully, this will give you the information you need to do manual color correction, and experiment with your colors.
Why do you need color correction?
What happens when you convert an Epson EcoTank printer? The printer itself is adjusted to inks that are for inkjet printing. We are converting that to a sublimation printer with sublimation ink, and that may not print the colors the way you want them due to the difference in inks. With those converted printers, sometimes you have to do some color correction. A simple way to do that is to go to your ink manufacturer, get a customized ICC profile for your printer paper or combination, and use that. Sometimes that looks amazing and sometimes it does not. If your colors are still off, keep reading for another option!
Issues with Finding Printer Settings
Most likely, if you just open an image on a PC, it’ll open in something like Photos. If I go to print in this program, there are not a ton of options. If you see a screen that looks like the one below and you can’t find all the settings, you need to look for another program to open your images. To do that, you can right-click on any image and click “open with” to find other programs that open images that are on your PC. A program that is on just about every PC is Paint and you can do all of the settings I will be showing in Paint. I’m going to illustrate the process in both Word and Cricut Design Space because those are common programs that people use to print sublimation designs.
Using Word for Sublimation Printing
To print using Word, open a blank document and click “insert” then choose “picture from this device”. Find the image that you want to print and insert. I usually right-click the picture, do “wrapped text” and do “in front of text”.
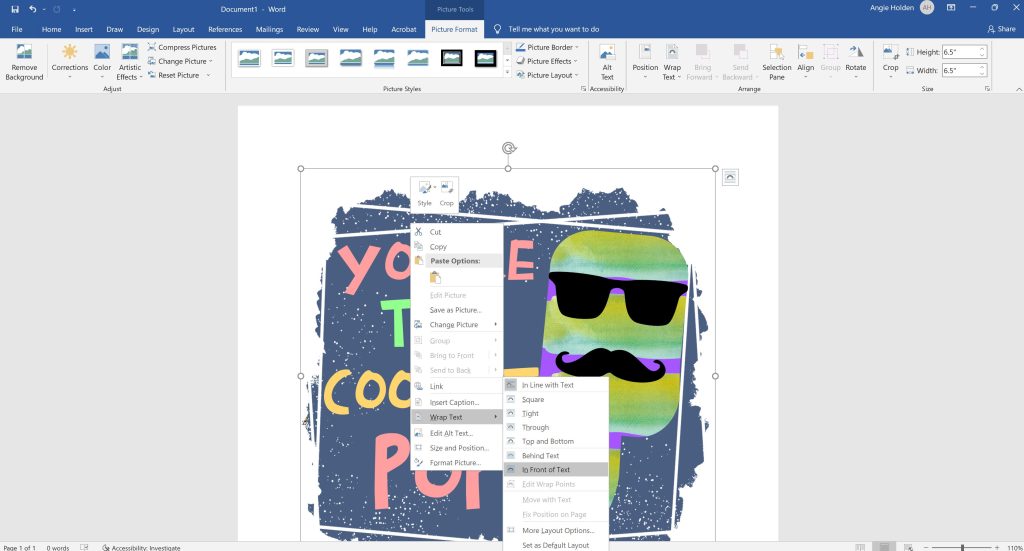
Then grab the corner of the picture and you can resize it. If you want the exact size, you can type it in the corner. I made this example 5 x 5 inches. Then click “file” and “print”. Once you click “file” and “print”, you should see something like the image below. Pick your sublimation printer and click “printer properties”.
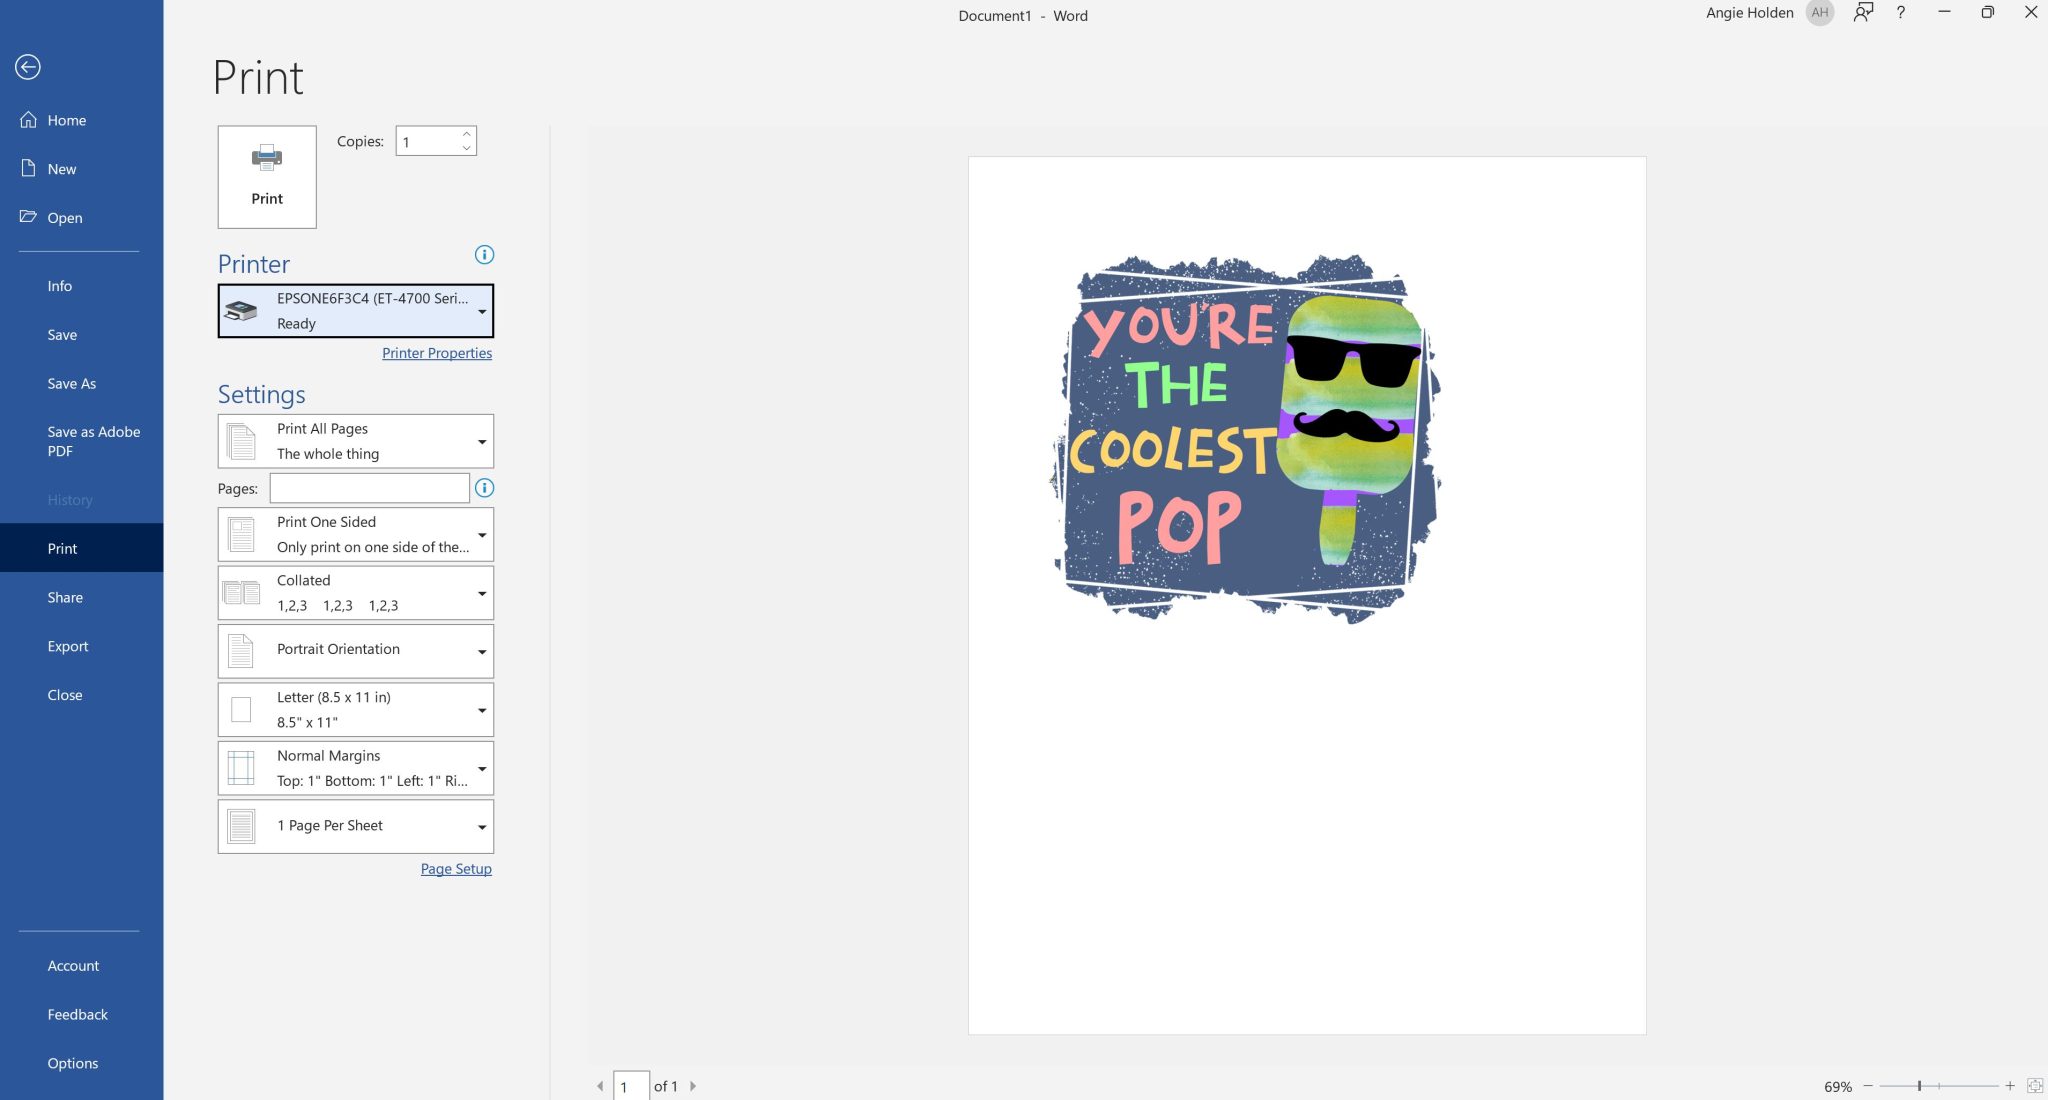
Printer Settings in Word
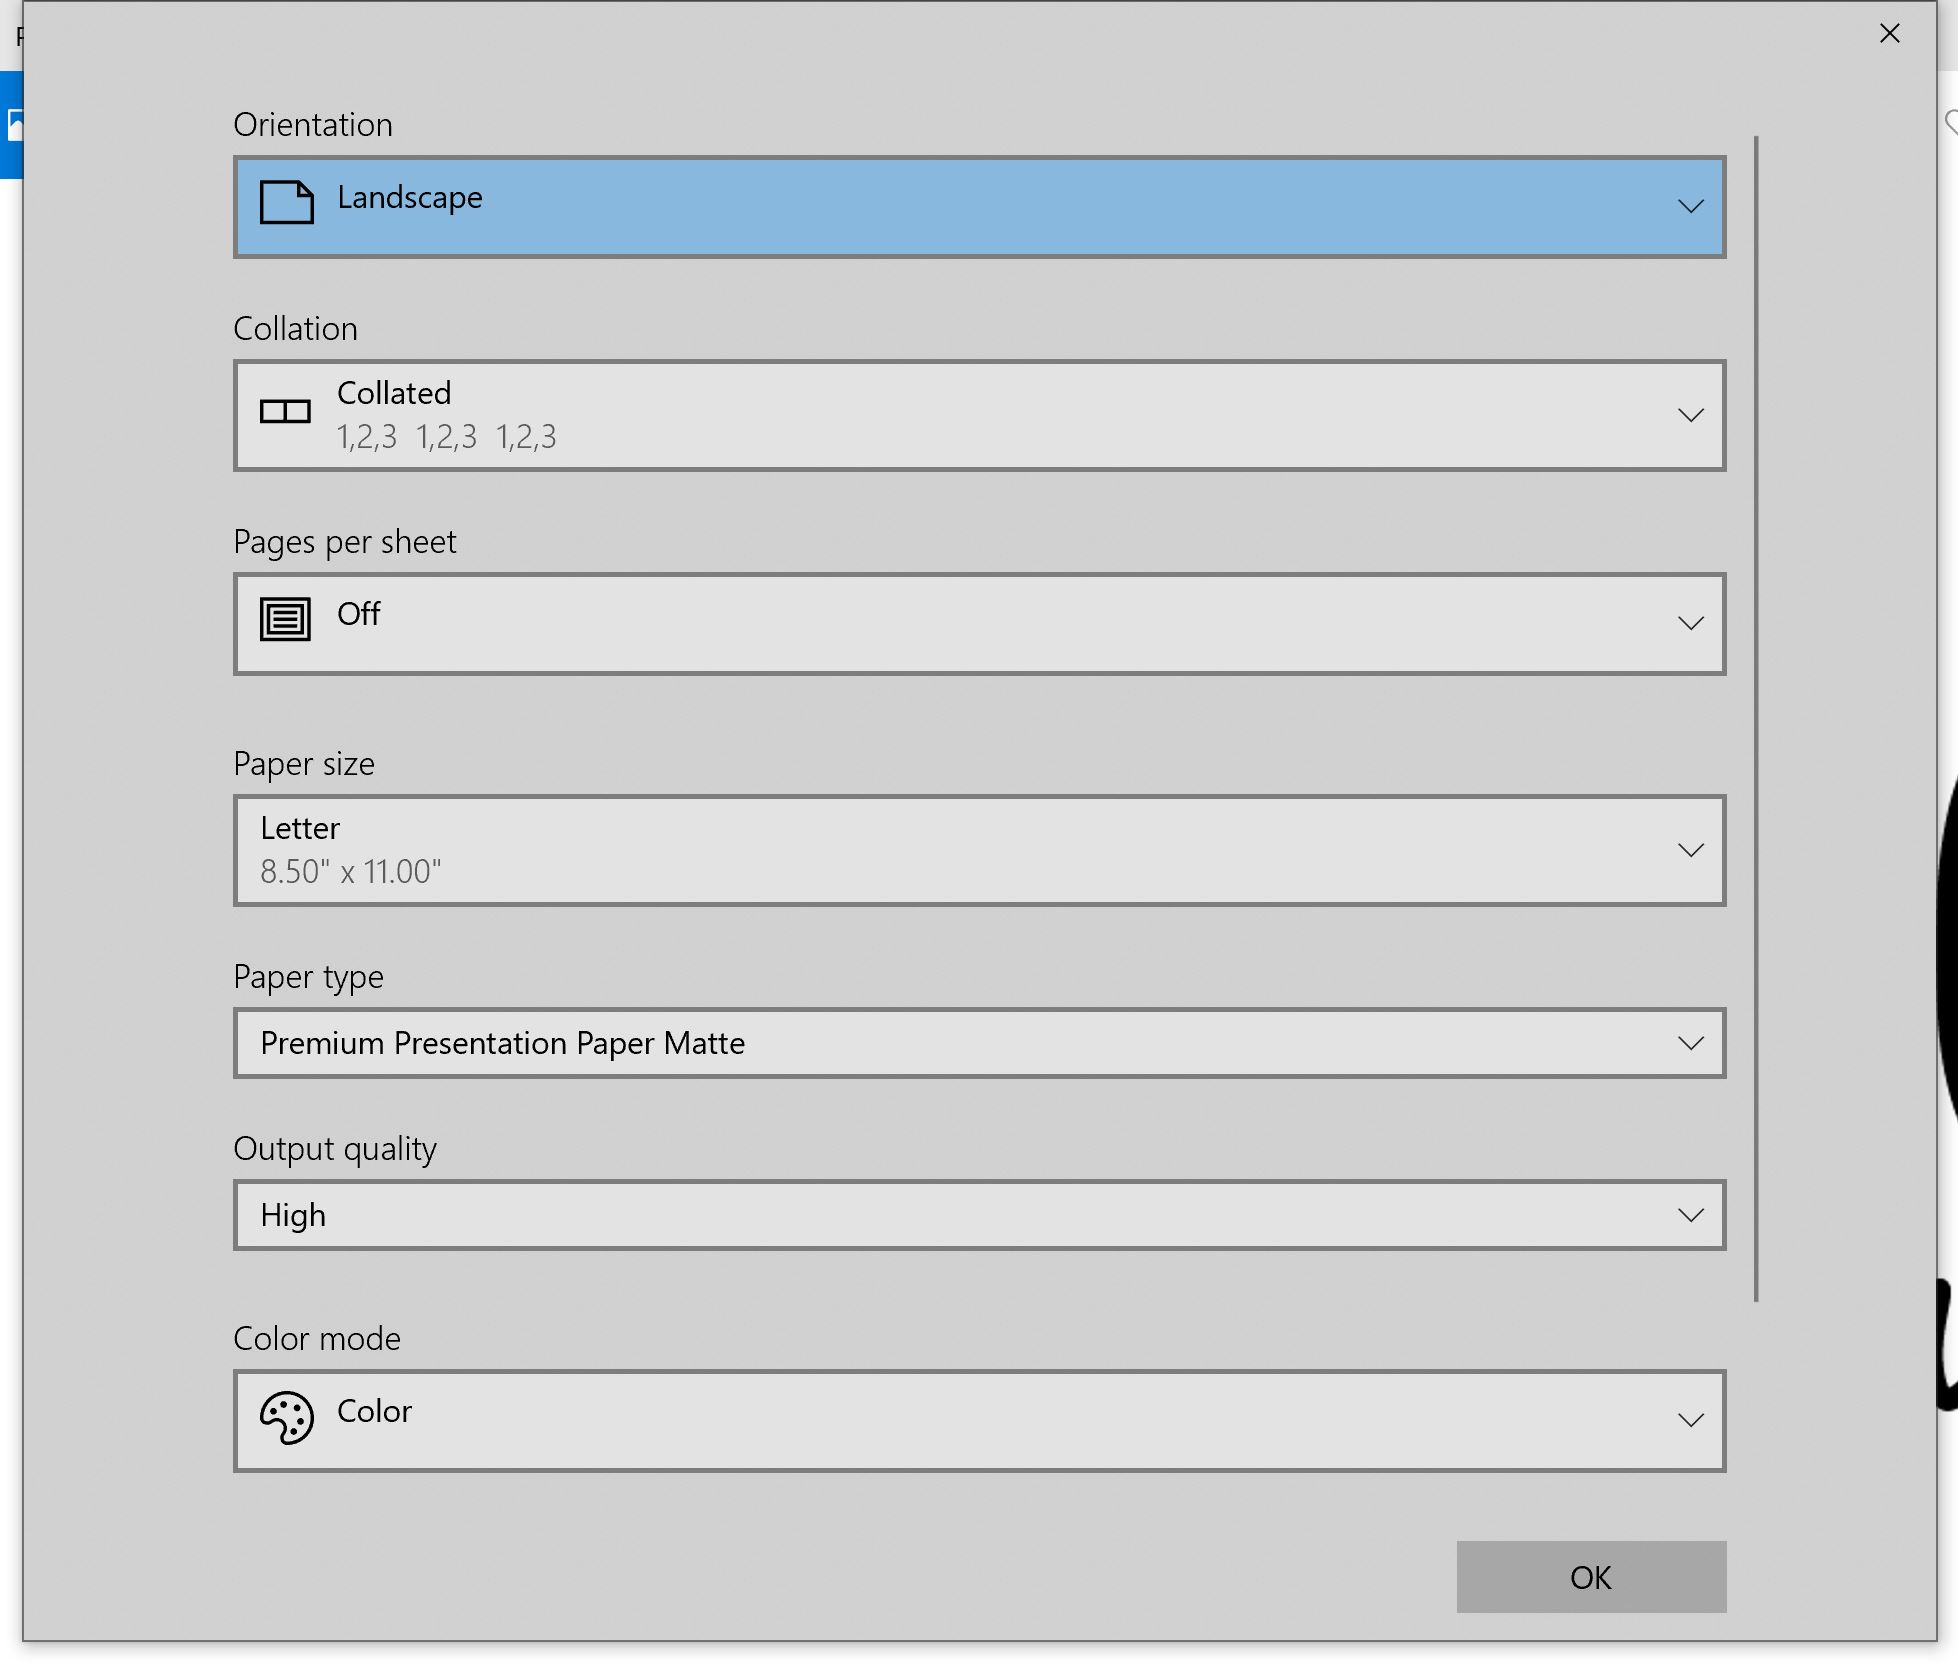
This is the screen you want to see when you print with your sublimation printer in order to get the settings we’re going to talk about. The first thing I want you to do is to change the paper to premium presentation paper matte. If you can’t find this exact setting, another matte paper setting will be fine. Be sure to change the quality to high and you should always be printing in color. Two-sided printing should be off. If you’re using letter size paper, it should be 8.5 x 11. Then click more options at the top.
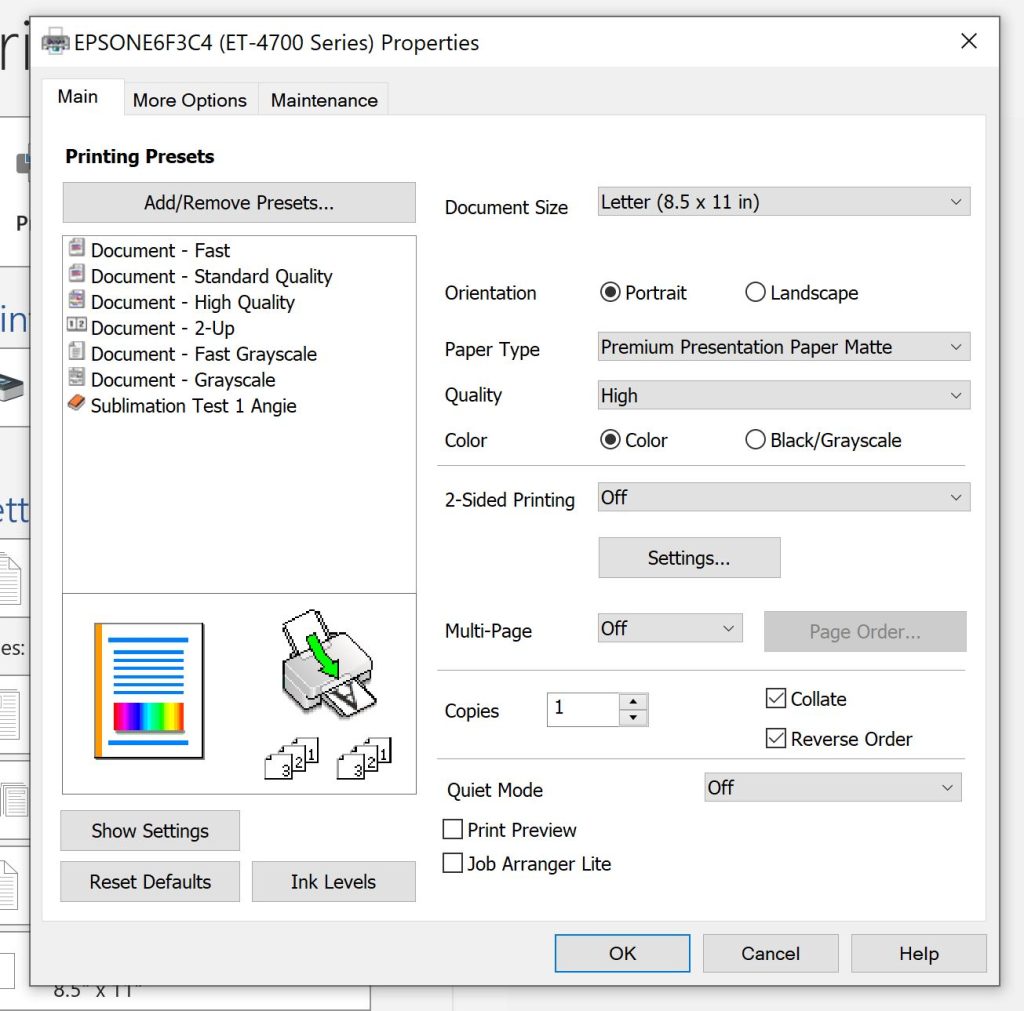
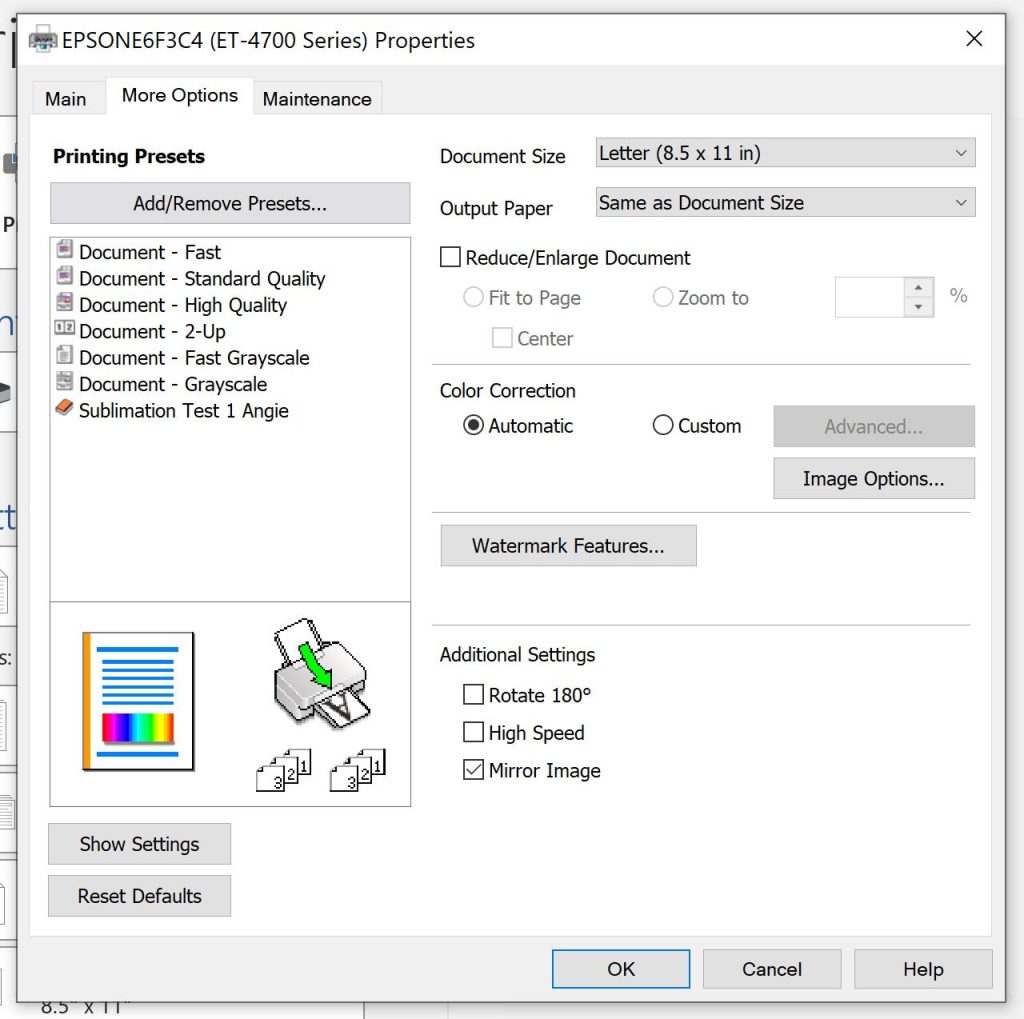
Here be sure that high speed is not checked and that mirror is checked.
Manual Color Correction for Sublimation
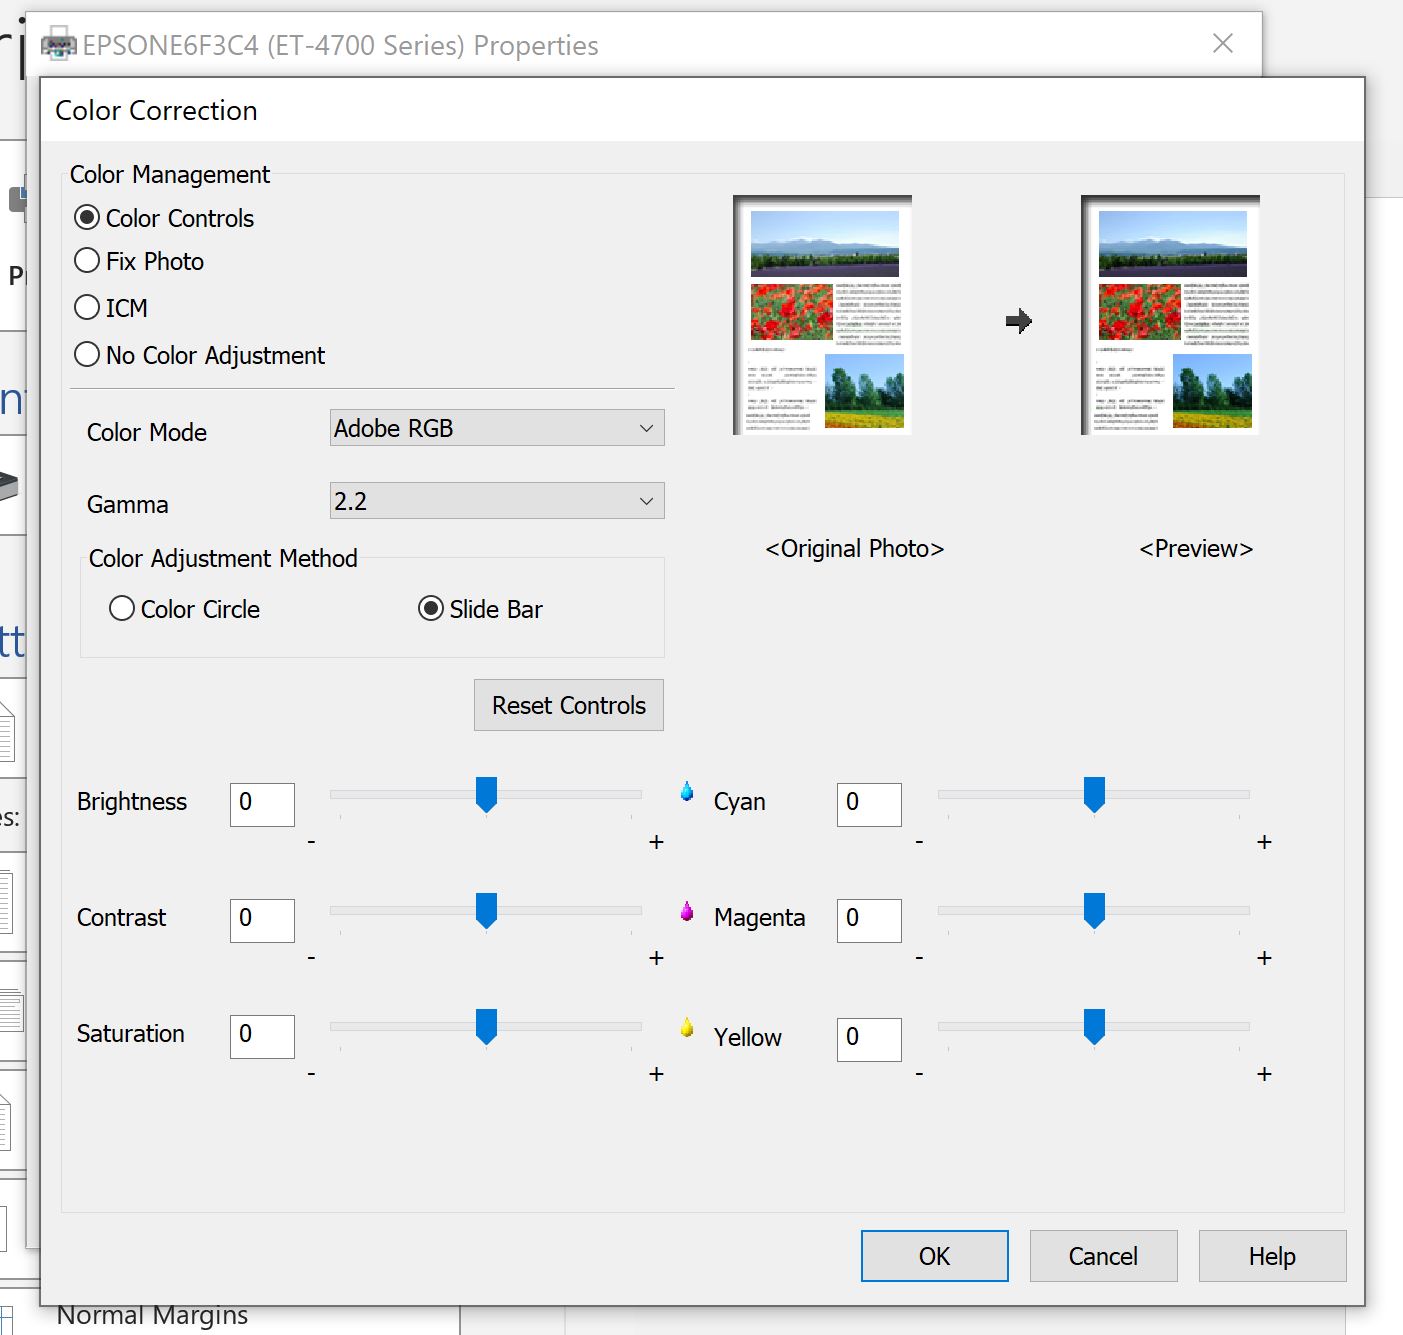
Now we’re going to do some manual color correction. Under color correction, change to custom and then click “advanced”. From here, we’re going to click “color controls”.

Make sure color mode is “Adobe RGB” and gamma is on 2.2. At this point, what you choose is completely up to you. You can change the brightness, contrast, saturation, and density. You can also change the color itself. The color itself is a little easier to change if you click “slide bar”. Now you can move the colors up and down from cyan to magenta to yellow to get more or less of those hues in your print. This helps you dial in those colors without the need for an ICC profile. If you feel like your printing is pretty good, but you would like a little more or less red in your print, you could use this slide bar to add or take away and then do a sample print.
How to Make a Sublimation Printer Preset
Adjust each of the settings to just how you want them then click ok. Now you can make a preset. That means you don’t have to do this each time! After adding the preset, you can pick it from now on and be printing in seconds. Click “add or remove presets” then name it anything you would like and click “save”. From now on when I go to print, all I have to do is make sure that the preset is picked if I like the results. You would need to experiment with those color settings, get what you want, make yourself a preset, and then use that every time to print with your sublimation printer. The beauty of this is that you could make more than one preset. Customize each to be exactly what you want for different types of sublimation printing. Maybe one color combination looks good on fabric and another on mugs. You can make two different ones with this method.
NOTE: Anywhere where you have this screen, you can make a preset. It does not have to be Microsoft Word. This includes Paint and Cricut Design Space. There are a lot of free options out there to print your sublimation designs and make these presets.
Using Cricut Design Space for Sublimation Printing
Within Cricut Design Space, you want to upload your image and add it to the canvas. Then, you would resize that to whatever you wanted it to be. You would need to make sure that a machine that handles print and cut is picked, which is a Maker 3, Explore 3, Cricut Maker, or Cricut Explore Family. Click “make it”. Because we’re mirroring within our settings, we do not need to mirror here. Just click “continue”.
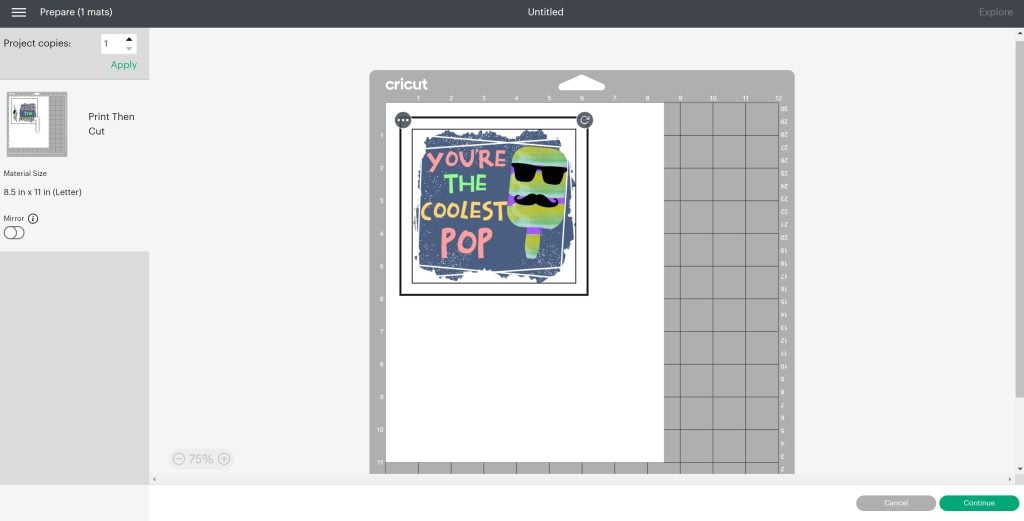
Click “send to printer”. Pick your sublimation printer, turn off bleed, then click “use system dialogue”, and click “print”. NOTE: Currently Design Space is not showing the preview correctly but it is printing correctly.
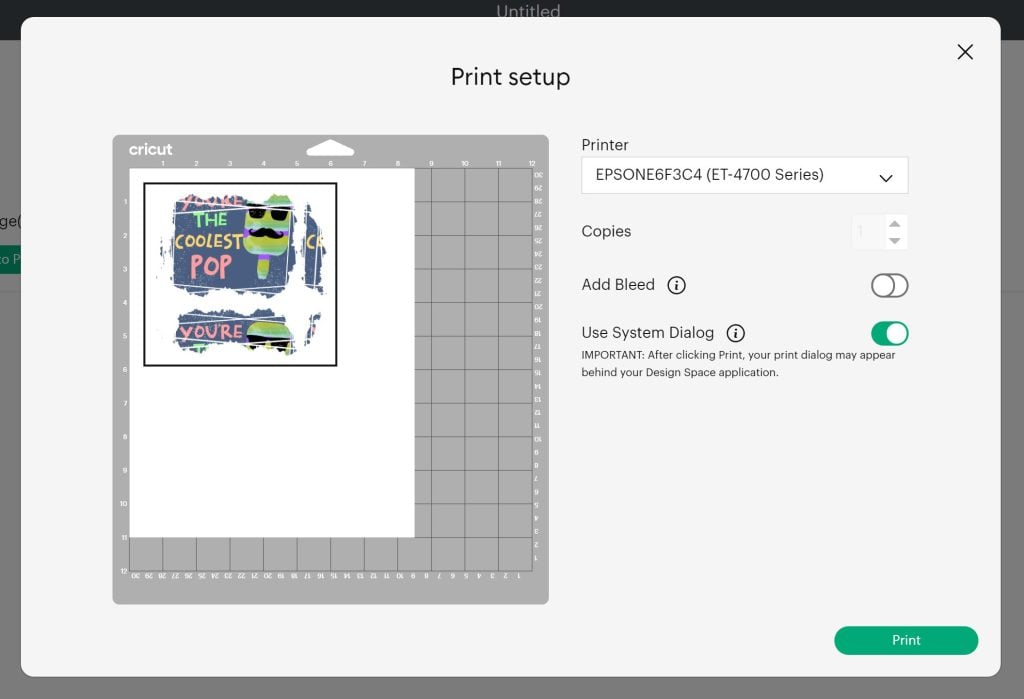
This same screen that I showed above for Word pops up. Pick your sublimation printer and then go to preferences. Now that you have made a preset you can pick it or make a new one as shown above.
Using PhotoShop for Sublimation Printing
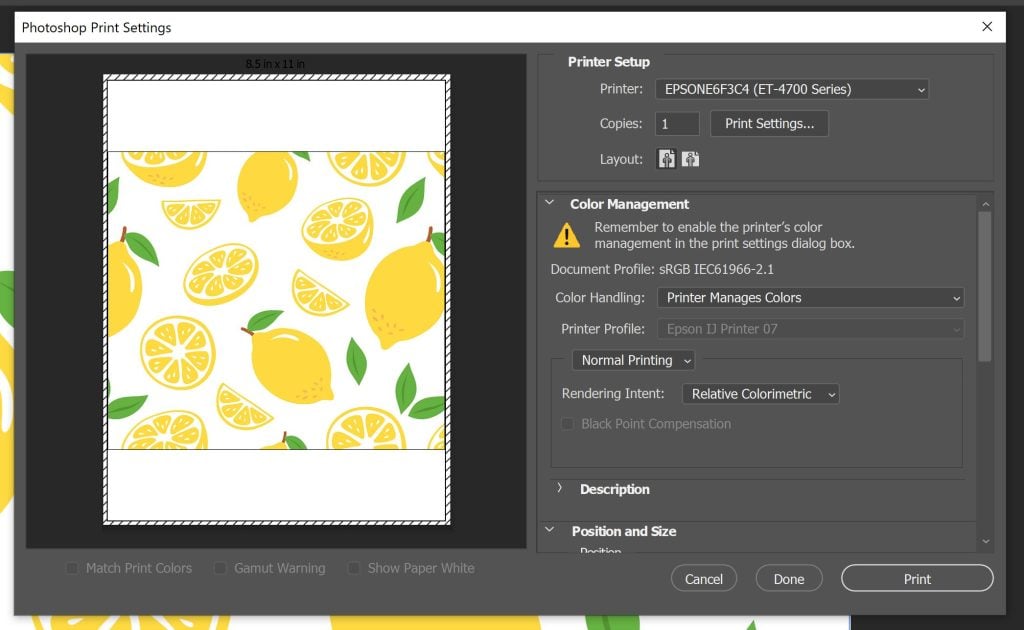
Open the file in Photoshop then click “file” and “print”. If you want to use manual color correction, I make sure that you pick, “printer manages colors”. Then go to “print settings” and the same window that I showed above will open up. You can pick a preset if you made one or make a new one with the instructions above. Click “okay” and then click “print once you have your settings.
Changing Settings on Your Sublimation Printer
The first time you use this in your printer, you’ll add paper and it’ll tell you what the paper settings of the printer itself are on the screen. Mine says plain paper and I want to change that to the matte paper setting. On the screen, click “change” and then scroll through the settings. Pick letter paper size and premium matte paper. Then pick “okay” twice to confirm. Now my settings on my printer have been changed, as well as the settings on my computer. You can do this when you put the paper into your printer or when you go to print. The printer should remember this unless you need to alter it again.
How to Test Colors
I like to test my colors using a color chat. The color chart that I like to use for testing my colors is from HTML-color-codes.com. You can print it with any ICC profile or manual color corrections that you make to see what a difference it makes on your colors. Remember, testing is not just printing it on paper. You will want to press is to a 100% polyester cloth to actually see the colors.
Preheat your cloth, make sure you get all the moisture out, lint roll it well, then press the color chart that you print. That way you can tell what your colors will be like when you press them. What you print is not necessarily what you will get once you press. Grab some 100% polyester cloth and start sublimating those color charts to see what a difference it can make.
Example Tests
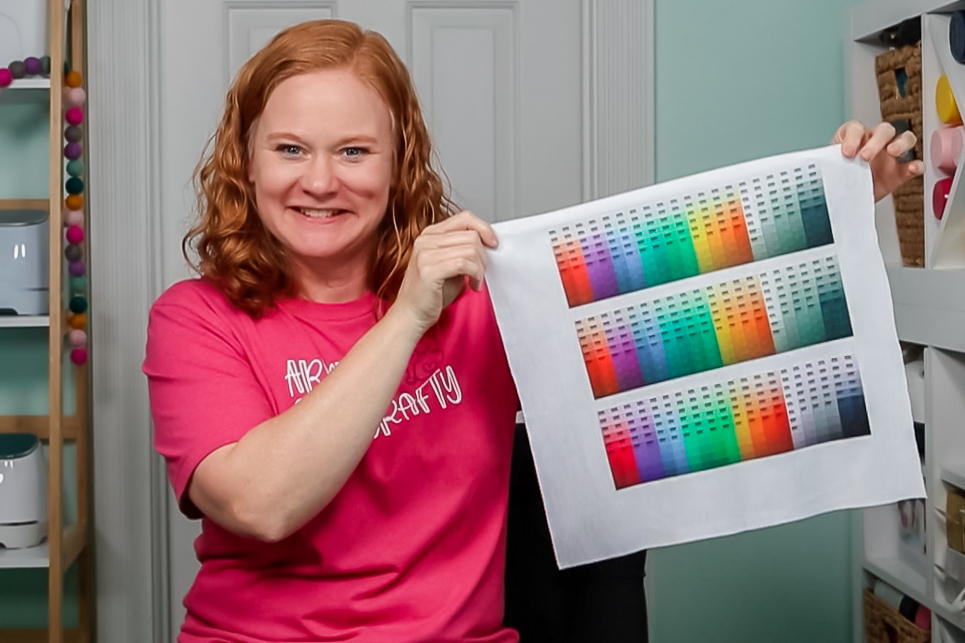
Let’s take a look at some example colors that I printed. The middle one is just with my printer – no color correction at all. The bottom is with my custom ICC profile from Hippo. The top is when I played around with those manual settings a bit to see what would happen. I can definitely see a difference in person between them. This is a great way to determine what you would like to use. If you will notice on the top one, I turned my brightness way up and I actually lost some of the lighter colors. This will help you dial in your preferred settings.
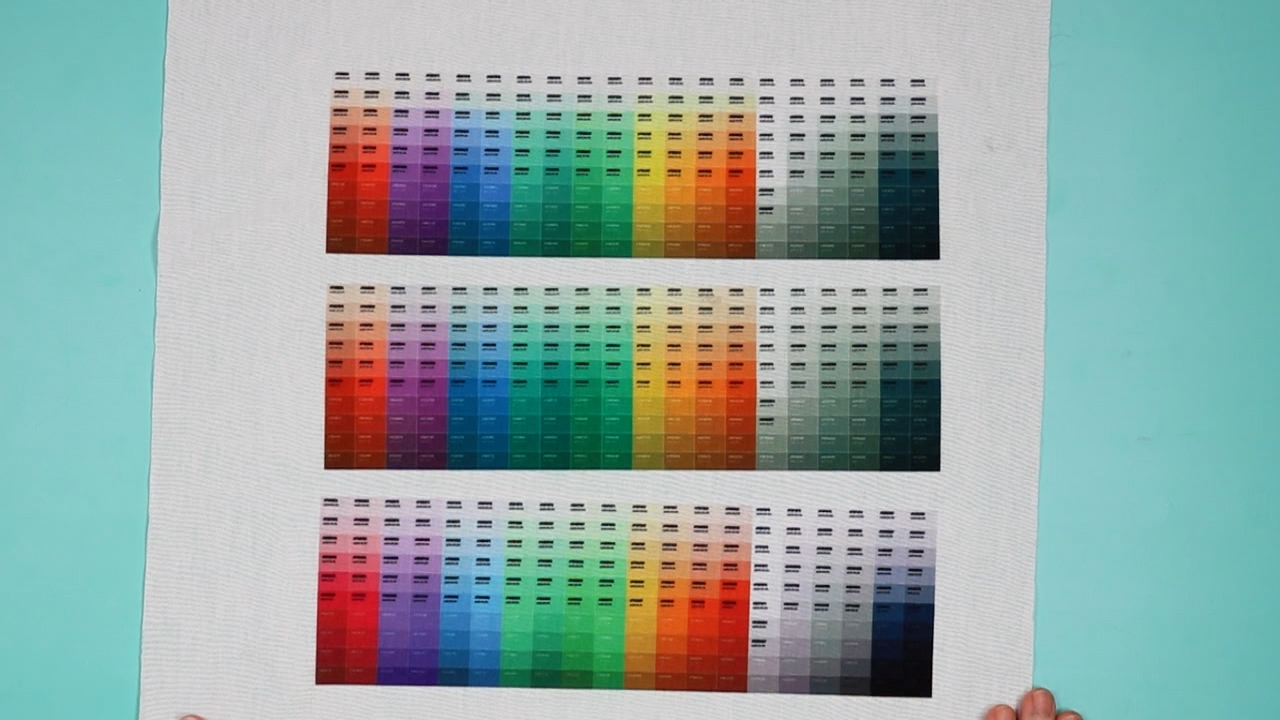
This is what you’re going to need to do to dial in your manual color correction. Print and then slowly make changes until you get something you’re happy with. Again, you might find different presets work for different types of sublimation, but this is a great way to dial in those colors manually when you can’t find an ICC profile that works or an ICC profile that you like. Because this is a hex color code chart, you can find the hex number and you could change the colors in something like Photoshop on a wide variety of prints. However, for photos, you just want to dial it in as close as you can and use that preset for all your photo sublimation.
Where to Start with Color Correction
Now you have a way to manually correct your colors and hopefully dial those in a little bit to what you prefer for sublimation. It will take some trial and error – I’m not going to lie. This is not a perfect process. I can’t tell you precisely what to set your printer at. Feel free to just move those sliders a little bit and test to see what happens. You can also try the values here from my friend Cheryl over at That’s What Che Said to get a starting point.
I think you’re really going to love this once you find a preset that works for you and your particular printer. I don’t think everyone’s printer is going to be the same. Maybe you have the exact same printer that I do, but yours doesn’t work the same way mine does. That happens. Just because my printer works great with the Hippo profile, it doesn’t for everyone. You really have to adjust those just for your printer and your situation, but I think you will find that through manual color correction, you can get the color profile that you love.