This post and photos may contain Amazon or other affiliate links. If you purchase something through any link, I may receive a small commission at no extra charge to you. Any supplies used may be given to me free of charge, however, all projects and opinions are my own.
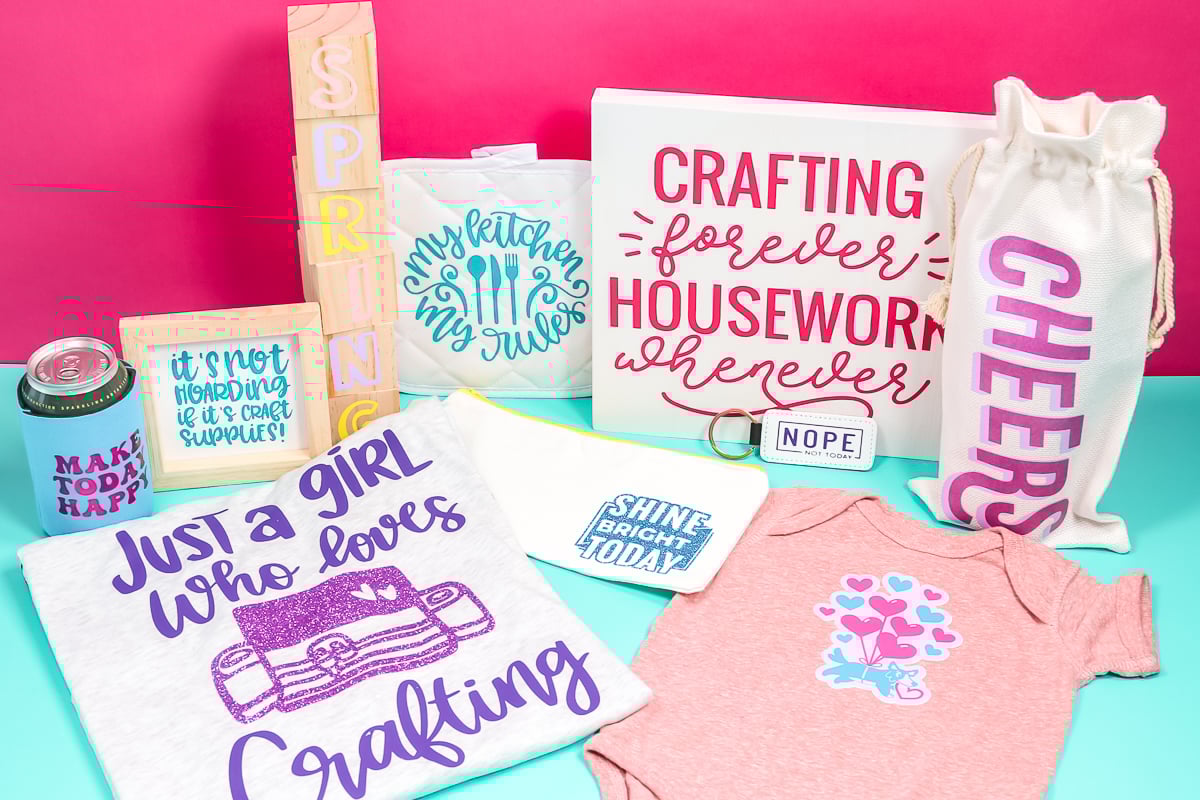
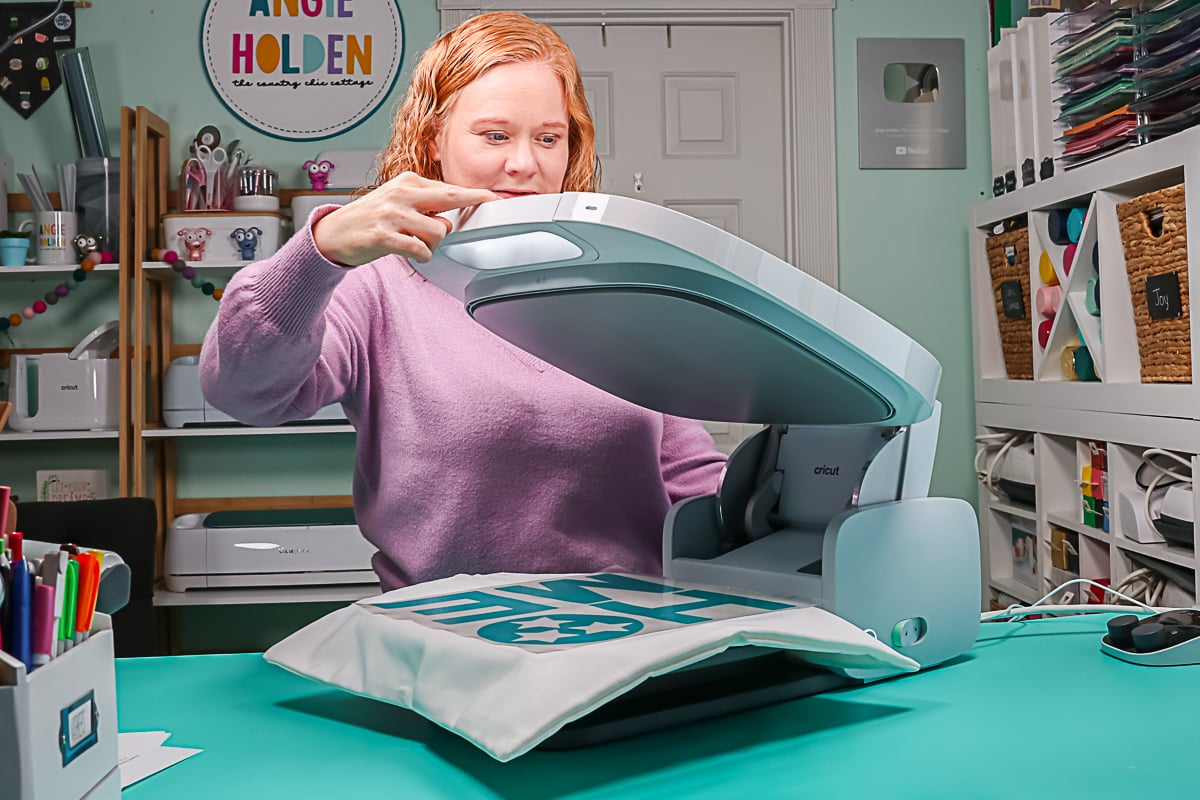
Today I am testing the Cricut AutoPress with HTV. This is my second in a series of videos about the new Cricut AutoPress. Want to see how various types of iron-on or HTV work on the AutoPress? I have a wide variety of projects that you are going to love. Plus I am going to put HTV on onesies, shirts, can koozies, zipper pouches, wood, and more! I am going up to 2 inches in thickness to really put this machine to the test! Do I have to alter the settings? Do I have to press a second time? Is it not going to work at all? Let’s put each of these to the test and find out.
Confused about how to use HTV? You can start with my basics guide here.
Cricut AutoPress with HTV
Click play on the video below and watch me use HTV on various projects using the Cricut AutoPress. I think you will really love how these projects turn out! You might even find some of them surprising.
Can’t watch the video or miss some of the steps? You can also follow along below.
Supplies Used
Every single project I’m going to make the design is in Cricut Design Space. Find all the projects I’m making here, remove the ones you don’t want to make, then click “Make It”, and make any of the things that I’m showing you.
How the Cricut AutoPress Works
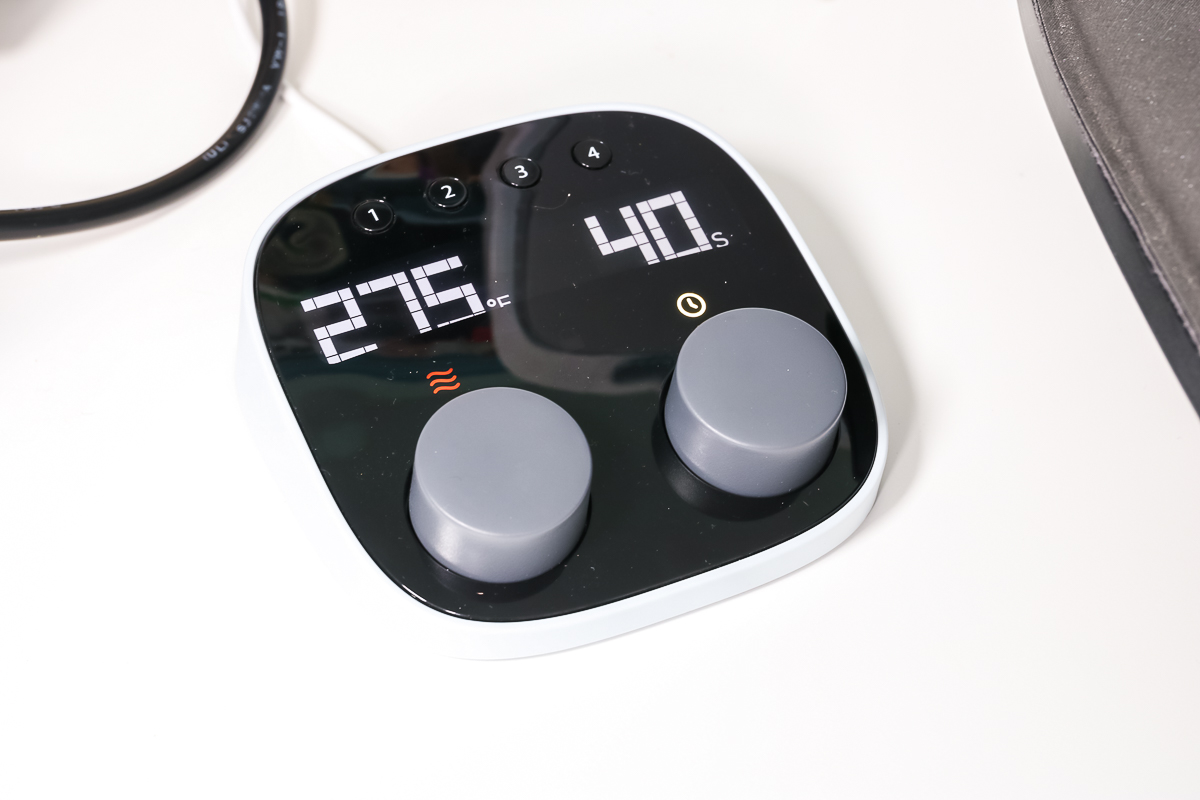
The Cricut AutoPress has a control pod that plugs into the back of the machine. It has a couple of dials – one for temperature and one for time. You just turn those dials to alter the settings. There are presets at the top for quickly choosing commonly used materials. You can set those to whatever you would like. I have instructions for resetting those here.
For now, I’ll just set the time and temperature to what I want for my first project and let the AutoPress heat up. The icon above the temperature dial will be red while the AutoPress is heating up. It will change to green as soon as the press comes to temperature, then you’re ready to press. The AutoPress can take up to eight minutes to heat up. Be sure to account for that when you are starting to work on your projects. You will want to find your time and temperature on the Cricut Heat Guide for Cricut materials or on the website for the HTV you are using.
Cricut does recommend a preheat on most items. However, you don’t have to flip over to the back and pressing Cricut materials with the AutoPress. You just press it from the front and you’re ready to peel back your carrier sheet. With Cricut iron-on, you will want to let your project cool before you peel that back.
To operate the AutoPress, you just lower the lid and press it down. You can press it down with as few as two fingers, so it’s super easy to press. Once you press the handle down, it will auto-engage and automatically set the pressure. The pressure is not adjustable. It is controlled by the AutoPress itself. Once you press that down, the controller will start to count down the time. Once it reaches zero, the AutoPress automatically pops up. No more having to worry about popping up the handle.
If you’ve forgotten something once you get your material inside, you can use two fingers. Just tap up on the handle, and the AutoPress will pop open. You can re-adjust or do whatever you’ve forgotten then close the AutoPress back for the recommended time and temperature. As you change from one HTV type to the other, you just use the dial to change the time and temperature settings. The Cricut AutoPress will heat up or cool down, depending on what your new temperature setting is.
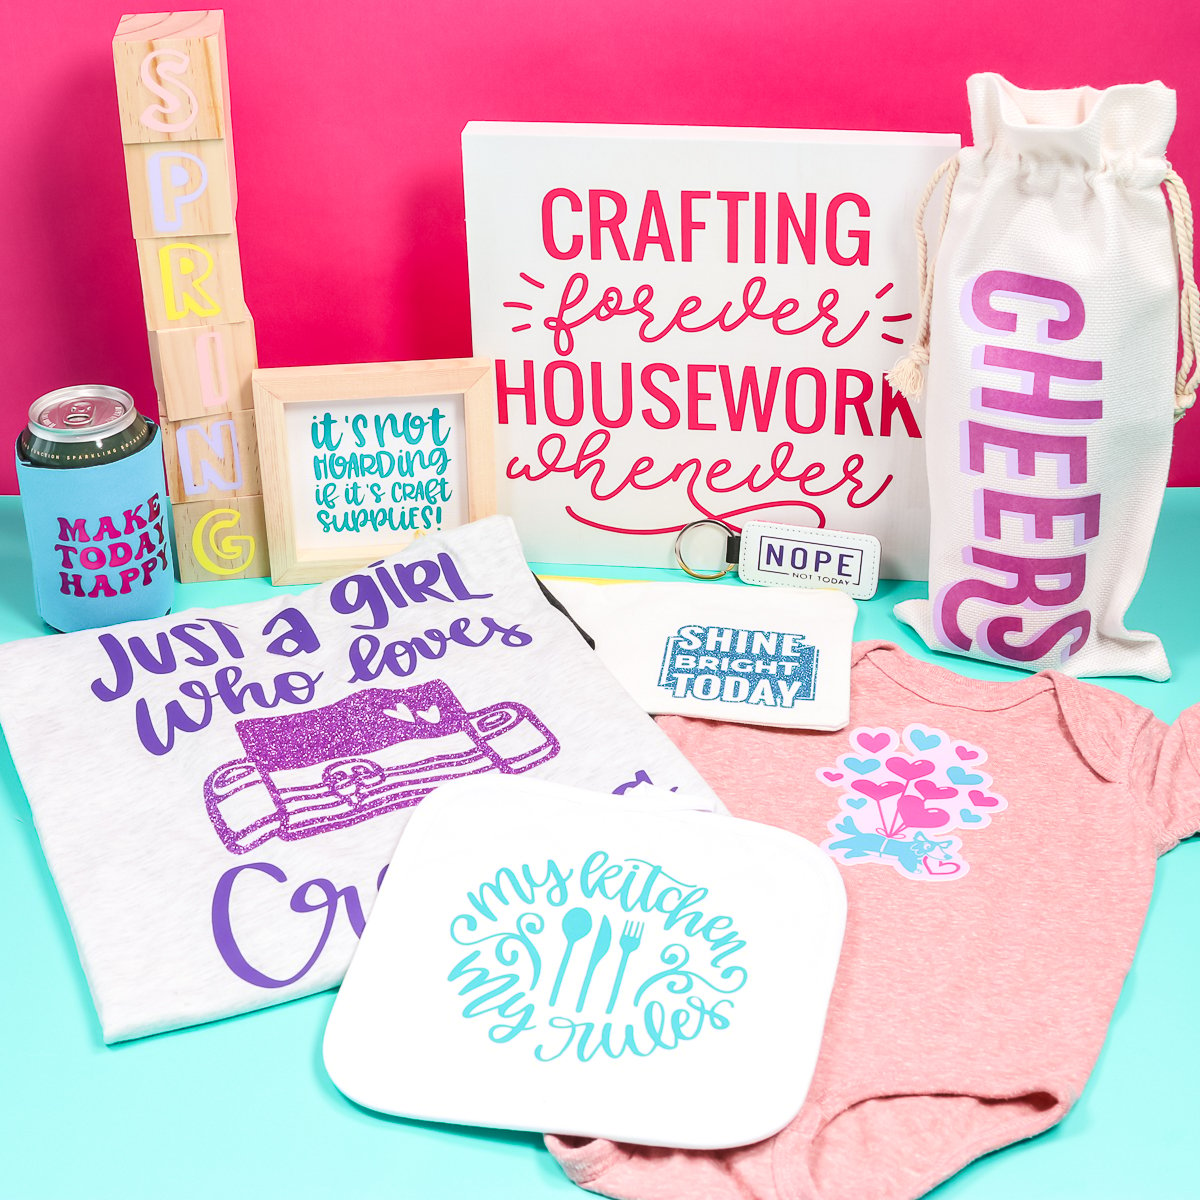
HTV Projects on the Cricut AutoPress
Now it is time to use a variety of HTV products on a wide range of surfaces. I am even doing some layering to really put this product to the test.
Reverse Canvas
First up is adding an HTV design to a piece of canvas to make a reverse canvas. I removed the frame from the inside of the canvas first. I’m pressing my HTV to it and then I will add the frame later.
I pressed and then removed the carrier sheet. It stuck great and I only pressed it once. Now to complete the canvas, I’m just going to add the frame with some hot glue. There is project number one complete with the Cricut AutoPress.
You can see more about making a reverse canvas here!
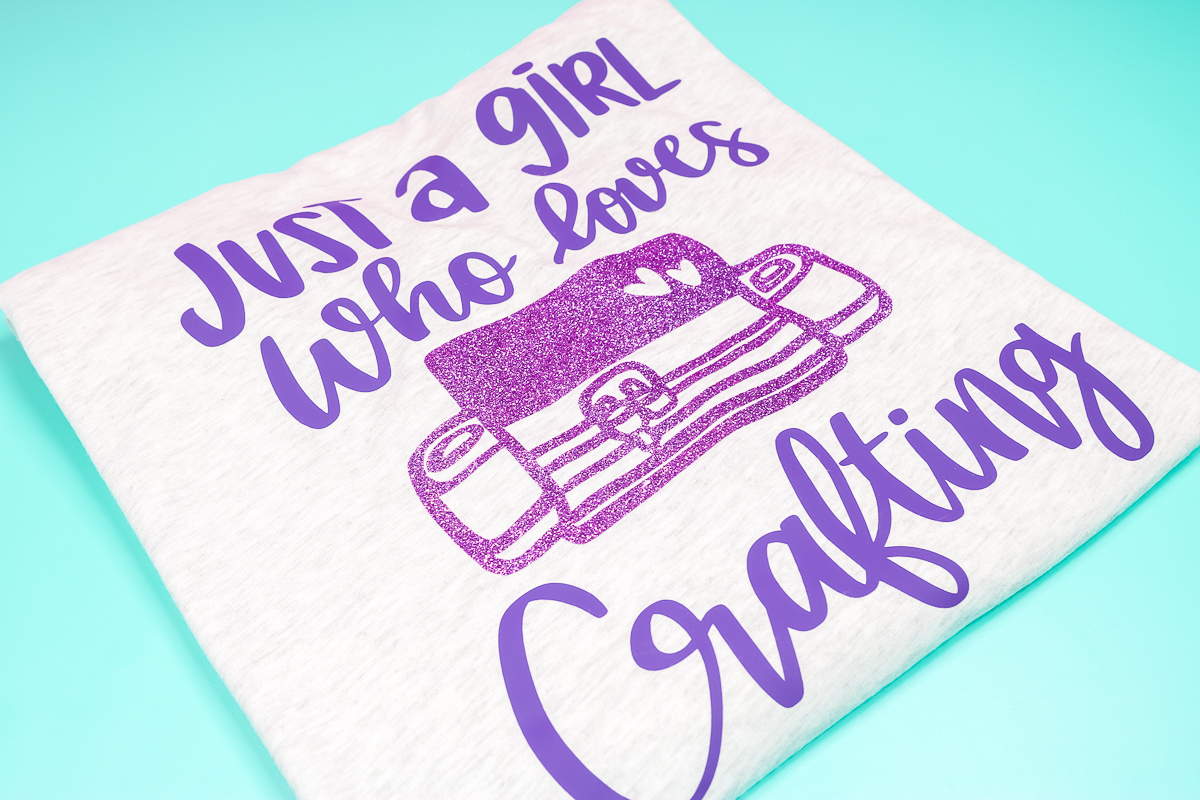
Adult Shirt
For this shirt, I’m doing a layered design. However, both materials I can press at once because they do not overlap. I just cut the carrier sheets and made sure that the carrier sheet of one is not under the carrier sheet of the other. This way I can press them at the same time. I use the time and the temperature that is the greatest if I’m using two different types of HTV like I am in this case.
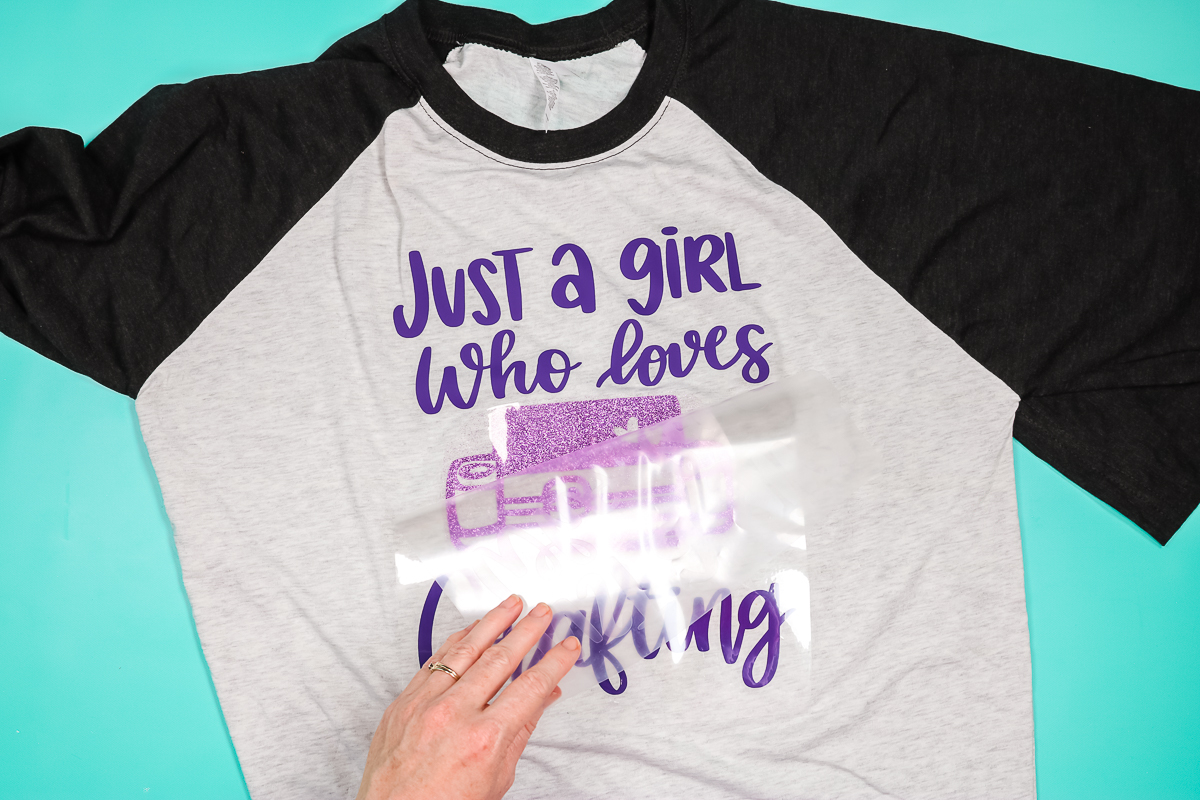
Just remove both carrier sheets once they cool and you can see that everything worked great. I’m super impressed with how this shirt turned out.
Confused about layering HTV? Try our post here!
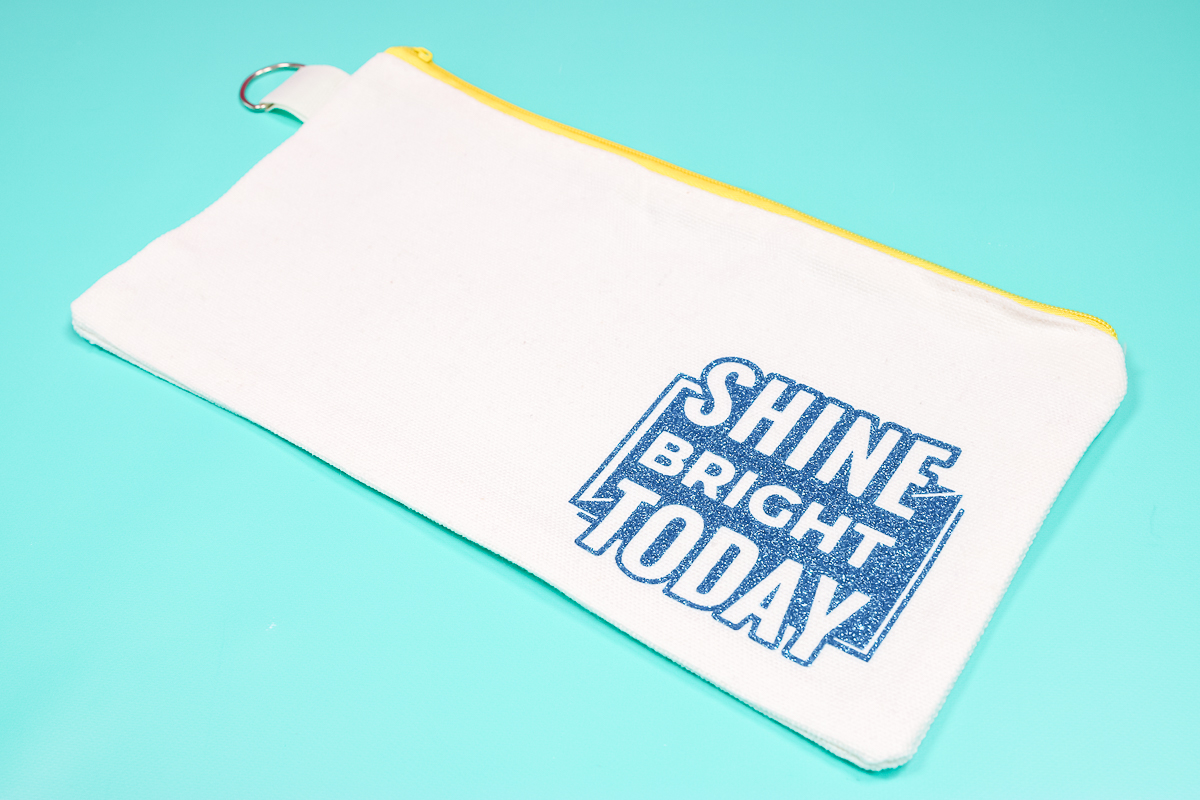
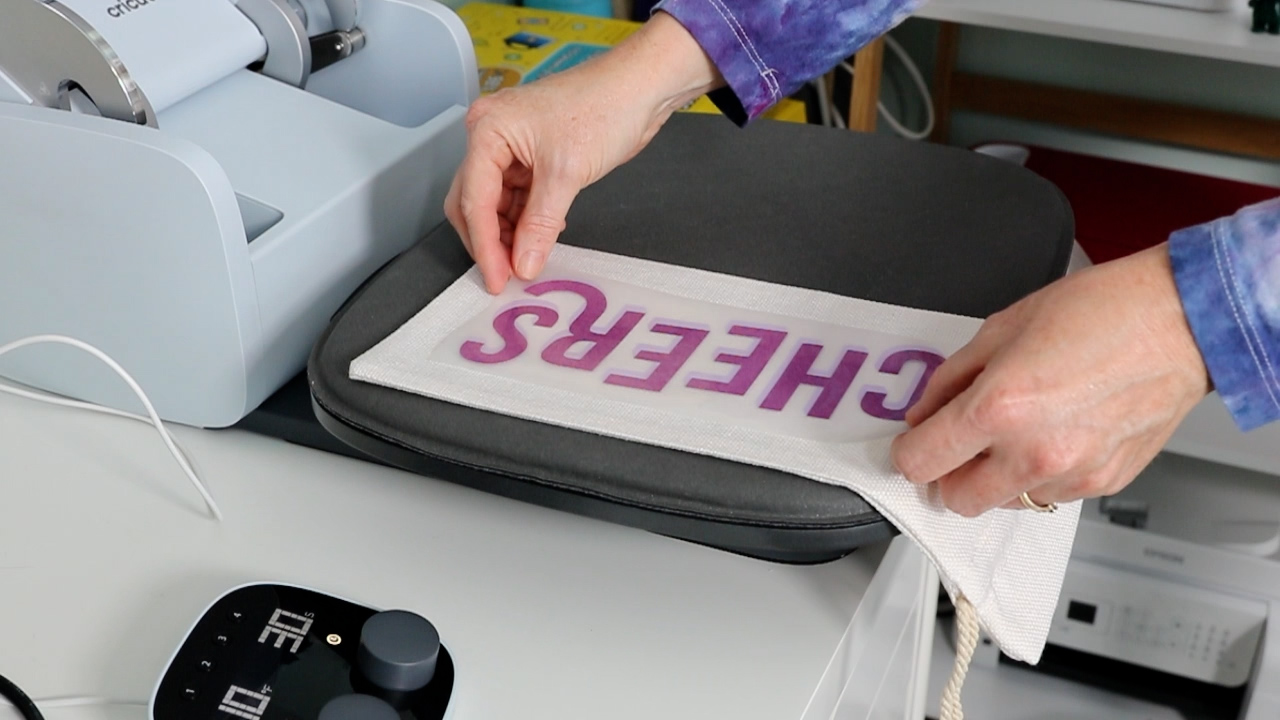
Zipper Pouch
For things like the zipper pouch, I like to leave the zipper hanging off the side of the press. That way I don’t have to worry about it melting or interfering with the press itself. I do this with any items that have any thickness.
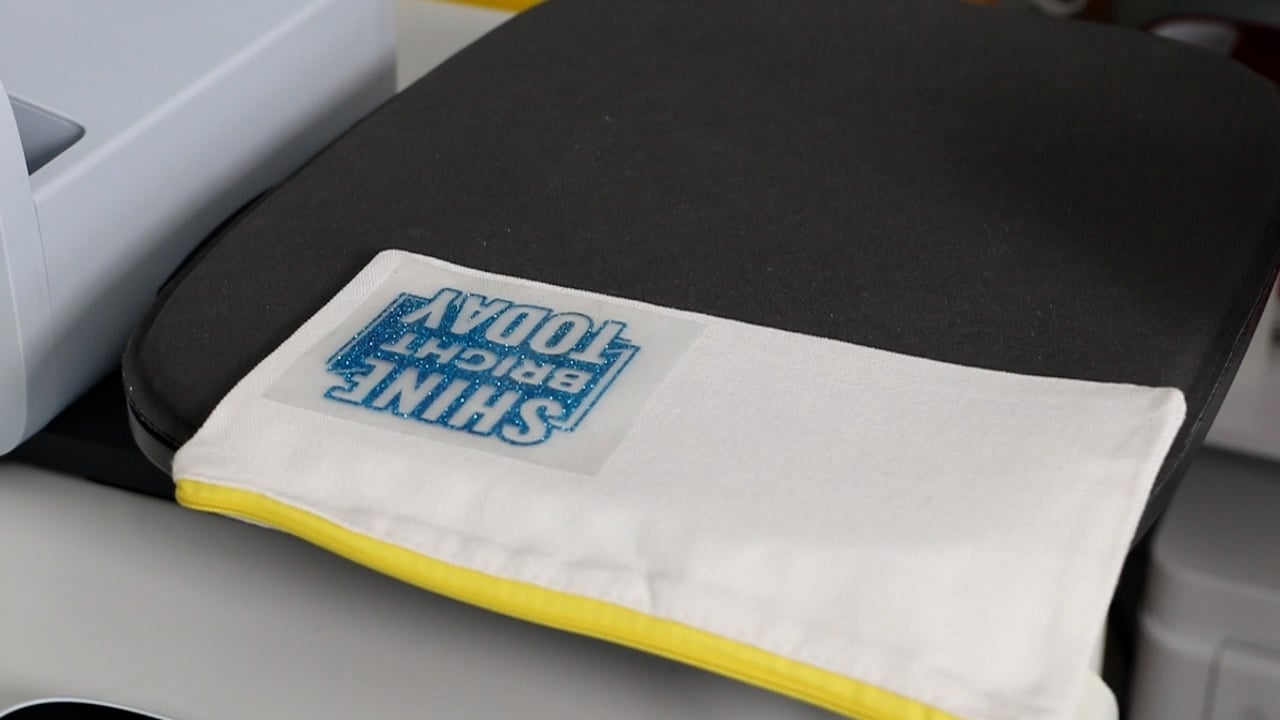
After pressing, I just removed the carrier sheet. This is glitter HTV, so I was super impressed with how it turned out. Just look at that sparkle and shine.
Wine Bag
When pressing this wine bag, I’m going to do something similar to when I did the zipper pouch. I’m going to hang off the area that has the tie at the top so that it won’t interfere with the pressing. When layering two types of HTV, like on this wine bag, I press according to the temperature indicated by Cricut, but for about half the time for the first layer. Then I try to peel the carrier sheet back. Once that is removed, I add the second layer and make sure both layers are covered up. Then press for the full time at the correct temperature that Cricut recommends.
The top layer is actually patterned HTV from Cricut. Once that cools, you can remove the carrier sheet and reveal your gorgeous design. Layered HTV on the AutoPress worked perfectly!
Confused about layering HTV? Try our post here!

Can Koozie
For this can koozie, I wanted something a little bit thicker to try on the Cricut AutoPress. This was the perfect middle ground to see how the Cricut AutoPress works with thicker objects. I am adding foil HTV to the front of this one.

Just press for the full time then remove from the press. Allow to cool and remove the carrier sheet. This is foil HTV, which I was super excited to try in the AutoPress. Everything peeled back great and it looks amazing.
You can see more about making can koozies here!

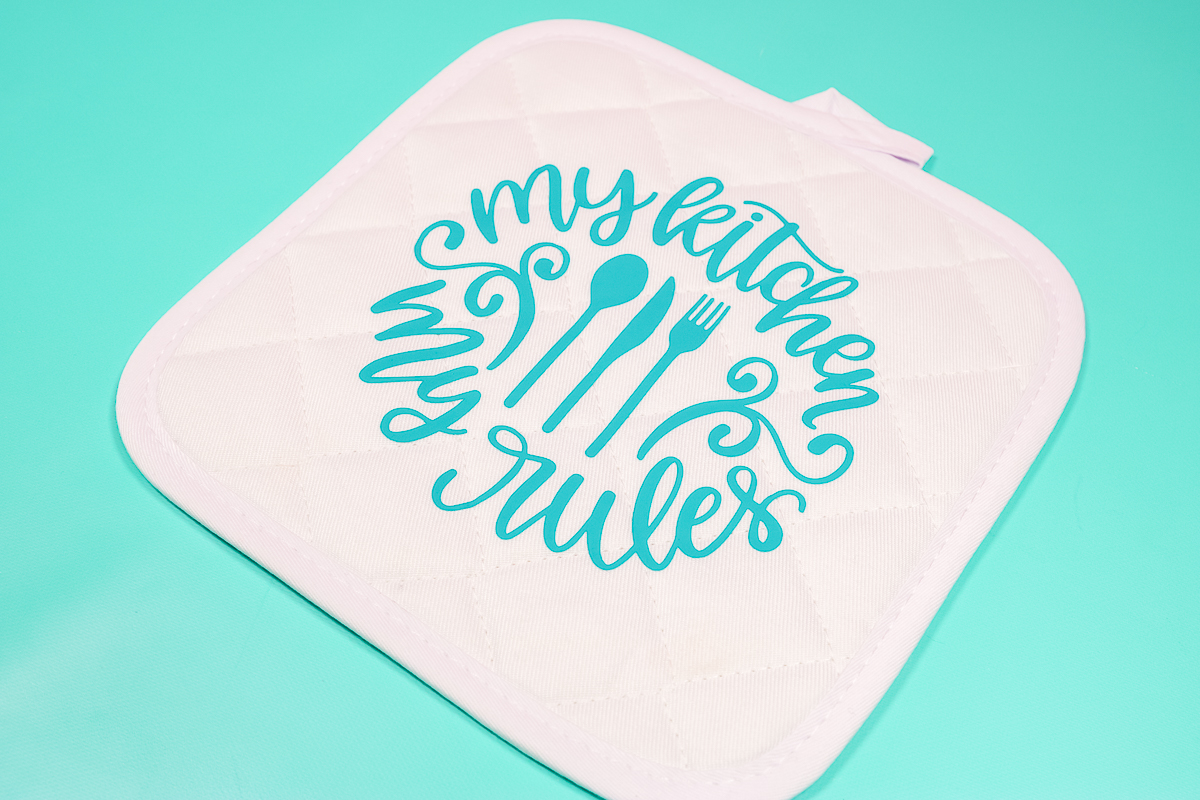
Potholder
I find surfaces like this potholder can be tough to press because of all the grooves on the surface itself. Press at the full temperature and time. Then while it’s still hot, use a scraper to run across it and push it down in those grooves.
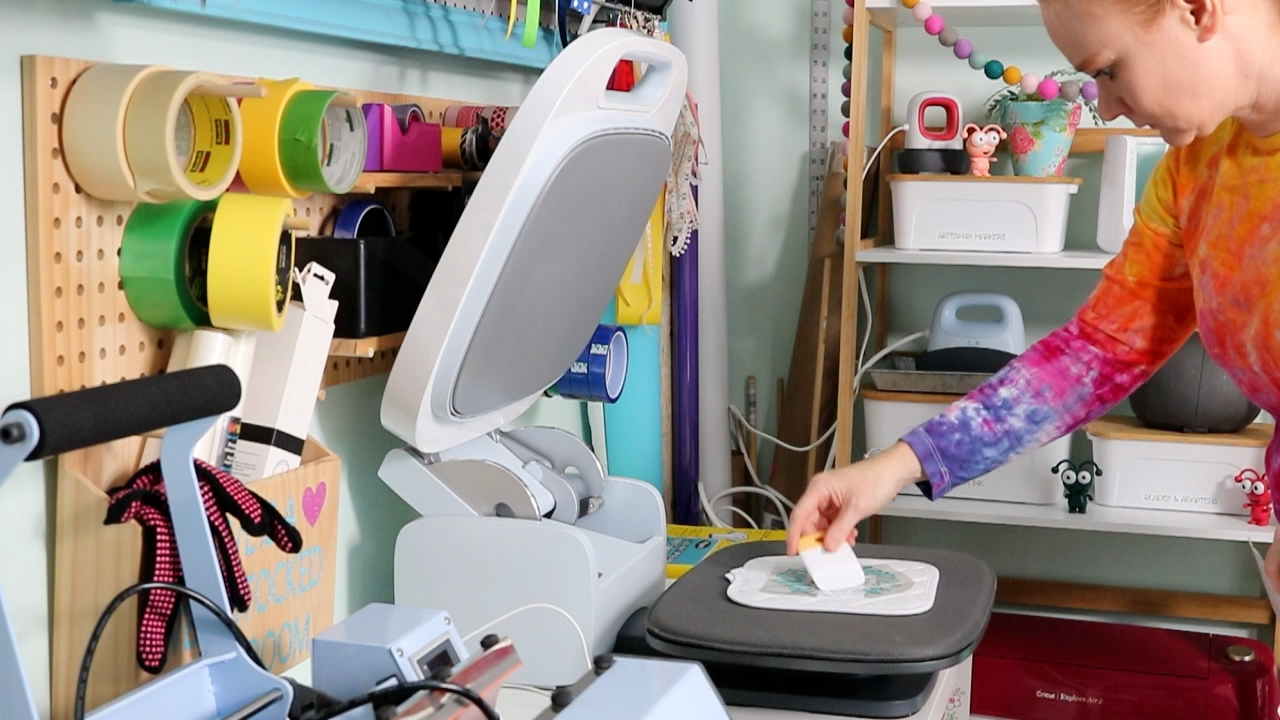
Here’s that potholder. I was nervous about the texture on the surface. However, AutoPress seems to have done an amazing job. You can see it’s all stuck perfectly, even though there’s stitching all over the front.
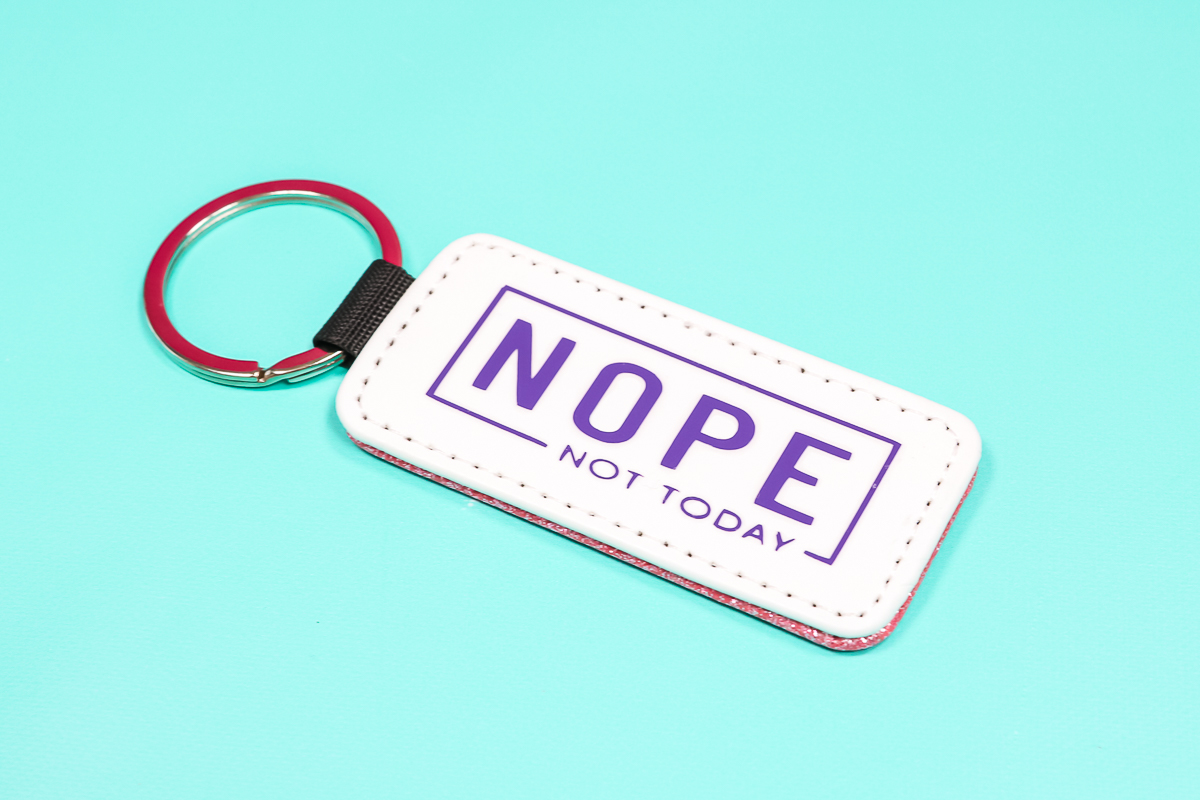
Faux Leather Keychain
This faux leather keychain is perfect for a small design. It’s actually a sublimation keychain, so it should be able to handle the heat. I added regular HTV to the white side and hung the metal portion off of the side of the press. Be sure to use something like a Teflon sheet to cover materials you are not sure about.
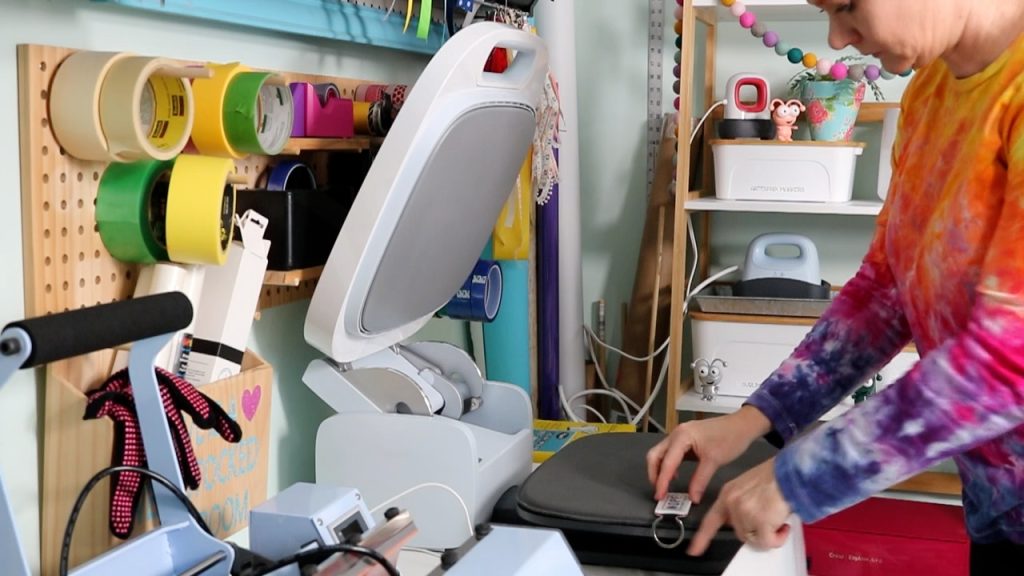
I was a little bit nervous as this is a thicker blank, but the carrier sheet peeled back great. I have a new keychain that looks amazing.
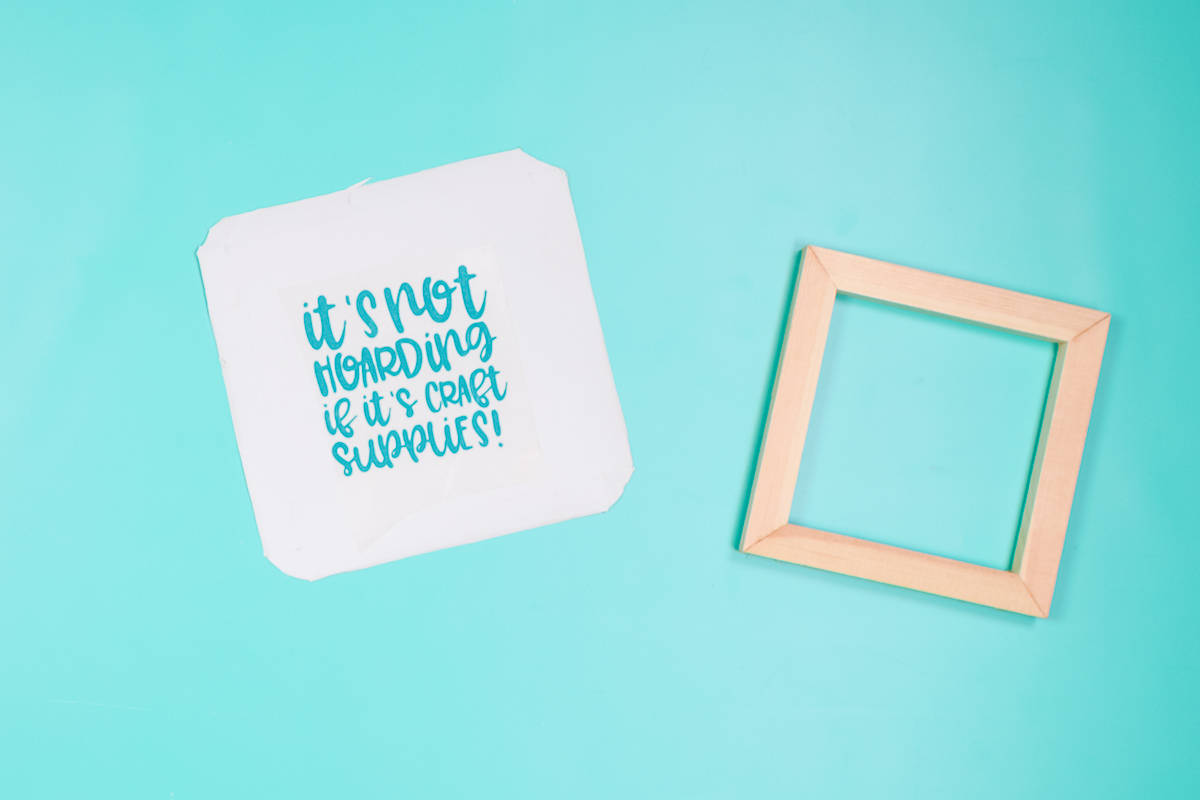
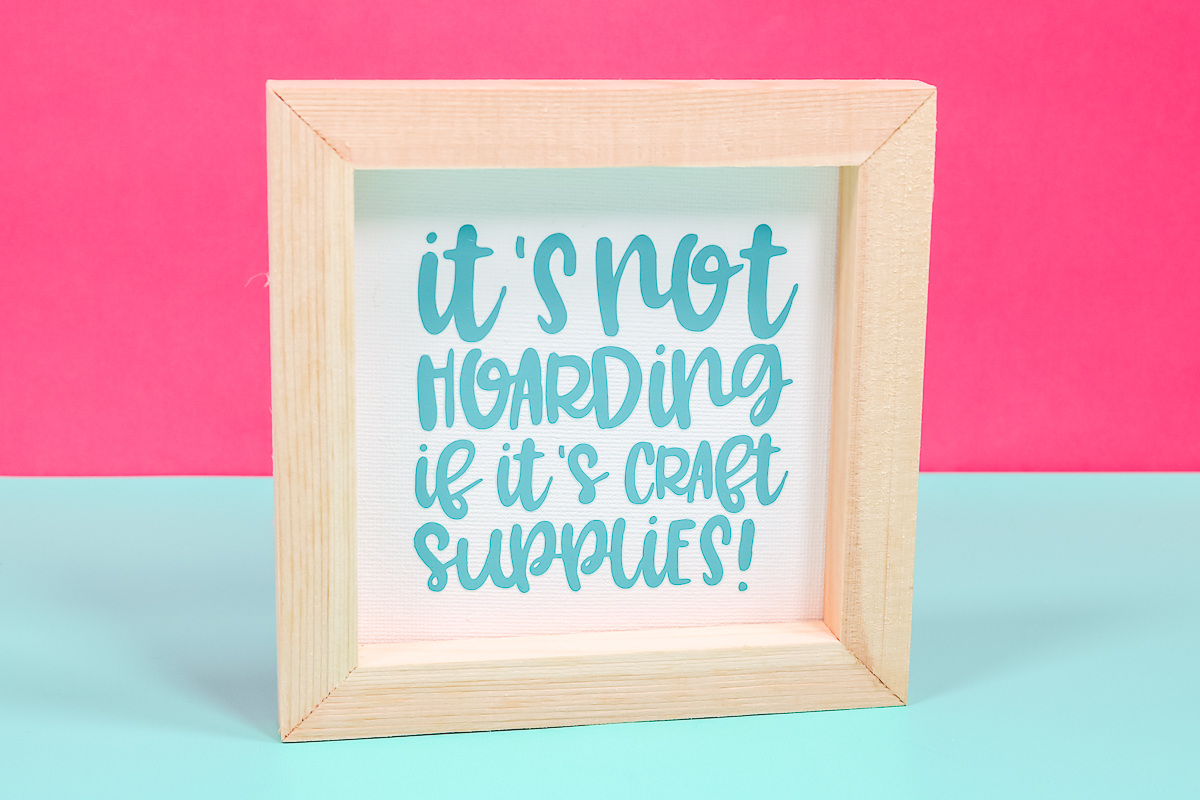
Painted Wood Sign
Pressing wood can be a little tricky. Here I’m using a painted wood surface that’s about 3/4 of an inch in thickness. With any wood product, I like to cover it with my Teflon sheet while pressing, just to make sure that it doesn’t damage my heat press surface. The wood itself may not be a very smooth surface. Once you pull it off the AutoPress while the HTV is still hot, you might want to run your scraper over the surface while it cools, just to make sure everything gets stuck down and it doesn’t lift up.
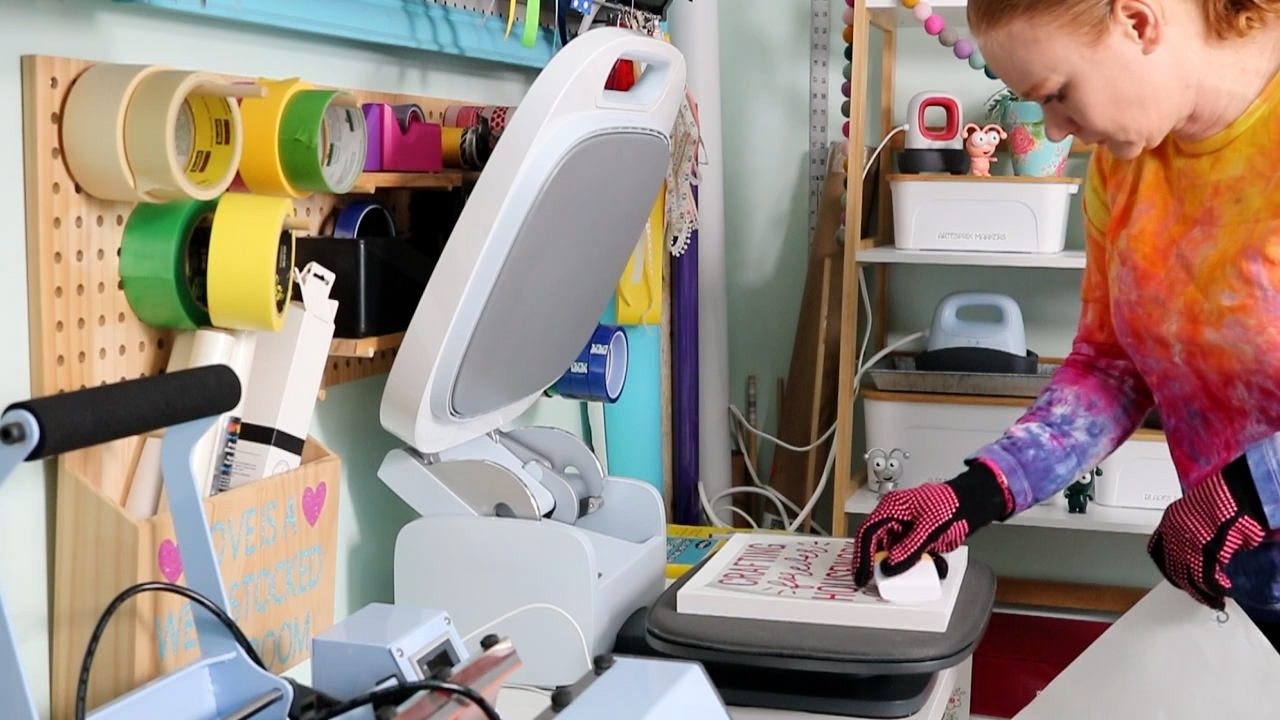
There was a small place that was not stuck where there was an area in the wood that was indented. I reheated the entire project and rubbed well with my scraper in that area. Then I could peel the carrier sheet back once it was cool. Everything is stuck and looks amazing. Now you know that you can use the Cricut AutoPress with HTV on wood.
Don’t miss our guide on adding HTV to wood here!
2-inch Wood Blocks
I was super nervous about these 2-inch blocks. The AutoPress says it can press anything up to 2 inches. We are going to put that to the test. Here I’m using raw wood in block form with HTV in different colors on the top.
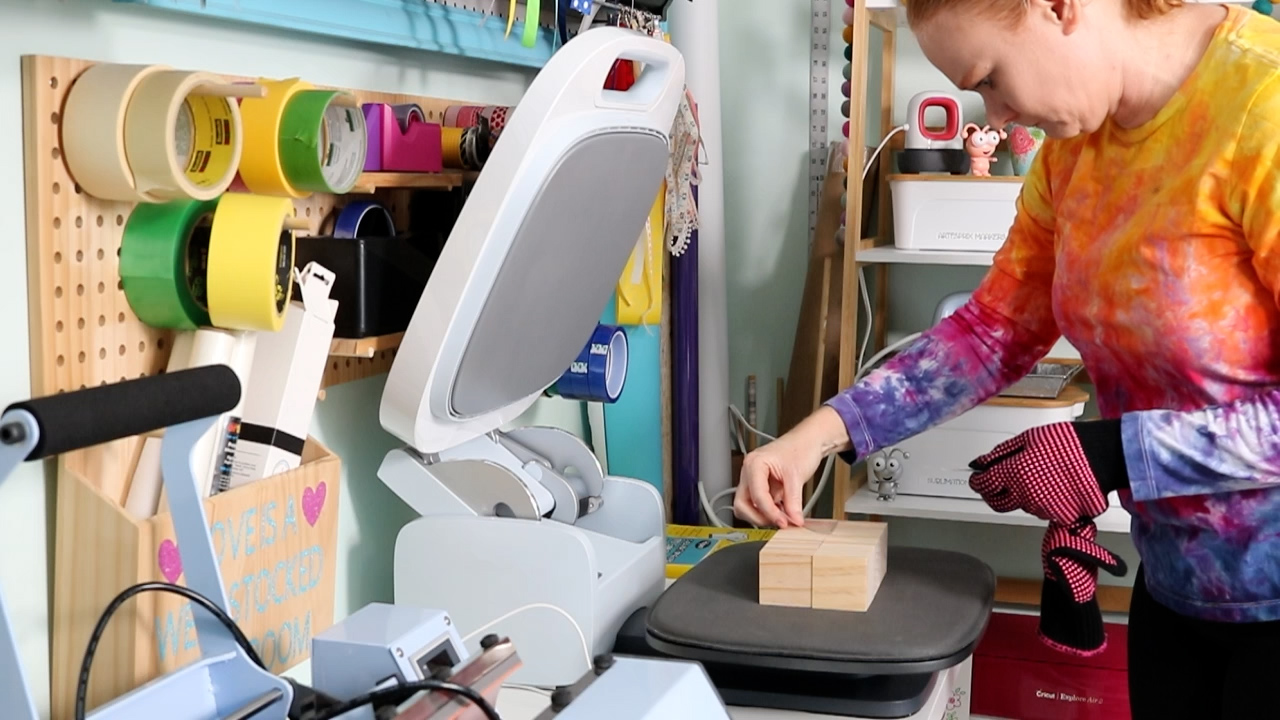
These blocks worked out great. The carrier sheet on all three colors of HTV was removed perfectly. Cricut AutoPress with HTV actually works great on raw wood that is two inches thick.
Don’t miss our guide on adding HTV to wood here!

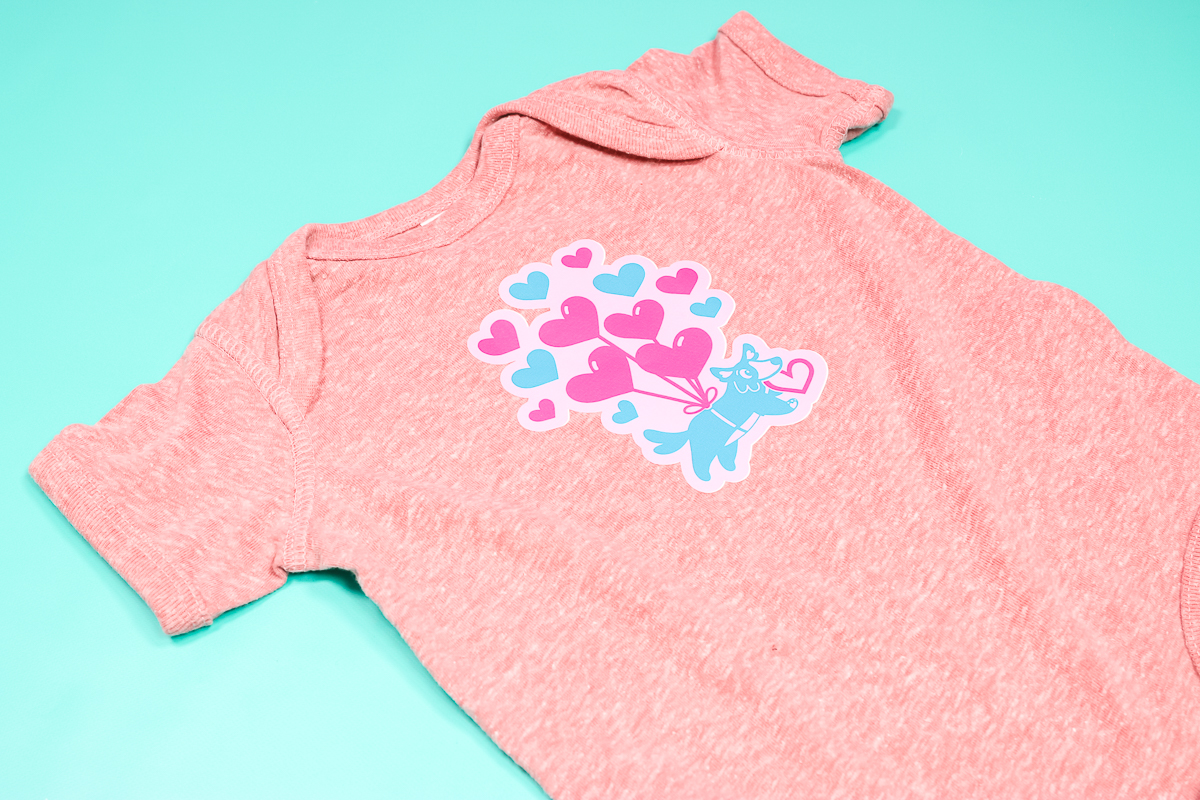
Printable HTV on a Onesie
For something like this onesie, you can actually put a small EasyPress Mat on the inside to raise it up. Similar to the zipper pouch, this helps to raise that middle up and avoid all of the seams that are on the onesie. Here I’m also using a printable HTV that I printed on my inkjet printer. With the printable HTV, I do need a Teflon sheet over the top to protect the material.
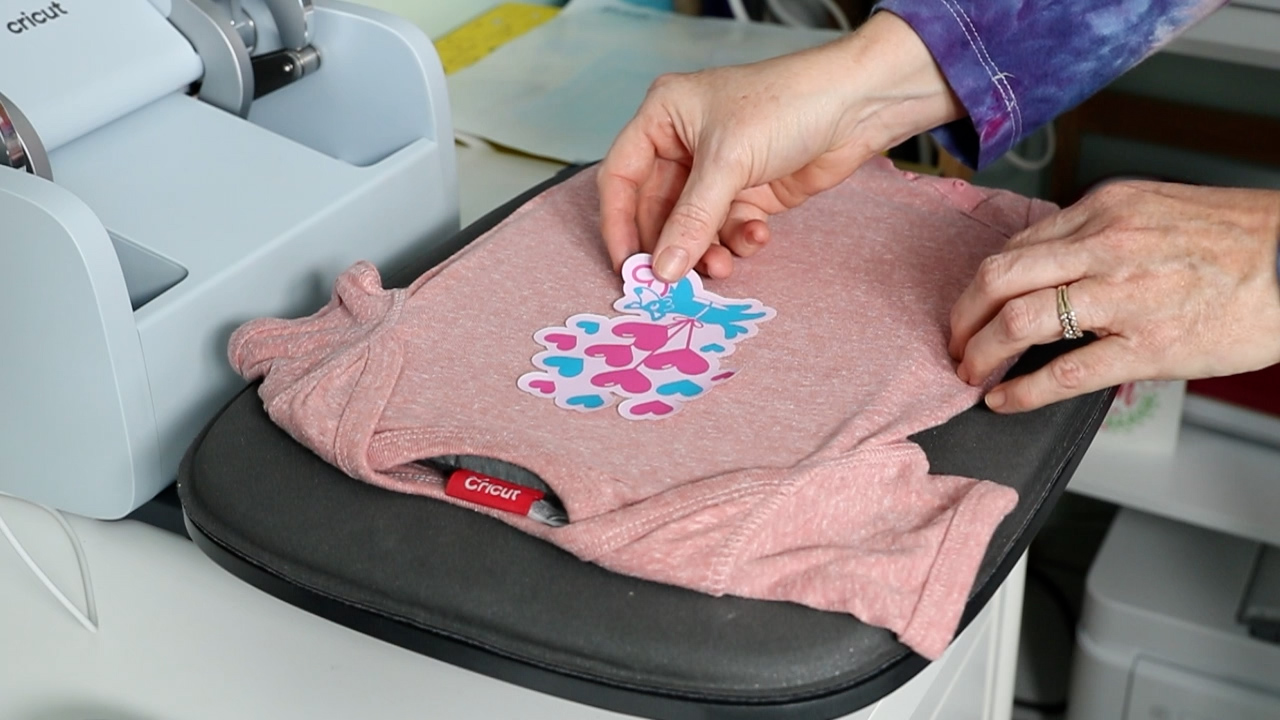
This onesie did need to cool completely before the Teflon sheet could come off. That was in the instructions on the printable HTV. Then just peel it back. It stuck really well and looks great! This printable HTV does require medium pressure. I was worried about it, but it stuck perfectly to this onesie.
You can see more about using printable HTV here!
Cricut AutoPress with HTV Results
Can I just admit that I was worried about some of these? I really wanted to push the AutoPress to the limits. I never in a million years thought that the 2-inch wood blocks would work, and they literally worked on the first try. I’m super impressed with the AutoPress so far and using HTV or iron-on with it.
I did have to press the painted wood art twice. I do have to do that with HTV on wood most of the time due to imperfections in the wood. Once I burnished it down really well in the low area while it was hot, it actually peeled back fine. I do think you can definitely do painted wood, raw wood, and all of the other surfaces above. So far, the Cricut AutoPress with HTV is a winner for me!
FAQ
Here are some answers to some common questions I get for posts like these. Feel free to ask any additional questions you may have in the comment section below.
Where did I get the time and temperature for each of these?
If it’s a Cricut material, you can check out the Cricut heat guide. If it’s a non-Cricut material, you’ll need to follow the directions from the manufacturer for whatever you’re pressing.
What brands HTV or iron-on was used?
Generally, I use Cricut or Siser HTV, and sometimes purchase from Heat Transfer Warehouse. Those are my three sources for HTV or iron-on products, because I know they’re good quality.
What do you do about seams or thick areas?
I love that I was able to do things like the zipper with the wine bag, which has the tie on the end. I, personally, hang those off the edge, just to make it a little bit easier on myself and make sure that my heat is not riding too high. For the onesie, I put the mat on the inside, and you can definitely do that. The EasyPress Mats, that you may already have, can go on the inside.
So are you going to try any of these projects? I really love the Cricut AutoPress with HTV and I can’t wait to test it with more materials. Do you think it will work with sublimation? Things that require heavy pressure? I am definitely going to find out!