This post and photos may contain Amazon or other affiliate links. If you purchase something through any link, I may receive a small commission at no extra charge to you. Any supplies used may be given to me free of charge, however, all projects and opinions are my own.
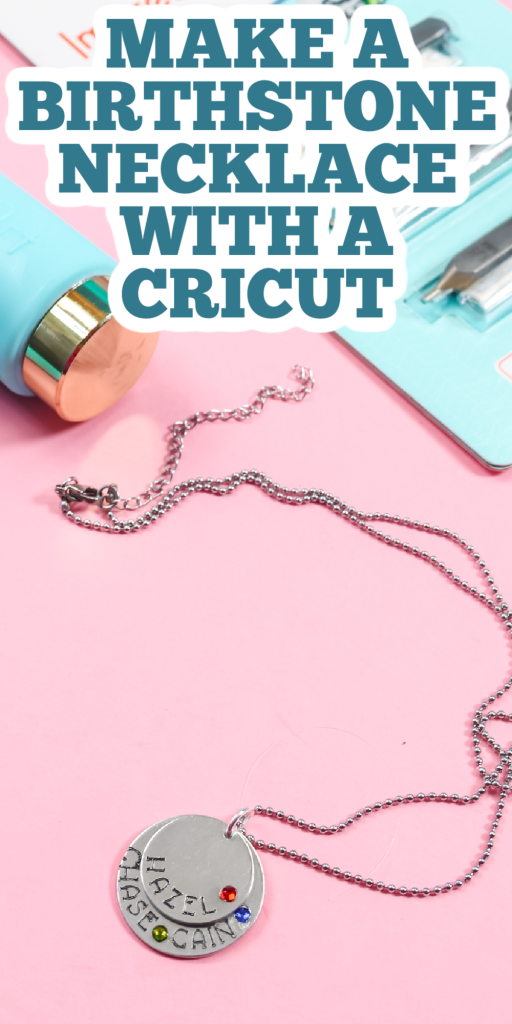
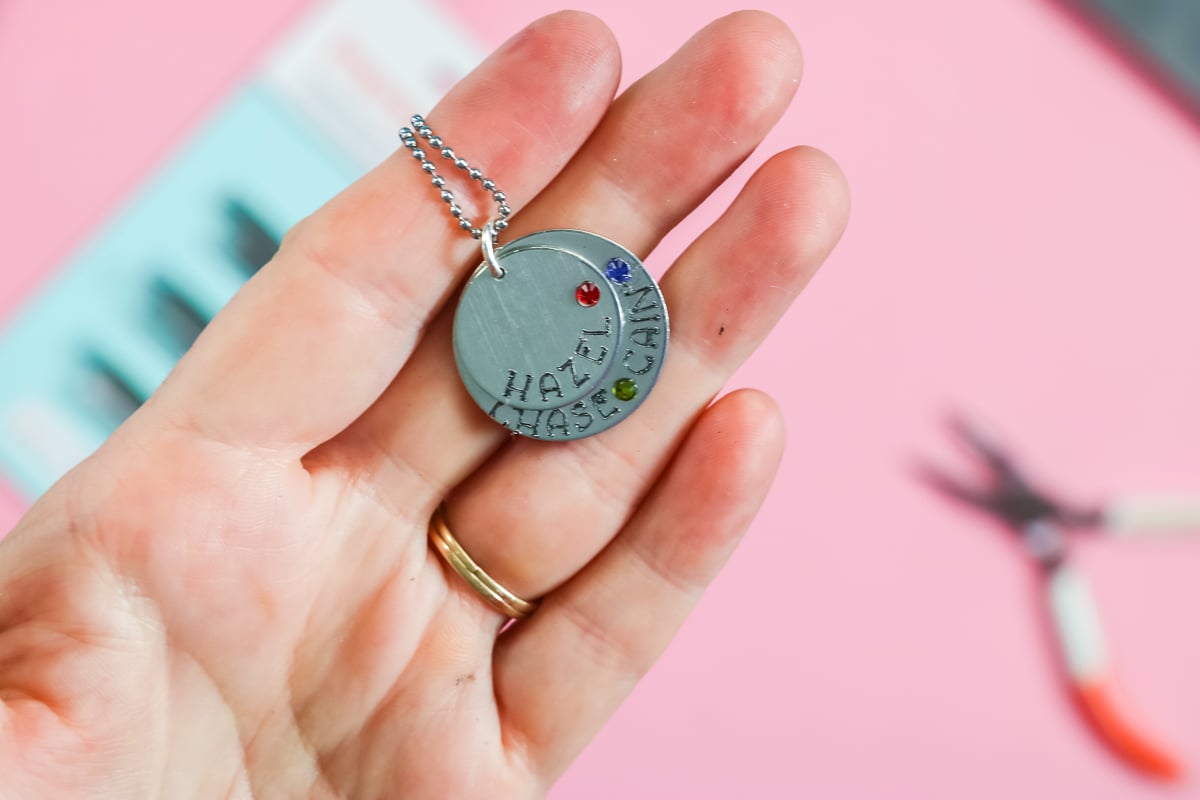
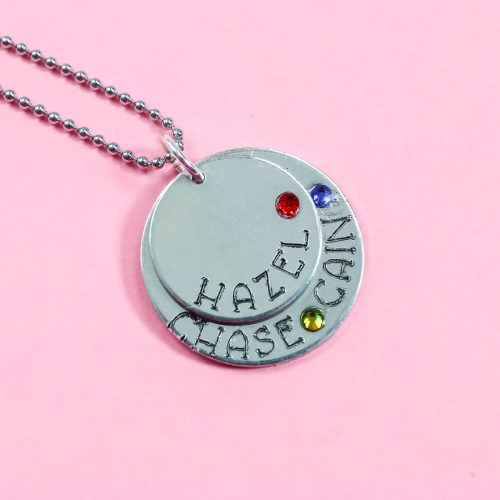
Are you ready to make a DIY necklace with your Cricut machine? Yes, we’re going to engrave on metal again. You all have been loving these projects, and I thought I would give you another idea. This time we’re going to use the Cricut Maker with the engraving tip on the quick swap housing. You can also use a Cricut Explore Air 2 or Explore 3 with this project using the tool I used to make these ornaments. I think you will really love the DIY necklace I have for you today as I am going to be adding birthstones.
DIY Necklace
Don’t think that this project is only for a DIY necklace. You can get this crystal kit and start adding birthstones to various other projects as well. Click play on the video below to see how to make this stacked necklace with names and birthstones. I really think you’re going to love this. It will make an amazing gift idea!
Can’t watch the video or miss some of the steps? You can also follow along below!
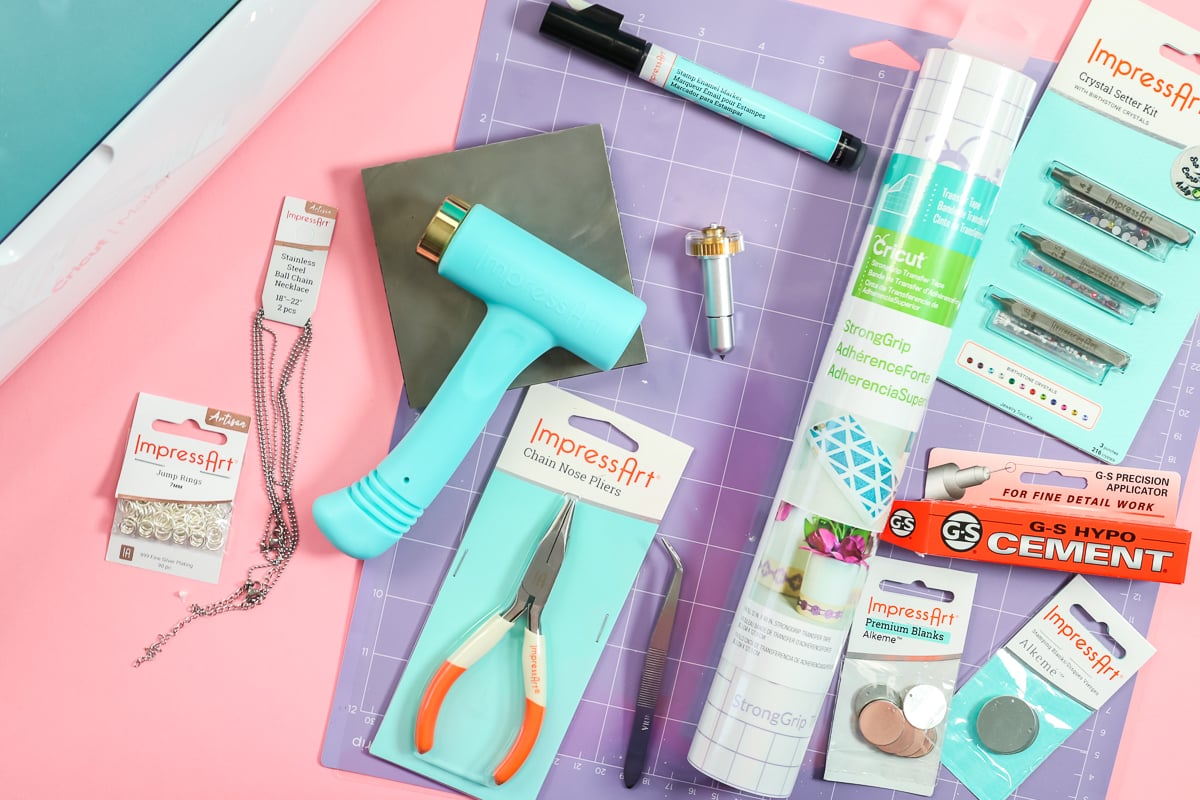
Supplies Needed
How to Design your DIY Necklace
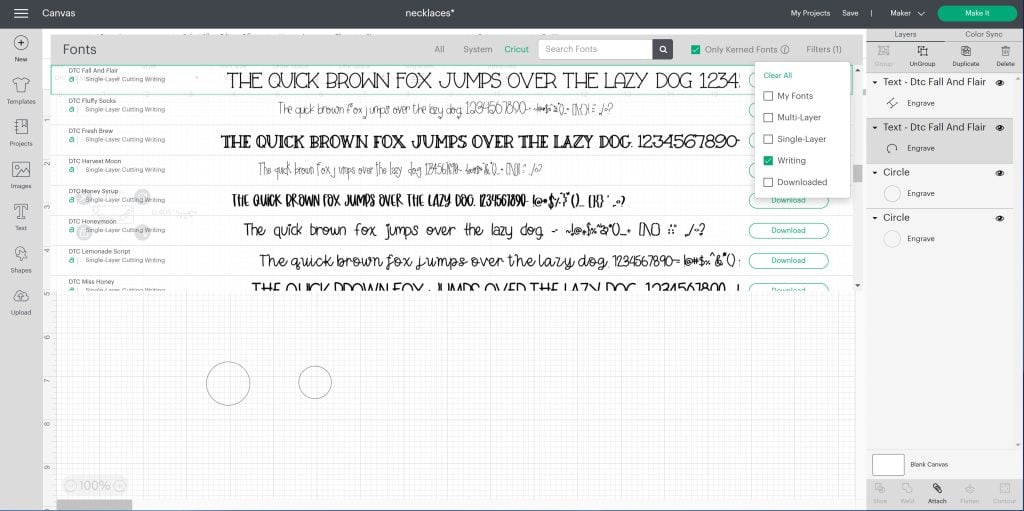
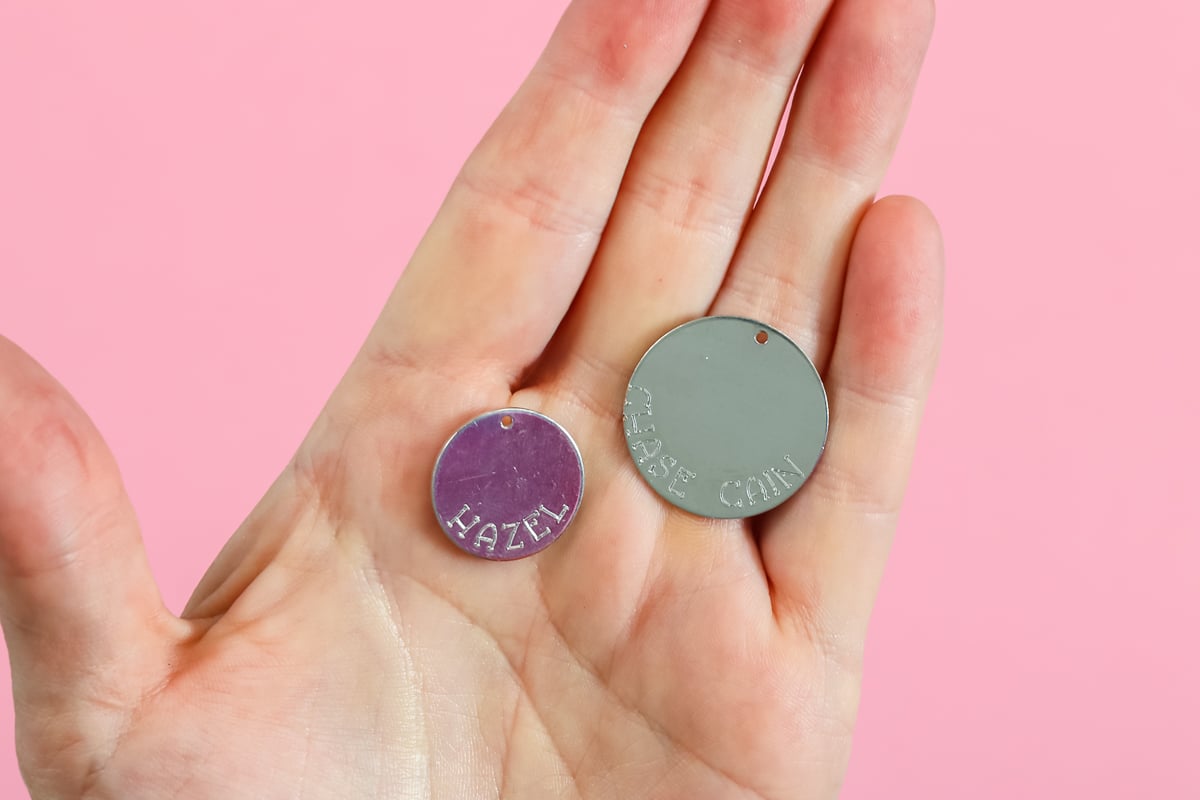
Add circles in Cricut Design Space that are the size of your blanks. One of my blanks is once inch and the other is three-quarters of an inch. Add the text of your choice. I went ahead and picked out a font that is a writing font. To find writing fonts, you go to Cricut fonts, click “Filters”, and choose “Writing”. Then, pick a font that you like. The one I’m using is DTC Fall and Flair.
I made the font fairly small. The two necklace blanks are going to stack on top of each other. I want to make sure that my writing does not get covered up once the pieces are together. I ended up using a font size of 9.5 for both pieces. You do want to make sure the font sizes are the same. Then make the names fit the circles with the “Curve” option. It will be a negative curve because you want it to go down and around the circle.
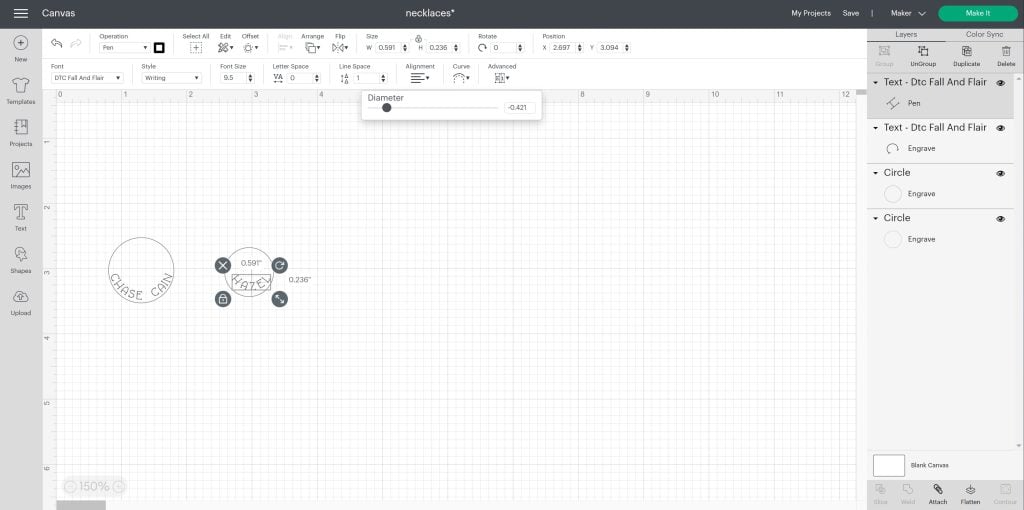
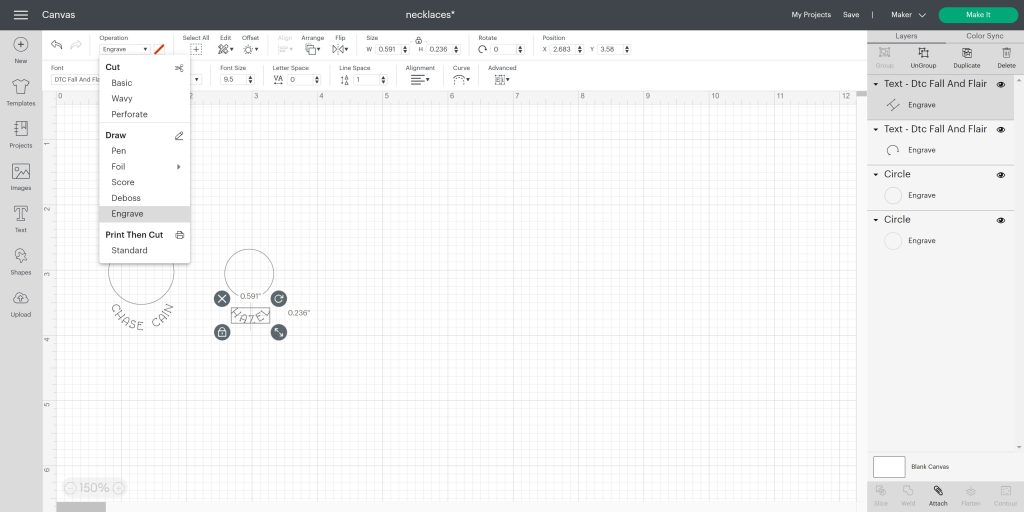
You can play with the curvature and the diameter until you get something that looks the way you want it. The curvature of the pieces will be different. I ended up with a negative .721 and a negative .421. Pick each word and change the operation to Engrave. You will need to have a Maker machine picked as your machine type for this to work. Also, you DO NOT want to attach the writing to the circle. Leave them as two different pieces.
Locating the Engraving
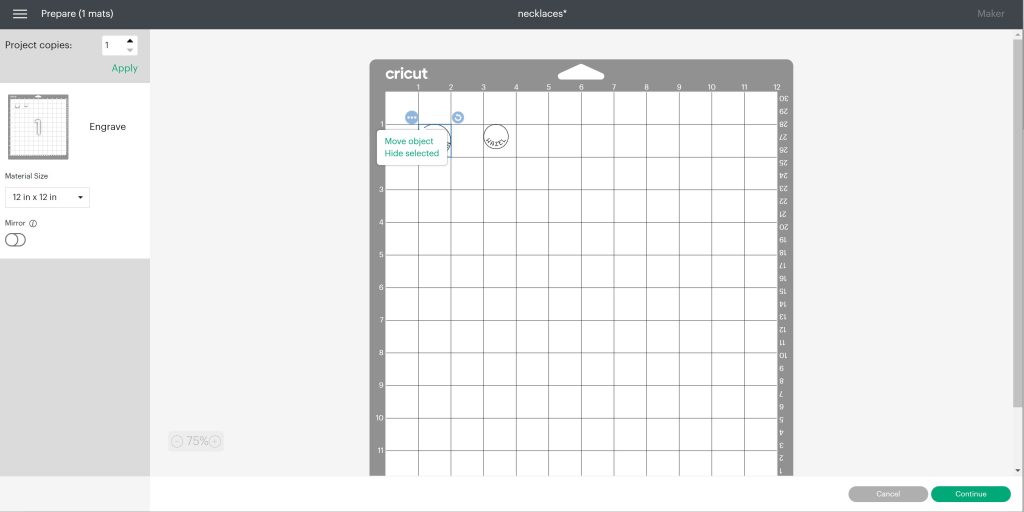
Click “make it” and you will see your pieces. Move the two circles to where you are going to locate your blanks on the actual mat. I try to line them up with the gridlines so I know the location. Then move the words over those circles until they are in the right location. Then just click the circles and click the three dots to hide each of those. You only want the engraved words on your mat.
Adding Blanks to the Mat
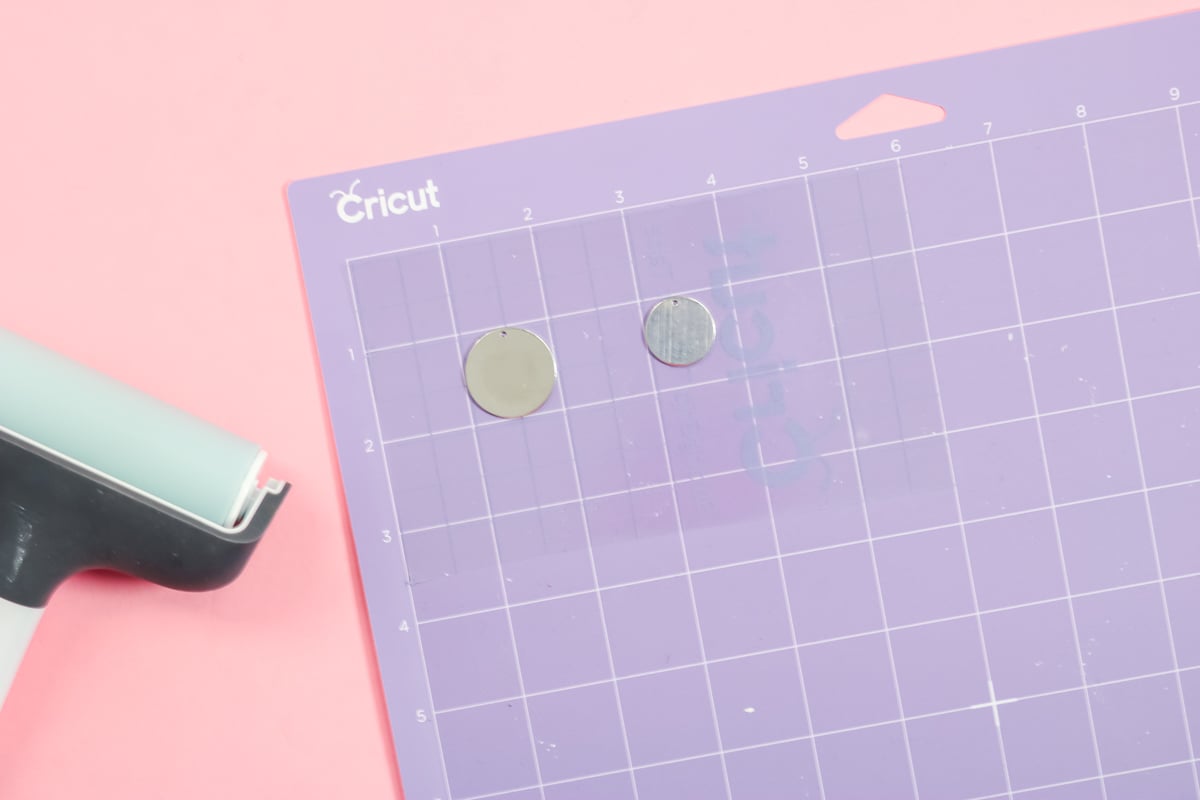
I have found that strong grip transfer tape works best for holding the blanks in place. Just cut a little piece off and stick it to the mat with the backing paper side up. You can use a brayer for this.

Then peel the backing paper off of the transfer tape. Make sure the sticky side of the transfer tape is exposed. Locate the blanks just as they are located in Design Space by using the grid lines on the mat to line them up. You do want to put the hole that is in the blank at the top. Press those down really well with a brayer.
Cricut Settings
This material is most like stainless steel, so I use that as my material setting. You should pick whatever is closest to the material you are engraving. Remember that if you are using a Cricut Explore the process for “tricking” the machine to engrave is a bit different. You can see more about that here.
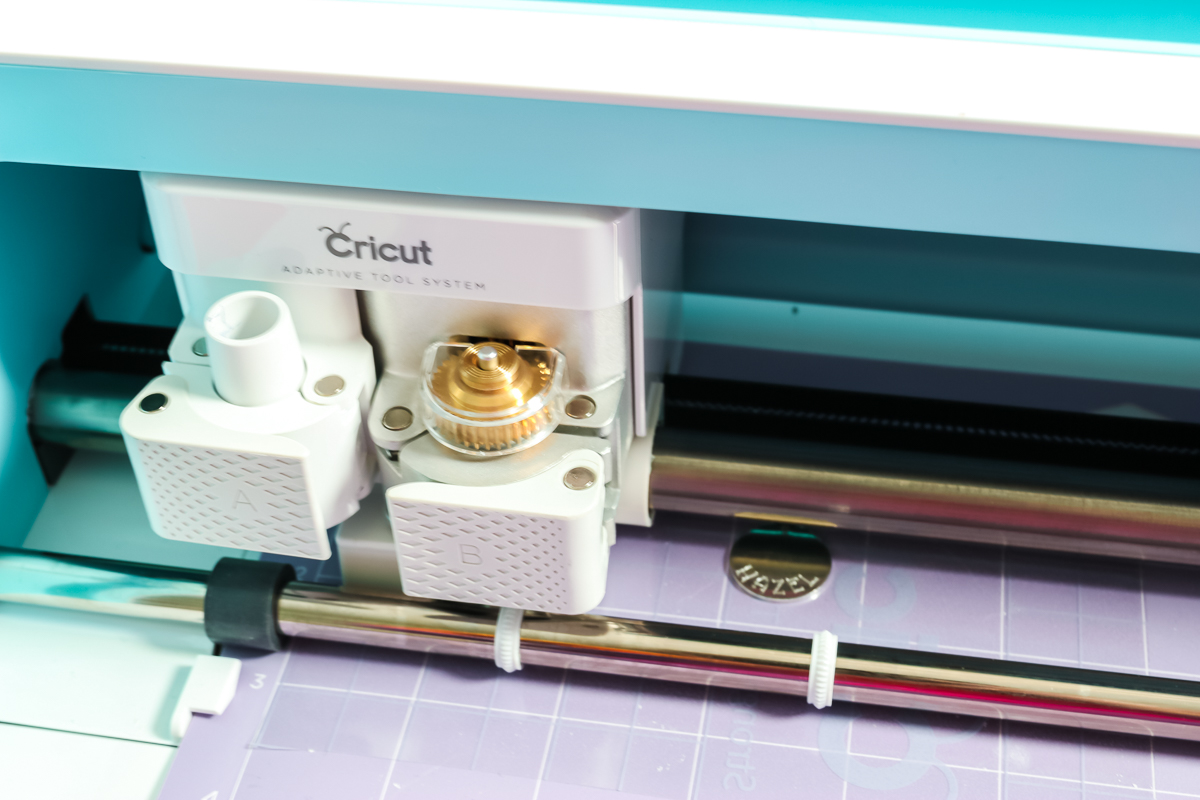
Engraving with the Cricut Maker
Add the engraving tip with the quick-swap housing to the clamp in the Maker then load the mat. Then just press go to start the engraving process and wait for your machine to finish.
Finishing the Engraving
First, you want to peel up the transfer tape. I like to lay it over my blanks and press it down to pick up any small bits of debris that may have happened during the engraving process. Then remove the entire thing from the mat and peel off your engraved blanks.
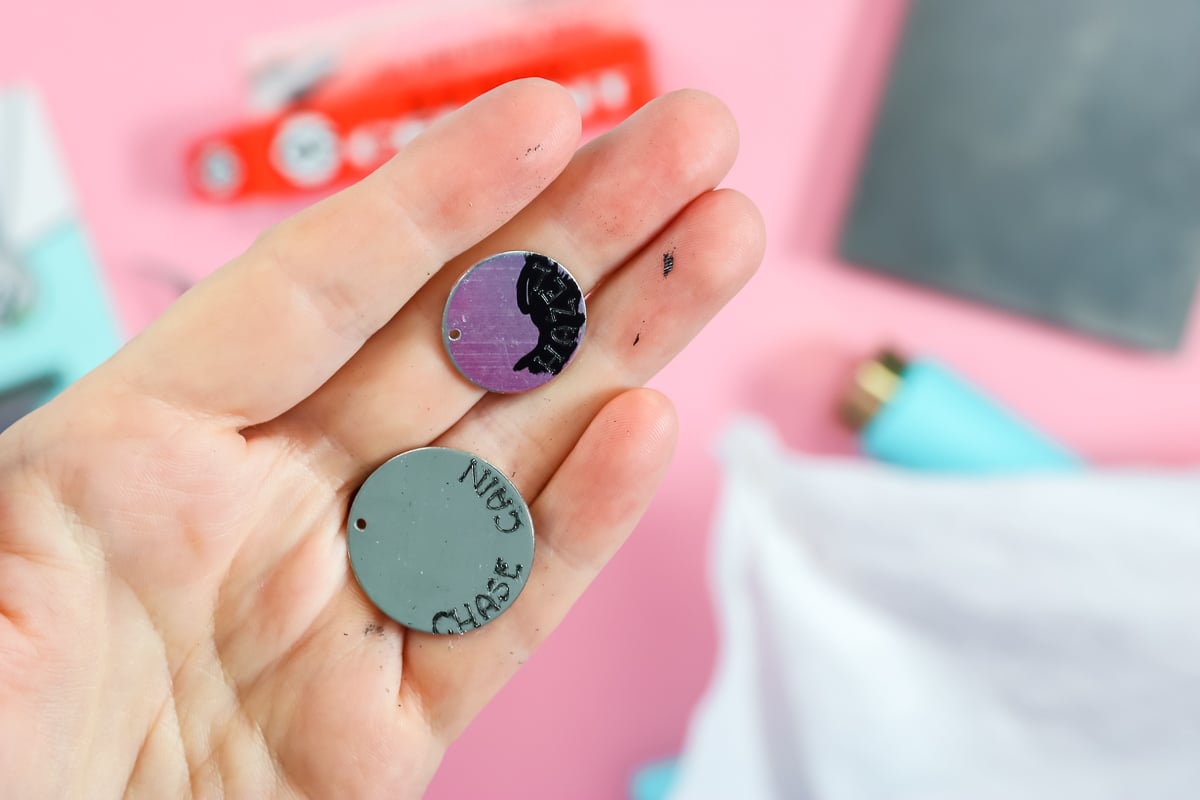
Let’s start with making this engraving stand out a little bit more with our stamp enamel marker. We’re just going to rub it onto the engraving.
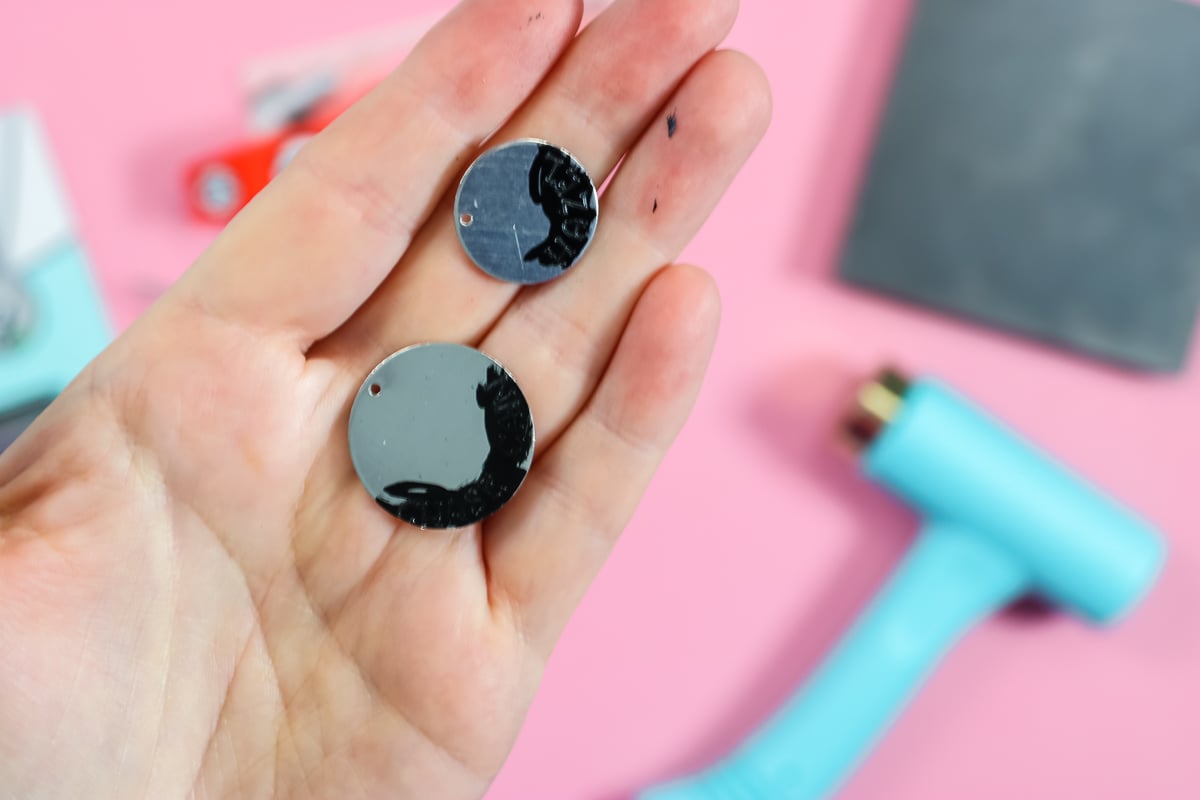
Allow that to sit a few minutes, and then wipe it back off. This marker will get down in the engraving and make it pop just a little bit more. I’m using black, but there are several colors available. Once it is dry, we’ll just wipe off all that excess. You’re left with a darker engraving on your piece.
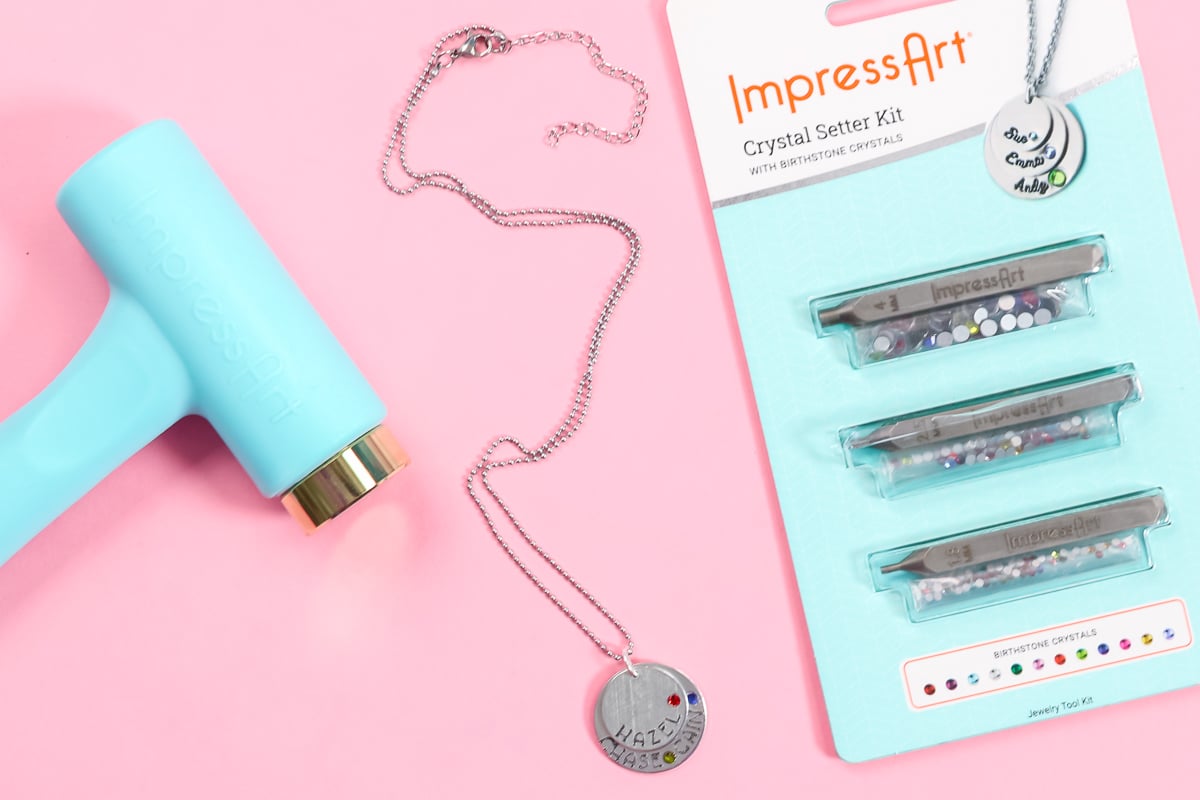
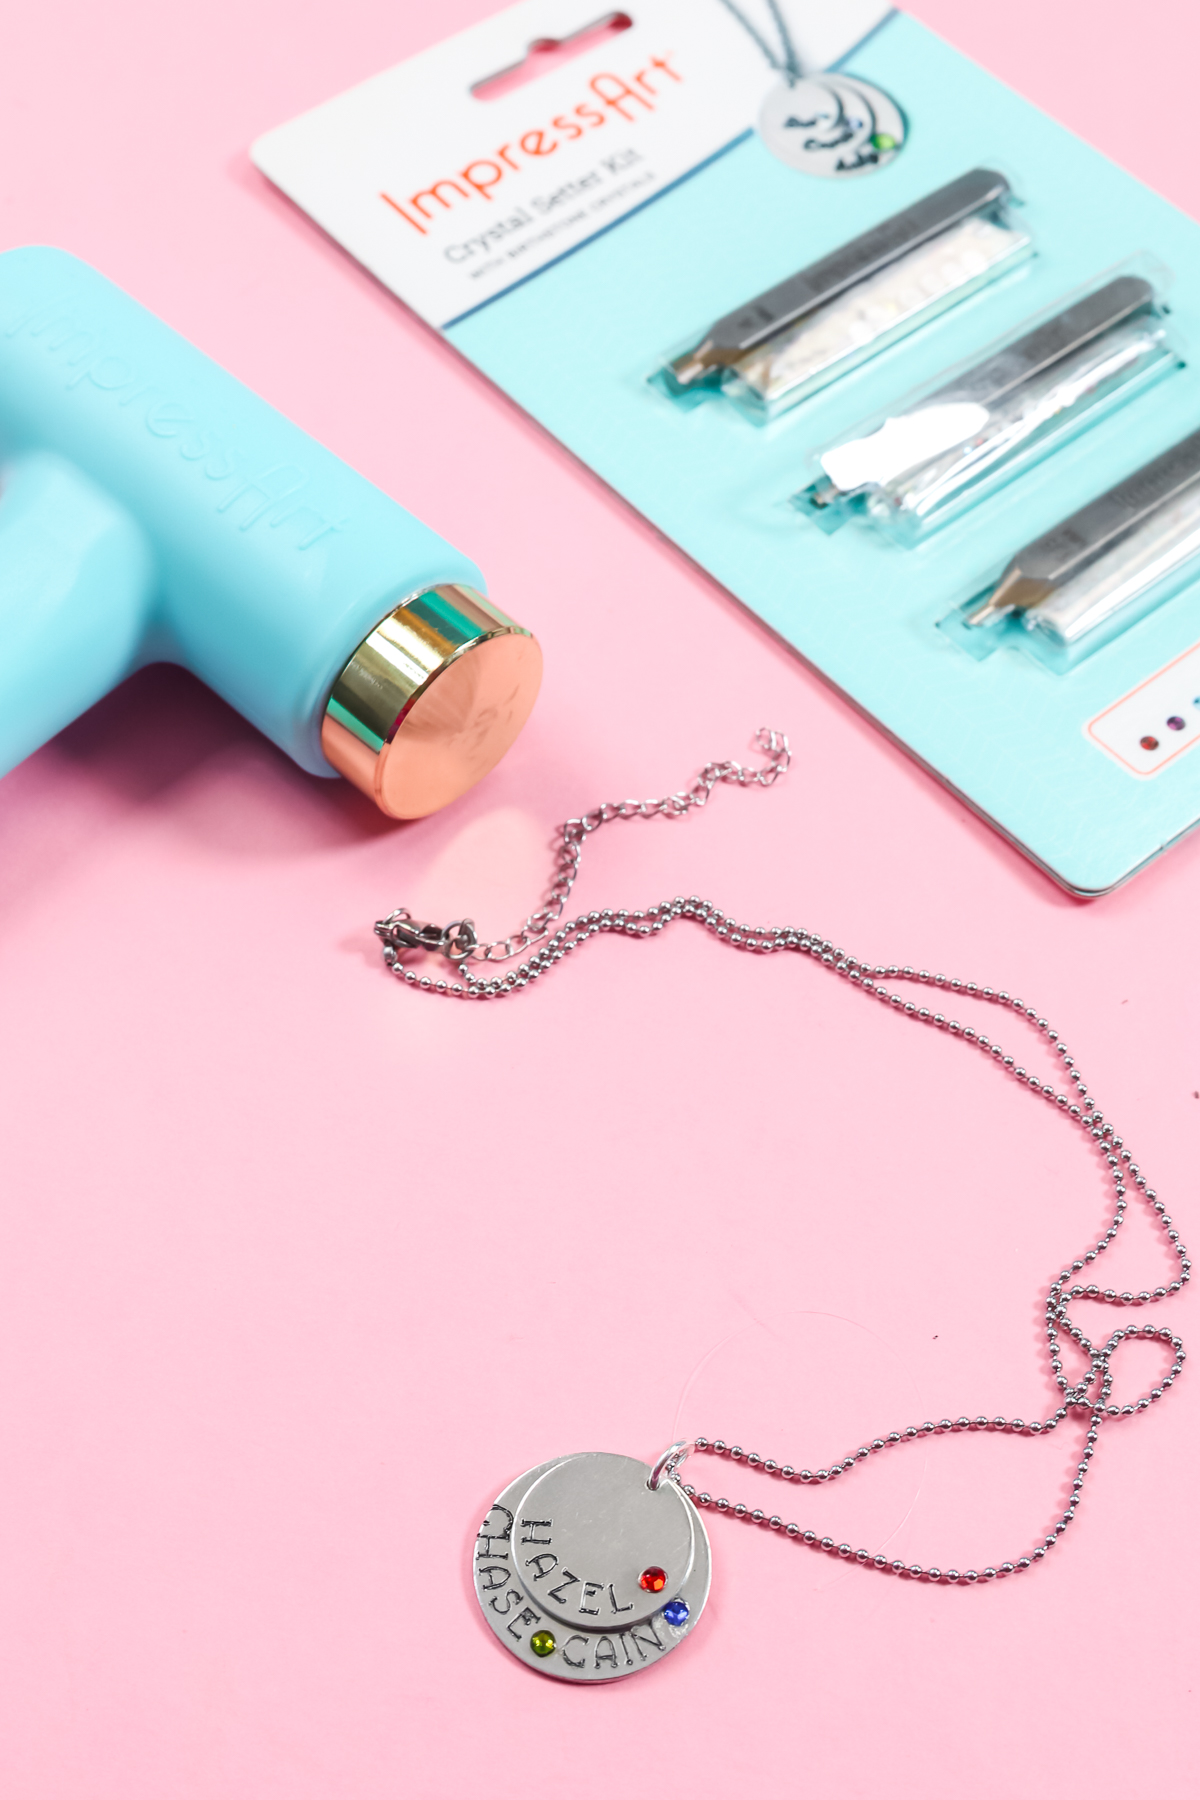
Adding Birthstones to Your DIY Necklace
The kit comes with three different sizes of stones. Pick the one that you would like to use. I am using the 2.5 millimeter stone. This kit does have a guide on the back to tell you which birthstone is for which month. Place your engraved blanks on the stamping block. Take the punch that comes with the kit and place it where you want your first stone.
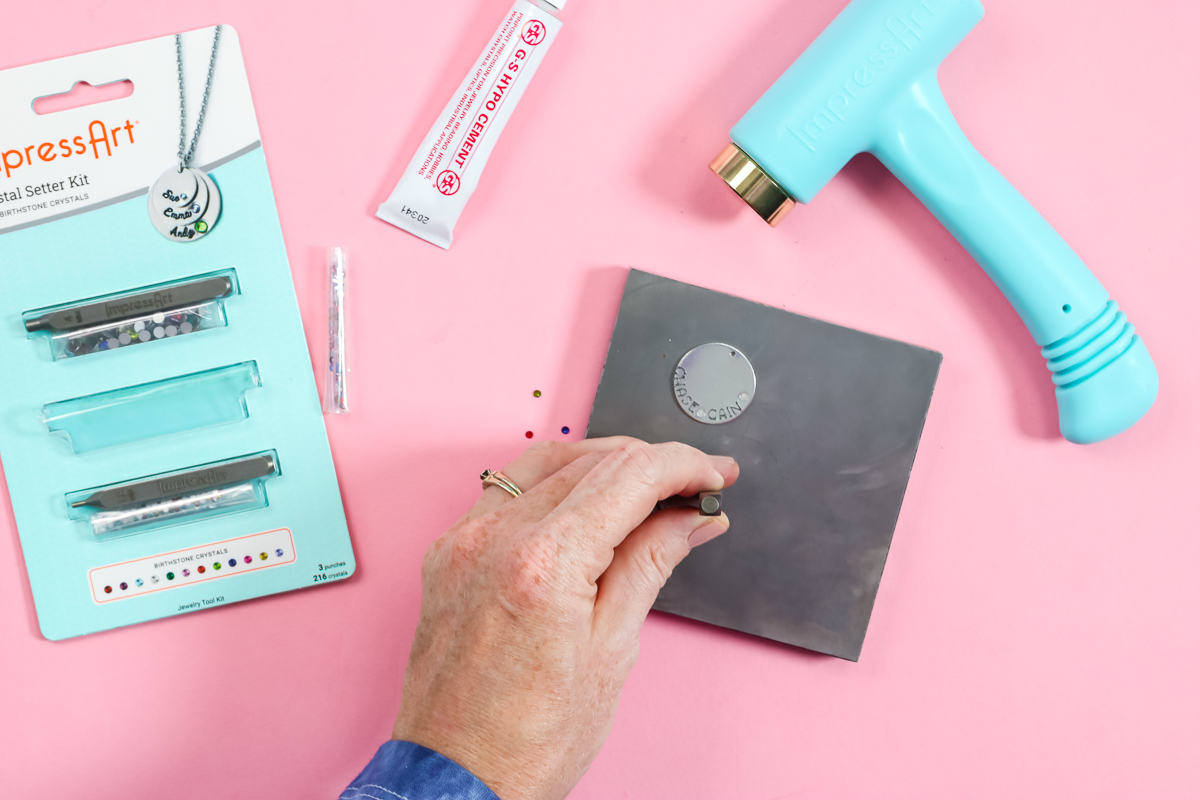
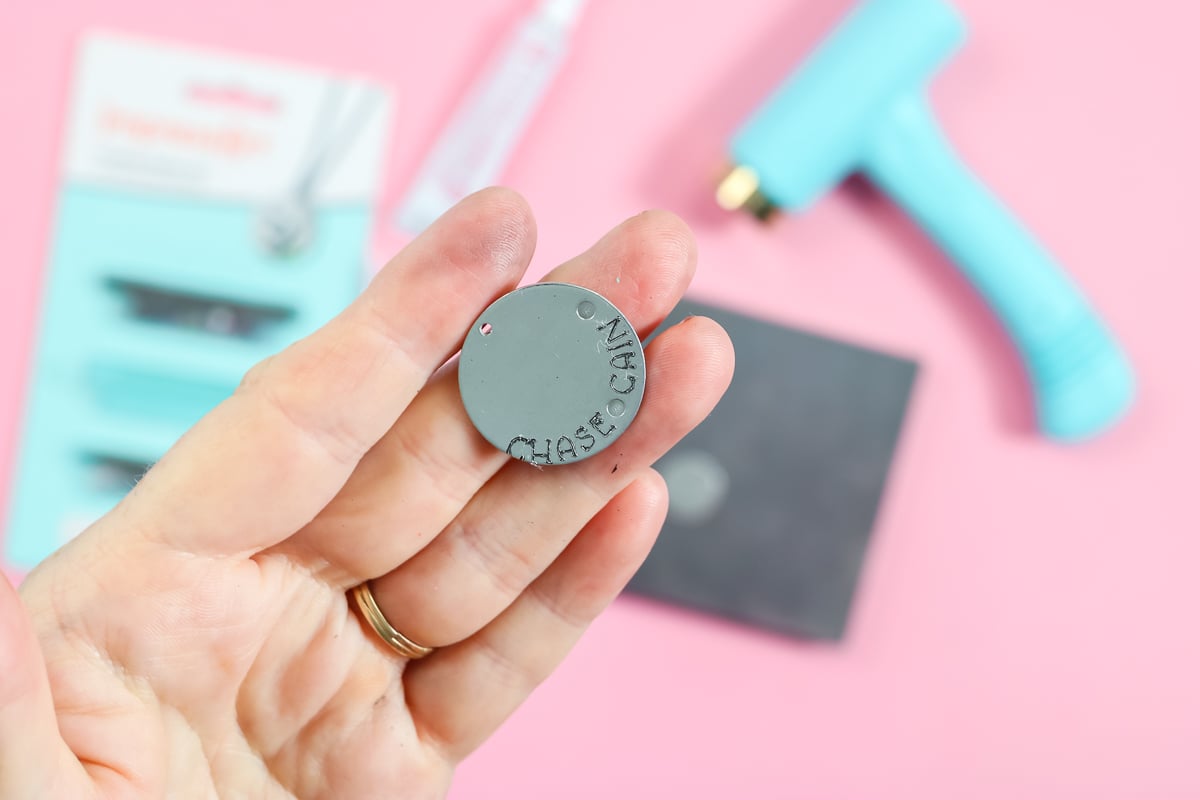
Strike it with the hammer. You’re just making a slight indention where you want that stone to go. You don’t even have to go very deep but it does make it easier to set your stones. Repeat the same process with the punch and the hammer for each stone.
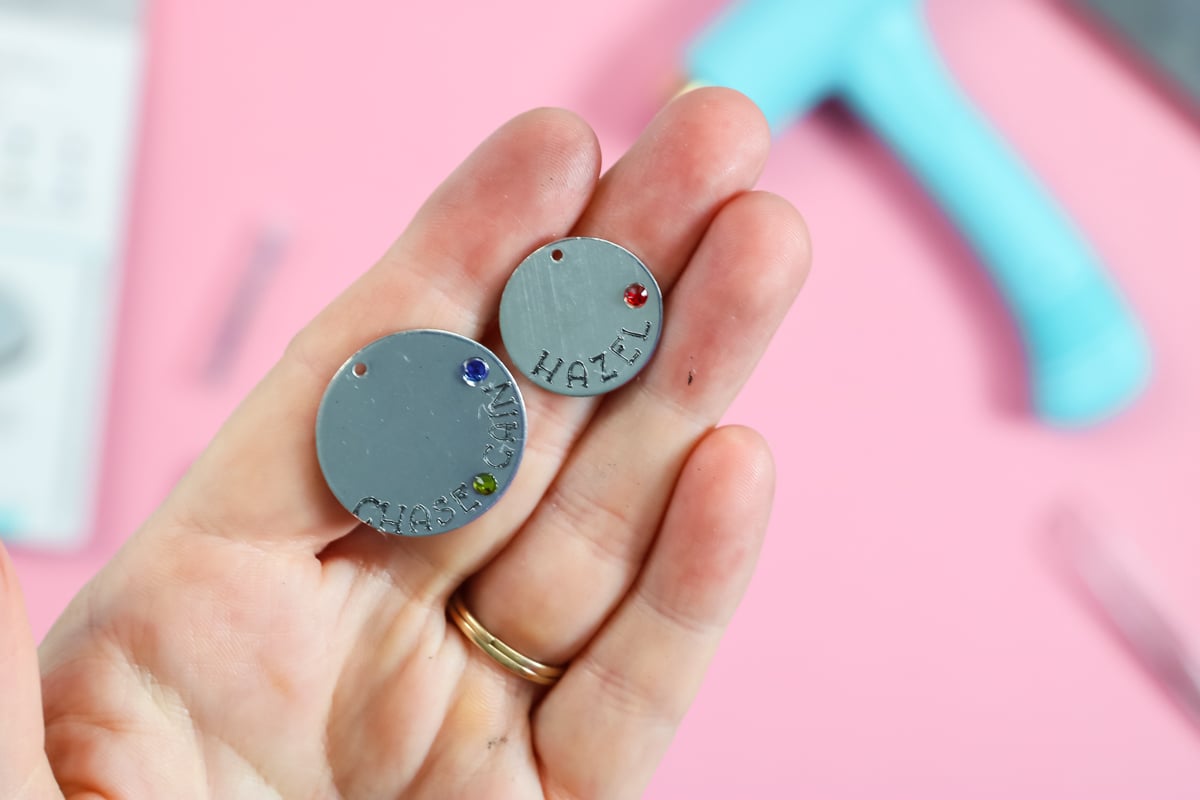
Once you have all of your indentions made, add a drop of glue to each of the indentions. Set each stone on the glue in the right location. It’s easier to use tweezers to place each of your stones. Then we’re just going to allow these to dry before we assemble the DIY necklace.
Finishing your DIY Necklace
Use a jump ring to attach the two blanks together and put them on your chain. It really is that easy to make a custom birthstone necklace with your Cricut machine!
Now you’re ready to make your own birthstone DIY necklace with your Cricut machine, an engraving tool, and the kit from ImpressArt that allows you to add those birthstones. It really adds something amazing to the project.

It is definitely a kit that I would pick up if you are working on engraving just about any metal project. You could add it to a necklace in this case, but you could also add it to the engraved bracelets we made here. There are tons of different blank options on the ImpressArt website. You can add the crystal setting kit to those and add a little something extra special to your projects!
So, will you be adding this DIY necklace craft to your must-make list? It is definitely one that is perfect for giving to mom this Mother’s Day or just about any other occasion you can think of!
Want to make more Cricut crafts? Try the links below as well!

Did you know that you can engrave acrylic with a Cricut Maker? Follow along to see how and start making your own projects today!
Learn how to engrave wood with the Cricut Maker and use it to make some earrings you will love!

Want to organize your spice cabinet? Here’s how to make printable spice jar labels that look great and help keep your kitchen organized!
Want to print the instructions for this DIY necklace? Try the card below!
DIY Necklace with Birthstones
Use your Cricut machine to engrave a necklace then add birthstones with this special kit!
Supplies
- Round blanks two different sizes for the stacked effect
- Crystal setter kit
- Tweezers
- Adhesive
- Cricut machine
- Maker engraving tool or Explore engraving tool
- Stamp enamel marker
- Strong grip mat
- Strong grip transfer tape
- Hammer
- Stamping block
- Jump rings
- Chain
- Jewelry pliers
- Brayer
- Paper towels
Instructions
How to Design your DIY Necklace
-
Add circles in Cricut Design Space that are the size of your blanks. One of my blanks is once inch and the other is three-quarters of an inch. Add the text of your choice. I went ahead and picked out a font that is a writing font. To find writing fonts, you go to Cricut fonts, click “Filters”, and choose “Writing”. Then, pick a font that you like. The one I’m using is DTC Fall and Flair.
-
I made the font fairly small. The two necklace blanks are going to stack on top of each other. I want to make sure that my writing does not get covered up once the pieces are together. I ended up using a font size of 9.5 for both pieces. You do want to make sure the font sizes are the same. Then make the names fit the circles with the “Curve” option. It will be a negative curve because you want it to go down and around the circle.
-
You can play with the curvature and the diameter until you get something that looks the way you want it. The curvature of the pieces will be different. I ended up with a negative .721 and a negative .421. Pick each word and change the operation to Engrave. You will need to have a Maker machine picked as your machine type for this to work. Also, you DO NOT want to attach the writing to the circle. Leave them as two different pieces.
Locating the Engraving
-
Click “make it” and you will see your pieces. Move the two circles to where you are going to locate your blanks on the actual mat. I try to line them up with the gridlines so I know the location. Then move the words over those circles until they are in the right location. Then just click the circles and click the three dots to hide each of those. You only want the engraved words on your mat.
Adding Blanks to the Mat
-
I have found that strong grip transfer tape works best for holding the blanks in place. Just cut a little piece off and stick it to the mat with the backing paper side up. You can use a brayer for this.
-
Then peel the backing paper off of the transfer tape. Make sure the sticky side of the transfer tape is exposed. Locate the blanks just as they are located in Design Space by using the grid lines on the mat to line them up. You do want to put the hole that is in the blank at the top. Press those down really well with a brayer.
Cricut Settings
-
This material is most like stainless steel, so I use that as my material setting. You should pick whatever is closest to the material you are engraving. Remember that if you are using a Cricut Explore the process for “tricking” the machine to engrave is a bit different.
Engraving with the Cricut Maker
Finishing the Engraving
-
First, you want to peel up the transfer tape. I like to lay it over my blanks and press it down to pick up any small bits of debris that may have happened during the engraving process. Then remove the entire thing from the mat and peel off your engraved blanks.
-
Let’s start with making this engraving stand out a little bit more with our stamp enamel marker. We’re just going to rub it onto the engraving.
-
Allow that to sit a few minutes, and then wipe it back off. This marker will get down in the engraving and make it pop just a little bit more. I’m using black, but there are several colors available. Once it is dry, we’ll just wipe off all that excess. You’re left with a darker engraving on your piece.
Adding Birthstones to Your DIY Necklace
-
The kit comes with three different sizes of stones. Pick the one that you would like to use. I am using the 2.5 millimeter stone. This kit does have a guide on the back to tell you which birthstone is for which month. Place your engraved blanks on the stamping block. Take the punch that comes with the kit and place it where you want your first stone.
-
Strike it with the hammer. You’re just making a slight indention where you want that stone to go. You don’t even have to go very deep but it does make it easier to set your stones. Repeat the same process with the punch and the hammer for each stone.
-
Once you have all of your indentions made, add a drop of glue to each of the indentions. Set each stone on the glue in the right location. It’s easier to use tweezers to place each of your stones. Then we’re just going to allow these to dry before we assemble the DIY necklace.