This post and photos may contain Amazon or other affiliate links. If you purchase something through any link, I may receive a small commission at no extra charge to you. Any supplies used may be given to me free of charge, however, all projects and opinions are my own.
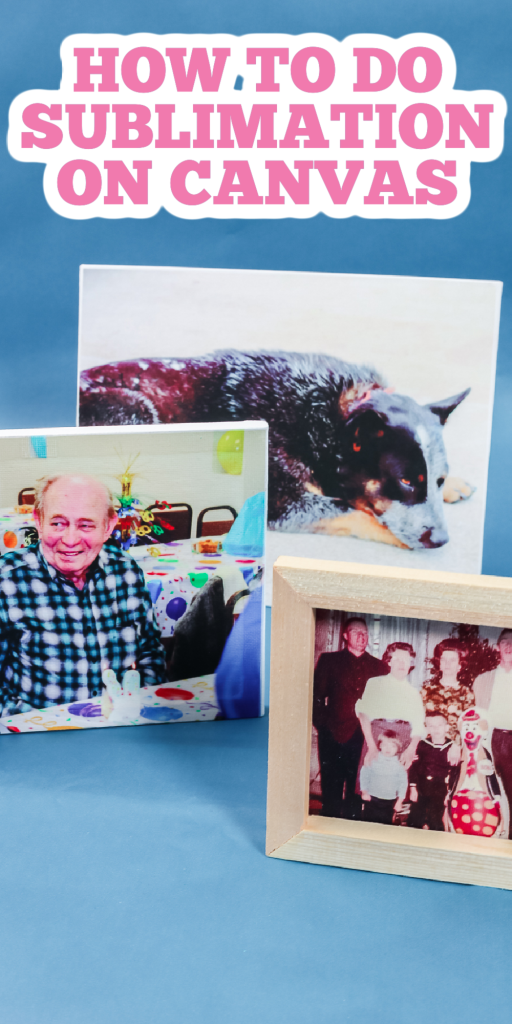
Today, we’re going to talk about sublimation on canvas. These canvases make an amazing gift idea, and I’m going to give you a few options on how to make them. If you don’t have a sublimation printer, I have a technique to make a photo canvas here using an inkjet printer. However, if you have a sublimation printer, you are going to love this technique for sublimating on canvas. I’ve seen sublimation on canvas a few different ways, and I didn’t really like the results of those. I came up with a method all on my own and I know you are going to love it!
Sublimation on Canvas
This photo canvas sublimation method uses clear dye sub HTV. It’s a fairly new product on the market and it has so many possibilities. See me use it in the video below to make gorgeous DIY canvas art for my home.
Can’t watch the video or need more information? Keep reading for the details below!
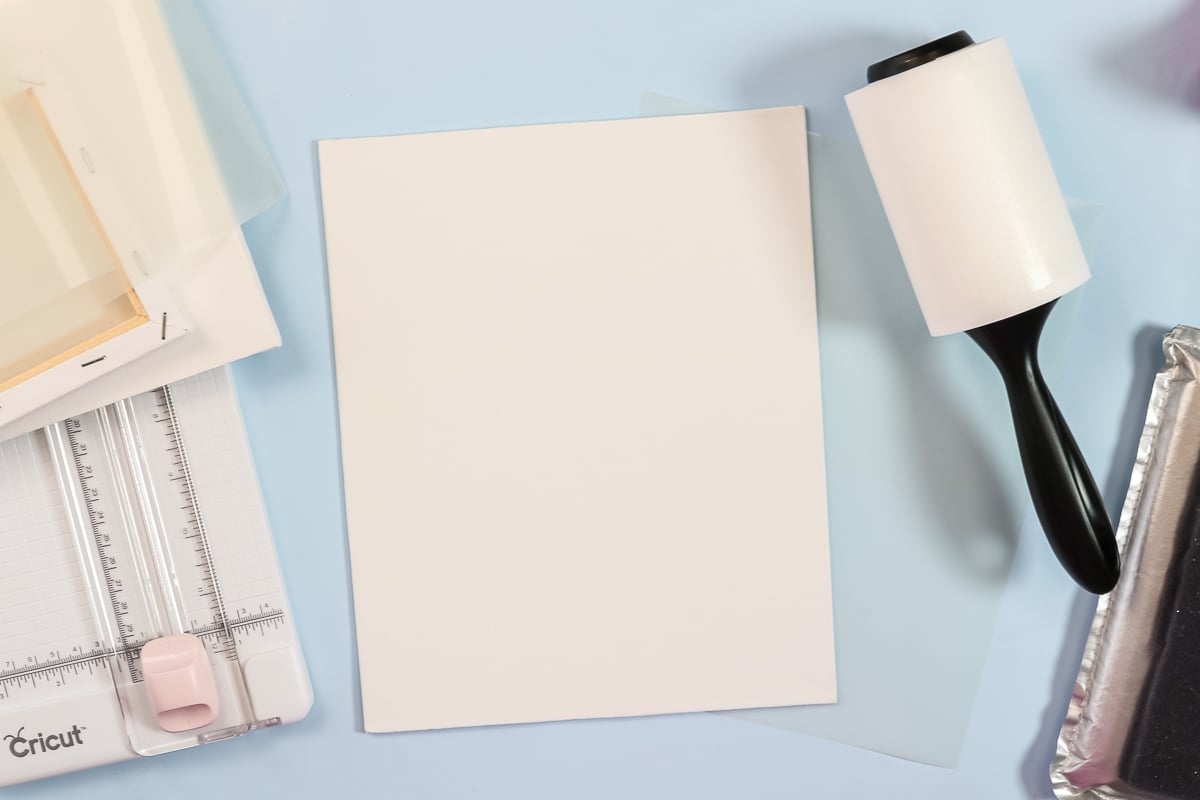
Supplies Needed
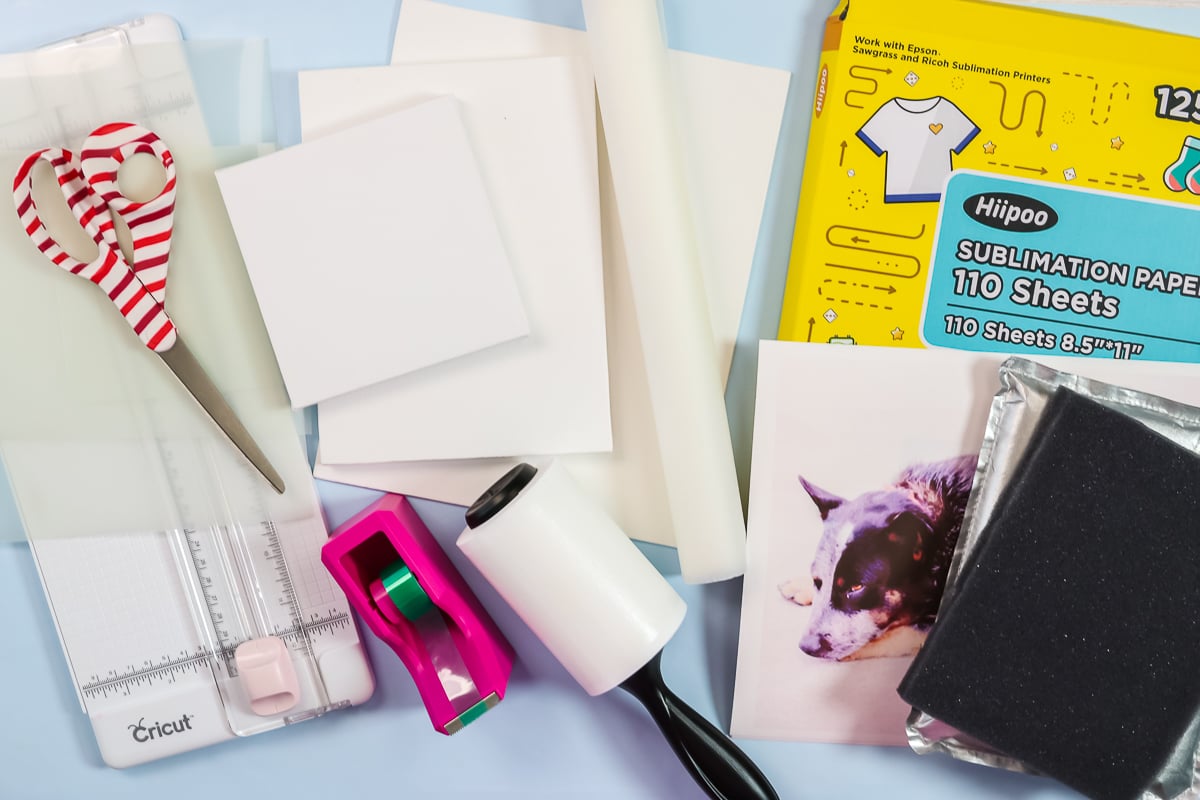
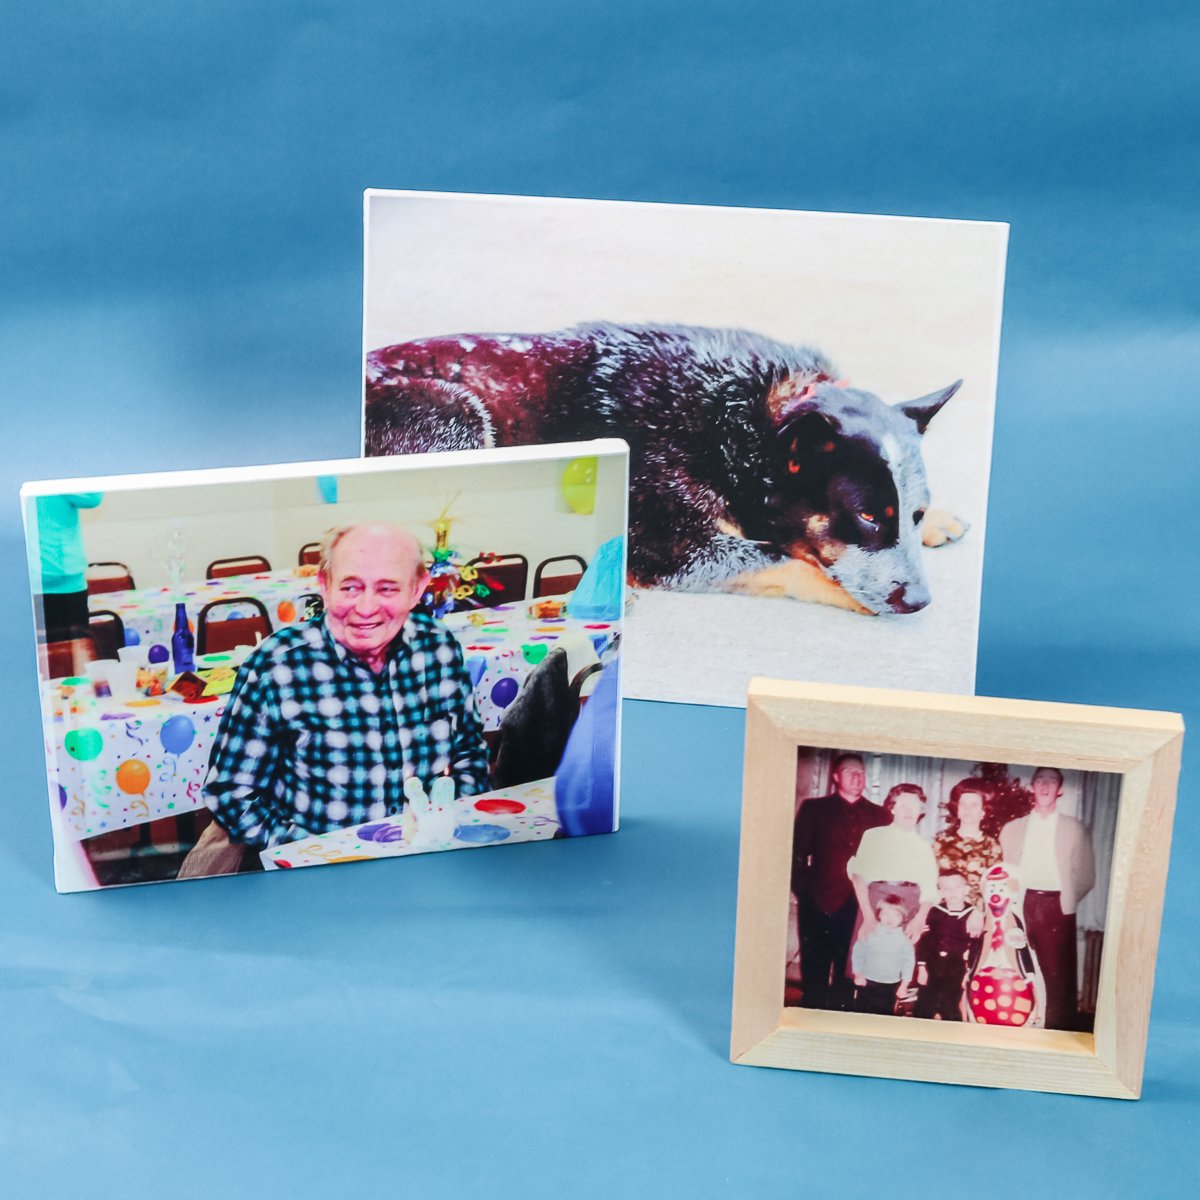
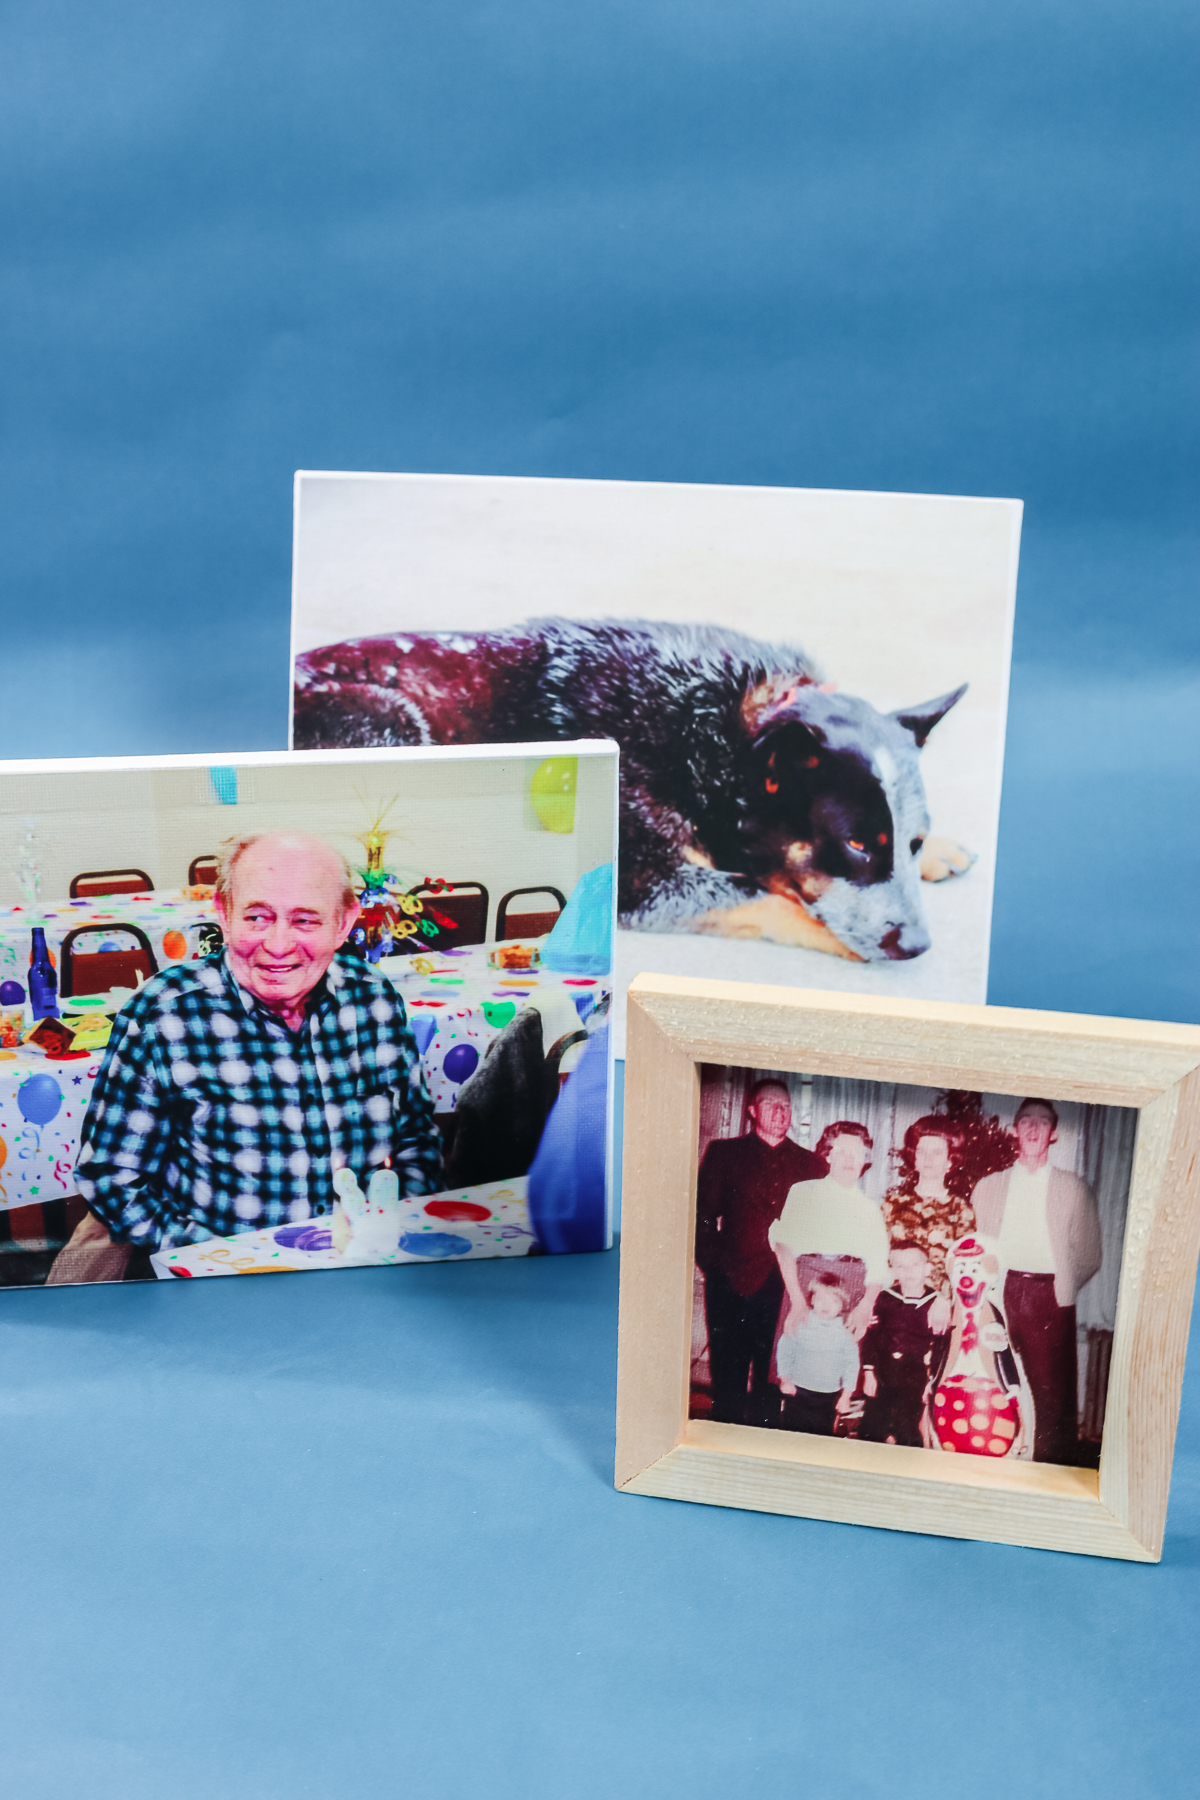
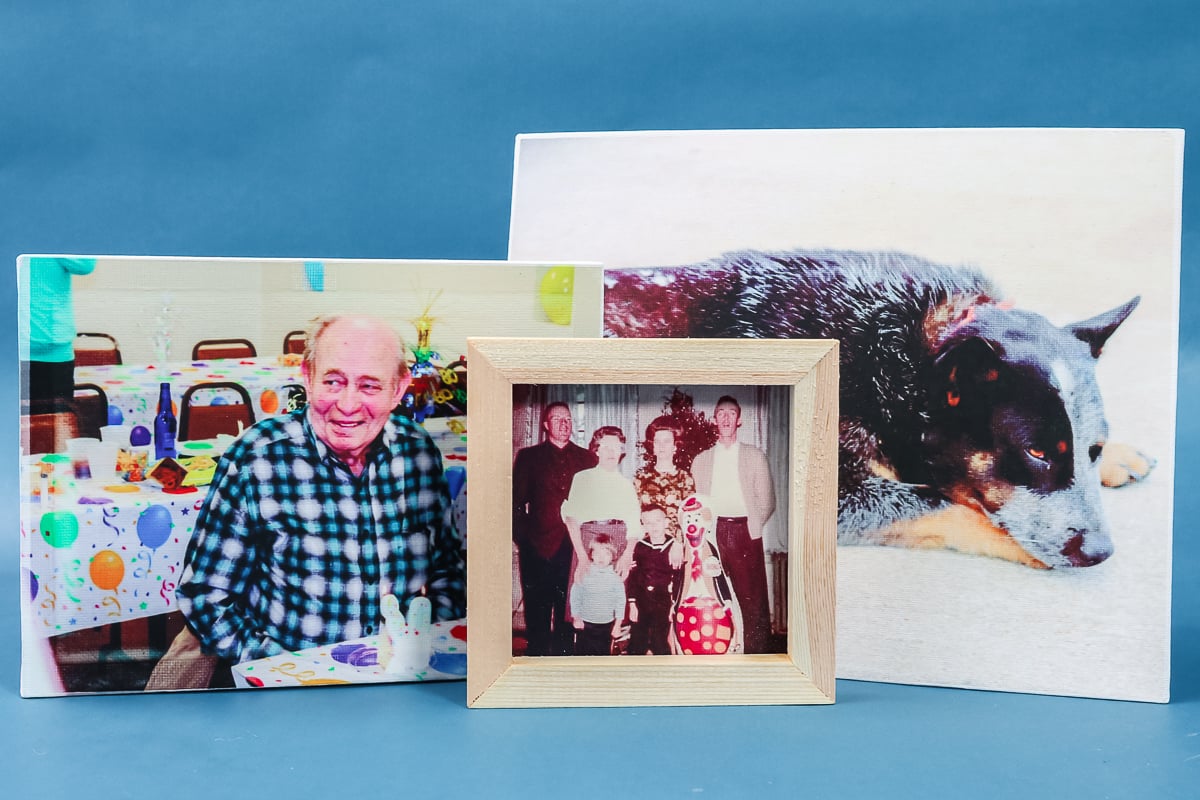
Photo Canvas Options
Here are a few different ways you can choose to add a photo to a canvas. I am actually going to show you the steps for each of the methods below then you can pick your favorite.
- Use a flat canvas with no frame and just sublimate on the top. This is definitely the easiest method and great if you are just getting started.
- Use a canvas with a frame inside and sublimate on the outer surface. This does require a few extra materials but may be worth it to get that gallery canvas look.
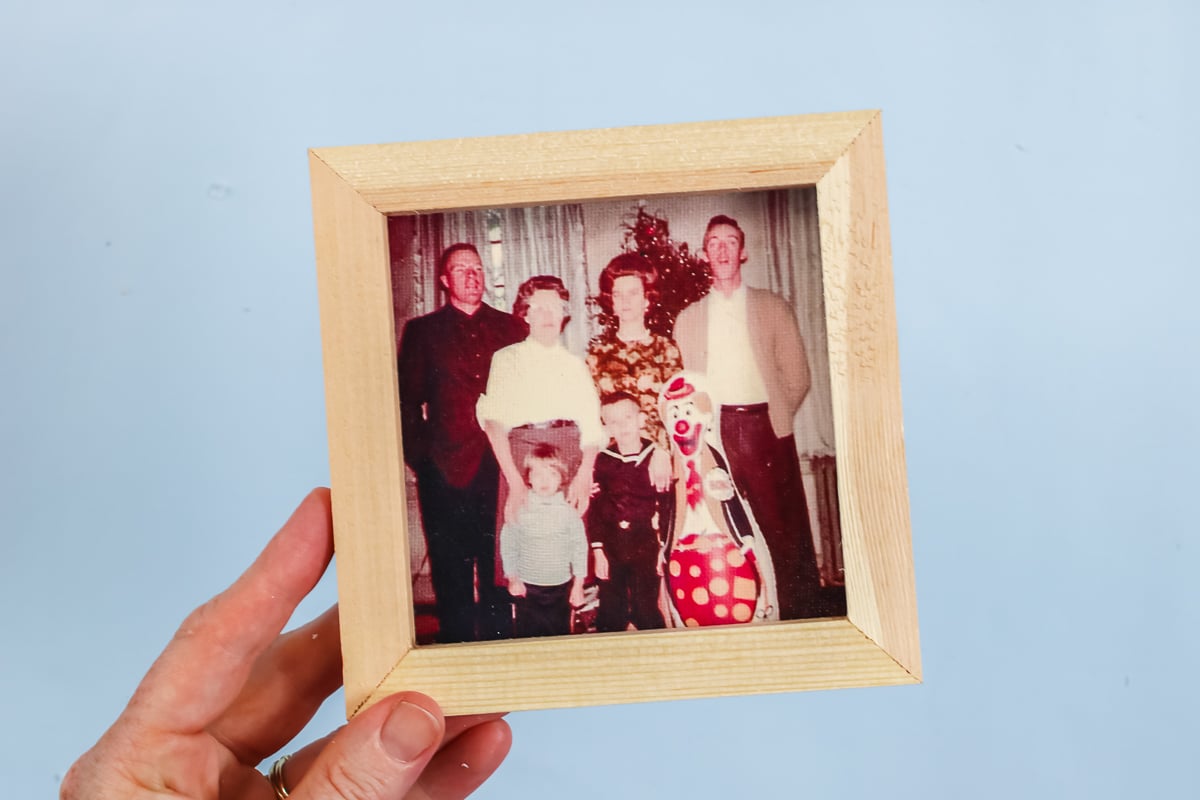
- You can also choose to do a reverse canvas which means that you will remove the frame from the inside and use it on the outside. I love this look for some of my projects, however, it can be a bit rustic in appearance.
Adding Clear Dye Sub HTV to Canvas
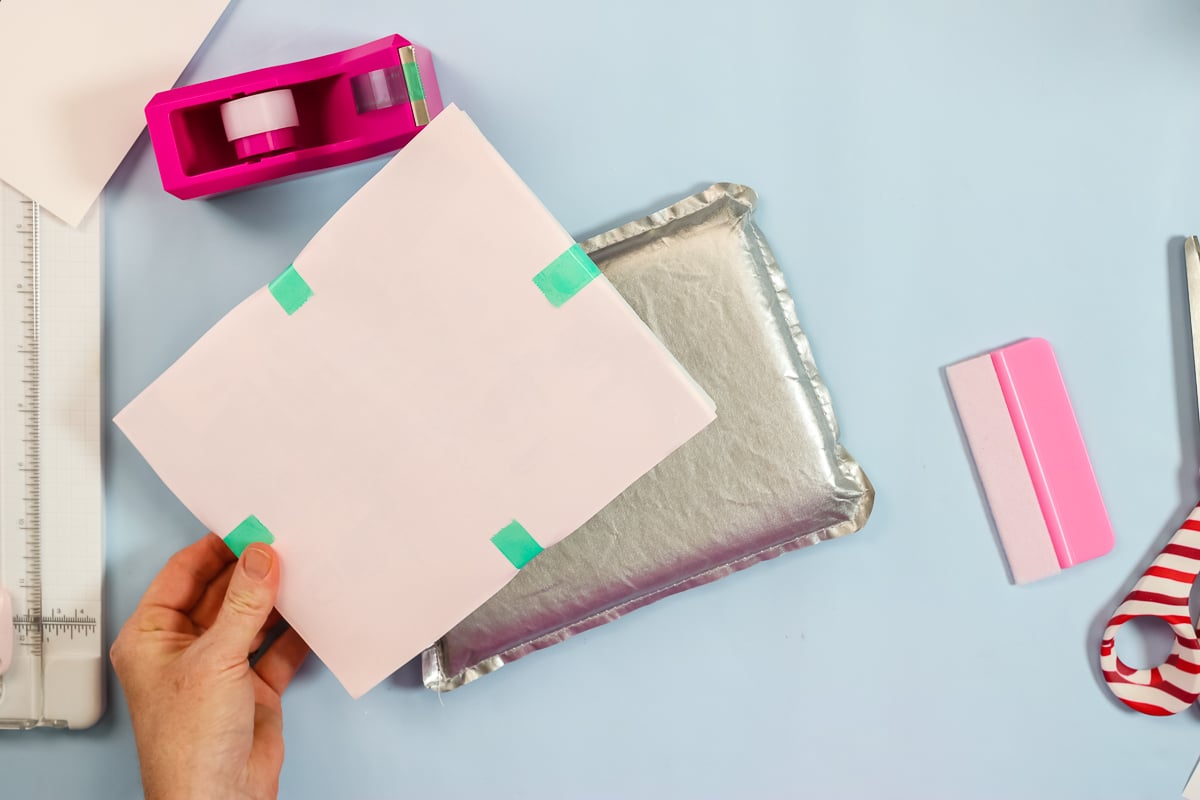
First, let’s talk about adding the clear dye sub to your canvas. There are a few things that you would do in each case. That includes measuring your area and using the paper trimmer to cut the clear dye sub HTV to the exact size of the area you will be sublimating. You may want to keep it just very slightly inside the canvas to make it just a little bit shorter. Ths way you don’t get the edge of the HTV on the edge of your canvas, which could make a rough edge.
You also want to clean your surface well in each case. Any hair or lint on your surface will show through the clear HTV and you definitely do not want that!
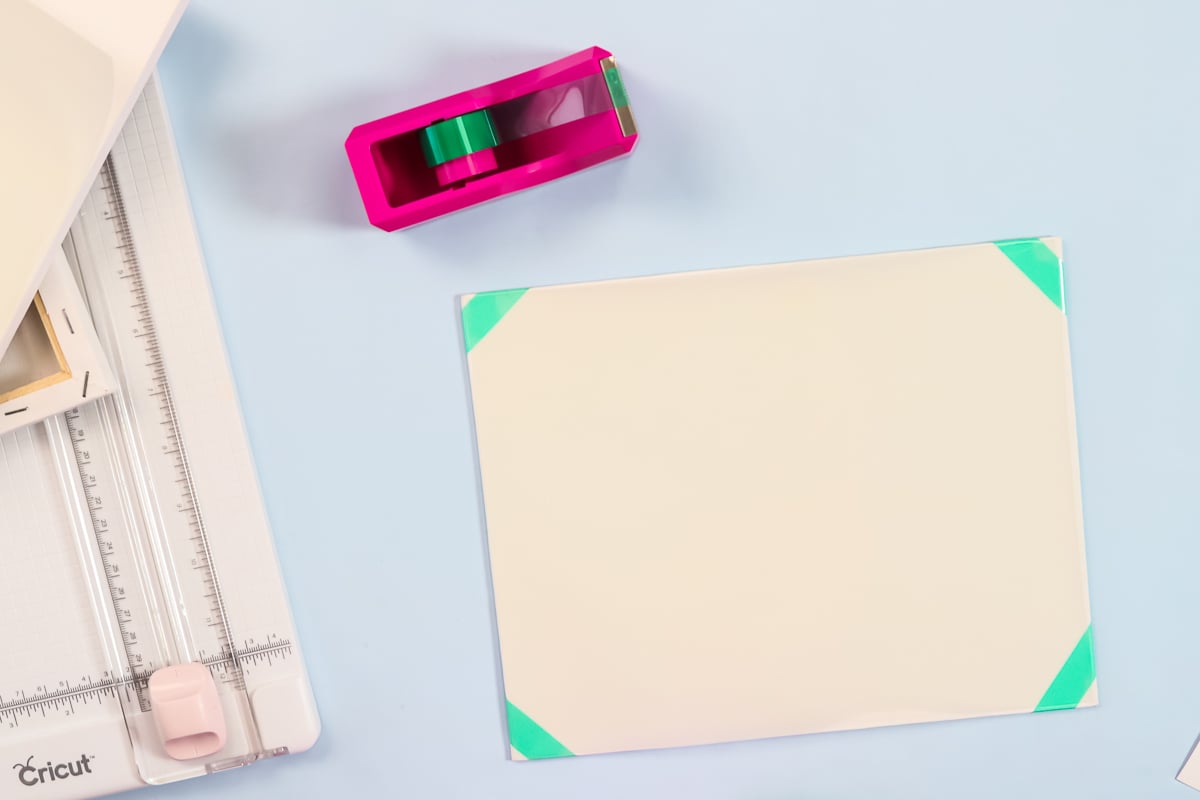
You always want to apply this HTV with the shiny side down on the canvas. The rough or dull side should be up when pressing. I like to locate my HTV and tape it down with heat-resistant tape to hold it exactly into place. For the flat canvas, you will just add to your heat press after applying the HTV to the surface.
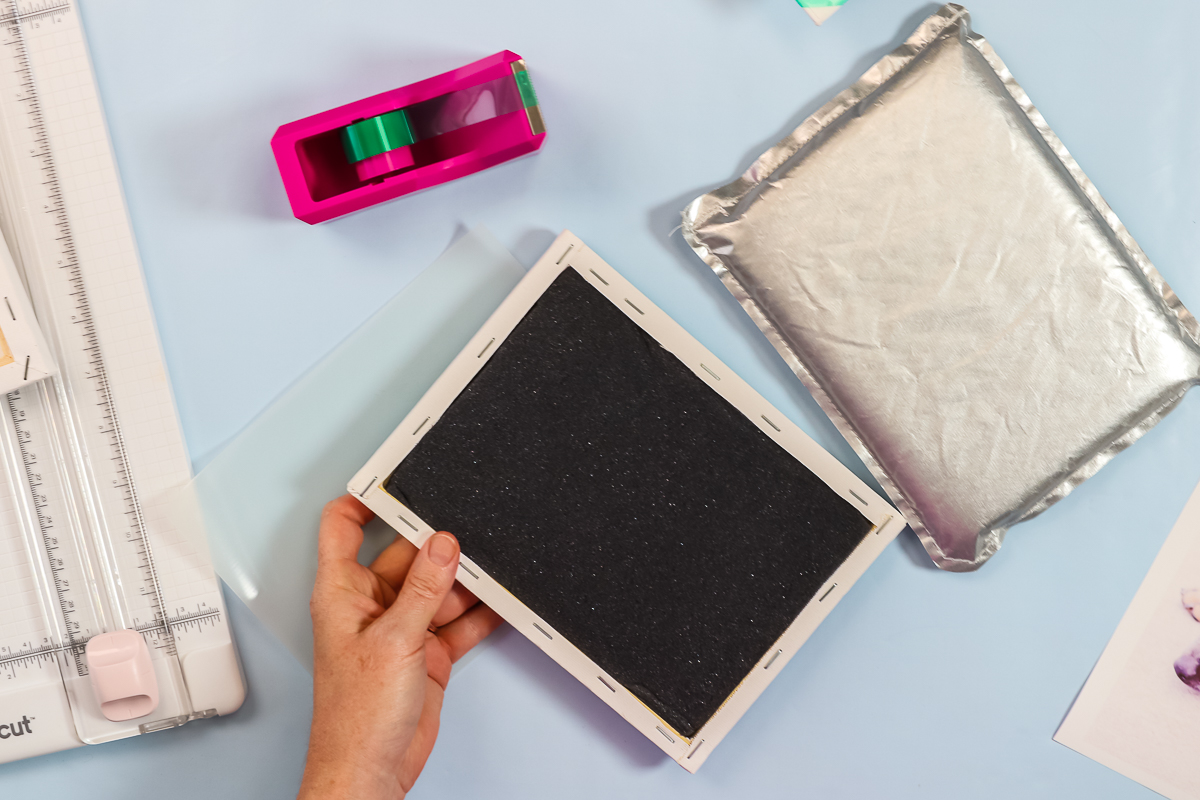
For the version with the frame inside, you will need something on the inside to apply pressure. I added heat-resistant foam to the inside and then put it on top of a pressing pillow. That game me something solid to press against. Then it is just a matter of adjusting your heat press and pressing in the same manner as the flat canvas above.
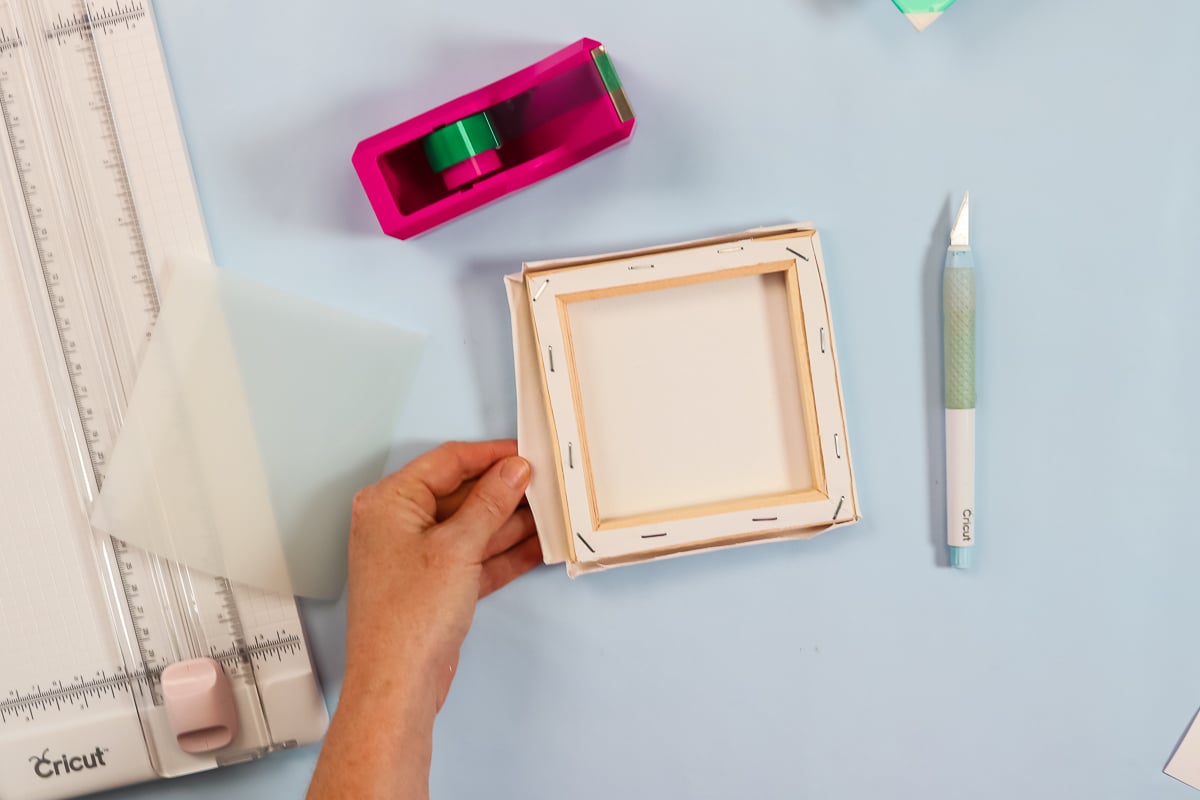
To make a reverse canvas, cut the canvas on the outside of these staples on the back all the way around.
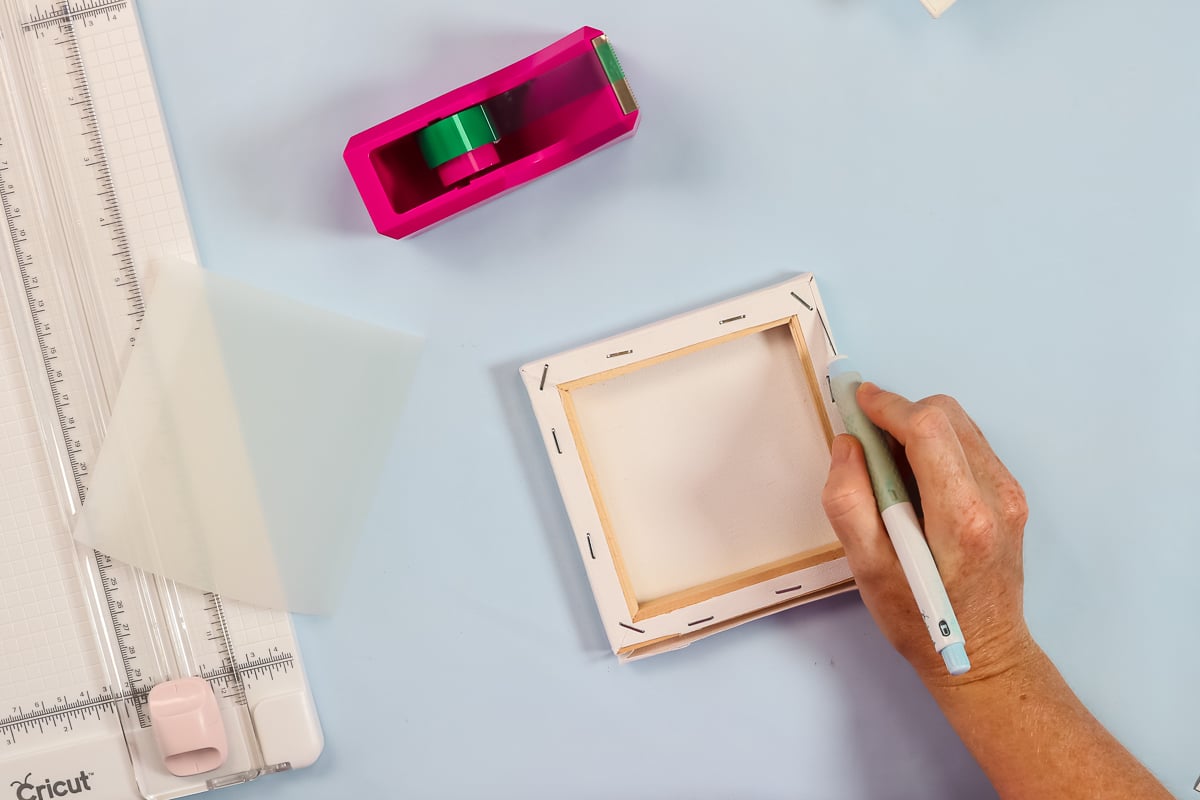
Once that is cut all the way around, just remove the canvas and flip it over. You will add your HTV to the flat canvas portion in the same manner as above. You will use the frame later on the outside so be sure to set it to the side. NOTE: You can stain or paint it if you would like.
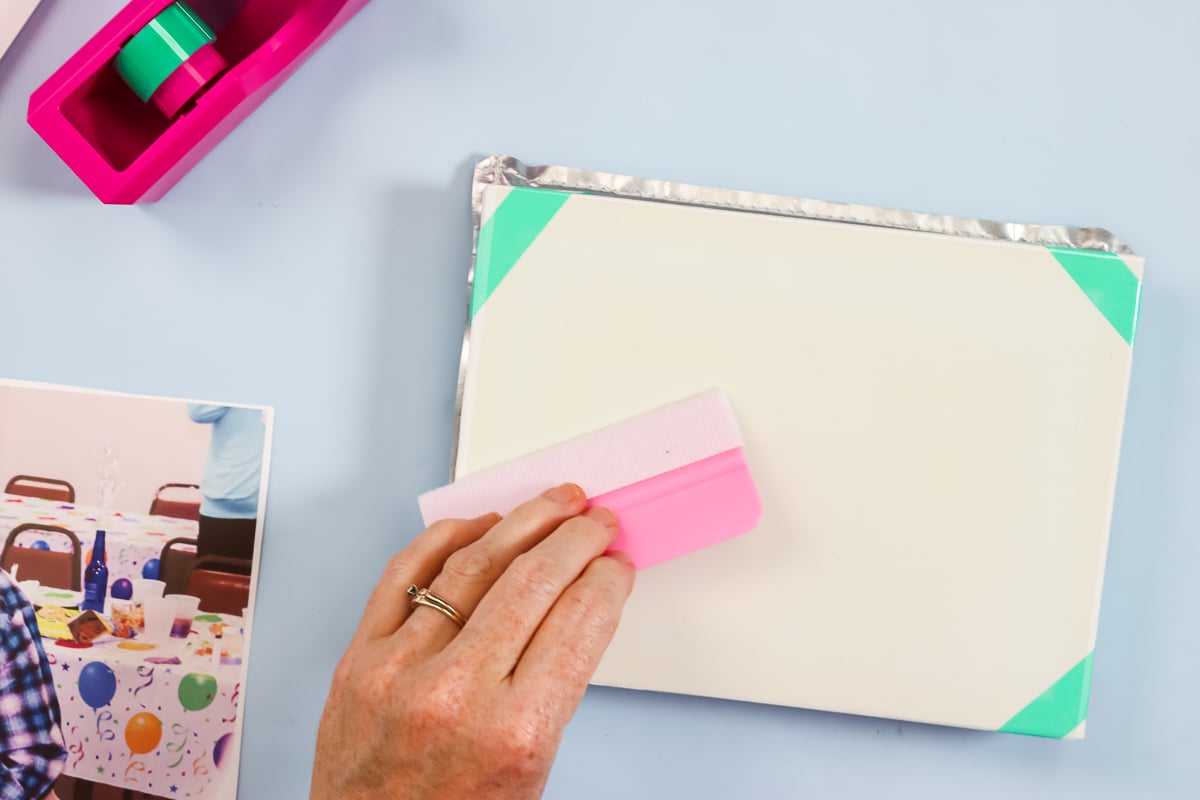
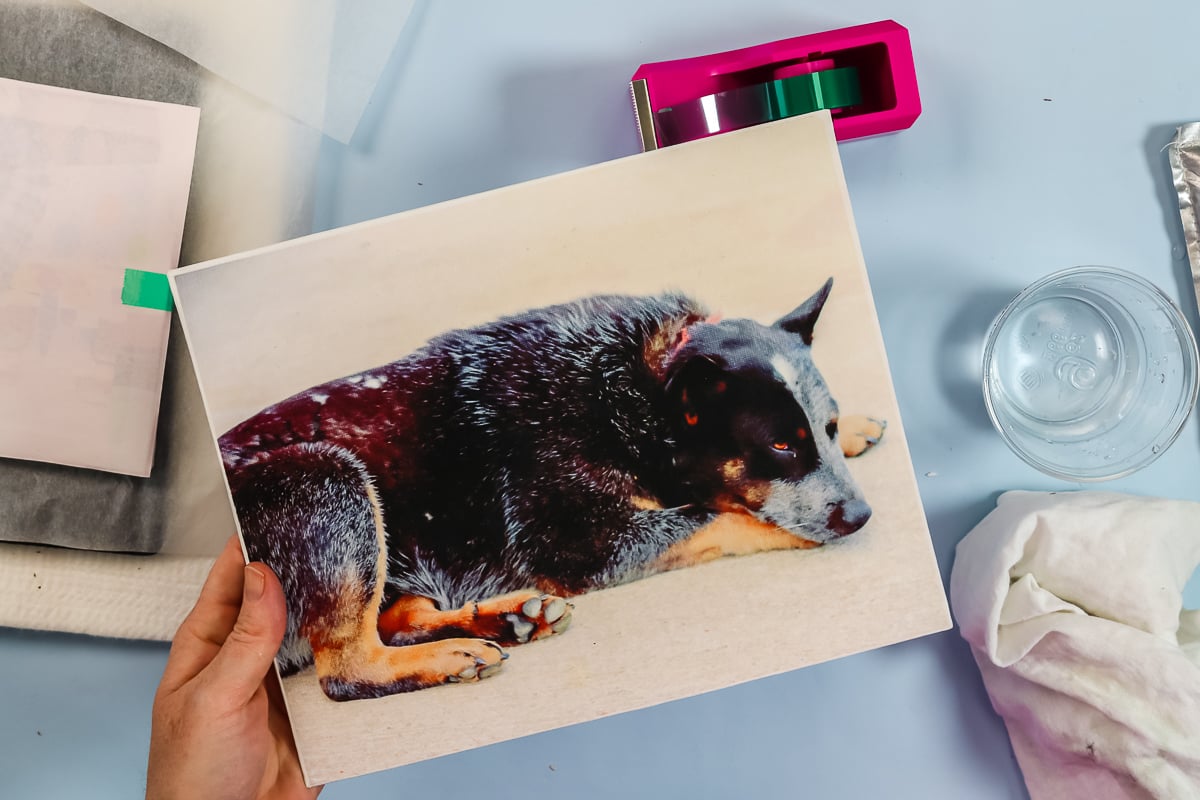
Press each of the canvases at 380 degrees F for about 10 seconds. After you pull it out and it’s still warm, you might want to just go over it with a scraper, just to make sure you’re getting all those areas down as well as possible. You just want it stuck enough to get the carrier sheet off.
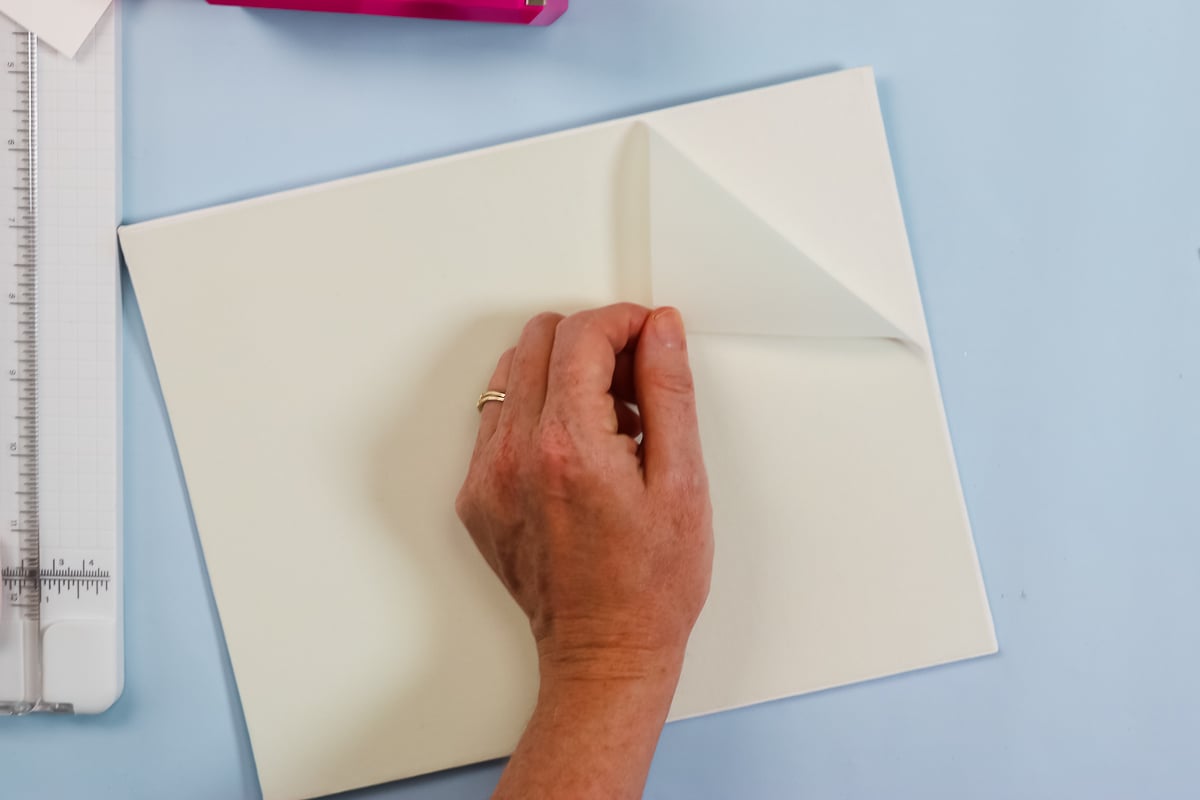
Take the tape off of the corners and peel back the carrier sheet. It is hard to see because it is clear, but once you get it started, you can feel it on your canvas. If it doesn’t look like it’s stuck in all areas, it’s fine as long as it stays on the canvas and doesn’t wrinkle up. We are going to press it again for a longer time with the sublimation print. It will continue to adhere and activate that adhesive on the canvas with our next press.
NOTE: I did notice on the flat canvas piece, as well as the one I removed the frame from, that the heat tended to bow the canvas. After the sublimation portion when it’s nice and hot, I’ll put it under something heavy and allow it to cool. That way, hopefully, it will stay flat for the final product.
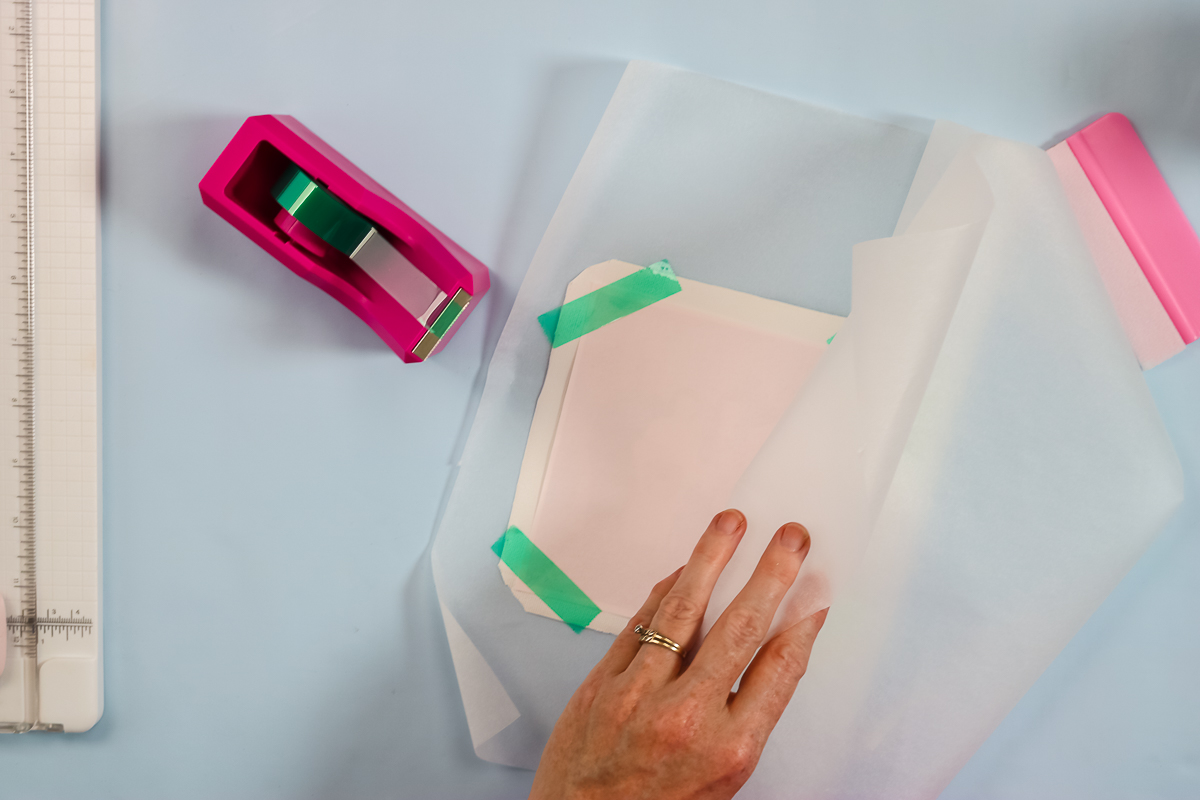
Adding Sublimation on Top
I like to clean with a lint roller once more just to be sure everything is clean. Then add your sublimation print face down to each of the canvas options. Locate each print and use heat-resistant tape to secure it into place.
NOTE: For the version with the frame inside the canvas, you want to make sure to leave the foam in place and use the pressing pillow once again.
I pressed each of my pieces at 380 degrees F for 45 seconds to sublimate the print onto that clear dye sub HTV. Be sure to use protective paper on the bottom as well as the top in order to protect your press.
NOTE: You can reuse the same tape pieces that you used to hold down the HTV for the sublimation portion of this project so be sure to save them.
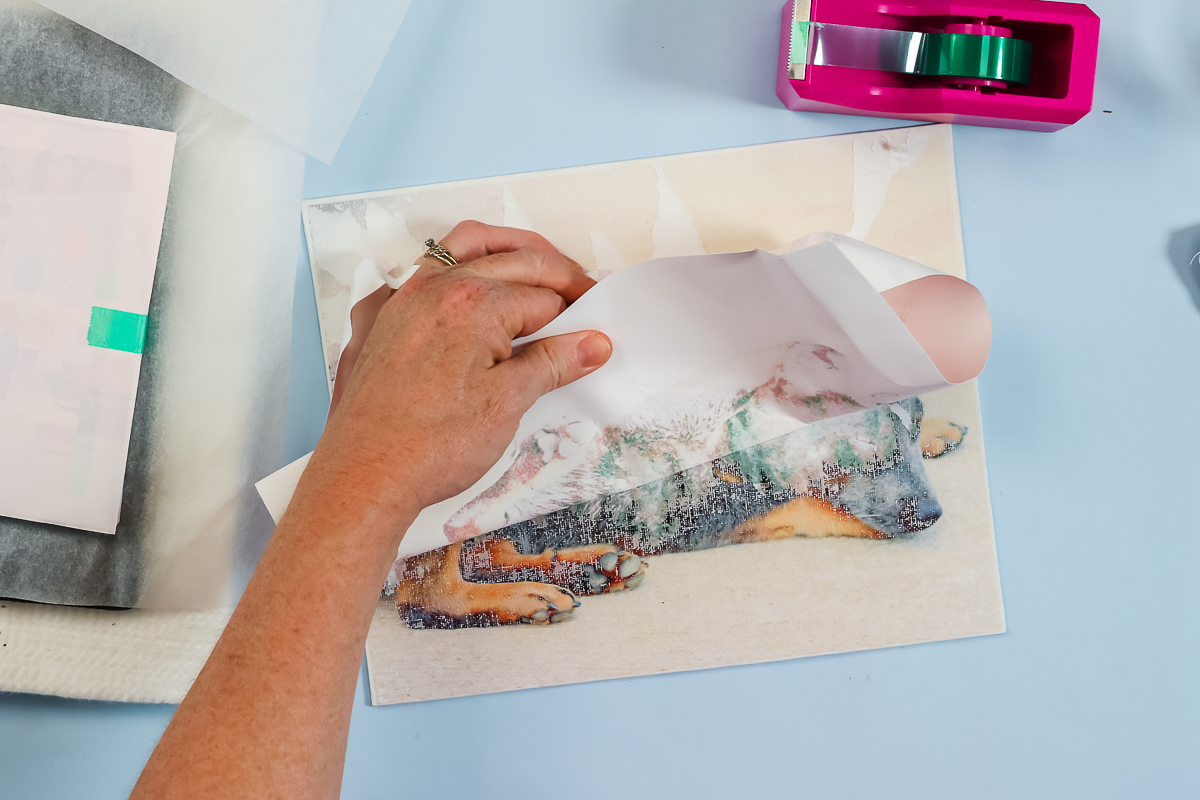
Finishing After Sublimating
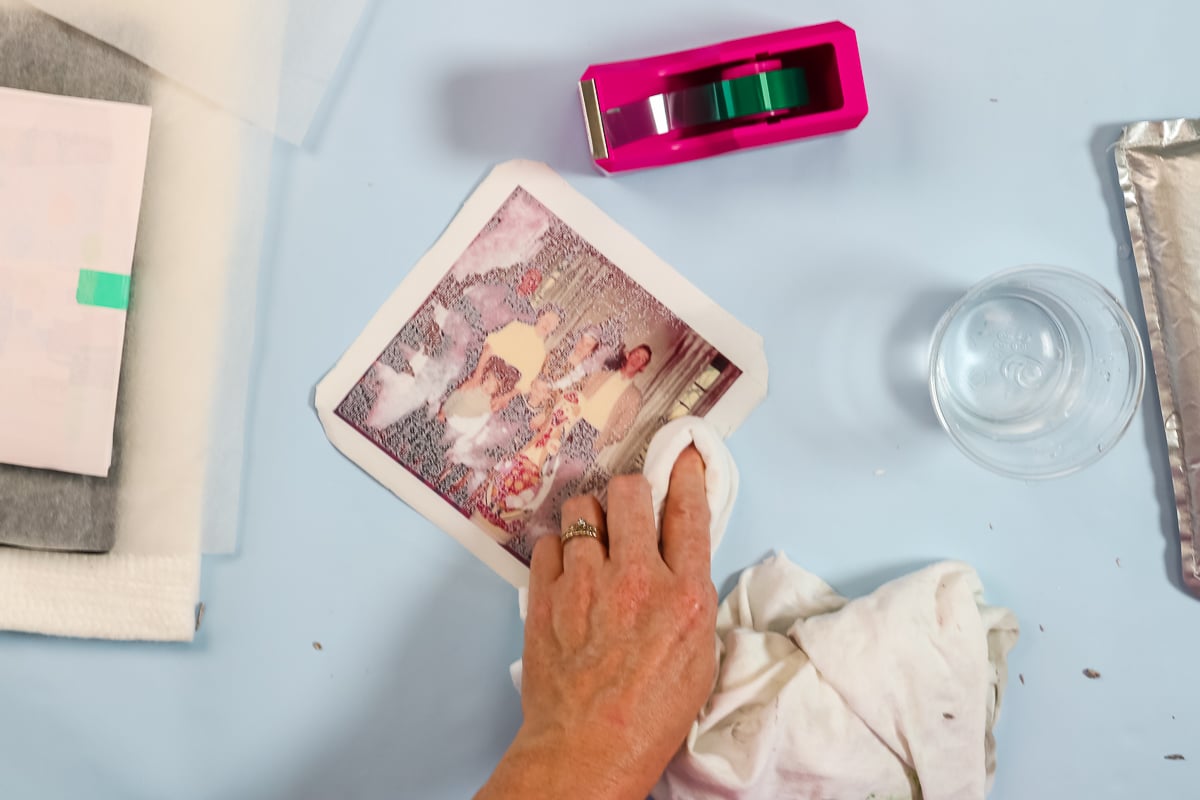
Remove the tape and start peeling this paper back. When you peel it back, don’t be shocked. It will look horrible when you first peel it back. In some places, the paper is even going to want to try to stick. This is a residue from the paper.
Once you rip the majority of the paper off, it’s time to break out a rag and some water. We just want to get the residue that is on here from the paper off. The paper will just kind of curl up from the water, and you’ll be left with a gorgeous print on canvas. You just want to do this all over your print to remove all of that paper residue.
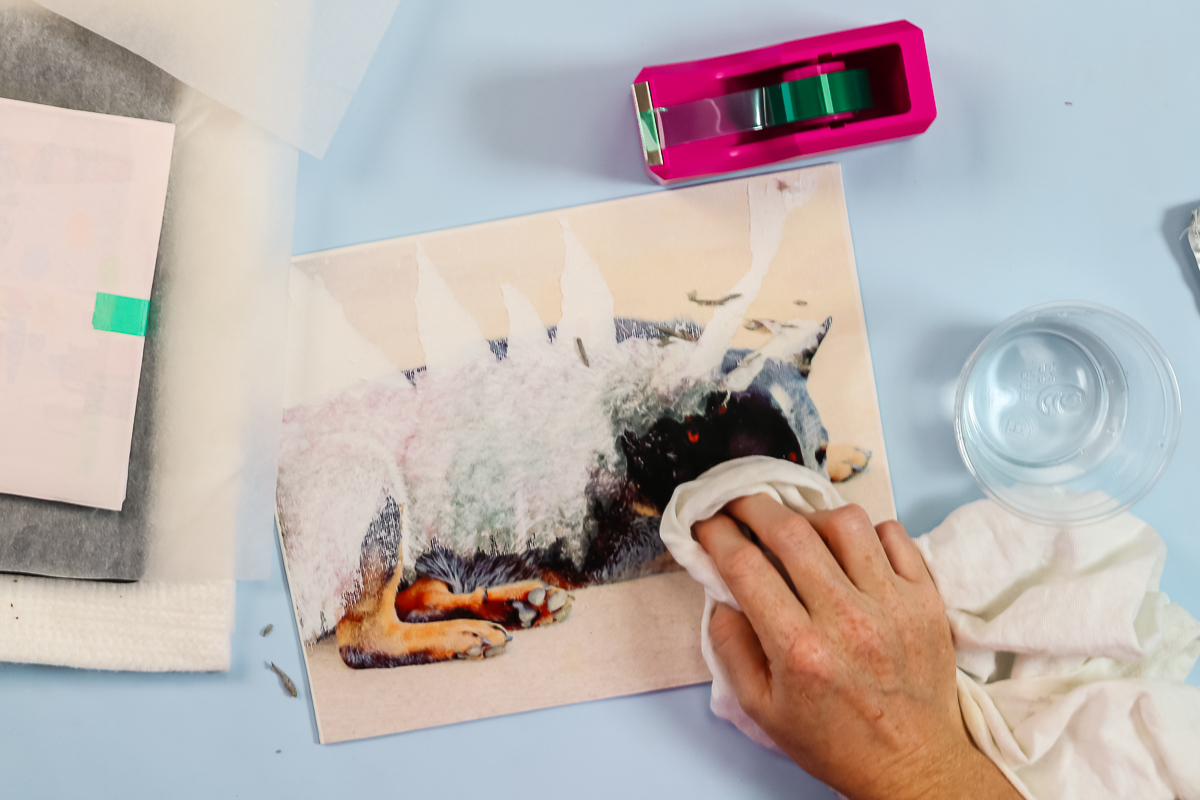
Here are the results after the paper residue is removed. Allow it to dry completely just to make sure that all that residue is gone. Use this same procedure on each version of the canvas.
You may find that your rag gets some color on it. That is just from that sublimation paper coming up. The print itself is permanent on that clear dye sub. You don’t have to worry about rubbing it off.
I think perhaps the less pressure you use the less of the paper will stick. Keep that in mind when setting the pressure for your sublimation on canvas. You will have to use water on the top no matter what though as I found at least some residue was left regardless.
Texture Through Clear HTV
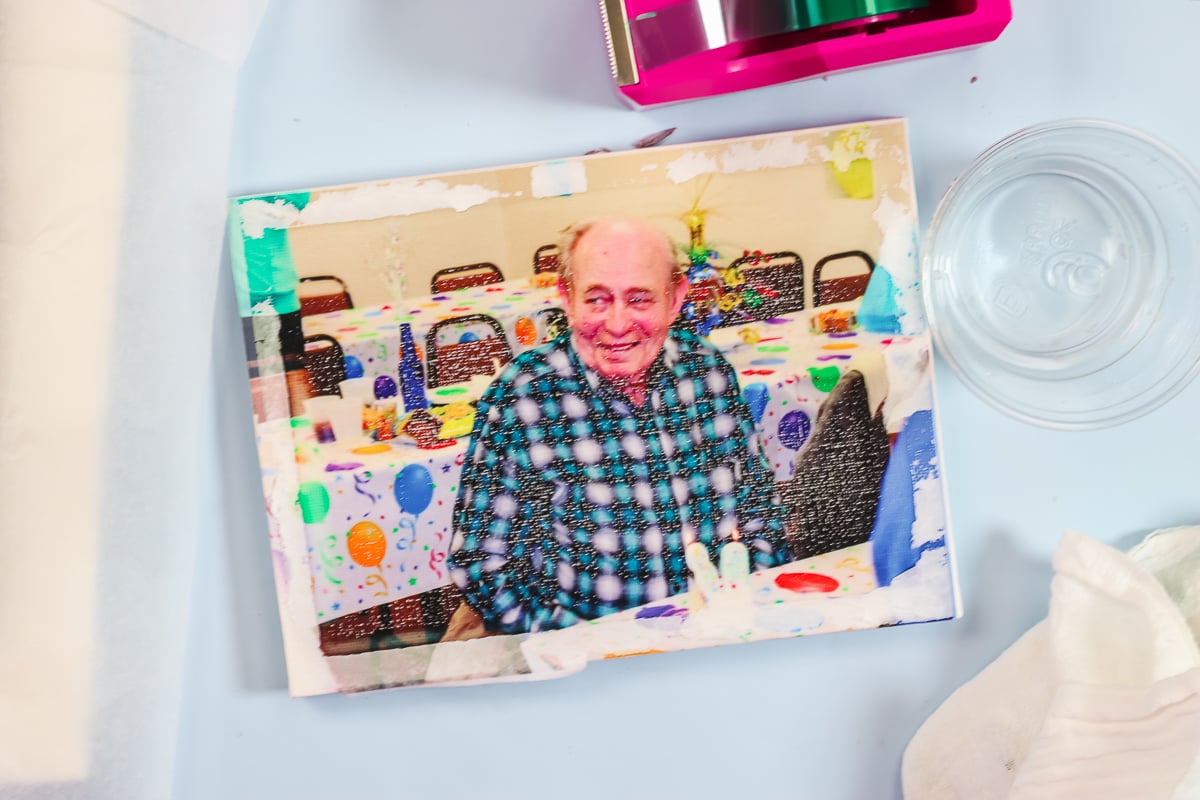
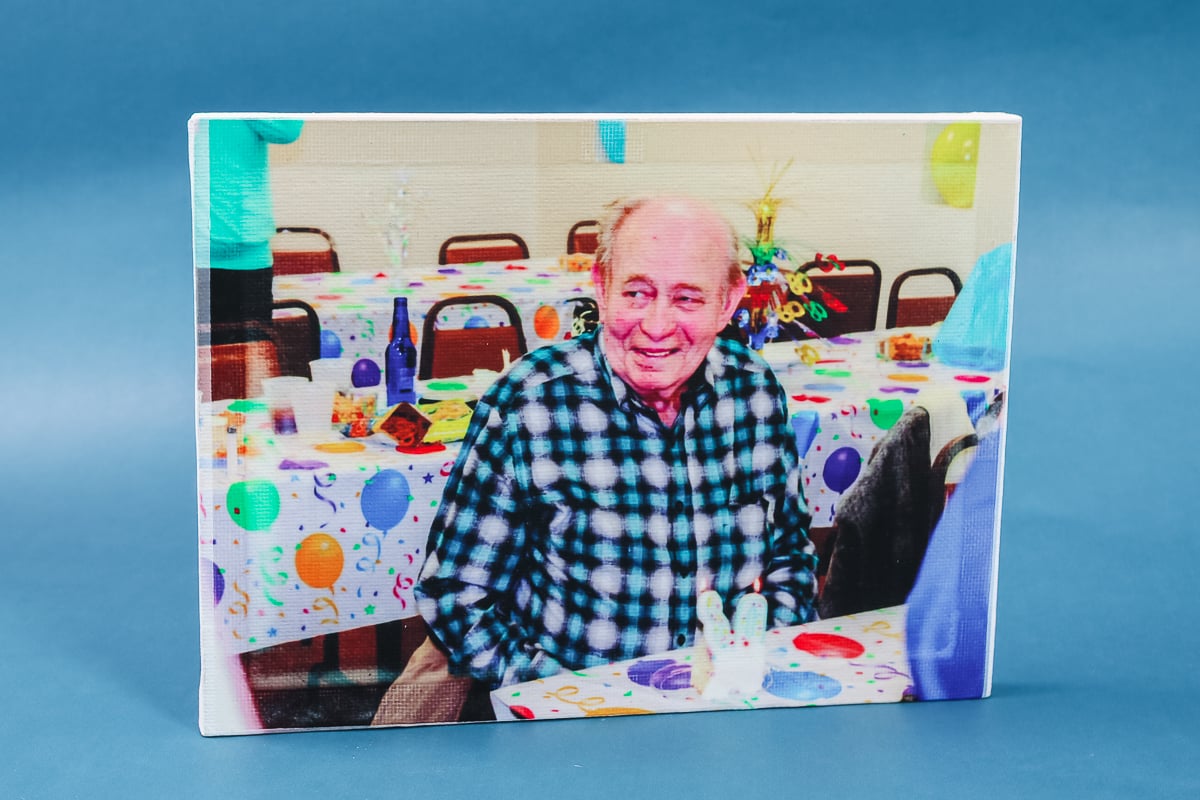
Here’s the large flat canvas after everything is dried, and it looks amazing. What I like about this product is that you can see the texture through the clear HTV. It does look like a regular canvas. It’s also not glossy. You get that matte finish just like a regular canvas with this product. It’s definitely something that I love to make as a gift idea.
Finishing the Reverse Canvas
Trim where the photo is all the way around with a pair of scissors. You want it to be small enough that the frame covers the edges. Then just add hot glue to the back of the frame and add it to the print. Pess that down well, and then this framed canvas is ready to go.
What Happens If You Don’t Use HTV?
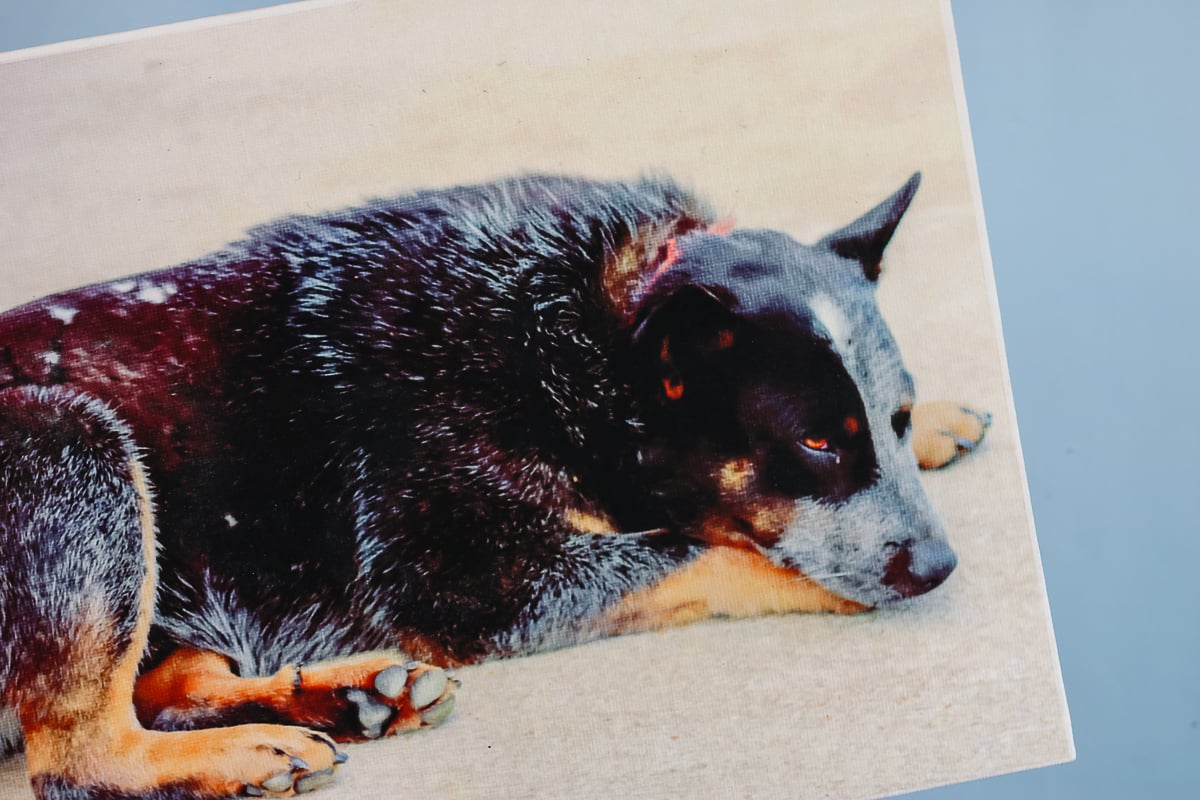
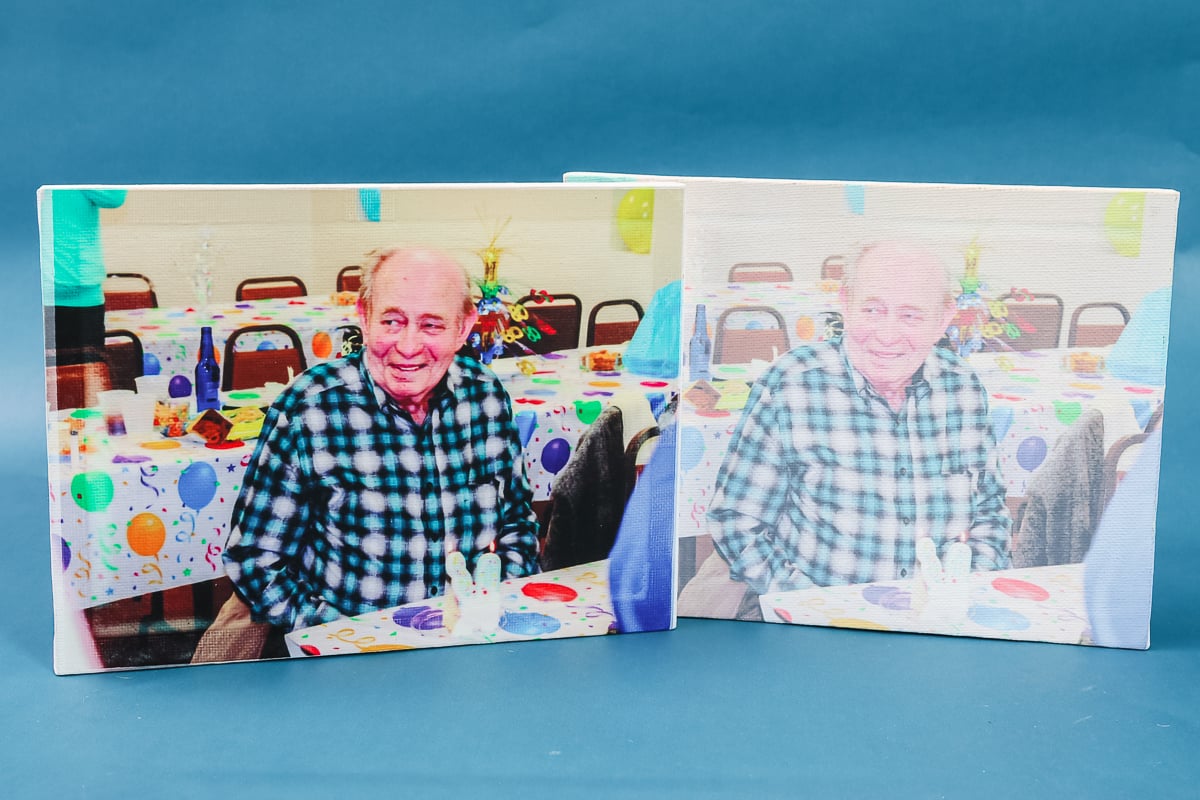
First of all, I wanted to point out, I probably got my dye sub HTV a little small. If you can see that line down the left side where it’s lighter, that means this portion of the canvas doesn’t have HTV on it.
Then I made one with this same picture with no HTV at all. That is the print below on the right. You can see the dramatic difference between the one with the sublimation HTV on the left. This is what would happen if I didn’t use any product at all.
Why This Method for Sublimaton on Canvas?
Now you saw the amazing results, and we did it three ways – with the flat canvas, the canvas with the frame on the inside, and then the canvas that we took apart and made a reverse canvas with sublimation. All three of these techniques turned out great with the clear dye sub HTV. I like this version because the finished product isn’t glossy.
It looks like a regular canvas because you can see the texture of the canvas coming through that clear dye sub HTV. It also makes a really bright, vibrant print and even looks like a canvas that you would purchase. I did want to point out, on the one that we left the frame on the inside, the edges are unfinished. You can’t really wrap the sublimation around the edge. You could either leave this edge white or paint it black – however you want to do that.
The other versions I’ve seen of sublimation on canvas use laminate sheets, which I don’t like because it makes that glossy finish. It looks like a glossy image with the sublimation on top. The second version I’ve seen uses a spray poly to get a polyester coating on the canvas, and then they press on the top. The reason I don’t like that is that I haven’t had a ton of luck with spray poly coatings. I usually find that they don’t work very well. They leave some gaps.
This dye sub HTV makes an amazing print on my canvas without really any effort. I just press the HTV and press the sublimation on top. I do like the clear better. It allows that texture of the canvas to come through, which to me makes it look like a more professional product that you can either give as gifts or sell. I really think these would make a great gift this holiday season. I hope you enjoy this technique for sublimation on canvas!