This post and photos may contain Amazon or other affiliate links. If you purchase something through any link, I may receive a small commission at no extra charge to you. Any supplies used may be given to me free of charge, however, all projects and opinions are my own.

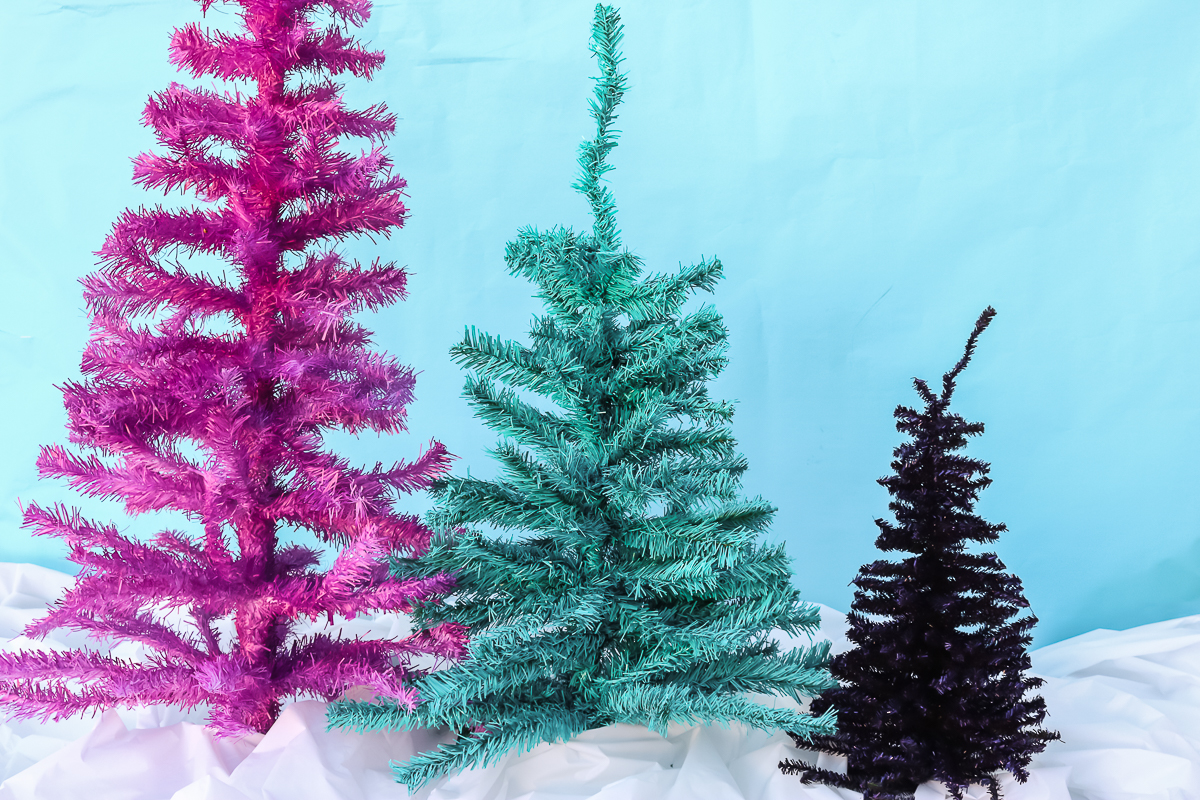
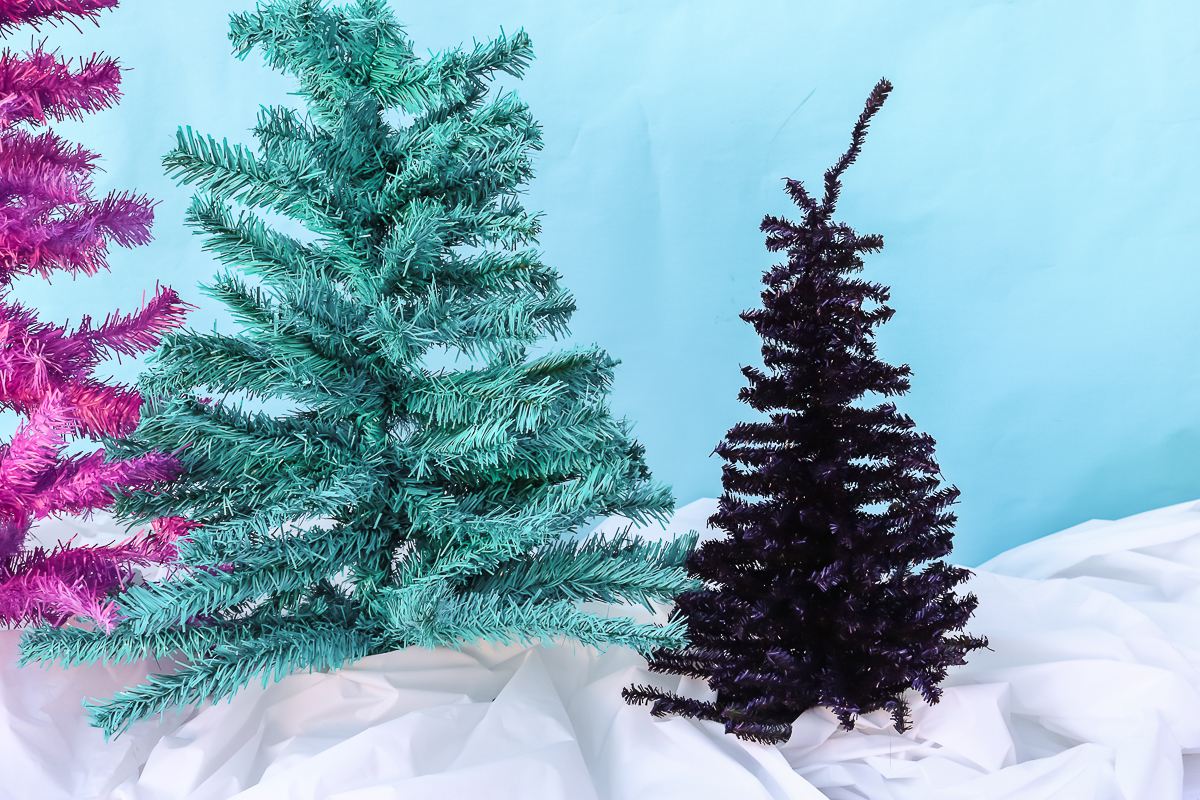
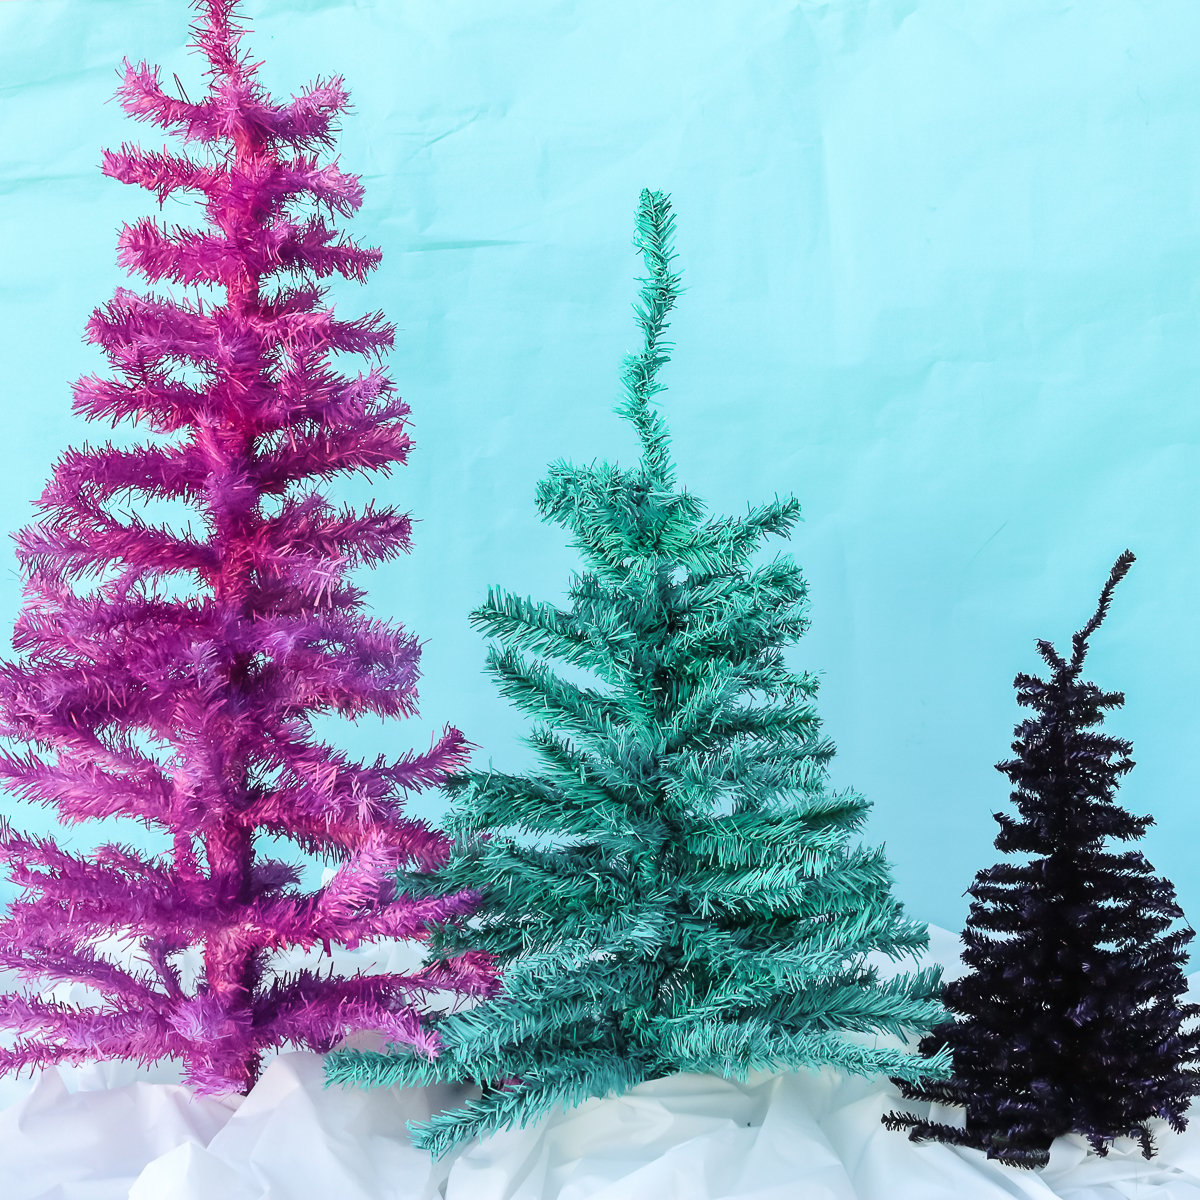
You can learn how to paint Christmas trees and add some fun and bright colors to your holiday decor this year. Just grab your spray paint and any artificial tree to get started. I have all of the tips and tricks that you need below to make your project a success. I know you will love trees in all the colors of the rainbow. For me, I went with pink, purple, and aqua. I can’t wait to do something way different with my Christmas decor! This post is sponsored by Rust-oleum, however, all projects and opinions are my own.
Looking for more holiday spray paint ideas? You don’t want to miss these DIY pizza pan wreaths from last year!
Paint Christmas Trees
You can actually watch me paint all three of these trees in the video below. I am also sharing my best tips and tricks so you can paint your artificial trees the right way.
Can’t watch the video or missed some of the steps? You can also follow along with my tips and tricks below.
Supplies needed:
- Artificial trees
- Masking tape (optional)
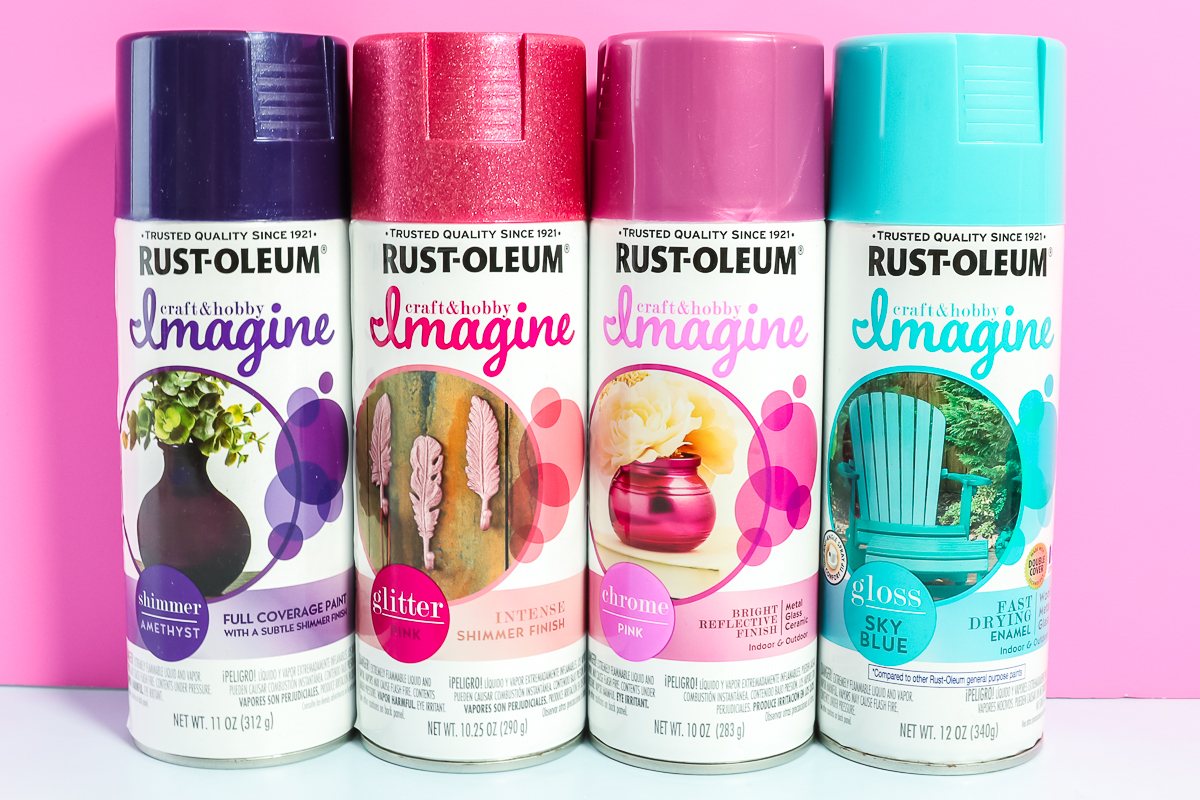
- Rust-Oleum Imagine Spray Paint NOTE: You can find this paint at the following locations: Do-It-Best (Glitter Spray Finish), Menards (Shimmer & Chrome Finish), Joann (Glitter & Chrome), or here on Amazon (Gloss Sky Blue). You can also see the colors I used and loved below!
Painting Artificial Christmas Trees
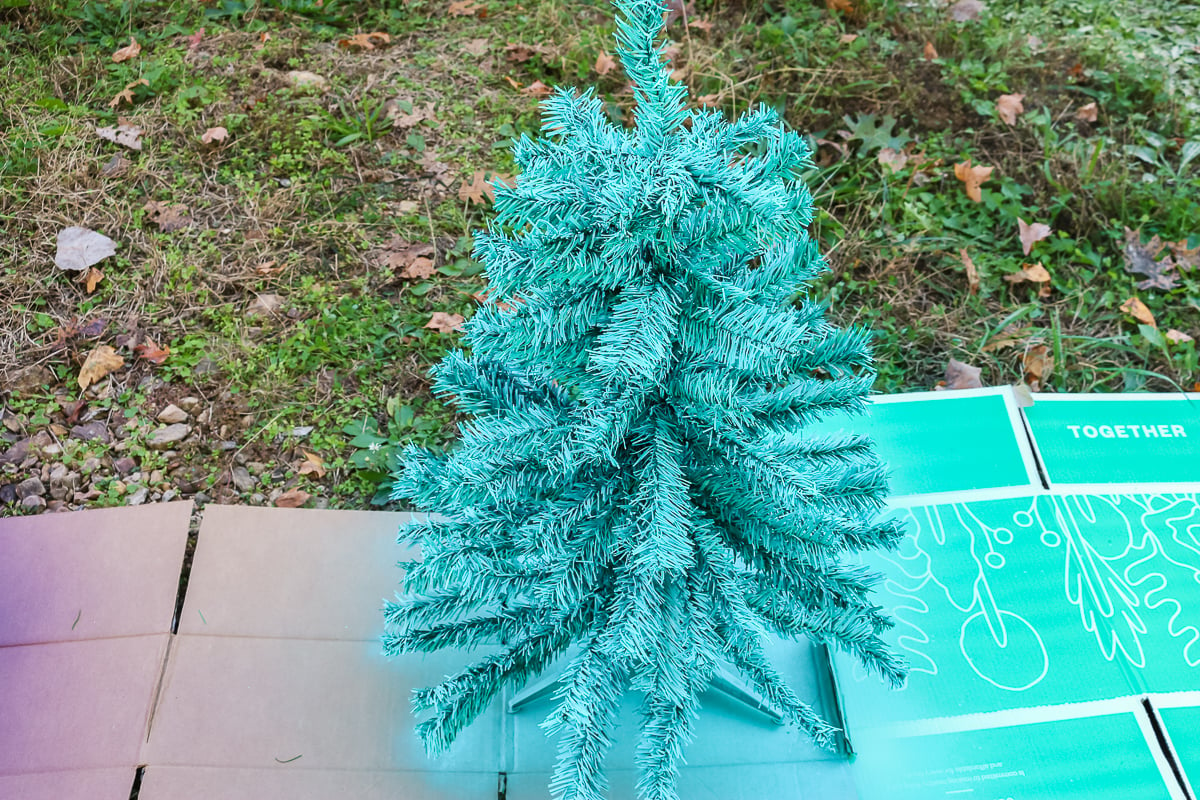
Now that you have your supplies you are ready to paint! Be sure to paint your trees outdoors and wait for a warm day. If you live in a colder climate, try a spray painting tent in a heated garage or shop building. I added my tree to cardboard boxes outdoors.
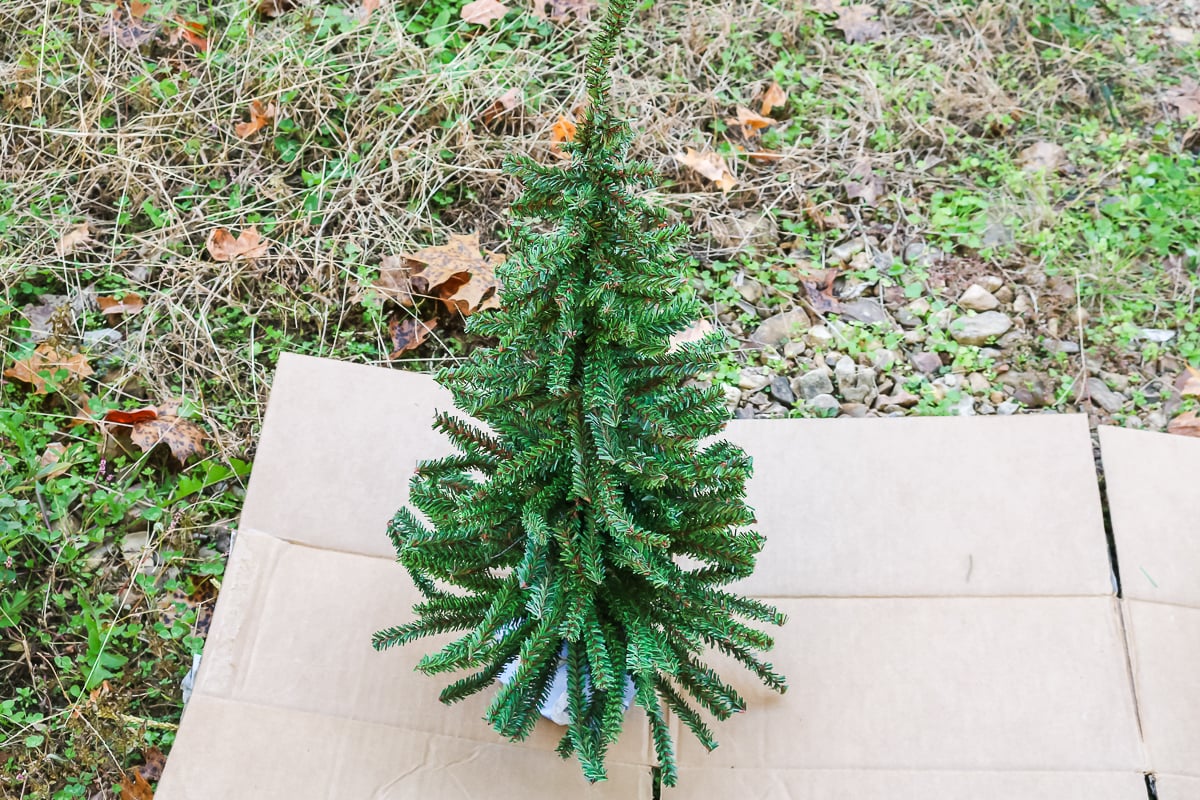
Be sure to straighten and separate each individual branch before painting. Here is the order that I used for painting my trees:
- Mask any areas that you want left unpainted.
- Set the tree up on cardboard or another disposable surface to paint.
- Paint a few light coats on the tree from all sides.
- Then pick up the tree and paint from the bottom. You should be able to tell which surfaces you are not going to be able to reach from the top.
- Set the tree back down and paint from all directions including the top and all sides. Go slowly with this and paint in light coats.
- If you want to add glitter paint on top of your color, spray it over the top at this time.
- Once you have complete coverage, allow your tree to dry for at least 72 hours in a warm place before moving the branches.
That is really it! The process is simple and you will be left with a stunning and amazing tree that you can be proud of!
What type of paint should you use?
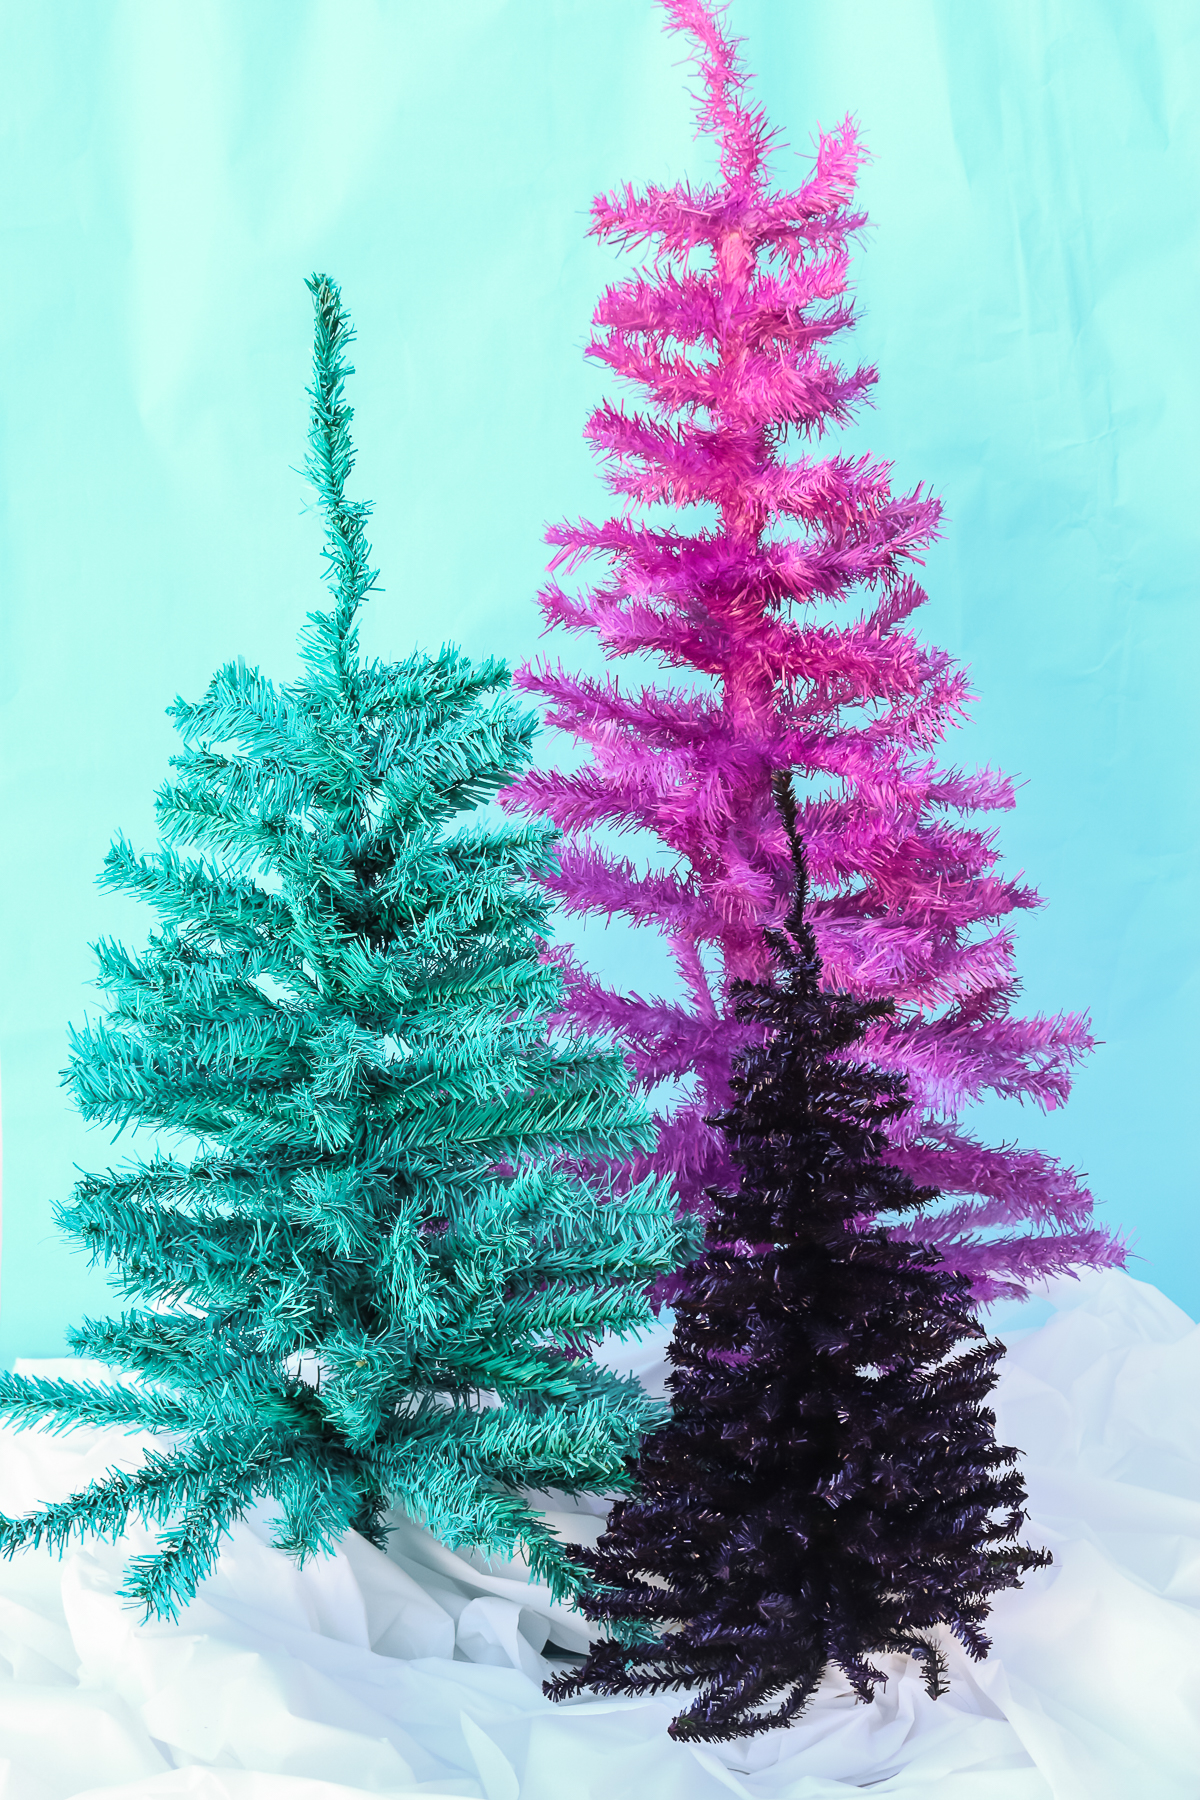
As mentioned, Rust-Oleum Imagine Spray Paint is great for this but there are several different finishes and types on the market. I loved the chrome and shimmer version of this spray paint as it gave a metallic look to the trees that was a bit retro. The gloss version was a close second. I also loved the glitter spray paint but only over the top of another color. I found it didn’t give that bold look that I personally wanted if sprayed by itself. If you are looking for a more understated look, try the glitter on a white tree!

Tips for Choosing Your Tree and Paint Colors
There are a wide variety of artificial trees on the market. When looking to paint Christmas trees which are best? I would say the darker the original tree, the darker your paint color should be. So I added purple to my darkest tree and pink to my white tree for example. Keep in mind the color of your original tree when choosing a paint color.
What type of trees are best for painting?
You can spray paint any Christmas tree! The tallest one here is from the Dollar General while some of the others were more expensive. It doesn’t matter! Choose one that you love the shape or use what you already may have on hand in your attic. Give those old trees a completely new look with Rust-oleum!
Tips and Tricks for Painting Christmas Trees
Here are a few of my best tips and tricks as well as advice for common mistakes. Painting Christmas trees is easy, however, you can definitely make a mess by using the wrong techniques.
- The most common issue I see is trying to paint when it is cold. Make sure you have warm (70 to 75 degrees F) temperatures and that your tree and paint are both warm when painting.
- Another common mistake is to paint the tree and bring it inside to decorate within a few hours. You want to give your paint time to cure before using it to decorate your home. I recommend 72 hours.
- Be sure to take your time and straighten all of your branches and separate them as much as possible.
- Paint from all sides. Top, bottom, and each side. This will give you complete coverage.
- Don’t forget to paint the inside. The branches as well as the very inside surface of your tree need to be painted.
- Don’t be afraid to go bold! Paint your trees in bright colors and bring a little happiness to your holiday decor this year.
Where can you put your painted Christmas trees?
Now that you have learned how to paint Christmas trees, where will you use them? You can use these in your home’s decor indoors or out! Put larger trees on your porch or in a bedroom. Add small trees to your mantel or even a centerpiece for Christmas dinner. There are so many options for these bright and bold painted trees.
So, will you paint Christmas trees for your holiday decor this year? Which of these colors do you like best? Pick a Rust-oleum spray paint and make your own version of this project. I know you will love the way it turns out!
Love this holiday craft and want more ideas? Try the links below as well!

Grab your pizza pans and make a cute wreath that everyone will love for the holidays.

Add this cute ornament to your tree with a bit of help from your little ones with their fingerprints!

Adorable wooden Christmas ornaments that are finished in 15 minutes or less. They’re so easy to make and add a festive farmhouse touch to any Christmas tree.

Need to give Santa a key to your house? This is a great way to make a magic key you can put out on Christmas Eve.
Want to print the instructions for this project? Just use the card below!

How to Paint Christmas Trees
Use this method to spray paint your artificial Christmas tree in any color of your choice!
Supplies
- Artificial trees
- Masking tape optional
- Rust-Oleum Imagine Spray Paint
Instructions
-
Be sure to straighten and separate each individual branch before painting.
-
Mask any areas that you want left unpainted.
-
Set the tree up on cardboard or another disposable surface to paint.
-
Paint a few light coats on the tree from all sides. Then pick up the tree and paint from the bottom. You should be able to tell which surfaces you are not going to be able to reach from the top.
-
Set the tree back down and paint from all directions including the top and all sides. Go slowly with this and paint in light coats.
-
If you want to add glitter paint on top of your color, spray it over the top at this time.
-
Once you have complete coverage, allow your tree to dry for at least 72 hours in a warm place before moving the branches.