
This post and photos may contain Amazon or other affiliate links. If you purchase something through any link, I may receive a small commission at no extra charge to you. Any supplies used may be given to me free of charge, however, all projects and opinions are my own.
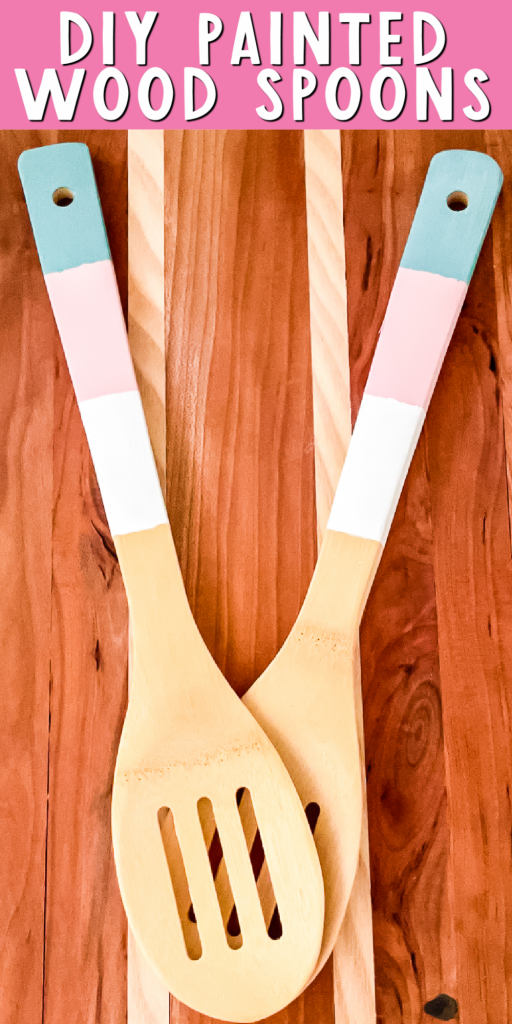
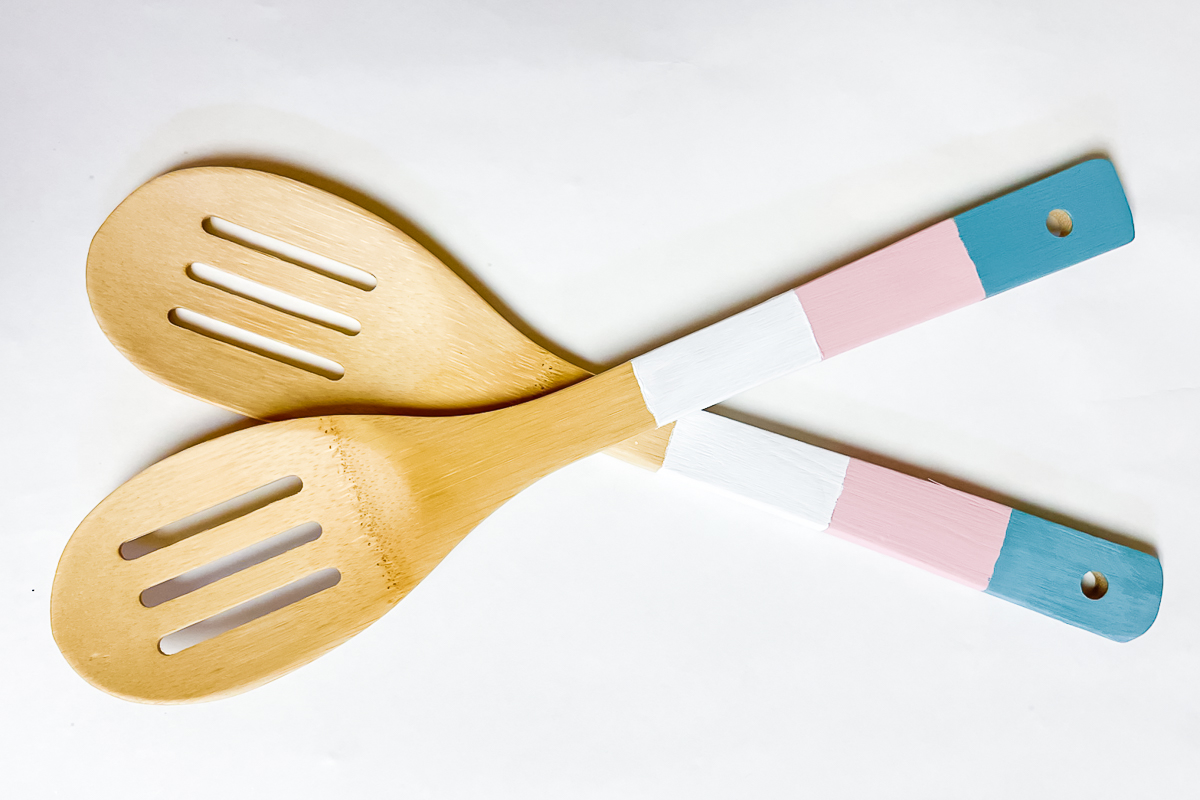
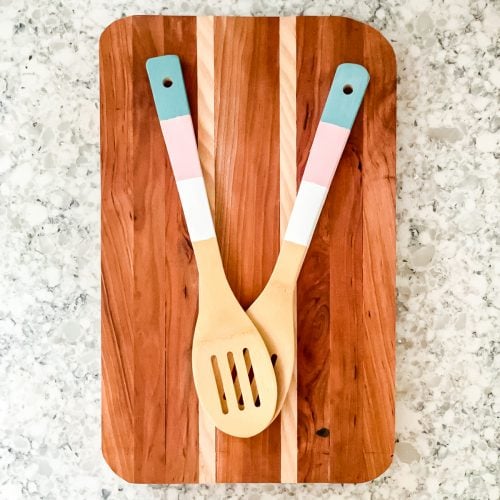
Painted wooden spoons can add a little something special to your own kitchen or even be a great addition to a handmade gift. Think of this gift idea when you are attending a bridal shower or a housewarming party. These spoons are easy to make and the colors can be customized to match your home’s decor. So, grab some wood spoons from the dollar store and get started creating this cute craft project today!
This one was first published on April 24, 2013, however, I am republishing with more information.

Painted Wooden Spoons
Any wooden spoons will work for this project but I like mine to have a large flat area. That makes them excellent for painting. I would also look for some that are unfinished. At times, you find that some stores have them with a poly coating over the top. Any coating could affect the adhesion of your paint.
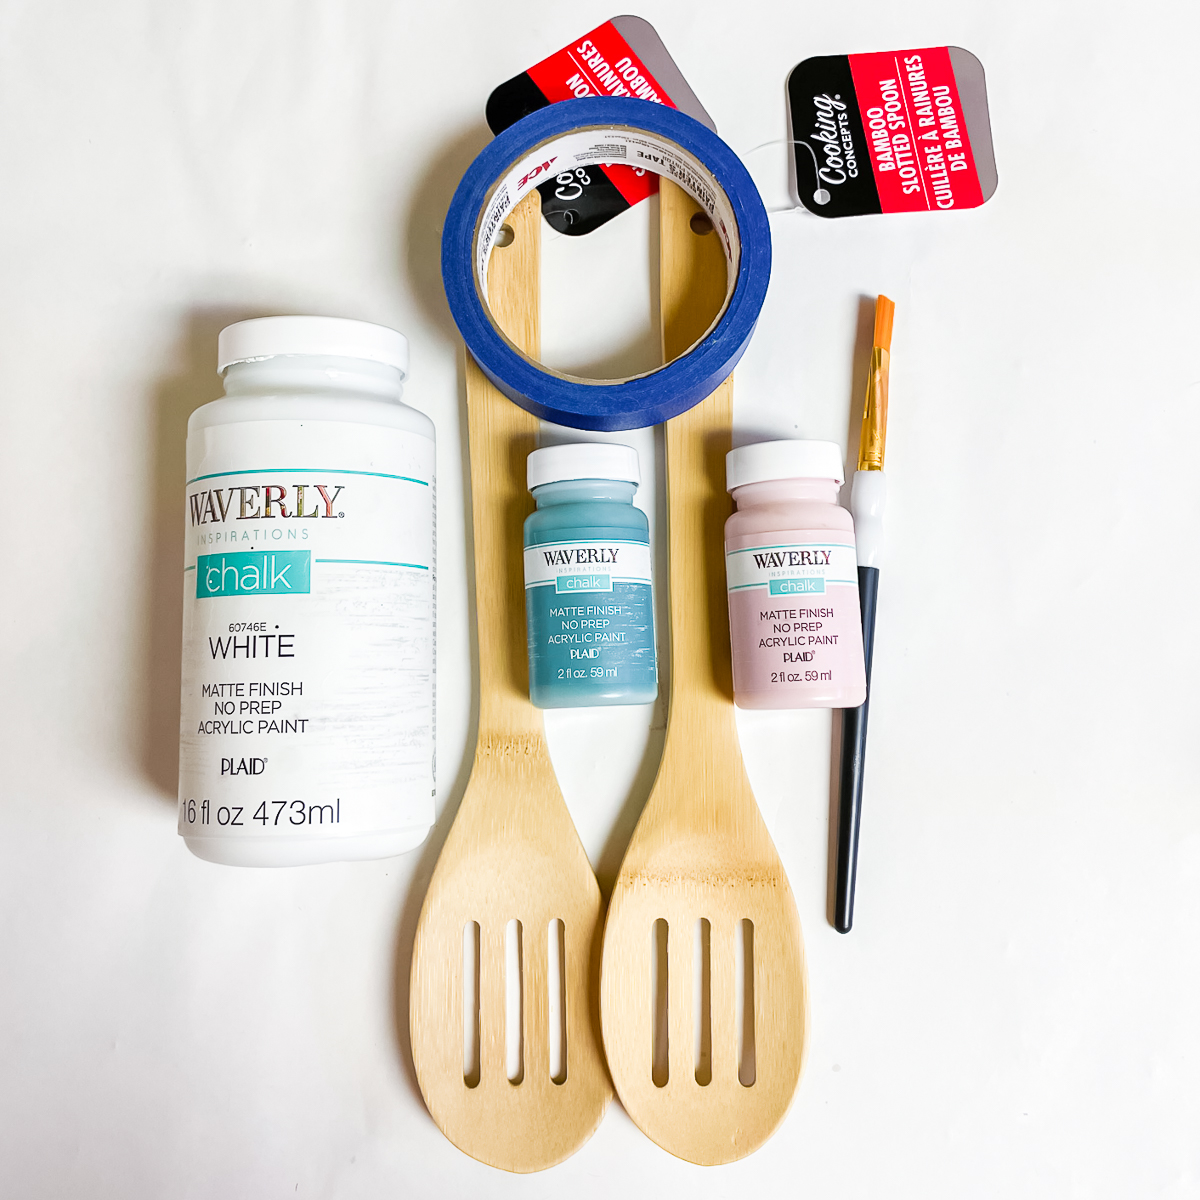
Supplies needed:
How to Paint Wood Spoons:
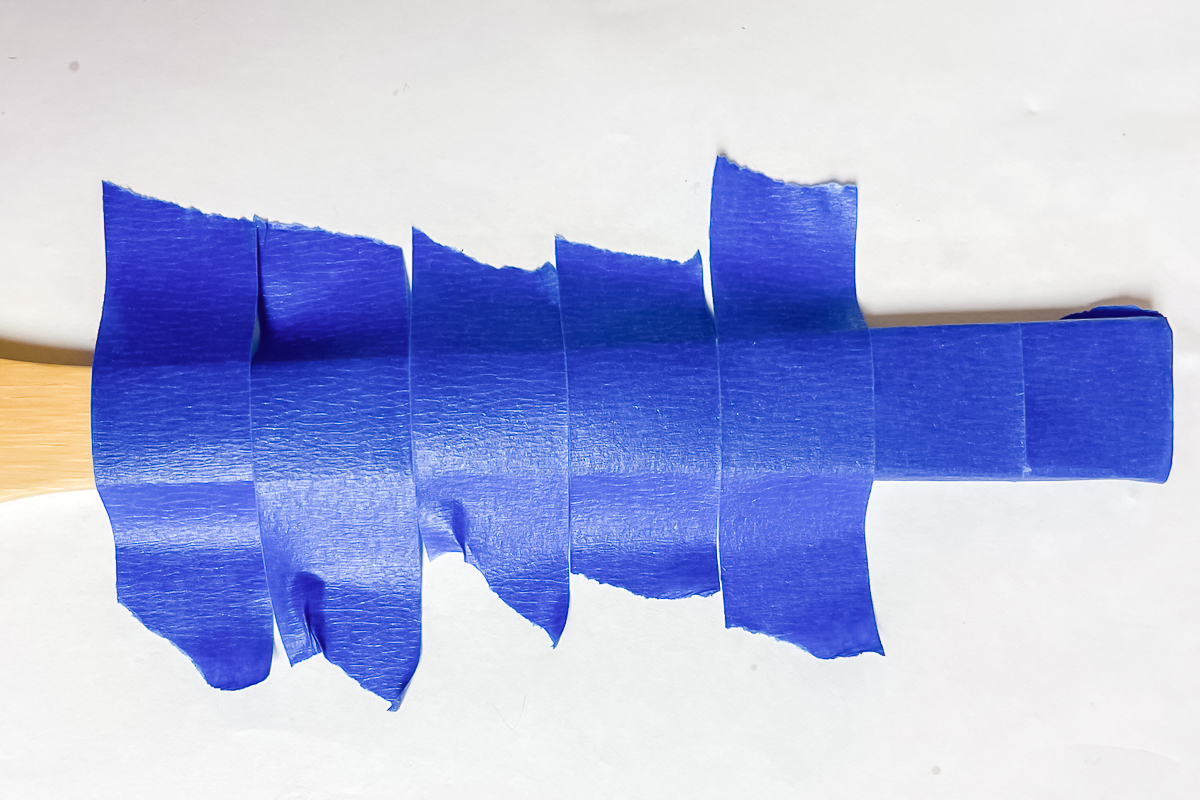
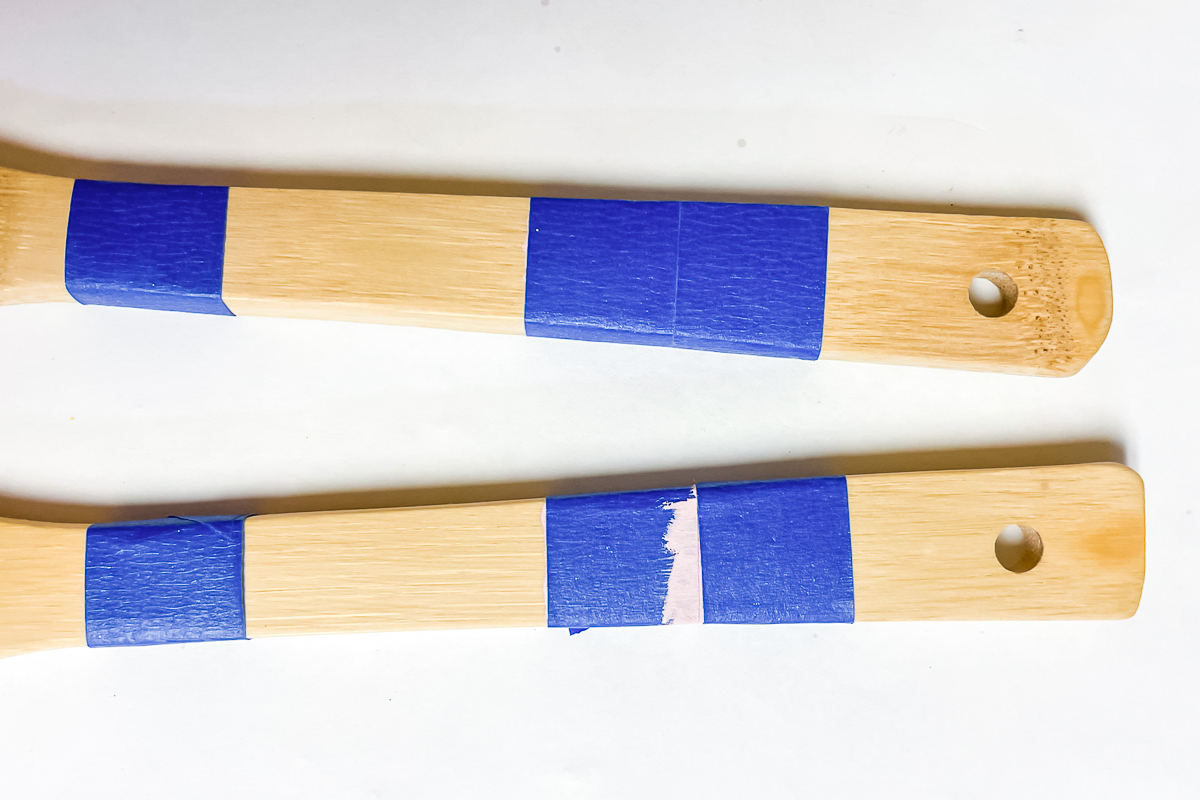
Start by tearing 7 pieces of painter’s tape per spoon and wrapping them tightly around the wooden spoons. Make sure that the pieces of tape line up so that there isn’t any space in between them. This will get you the spacing for your stripes.
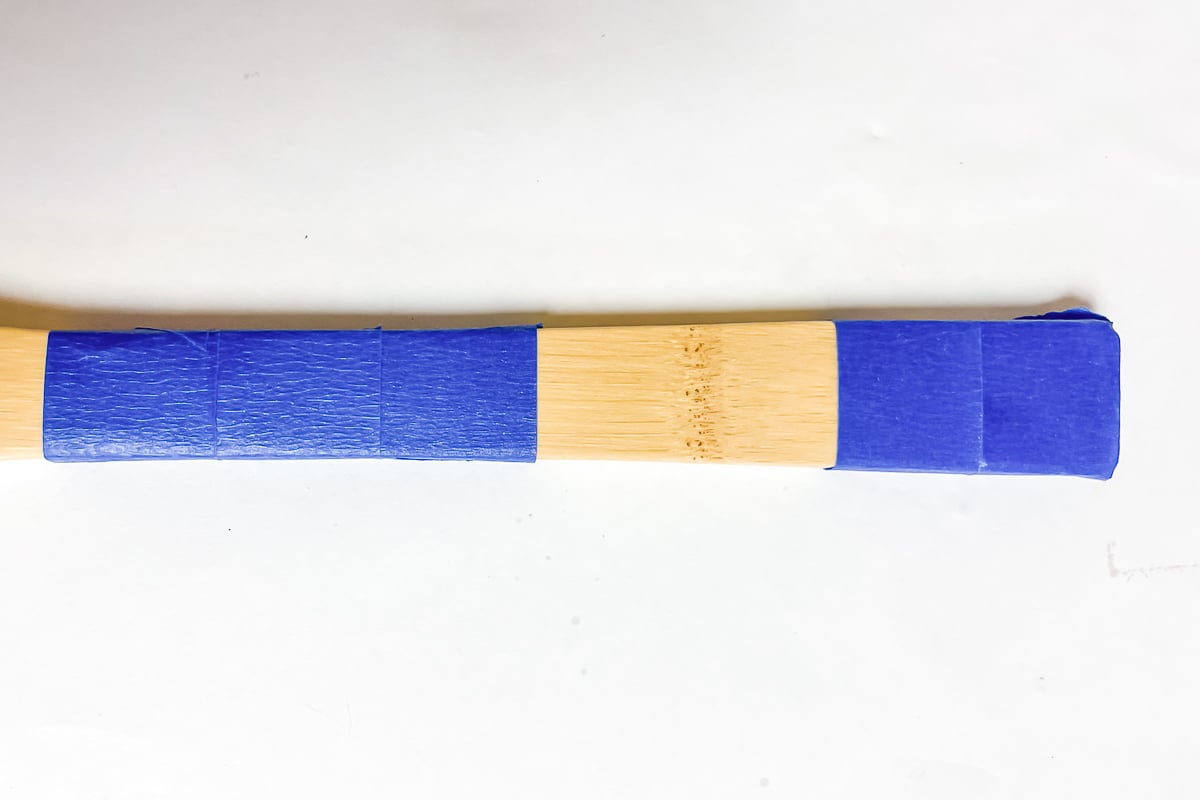
Leave the two pieces of tape at the top and remove the 3rd and 4th piece of tape. You can change this up if you would like to get a different look. Use a different width of painter’s tape or remove the tape in sections that are wider or thinner.
Paint the unmasked area with light pink paint. I like to use two layers with chalk paint. Be sure to allow the first coat to dry before adding a second coat. I stood my spoons in a mason jar while drying so I was able to paint front and back at one time.
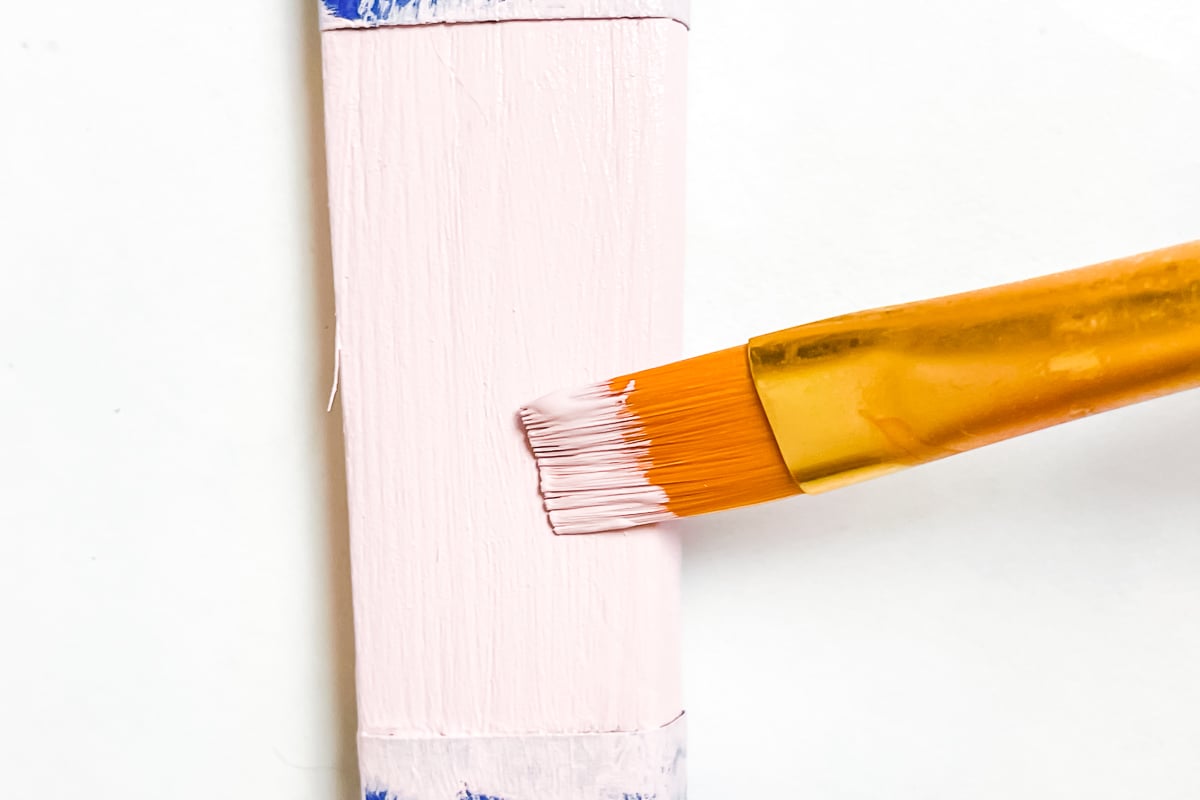
Once completely dry, cover the pink section with the two pieces of tape. Make sure the tape is pressed firmly down so that when you paint the other sections, none seeps under the tape. TIP: You can paint a little bit of pink paint on each side of the painter’s tape and allow it to dry. This will seal the area with pink paint and allow for really crisp paint lines.
Once the light pink section is taped, paint the top part of the spoon with the aqua and the lower section with white. Leave the bottom strip of tape on while you are painting the white section so that you have a nice clean line for the bottom section. Again, you will want to use two coats of paint so be sure to allow to dry in between coats.
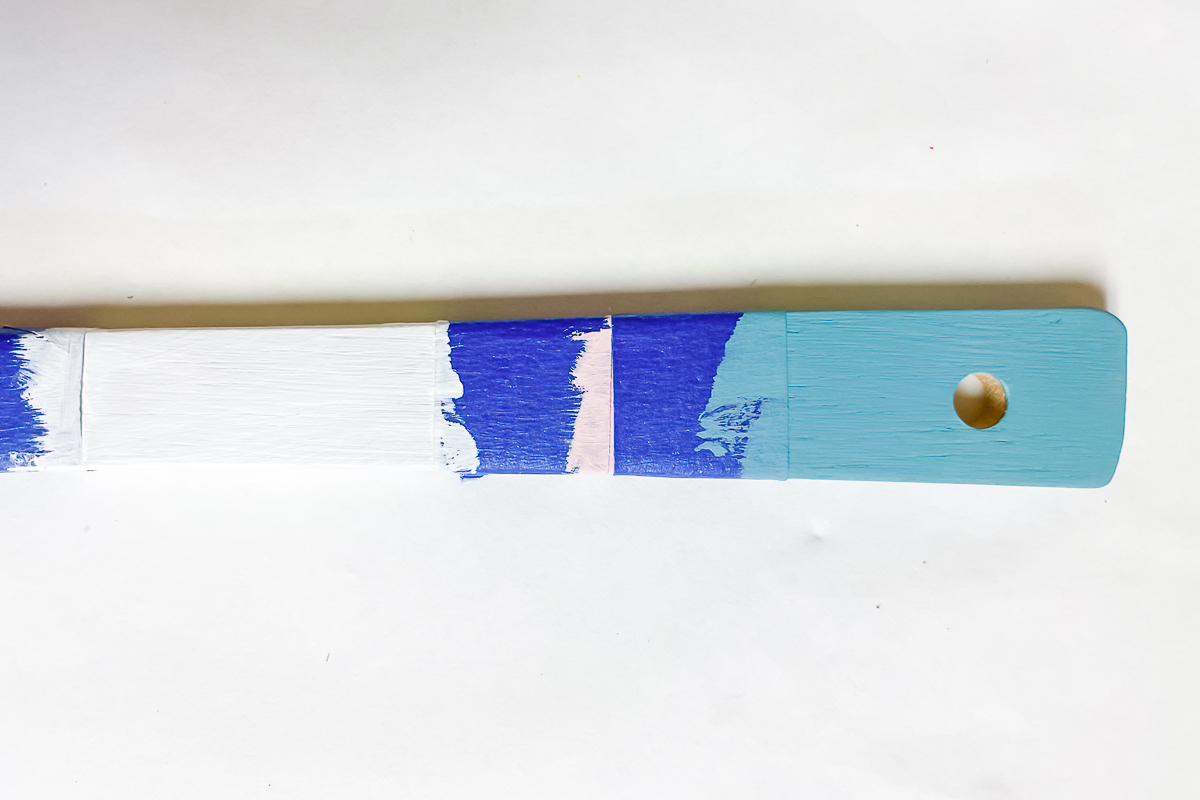
Once all of the sections are dry, remove the tape! Notice how I kept the paint far away from the actual spoon end of the utensil. These paints are not food safe and should not be placed into contact with food.
Sealing Your Paint
Now that you have these gorgeous painted wooden spoons, how do you protect them? I have a few sealing options for you below to get a long life from your creations. Please note that these spoons are NOT dishwasher safe no matter what sealer you use!
- For the most durable finish, you could add a clear epoxy over the top of the handles. I did that with a tinted epoxy here.
- You can also add a brush-on sealer. My favorite is Polycrylic.
- Your third option is to spray your handles with a spray sealer. Again, I like the Polycrylic for my projects.
For sealing, be sure to pick a finish option that you love. If you want to keep the matte look of the chalk paint, you will need a matte sealer. You could also go high gloss. The options are completely up to you and the final look that you would like to see.

So, will you be making these painted wooden spoons for your own kitchen or to give them as a gift? I know you will love how these turn out and how great they look in your space!
Love this project and want more kitchen ideas? Try the links below as well!
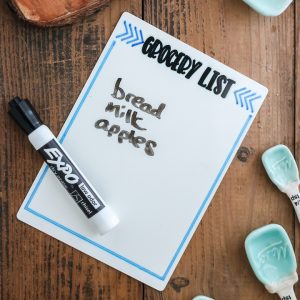
Make a dry erase grocery list board with sublimation markers and this organization SVG file.
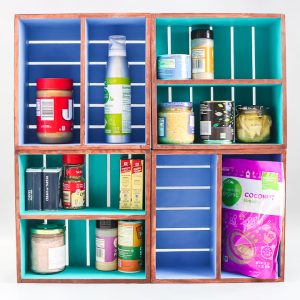
Turn simple crates into something to organize your kitchen in just minutes.
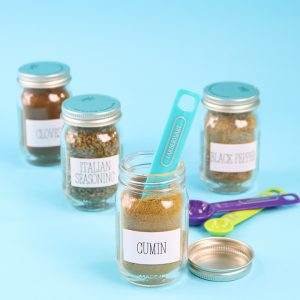
Want to organize your spice cabinet? Here’s how to make printable spice jar labels that look great and help keep your kitchen organized!
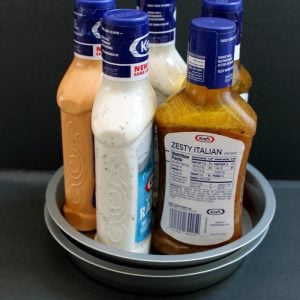
I love inexpensive ideas that keep me organized. This dollar store lazy Susan organizing idea has transformed my kitchen cabinets. All for just a few dollars! I wanted to share the details with you all so you could try this in your home. I really think you will love this one!
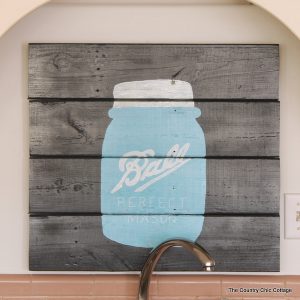
If you have been around here any time at all, you know that I love mason jars. When I needed a bit of new art in my kitchen, I created this fun mason jar pallet artwork to go in that spot. You can paint on the mason jar like my version or anything else that fits with your home.
You can also use the card below to print the instructions for these painted wooden spoons if you would like!
Painted Wooden Spoons
This easy DIY project is perfect for your kitchen or to give as a handmade gift.
Supplies
- 2 wooden spoons I got mine from Dollar Tree.
- Painters Tape
- White Chalk Paint
- Light Pink Chalk Paint
- Aqua Chalk Paint
- Sealer (optional but I will include notes below for those that want the added durability)
- Paintbrush
Instructions
-
Start by tearing 7 pieces of painter’s tape per spoon and wrapping them tightly around the wooden spoons. Make sure that the pieces of tape line up so that there isn’t any space in between them. This will get you the spacing for your stripes.
-
Leave the two pieces of tape at the top and remove the 3rd and 4th piece of tape. You can change this up if you would like to get a different look. Use a different width of painter’s tape or remove the tape in sections that are wider or thinner.
-
Paint the unmasked area with light pink paint. I like to use two layers with chalk paint. Be sure to allow the first coat to dry before adding a second coat. I stood my spoons in a mason jar while drying so I was able to paint front and back at one time.
-
Once completely dry, cover the pink section with the two pieces of tape. Make sure the tape is pressed firmly down so that when you paint the other sections, none seeps under the tape. TIP: You can paint a little bit of pink paint on each side of the painter’s tape and allow it to dry. This will seal the area with pink paint and allow for really crisp paint lines.
-
Once the light pink section is taped, paint the top part of the spoon with the aqua and the lower section with white. Leave the bottom strip of tape on while you are painting the white section so that you have a nice clean line for the bottom section. Again, you will want to use two coats of paint so be sure to allow to dry in between coats.
-
Once all of the sections are dry, remove the tape! Notice how I kept the paint far away from the actual spoon end of the utensil. These paints are not food safe and should not be placed into contact with food.
Notes
Now that you have these gorgeous painted wooden spoons, how do you protect them? I have a few sealing options for you below to get a long life from your creations. Please note that these spoons are NOT dishwasher safe no matter what sealer you use!
- For the most durable finish, you could add a clear epoxy over the top of the handles. I did that with a tinted epoxy here.
- You can also add a brush-on sealer. My favorite is Polycrylic.
- Your third option is to spray your handles with a spray sealer. Again, I like the Polycrylic for my projects.