This post and photos may contain Amazon or other affiliate links. If you purchase something through any link, I may receive a small commission at no extra charge to you. Any supplies used may be given to me free of charge, however, all projects and opinions are my own.
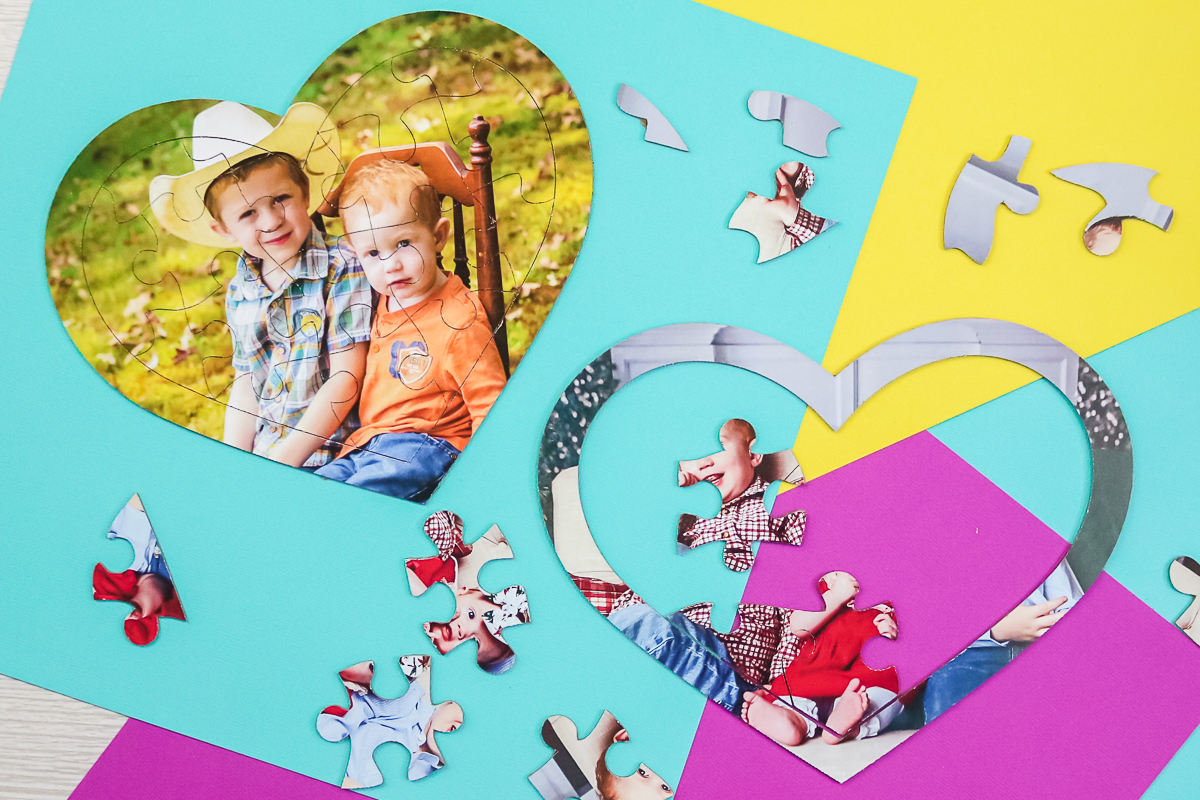
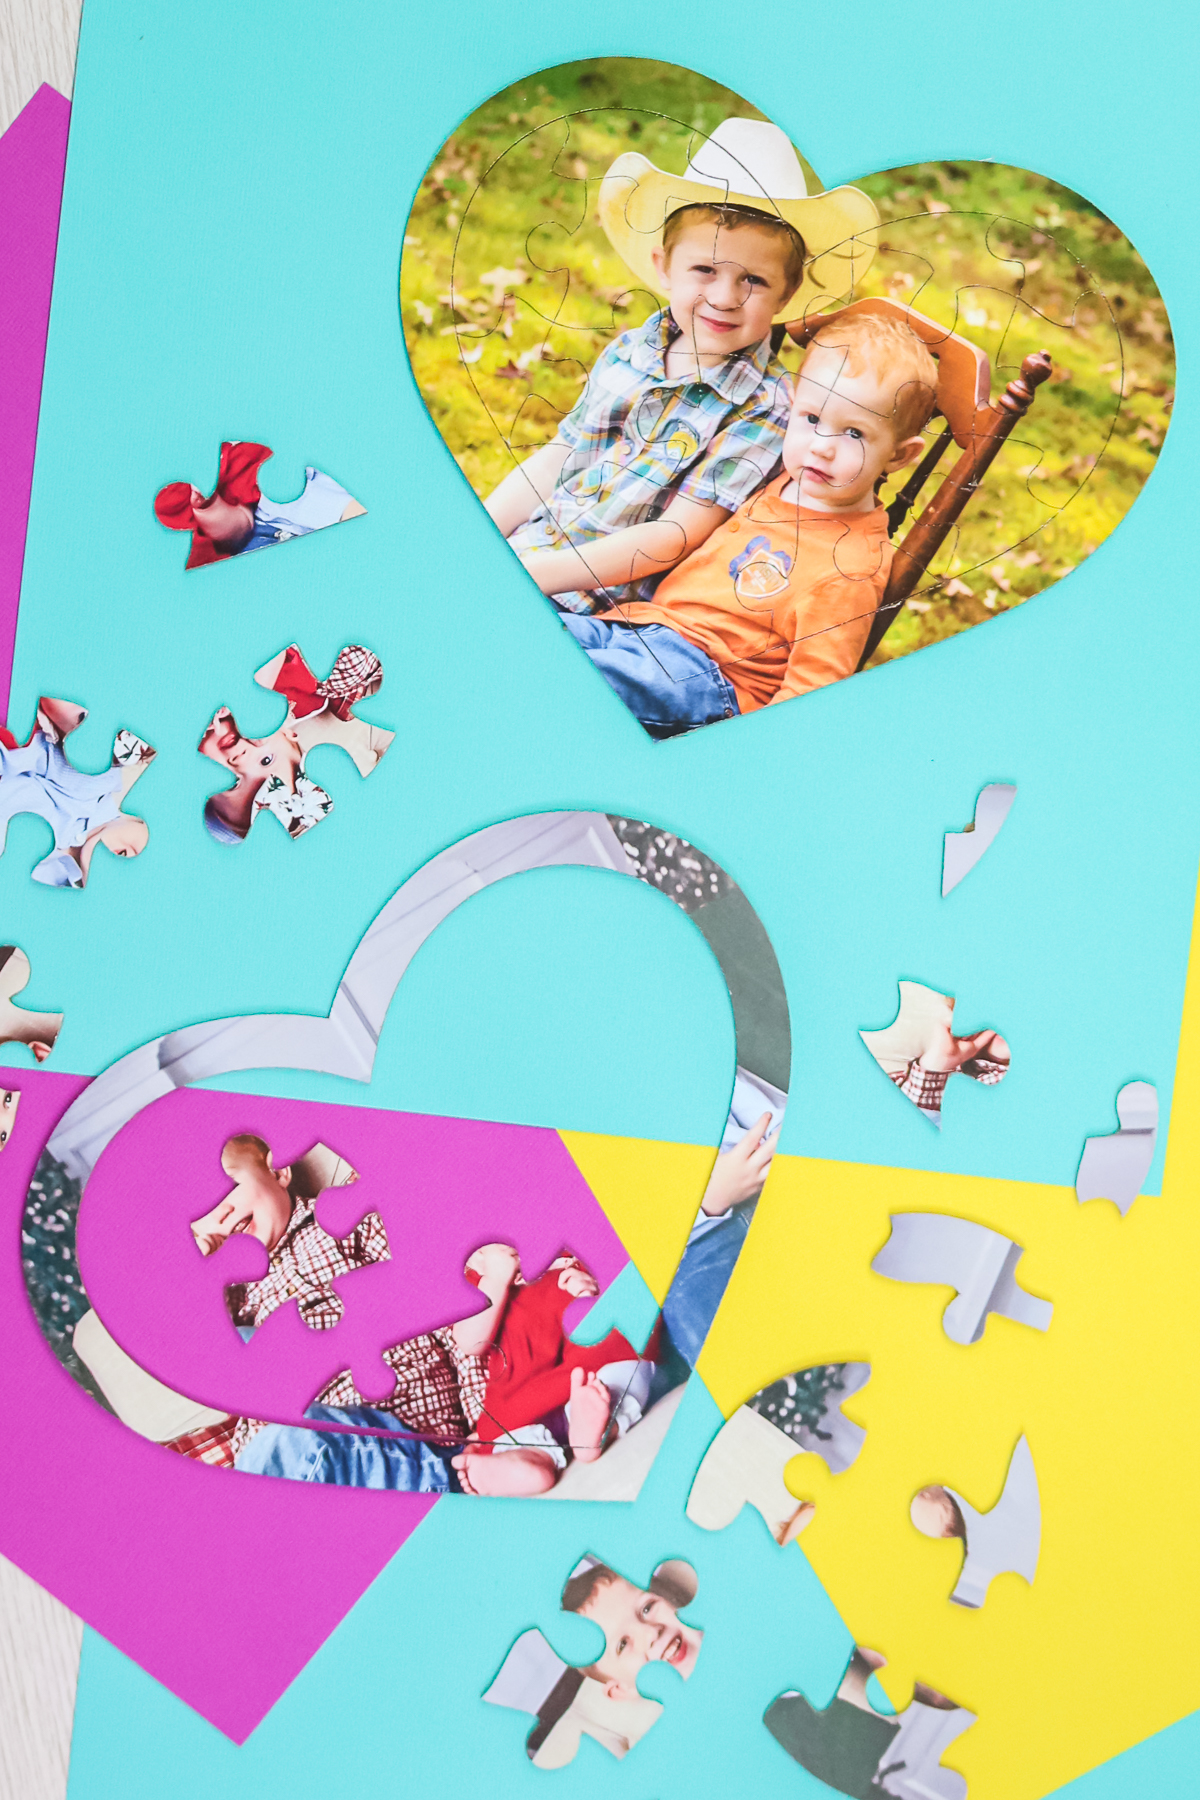
Did you know that you can make a puzzle out of a picture with your Cricut Maker? If you are looking for home games for kids, this is one idea that you can make in minutes with your Cricut machine using literally any picture. In fact, kids and adults alike will love this cute idea for summer fun or as a gift for any time of the year. So, pick out your favorite pictures and break out your knife blade to get started.
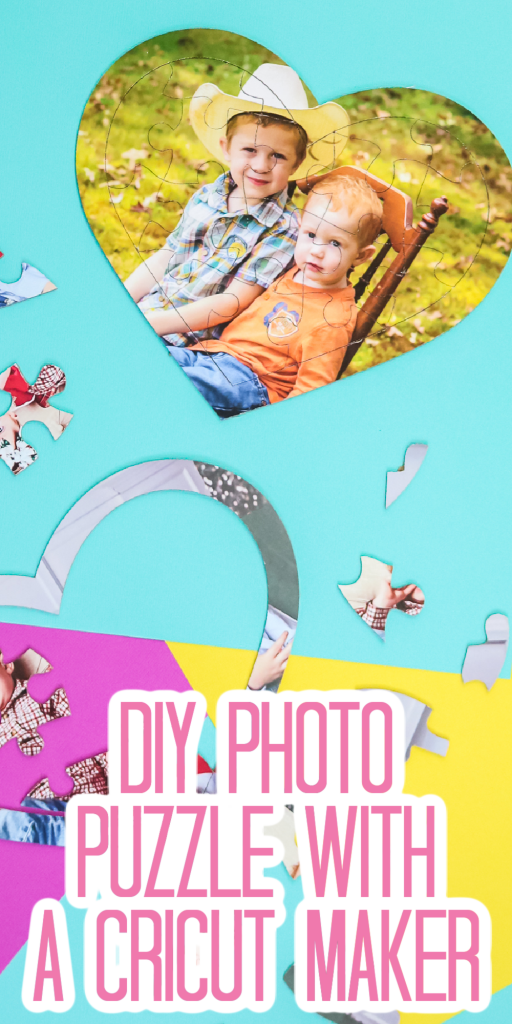
Make a Puzzle Out of a Picture
You can actually watch me create these games for kids in the video below. I even walk through how you can design your own picture puzzles right in Cricut Design Space. Just click play!
Can’t watch the video or missed some of the steps? I have the details for making your own games with your Cricut machine below as well.
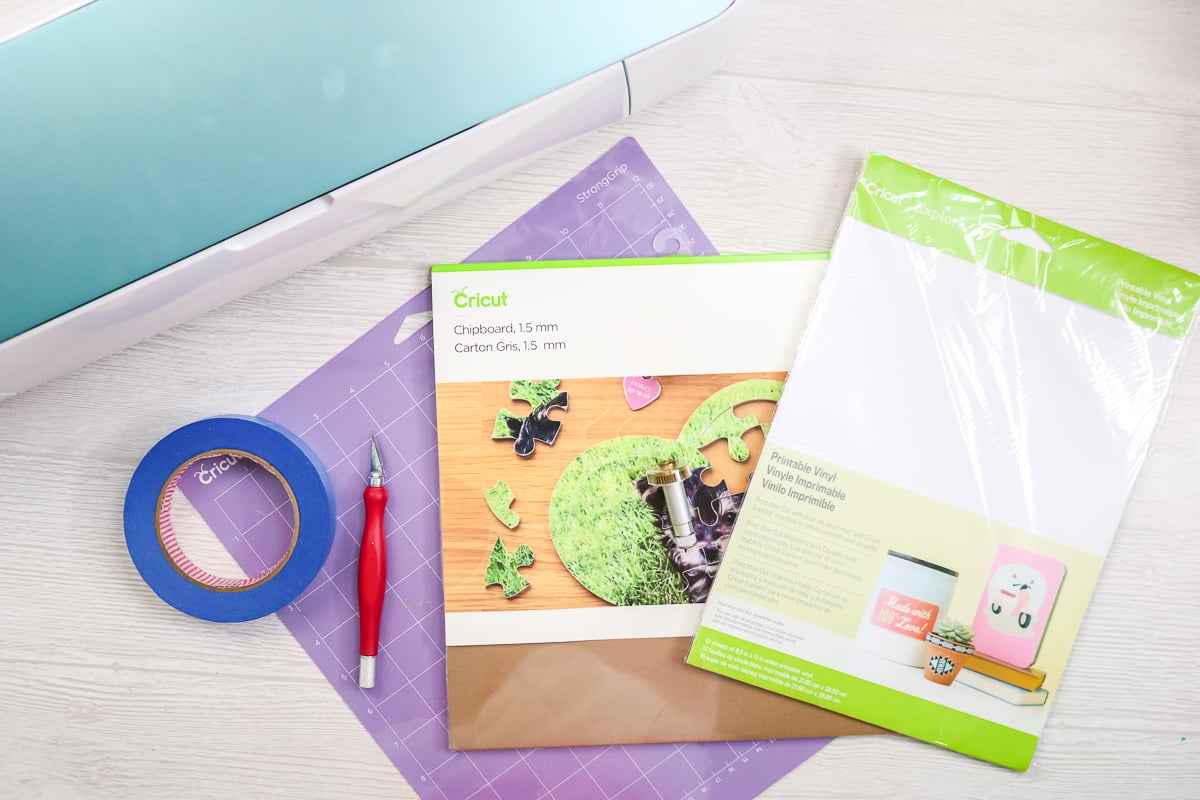
Supplies needed:
How to Design a Picture Puzzle
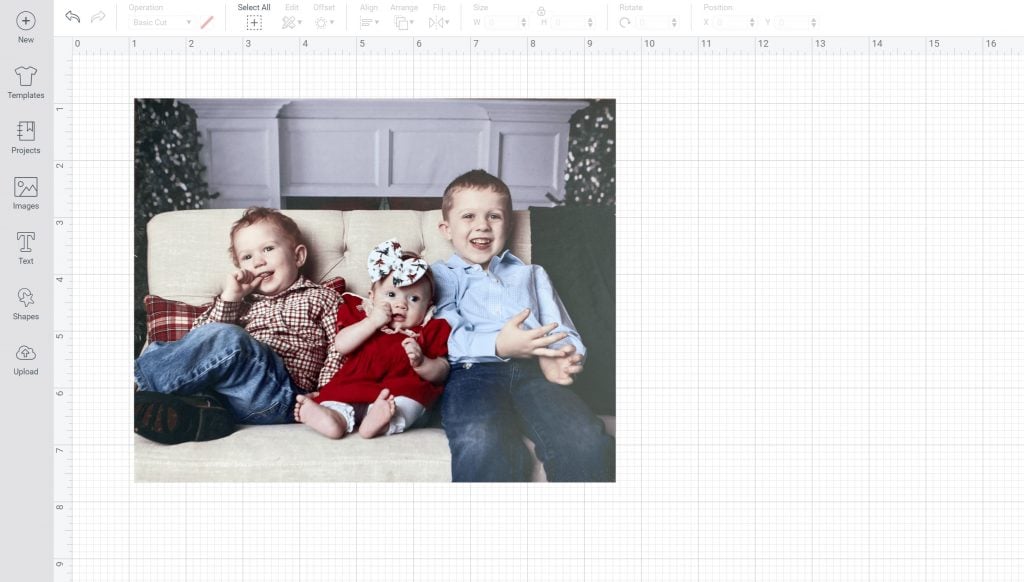
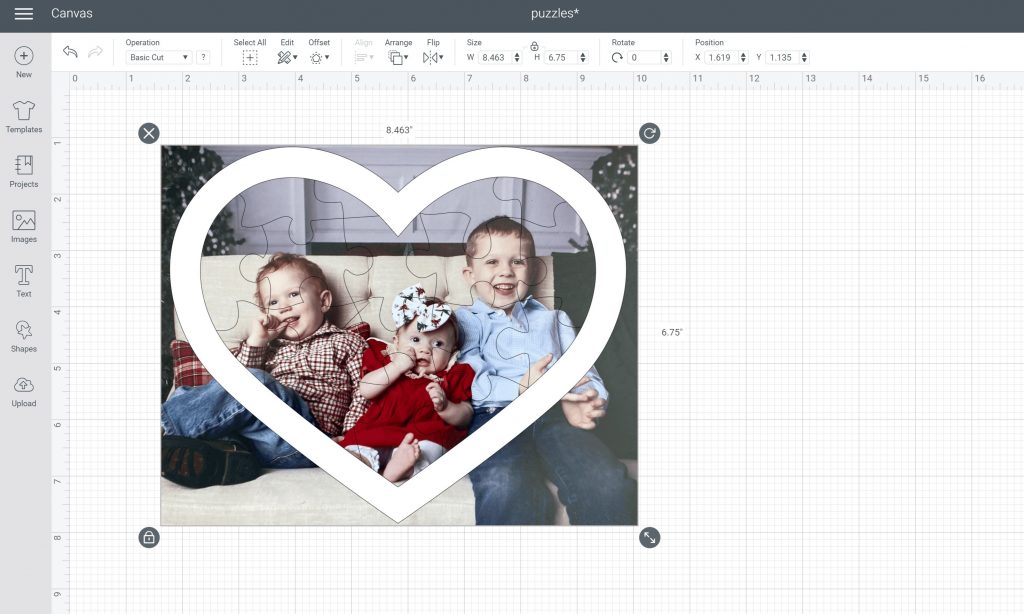
First, you will need to design your puzzle in Cricut Design Space. First upload your image as a print then cut image and insert that onto your canvas.
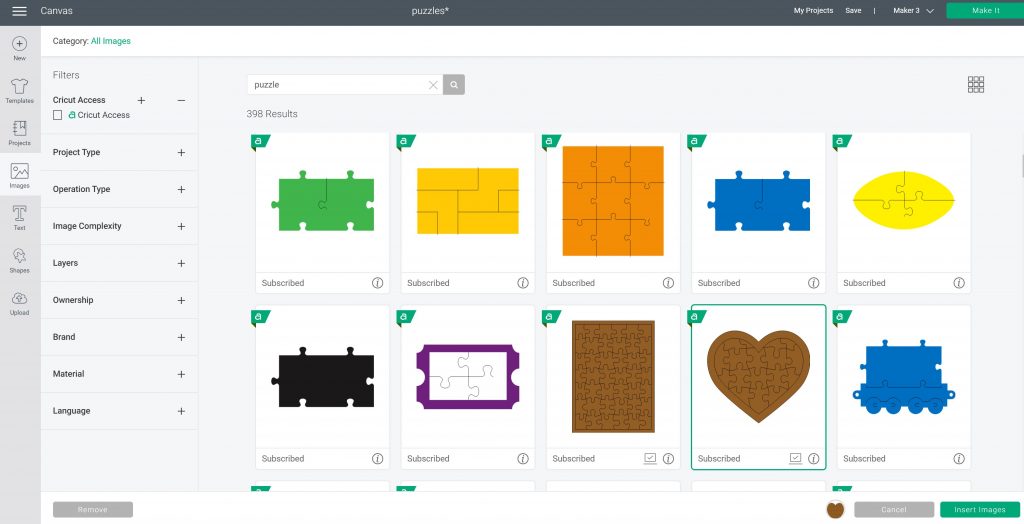
Then click image and search for “puzzle”. You will find a wide variety of templates that you can use. I am going to choose a heart for my puzzle but you can pick from any of the ones shown.
Once that is inserted, you will want to make sure that your image is the right size. It needs to be less than 6.75×9.25 inches in order to do print then cut. You can use slice to crop the image if you need to.
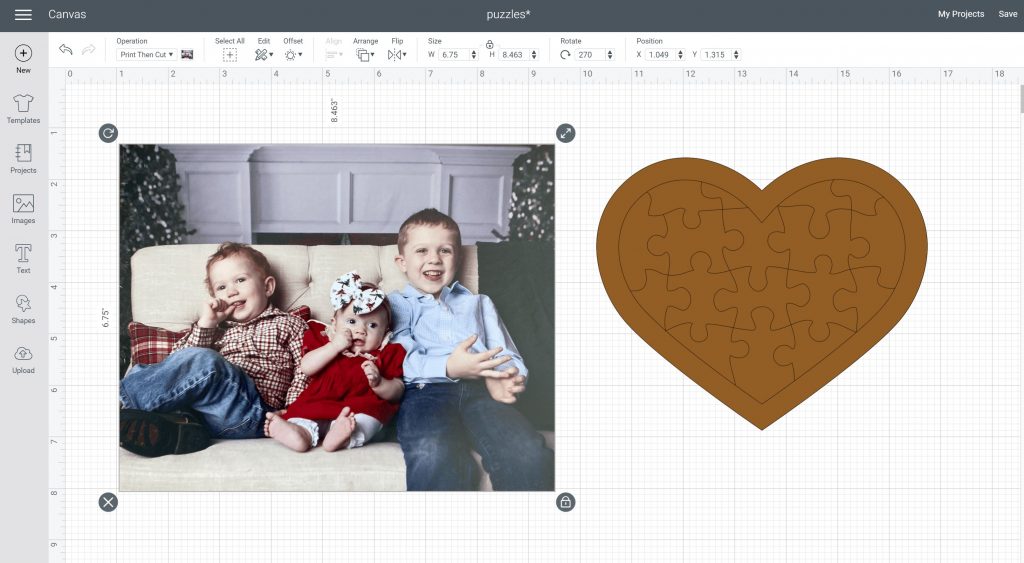
The puzzle I am using comes with two layers. A plain heart and the actual puzzle. I am just going to delete the heart layer. You could use this to slice your photo but I want the extra room around the edges to make sure the puzzle looks good when cut.
You can change the puzzle layer to white to see a bit better then put if over your image and locate it exactly how you want your puzzle to look. Pick both the puzzle layer and the picture and click attach.
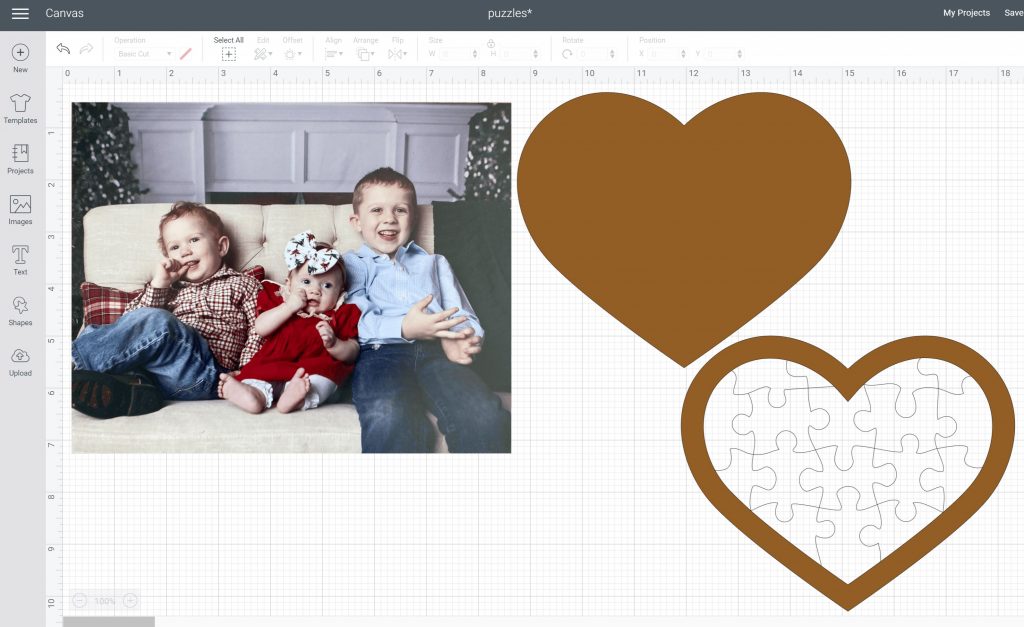
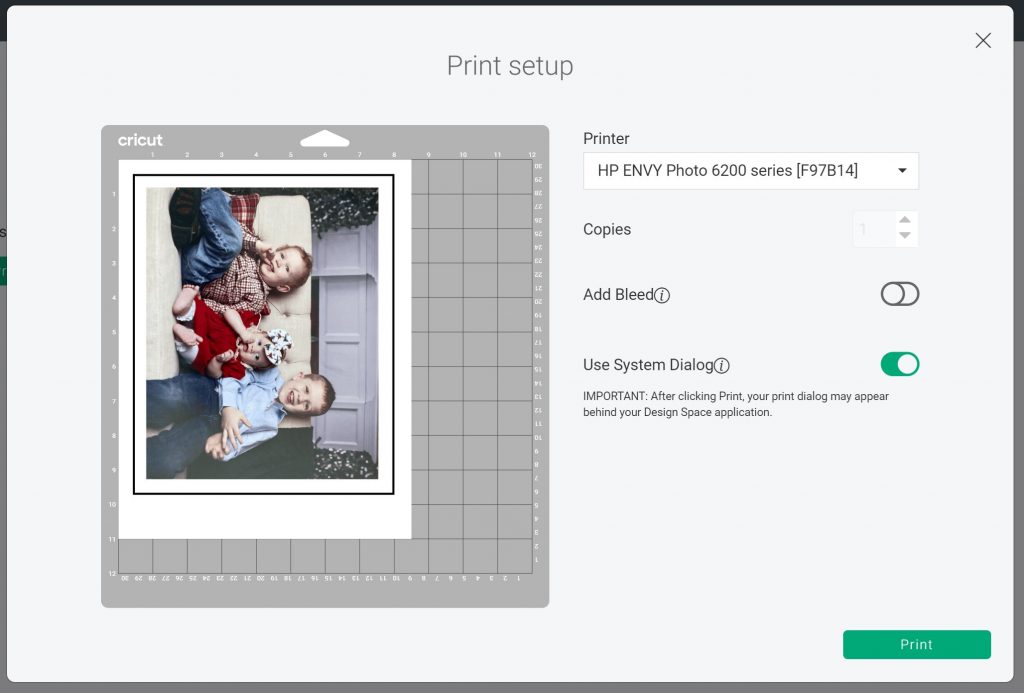
You are now ready to click make it and cut your puzzle. I will note that when you print your image, the puzzle itself will NOT print. Those lines are cut lines and will not be on your image. They will only cut with the knife blade after printing is complete. NOTE: I always turn off bleed and use system dialogue box so I can choose best quality when printing pictures.
Cutting a Chipboard Puzzle with the Cricut Maker
Are you ready to cut your photo puzzle? The process is pretty simple but there are a few tips and tricks you need to remember along the way.
Adding Printable Vinyl to Chipboard
Now that you have your design, you can print the image onto printable vinyl.
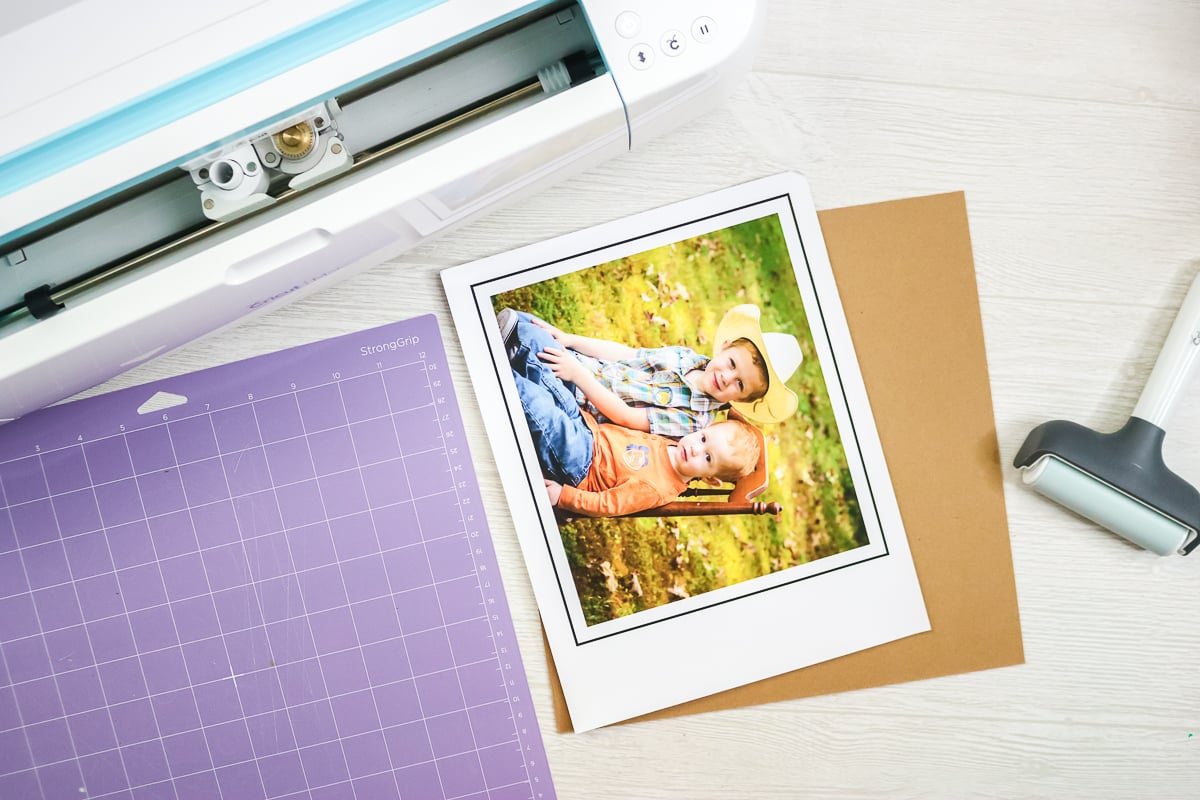
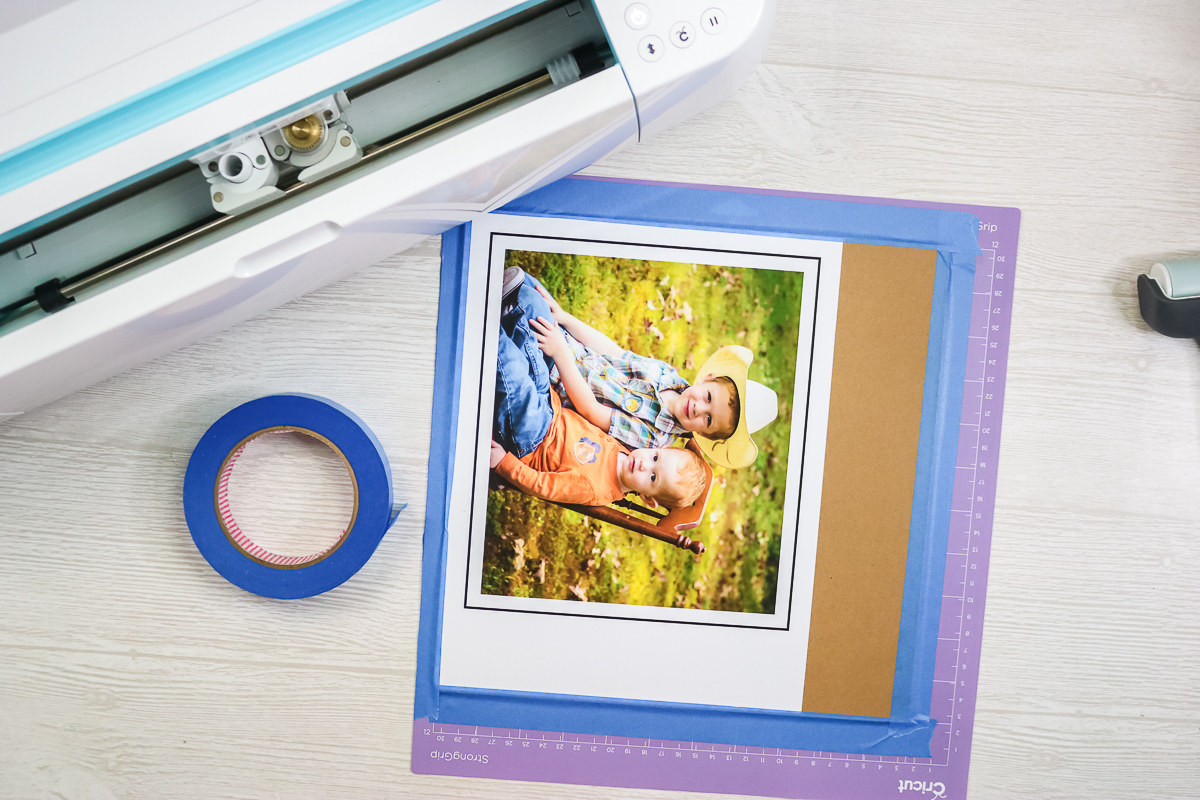
Then peel back the backing on the printable vinyl and stick it to the chipboard piece aligning in the corner. NOTE: You want to orient your image on the chipboard the same way it is oriented on the mat in Design Space.
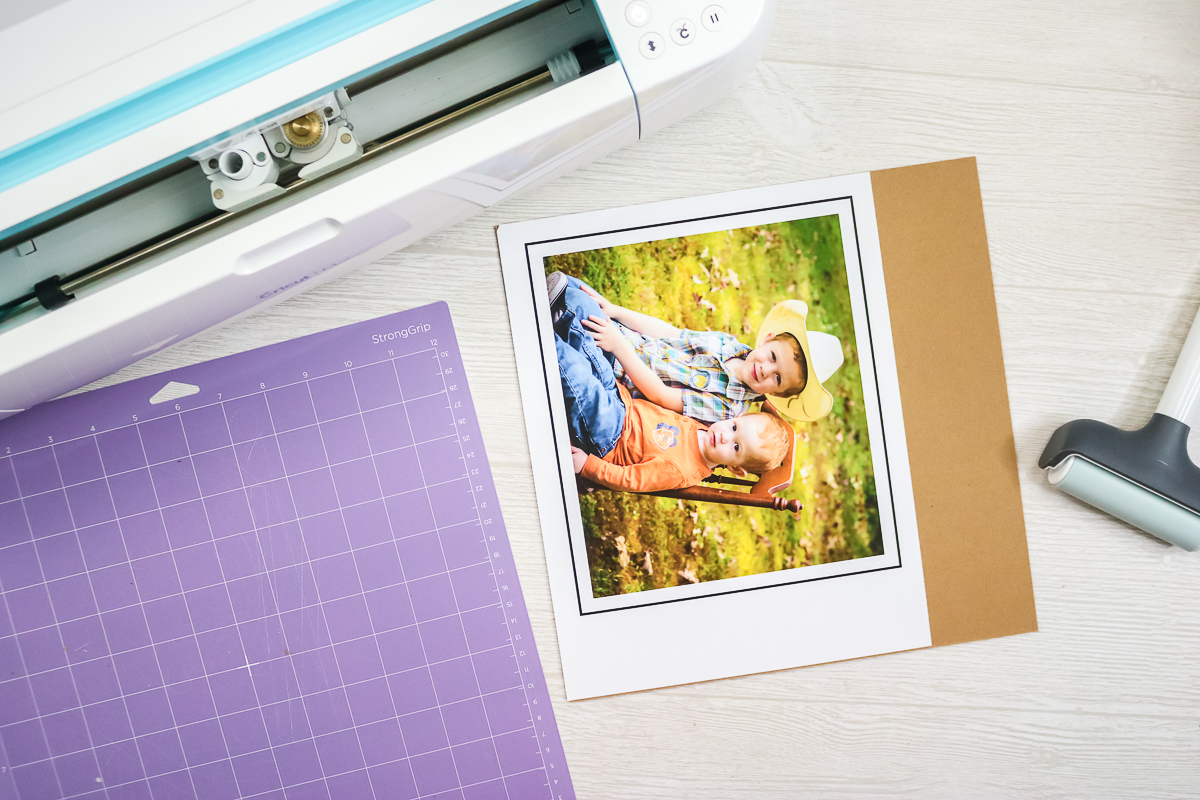
Then add your chipboard piece to the mat and align in the corner. Press the chipboard down well on the strong grip mat. I like to use a brayer to do this. Tape around all four sides of the chipboard using painter’s or masking tape. Just grip the very edge of the chipboard and press the tape down well. Be sure to cut away excess tape on the left hand side of your mat.
Cutting Chipboard with the Cricut Maker
Then add the mat to your Cricut Maker when prompted. You should have your knife blade installed and your white star wheels pushed all the way to the right. You will also want to pick the 1.5 mm chipboard setting in Design Space.
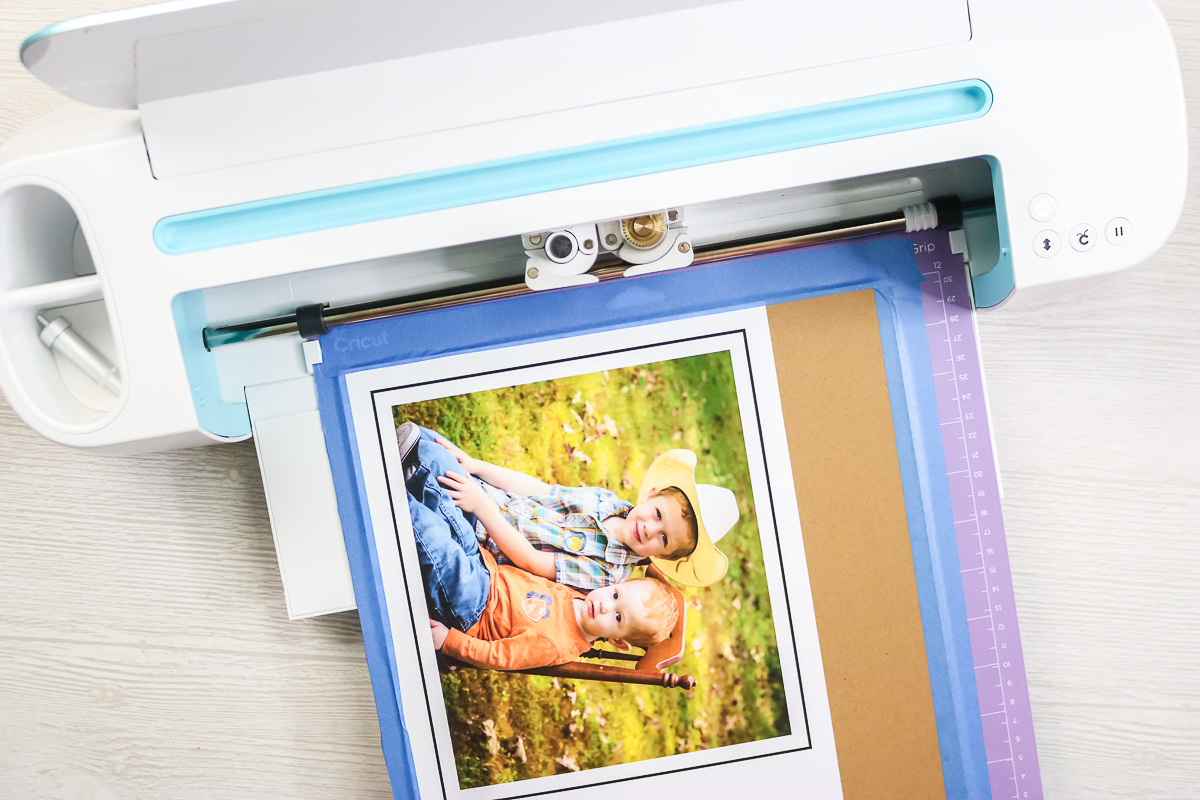
Press the go button when prompted to start the cut. You will see the Maker read the registration marks first then it will begin to cut your puzzle.

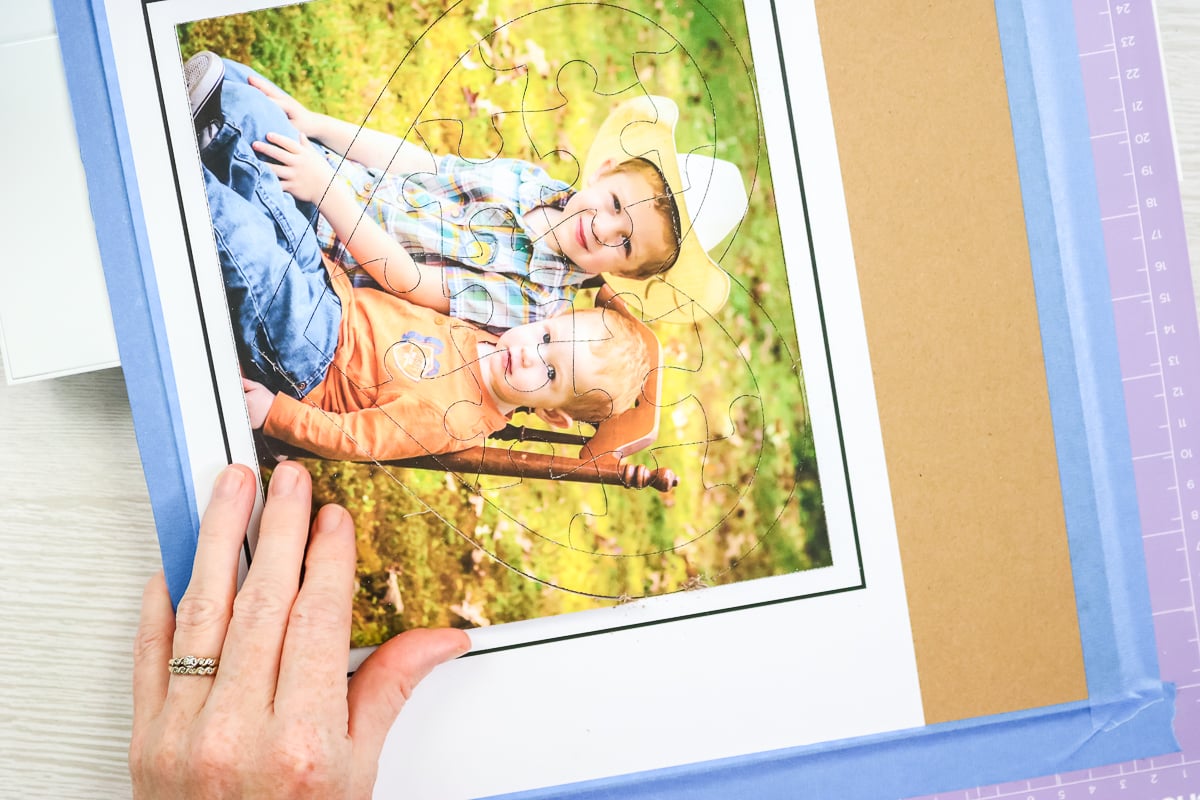
The cutting process is long and it will take a while. This puzzle stated it would take 12 passes to cut. I start to check the cut at around 7 passes.

Checking Your Cuts
To check the cut, pause the machine when the mat is mostly out. Then lift the puzzle edge to make sure it is cut through. Curved areas will cut through last so be sure to check those. If it is cut through, click the load/unload button to remove the mat. If it is not cut through, click the pause button again to resume cutting.
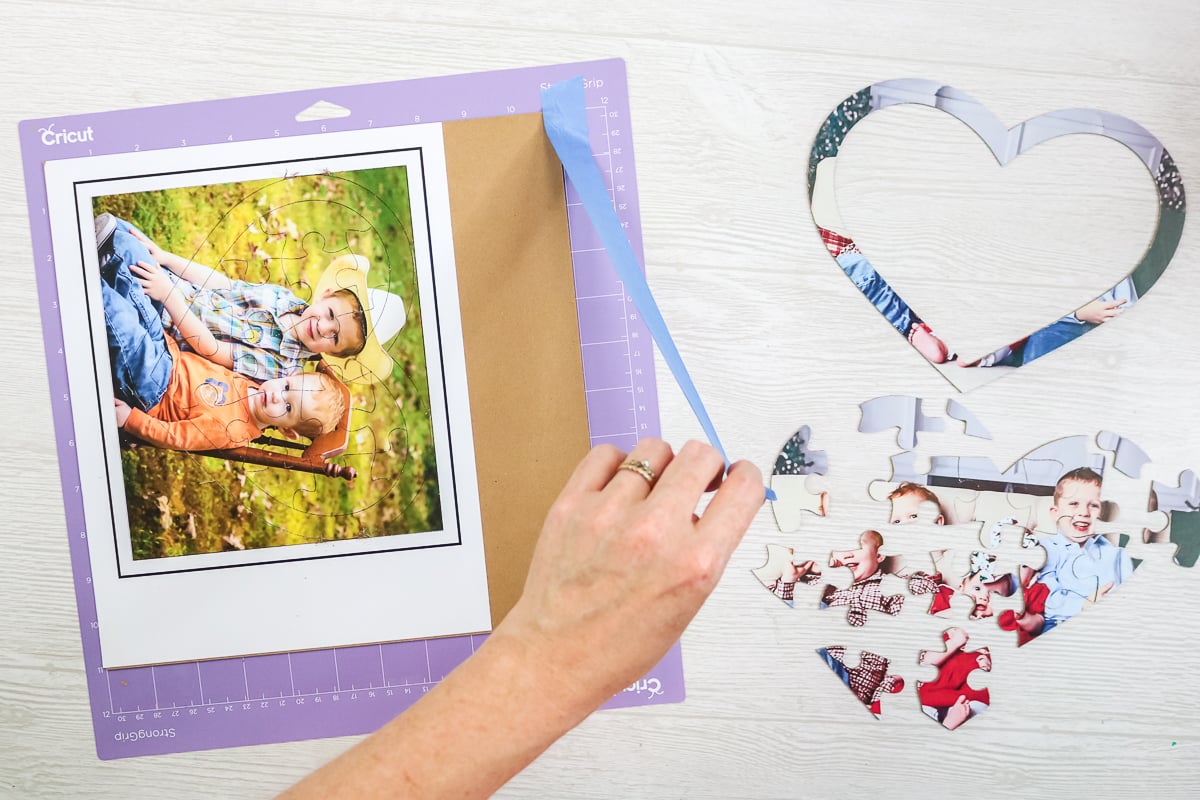
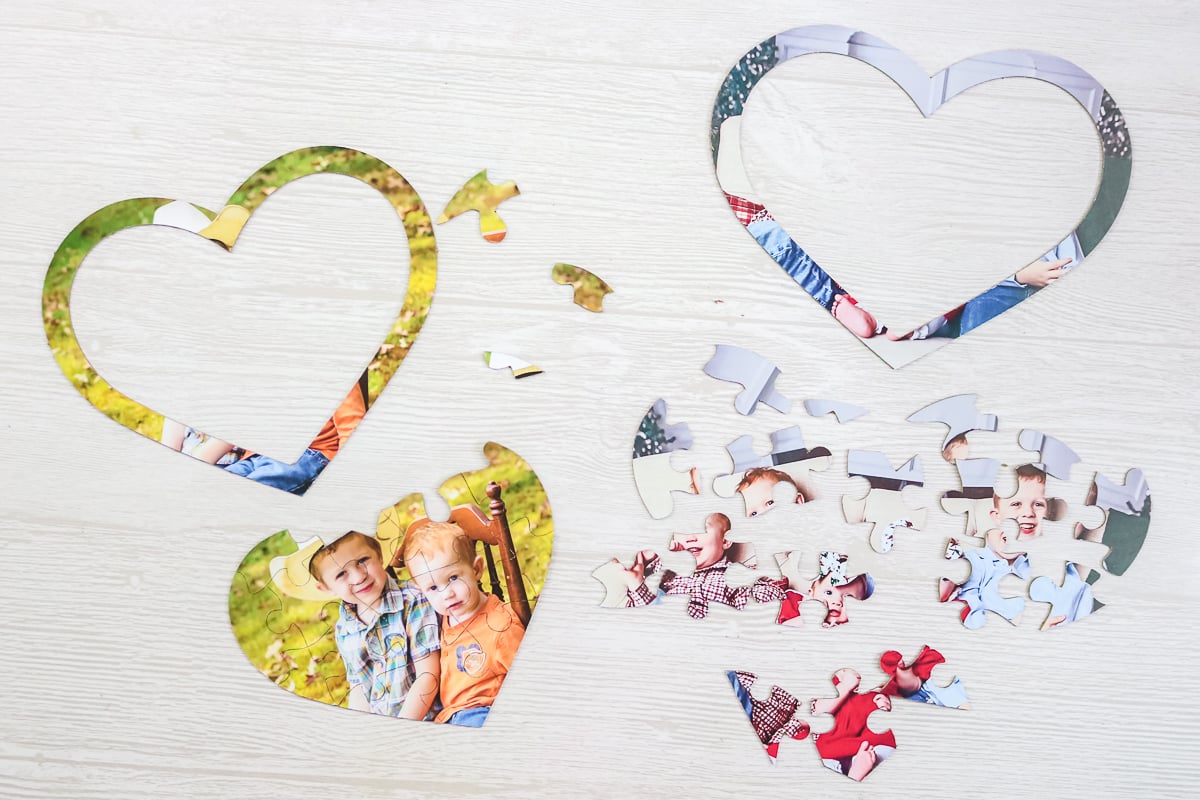
Completing Your Puzzle
Once the puzzle is complete, you can remove it from the mat. I find it is easiest to flip the mat over and pull the puzzle off of the mat. Then you will want to carefully remove each piece of the puzzle. If there are any areas that are not cut through, just complete the cut with your craft knife.
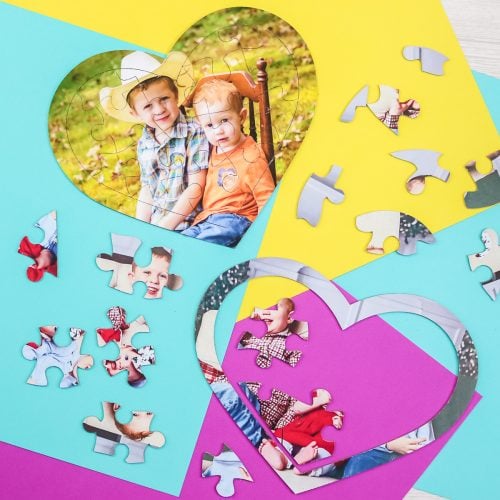
Now you have a home game for kids that you made yourself and that they are going to love! After all, who doesn’t love a picture puzzle?
Now that you know how to make a puzzle out of a picture, the possibilities are endless. You can make these photo puzzles with any image and give them to the kids, friends, family, and so much more.
I love this idea for a Father’s Day gift maybe with “we love you dad” spelled out across the image. Then have dad put it together to get his cute Father’s Day gift and message. You can also give one of these to grandma as a unique way to share your kids’ pictures.
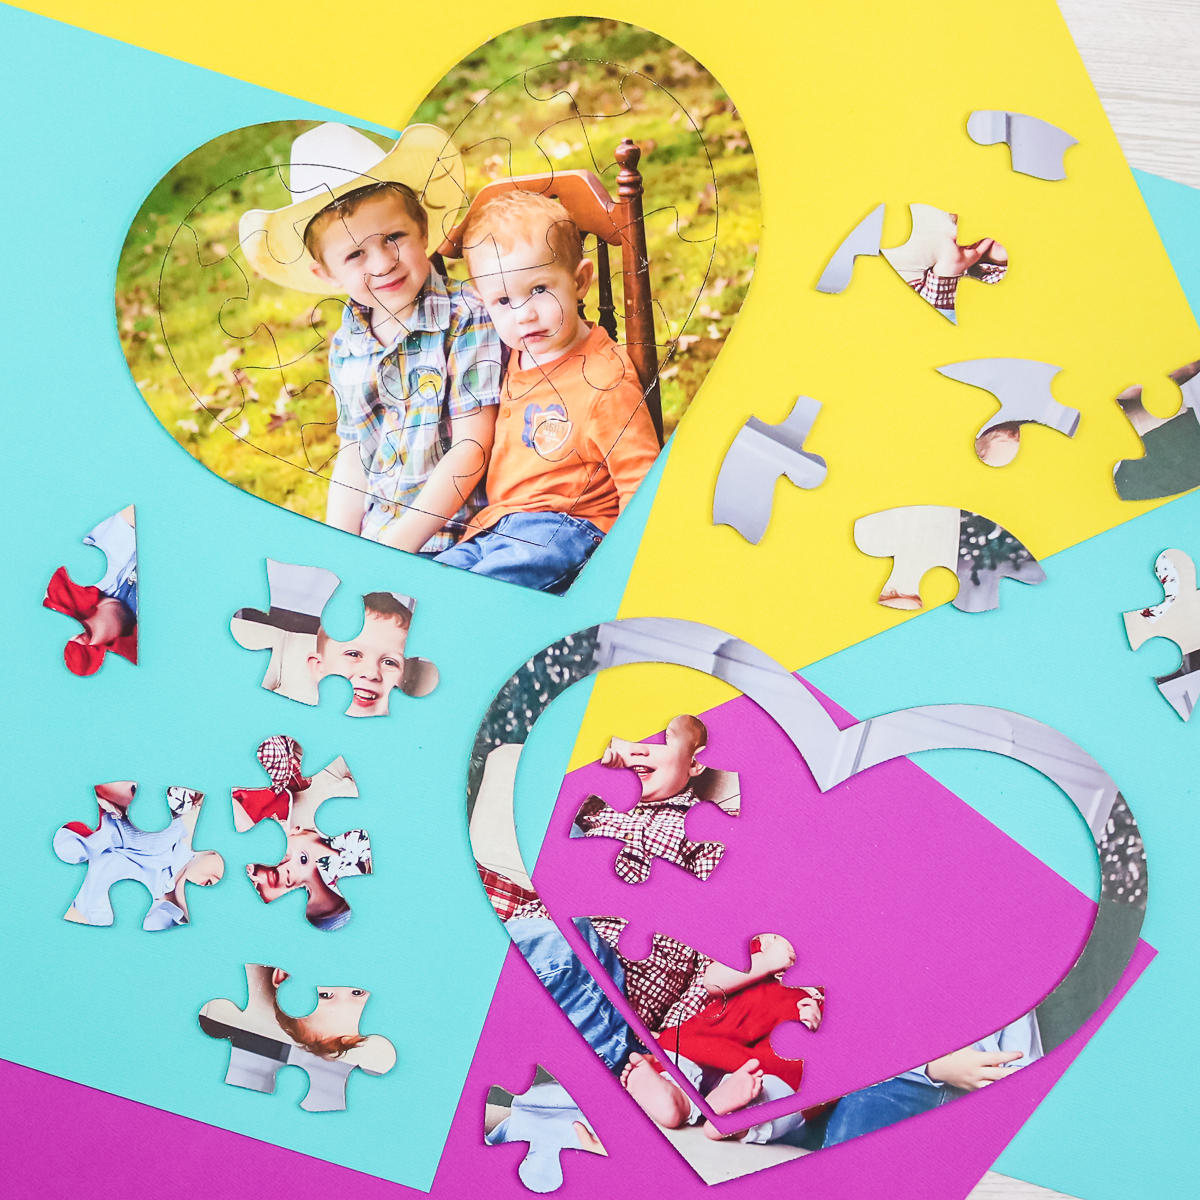
Plus the kids will definitely love putting together a photo puzzle with their own picture or even pictures of loved ones from far away. Add an image of your pet for a fun puzzle the whole family will love. Seriously, you can really let your imagination run wild with this one. So, be sure to make a puzzle out of a picture for any occasion or just because!
Love this game for kids and want to print the instructions? You can use the card below!
How to Make a Photo Puzzle
Make a puzzle from a picture with these easy to follow instructions and your Cricut Maker.
Supplies
- Cricut Maker
- Knife Blade
- Cricut Chipboard 1.5 mm thick
- Printable Vinyl
- Strong Grip Mat
- Printer
- Painter’s or masking tape
- Craft knife (optional)
- Brayer (optional)
Instructions
How to Design a Picture Puzzle
-
First, you will need to design your puzzle in Cricut Design Space. First upload your image as a print then cut image and insert that onto your canvas.
-
Then click image and search for “puzzle”. You will find a wide variety of templates that you can use. I am going to choose a heart for my puzzle but you can pick from any of the ones shown.
-
Once that is inserted, you will want to make sure that your image is the right size. It needs to be less than 6.75×9.25 inches in order to do print then cut. You can use slice to crop the image if you need to.
-
The puzzle I am using comes with two layers. A plain heart and the actual puzzle. I am just going to delete the heart layer. You could use this to slice your photo but I want the extra room around the edges to make sure the puzzle looks good when cut.
-
You can change the puzzle layer to white to see a bit better then put if over your image and locate it exactly how you want your puzzle to look. Pick both the puzzle layer and the picture and click attach.
-
You are now ready to click make it and cut your puzzle. I will note that when you print your image, the puzzle itself will NOT print. Those lines are cut lines and will not be on your image. They will only cut with the knife blade after printing is complete. NOTE: I always turn off bleed and use system dialogue box so I can choose best quality when printing pictures.
Cutting a Chipboard Puzzle with the Cricut Maker
Adding Printable Vinyl to Chipboard
-
Now that you have your design, you can print the image onto printable vinyl.
-
Then peel back the backing on the printable vinyl and stick it to the chipboard piece aligning in the corner. NOTE: You want to orient your image on the chipboard the same way it is oriented on the mat in Design Space.
-
Then add your chipboard piece to the mat and align in the corner. Press the chipboard down well on the strong grip mat. I like to use a brayer to do this. Tape around all four sides of the chipboard using painter’s or masking tape. Just grip the very edge of the chipboard and press the tape down well. Be sure to cut away excess tape on the left hand side of your mat.
Cutting Chipboard with the Cricut Maker
-
Then add the mat to your Cricut Maker when prompted. You should have your knife blade installed and your white star wheels pushed all the way to the right. You will also want to pick the 1.5 mm chipboard setting in Design Space.
-
Press the go button when prompted to start the cut. You will see the Maker read the registration marks first then it will begin to cut your puzzle.
-
The cutting process is long and it will take a while. This puzzle stated it would take 12 passes to cut. I start to check the cut at around 7 passes.
Checking Your Cuts
-
To check the cut, pause the machine when the mat is mostly out. Then lift the puzzle edge to make sure it is cut through. Curved areas will cut through last so be sure to check those. If it is cut through, click the load/unload button to remove the mat. If it is not cut through, click the pause button again to resume cutting.
Completing Your Puzzle
-
Once the puzzle is complete, you can remove it from the mat. I find it is easiest to flip the mat over and pull the puzzle off of the mat. Then you will want to carefully remove each piece of the puzzle. If there are any areas that are not cut through, just complete the cut with your craft knife.
GET OUR CRICUT BEGINNER’S GUIDE!
EVERYTHING YOU WANT TO KNOW ABOUT CRICUT DESIGN SPACE IN A FREE PRINTABLE GUIDE!
You have Successfully Subscribed!