This post and photos may contain Amazon or other affiliate links. If you purchase something through any link, I may receive a small commission at no extra charge to you. Any supplies used may be given to me free of charge, however, all projects and opinions are my own.
Are you ready to make customized hats? Let’s chat about the HTVRont Hat Press and everything it can do.
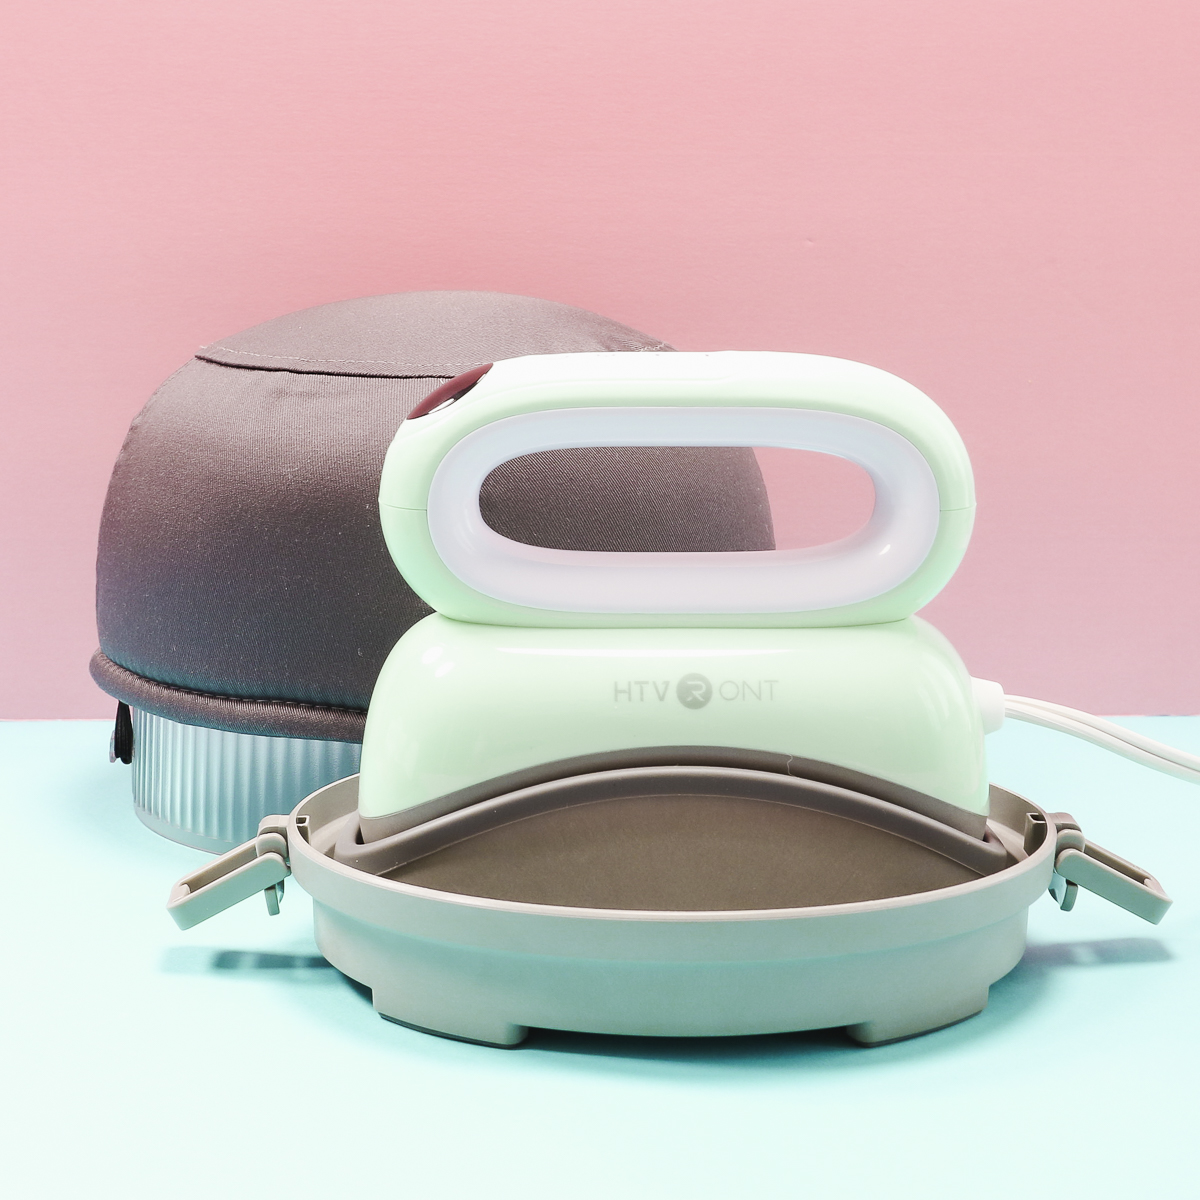
This new hat press comes with a hat form and I think you’ll like how everything fits together.
The HTVRont Hat Press gets hot enough for both HTV and sublimation projects so we’ll make a variety of projects today to test it out. I’ll also compare this press to the Cricut Hat Press since they are similar specialty presses.
A small hat press like the Cricut Hat Press or HTVRont Hat Press is a great option if you’re interested in making customized hats.
You can watch me test this new press by pressing play on the video below.
A Look at the HTVRont Hat Press
To start let’s look at the HTVRont Hat Press and everything that comes with it.
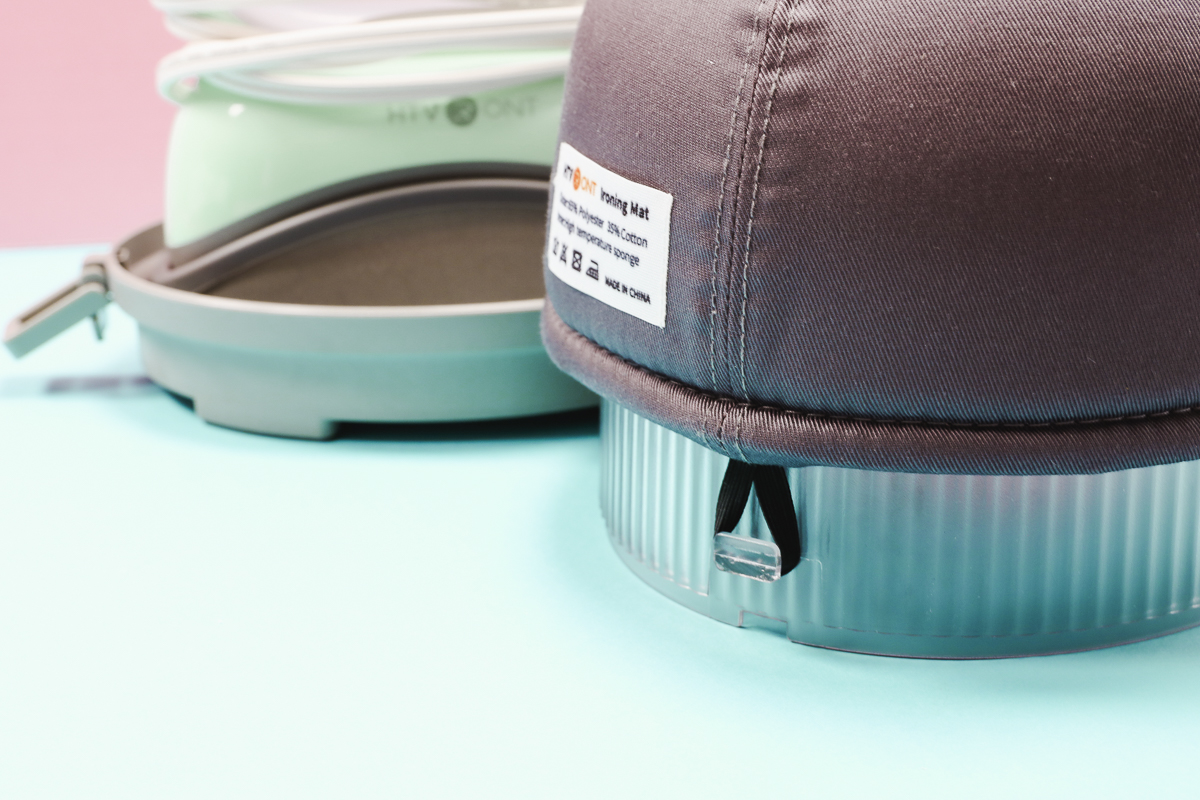
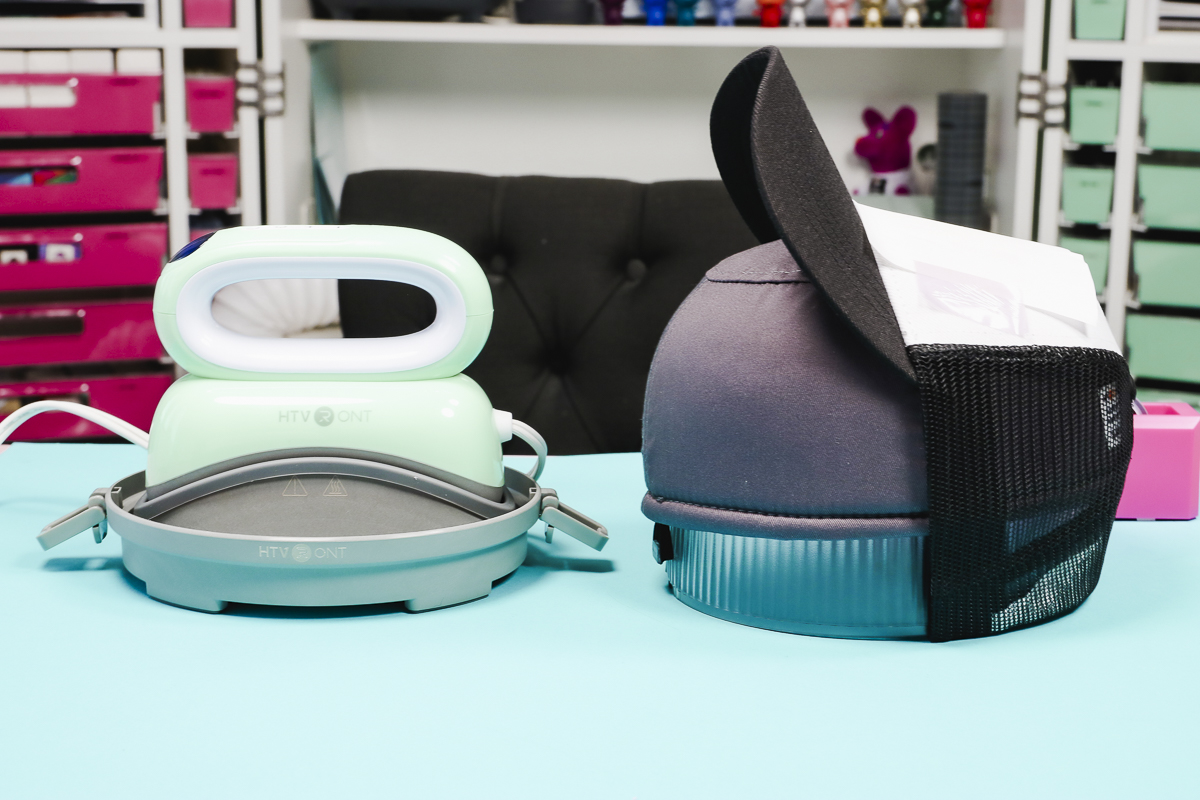
The hat press comes with a base, the hat press, a lid, and a form that fits over the lid. It also comes with a bag to store the hat press in and a user manual.
The cord wraps around the handle and everything fits inside the base and lid.

To remove the lid, open the clips on each side and lift it off.
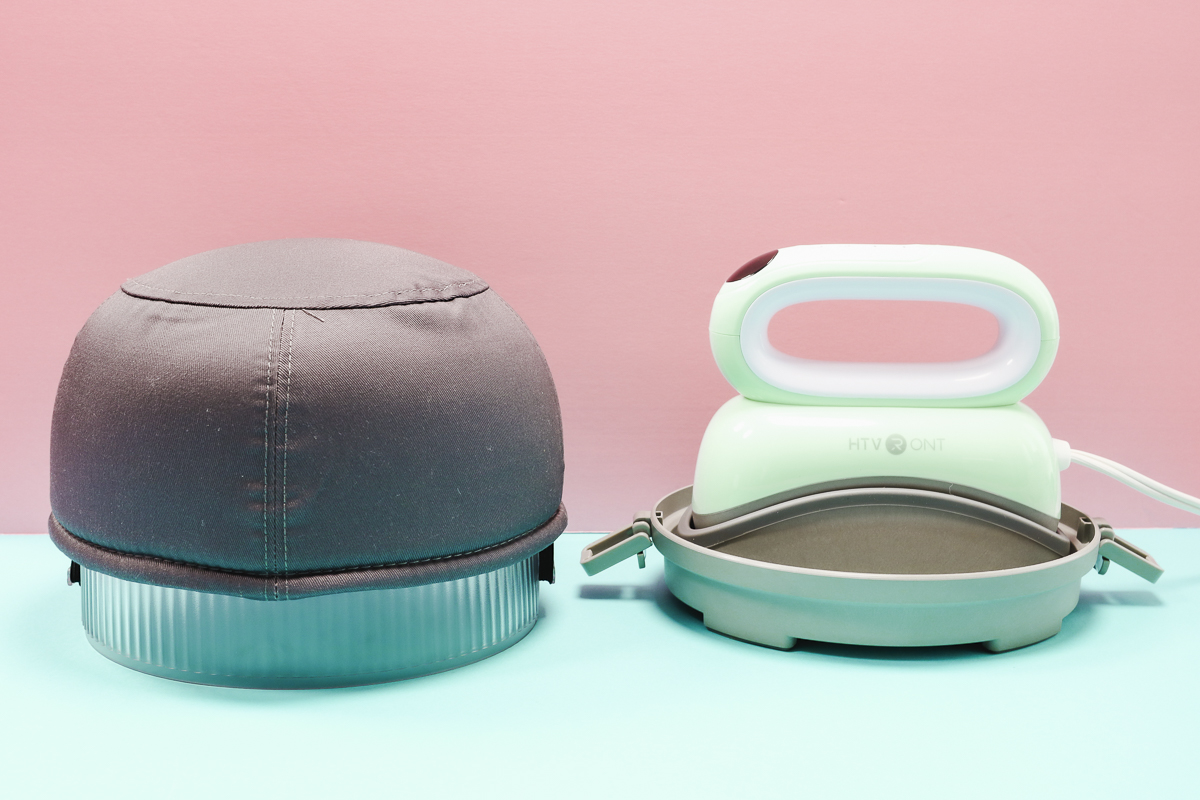
Place the form on top of the lid and secure it in place by placing the loop around the tabs on each side of the lid.
I am a big fan of how the press and the form can all be stored together. Even with the padded form on the lid, you can still clip the lid to the base.
HTVRont Hat Press Buttons and Display
To turn the hat press on, first, you need to plug it in. When you press the power button the display will light up.
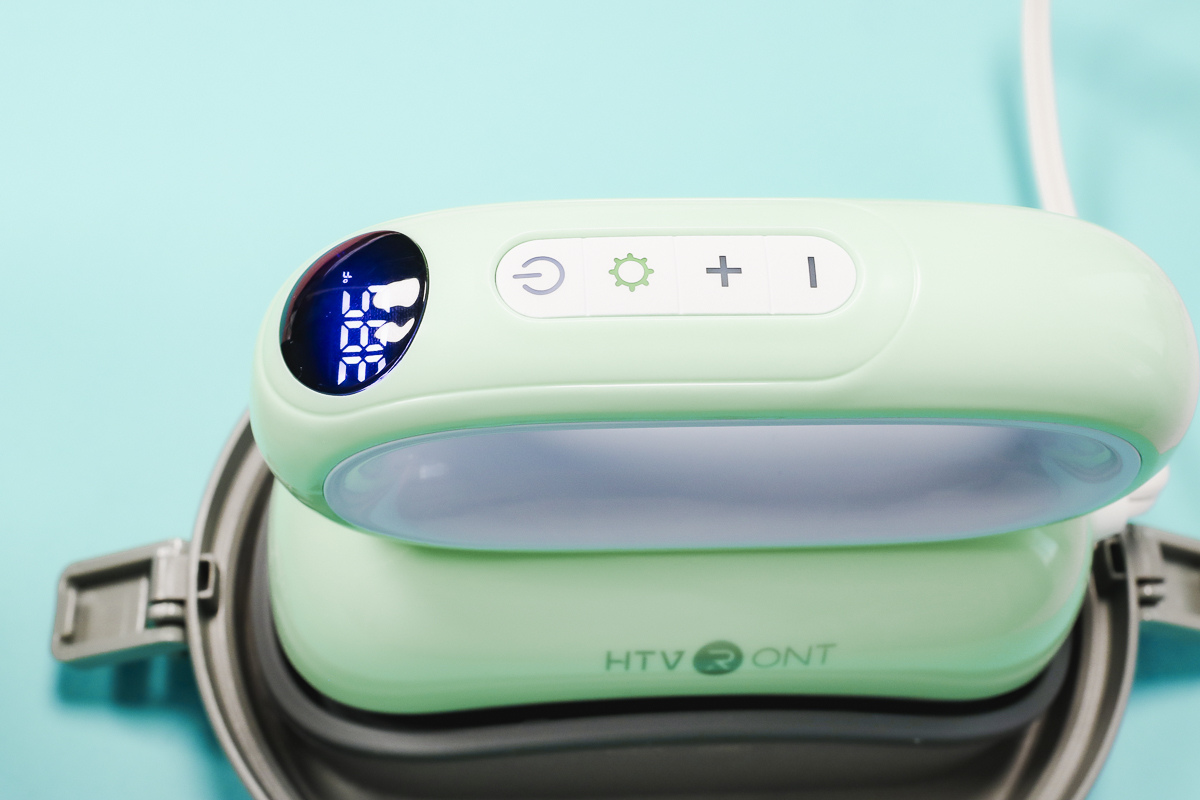
The star button in the center of the handle is the Settings button. To increase or decrease the temperature or time, press the Settings button and use the + and – buttons to adjust.
Press the Settings button once and that brings up the settings for the temperature. Once you have that set, press the settings button again to adjust the time.
When you have the settings correct, allow the press to heat up.
When the hat press is at the right temperature, a long press on the power button will start the timer countdown. A short press will stop the countdown. A second short press will turn the press off.
How to Use the HTVRont Hat Press
Let’s use the hat press to make a couple of quick projects so you can see how it works.
Supplies Used
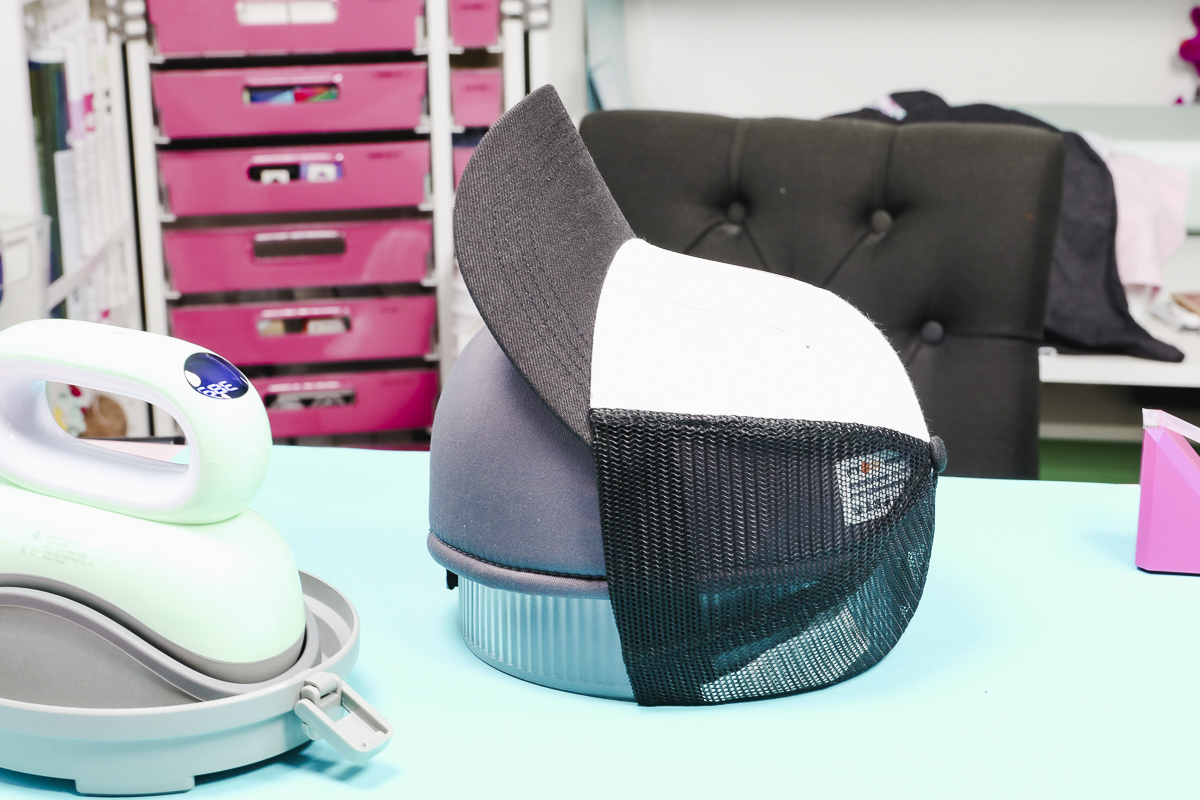
Step 1: Add a Hat to the Hat Press Form
To add a hat to the form, first, you need to remove anything that is inside the hat. There may be cardboard or paper in the hat to help keep the shape.
Next, flip the sweatband on the inside of the hat out, away from where we’re pressing.
The hat fits on this form differently than the Cricut Hat Press. Slide the hat onto the form so the back of the hat fits under the form and the top is snug around the form.
The process is going to be similar for other types of hats as well.
Step 2: Press Hat with the HTVRont Hat Press
The instructions are slightly different depending on which method that you are going to use to decorate your hat. Here are there examples of pressing with the HTVRont Hat Press.
Sublimation Hat
For a sublimation design, I have the hat press set to 385 degrees for 55 seconds.
Preheat the design area to remove any moisture. Next, lint roll the surface to remove any lint, dust, and hair.
Locate the design and use heat-resistant tape to hold it in place.
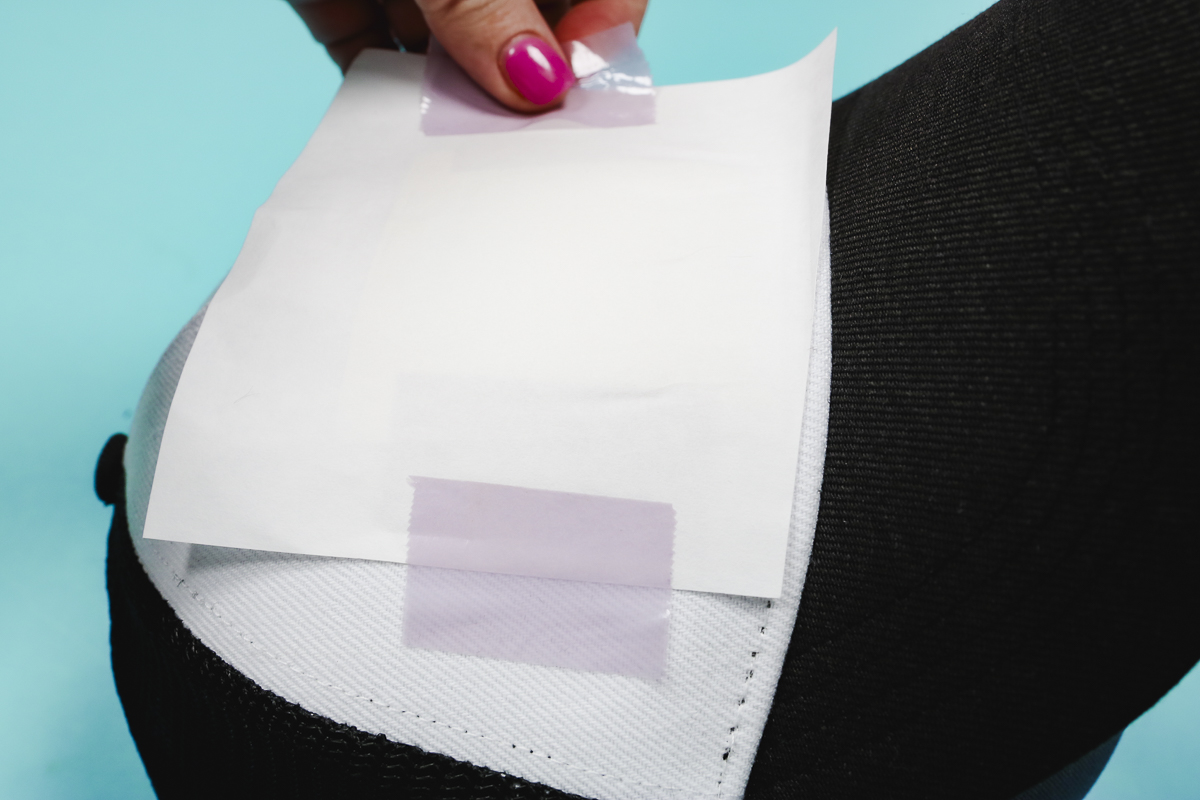
Cover the print with protective paper and press.
This hat press is not very wide. If you have a design that is larger than the heat plate of the press you’ll want to move it back and forth as you’re heating it.
If you’re pressing a design larger than the press you may need to add more time to make sure the entire design is being pressed for the full time.
When the time is up the press will beep. Remove the press and place it back on the base.
Before removing the sublimation print, I like to peek at the design to ensure it’s transferred completely. If it hasn’t, you can lay the design back down and press it again if you don’t move it.
When the design has transferred, remove the protective and sublimation paper to reveal the design.

The sublimation print transferred really well with the HTVRont Hat Press. This is a fun, distressed design and it looks really good on this hat.
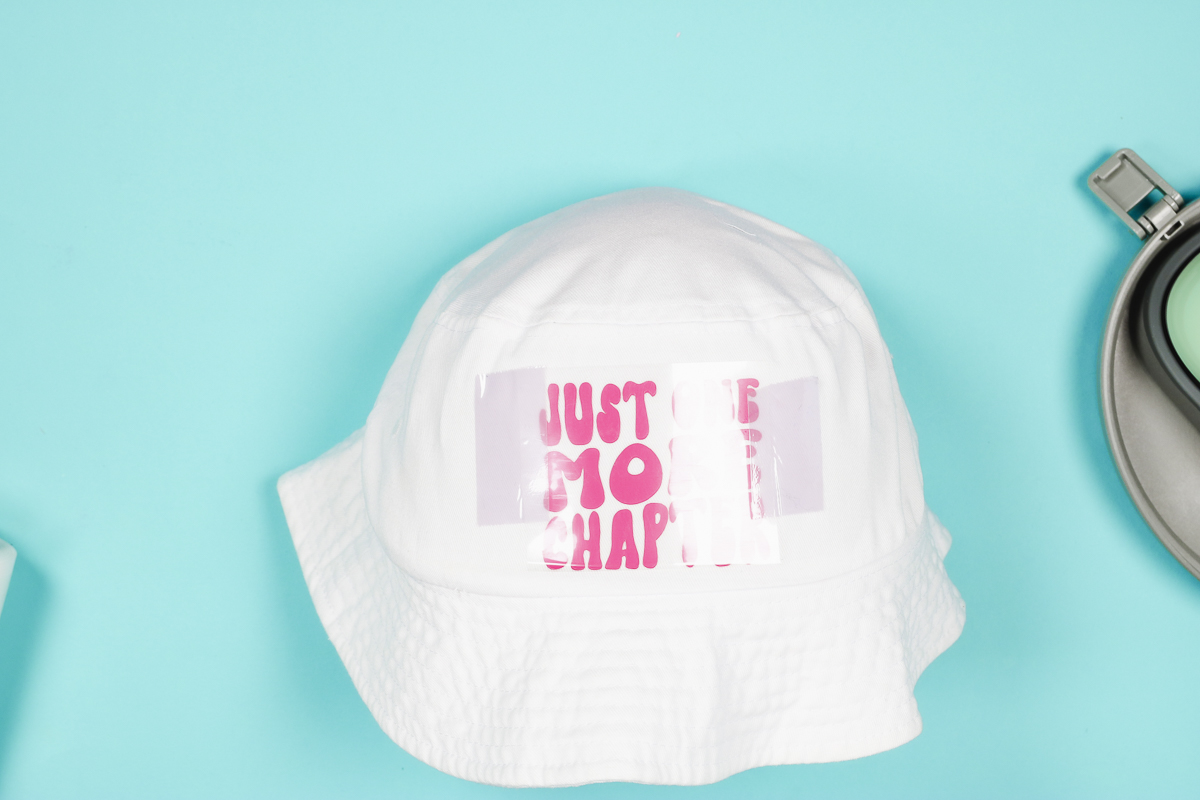
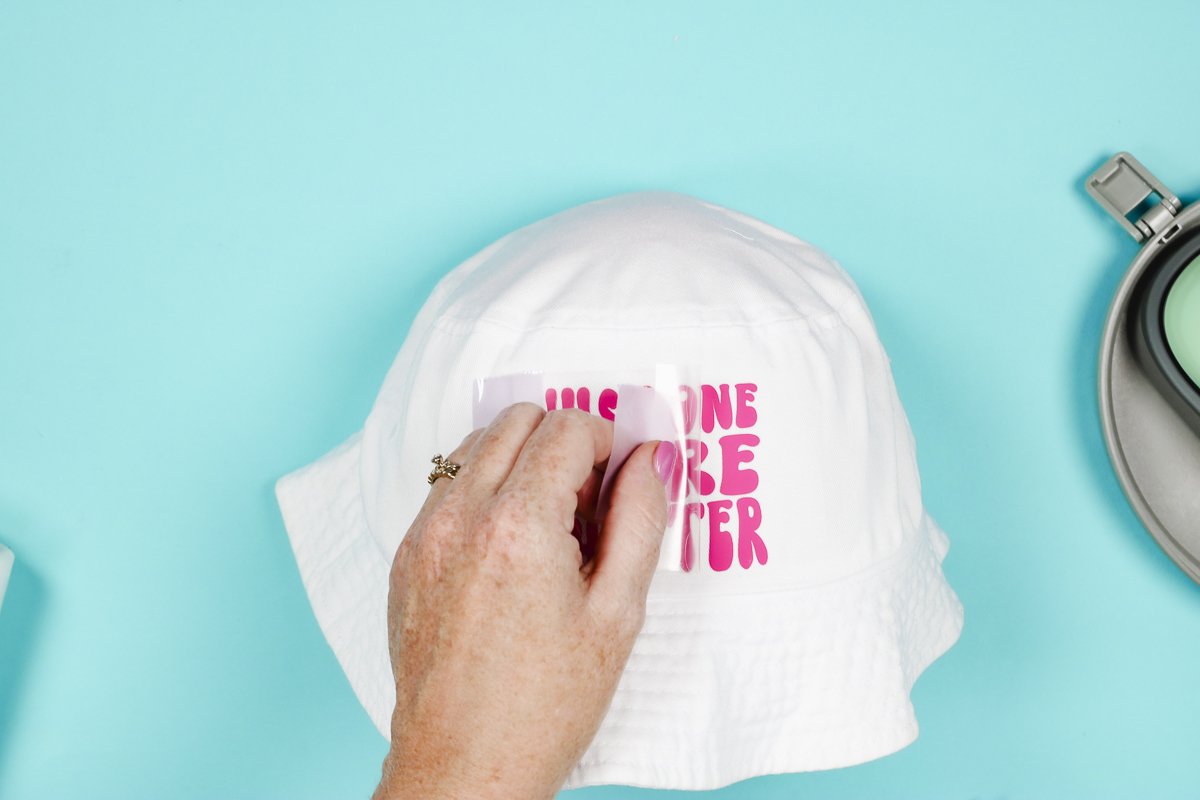
HTV Bucket Hat
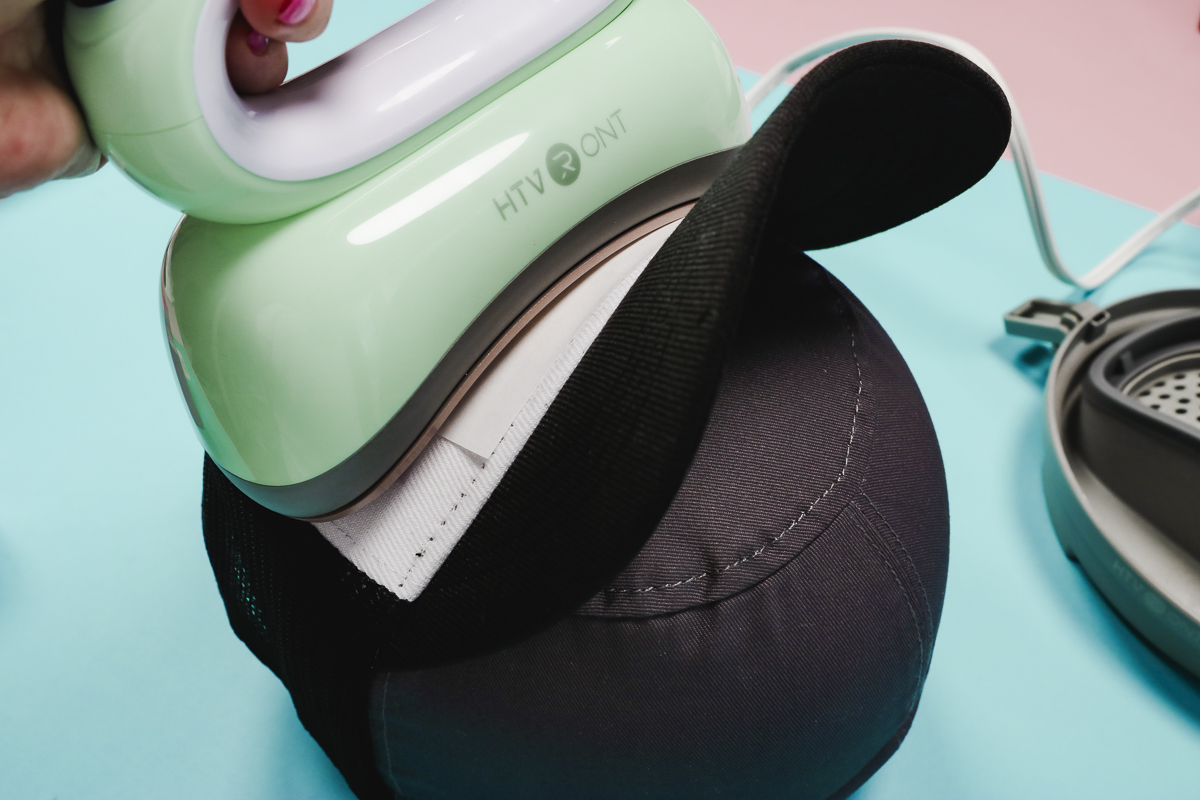
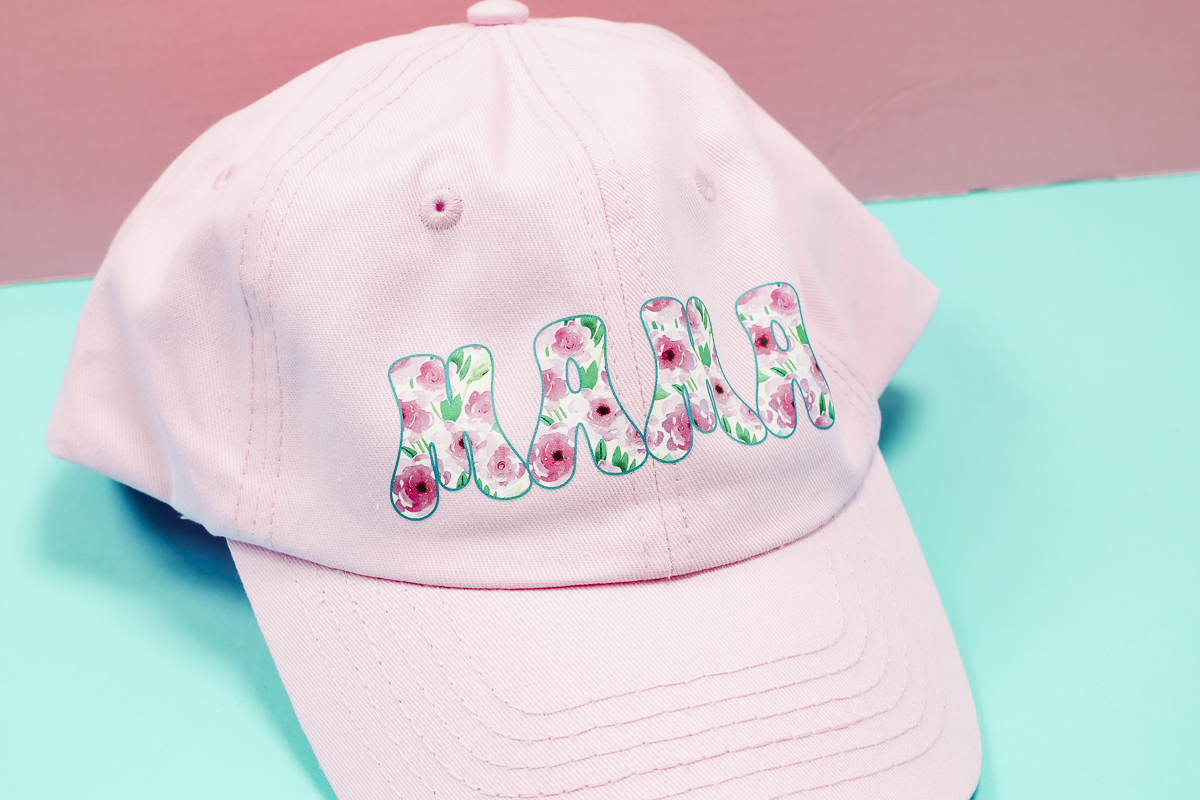
Next, I am going to make a customized bucket hat using HTV. I cut the HTV with my Cricut machine and weeded away all of the excess including things like the centers of letters.
Slide the hat onto the hat form making sure the sweatband is folded out and anything on the inside is removed.
Preheat the surface and then locate the design and on curved surfaces like this I like to use heat-resistant tape to hold the design in place.
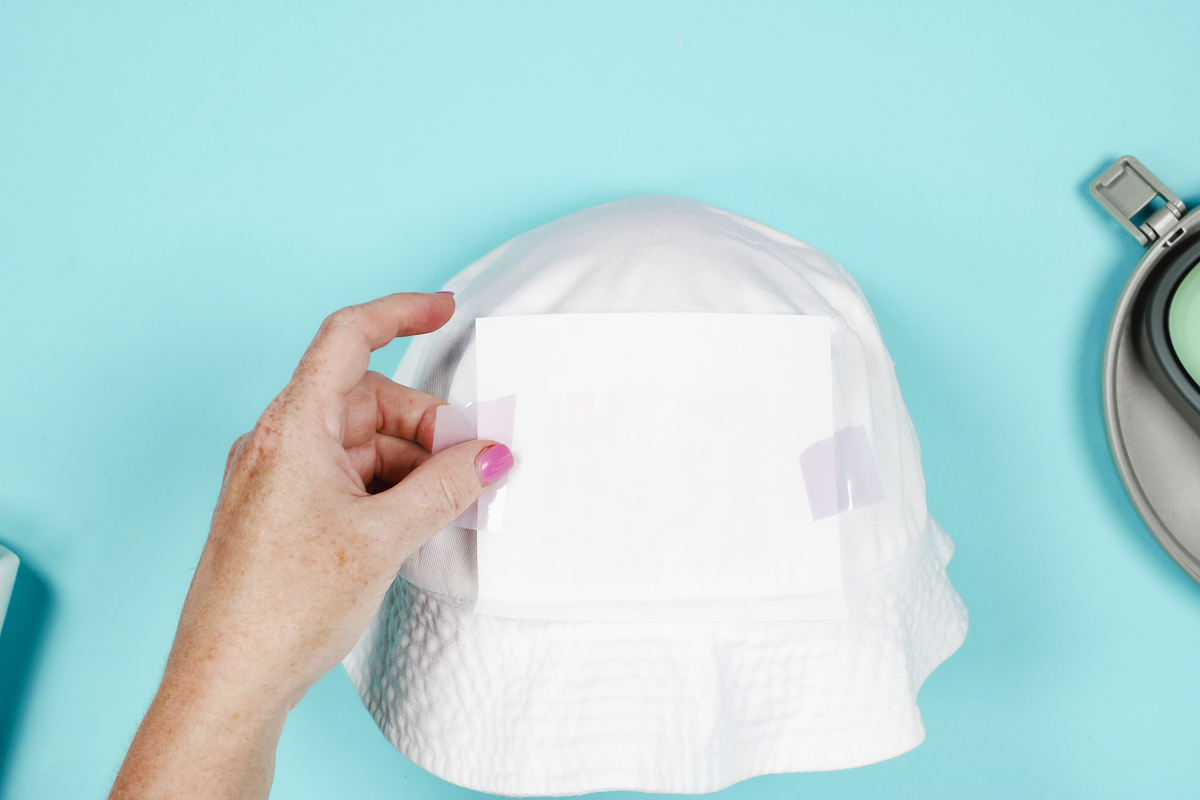
I added protective paper over the top of the HTV and secured it in place with heat-resistant tape.
For this design, I pressed the top section first and then the lower section.
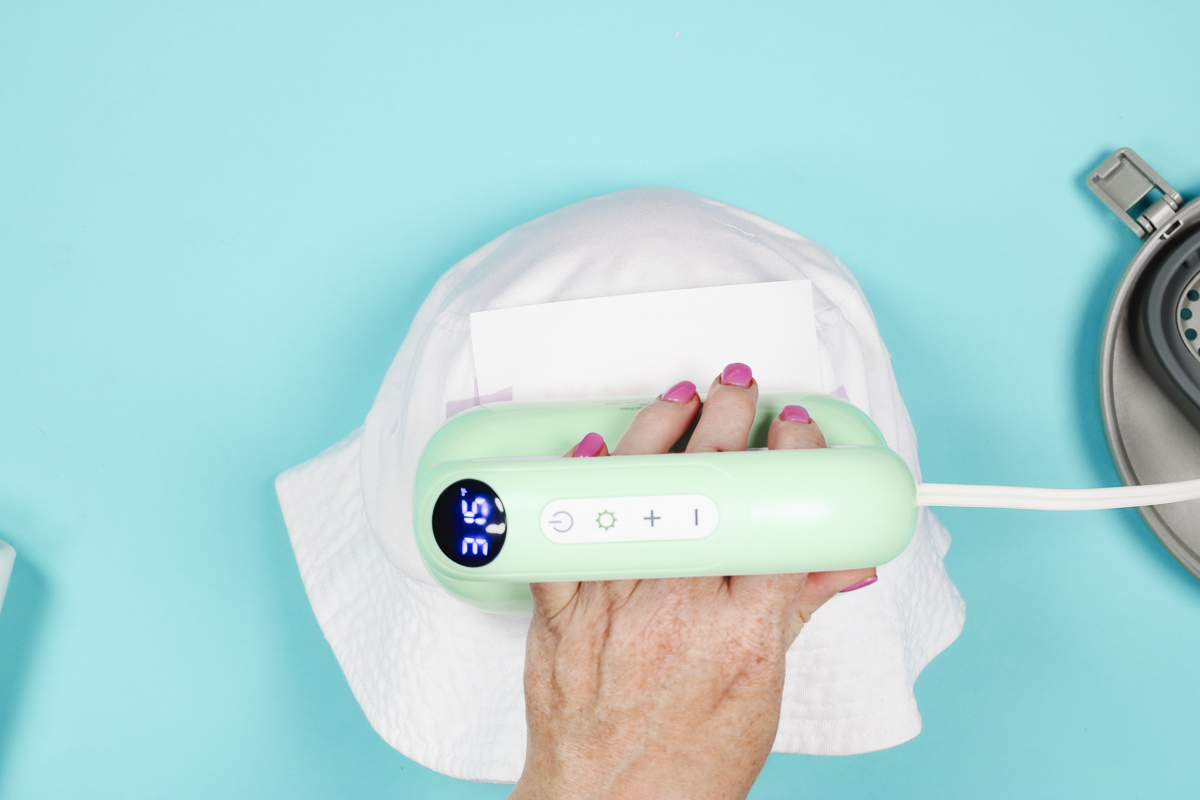
I have the HTVRont Hat Press set to the time and temperature recommended for the HTV I am using. Press each section for the full-time to make sure it’s pressed correctly.
I did have an issue with the buttons on the handle being pressed when I was applying pressure. I found it worked better when I put my hand inside the handle area and pressed it that way.
When the time is up, remove the press and return it to the base.
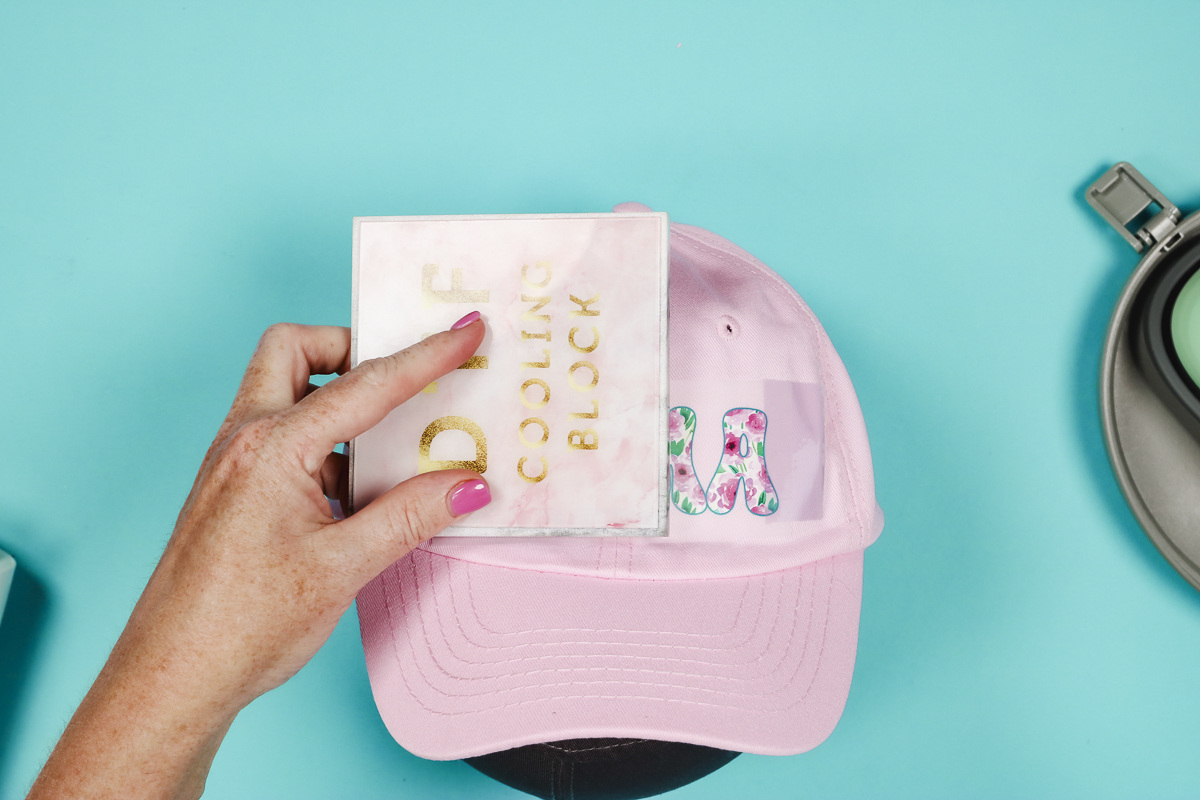
The HTV I’m using is a cool peel. I used a cooling block to cool the HTV to make sure that the adhesive had stuck to the hat.
When the HTV is cool, peel the carrier sheet back. If the HTV has not stuck to the hat you can replace the carrier sheet and press again.
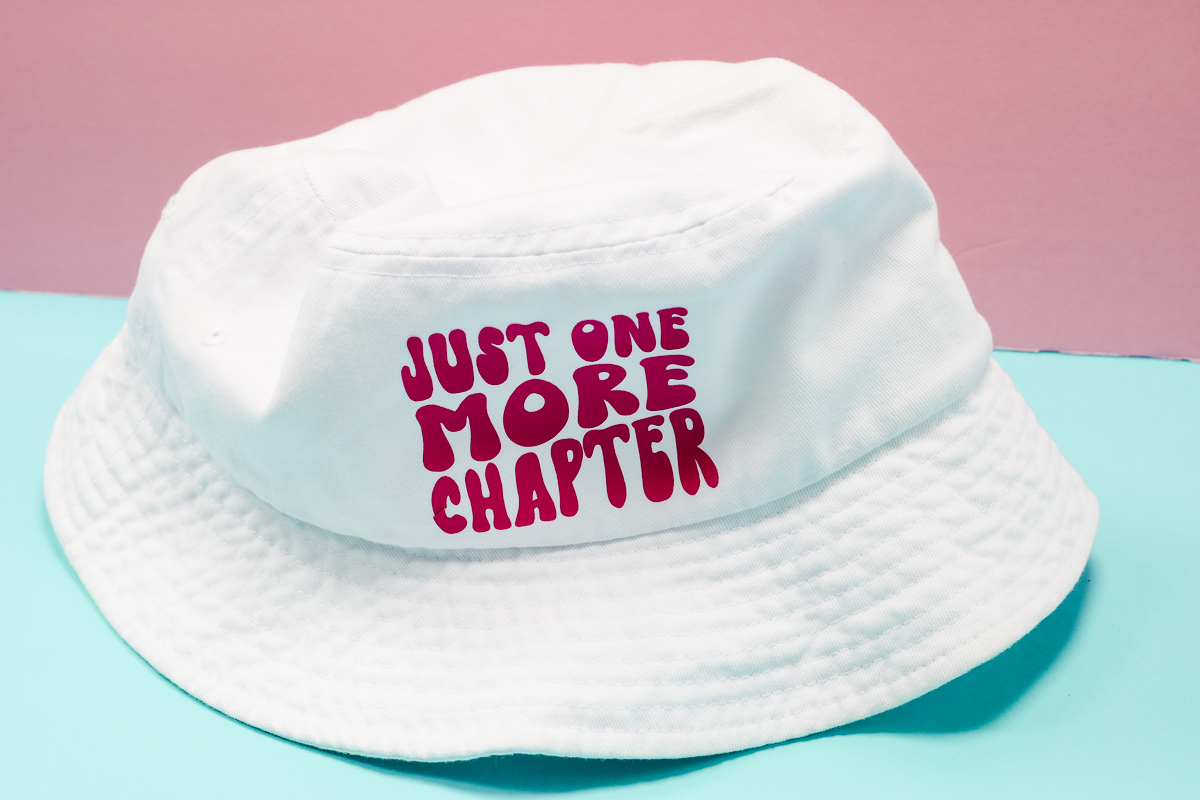
The HTV transferred really well with the HTVRont Hat Press.
Apply a DTF Transfer to Hats
Next, I’m going to add a DTF transfer to a ball cap. DTF transfers have a lower pressing time and temperature, so I wanted to see how the HTVRont Hat Press would work with that.
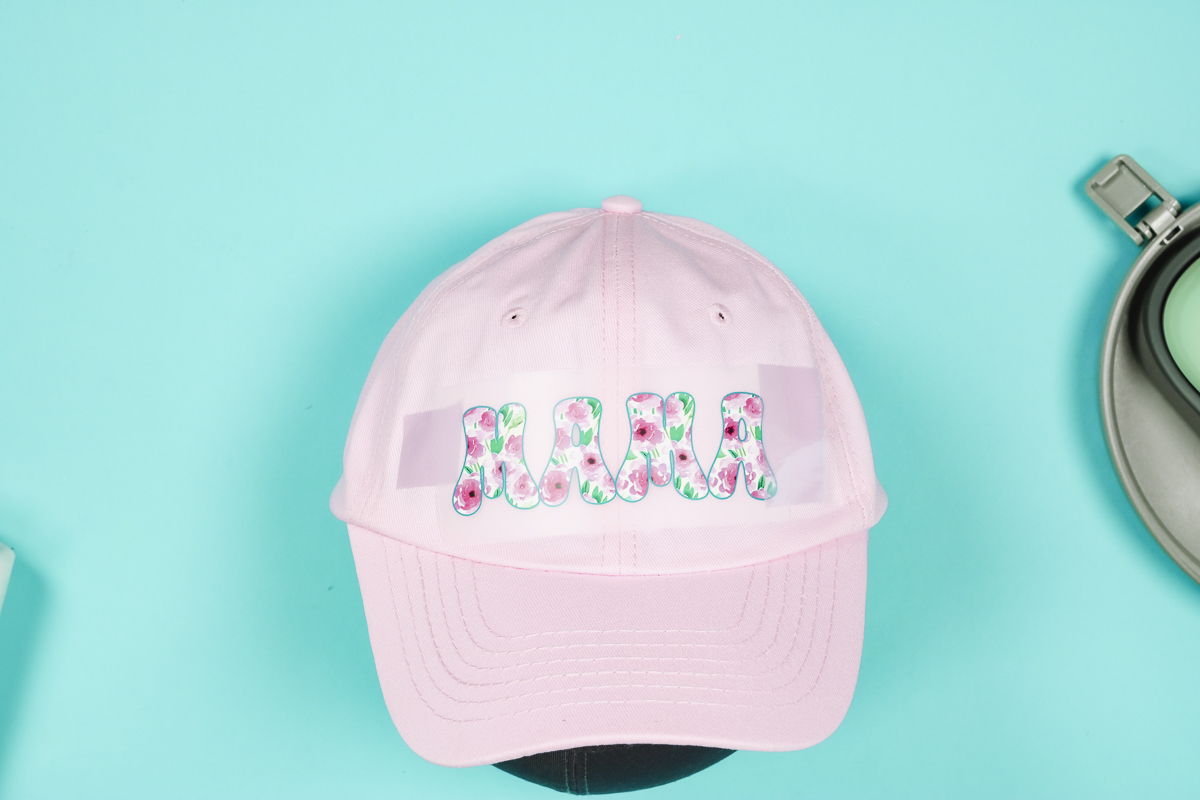
Add the hat to the hat form like we did before, make sure it’s snug on the form, and preheat to remove any moisture.
Locate the DTF transfer on the hat and use heat-resistant tape to hold it in place.
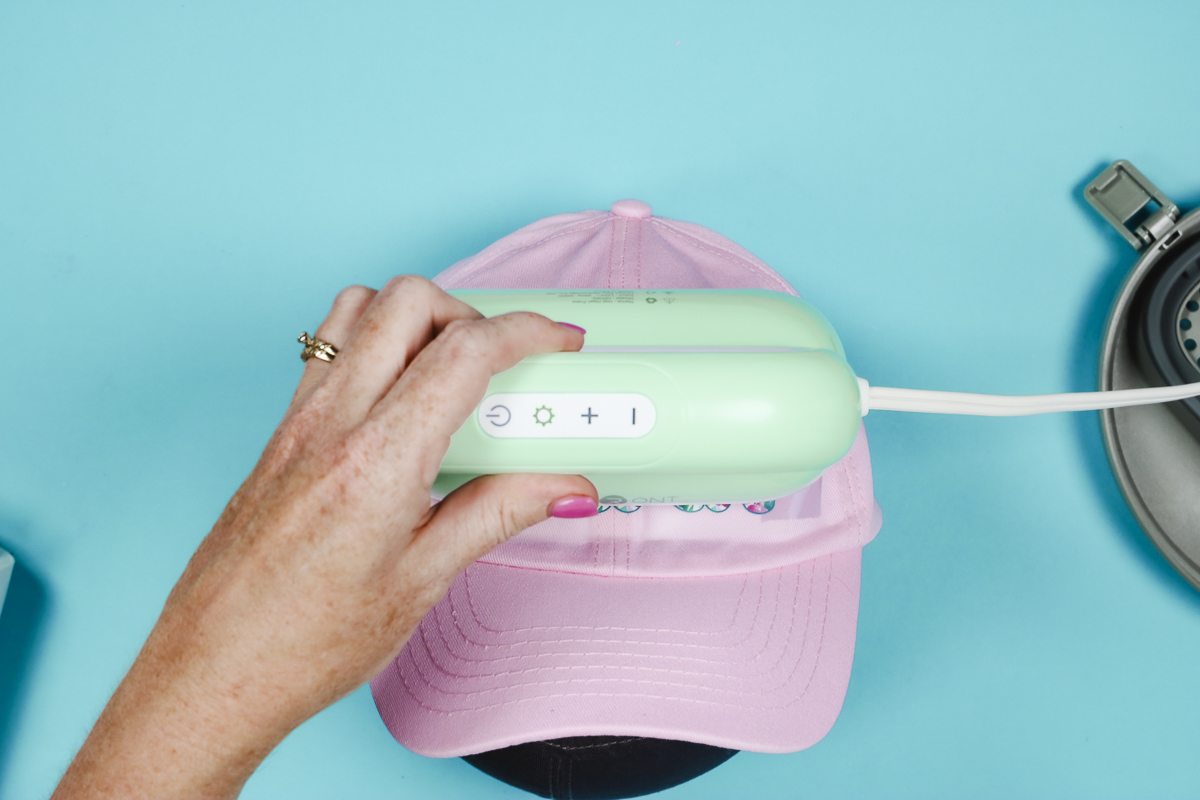
The DTF transfer I’m using has a 10-second pressing time. Make sure the entire design is pressed for the full time moving the hat press as needed.
DTF prints call for a cool peel. I used a cooling block to cool it off more quickly. Peel back the carrier sheet, if the design is not stuck down, replace the carrier sheet and press again.
DTF calls for a post-press. After you remove the carrier sheet, cover the design with a pressing cloth and press again for about 5 seconds.
Remove the pressing cloth and the DTF transfer hat is complete.
The DTF transfer looks amazing on the hat.
HTVRont Hat Press Pros and Cons
Now that we’ve tested the HTVRont Hat Press on a variety of different materials let’s talk about the pros and cons.
HTVRont Hat Press Pros
- I like that you can adjust the time and temperature on the press itself and you don’t have to have a separate app to set the time or temperature like the Cricut Hat Press.
- I really like that when the hat press is not in use it is all in one. The press sits inside the base and lid and the cord wraps around the handle so it can all be stored in one small space.
- The HTVRont Hat Press is very easy to use and the form worked well with a wide variety of hat types. I even think kids’ hats would work with the form and hat press.
Hat Press Cons
- The HTVRont Hat Press is not very wide. When compared to other hat presses it is pretty narrow. I would like it to be a little bit wider to cover more of an area.
- It’s easy to adjust the time and temperature on this press but due to the location, it’s easy to accidentally press the buttons when you’re pressing. I was able to get around this issue by putting my hand inside the handle area and pressing down from there. It will take some getting used to.
- I really like the form but it felt a little loose on the plastic lid. This didn’t impact any of my projects but I found myself messing with it to try to get it tighter.
- Due to the shape of the press, you’re limited on what you can press. This is a general con for all hat presses, not just this press.

Not sure which heat press is for you? Heat Press Roadmap has your answer! This extensive course is designed to guide you on your journey to deciding on the best heat press for your needs, space, and budget.
Join Angie Holden and Cori George as they explore 17 heat presses in 27 videos. Get the details and sign up for Heat Press Roadmap here!
HTVRont Hat Press vs Cricut Hat Press
What are the differences between the Cricut Hat Press and the HTVRont Hat Press?
- The Cricut hat press is more expensive than the HTVRont hat press.
- The HTVRont press is smaller in width than the Cricut.
- With the HTVRont press, you can adjust the time and temperature right on the press. With the Cricut Hat Press, to adjust the time and temperature you have to use the Cricut Heat App.
- The biggest concern with the Cricut Hat Press is that the hat form is made of walnuts. There are walnuts on the inside of the form so if there are walnut allergies this could be a problem. The HTVRont Hat Press form is made out of polyester and cotton and has a high-temperature sponge inside to hold up to the heat.
- Both hat presses work great for pressing a variety of materials onto different hats. However, you won’t have any allergy concerns with the HTVRont hat press.
My Review of the HTVRont Hat Press
I’m a big fan of this hat press. It works really well and I love how compact it is when it’s all closed up. I would allow the press to cool down before replacing the lid.
It is slightly smaller than the Cricut Hat Press so you’ll need to get used to making sure you’re pressing the entire design for the full time.
I was happy with the results of all the different materials I tested with the HTVRont Hat Press. Every hat turned out great.
Where to Buy the HTVRont Hat Press
If you’re looking for a hat press, this may be the right press for you. Get your HTVRont Hat Press and start making hats for yourself or even to sell!
I hope I’ve answered any questions you have about the HTVRont Hat Press. If you have any additional questions, leave them in the comments and I’ll be happy to answer them for you.