This post and photos may contain Amazon or other affiliate links. If you purchase something through any link, I may receive a small commission at no extra charge to you. Any supplies used may be given to me free of charge, however, all projects and opinions are my own.
Today I’m going to show you how to create custom QR codes that you can use to create crafts with your Cricut machine or sublimation. Custom QR codes are perfect for small business owners who want to quickly and easily connect with their customers.
If you are a small business owner, make sure you’re tuning in to Crafting for Profit Live Podcast to learn my best tips for starting and growing your small business.
If you’re wondering why you might need to create custom QR codes this tutorial is for you. You can watch me walk you through the whole process by pressing play on the video below.
If you own a craft laser Cori George from Hey, Let’s Make Stuff has a video all about creating QR code crafts with a laser that you’ll want to watch as well.
How to Design QR Codes
Are you ready to learn about making custom QR codes that you can use to create crafts to drive people to your small business?
Before we jump into how to make your own QR code keychains, let’s talk about what QR codes are and why you should use them.
What is a QR Code?
QR codes are special designs that when scanned with your phone take you directly to a specific website, social media page, sign-up sheet, etc. QR codes can be scanned with the smartphone photo app without requiring a special different app.
This makes it easy for consumers to get directly to the website they’re looking for.
Why Should You Use QR Codes for Your Small Business?
Why should you use a QR code? First of all, scanning a QR code eliminates the possibility of mistyping a website address.
Another reason I like using QR codes for my craft business is that it makes it easy for my customers to get more information about a product or my business if I happen to be busy talking to someone else.
You can create a QR code for any site. Create a page with more information about certain products or one that gives them more info about your business. You can also create a QR code to make it easy for customers to pay you. I like to have a few options for accepting payment because I’ve found that not everyone likes to pay the same way.
Digital business cards are another great use for QR codes. A customer can either bookmark your page or take a quick screenshot and have it right in their phone.
Create a Custom QR Code SVG File
To make a QR code that will work with your Cricut machine, you’ll want to create a QR code SVG. I used qrplanet.com to create my custom QR code.
On that site, add the link you want your QR code to point to, make sure you’re on the SVG tab, and then click Enter and that will make your QR code.
I found that level L worked best but you can test other levels if needed. Make sure your QR code isn’t damaged if you choose a different setting.
Click Download and your SVG will be downloaded right onto your computer. It will download as a zip file so make sure you unzip it before trying to upload it into Design Space.

Create a QR Code Image File for Sublimation
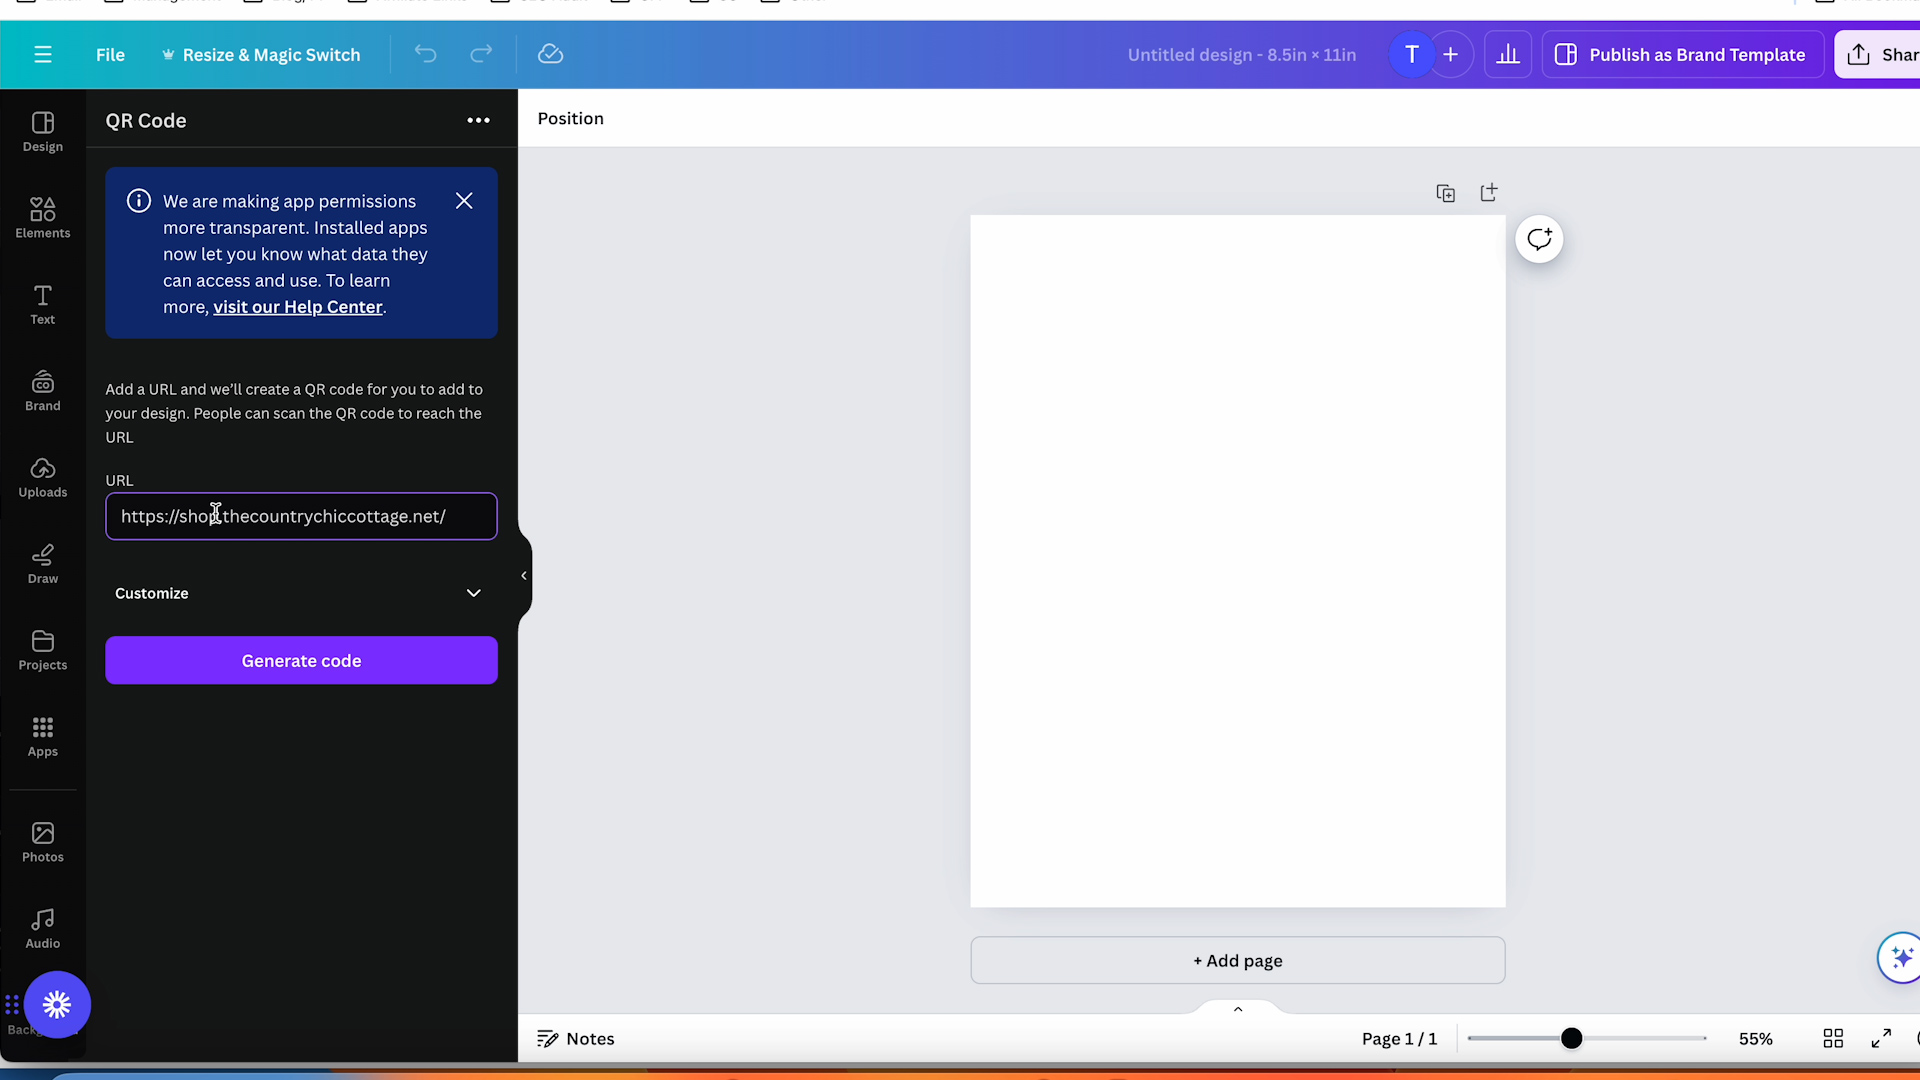
To create a QR code that will work with a sublimation blank I am using Canva.
Click Create Design and then Custom Size. I am setting my size to 8.5″ by 11″ because that is the size of my sublimation paper.
With the paper size set, click App on the left toolbar and search QR code. I am using the app that is called QR code.
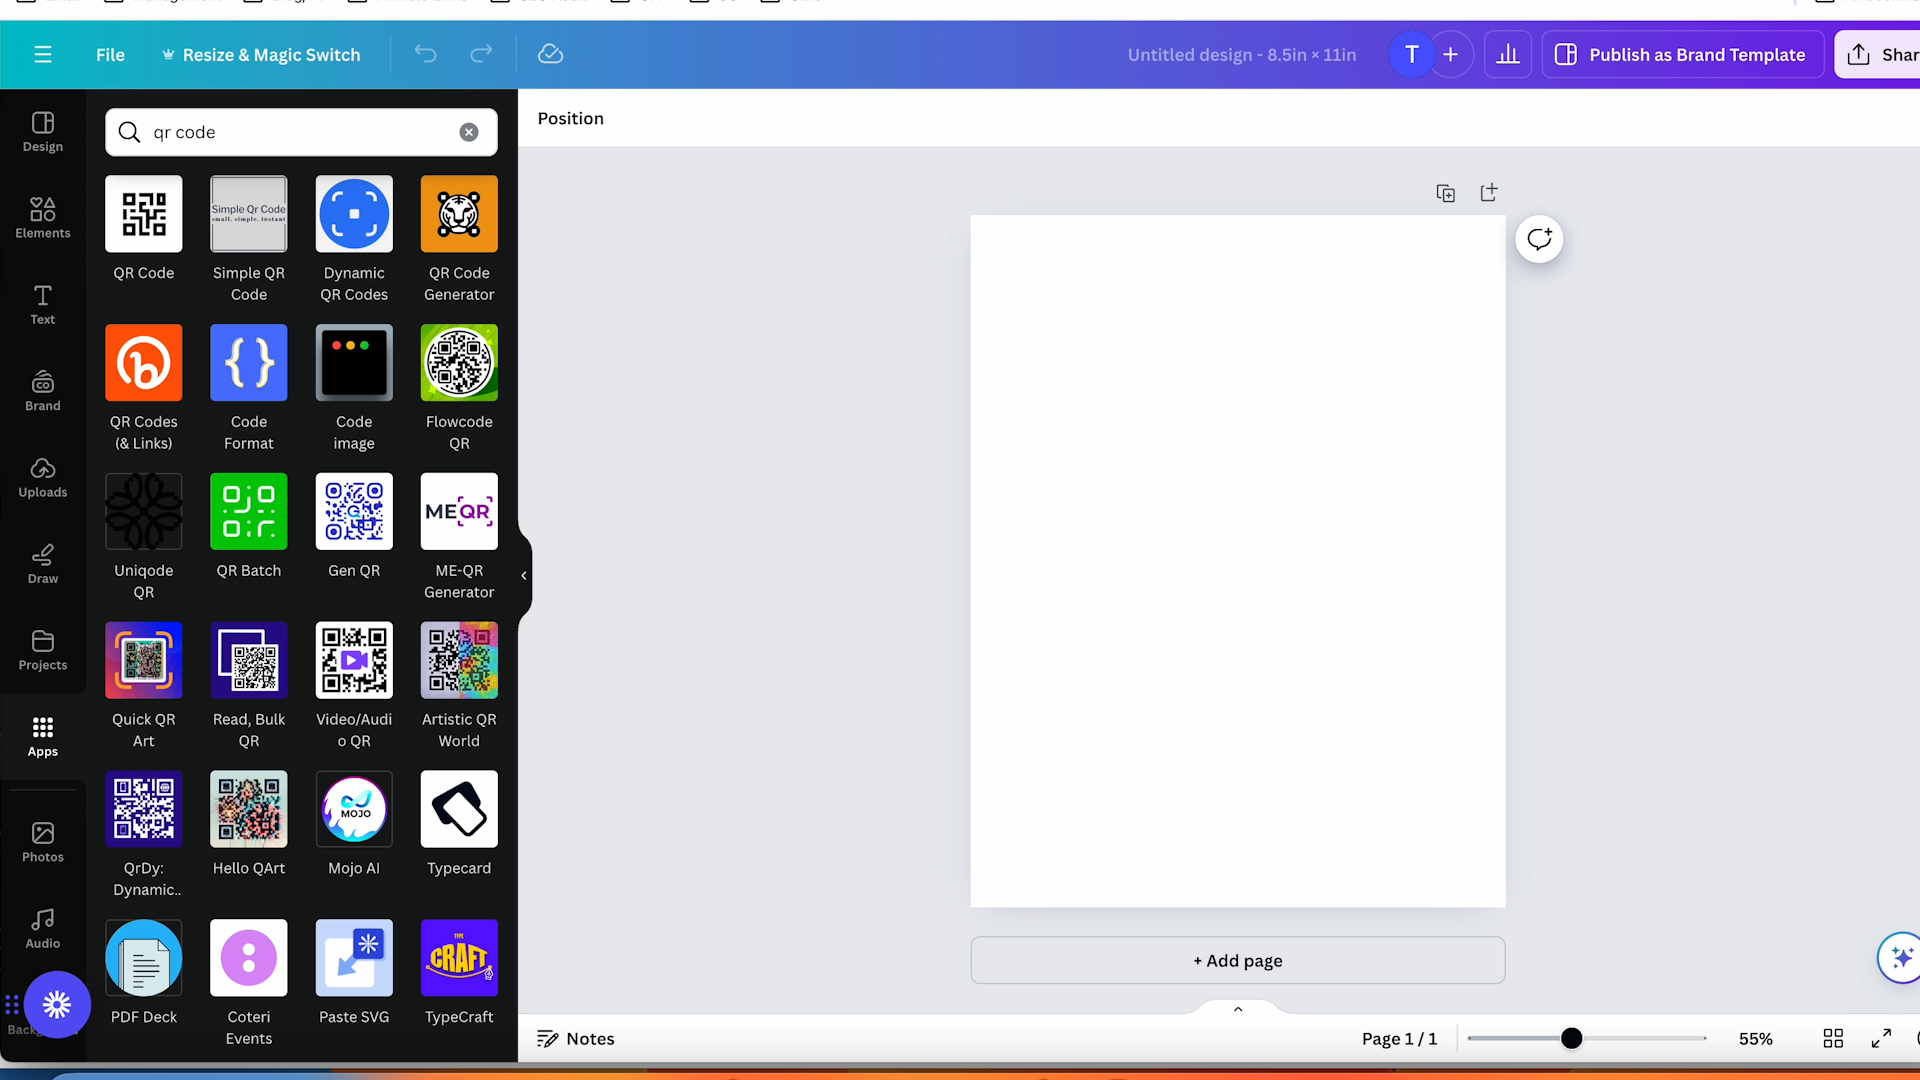
Click the app then paste the URL that you want the QR code to point to and click Generate Code.
You’ll see the QR code appear on your canvas.
How to Make a Keychain with a Cricut Machine
Now, let’s look at how to use your Cricut machine to make a QR code keychain that you can have on hand at all times.
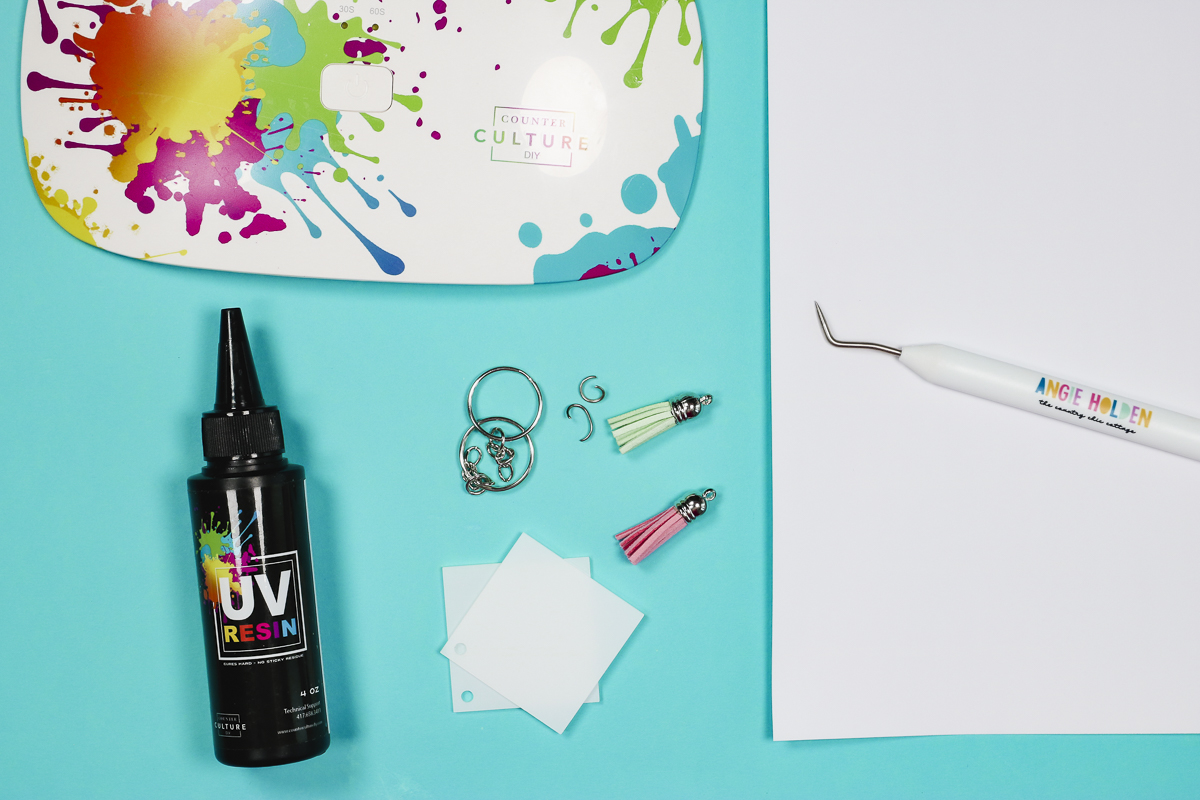
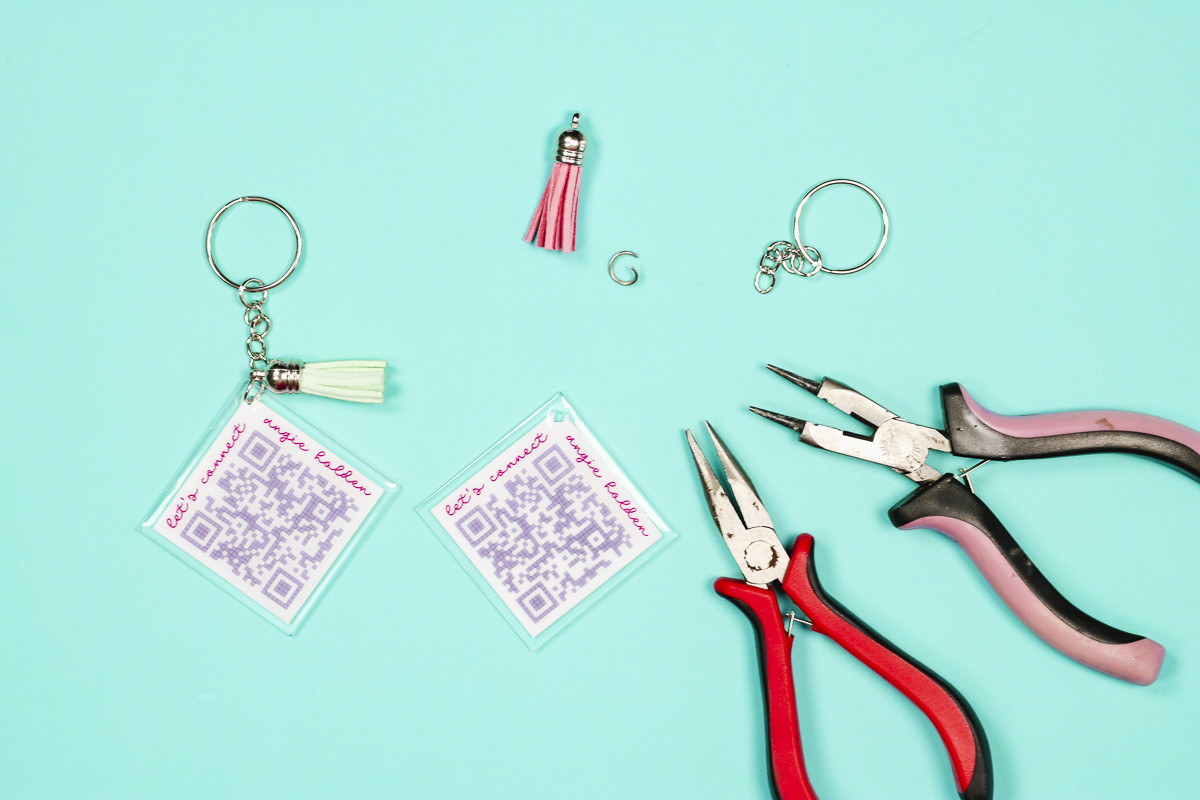
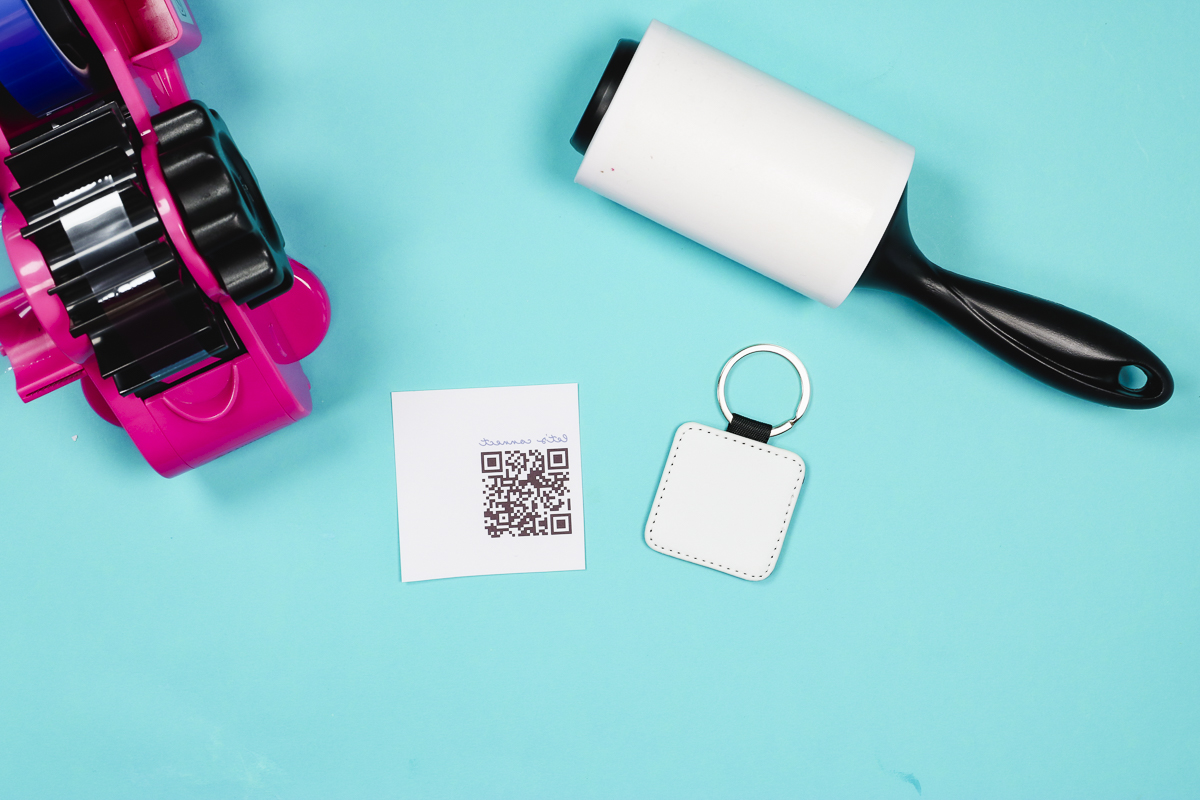
Supplies Used:
NOTE: The keychains I am using have a protective film on both sides. Make sure you remove that film before applying your design. They also came with all the accessories needed to finish it off. You can use any small blank keychain you’d like with this process.
Step 1: Upload SVG File into Design Space
Open Cricut Design Space and click Upload and Upload Image. Find the design on your computer and click Continue then Upload.
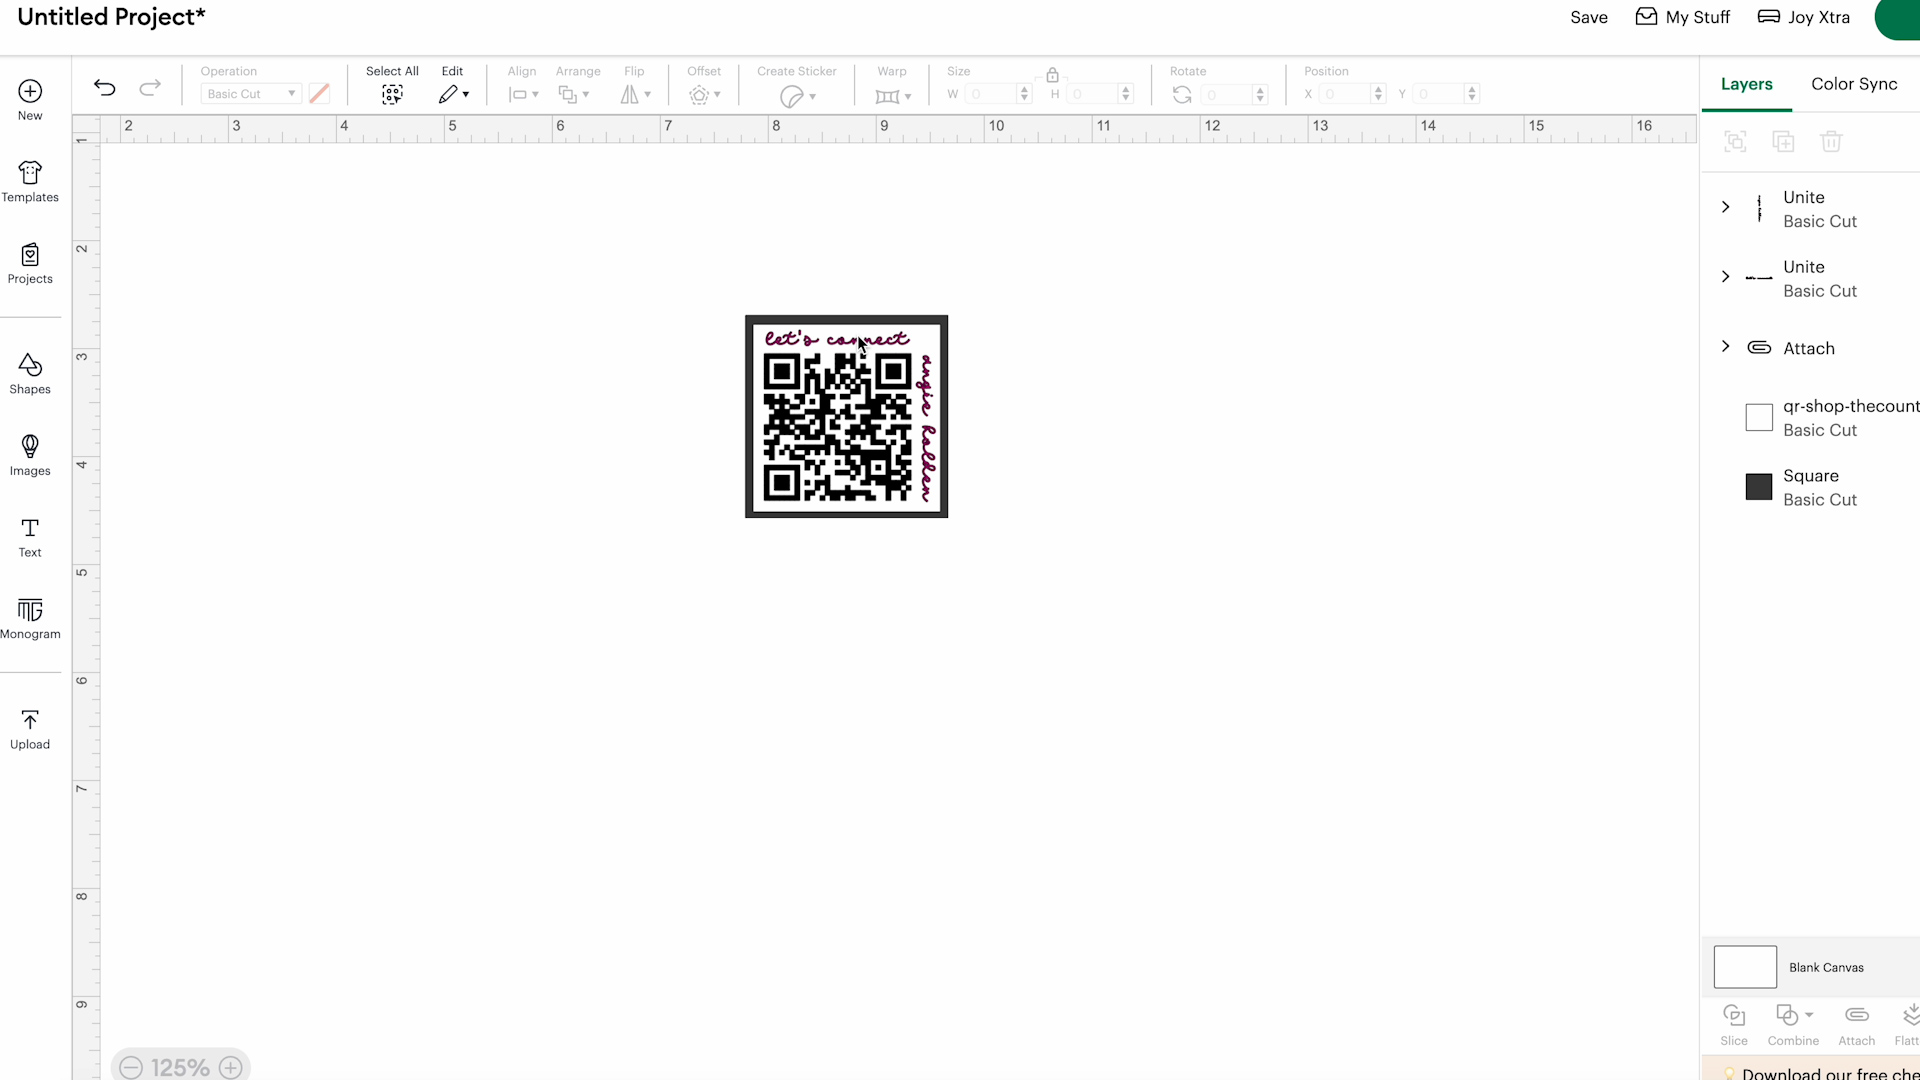
With the image on your canvas, click over on the layers panel, and you can see that there is the black QR code layer and another outline layer which is a white background layer.
If you were cutting the QR code out of vinyl and putting the design on a white blank, you could delete that layer.
I ungrouped the layers so the black and white are separate. Next, I clicked the black layer and then clicked Attach so the entire QR code would stay together exactly right.

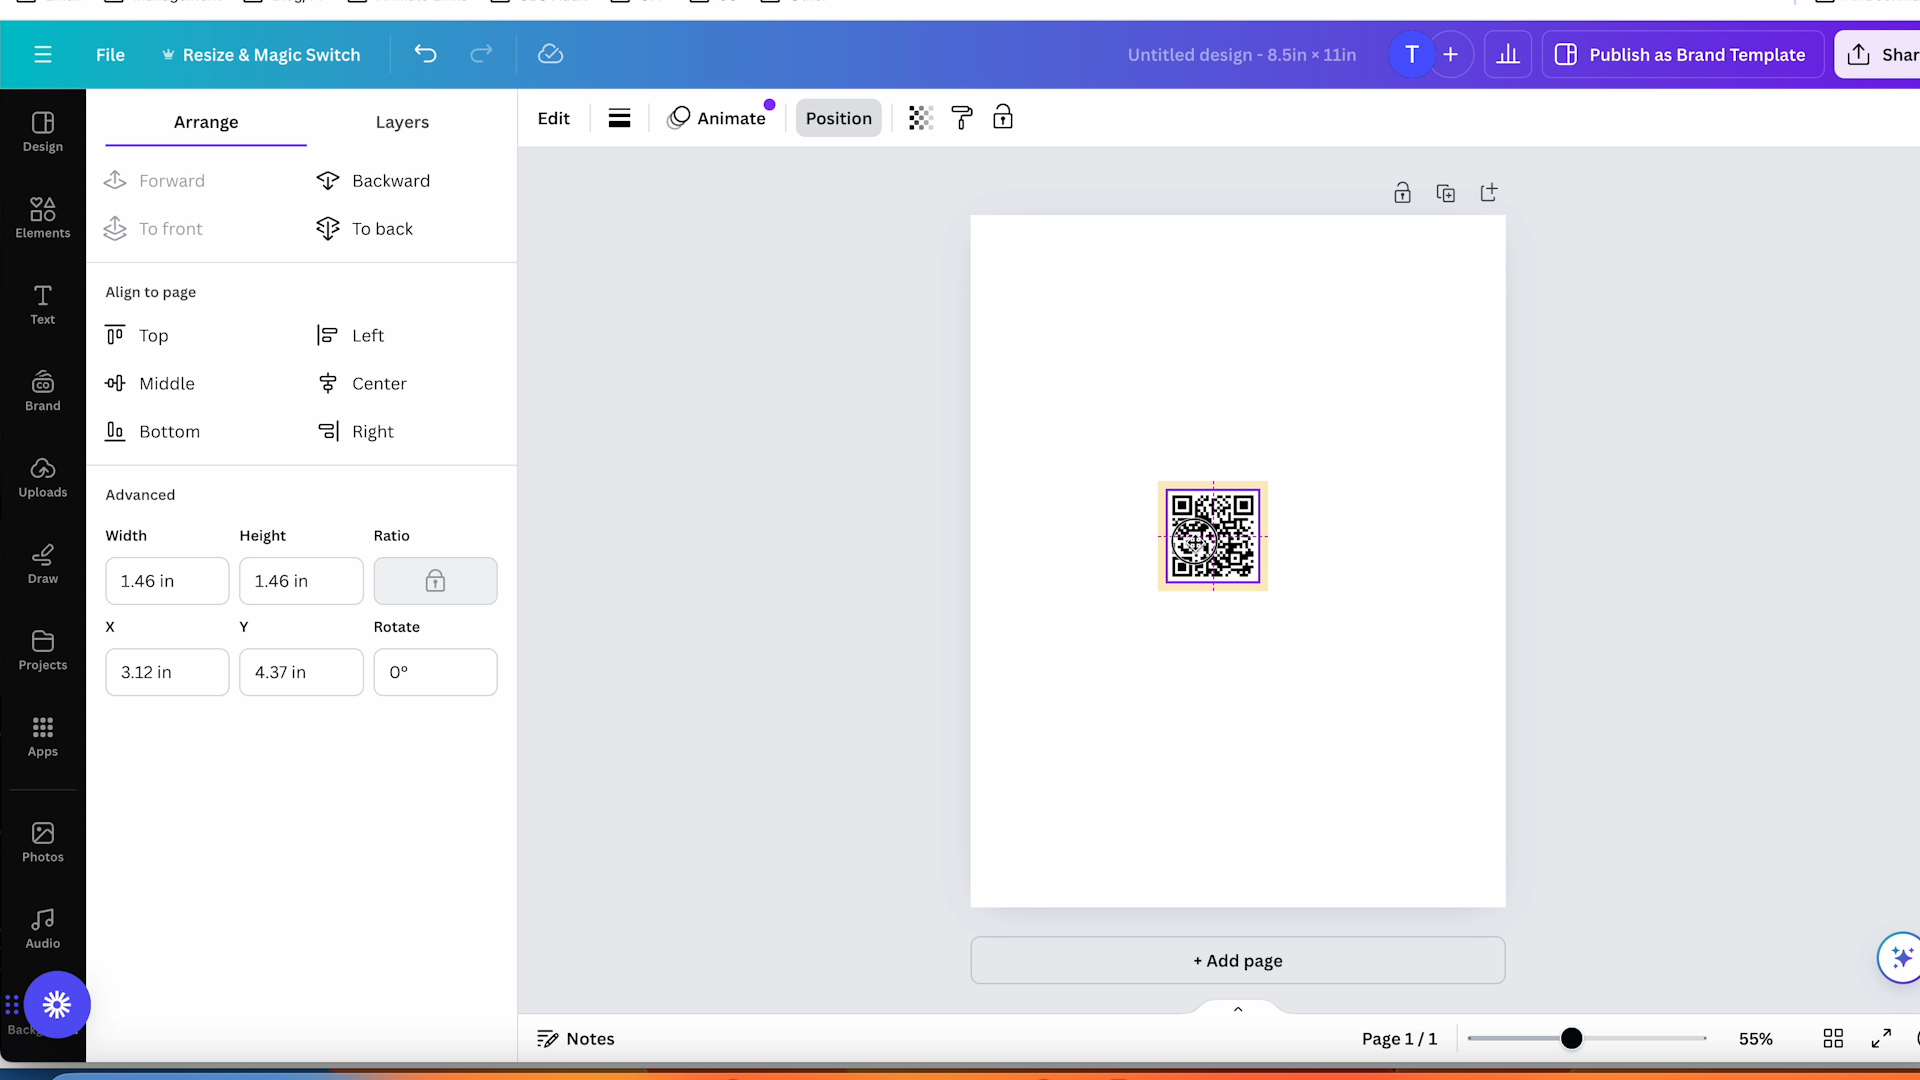
Step 2: Resizing QR Code to Fit Blank
Next, I am going to click Shape and select a square. To fit my keychain, I am going to make the square 1.875″ x 1.875″. Now I am going to send that to the back and use it as a keychain template to resize my design to fit.
Select the black and white layers and resize them to fit the template. My keychain blank does have a hole in one corner so I am going to move the design closer to the other side so the QR code doesn’t go over the hole.

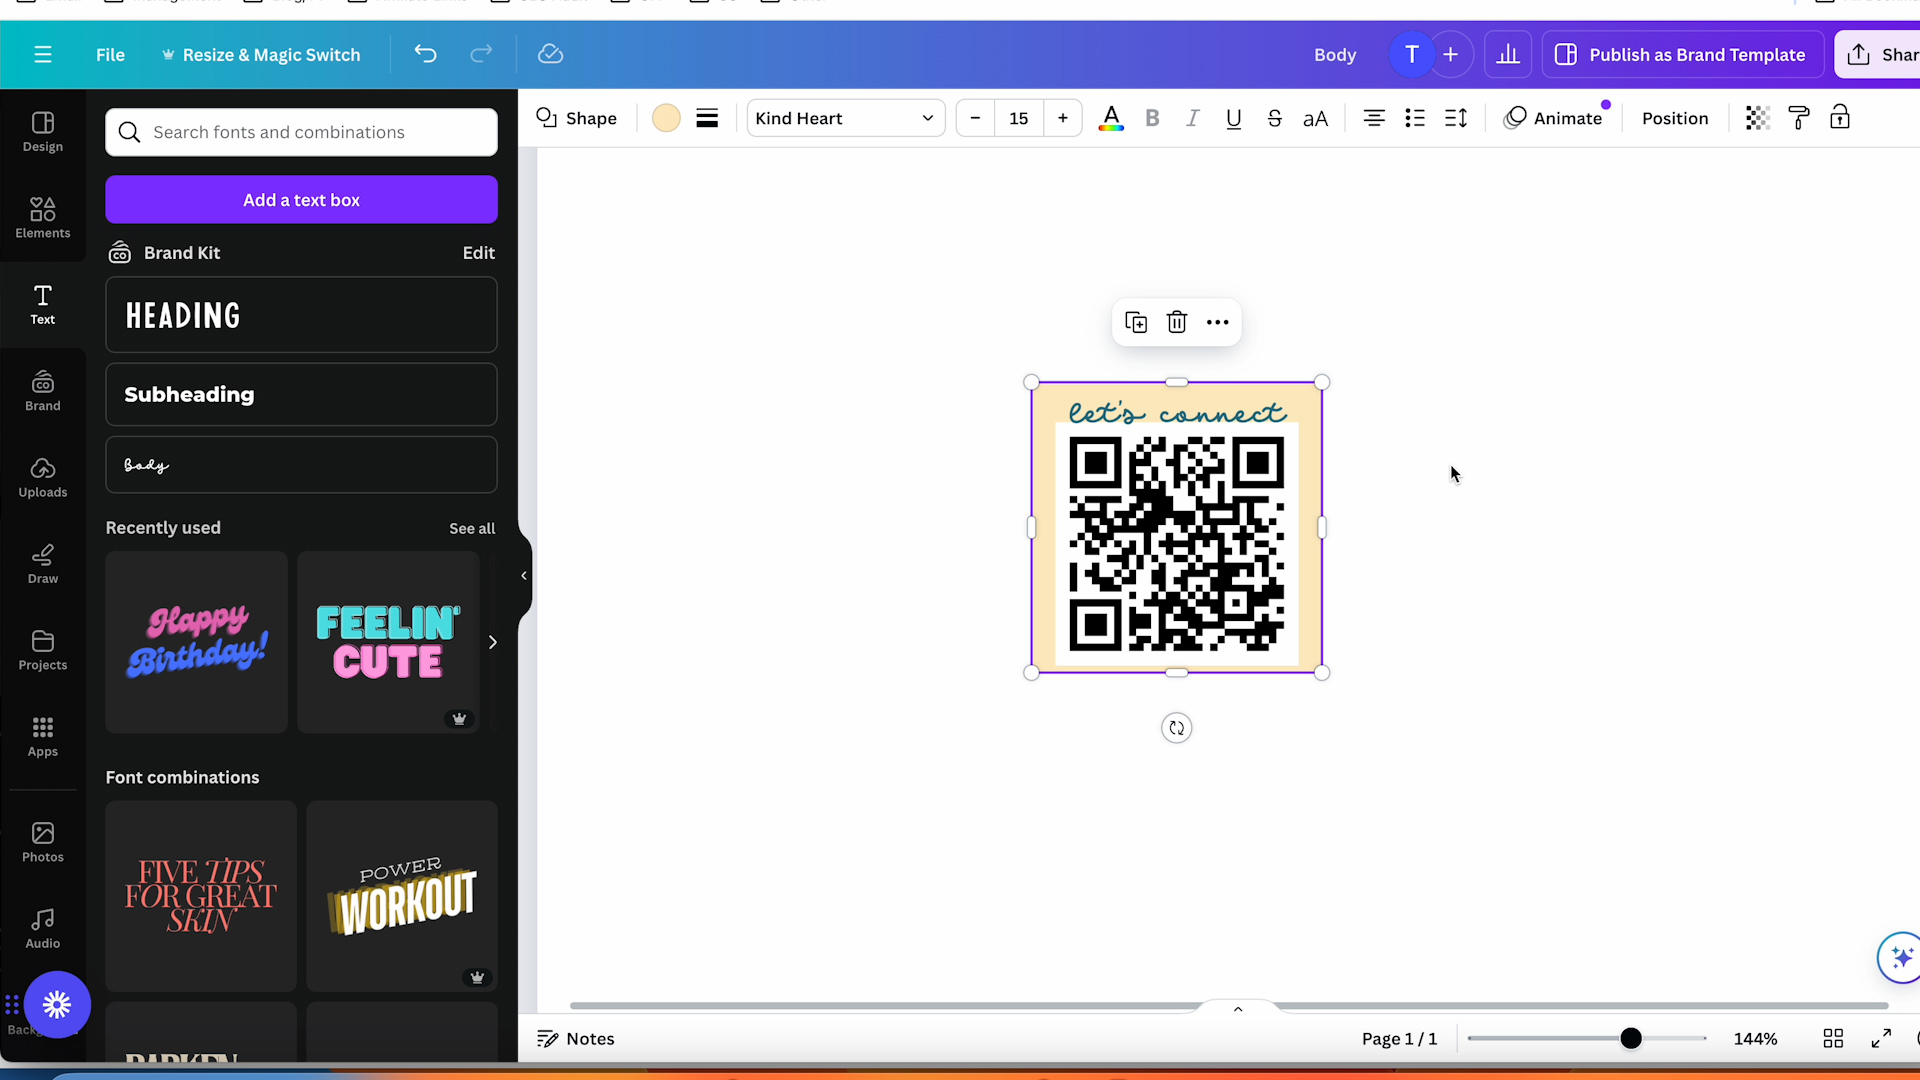
Step 3: Add Text to the Code Design
I am adding text to my QR code. To do this, click the Text button on the left toolbar and choose the font and color you want to use.
I am adding “Let’s connect” on one side and my name on the other side.
With those typed out, I can resize them to fit along the top and one side staying away from the area where the hole is.
Step 4: Deciding Between Vinyl and Printable Vinyl
If I was using this for a larger sign, I can keep the design set up how it is and resize it to fit the blank.
Because my blank is so small it’s likely the design would be very hard to cut out to fit the blank.
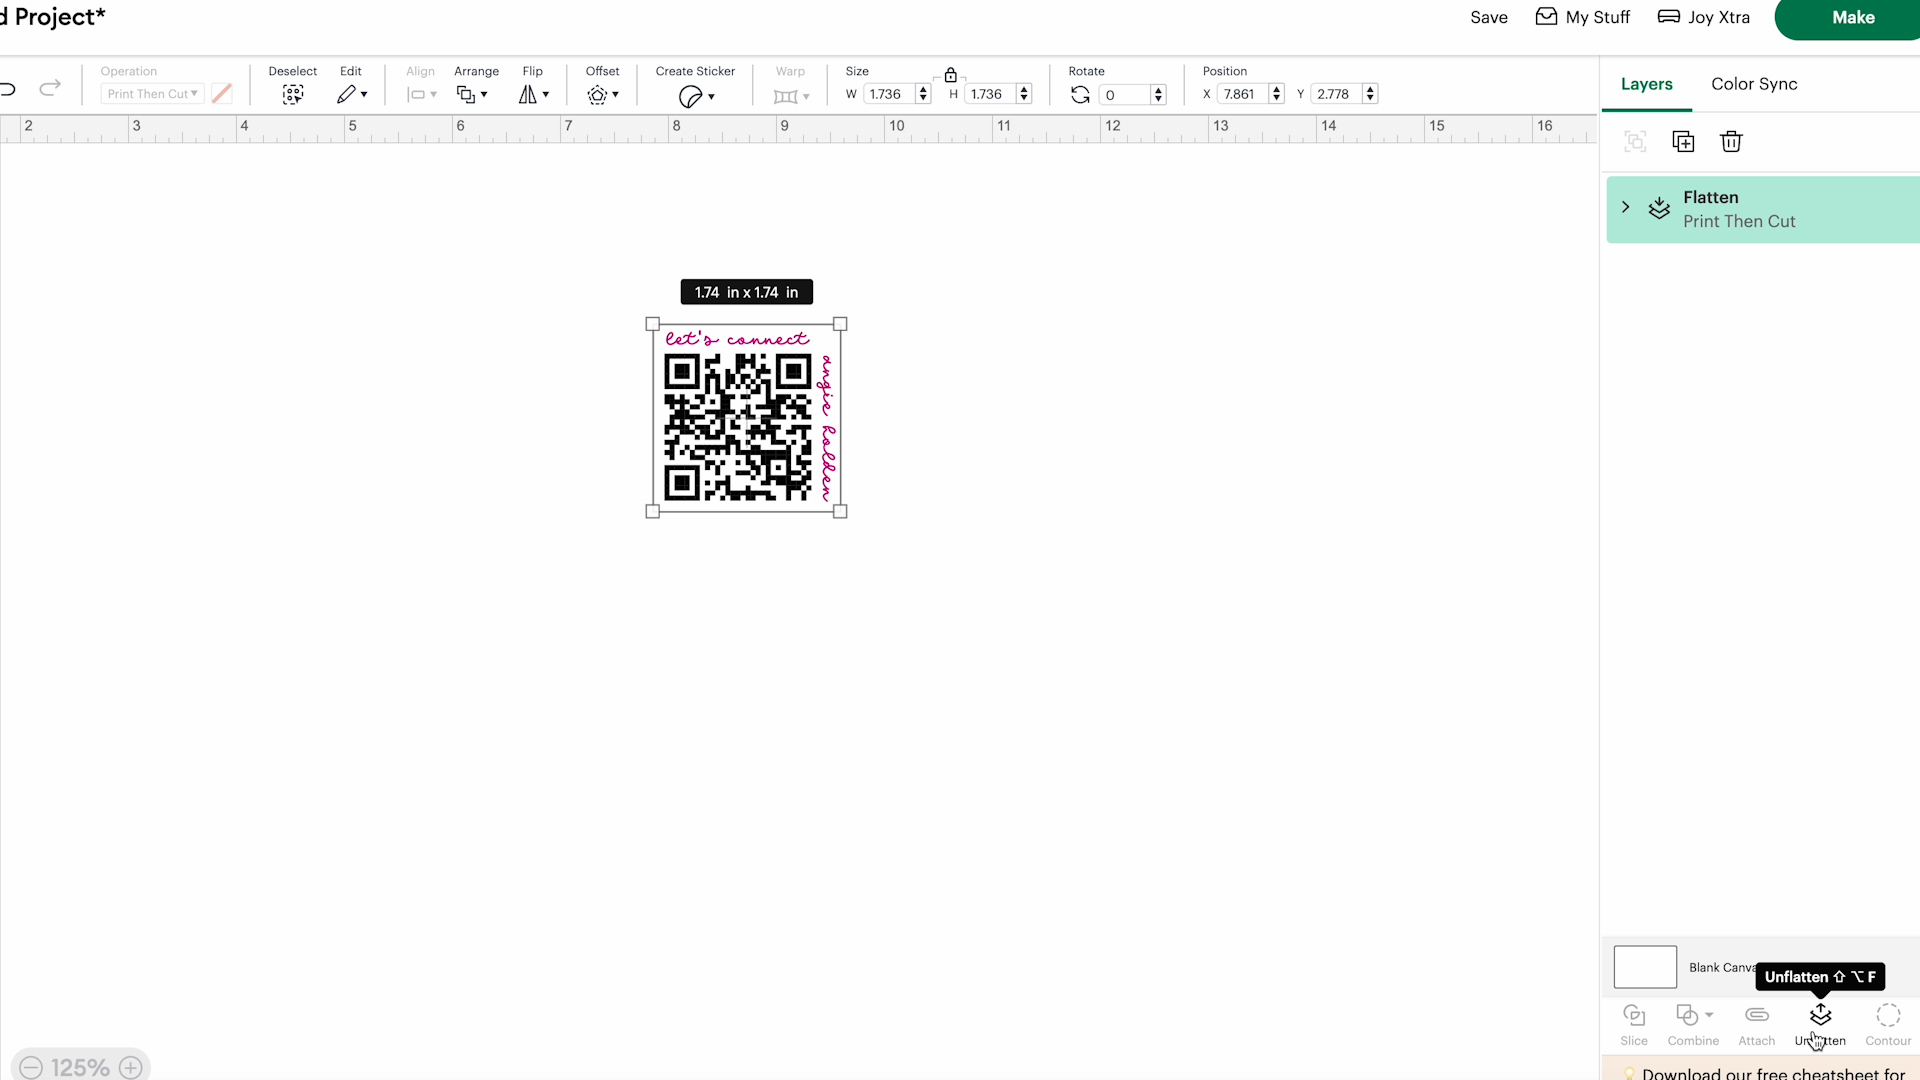
For my small keychain, I am using Printable Vinyl so I am going to make my design a Print Then Cut design.
Be sure to delete the template layer.
Select both layers and in the layers panel click Flatten. This will turn the SVG into an image that can be printed and then it will cut around the white layer.
Step 5: Print Then Cut a QR Code with a Cricut Machine
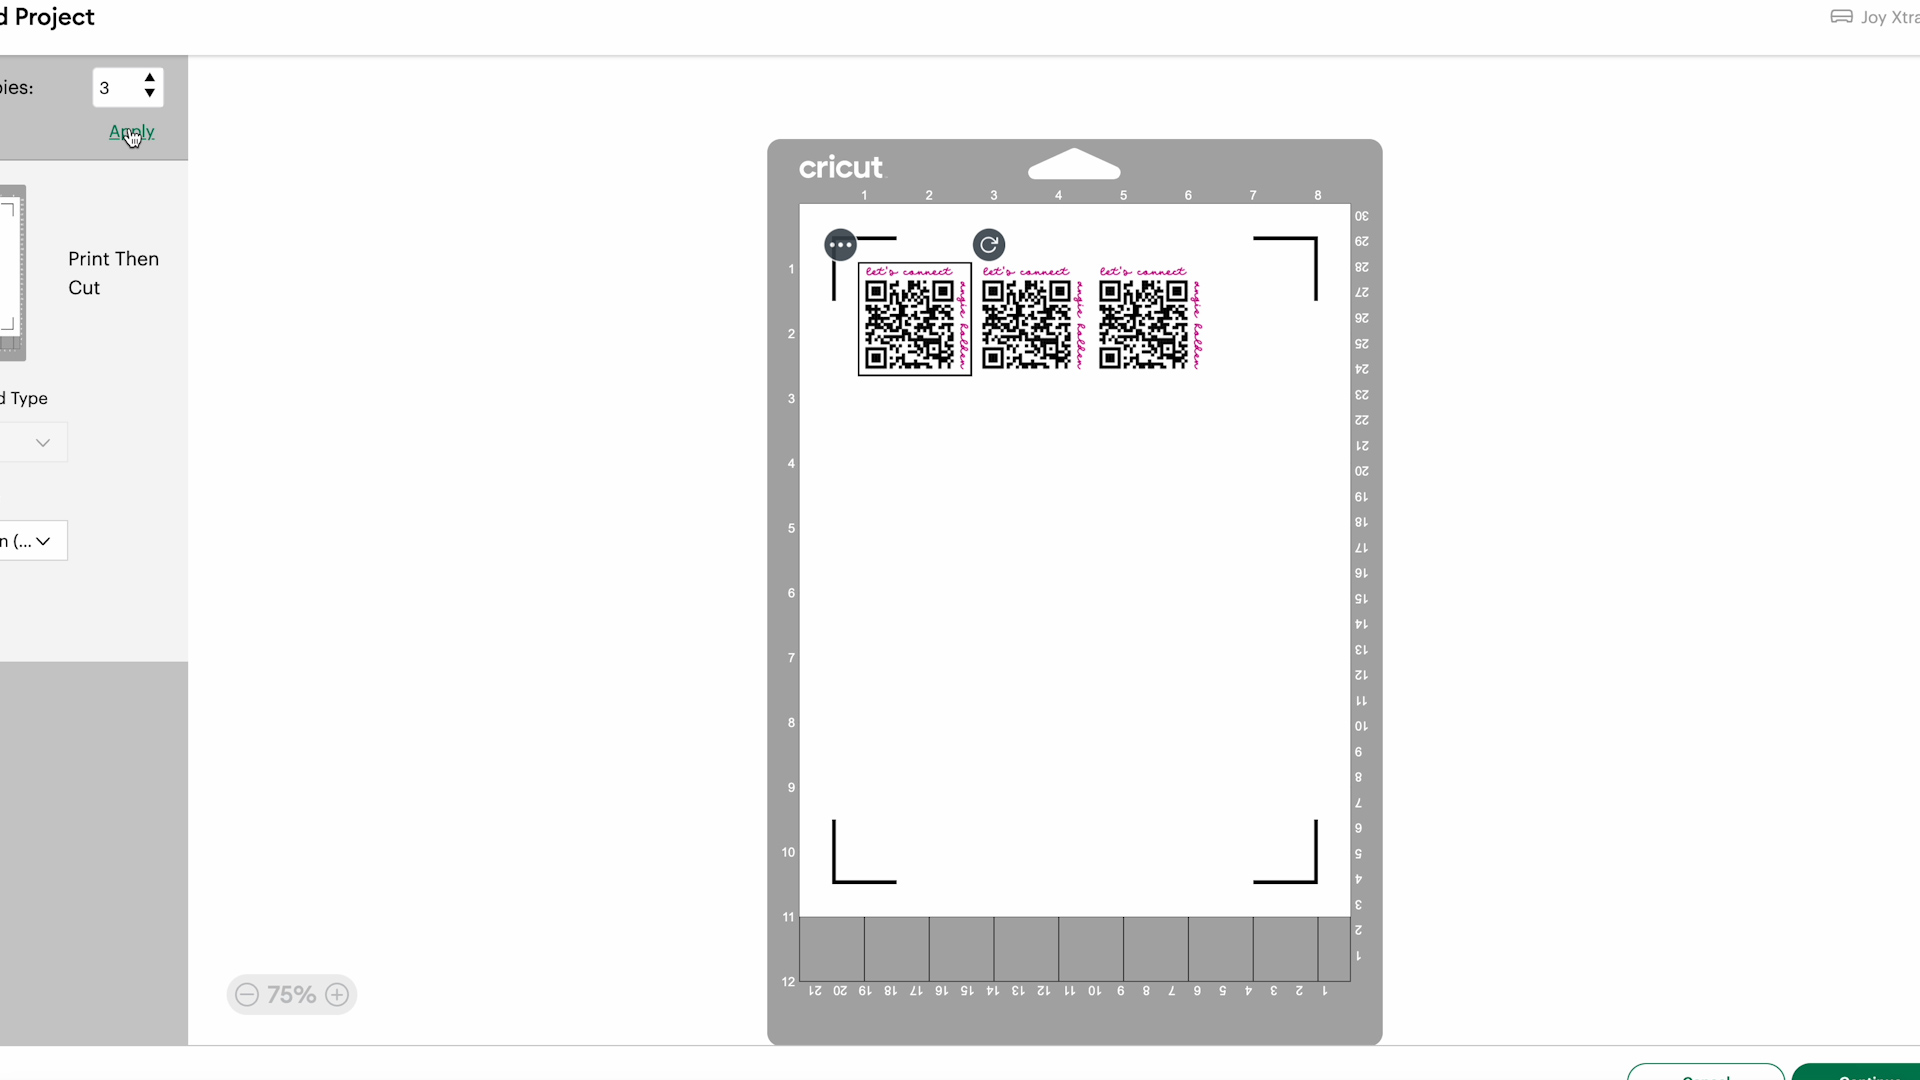
Next, click Make and you will see that it is going to Print Then Cut the design. If you’d like to use the whole sheet of printable vinyl, you can duplicate the design on the mat screen.
Use a regular inkjet printer to print out the design. In Design Space, you’ll select Use System Dialog and turn off Bleed.
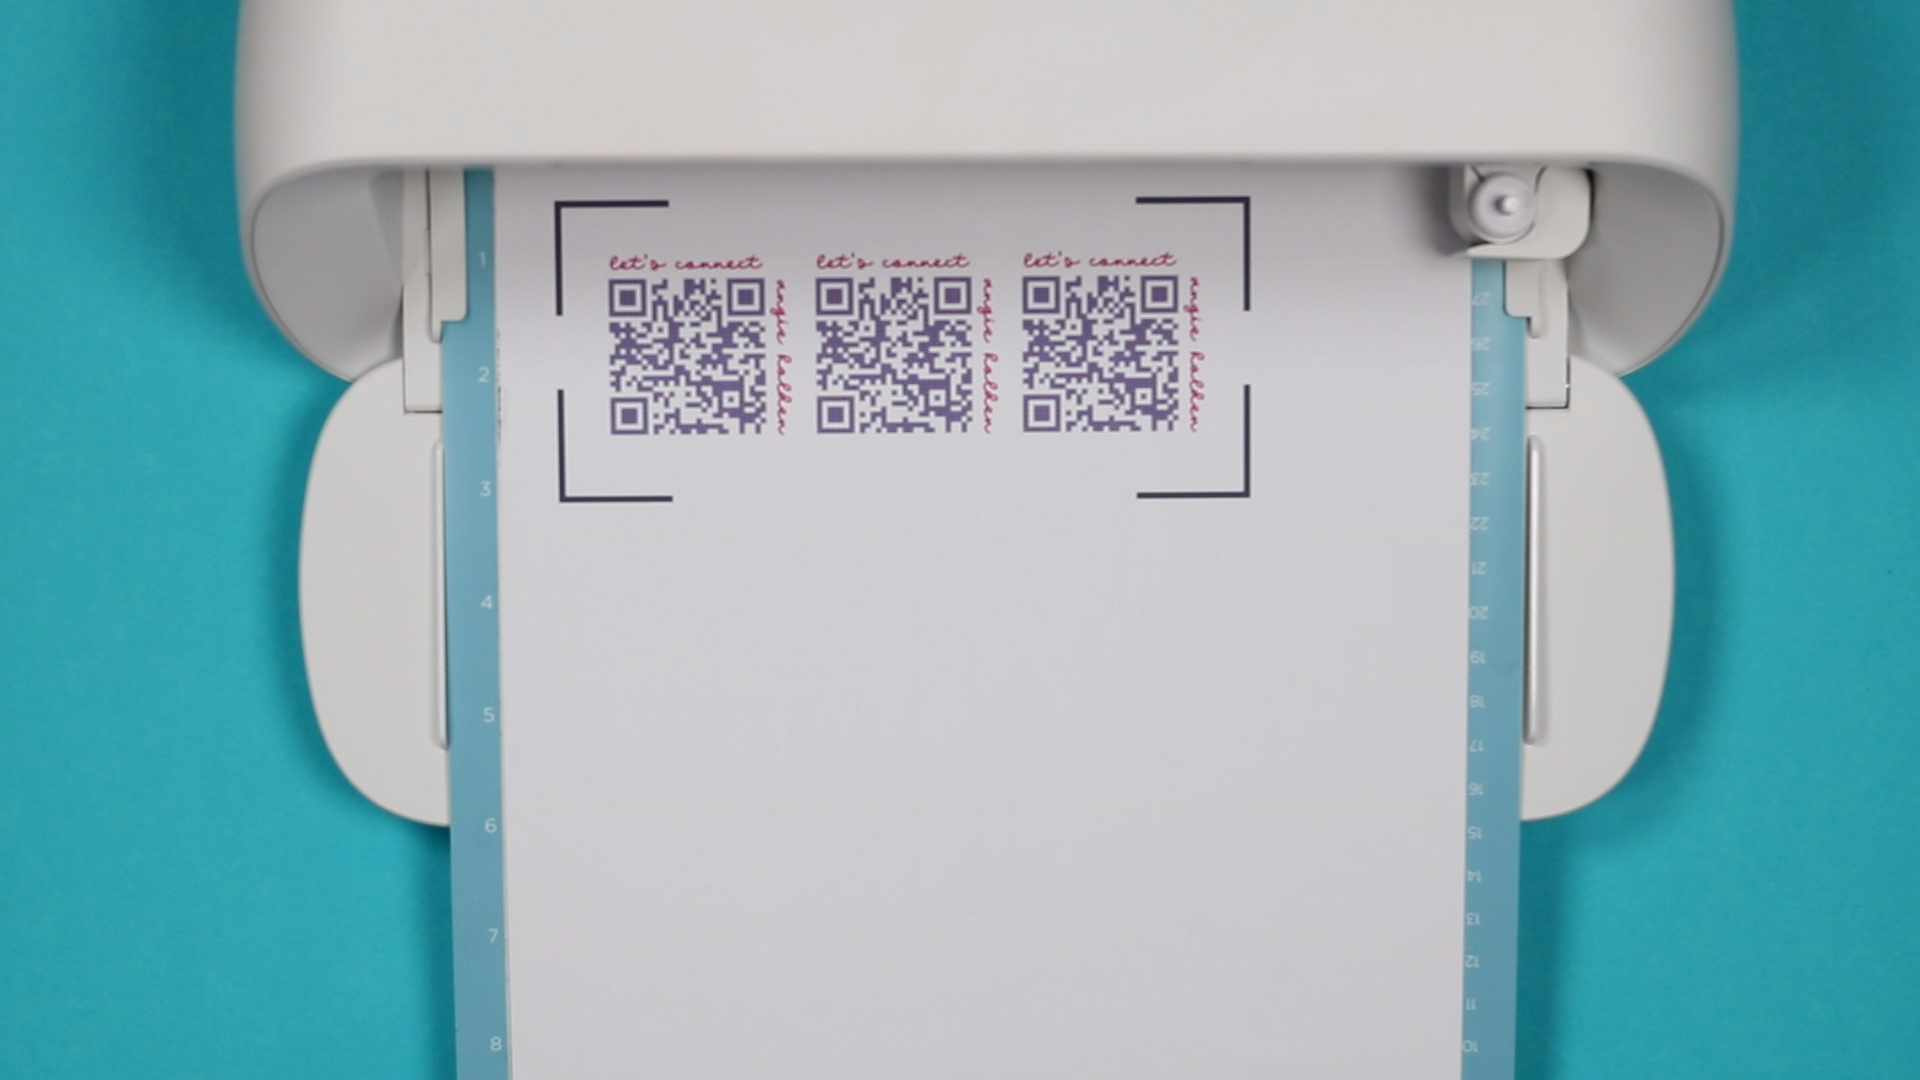
Click Print and then set your print settings in the dialog box and add the printable vinyl to your printer.
Step 6: Cutting Around QR Code
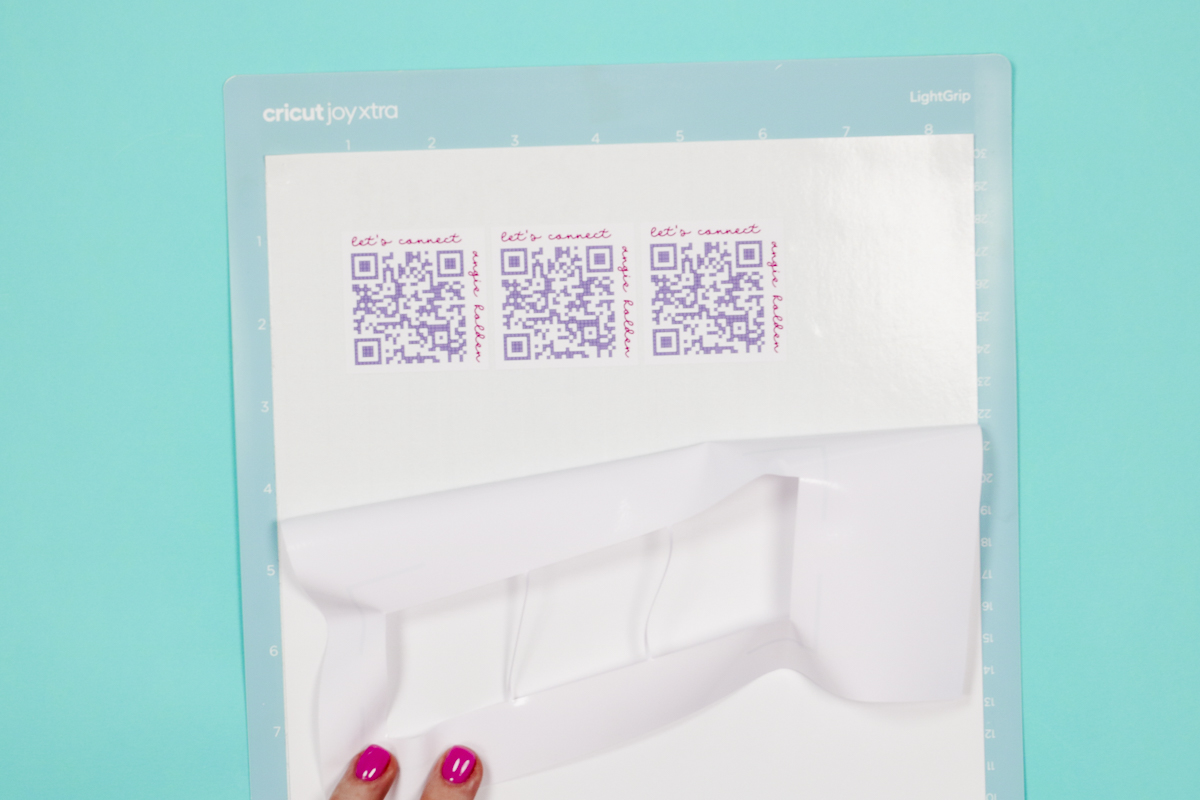
Place the printed vinyl onto the cutting mat, select the correct material for what you’re using, and load it into your Cricut machine. Your Cricut machine will read the registration marks on the print and then cut out the design.
Once the cut is complete, unload the mat and remove the printable vinyl from the mat.
Step 7: Adding QR Code to Keychain
Next, we need to weed out the design. Use a weeding tool to peel away the excess vinyl and you should be left with the QR code boxes on the carrier sheet.
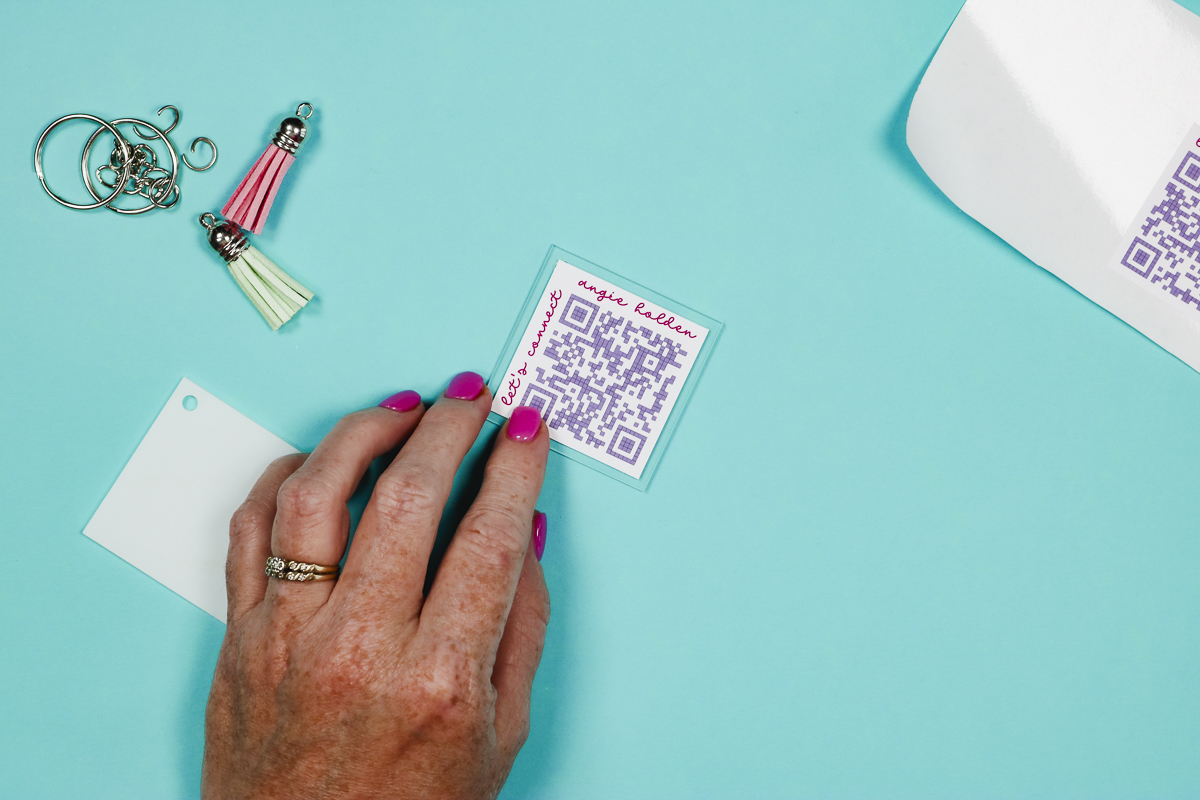
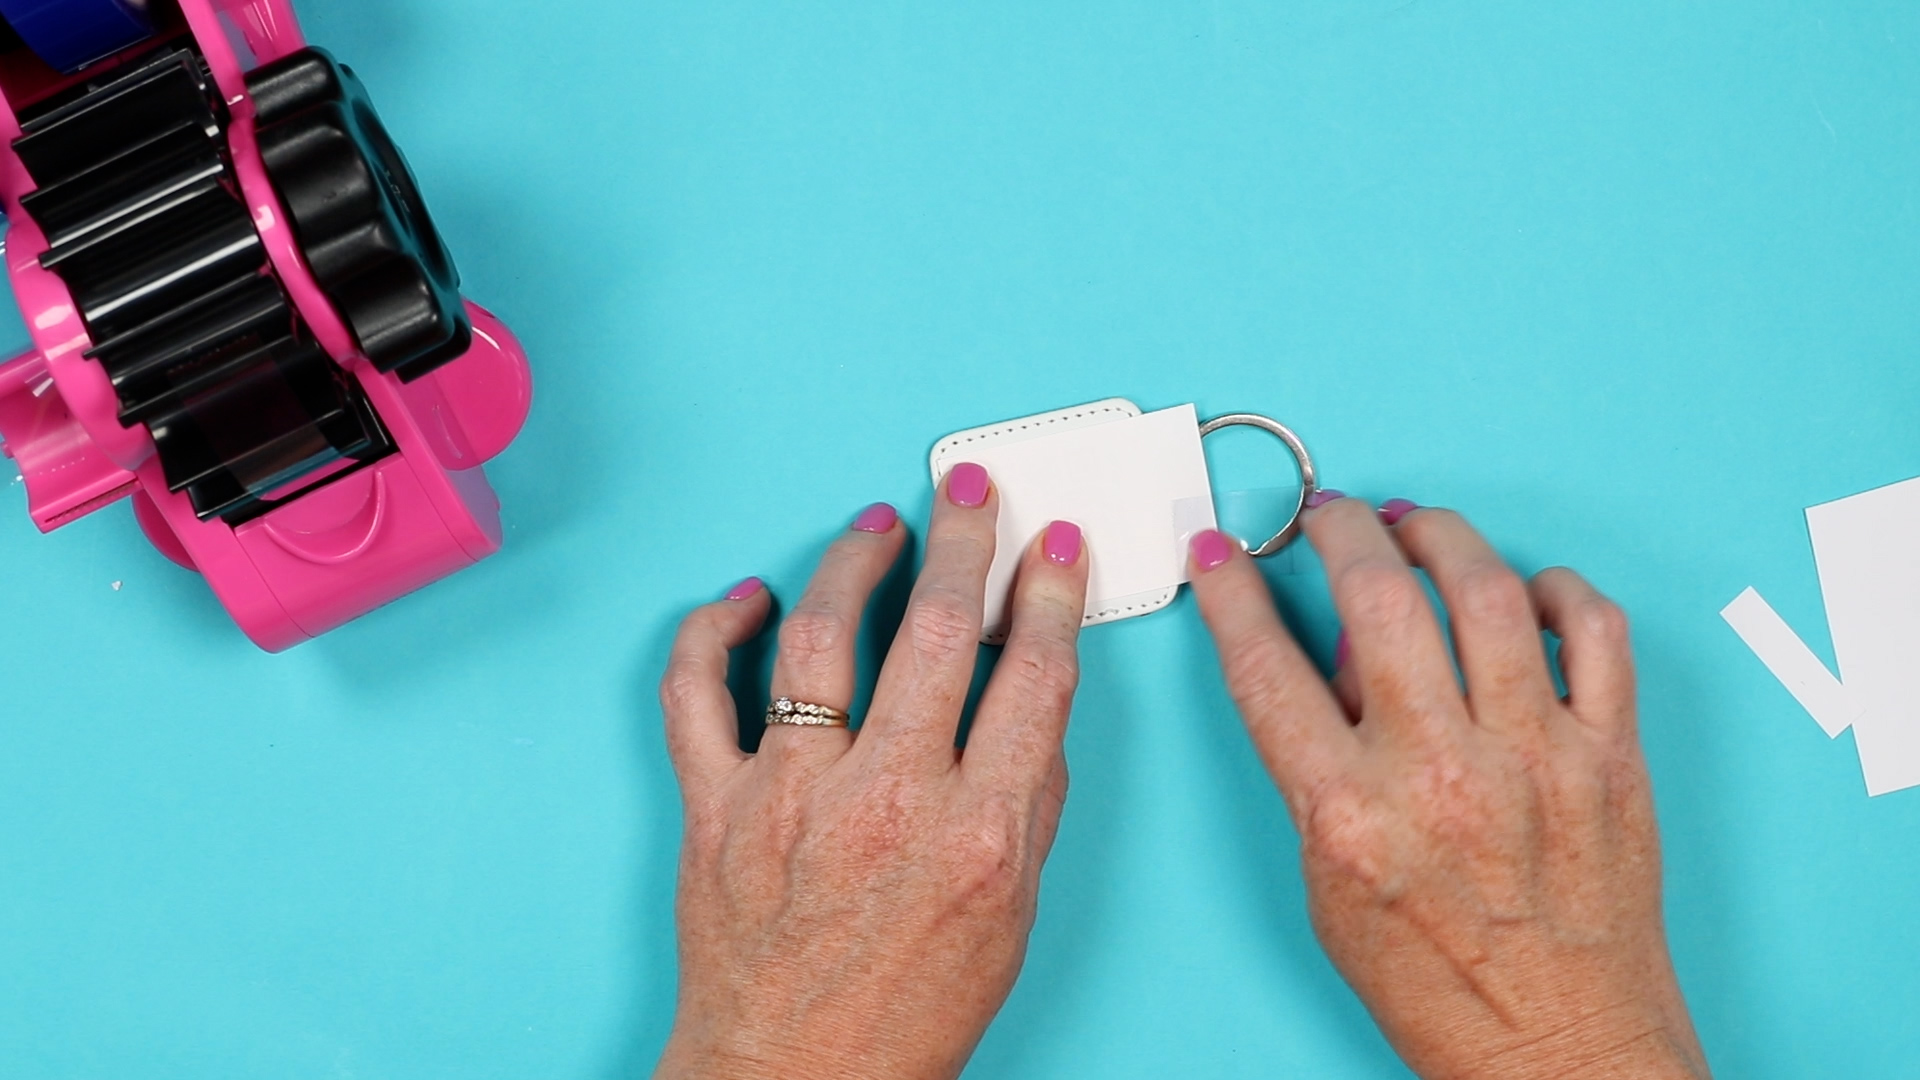
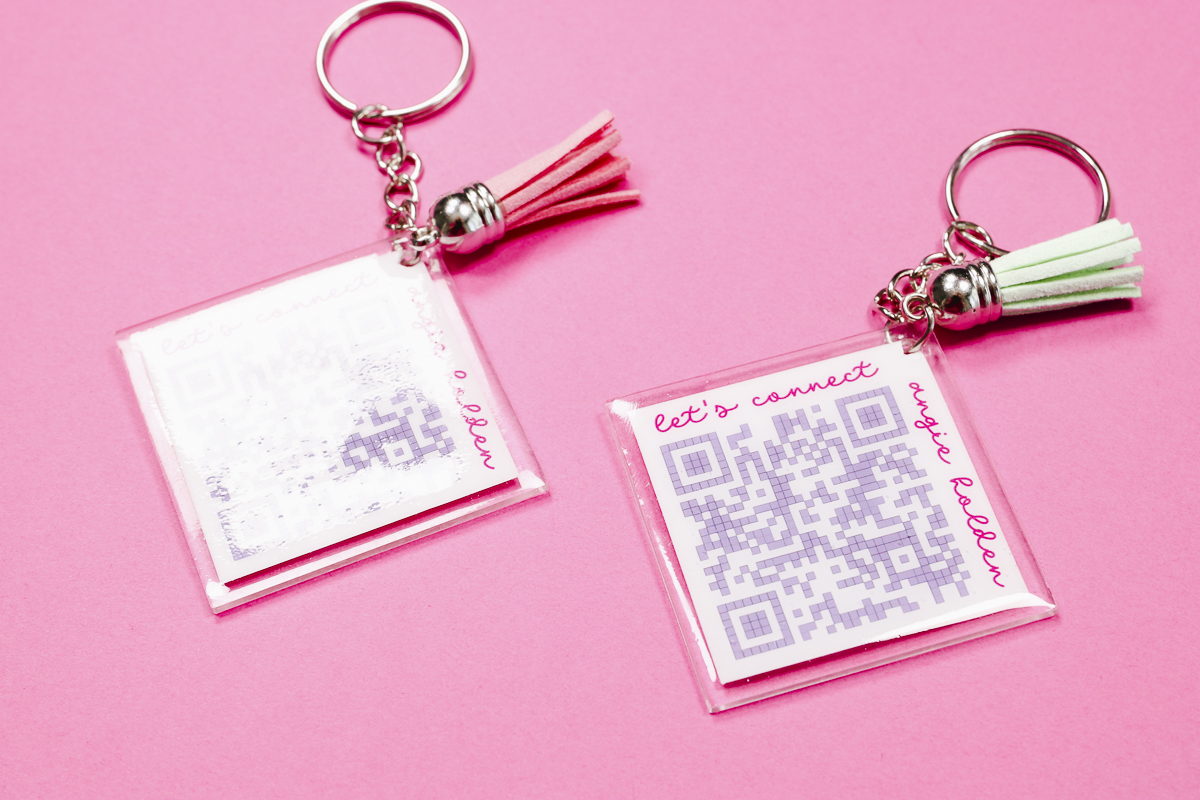
Remove the protective film from the acrylic keychain and apply the printed QR code to the keychain like you would a sticker.
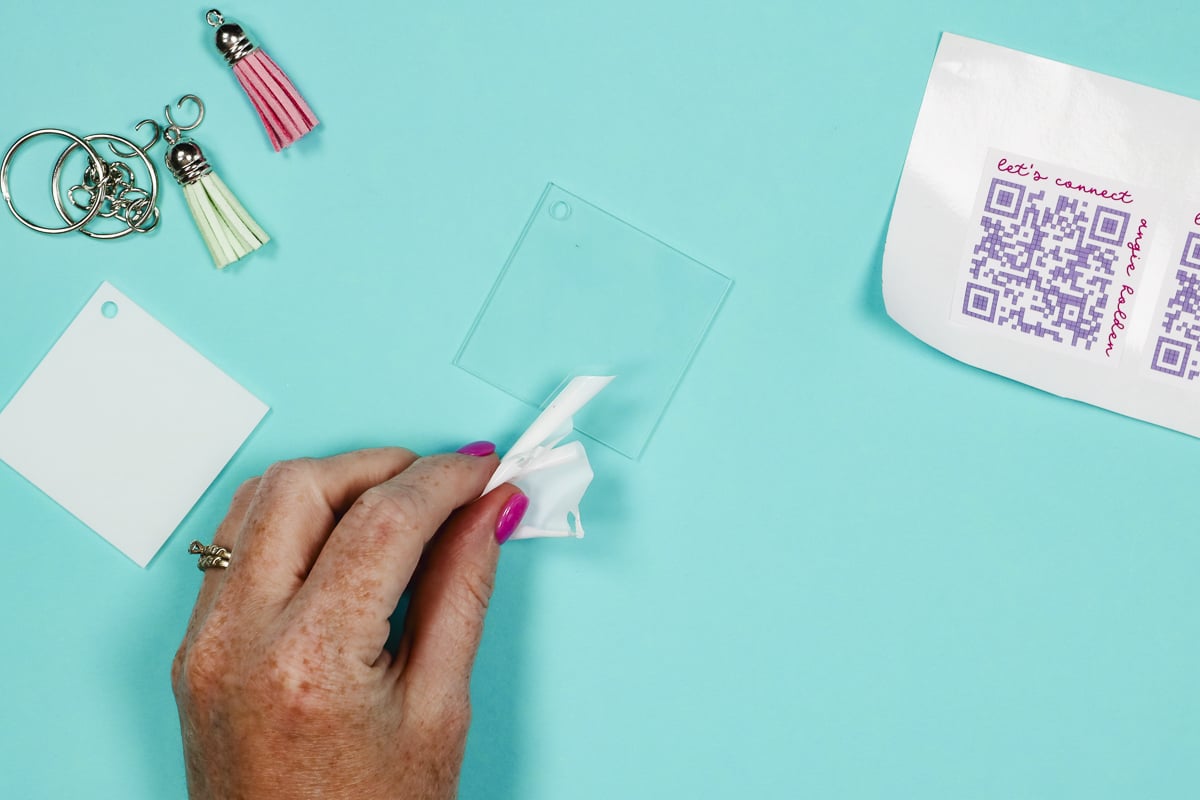
Line the QR code up with the corner opposite the hole and rub it down really well. If the vinyl goes over the hole, use the weeding hook to poke through the hole so you can apply the finishing pieces.
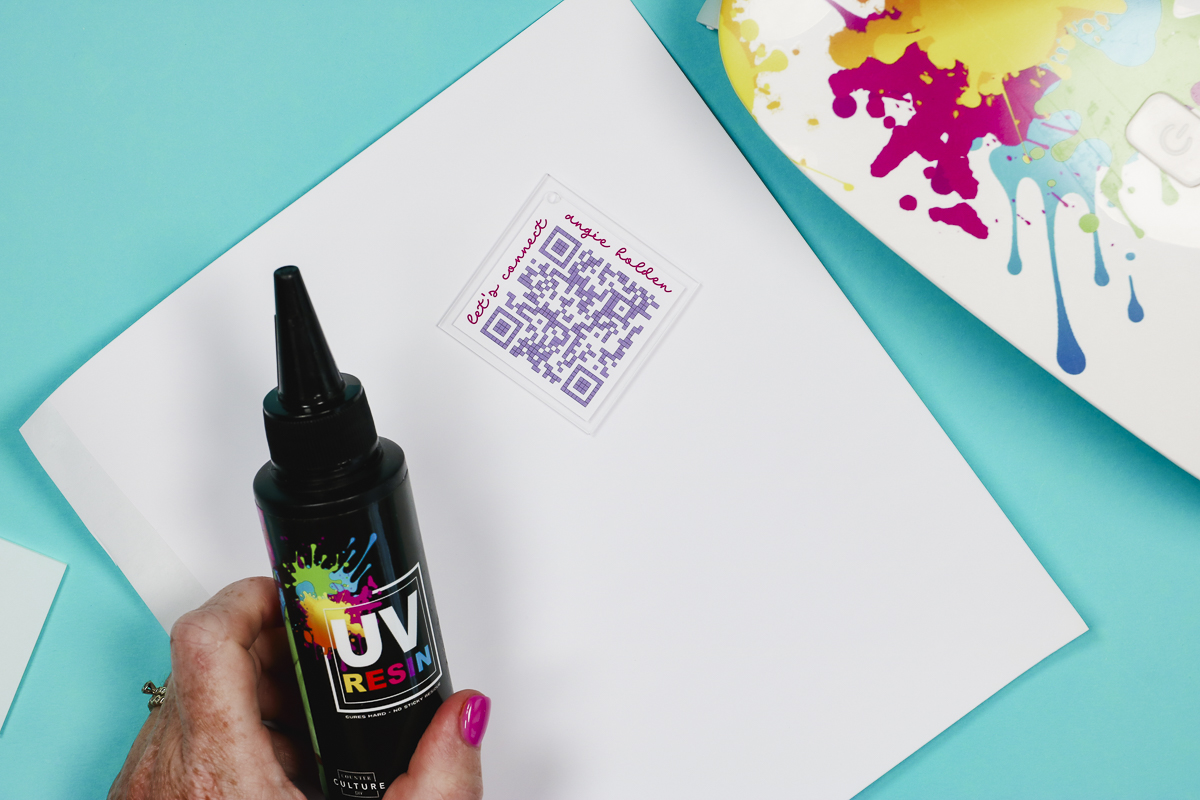
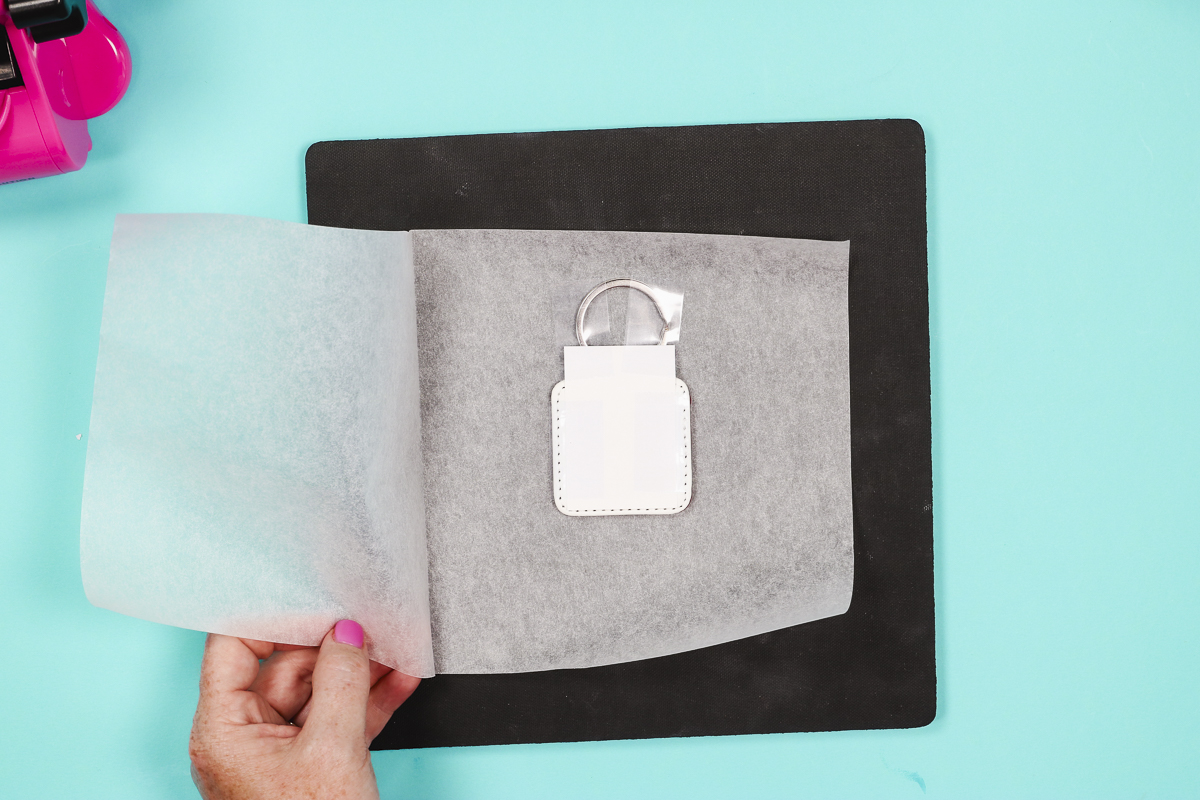
Step 8: Add UV Resin to Seal the Finished QR Code Keychain
I recommend adding some sort of sealer over the top of the keychain to help it hold up to daily wear and tear.
I am using a UV resin to seal my keychain. Test your print before adding UV resin, I didn’t have any bleeding of the ink.
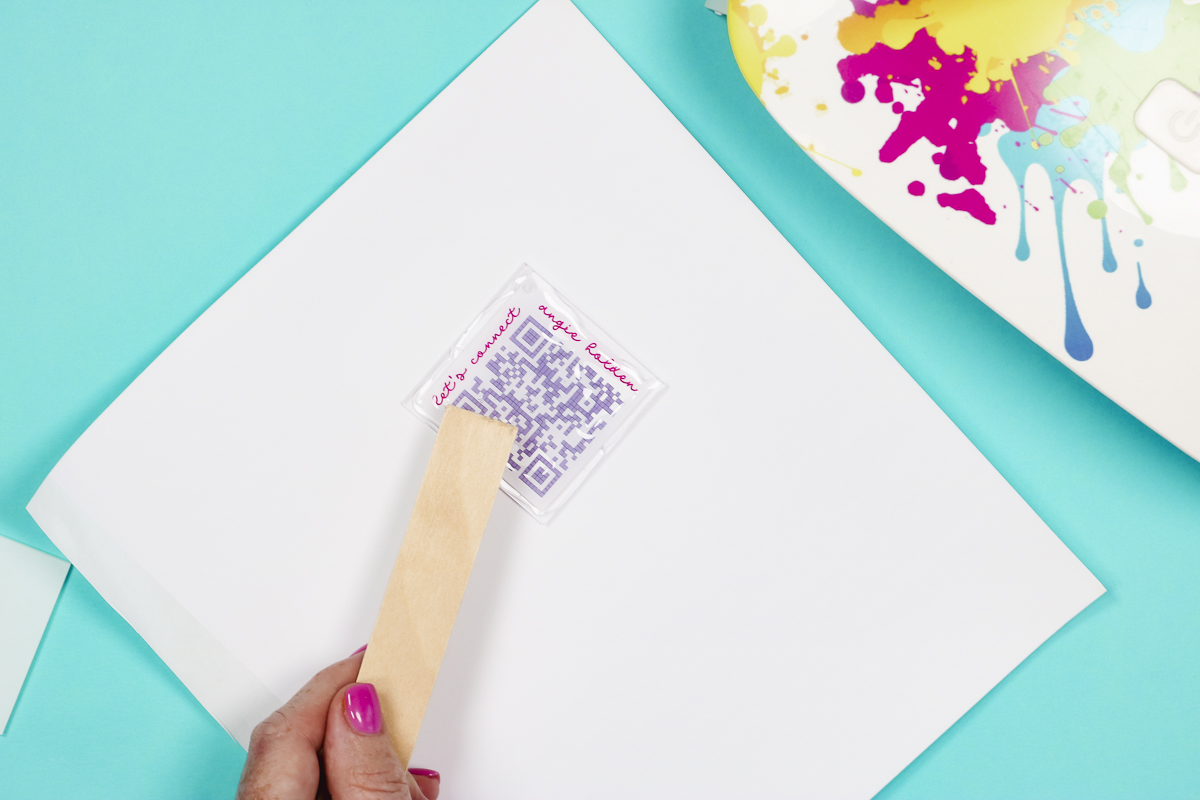
The resin I’m using is self-leveling and domes to give the keychain a really nice professional finish.
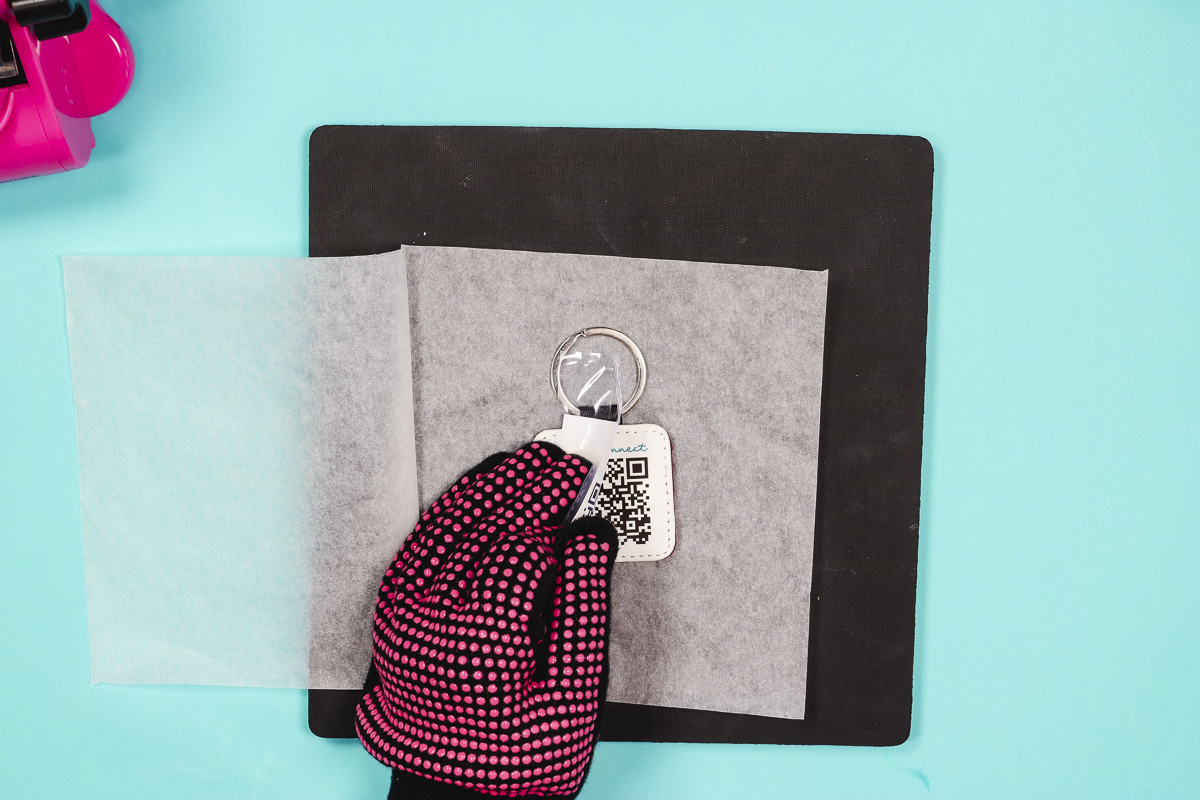
I am using a popsicle stick to smooth the resin and help keep it away from the hole. If resin does get into the hole, use a toothpick or something else that will allow you to clear the hole.
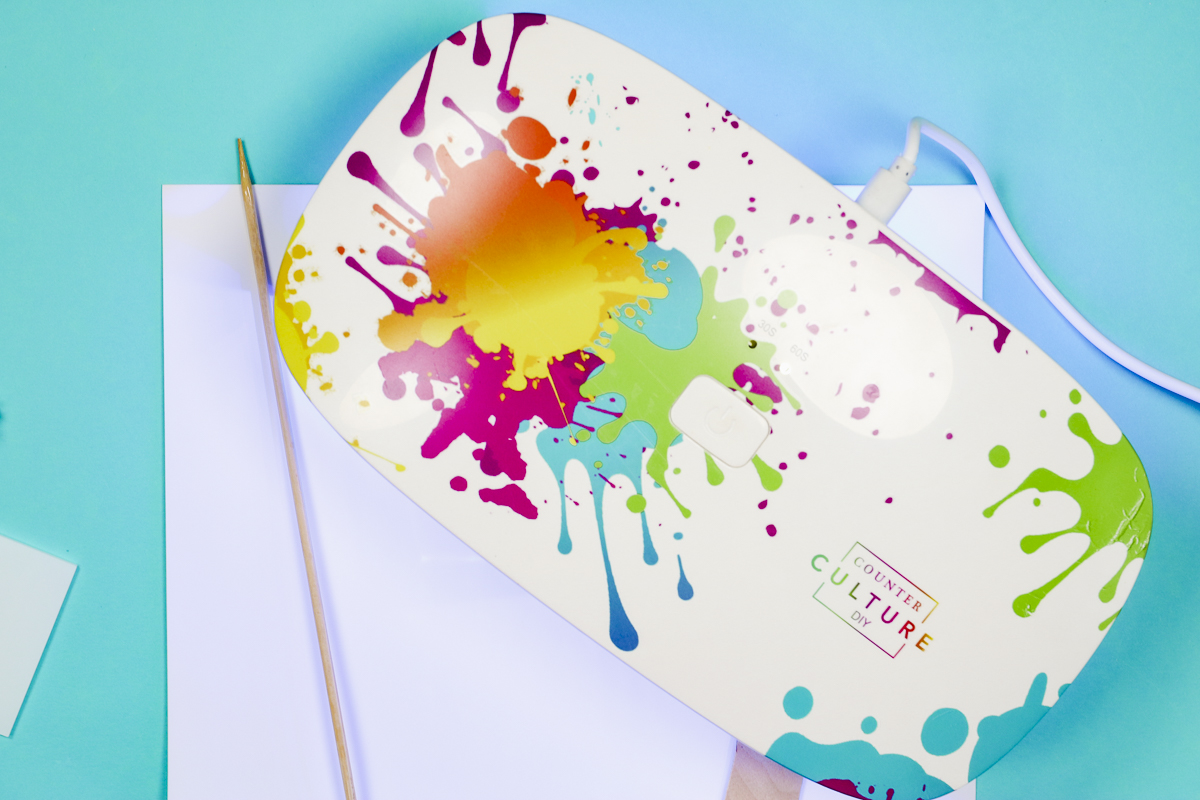
Use a low-temperature heat gun or hair dryer to pop any bubbles in the resin. Place the keychain under the UV light for the time recommended in the instructions to cure completely.
Step 9: Finishing the QR Code Keychain
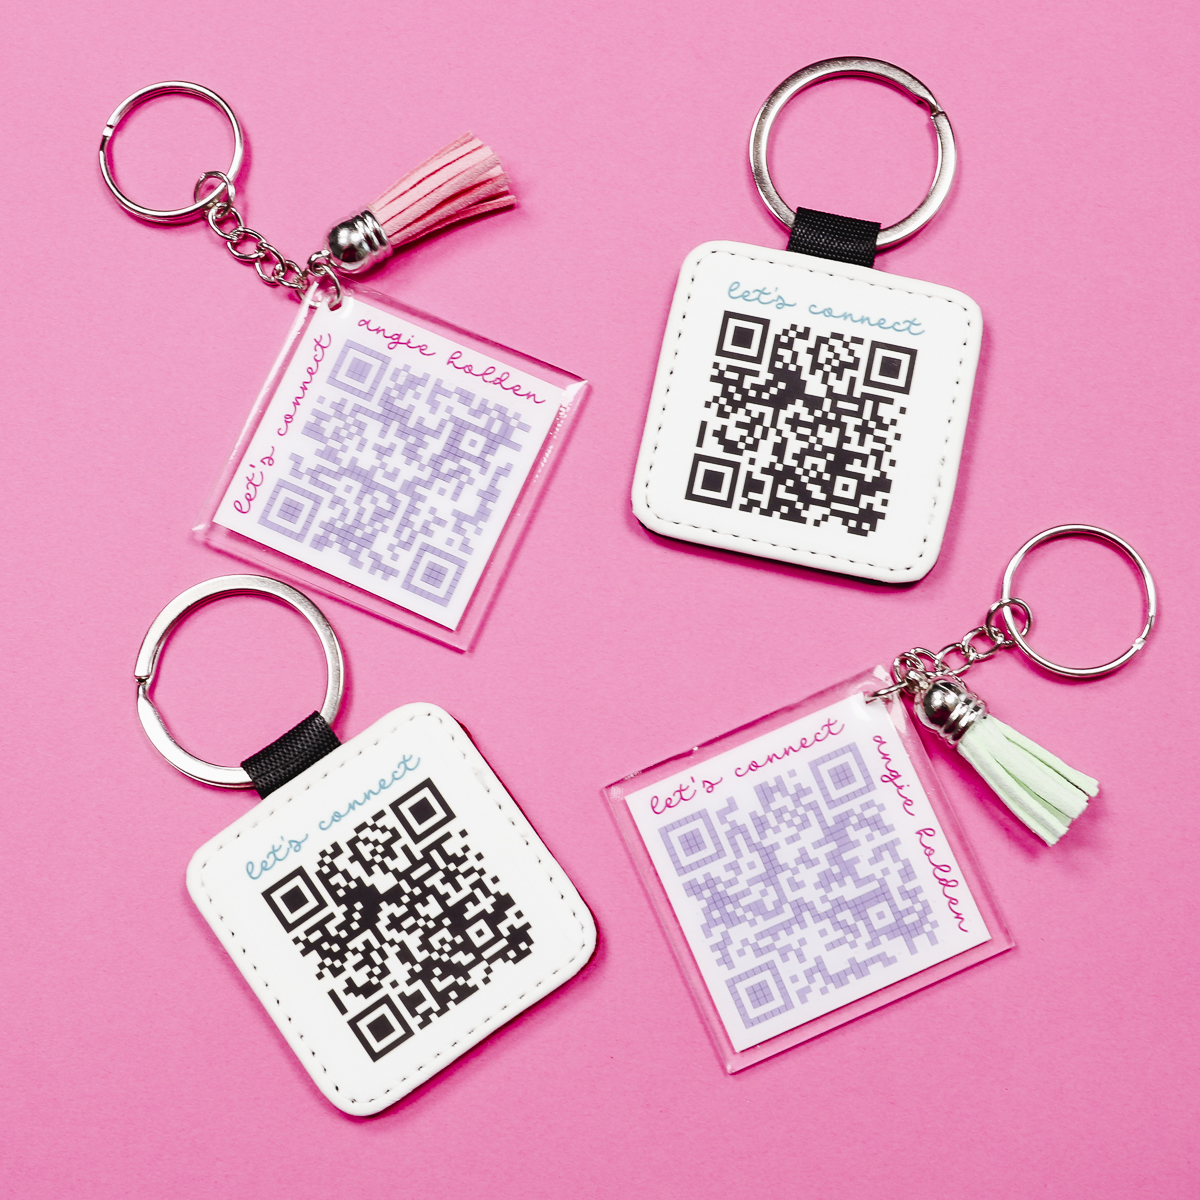
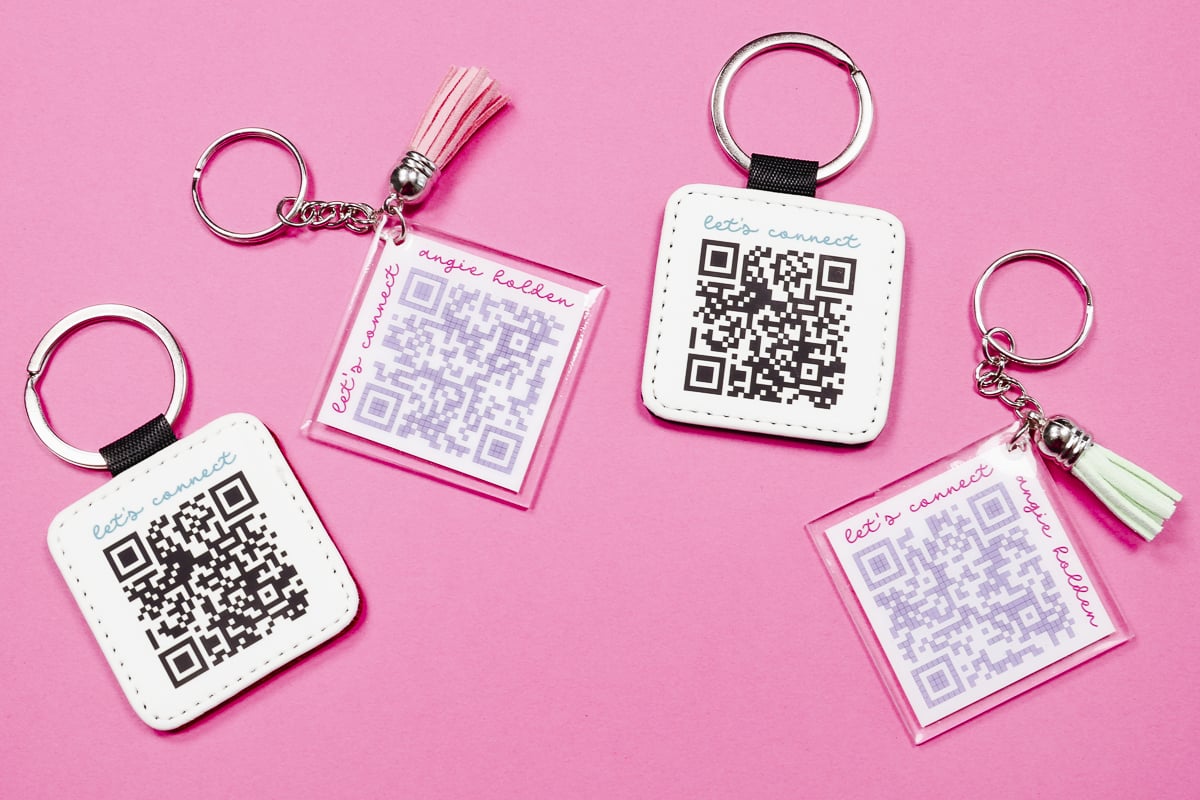
When the time is up, assemble the keychain with the jump rings and optional tassels and you have a finished QR Code keychain that you can use to share whatever URL you’d like.

Craft your future by turning your passion into a paycheck! With more than 25 years experience and a DIY community of more than 1.5 million, Angie Holden and Cori George share handmade business strategies, craft business insights, and inspirational stories. Every other Monday, you’ll learn from experts how to use your crafts to financially support a creative life.
Click here to sign up so you don’t miss future episodes of Crafting for Profit Live!
How to Make a QR Code Keychain with Sublimation
Now, let’s make a sublimation version of a QR code keychain. First, let’s look at the supplies we’re going to use.
Supplies Used

Step 1: Resizing QR Code
Start with the instructions above to make your QR code in Canva. Next, I want to add a template that is the same size as the sublimatable area of my keychain.
Click Elements then choose a square. Select Position and resize the square to match your blank. Mine is 1.75″ by 1.75″. Move that layer to the back and resize the QR code to fit the template.
Step 2: Adding Text to QR Code
If you want to add text, click on the Text tool, choose your font, and type out the text. I want my text and QR code to fit on the template so resize as needed.
Step 3: Print QR Code for Sublimation
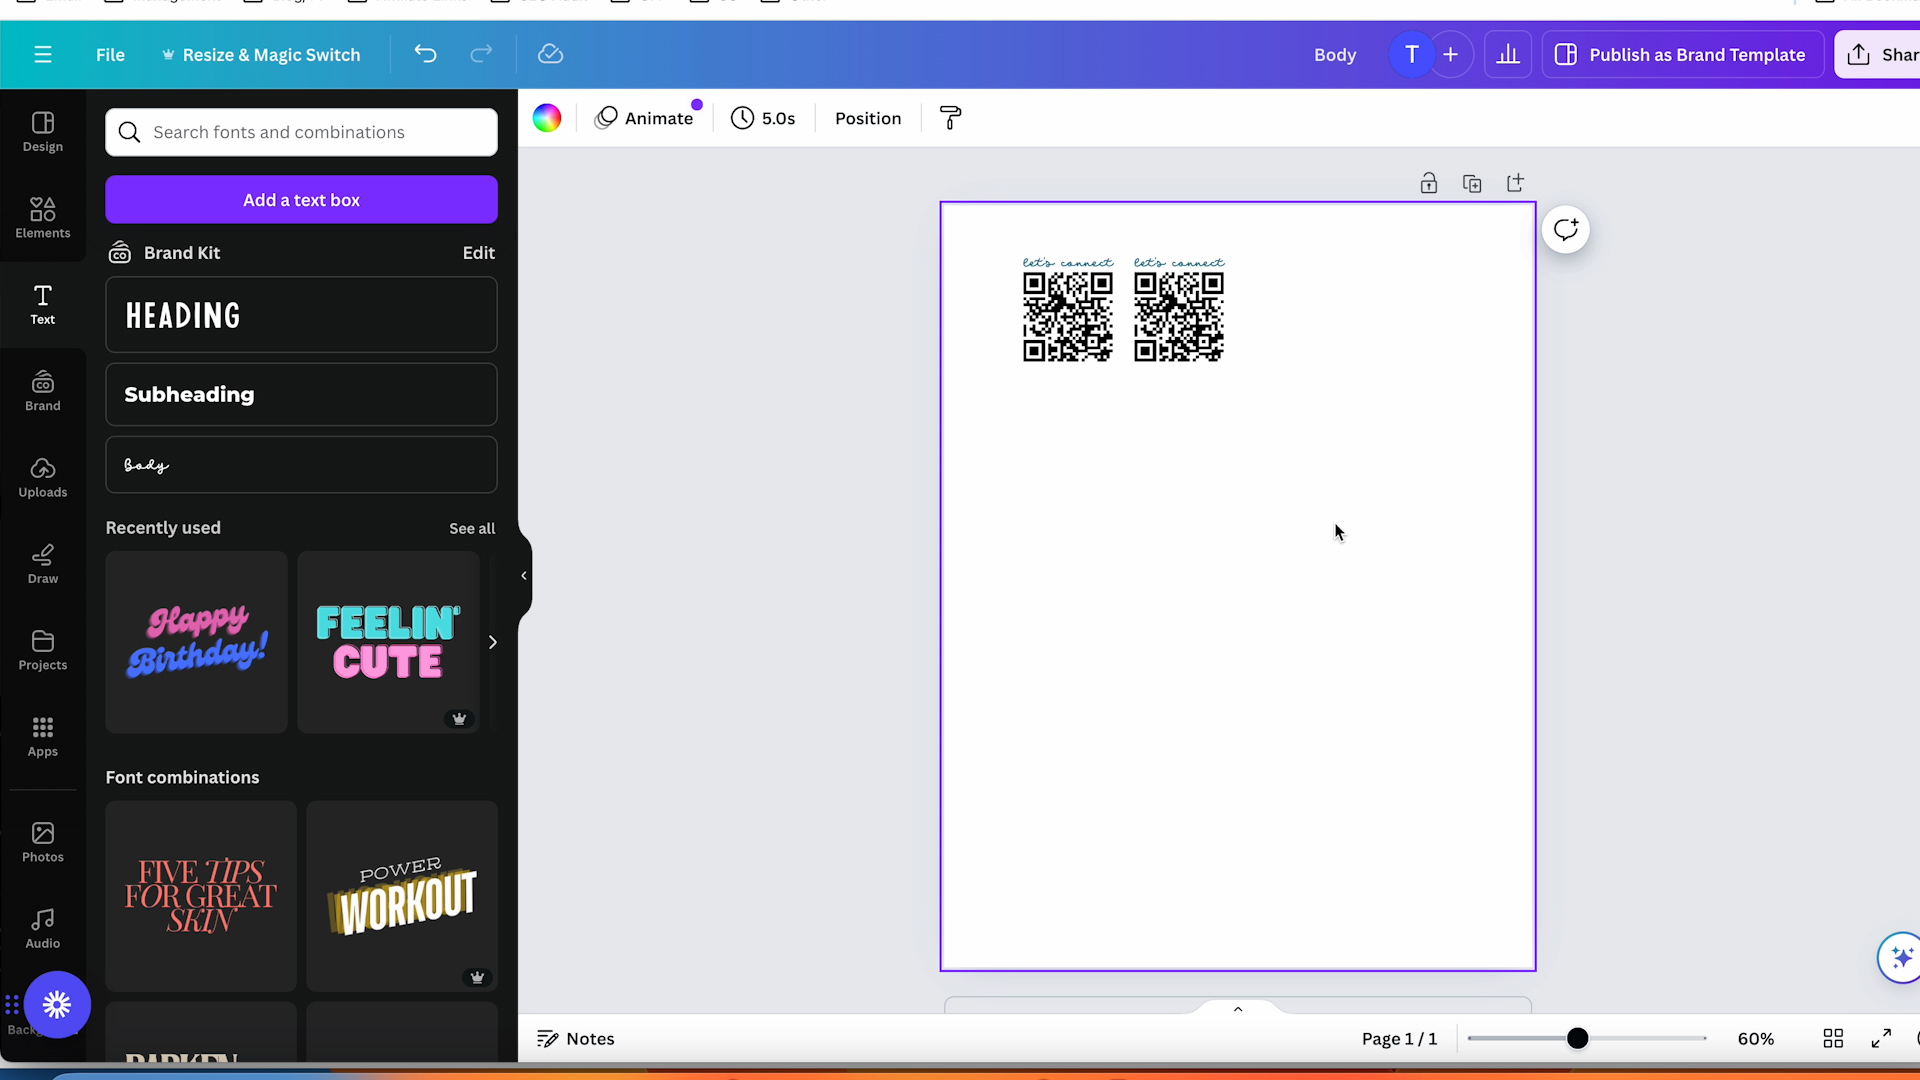
When the size is correct for the template, delete the template layer and duplicate the QR code as needed to fill your sublimation paper.
You do need a sublimation print for this project. Print your design using sublimation ink, printed onto sublimation paper from a sublimation printer.
Step 4: Prepare Sublimation Blank
Next, we need to prepare the sublimation blank. Moisture and dirt/dust are not good for sublimation projects. Depending on your blank use a lint roller or rubbing alcohol to clean the blank.
If needed, preheat the blank for a few seconds to remove any moisture. Fabric or wood would need to be preheated.
Step 5: Locate Sublimation Print onto Blank
I find it easier to locate these prints when they’re trimmed close to the design. With the design in place use heat-resistant tape to hold it in place.
I am not wrapping the tape to the other side of my blank because sometimes the decorative back can peel off with the tape when it gets hot. Because of that, I am sticking the tape to the ring portion and the front edge of the keychain.
Step 6: Press Sublimation Print onto the Keychain
Add protective paper to the top and bottom of the keychain and place the whole thing on a heat-resistant mat to press.
I am using my EasyPress set at 355 degrees for 50 seconds with medium pressure. You do not need to worry about moving the metal portion away from the heat. You can use any heat press for this project.
If you’re using an EasyPress, make sure you press down with medium pressure for the entire time.

Step 7: Remove Sublimation Print
Use heat-resistant gloves and remove the protective paper and sublimation print. The keychain will be hot, especially the metal ring portion.
Your sublimation QR code keychain is now complete.
Which QR Code Keychain is Right for You?
I really like how all of these keychains turned out. Whether you have a sublimation printer or a Cricut machine, you can create crafts with a QR code to help your small business.
I really like the glitter and color on the back of this style keychain.
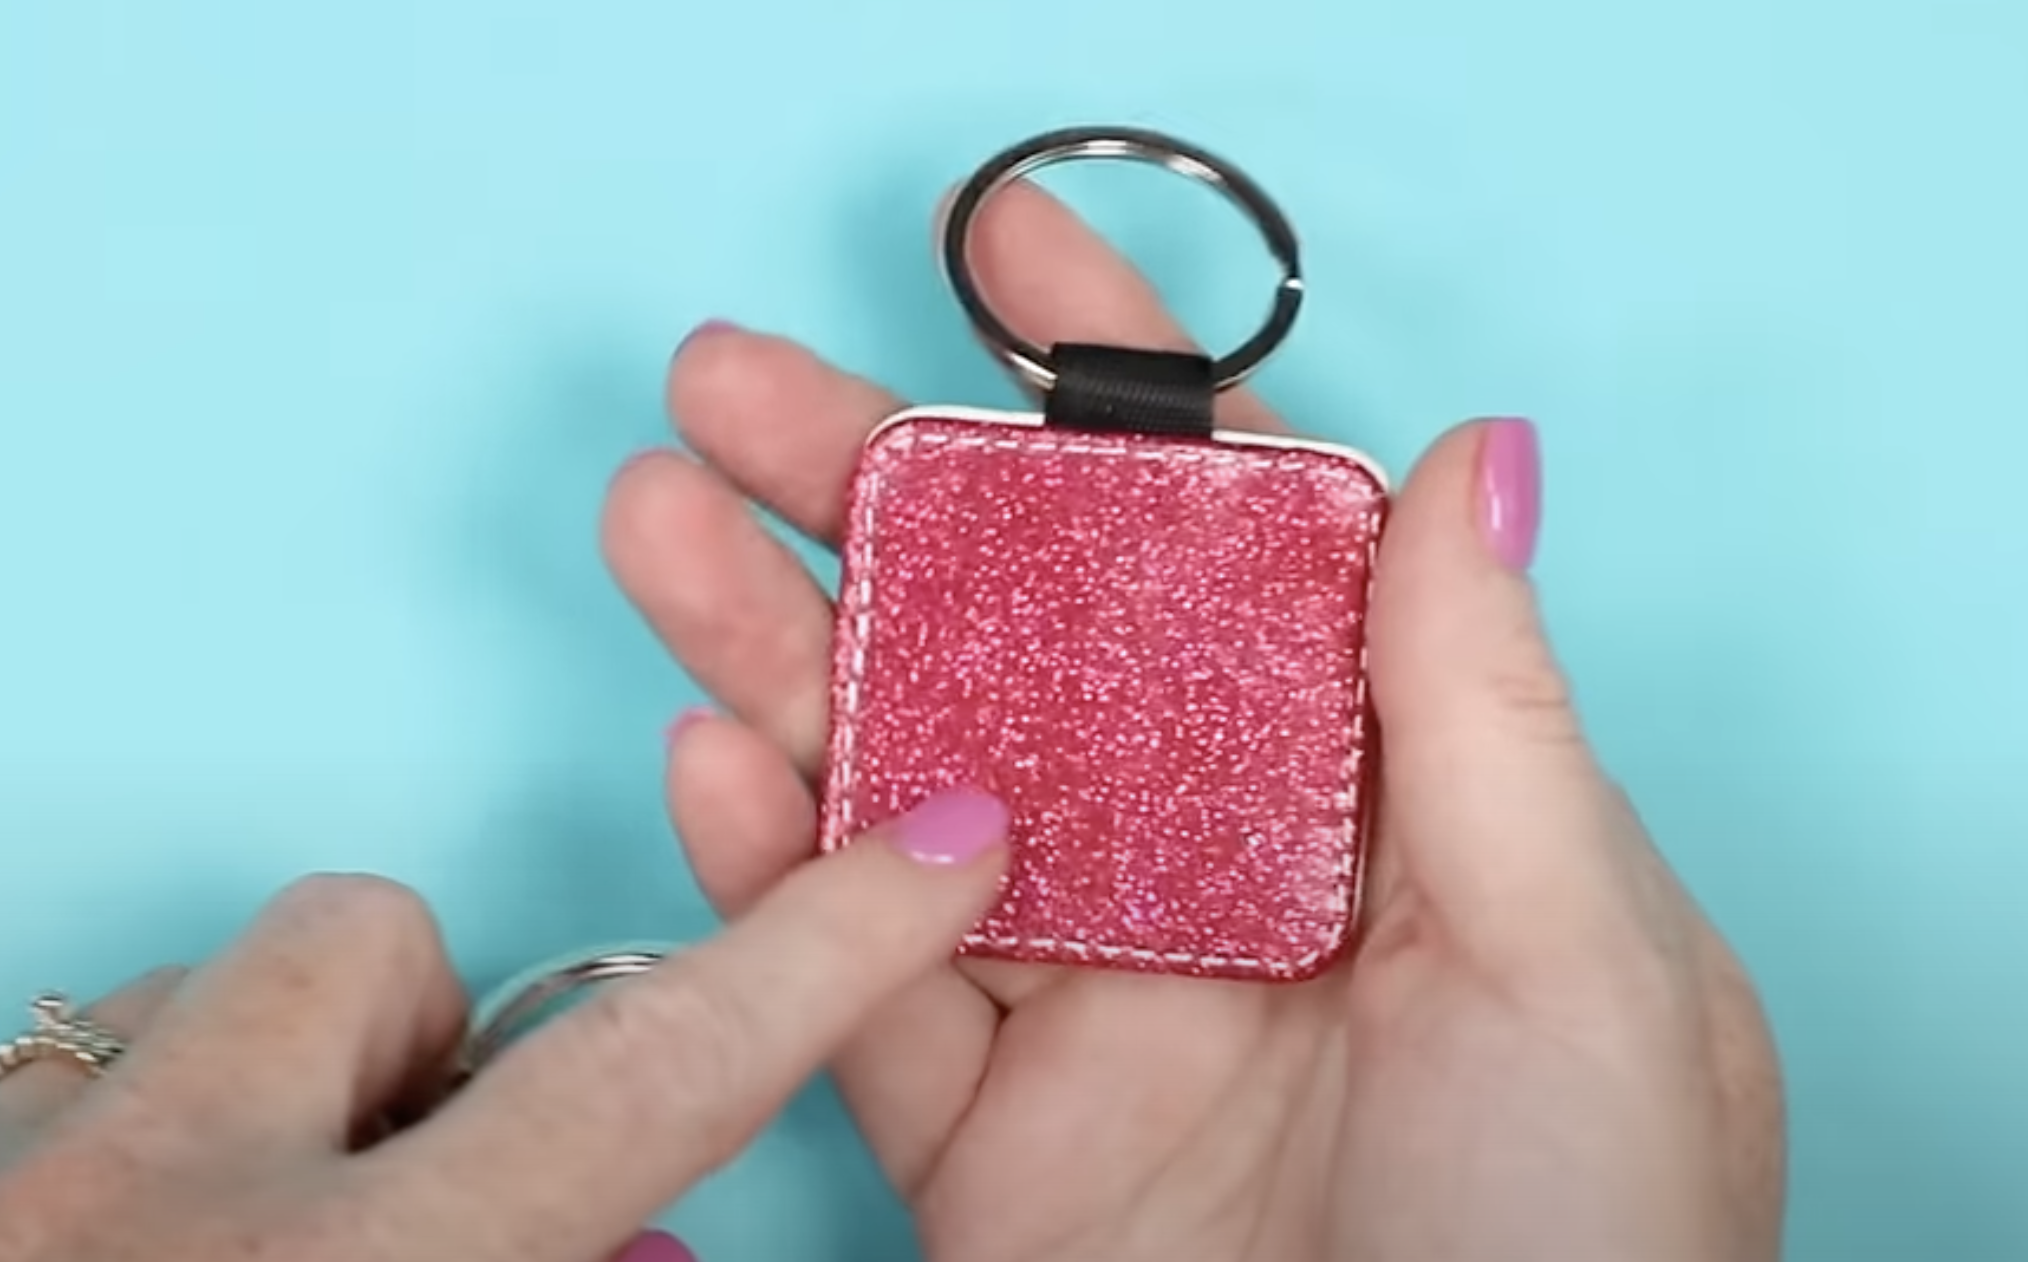
Adding the UV resin to the top of this QR code really makes the keychain look professional and will protect it from daily wear and tear.
I hope I’ve answered any questions you have about making QR code keychains for your small business. These keychains are a great way to help grow your business even when you’re on the go.
If you’re talking to someone, you can share the QR code and they can quickly connect with you to get more info.
If you have any additional questions, leave them in the comments and I’ll be happy to answer them for you.