This post and photos may contain Amazon or other affiliate links. If you purchase something through any link, I may receive a small commission at no extra charge to you. Any supplies used may be given to me free of charge, however, all projects and opinions are my own.
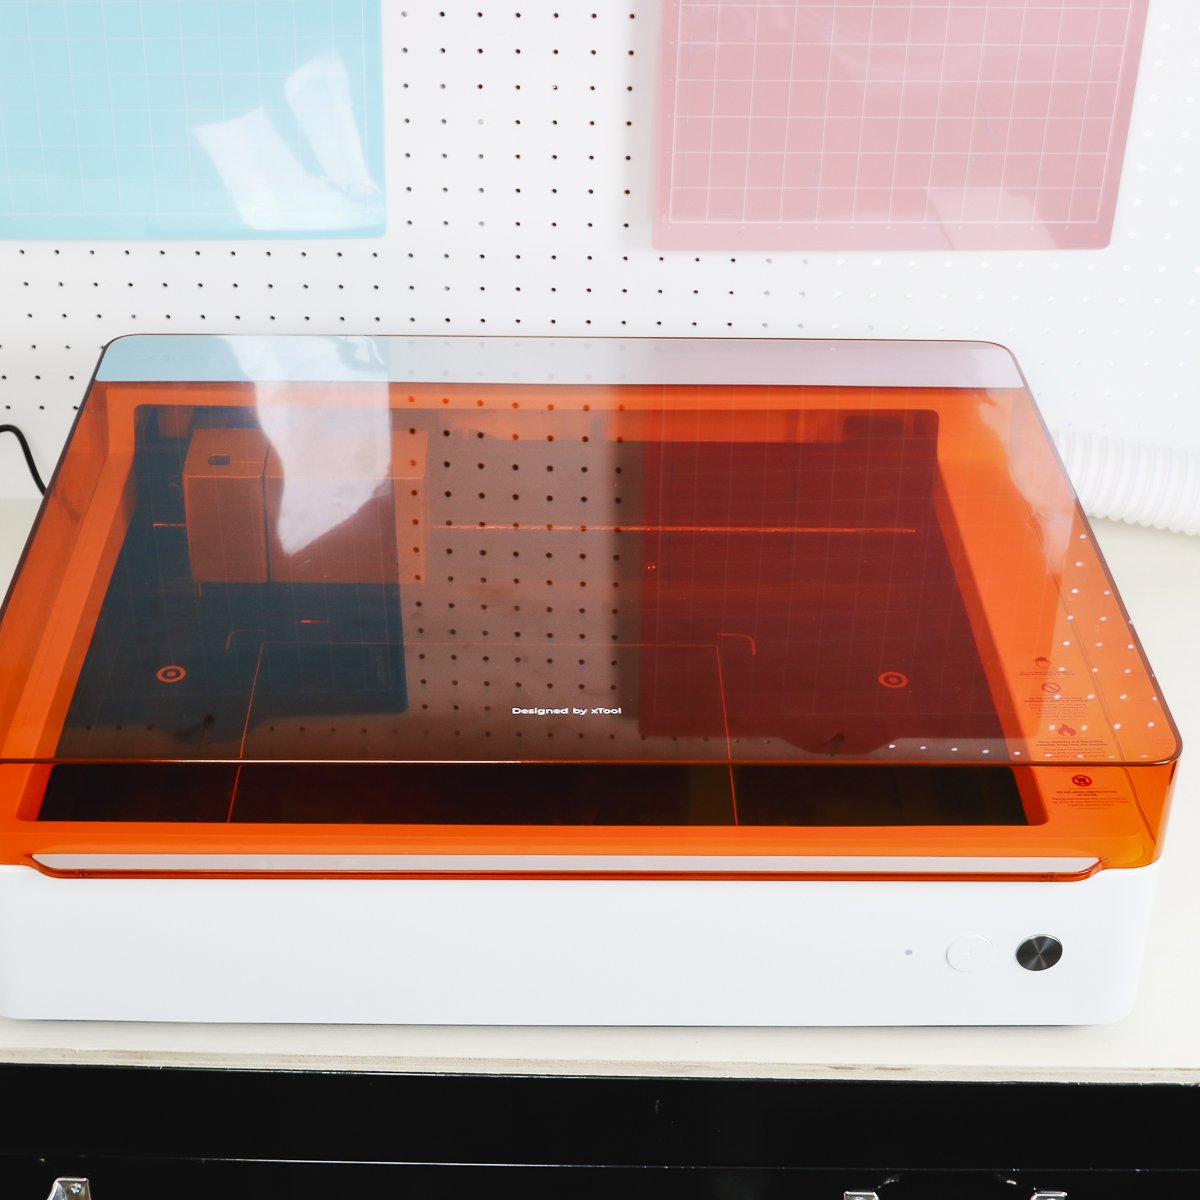
Today I’m going to talk to you about the new xTool M1 Ultra. This all-in-one crafting machine does everything from laser cutting and engraving to cutting materials like HTV and fabric. It can even print with additional accessories.
The xTool M1 Ultra is a Diode laser. I’m going to show you everything that comes with the laser when you purchase it and the different accessories you can purchase so you can see everything it can do. When we’re done, you should know if this is the right laser for you.
If you’re brand new to craft lasers and all they can do, make sure you check out my free Laser Ready course.
xTool did send me this laser to try out. All projects and opinions are my own.
Interested in seeing the xTool M1 Ultra in action? You can watch me make all of these different projects by pressing play on the video below.
What Comes With the xTool M1 Ultra?
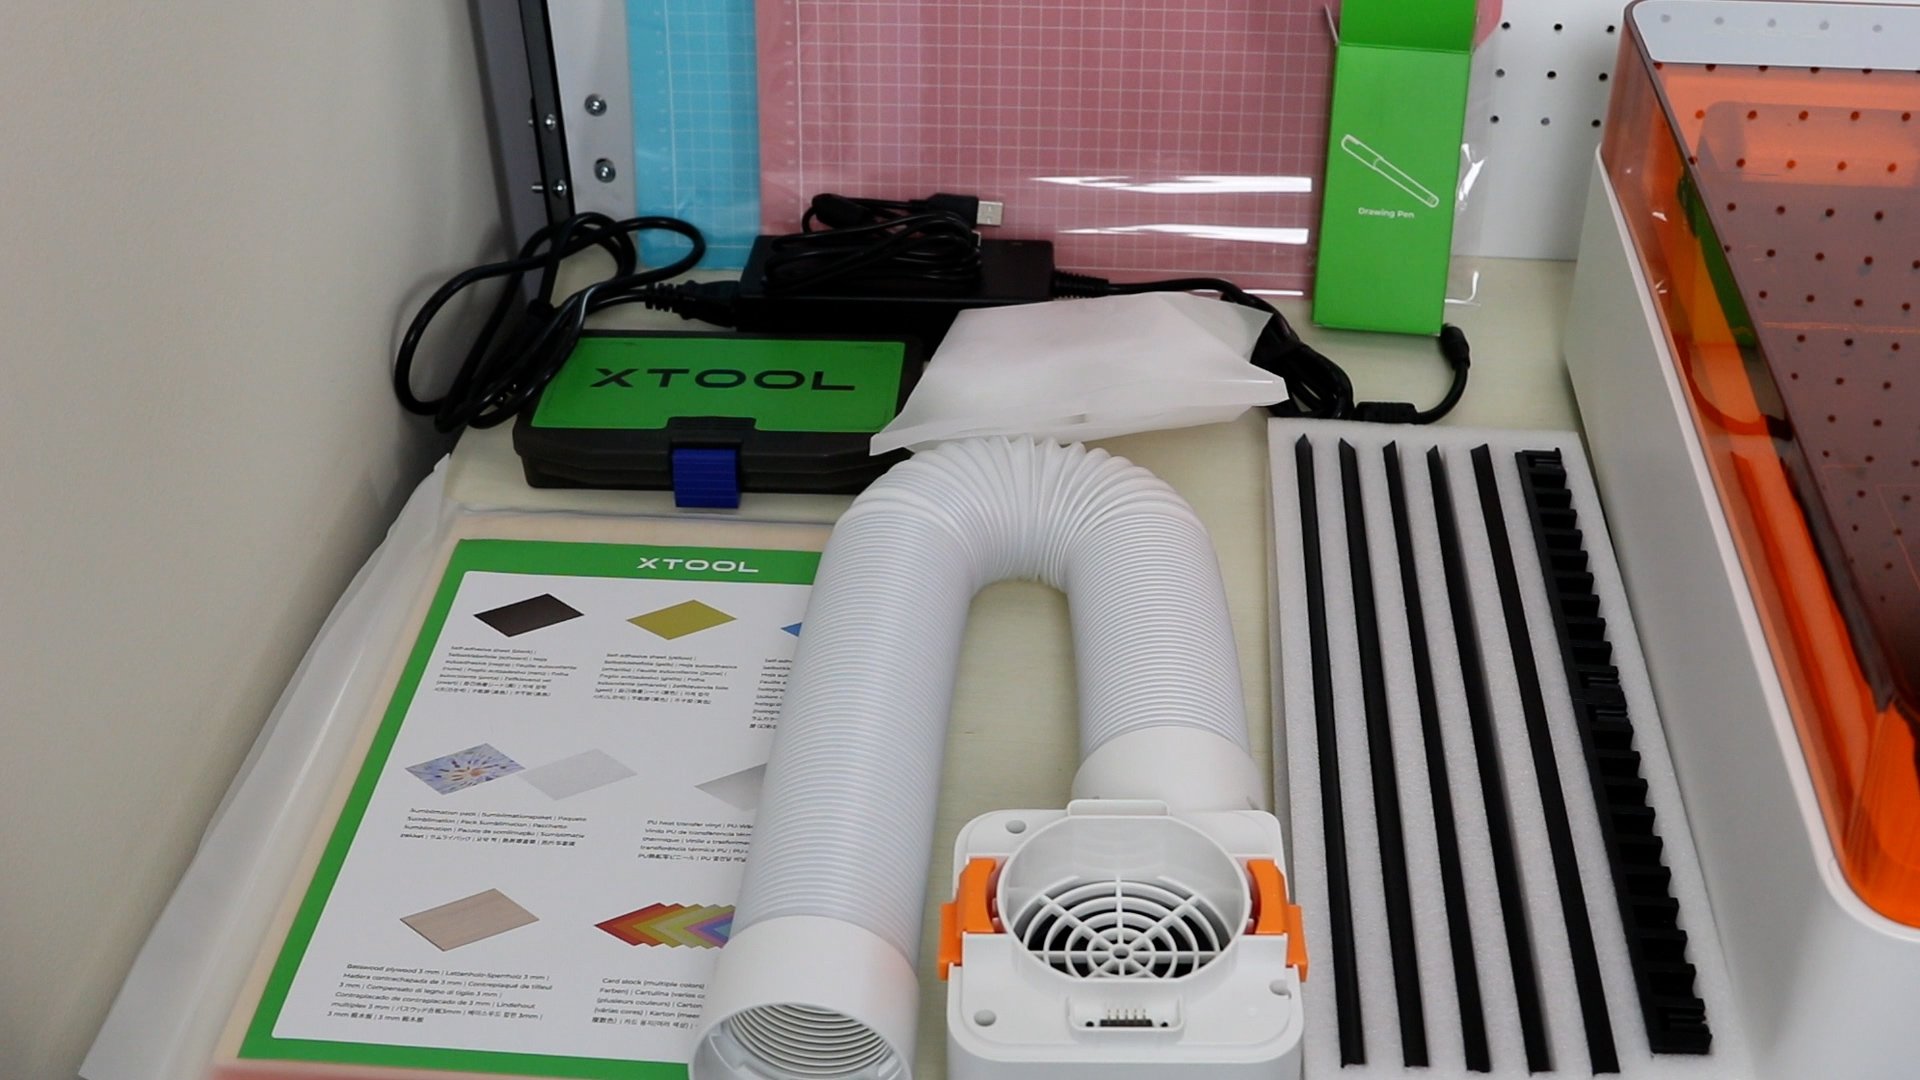
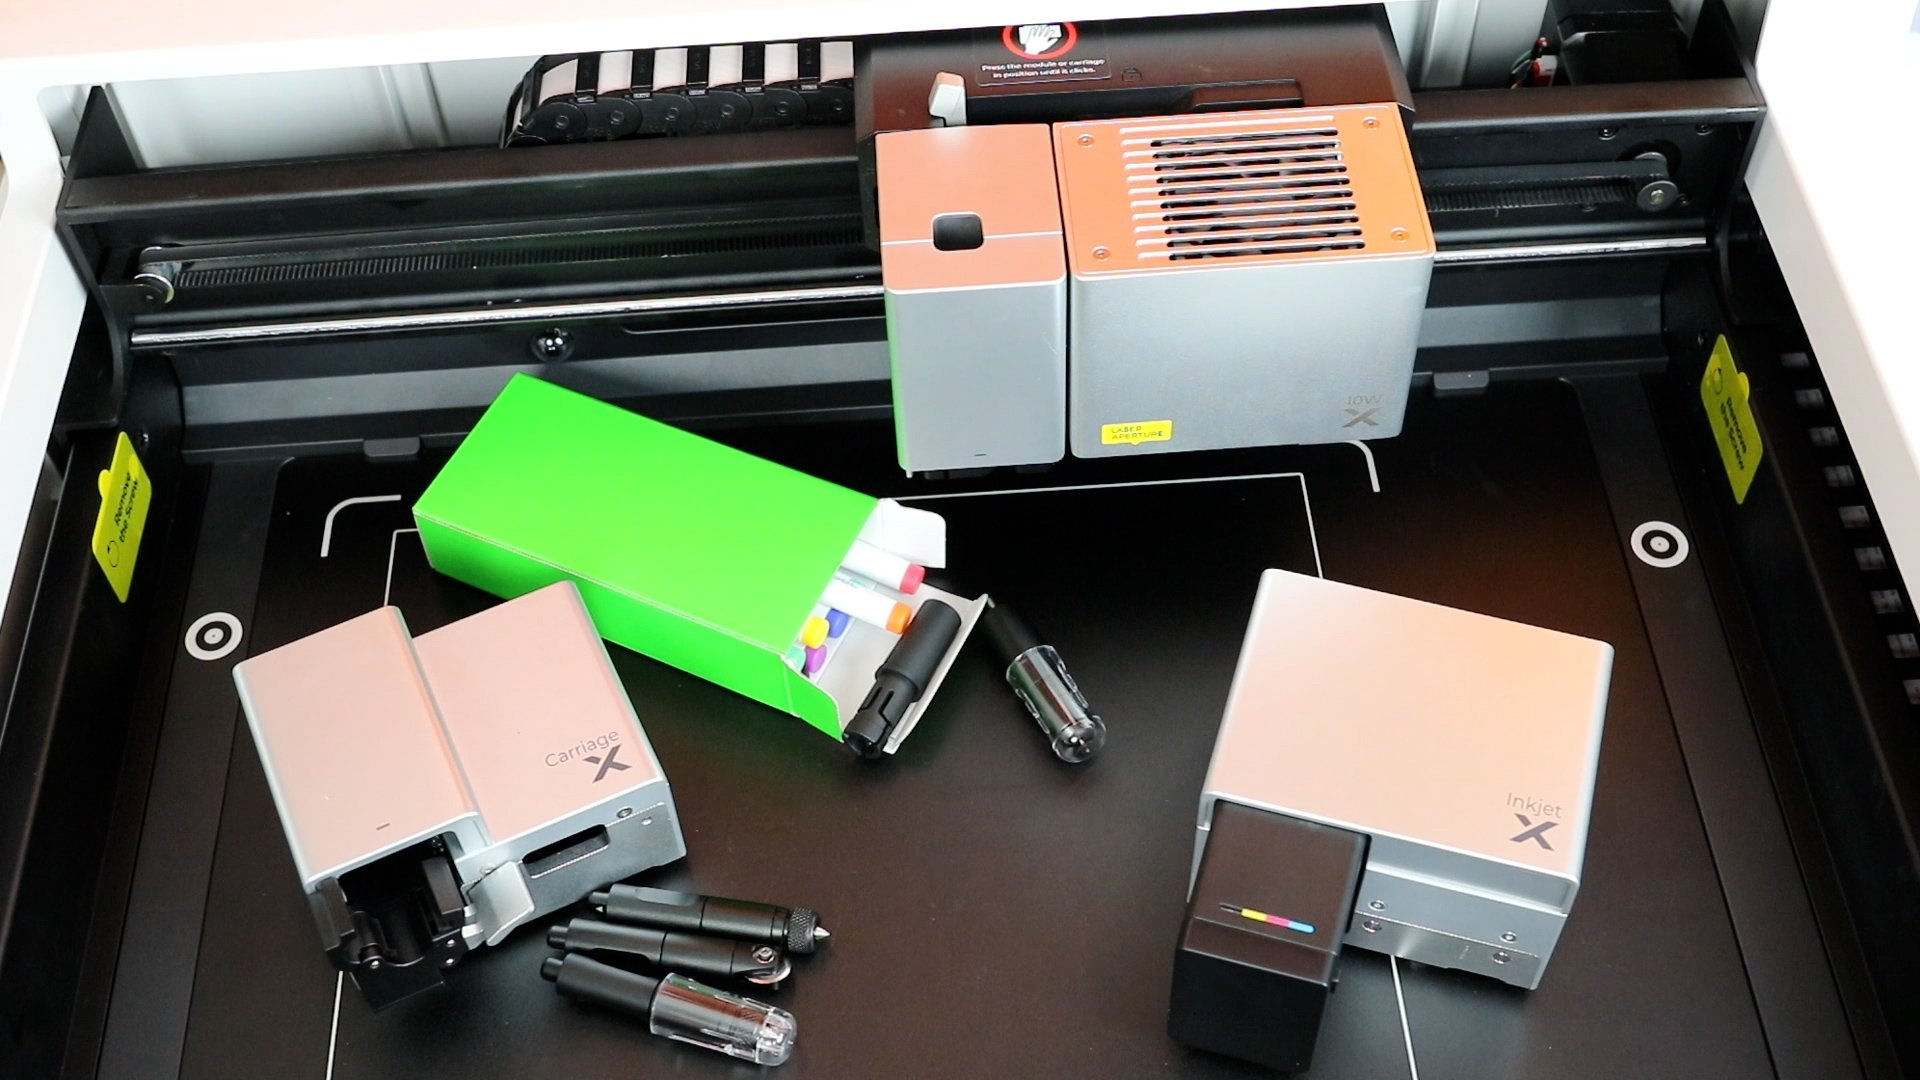
Let’s look at everything that comes with this laser if you purchase it without any additional accessories.
- A user manual that will guide you through the whole process.
- The Basic module is already installed in the machine.
- Laser module is included.
- The smoke exhaust module and several filters. You must vent the laser out a window or purchase the air purifier separately to run this machine.
- A variety of sample materials.
- Triangular prisms as well as the triangular prism holders which definitely come in handy holding those in place.
- Power adaptor and USB cable.
- Two cutting mats (light grip and fabric grip).
- 8 different pens.
- A small kit is included and it has the pen holder, fine-point blade, additional tools, and a variety of small things that go with the machine.
Supplies Used
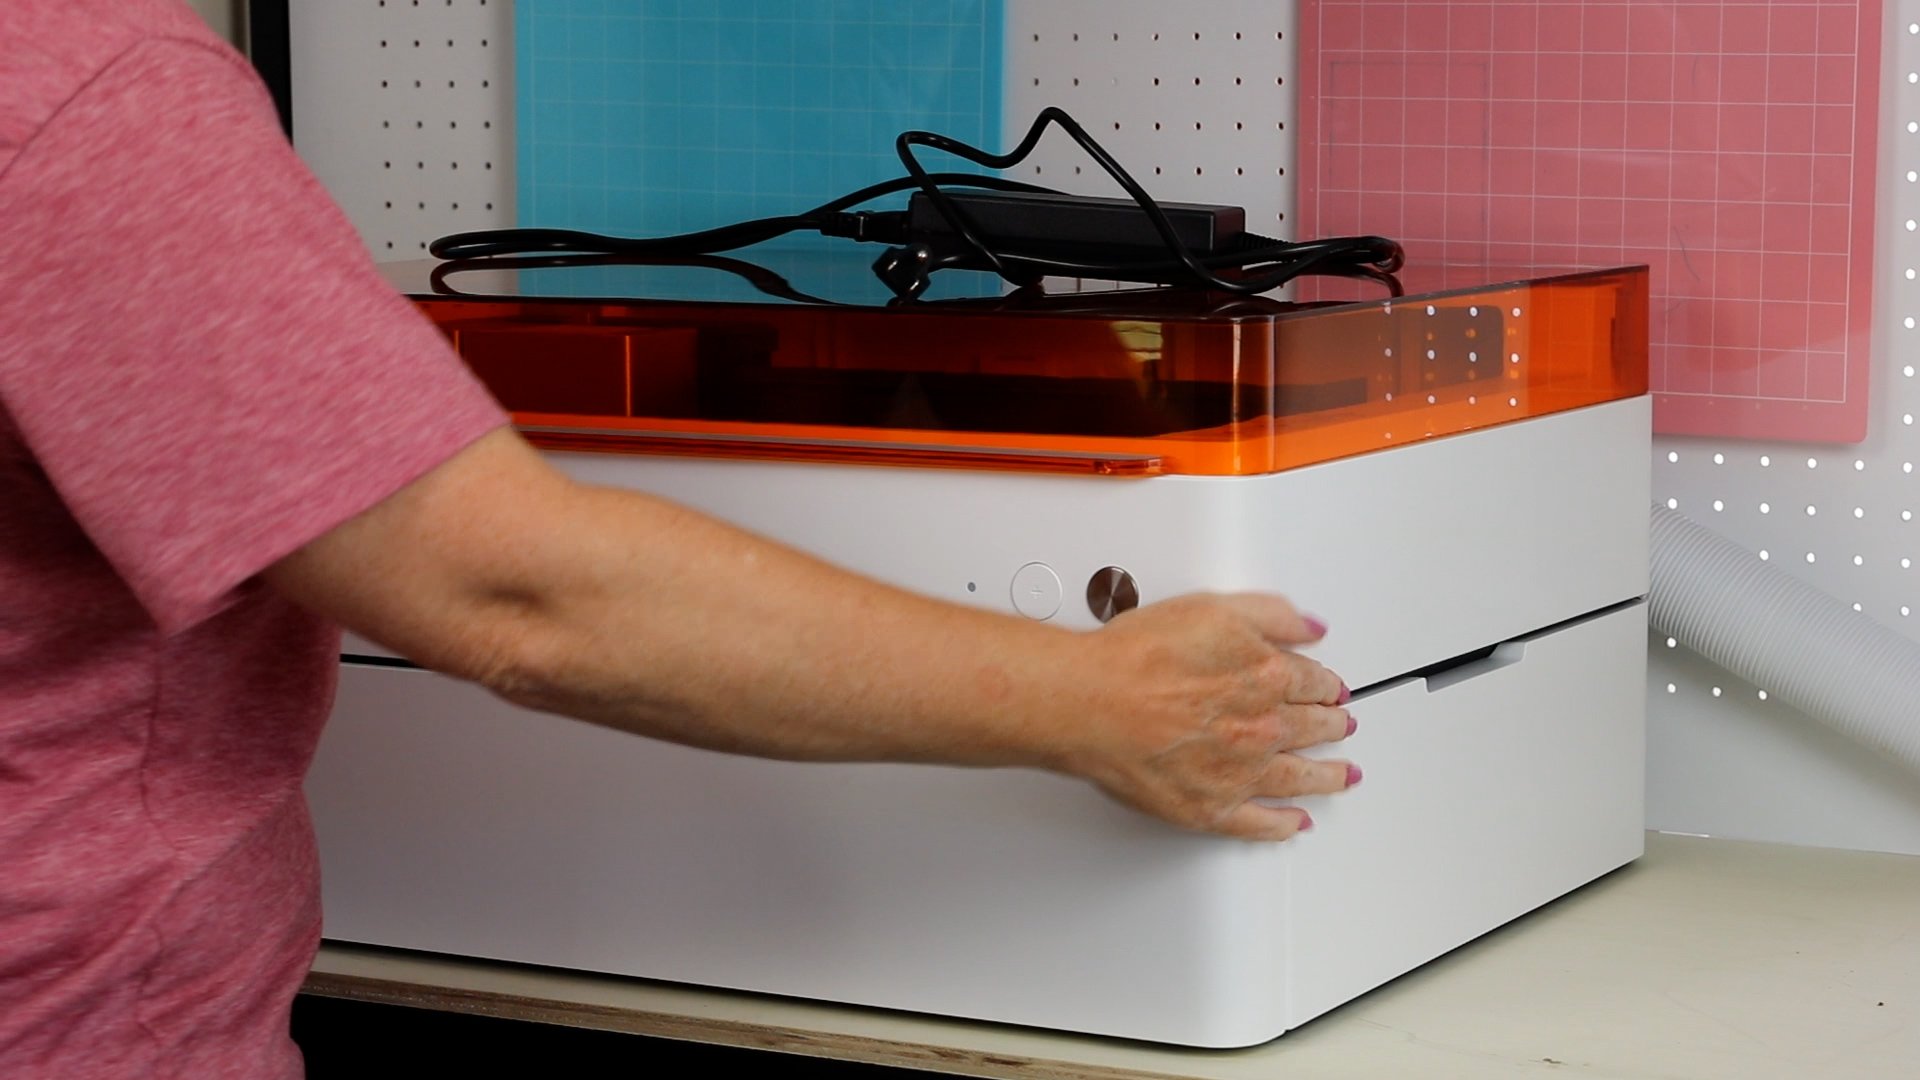
How to Set Up the M1 Ultra Laser
From the time you get your laser out of the box until you’re making your first project should be around 15 minutes. This is a very quick and easy set up so you can get crafting right away.
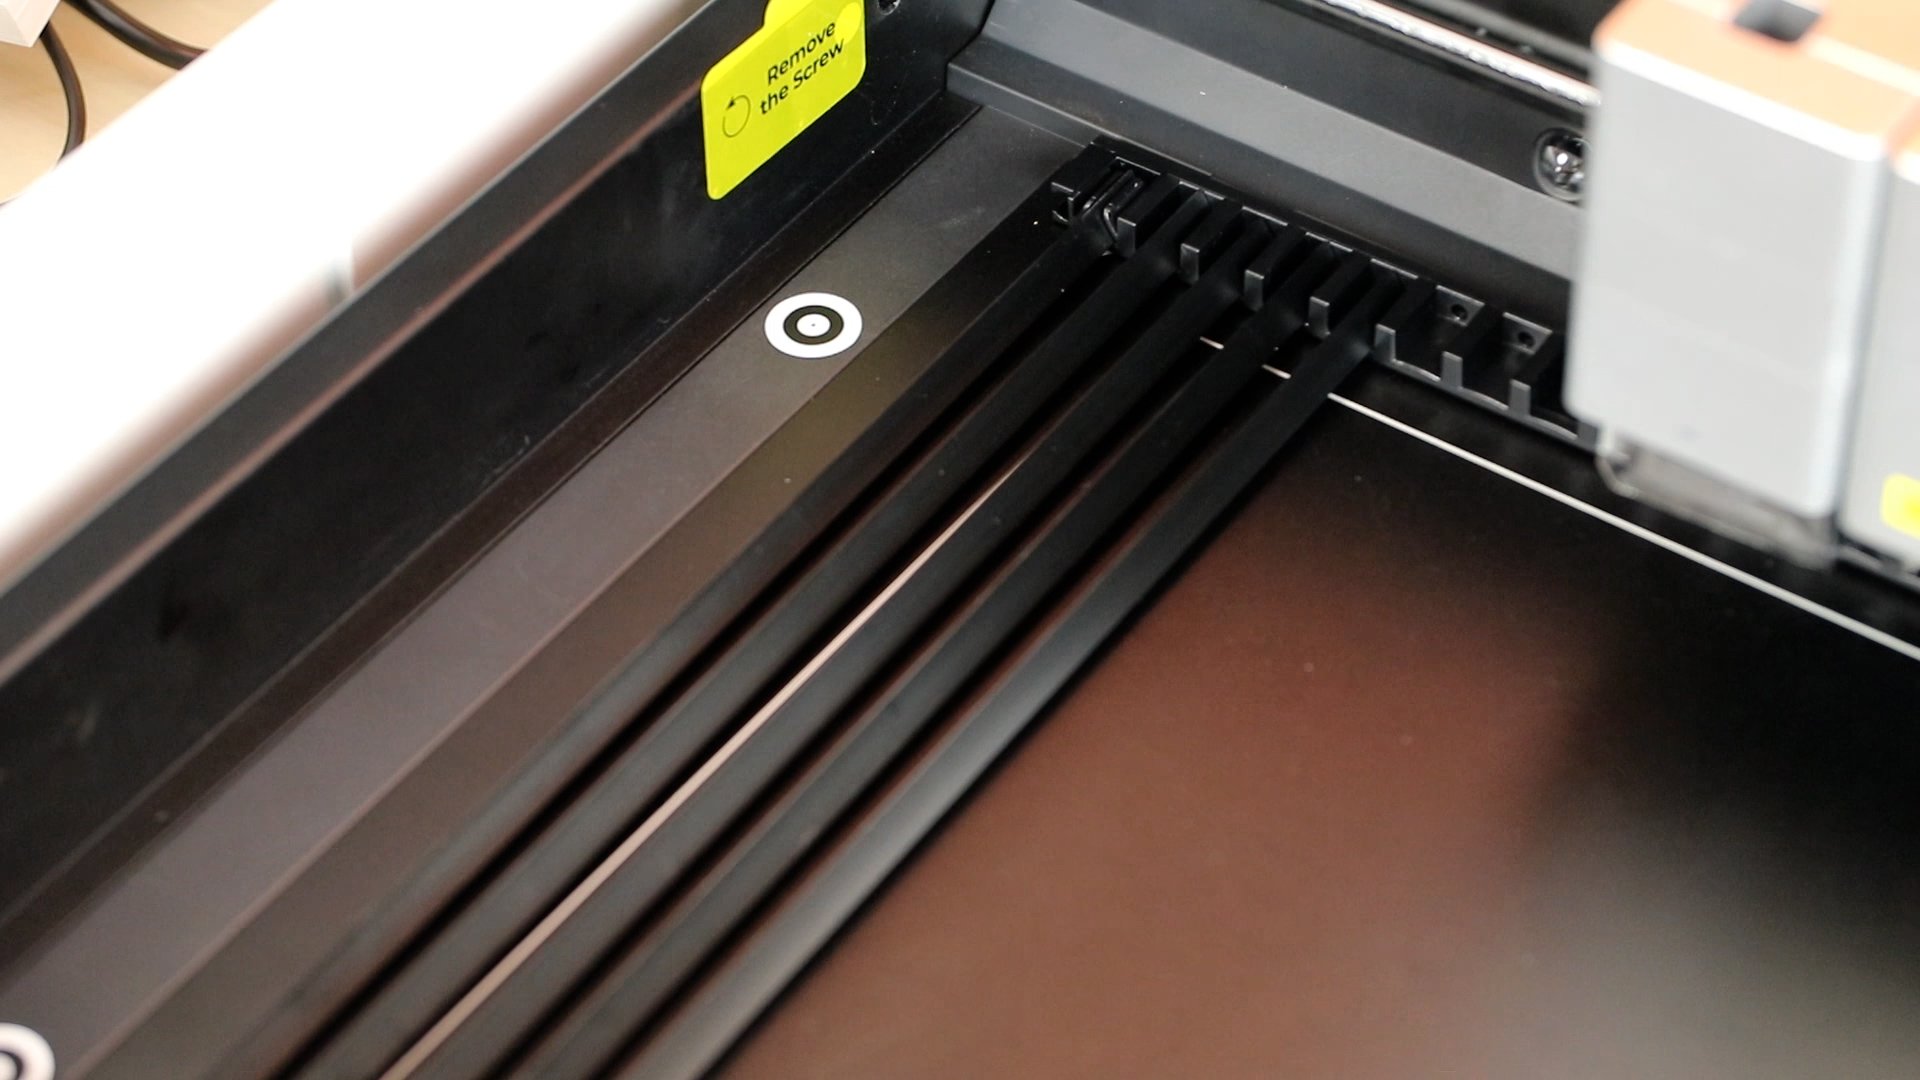
Remove all of the packaging including the three twist screws that are located to help hold everything in place during shipment.
The Quick-swap modules are very easy to install. Simply line it up with the grooves in the back and press it down until it clicks into place.
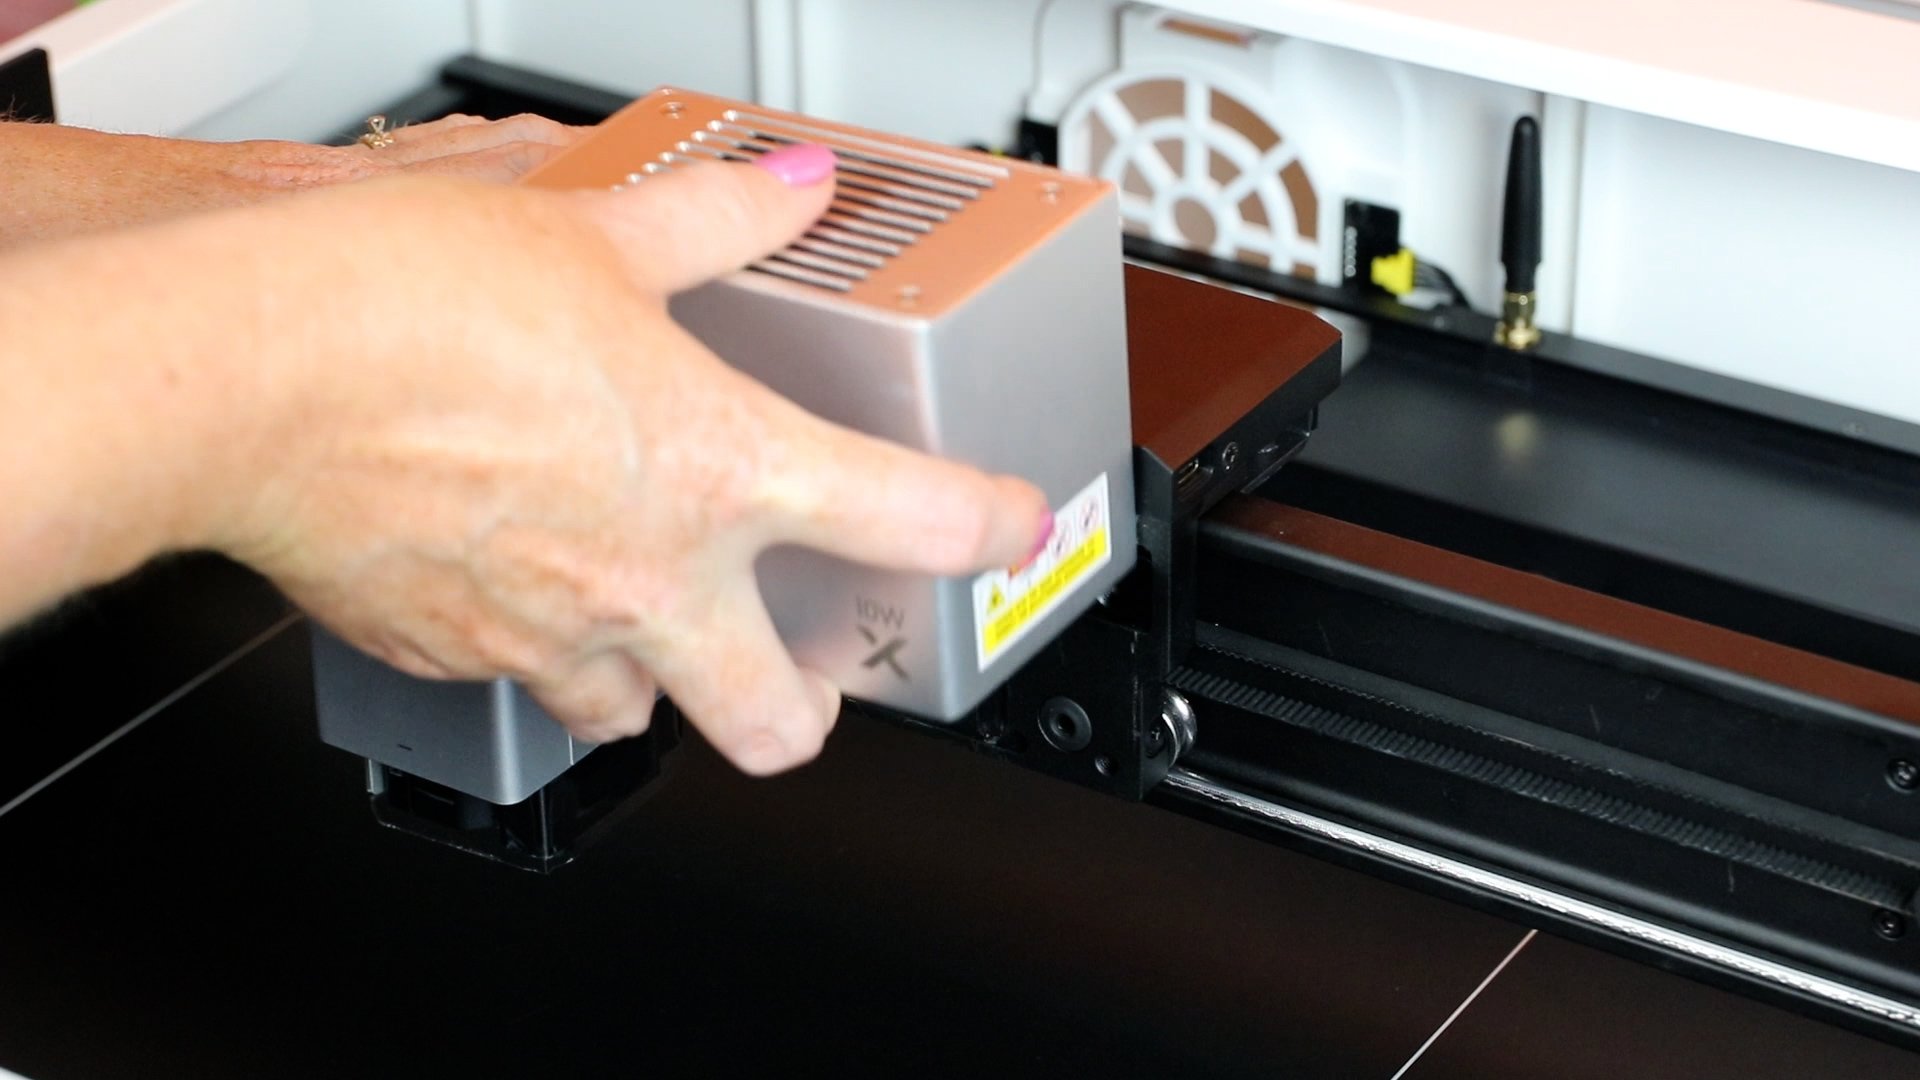
Flip the lever on the back/top to lock it into place. If you forget this step xTool Creative space will alert you that you need to lock it to continue.
Add the filter to the smoke exhaust module and snap it into place on the back. There are magnets that will pull it right in place.
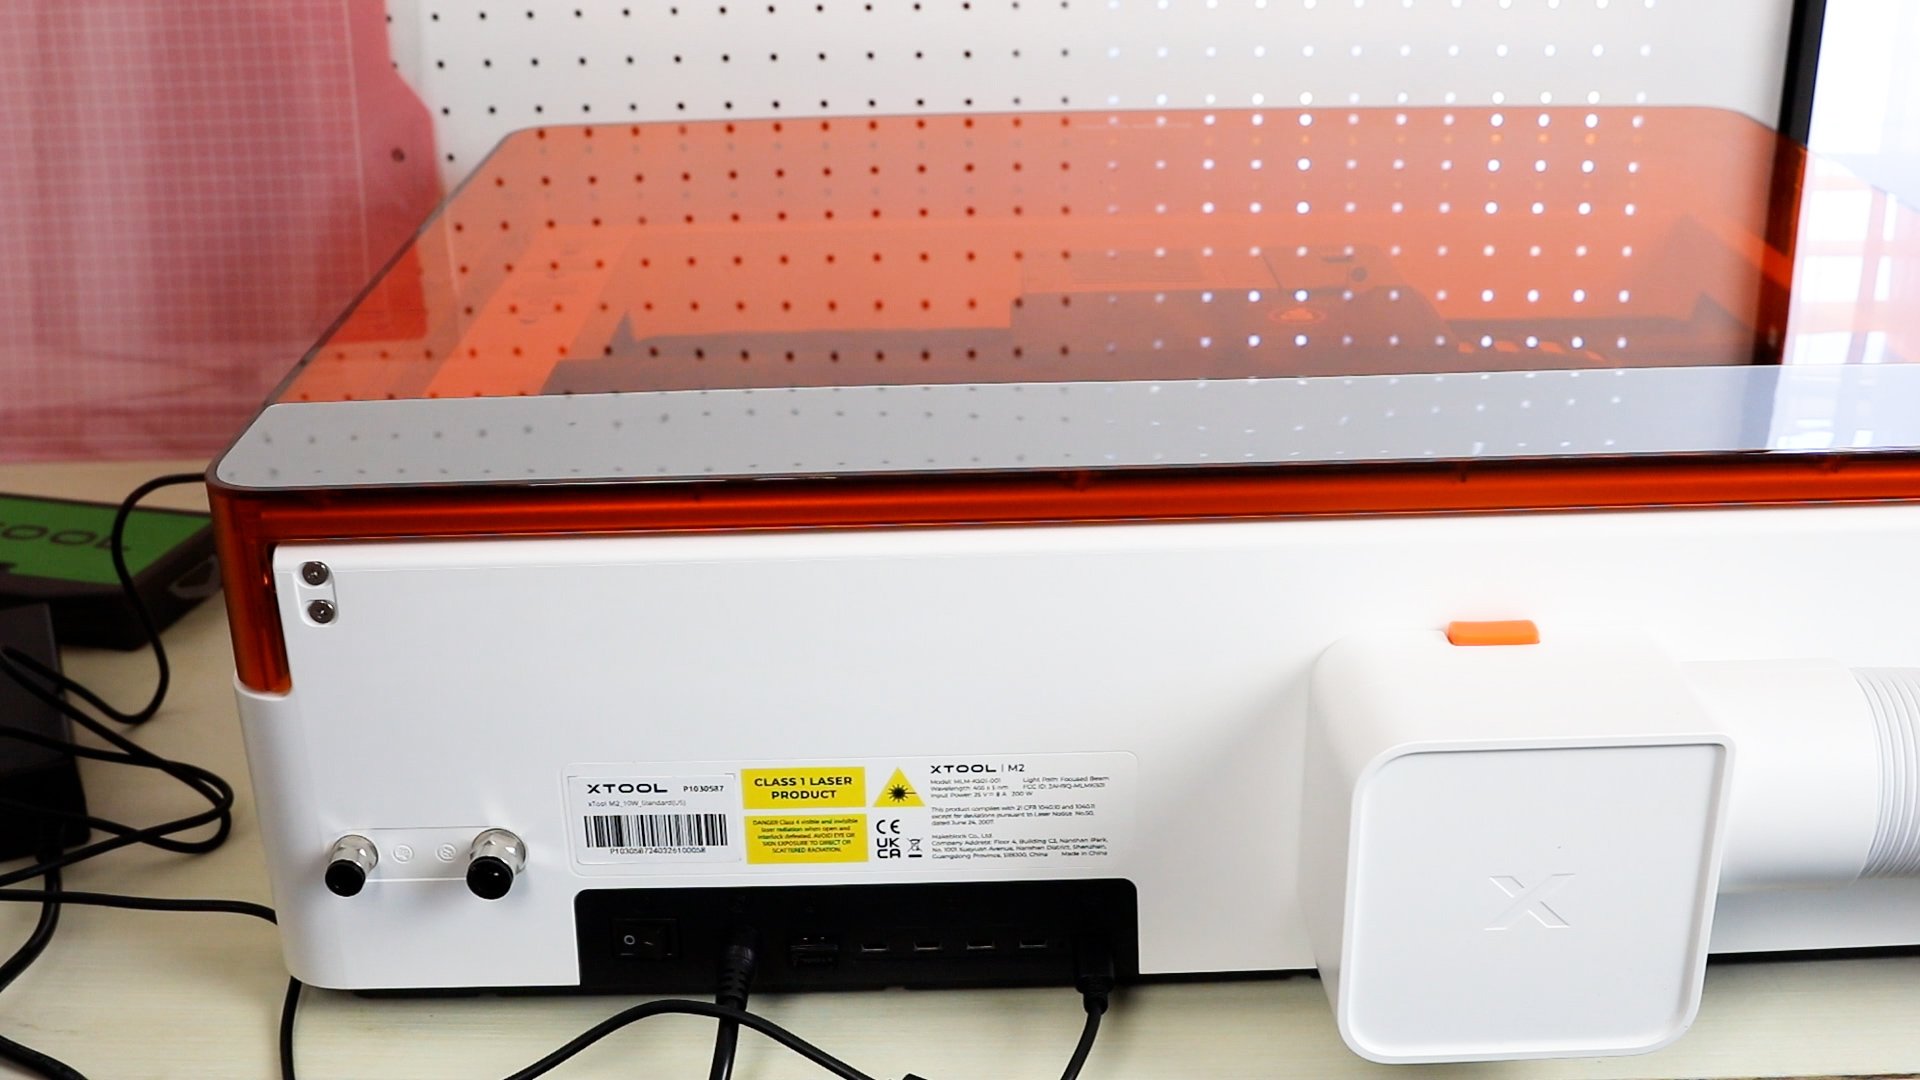
Connect the power cord and the xTool Key. You must have the xTool Key in place in order to operate the machine. It is a safety feature and the laser will not work without it.
To set up your laser, you will need to connect the laser to your computer with the USB cord. After the setup is complete, you can communicate via WIFI but you need the cord for the setup process.
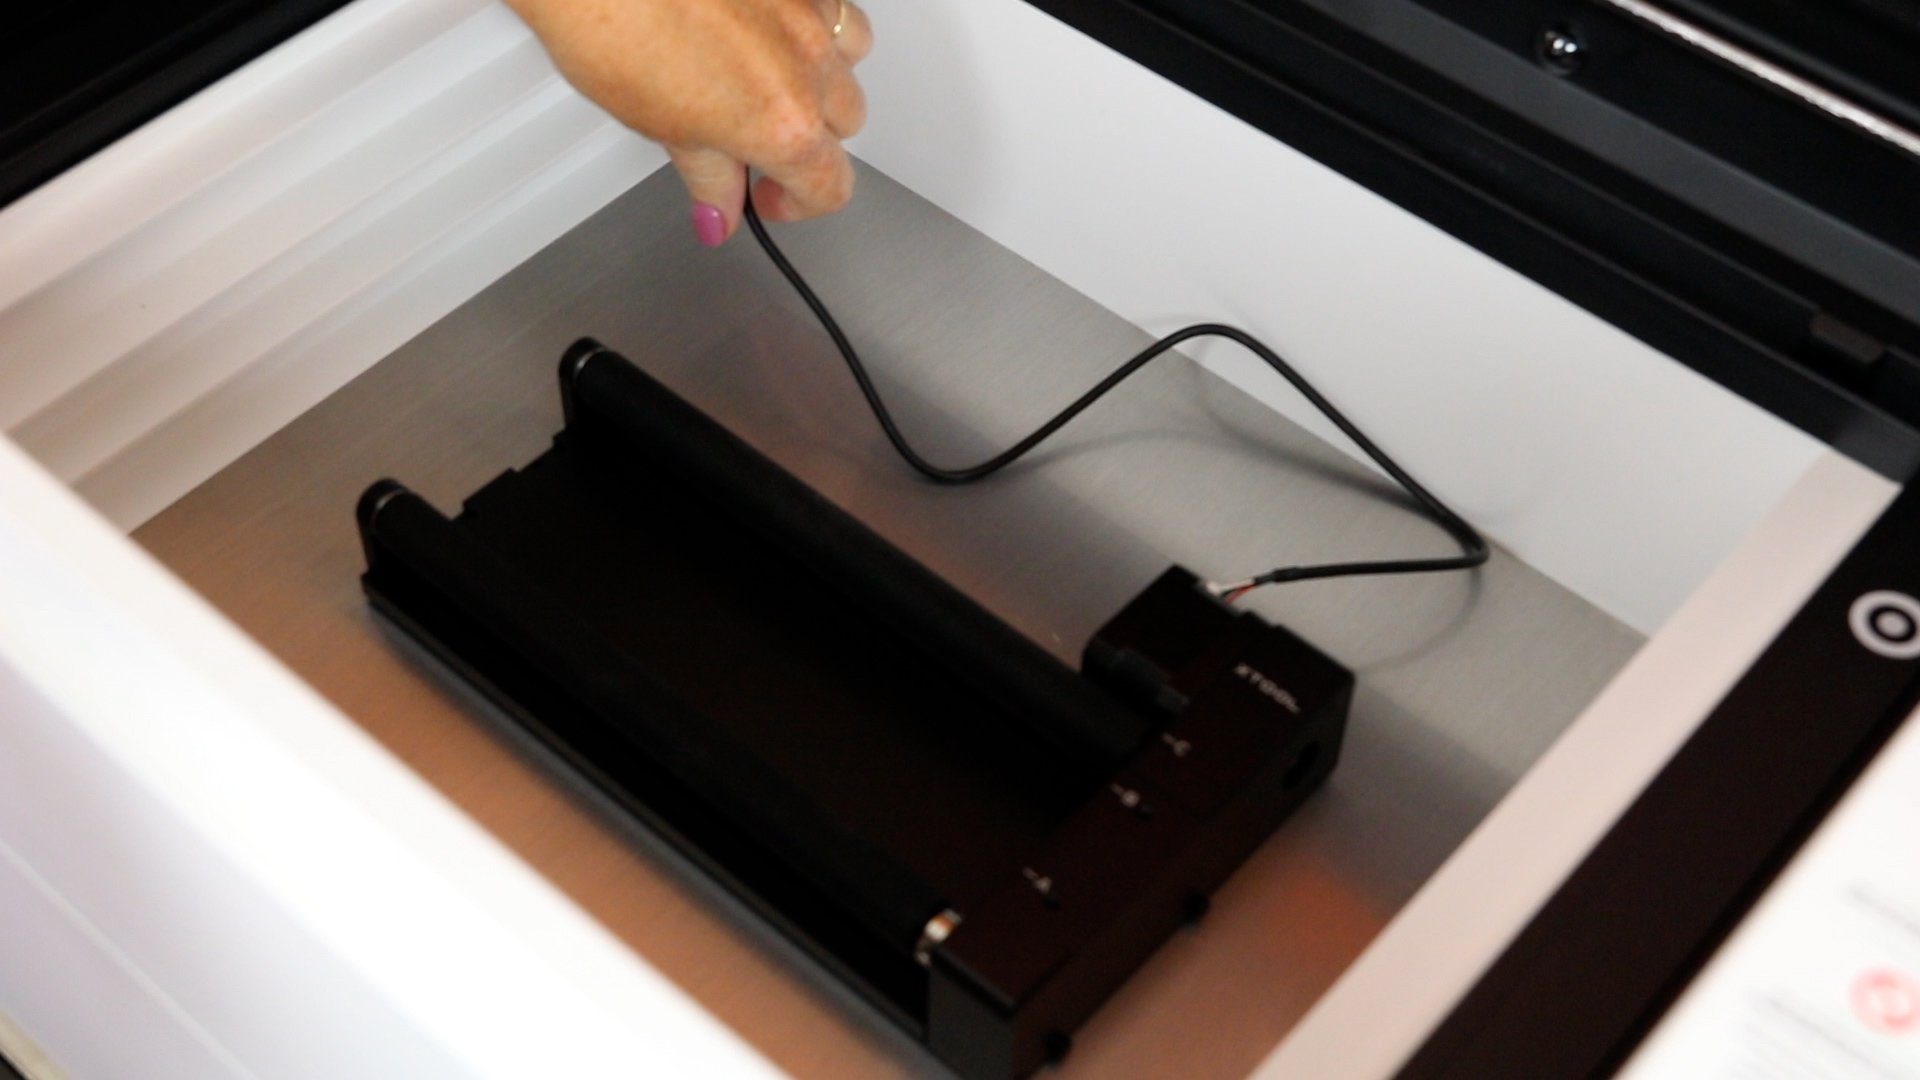
With the machine set up, we’re ready to take a look inside.
Mats vs Prisms
What module you’re using and what you’re cutting will dictate if you will use the triangular prisms or the cutting mat.
If you are using the fine point blade, knife blade, rotary blade, foil tip, pens, or printer you will use the cutting mats.
The cutting mats have an adhesive on both the front and the back and there are guides inside the laser for you use to line up the mat correctly.
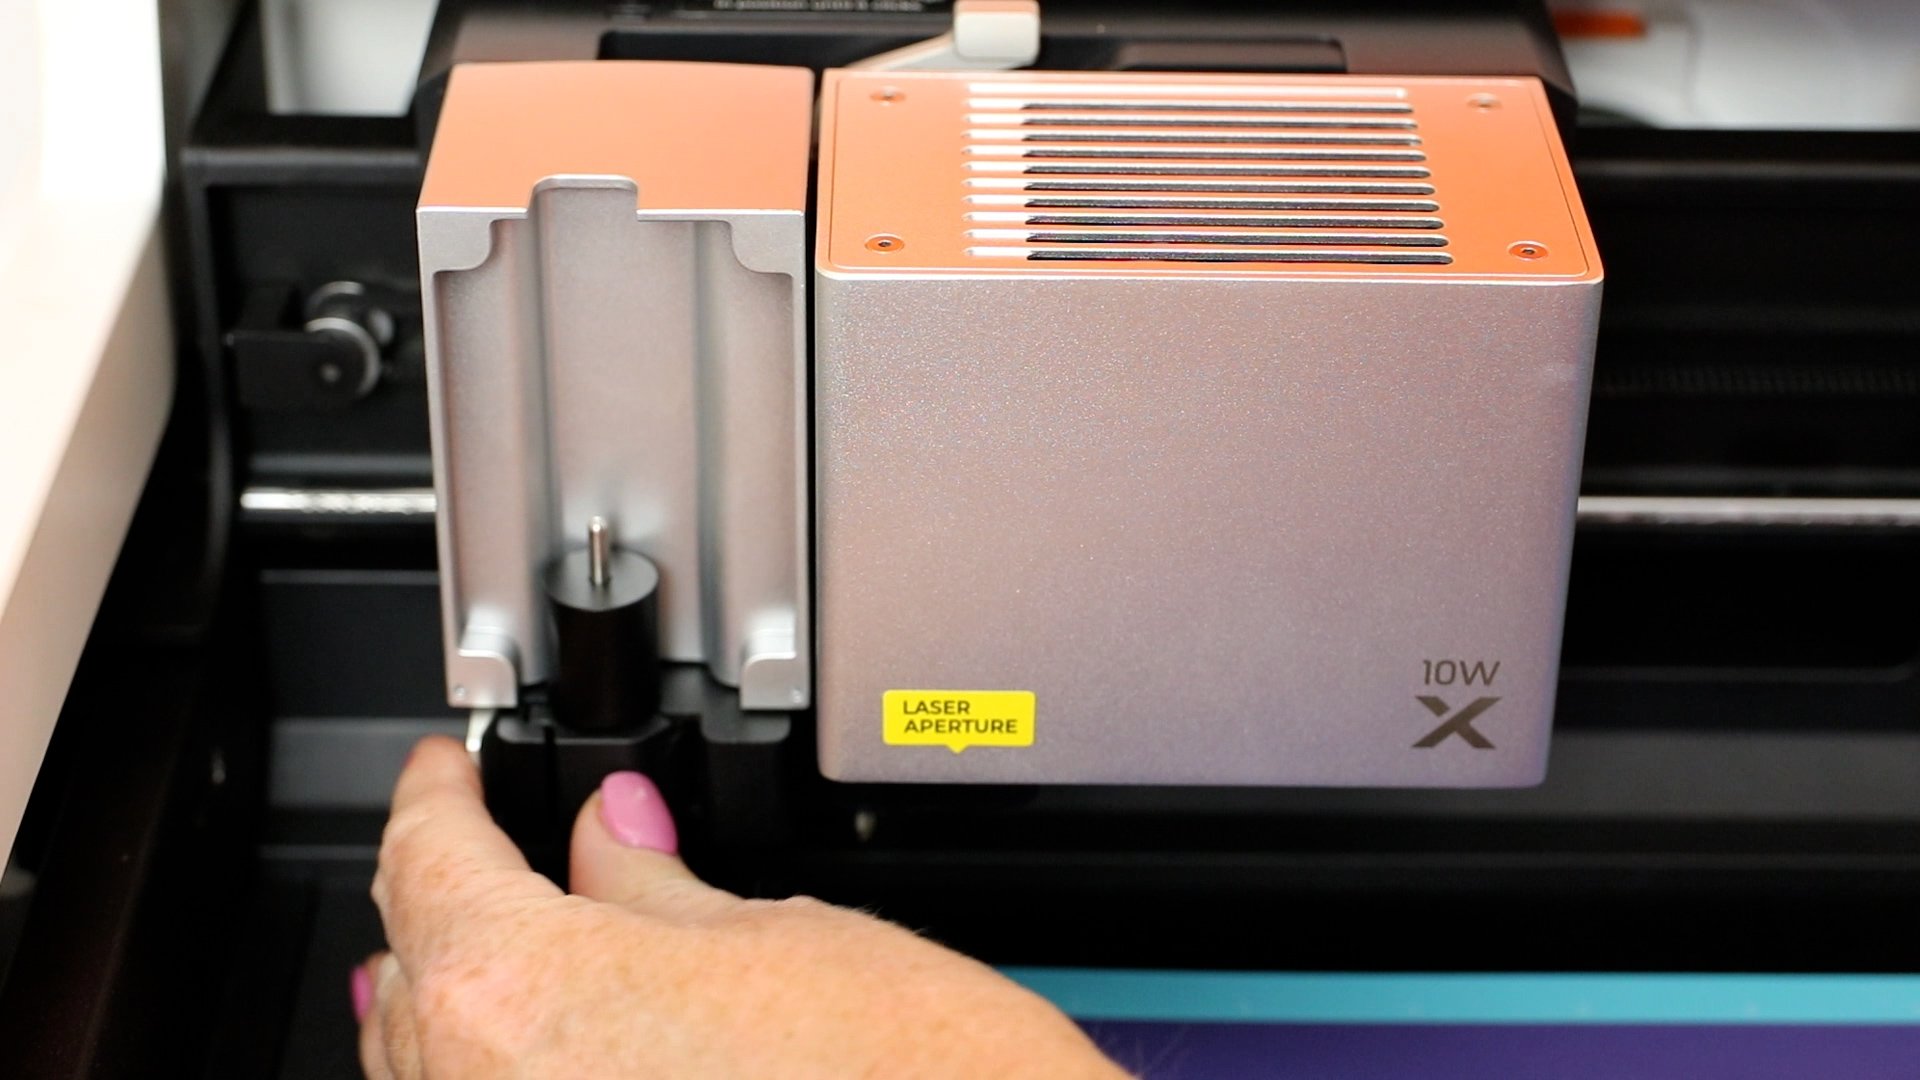
When you’re using the laser to cut, engrave, or etch you will use the triangular prisms. Add a prism to each end to make it square and then space the others out wherever you need them for the blank you’re using.
Laser Safety
If you’ve seen any of my other laser tutorials, you know I am passionate about laser safety.
- Always keep a fire extinguisher and/or a fire blanket on hand just in case you have something happen while operating your laser.
- Never leave your laser unattended. Make sure you know how long a project is going to take before starting so you know if you have enough time to finish it and stay with it the whole time.
- The xTool M1 Ultra has a tinted lid that will protect your eyes while it’s running. If someone were to open the lid the laser would stop automatically.
- Make sure you vent the hose out a window or purchase the smoke purifier separately if you can’t vent the laser outside.
- If you’re using the laser module, make sure you always use materials that are safe to cut with a laser. Laser-compatible materials must be used any time you’re using the laser module. If you’re using the printer, fine-point blade, or some of the other options, you can use materials that are not laser-safe.
You can learn more about how to safely operate a laser in my Laser Safety post.
xTool M1 Ultra Modules
There are four quick-swap modules that you can use with this laser cutter.
- The basic module comes with the laser. You can use pens with this module (8 come with the machine). You will need to use the pen adapter when you use pens and that also comes with the machine. With the basic module, you can also use the fine-point blade. This blade will cut very thin materials up to 1.5 millimeters thick.
- The laser module comes with the machine as well. I have the 10-watt laser and I can cut up to 8 millimeters thick. If you want more power you can also get a 20-watt laser.
- There is a multifunction module that you use for other blades like the foil tool, rotary blade, or knife blade. You have a maximum thickness of 2.5 millimeters with the multifunction module.
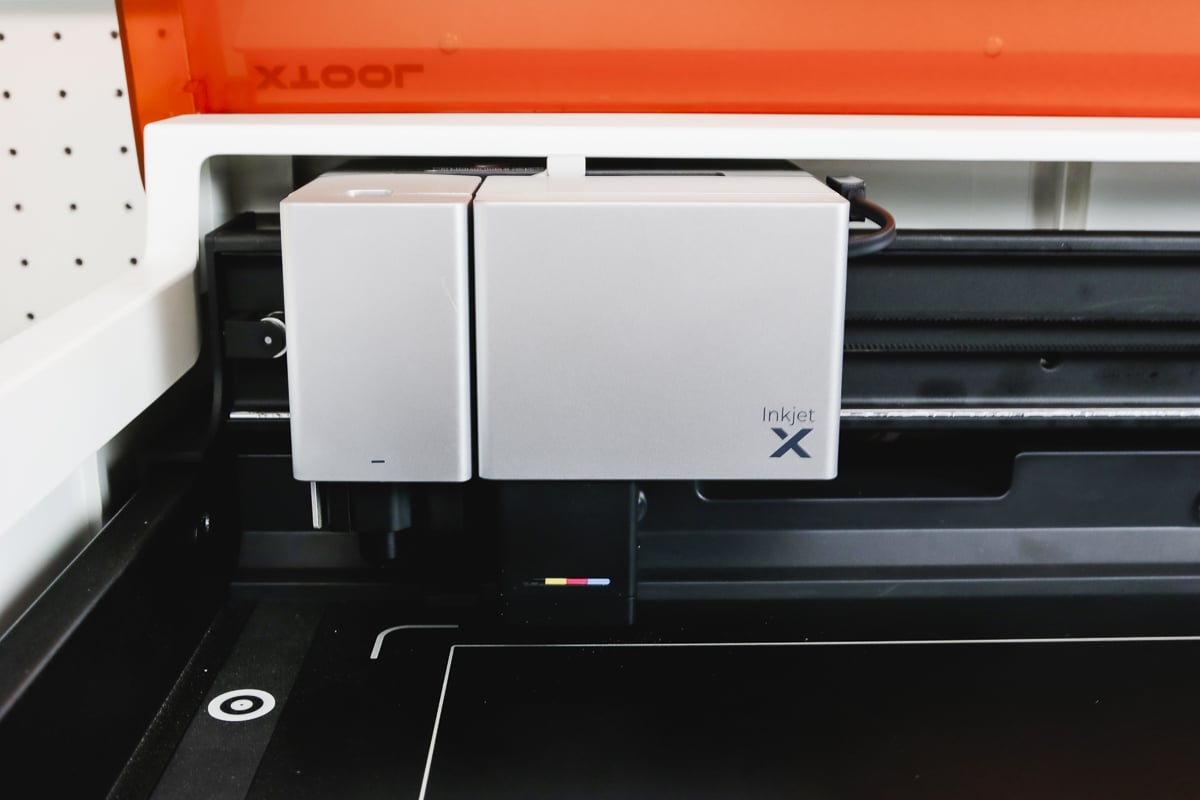
- The last module is the inkjet module. You can do inkjet printing right inside the xTool M1 Ultra laser. This module prints in CMY onto porous surfaces. This is not a water-resistant ink so you don’t want to use it on something that will get wet after printing.
The basic module and a laser module come with the xTool M1 Ultra. There are other modules you can purchase separately to use with the laser.
xTool M1 Ultra Blades
There are a variety of blades that you can use with this craft laser.
- Fine point blade can be used to cut thin materials like vinyl and cardstock.
- Foil tool is used to apply foil to a surface.
- Rotary blade is great for cutting fabric.
- Knife blade can be used to cut thicker materials that may not safe for laser cutting.
The fine-point blade comes with the laser but you would need to purchase the others separately.

The first thing we’re going to do is cut and engrave wood with the laser.
Step 1: Add design to xTool Creative Space
The project setup process is the same as it would be for other xTool lasers. Open Creative Space, click New Project and make sure the M1 Ultra is connected via WiFi.
Upload the design by clicking on File and Import Image. I am importing an SVG file and then, with the design on the canvas I can click ungroup and select the pieces I want to cut and engrave and hide the other pieces.
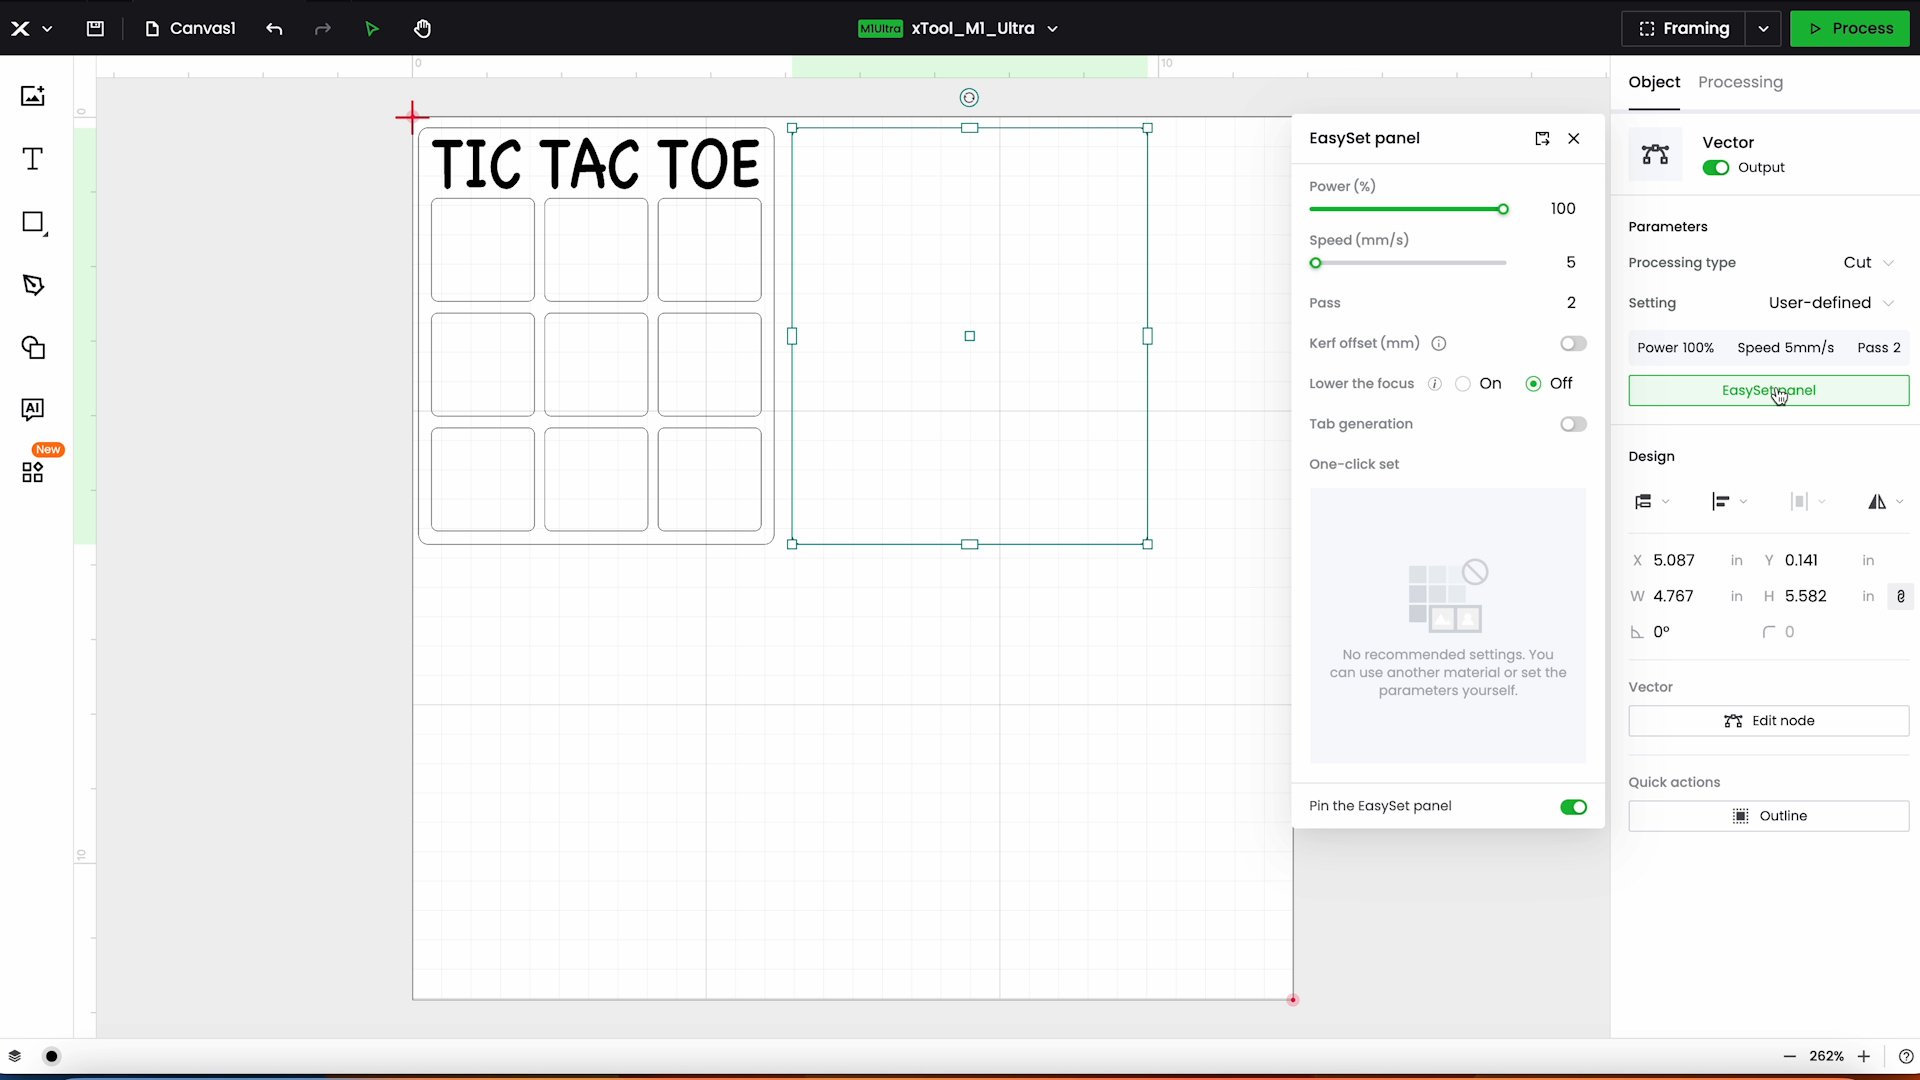
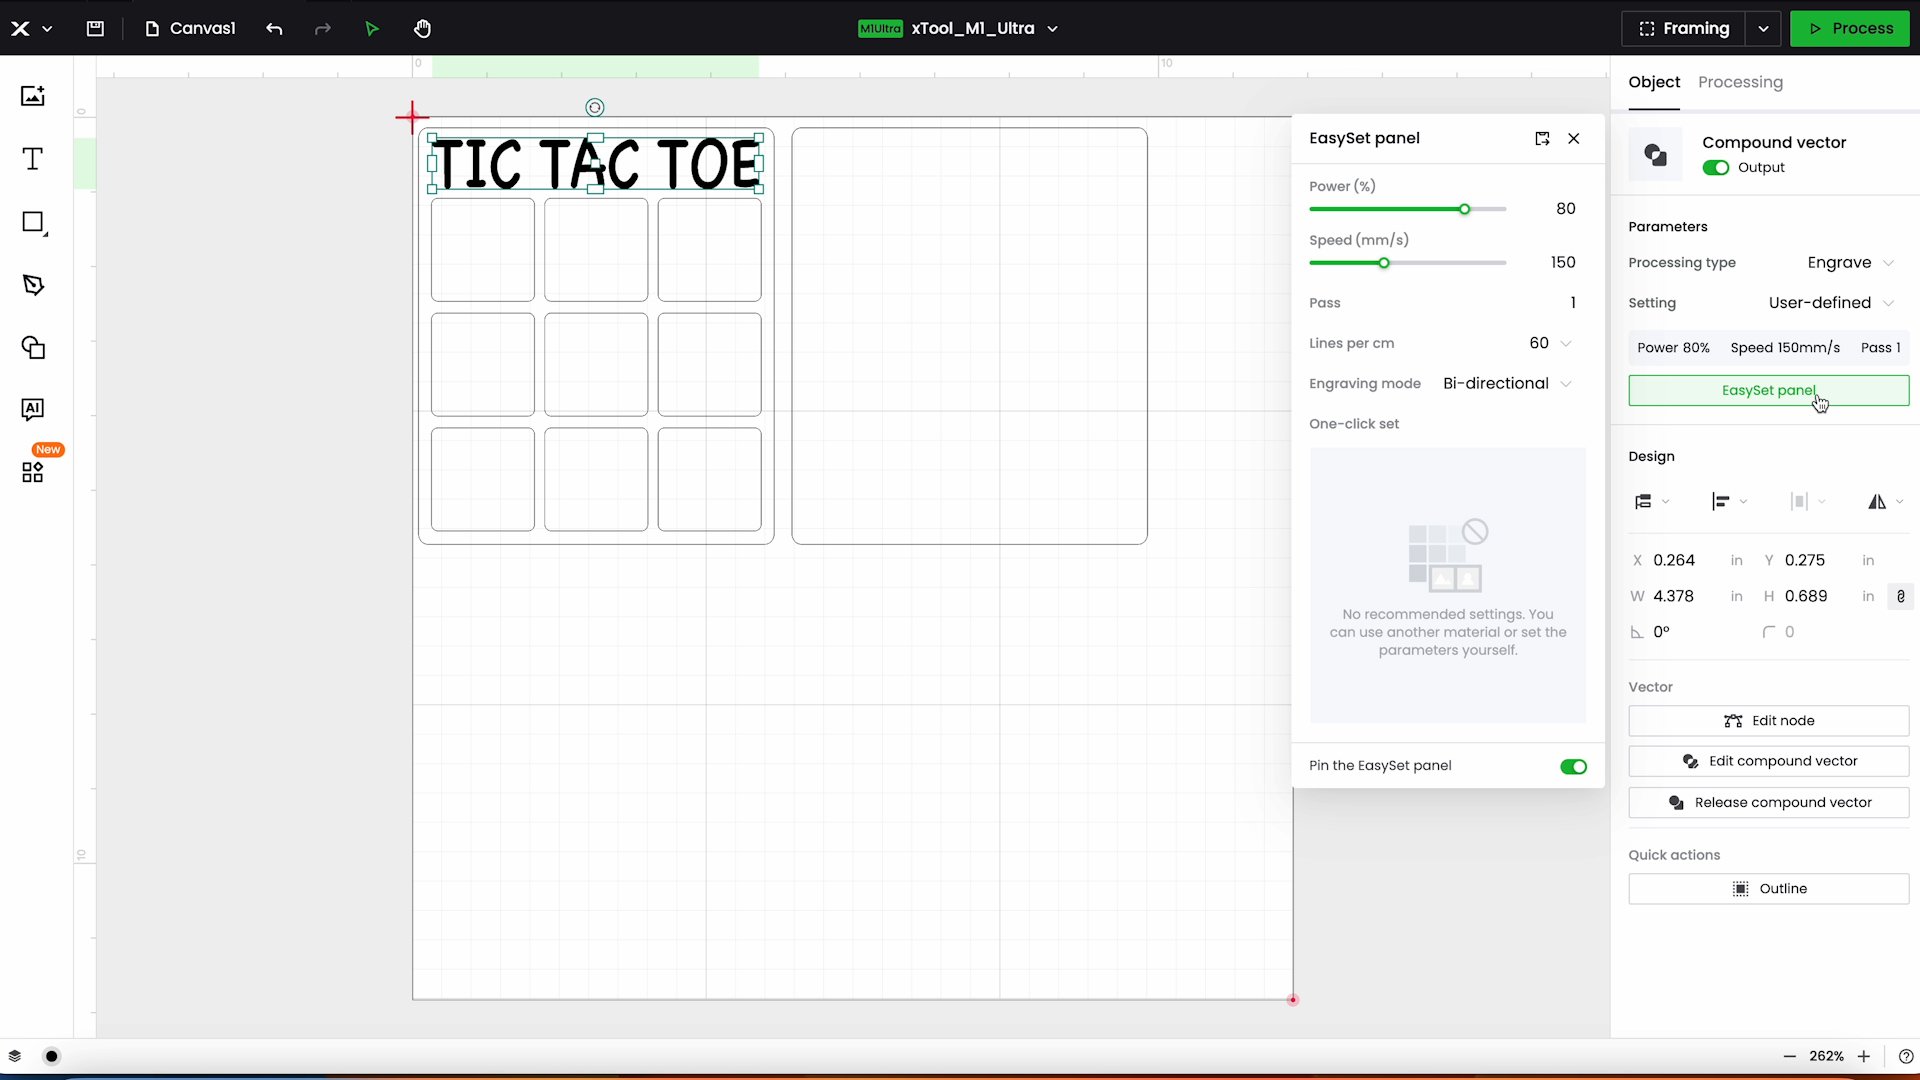
Step 2: Set cutting paramenters
Set the parameters in the Easy Set Panel. For cutting I used a power of 100%, a speed of five millimeters per second, and added two passes.
For the engraving, I used 80% power, 150 millimeters per second for speed, with one pass, and 60 lines per centimeter.
You can easily change these settings within the Easy Set Panel or choose a known material type.
Step 3: Add material to machine and measure
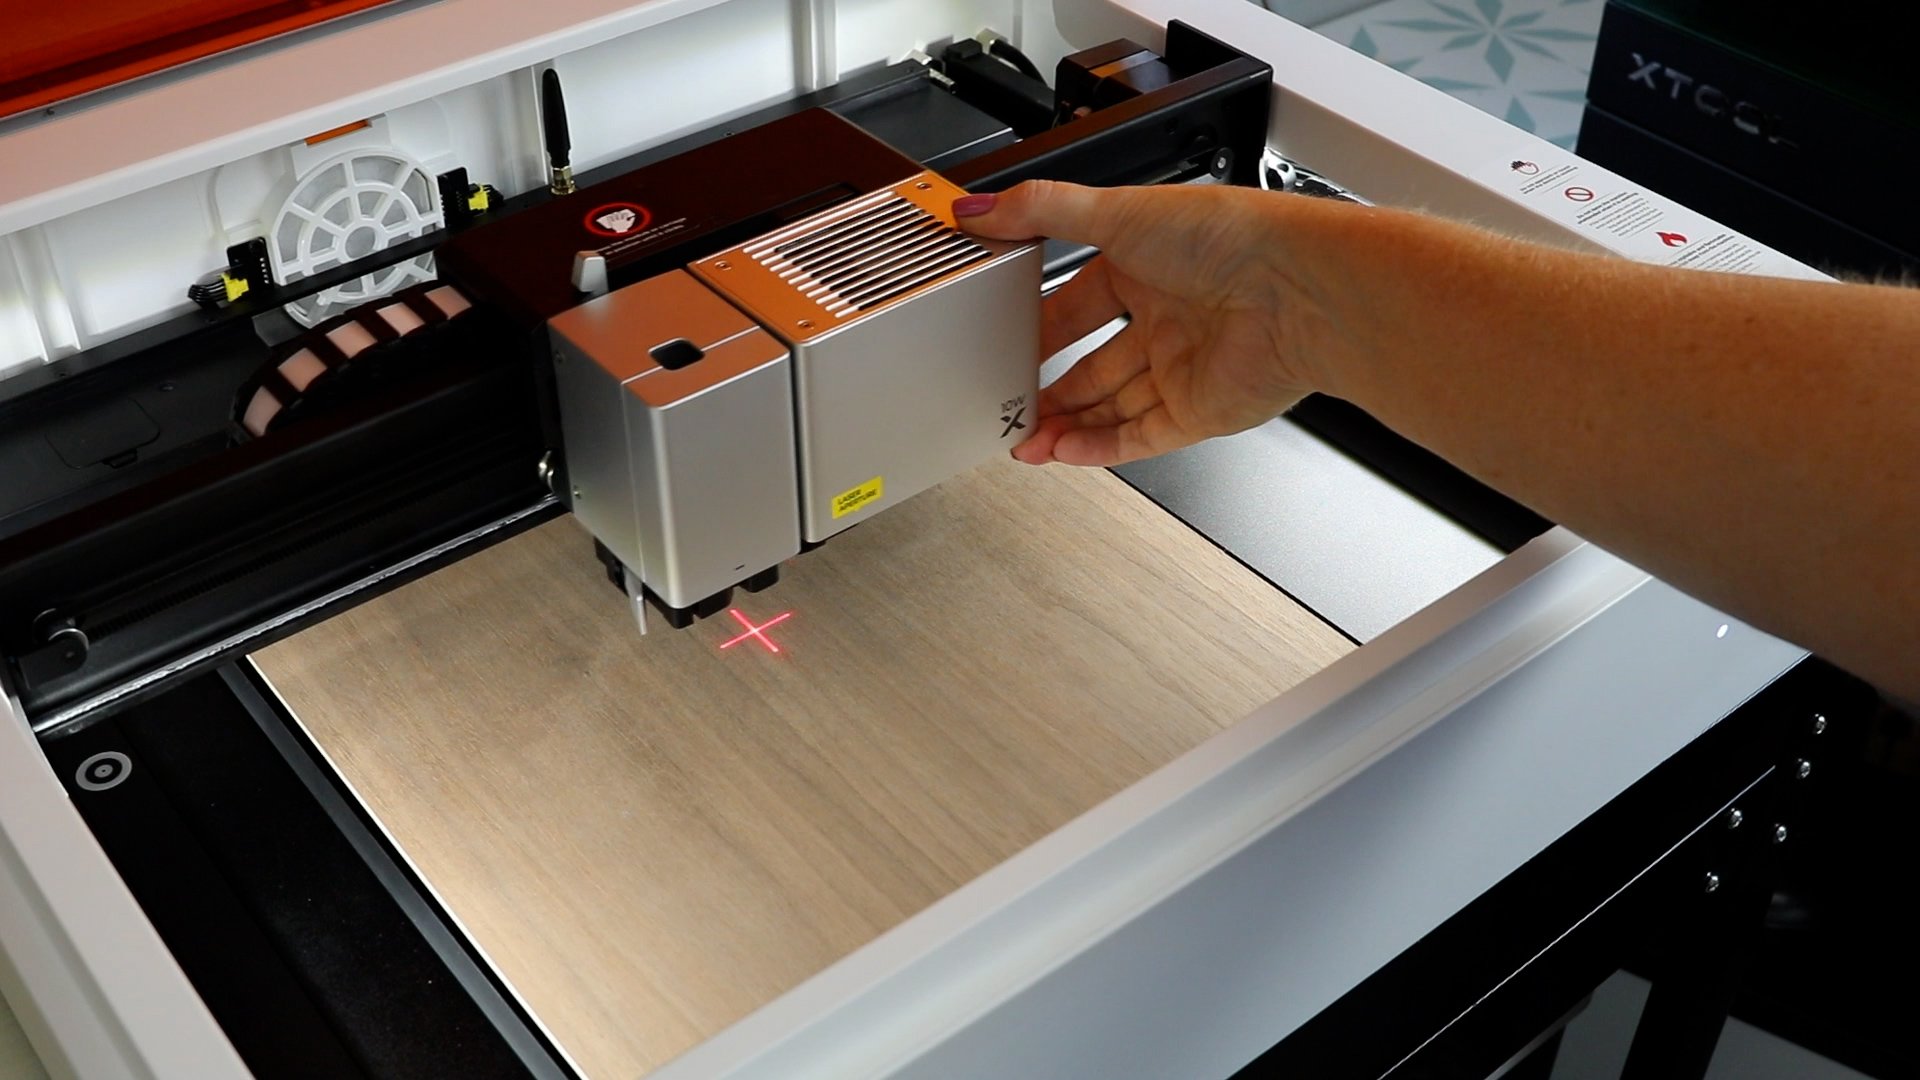
I am using the triangular prisms and the triangular prism holder to hold the material. Open the machine and place the material inside on top of the prism holder.
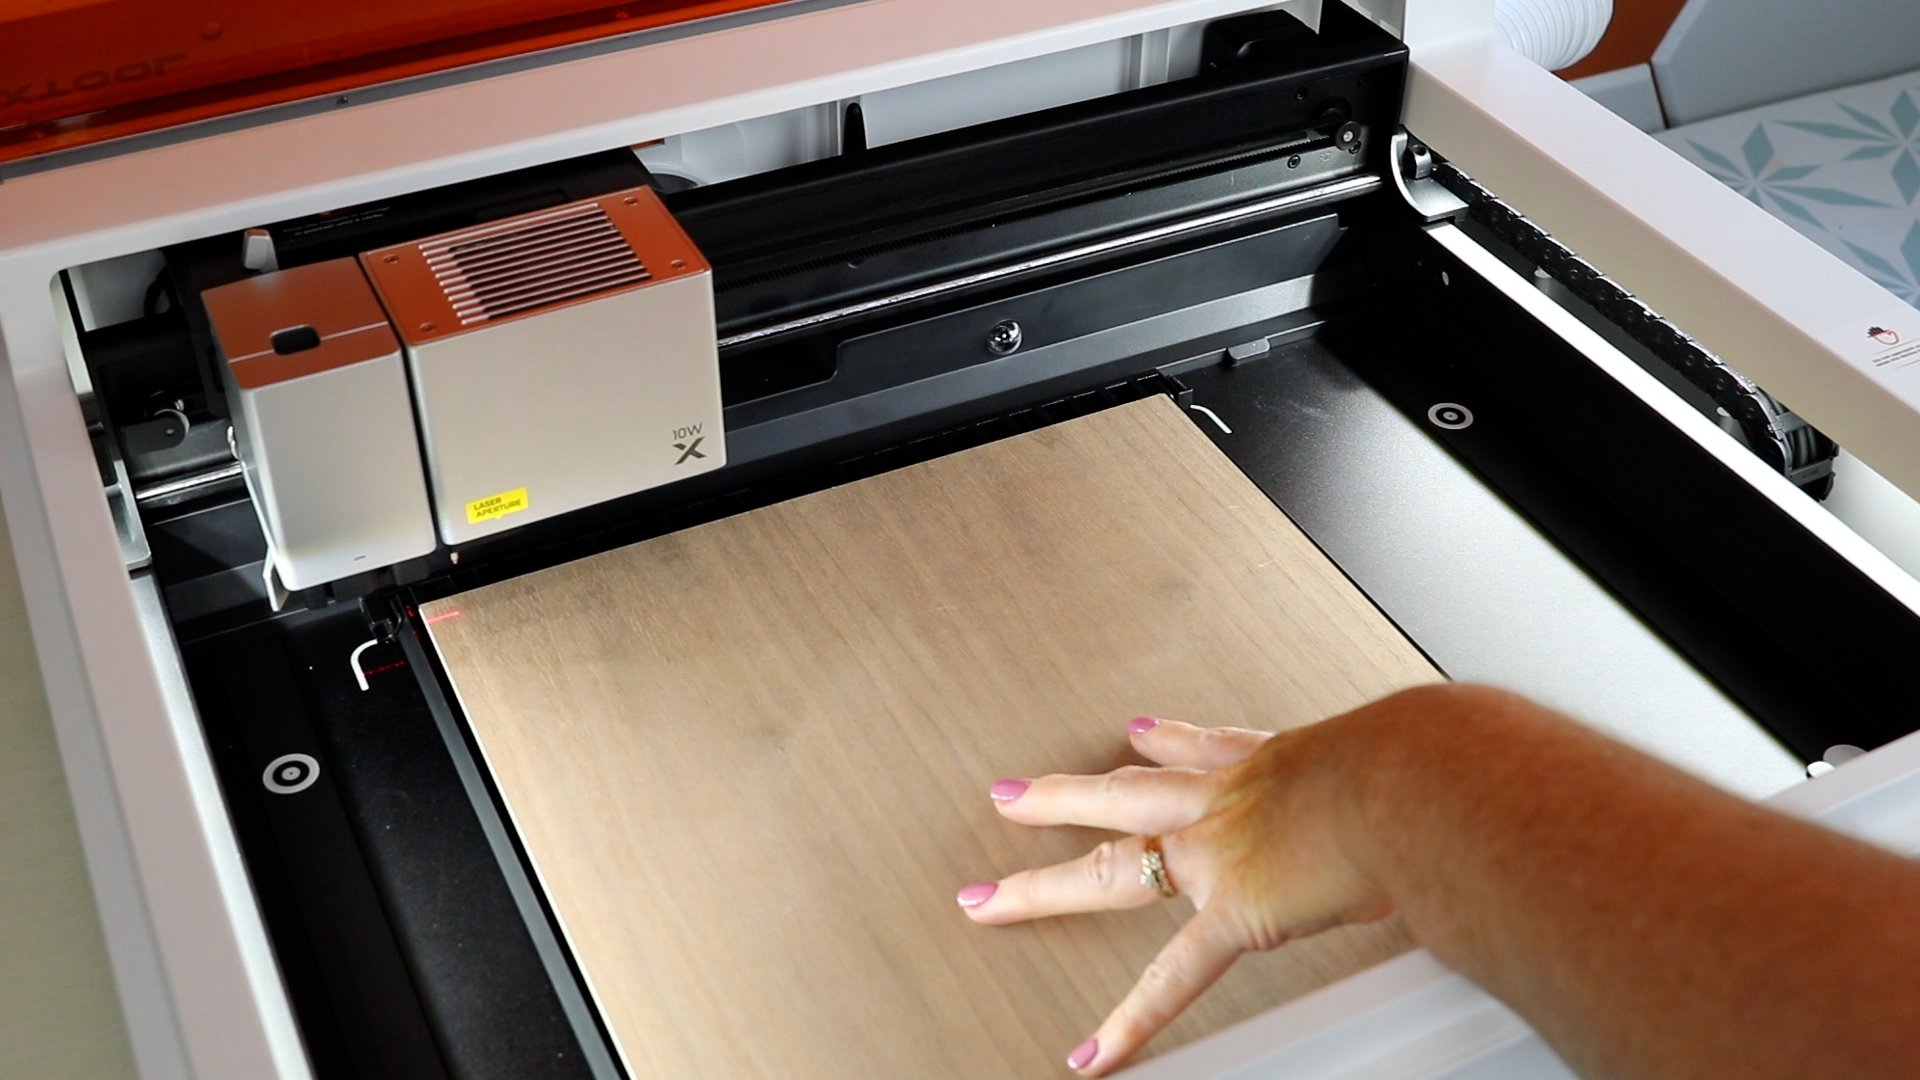
Move the laser head to the center of the material and select Auto Measure within xTool Creative Space. This will auto-measure the thickness of your material.
Step 4: Mark material location
Next, we need to mark the processing area. Select Mark, click Rectangle, and then click Start Marking. Move the laser head by hand to the corner, click the button on the front of the xTool to mark the corner and then move it to another corner and hit the button again to mark the second point.
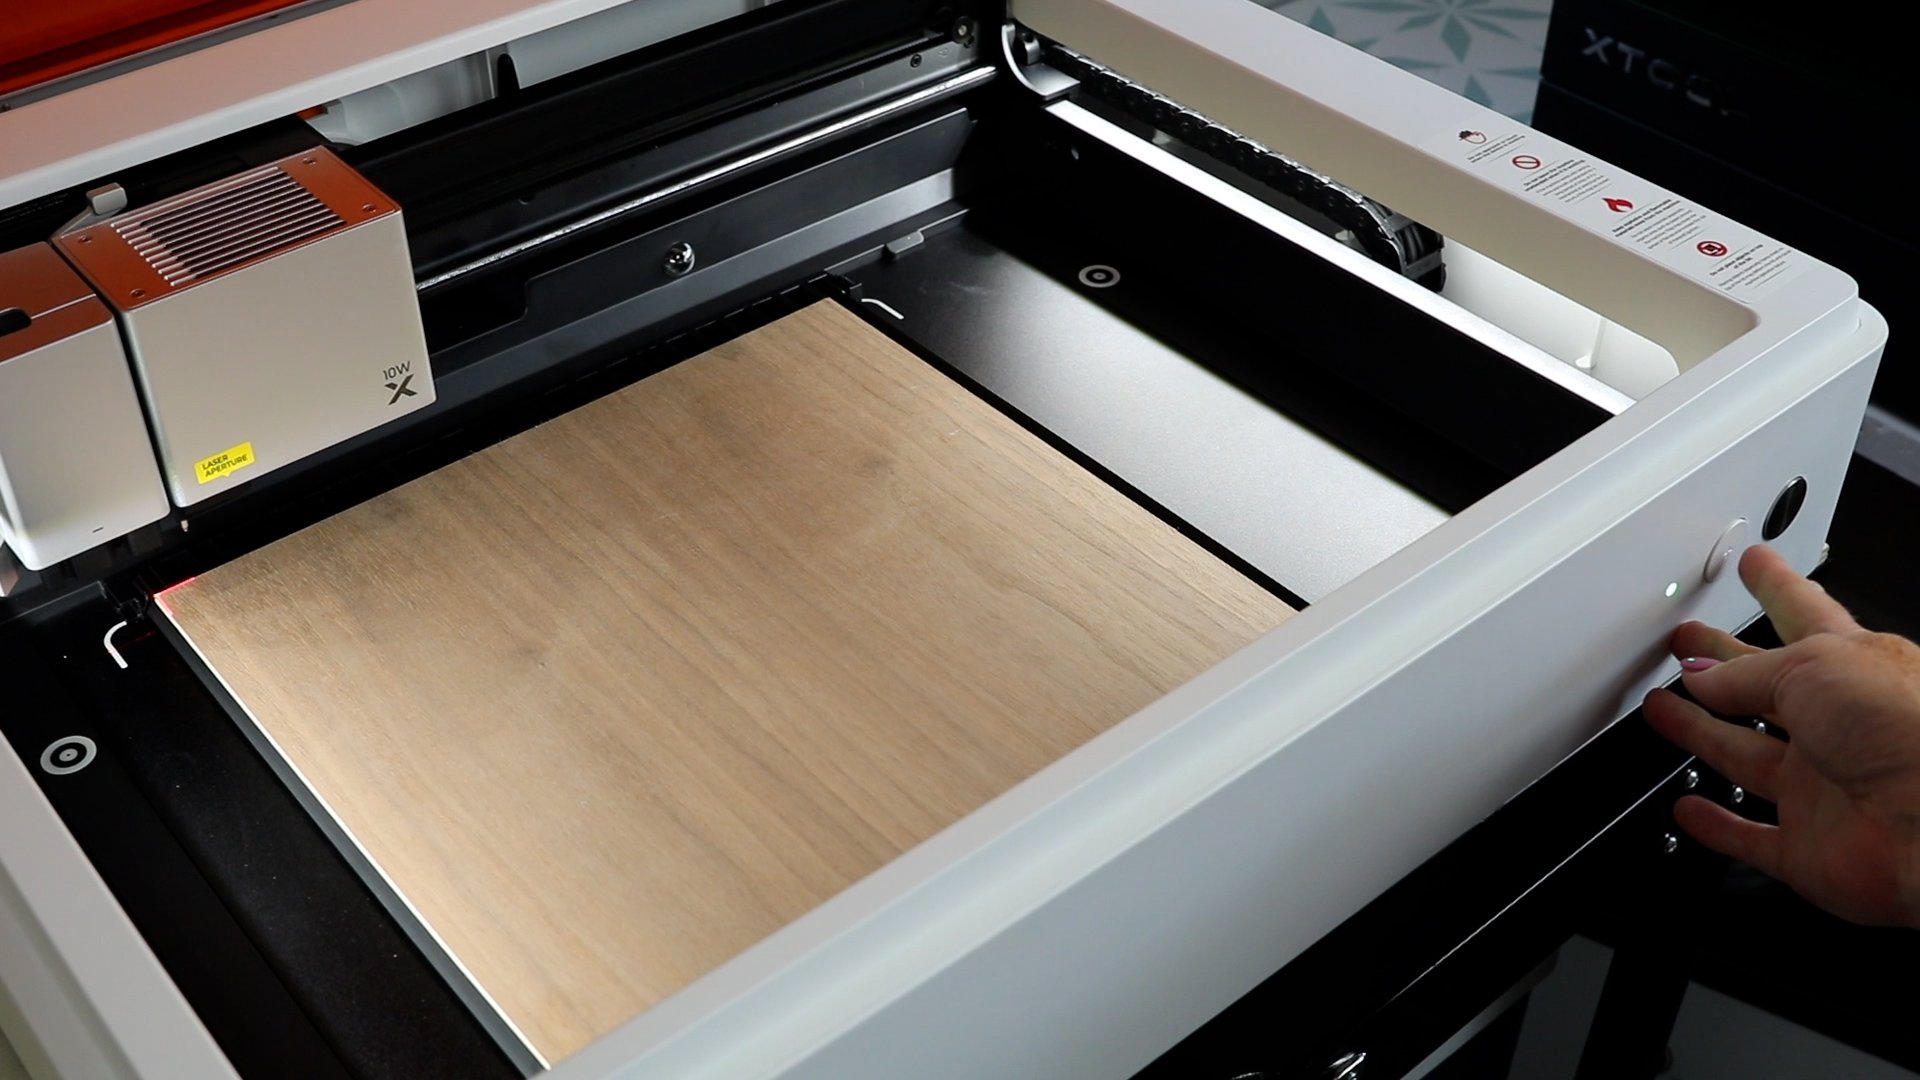
Select End Marking and then click Done. Now you can see the material on the screen and the red crosshairs will show you exactly where the laser head is.
Step 5: Cut and engrave design
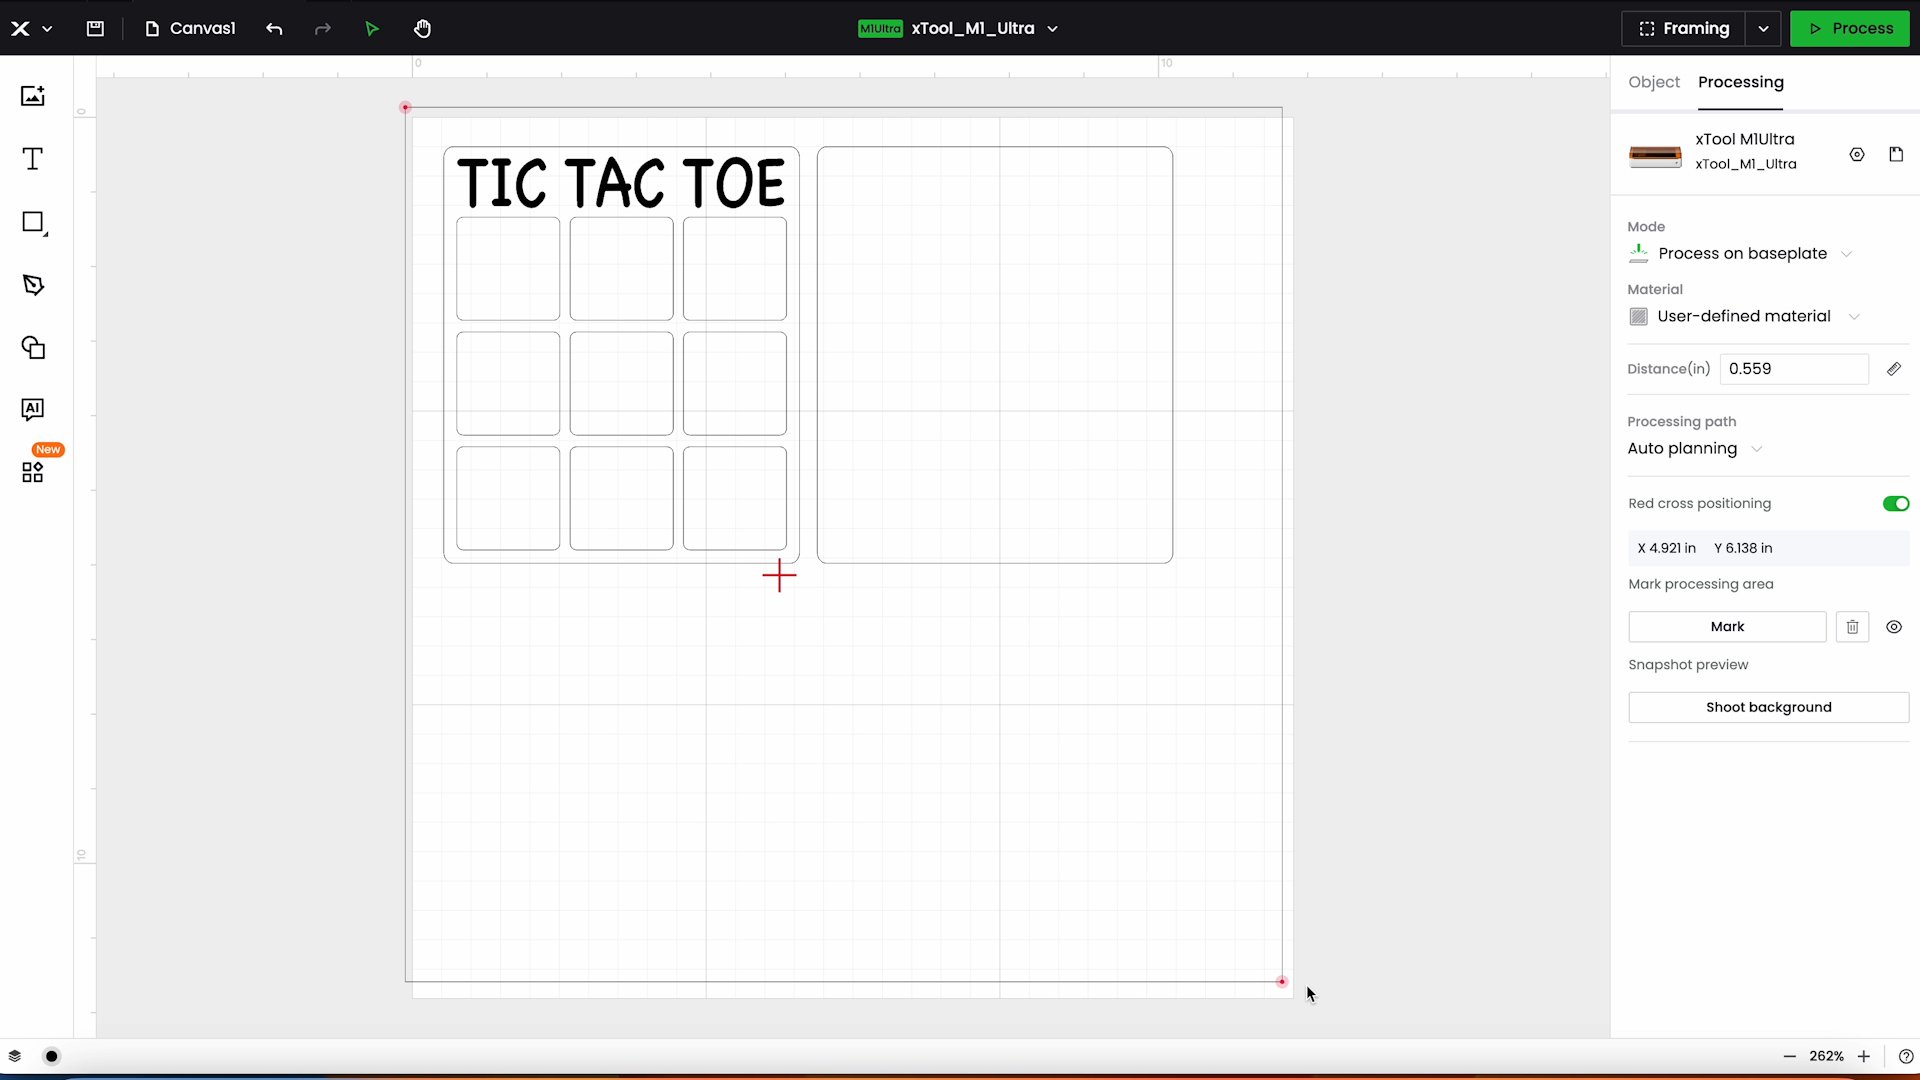
Select the design on the canvas and move it where you want it on the material and then click Process. On the screen, I can see that my laser module is installed and how long it will take to cut the design. This project says it will take 9 minutes and 50 seconds to cut and engrave both pieces.
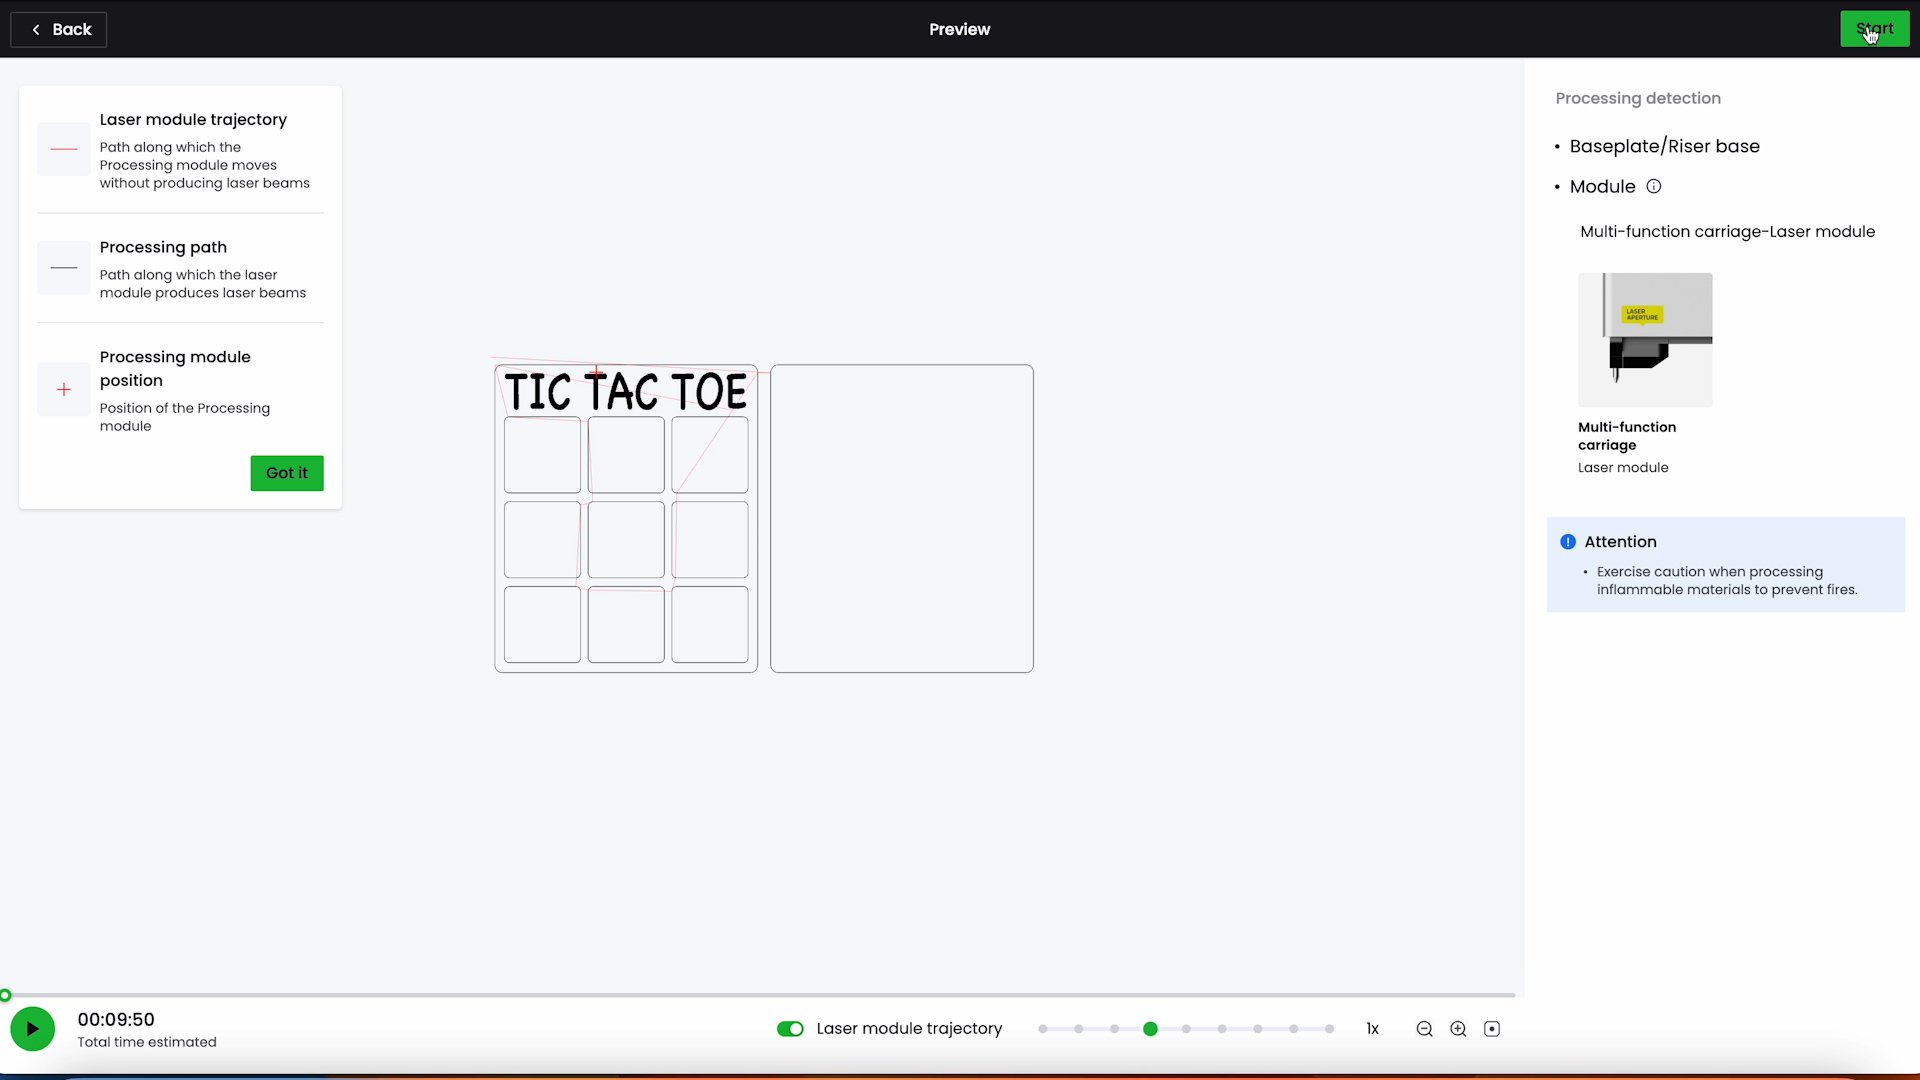
Click Start and then press the button on the front of the machine and it will start the cutting process.
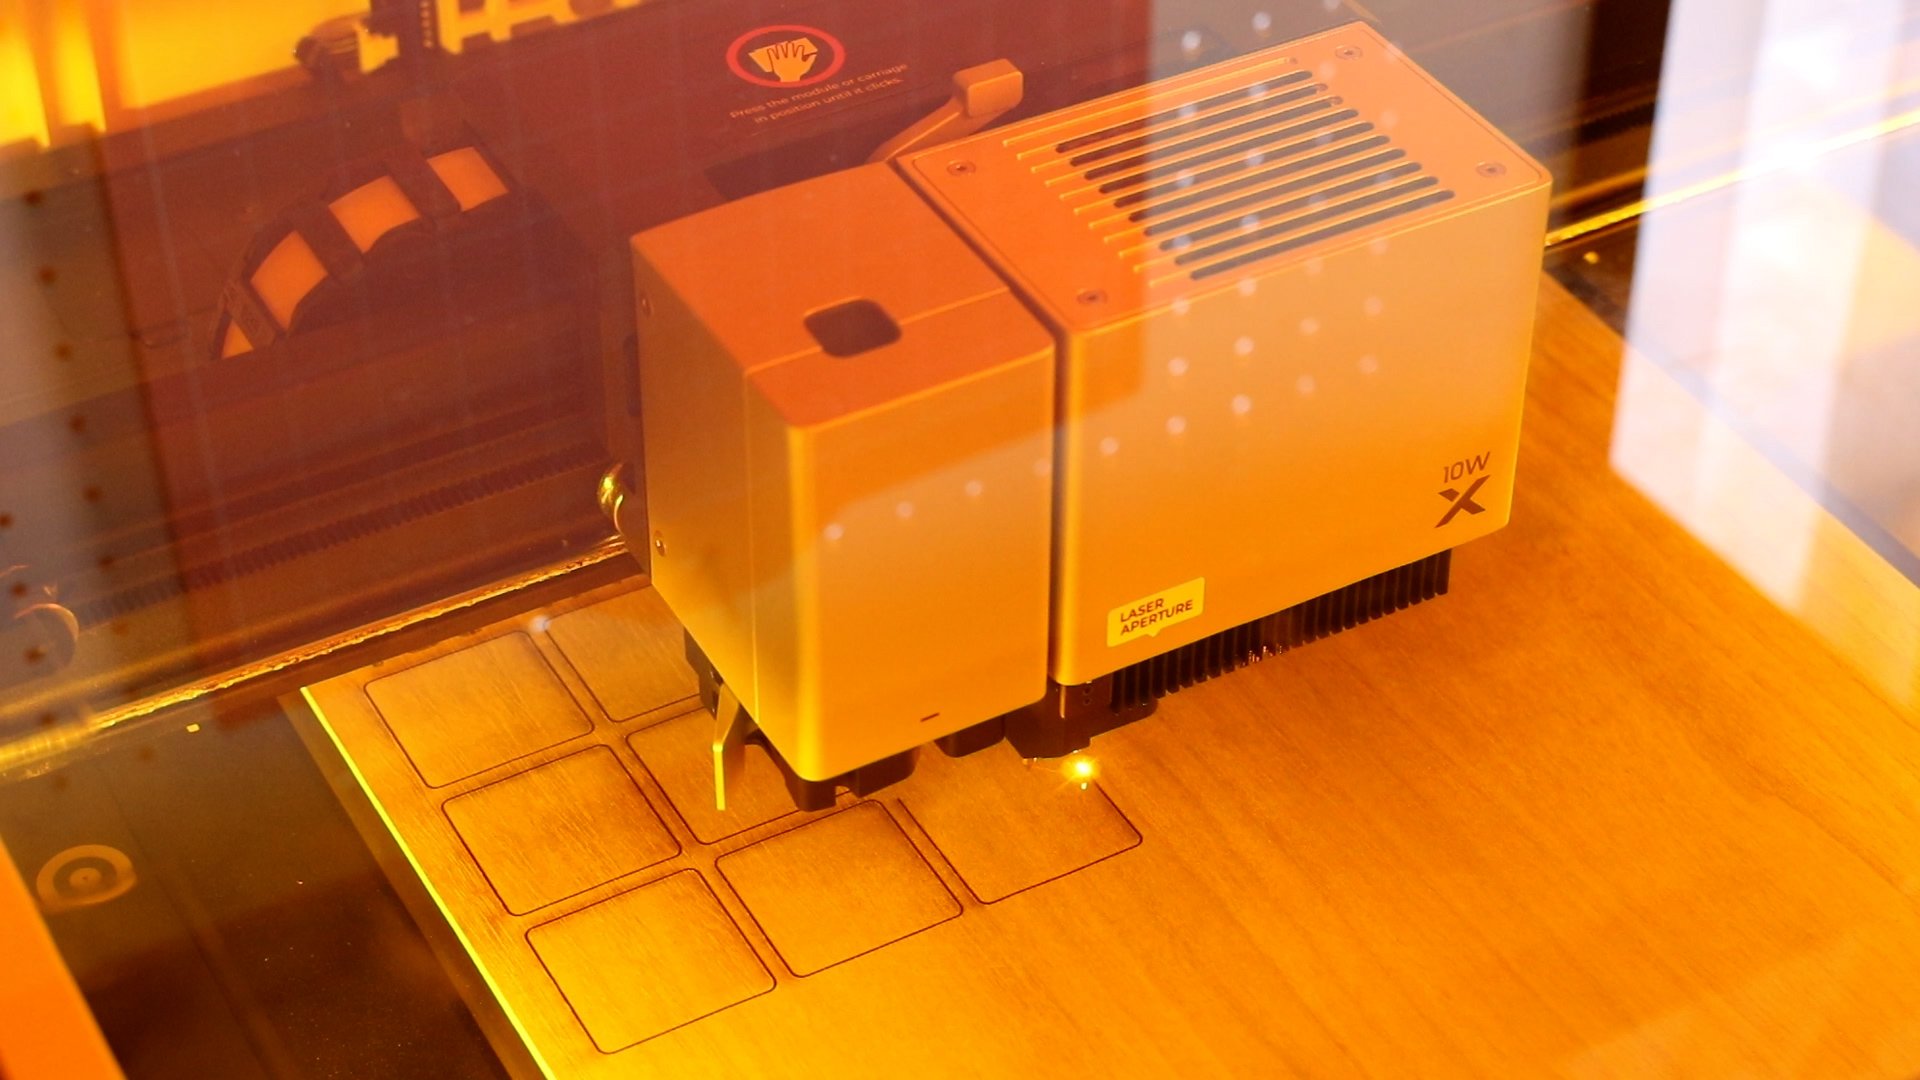
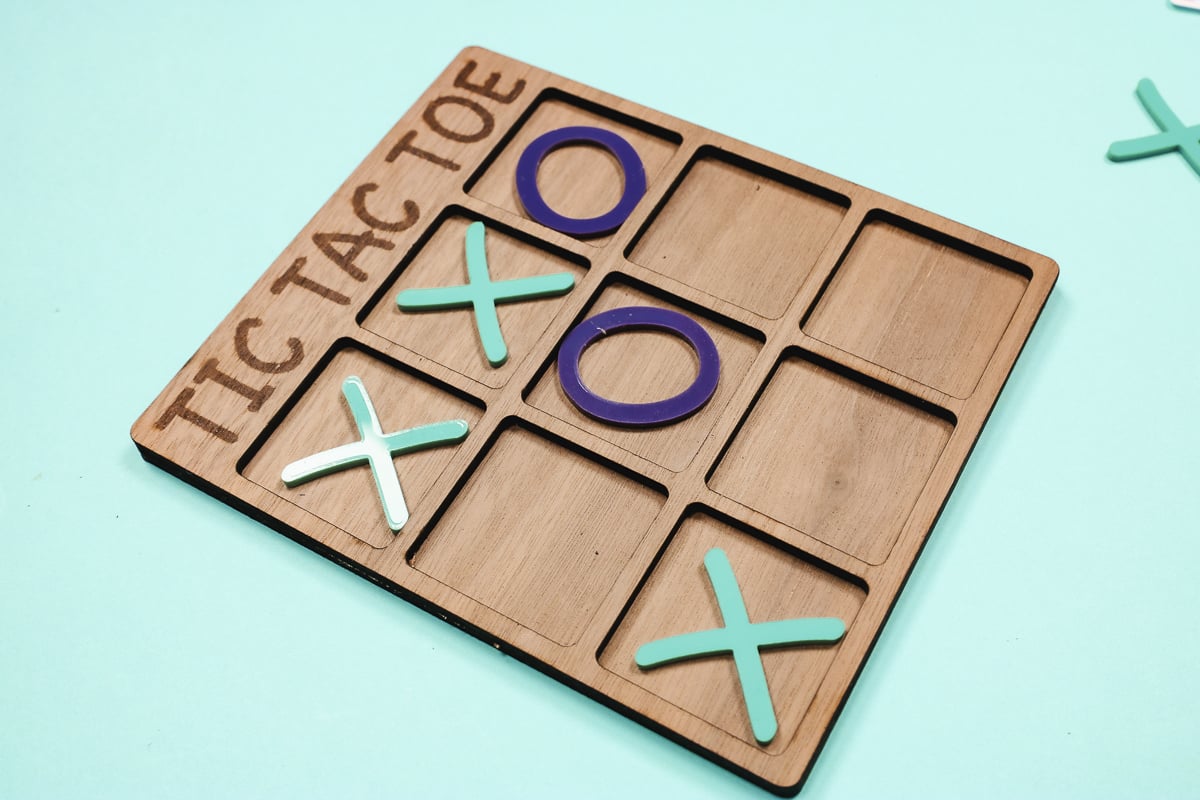
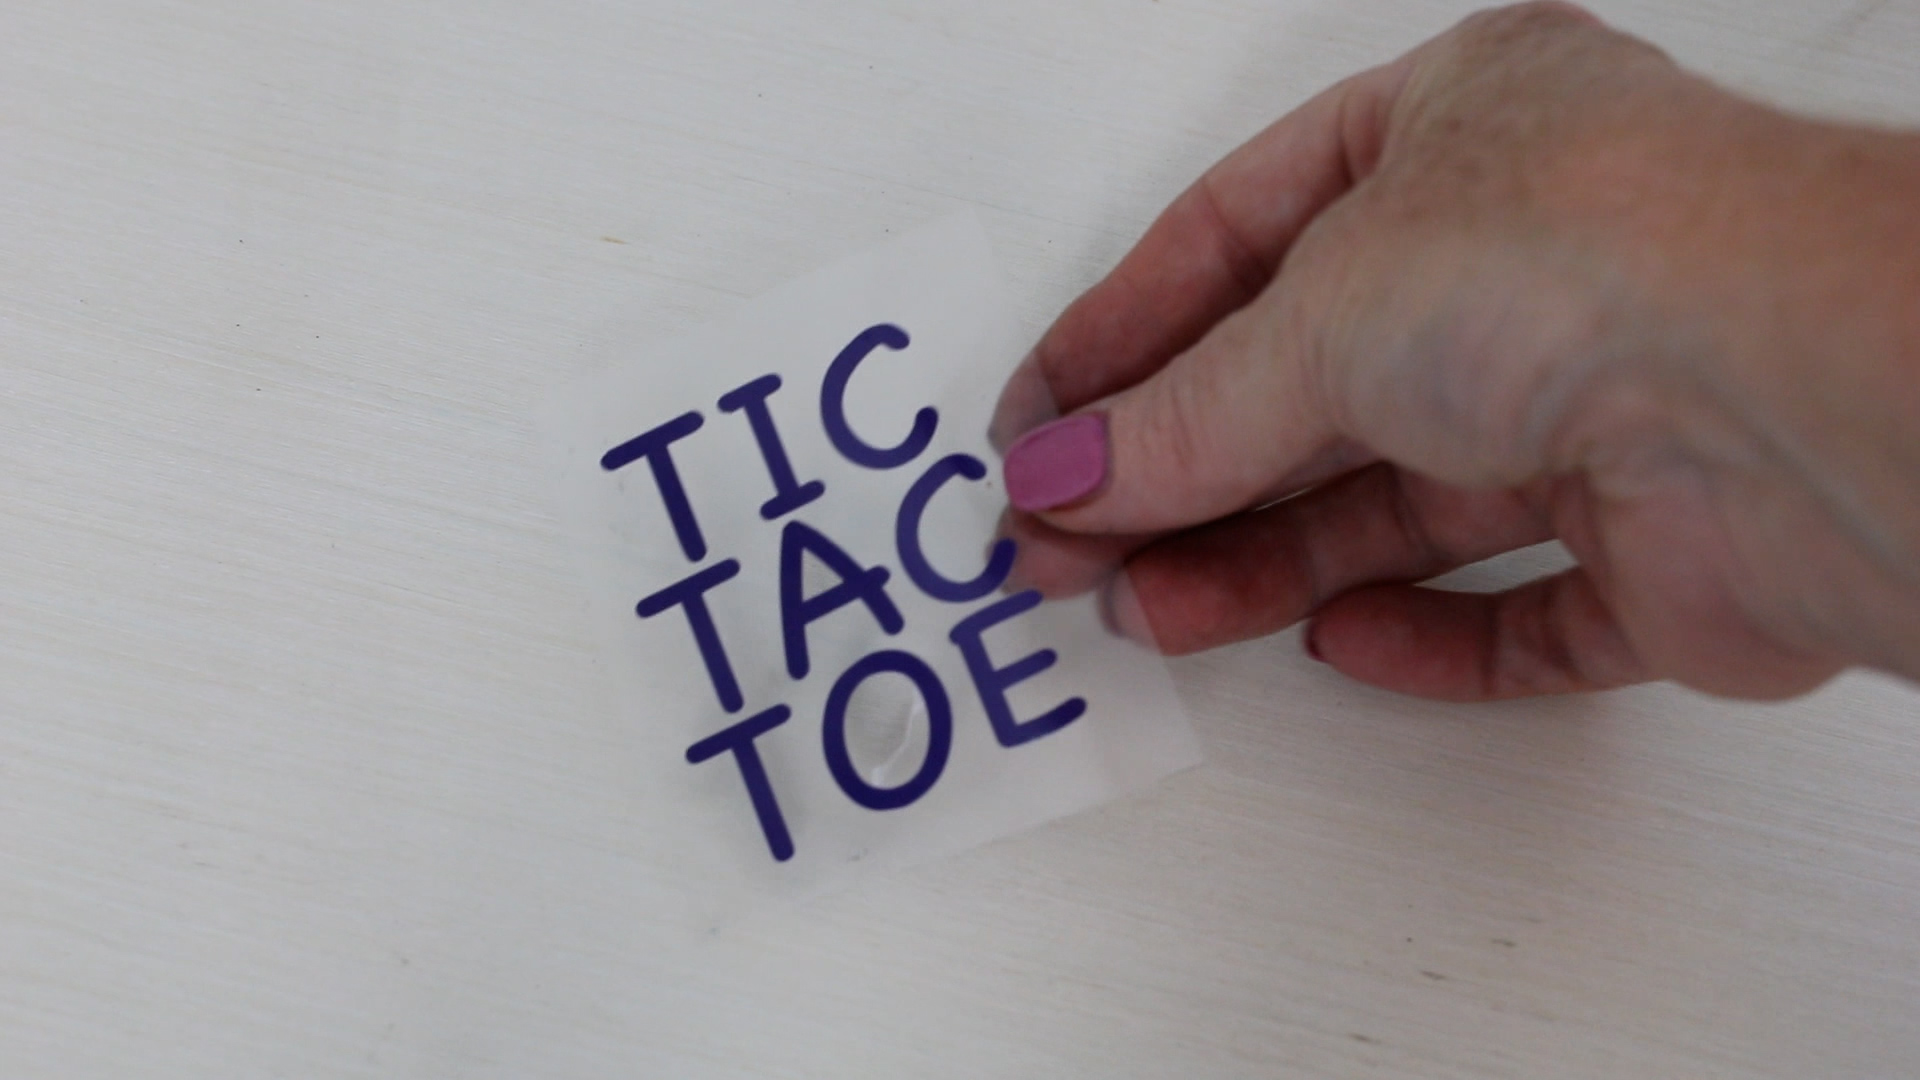
Once the cut is complete, remove the pieces from the machine. These two pieces will be glued together to complete a tic tac toe board.

Cutting acrylic is similar to cutting wood above. However, you will need different cut settings.
As before, import the design and set up how you want it cut. I want the Xs cut out of one color acrylic and the Os cut out of a different color.
Auto-measure the material and mark the processing area, and then move the design so it is on the material.
Change the process type to Cut. For acrylic, I used a power of 100% with a speed of 5 and three passes. Repeat the process for both the Xs and Os.
Once the acrylic is cut, you can glue the wood pieces together and add your acrylic pieces to play a game of tic tac toe! Want more to go with this project? Use your xTool M1 Ultra to make a bag to hold the pieces below.
With the base xTool M1 Ultra, you have the ability to use a fine-point blade. I am going to use the fine-point blade to cut HTV to add to my finished product.
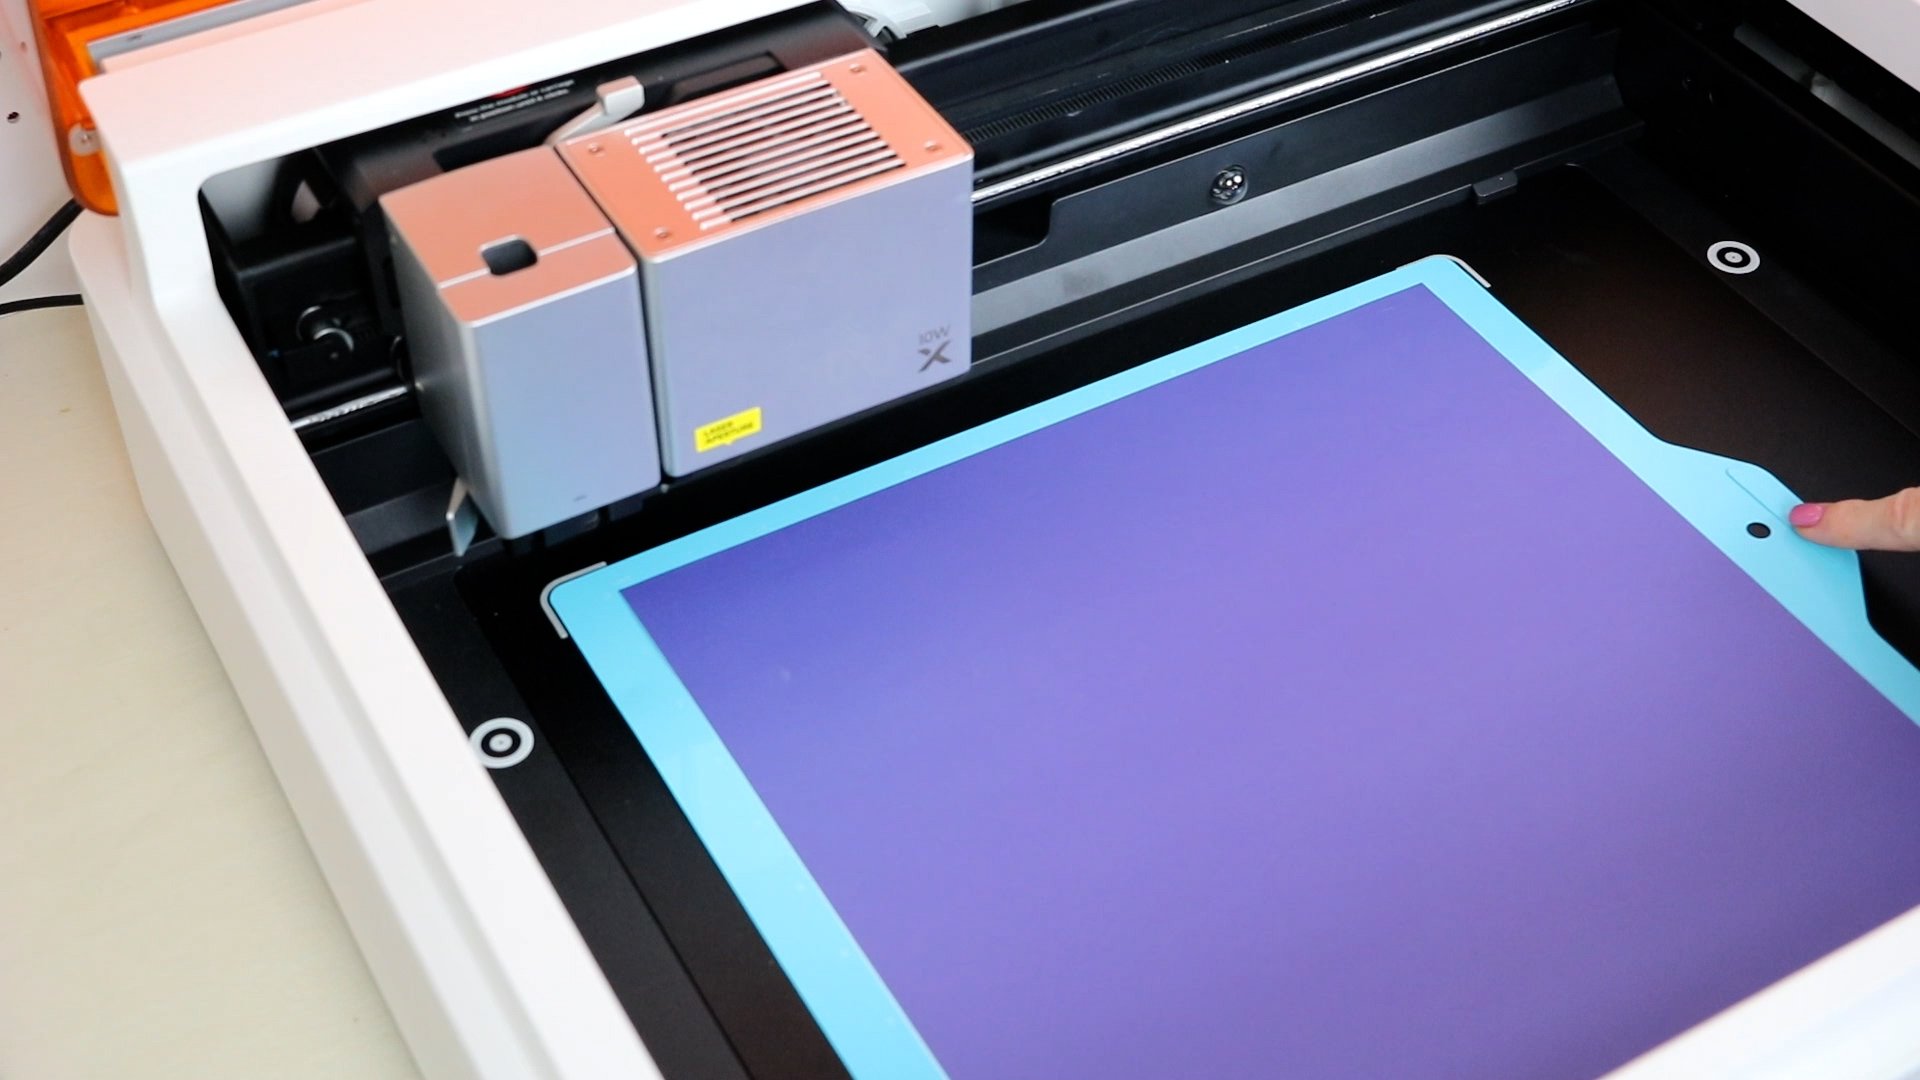
Step 1: Add the blade and mat to the machine
Add the fine-point blade to the basic module. Open the module, add the blade, and then close the clamp. Replace the cover to the module and you’re ready to cut.
When using the fine-point blade you need to use the cutting mats that come with the xTool M1 Ultra. Since I’m using HTV I am using the light grip blue mat. Add the HTV to the mat with the shiny side down and place the mat within the guides inside the machine.
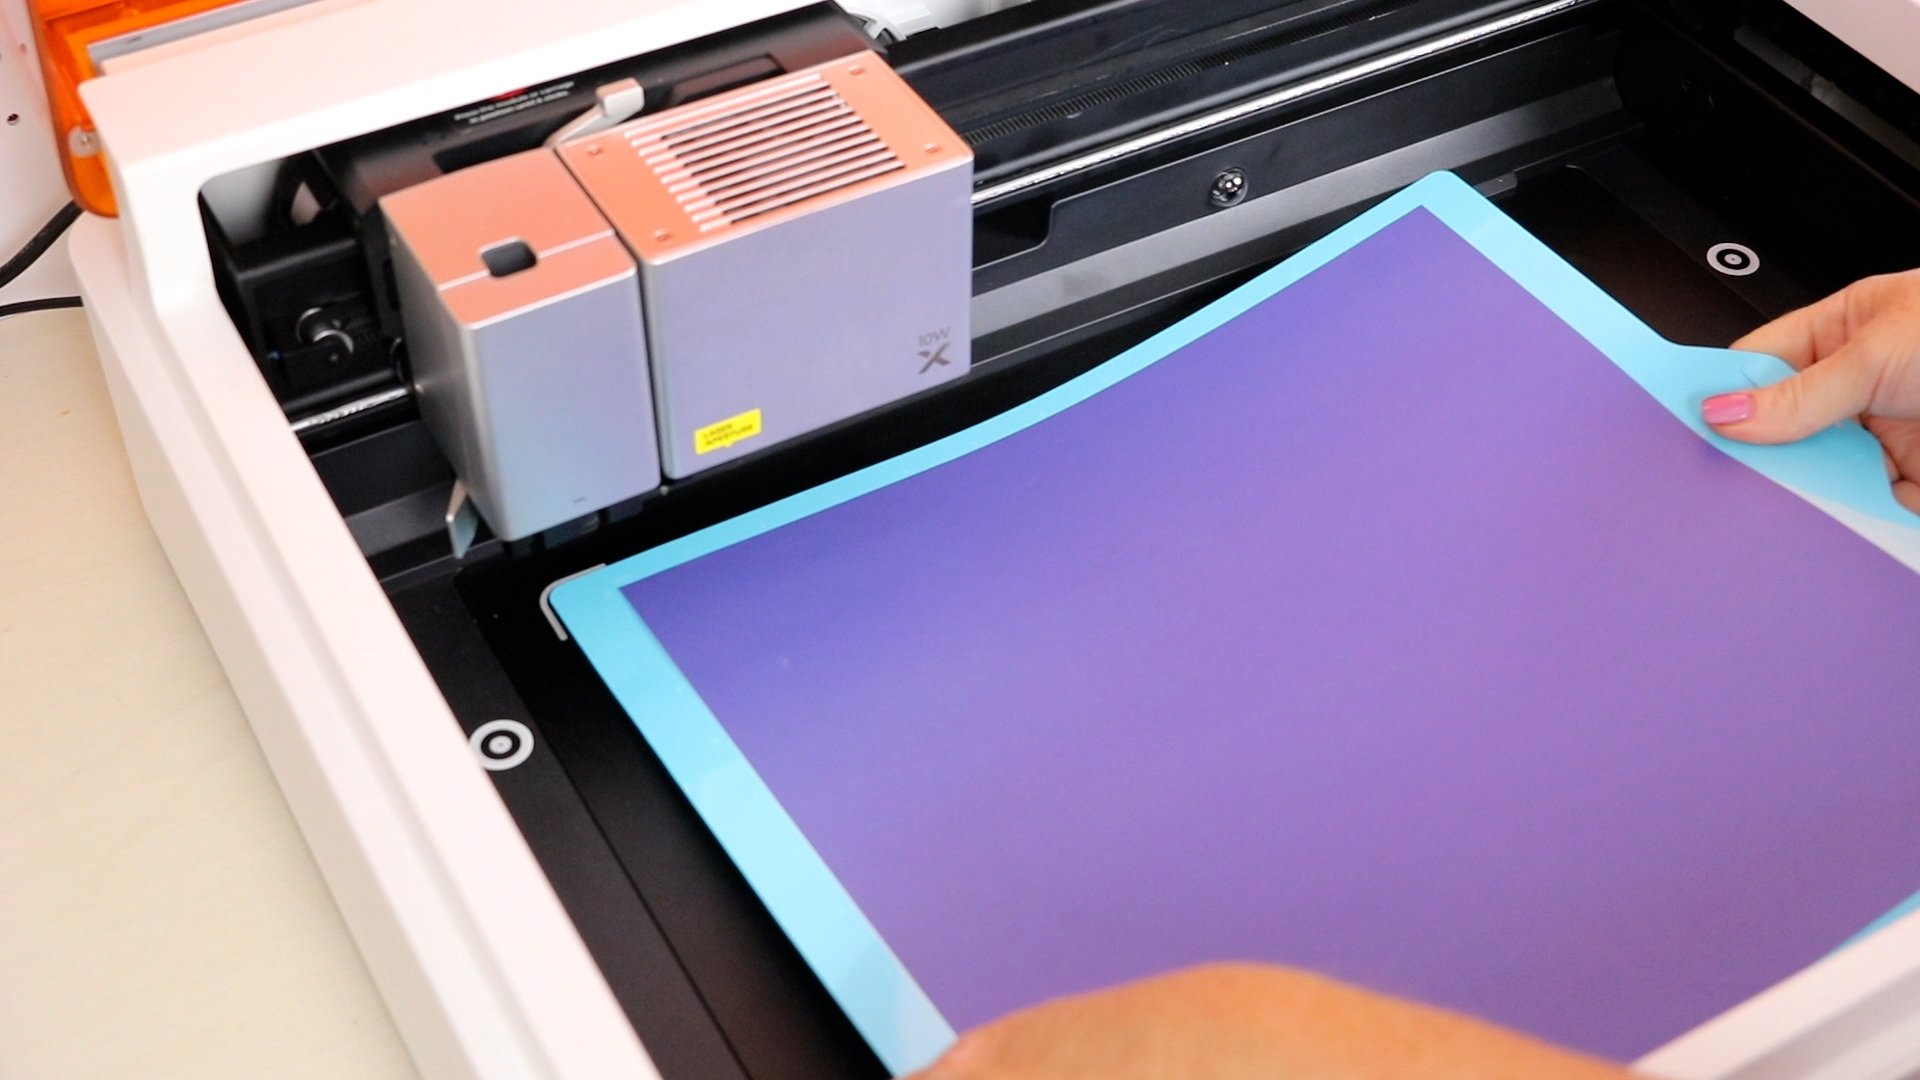
There is a protective sheet on both the front and the back of the mat to protect the adhesive surfaces. One side is for the material and the other side is to hold the mat in place, so it doesn’t move within the machine.
Step 2: Set cut parameters
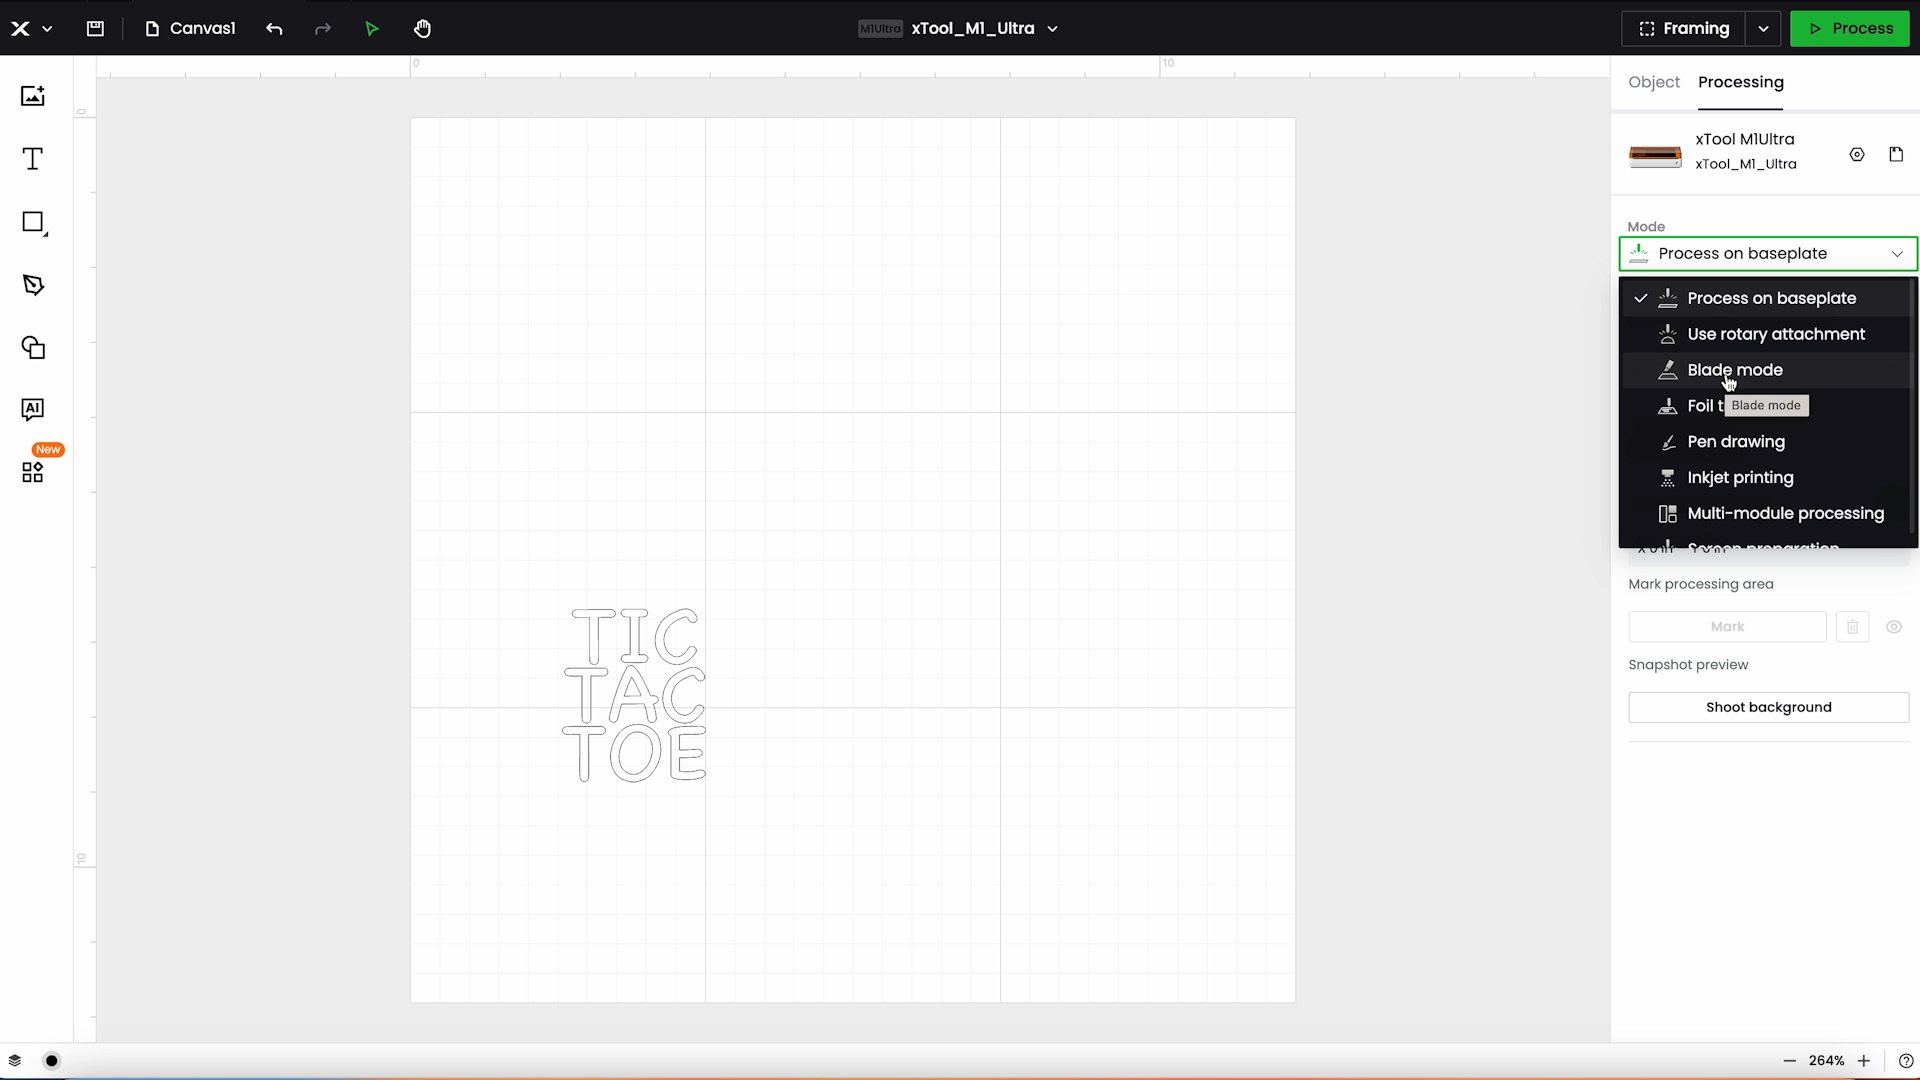
Now we can head to xTool Creative Space and we need to change the mode to Blade Mode. You can choose between different blades there, I am using the fine-point blade and the type will be Cut.
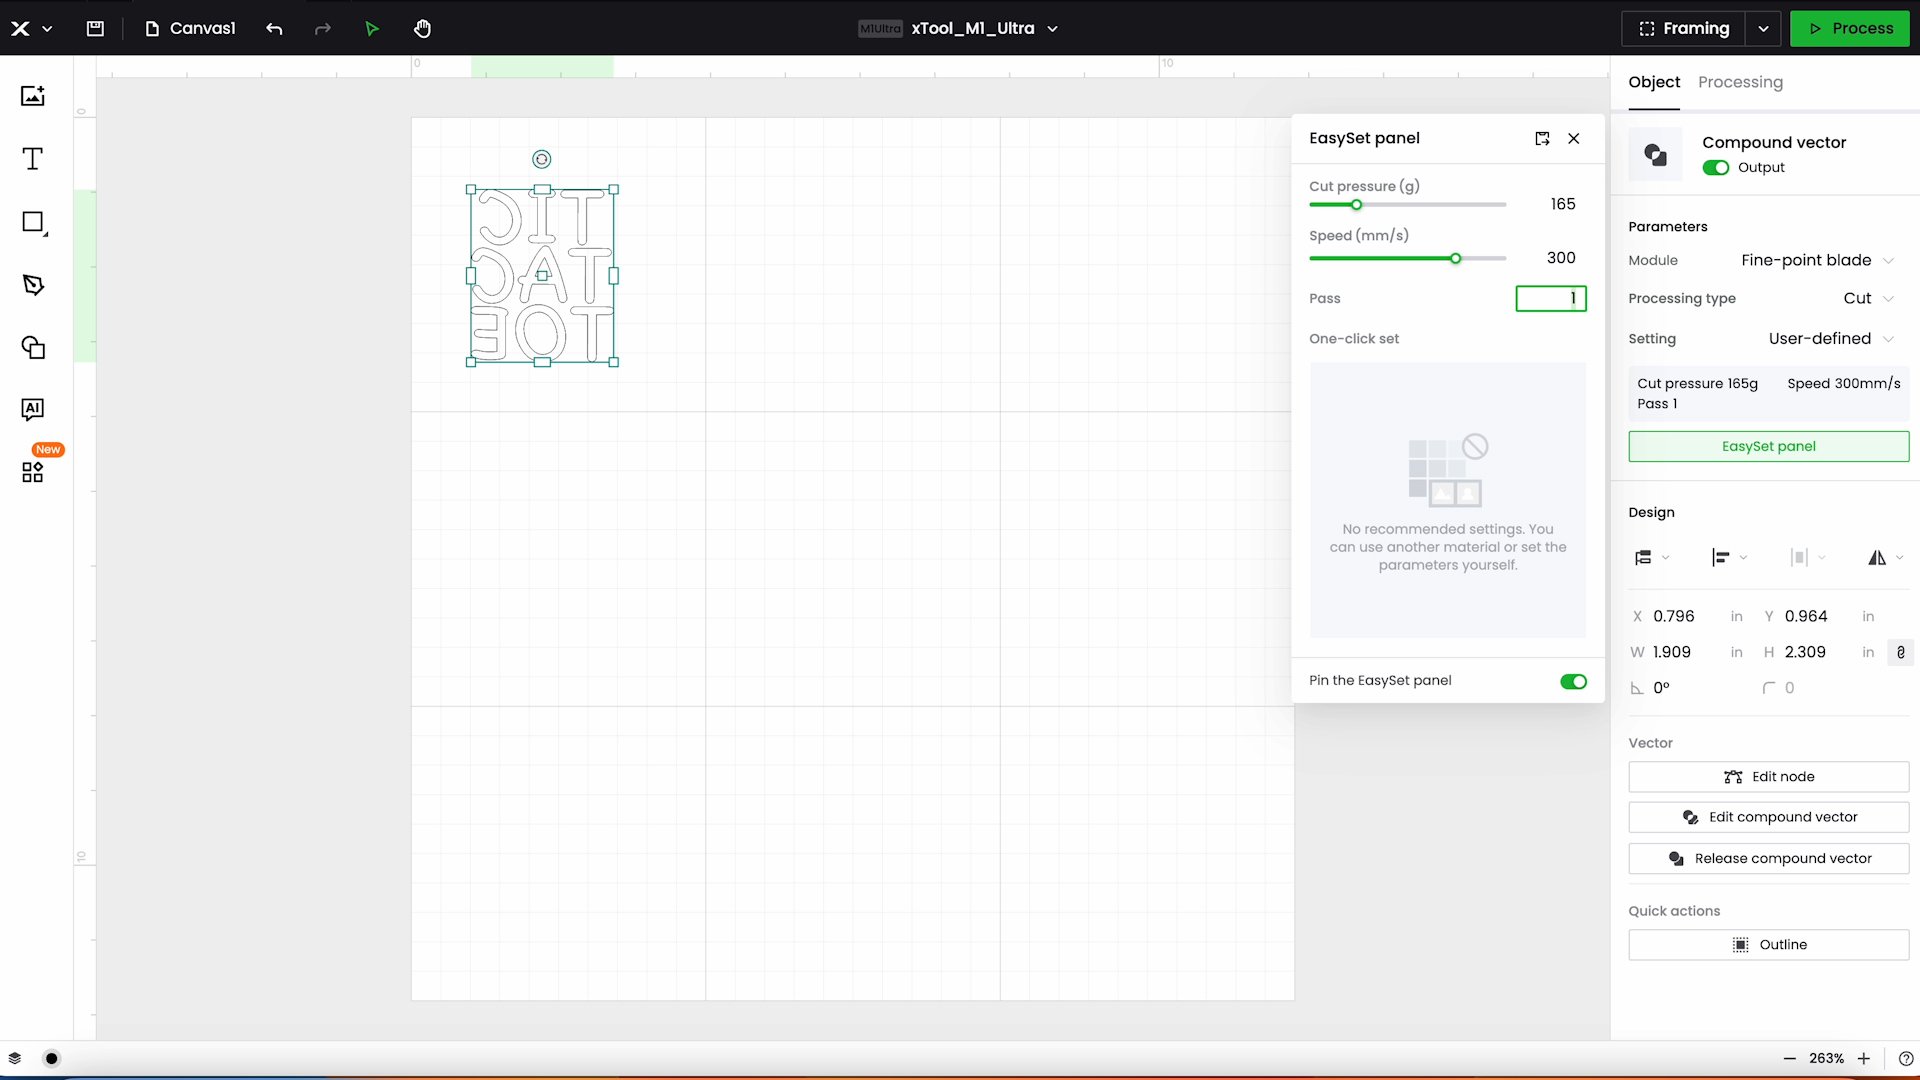
Mirror the design since we’re cutting HTV. I manually set the cut pressure at 165 with a speed of 300 and one pass.
Step 3: Mark the material
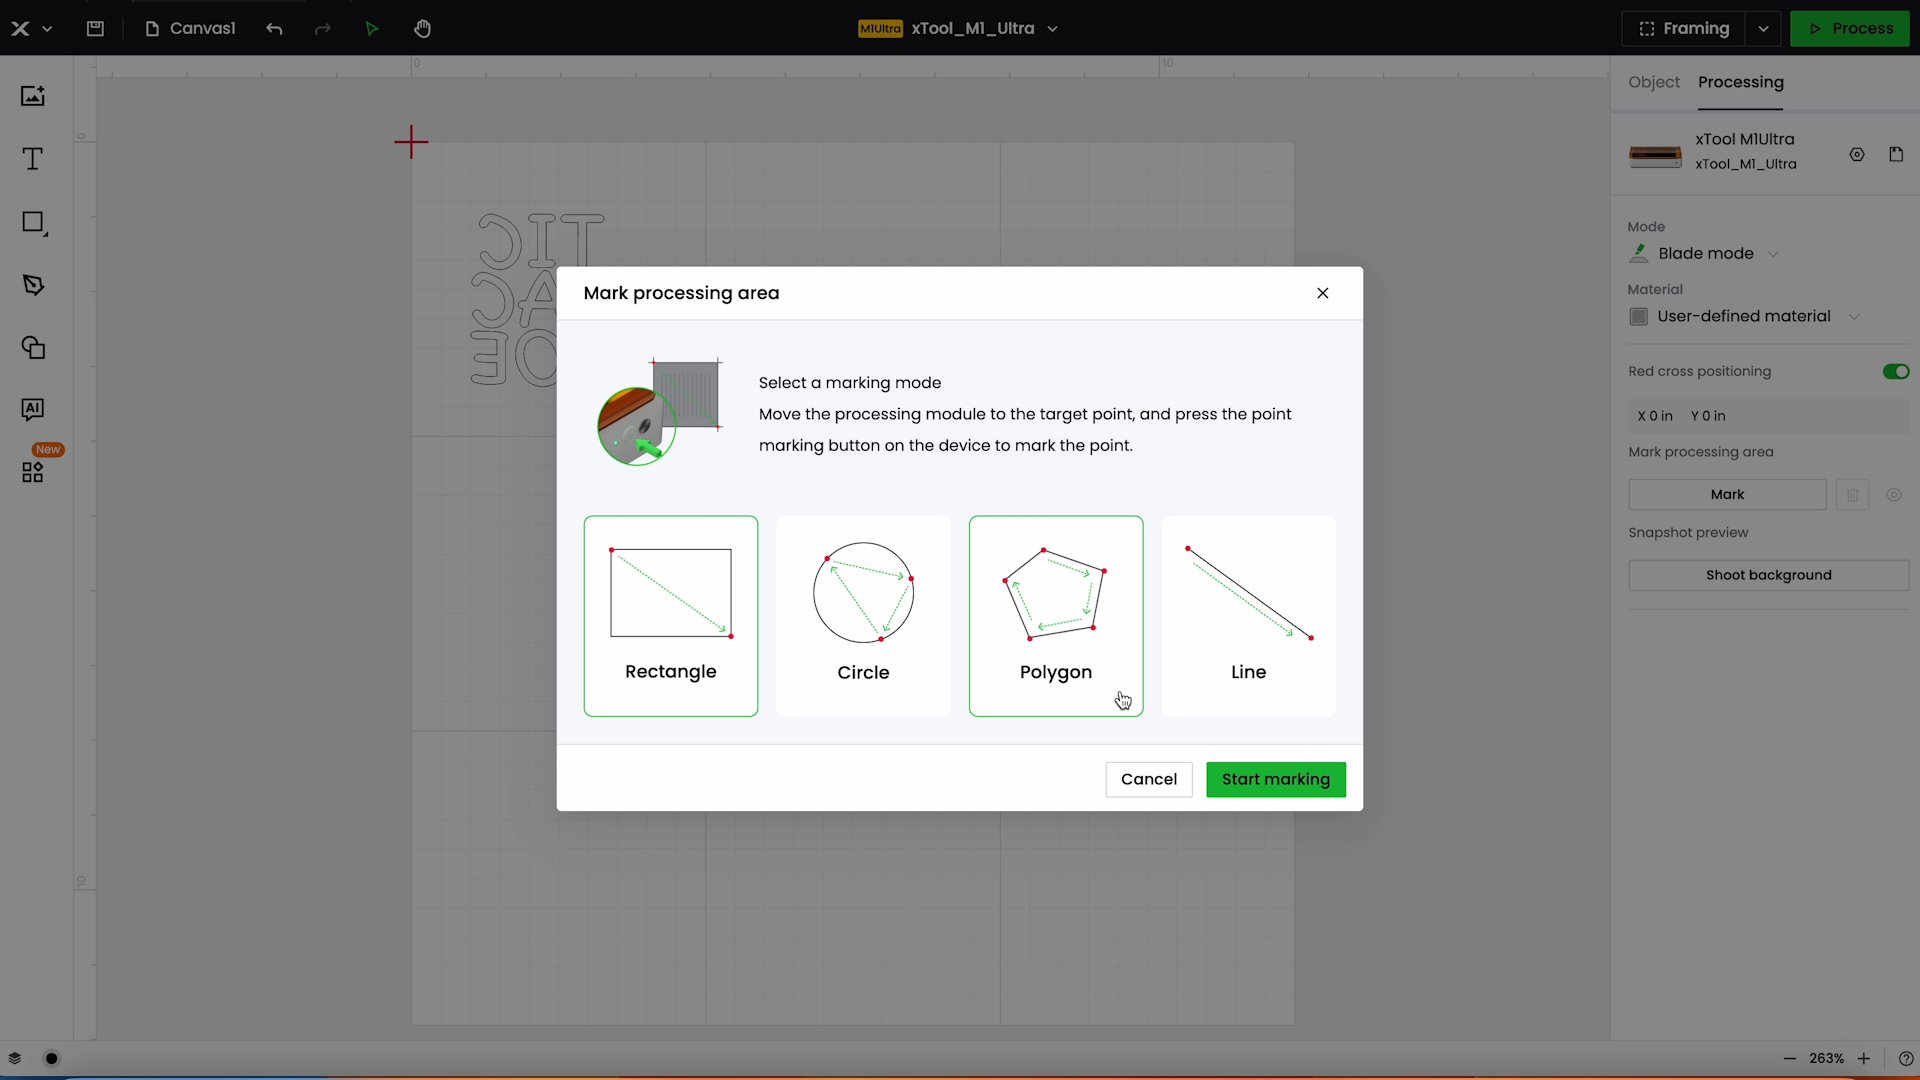
Start the marking process to mark where the HTV is located inside the laser. Mark as shown before by moving the laser and locating the corners of the material. Then move your design in Creative Space to be where you want to cut.
Step 4: Cut the material using the fine point blade
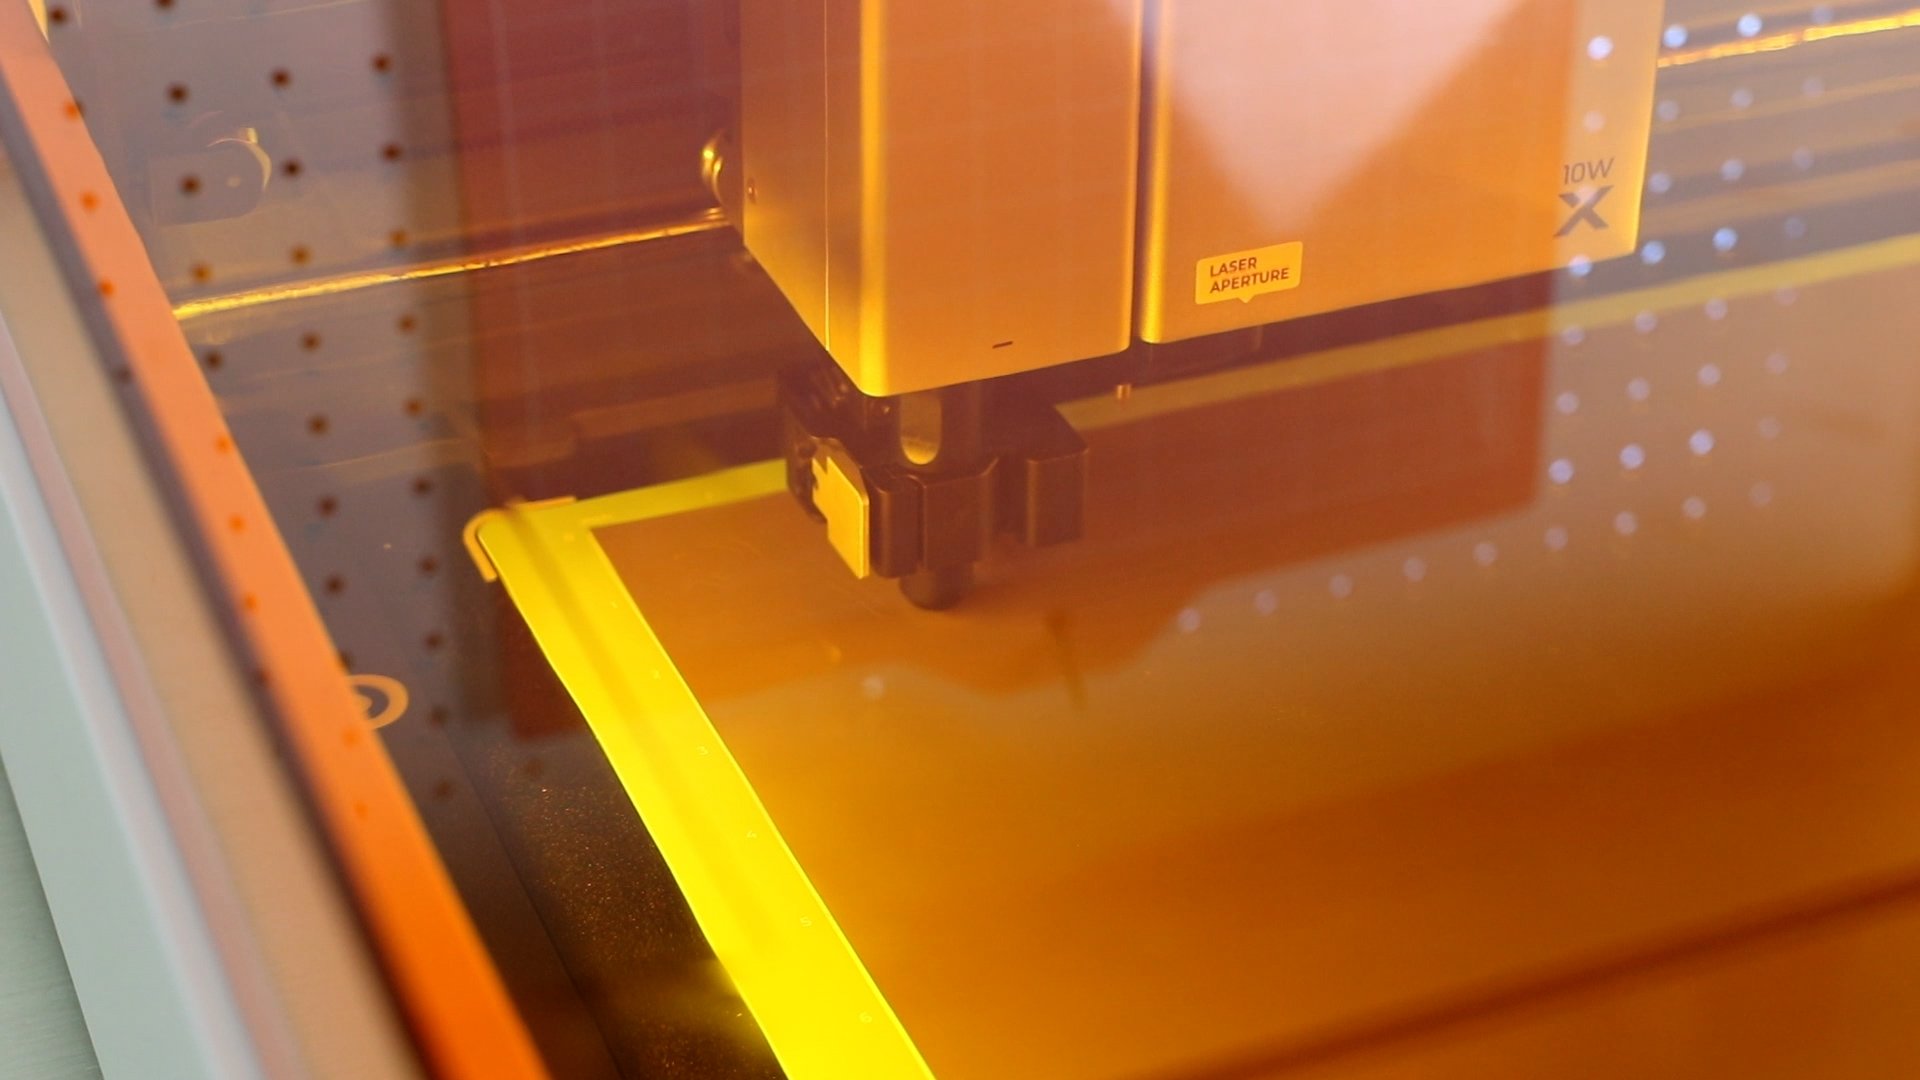
Send the file to the machine in the same way as before and press the button on the front of the machine to start the process.
Once the cut is complete, remove the material from the machine. For the HTV, I weeded away all of the excess material around the outside as well as the centers of letters. I will be using it on the bag that will be cut in the next section.
Next, I want to use the rotary blade for another piece of this project. The Multifunction Module is an additional purchase and does not come with the M1 Ultra.
Step 1: Add multi-function module to machine
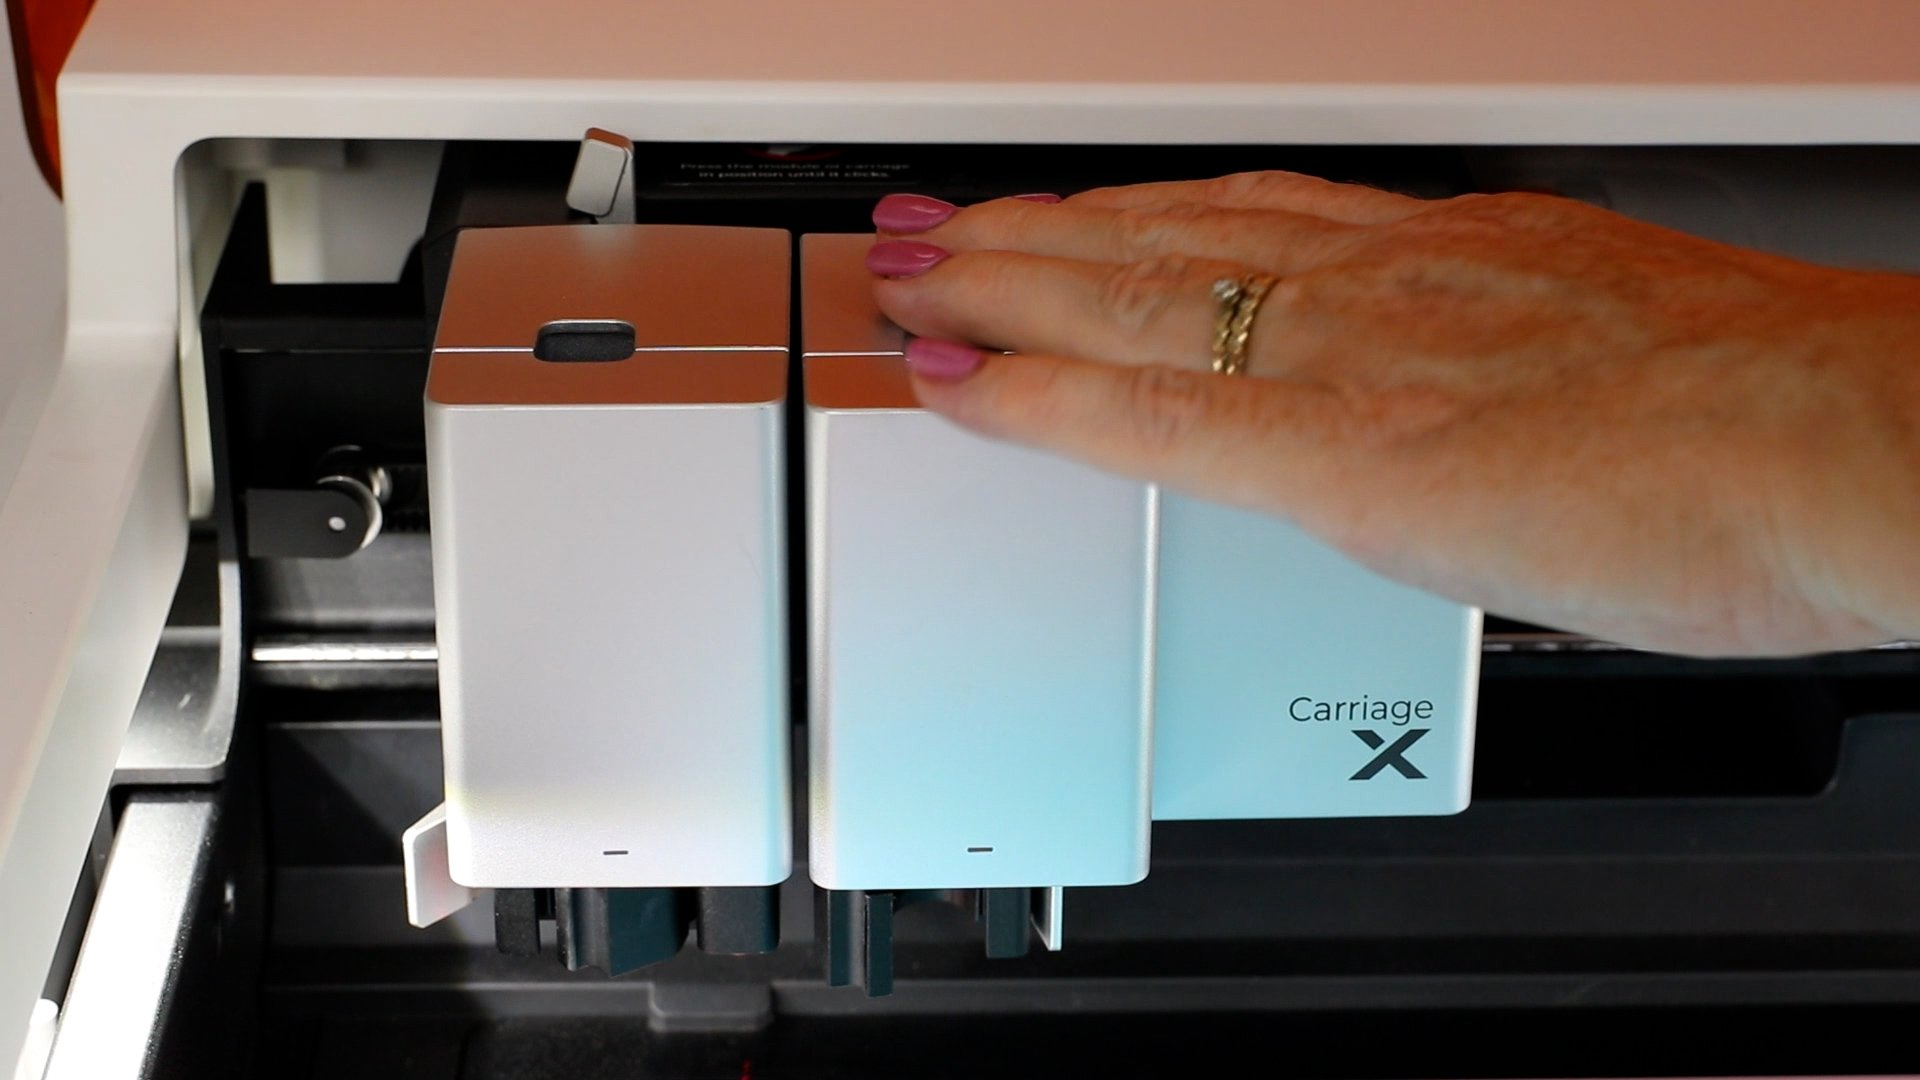
First, we need to remove the laser module by unlocking the lever and lift the laser head out. Slide the multifunction module into place and lock it down.
Step 2: Add the blade and mat to machine
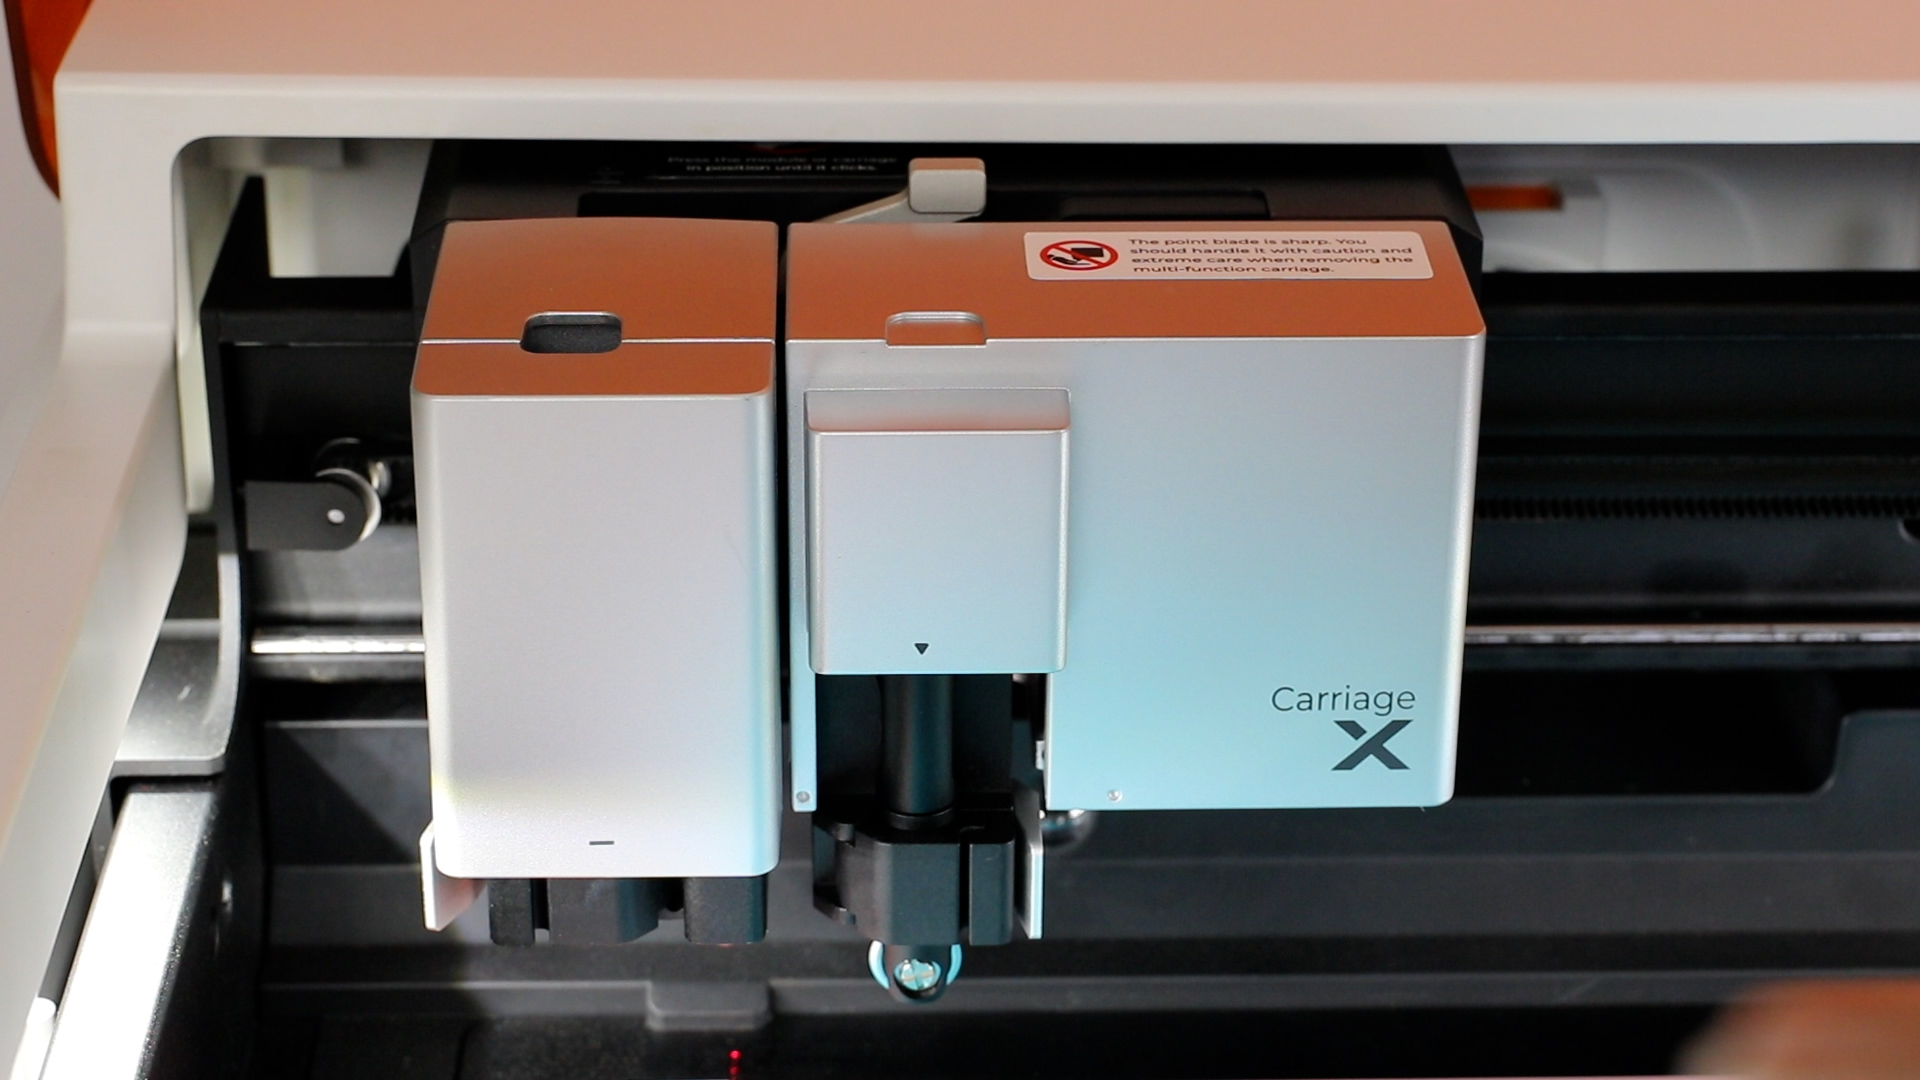
Remove the cover and add the rotary blade inside. There is an arrow that shows you the front of the blade so make sure you have that at the front.
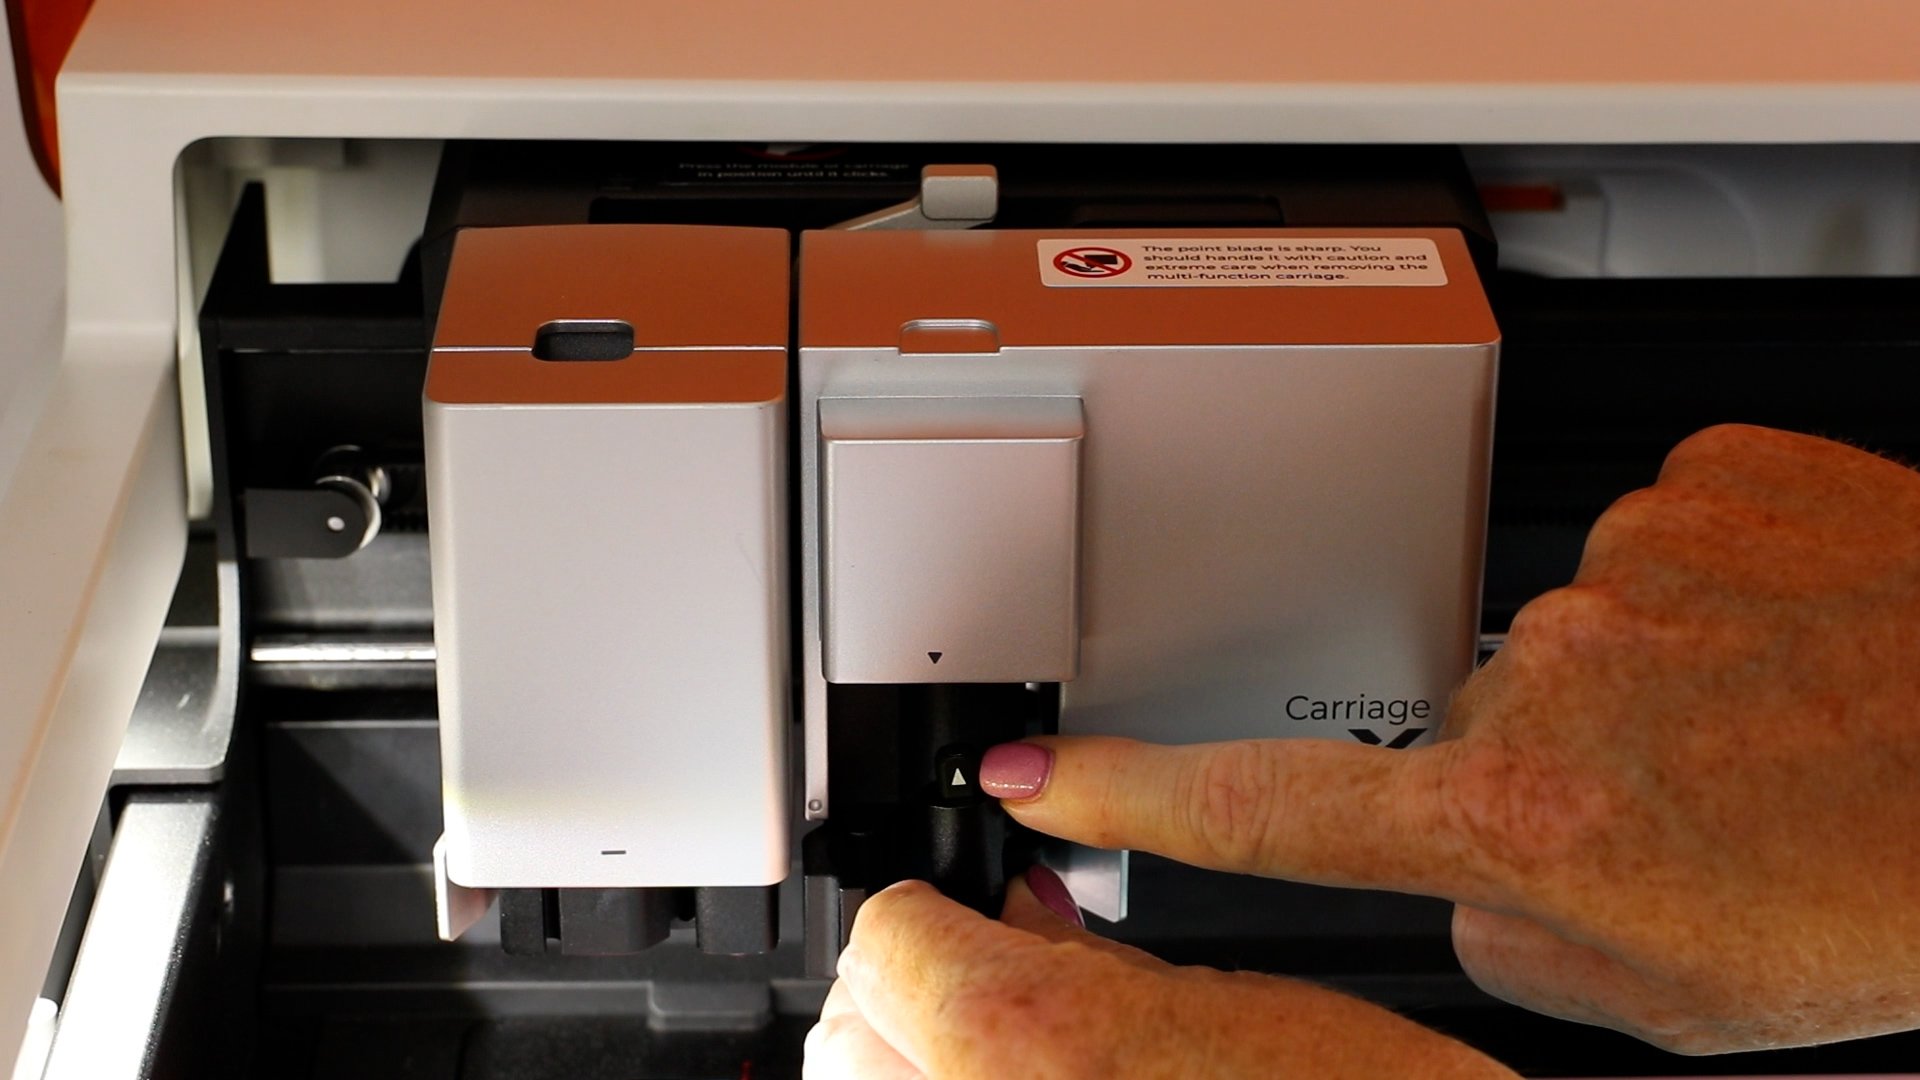
Push the blade inside the head and close the clamp. Replace the cover and we’re ready to use the rotary blade.
With the rotary blade you’ll use the cutting mat like we did with the HTV. For this step of the project, I am cutting fabric so I’m using the fabric grip mat. Add the fabric to the cutting mat and then place the mat inside the laser.
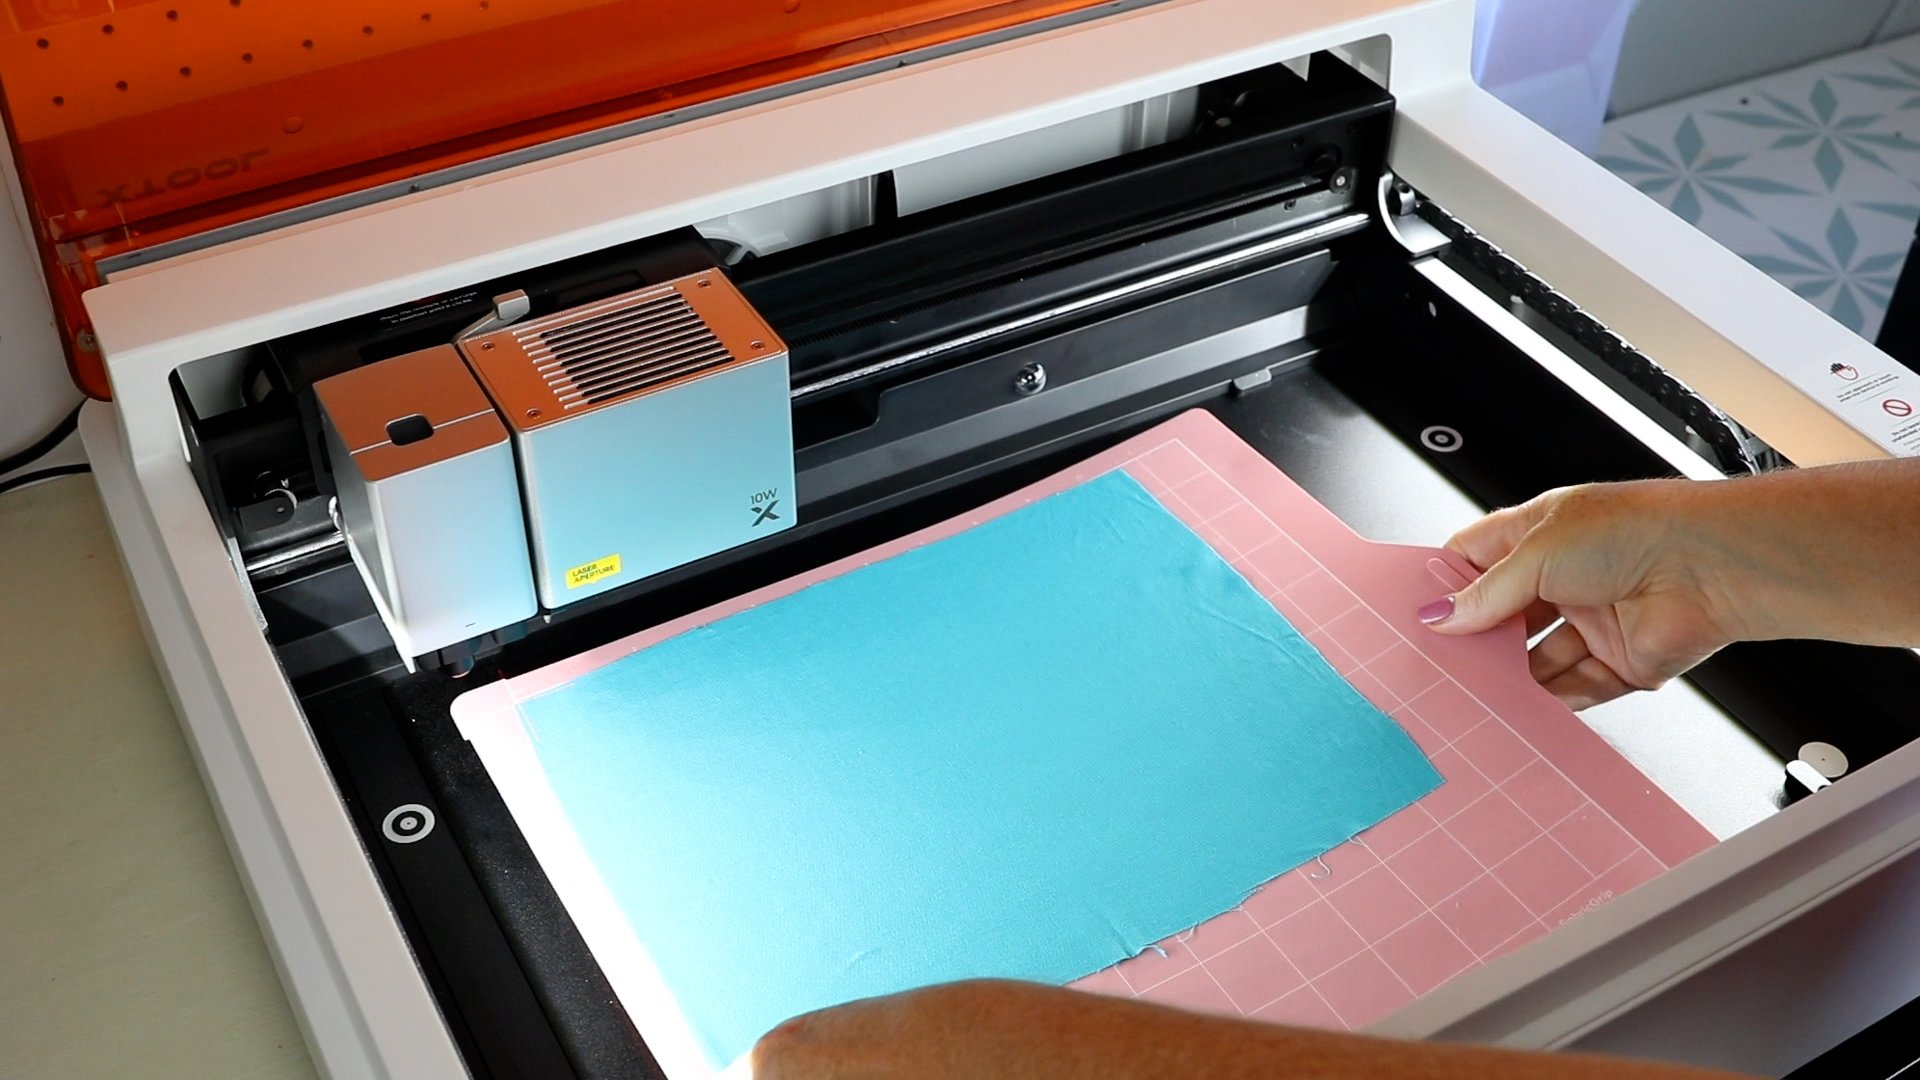
Step 3: Set up design in Creative Space
Close the lid and follow the same steps we used before within Creative Space.
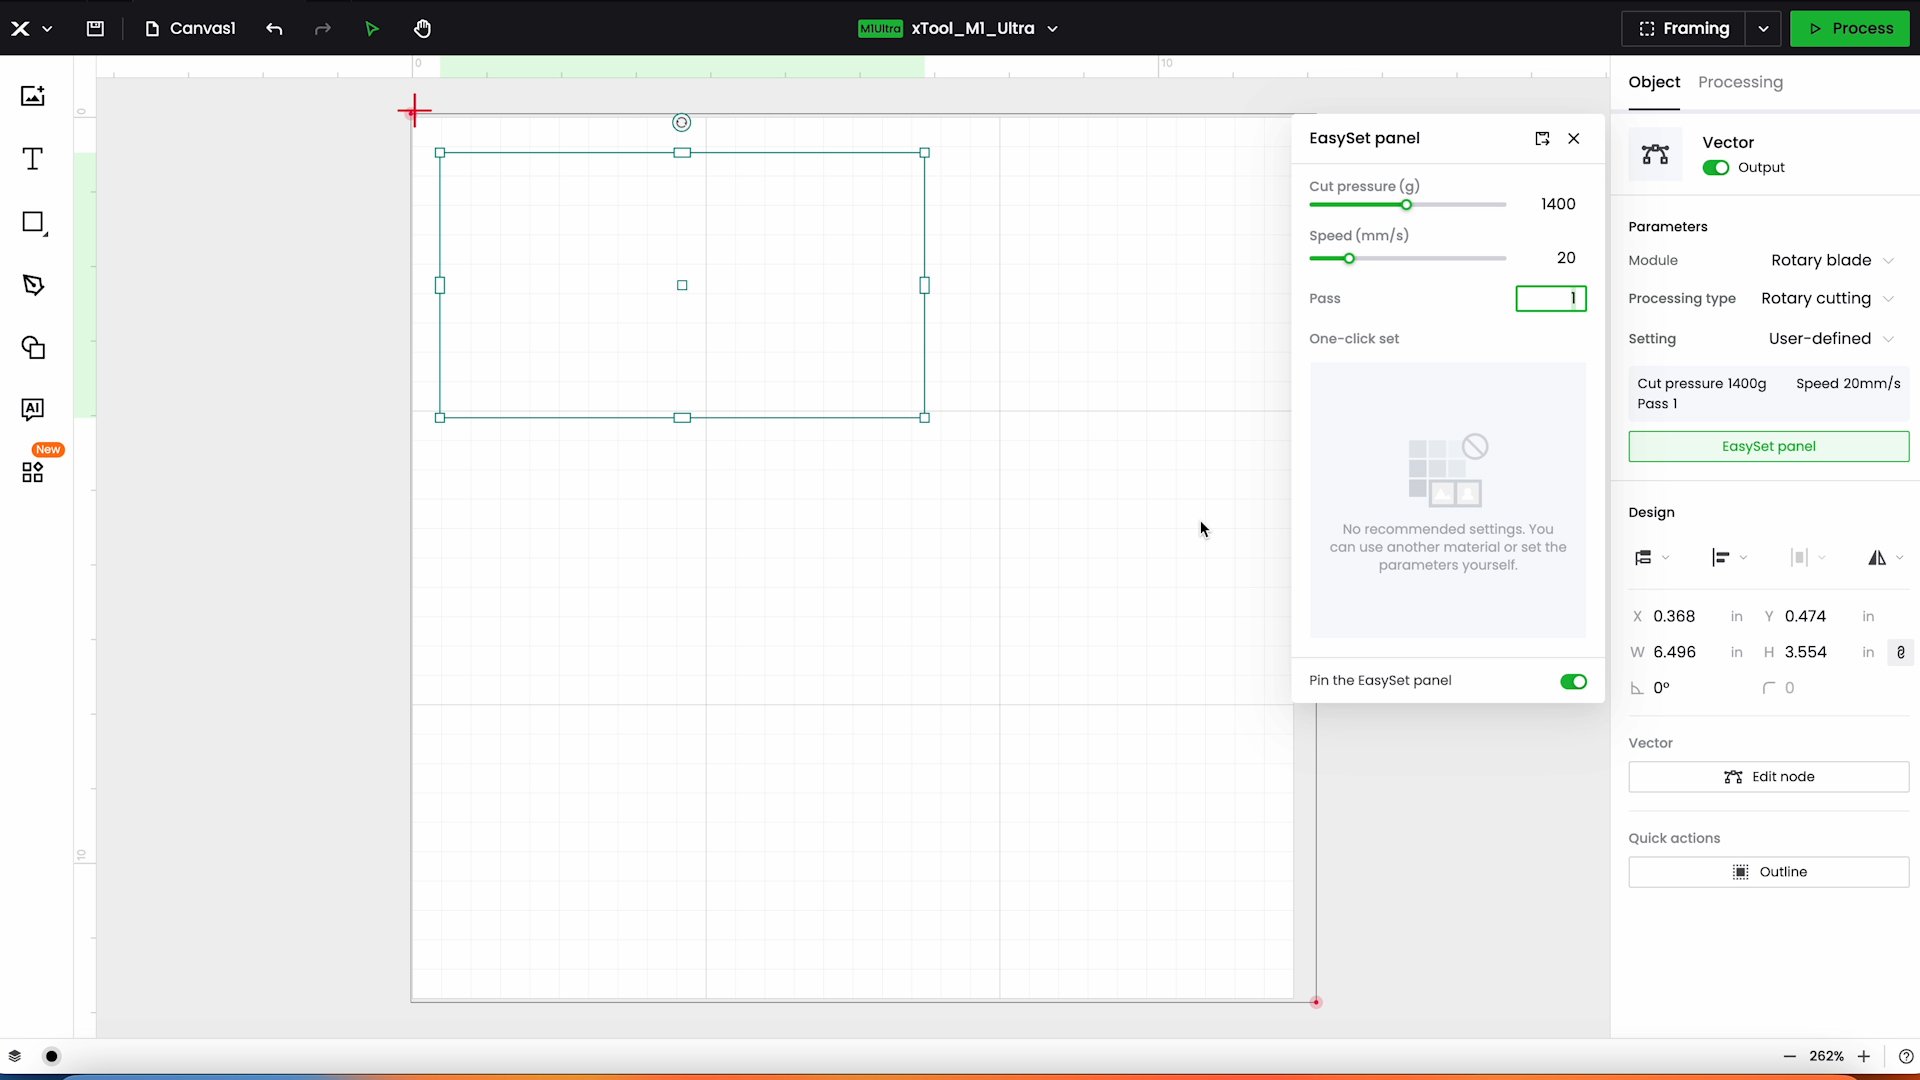
Change the Processing to the Multi-Module processing.
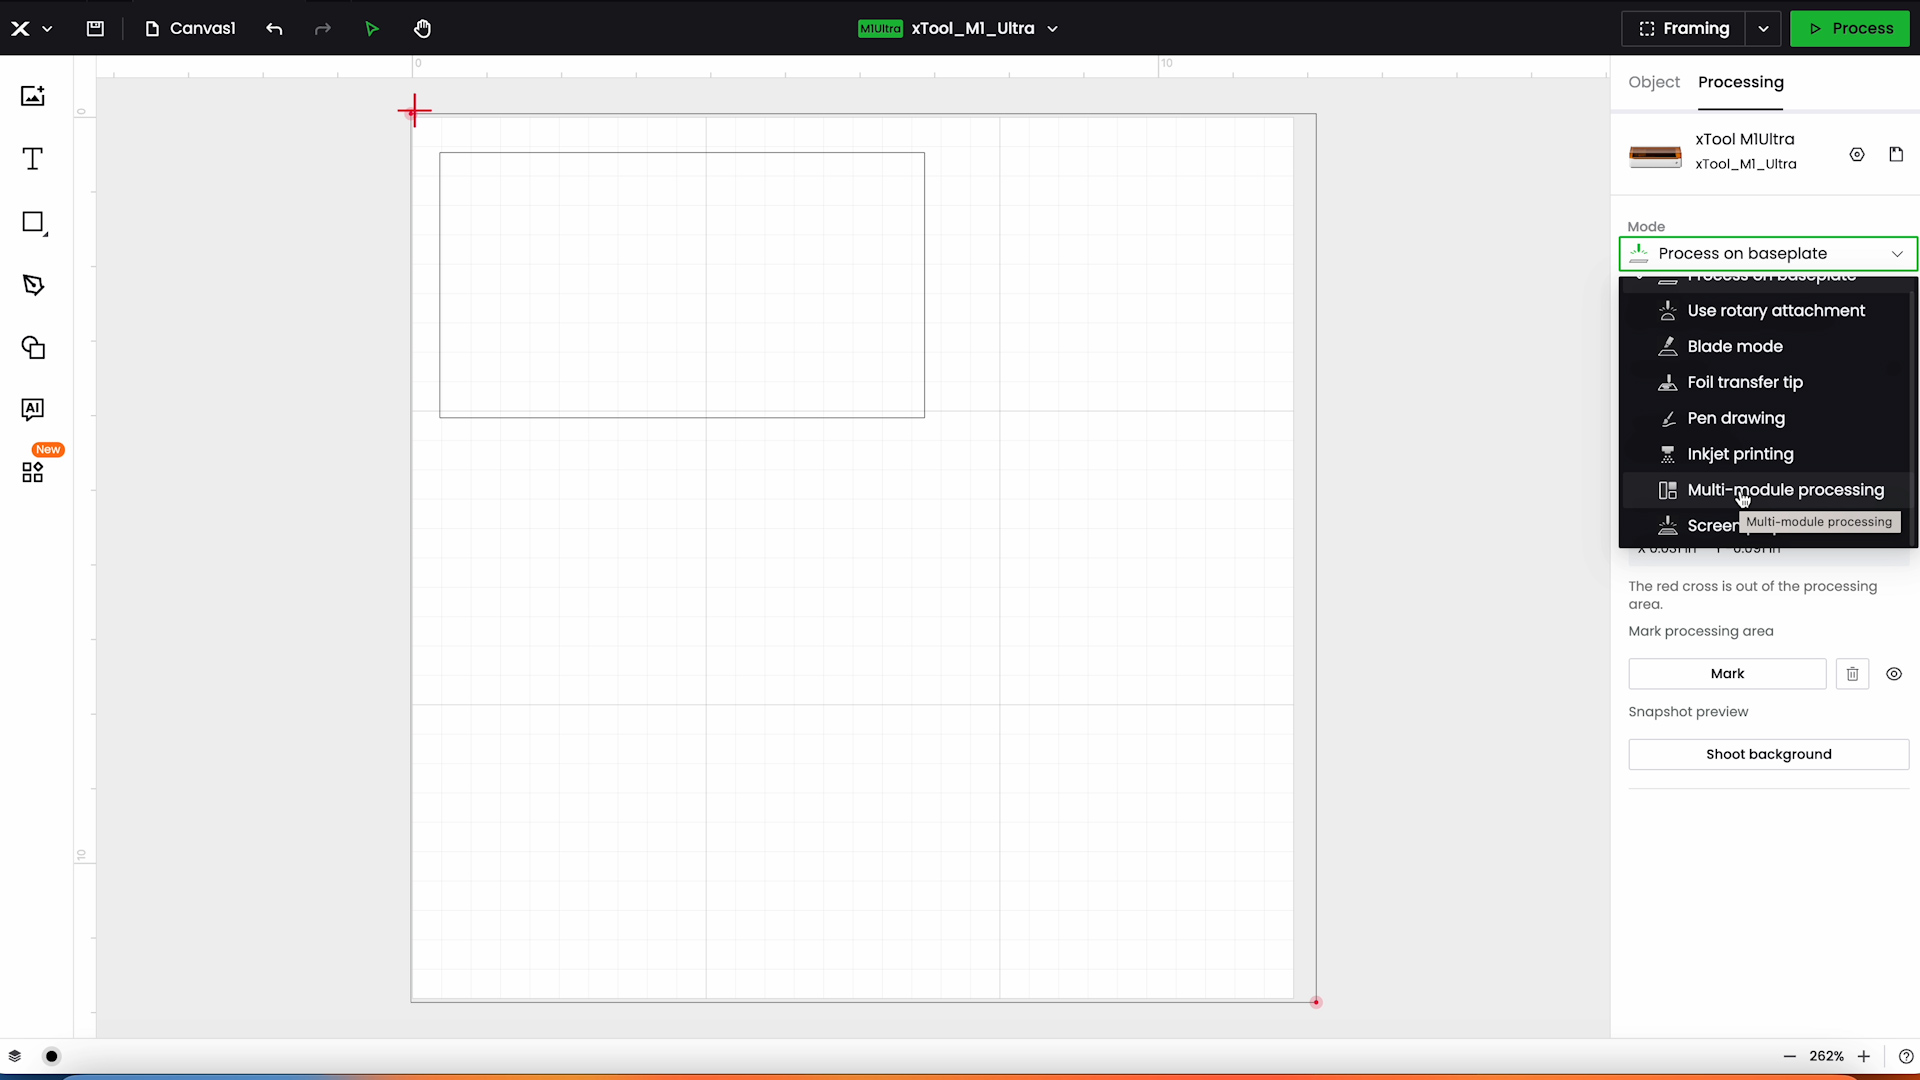
Click your cut and change it to Rotary Cutting. Use the Easy Set Panel to set your cut pressure and speed.
I used 1,400 grams of pressure and 20 millimeters per second as the speed.
Step 4: Cut fabric with rotary blade
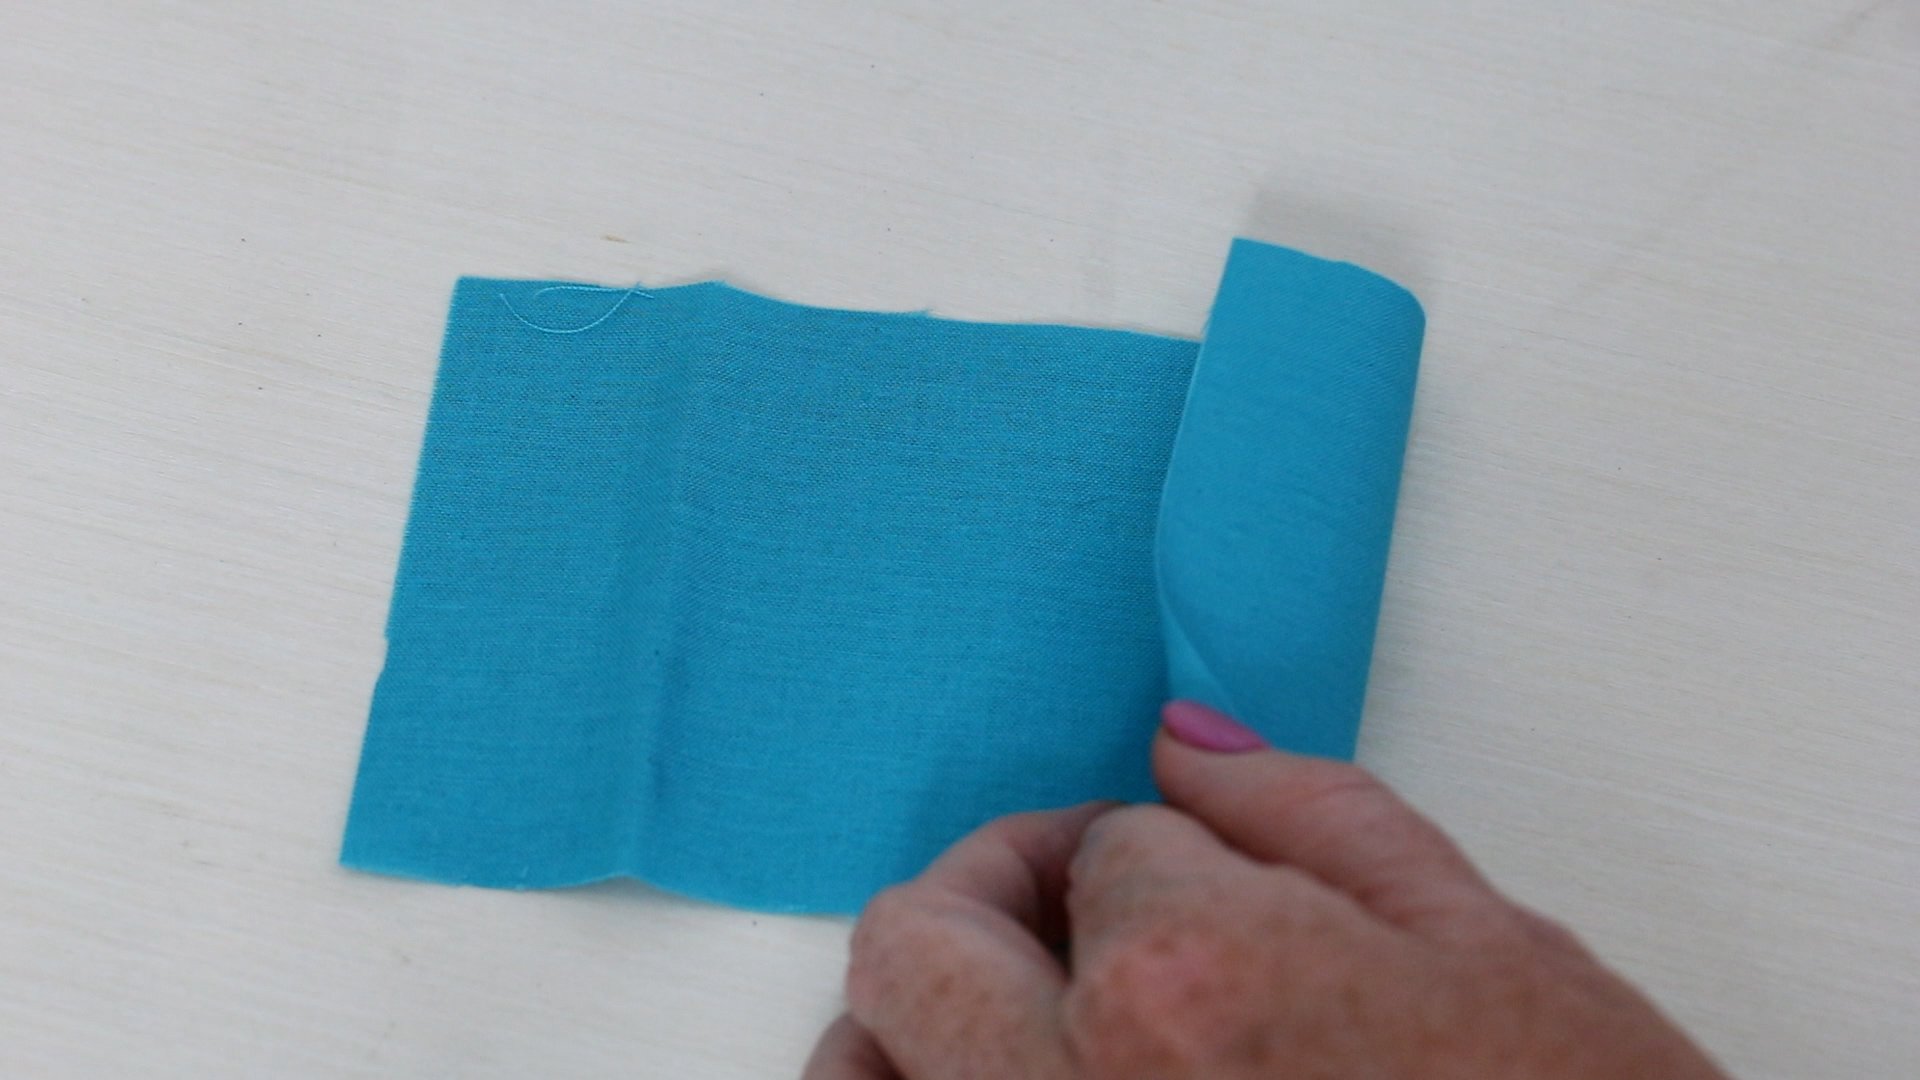
Mark the area and then click Process to start the cutting. The rotary blade will cut through materials like this cotton fabric easily!
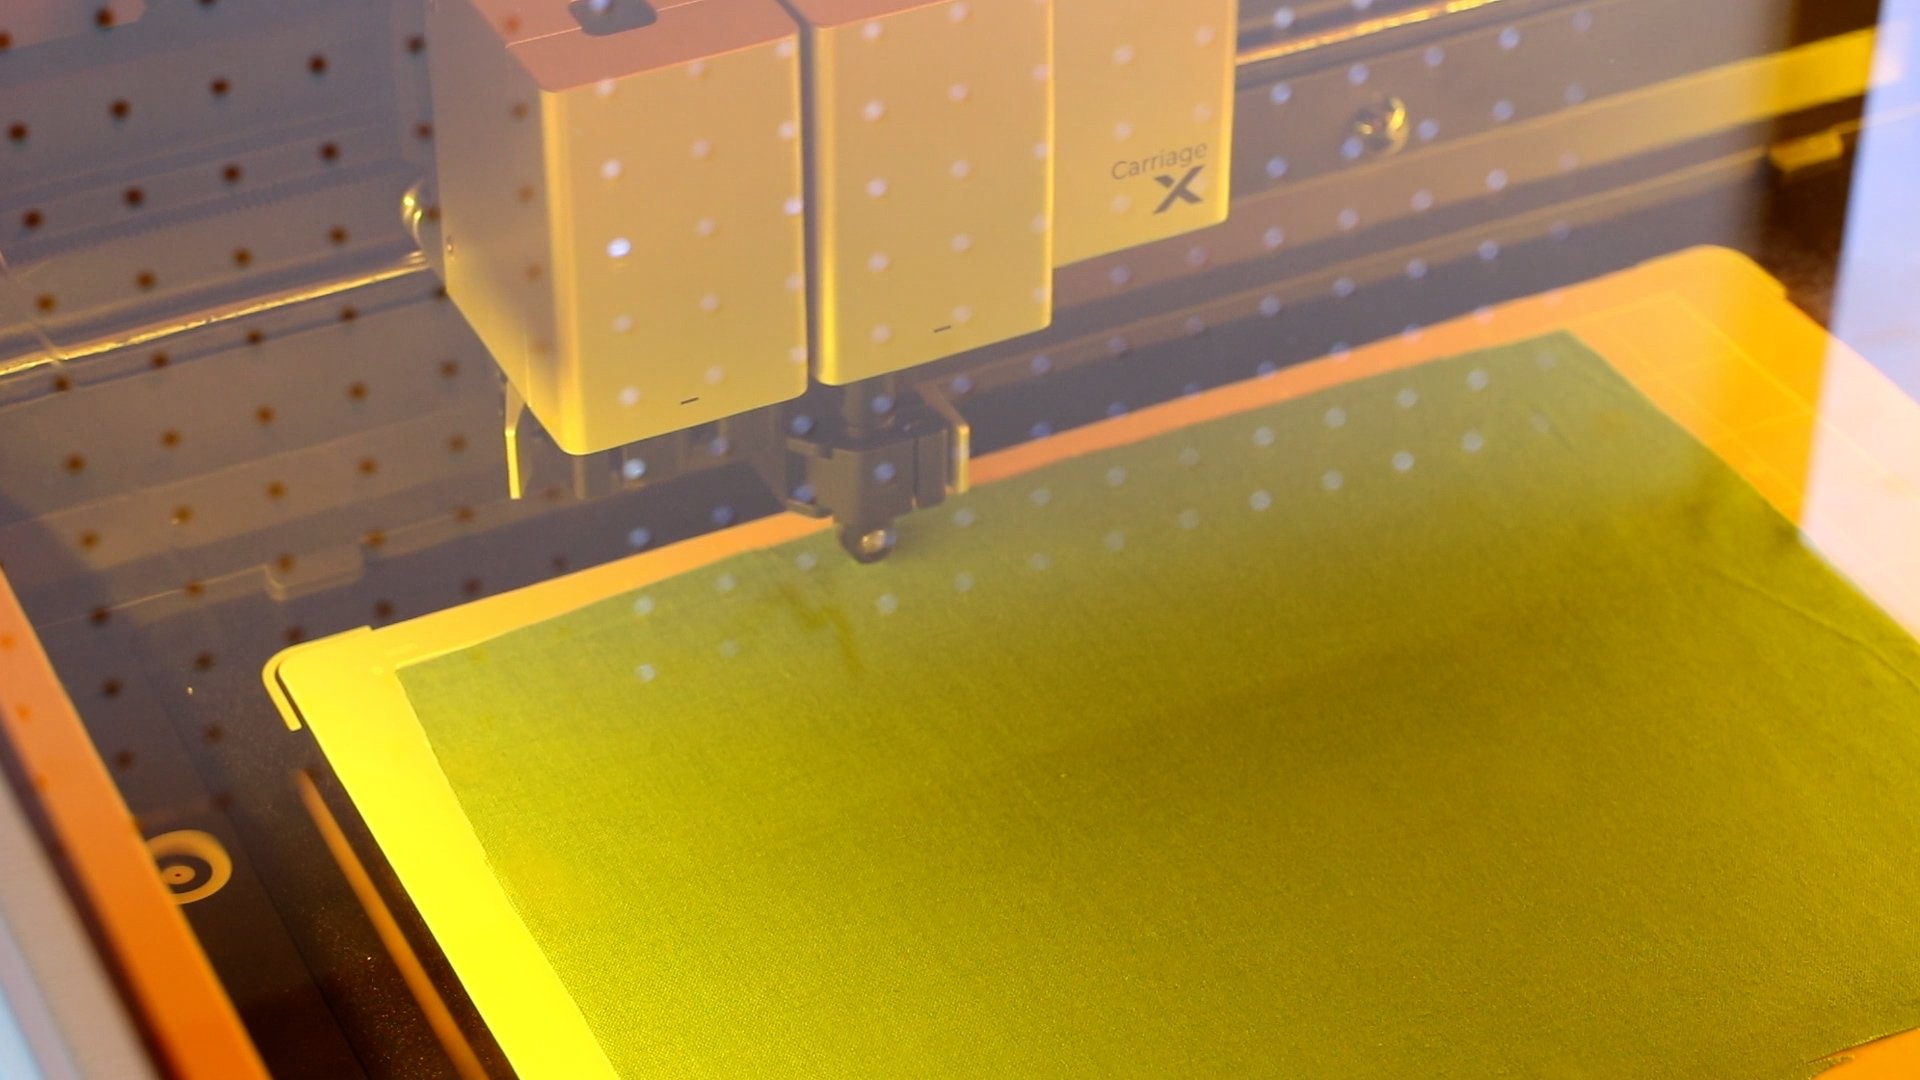
Once the cut is complete, remove the final piece from your machine. I will use this material to sew into a bag for my tic tac toe pieces.
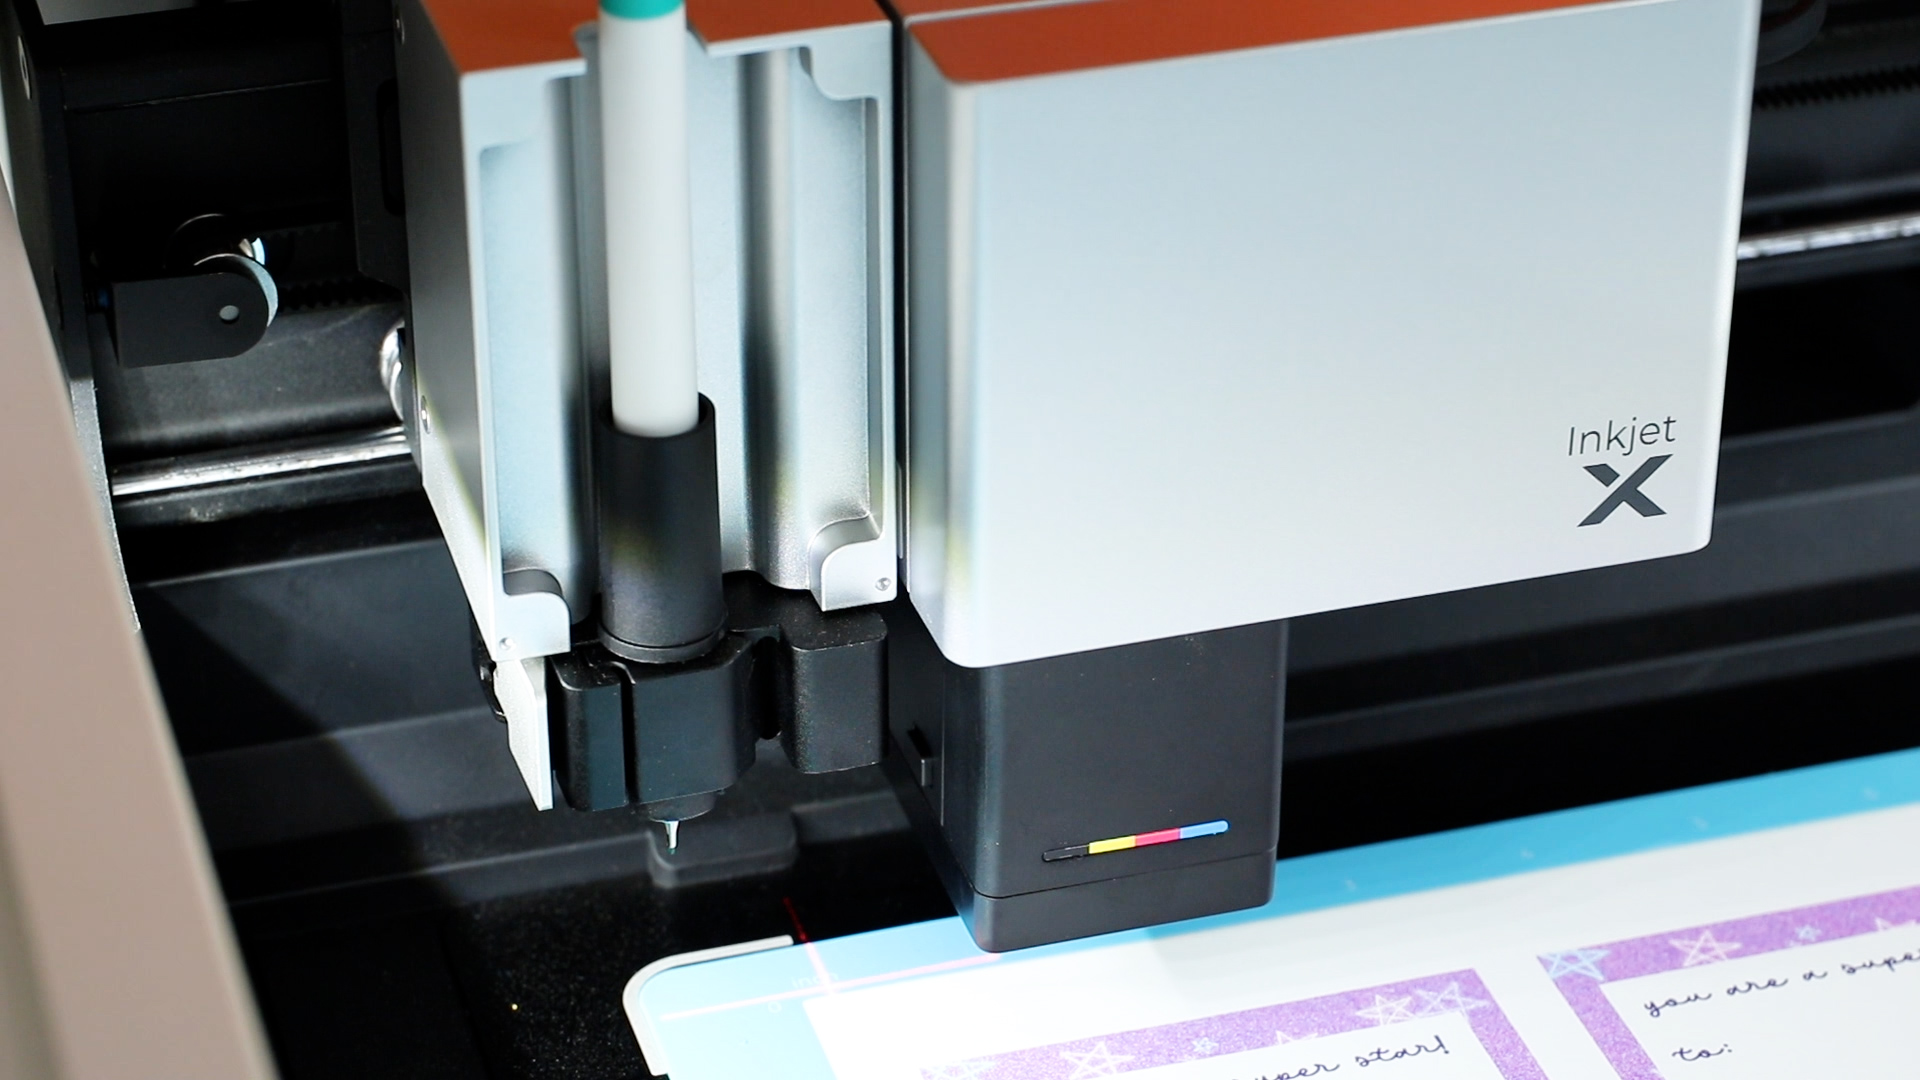
Next, we are going to use the printing module. I am determined to show you everything the xTool M1 Ultra can do with this project.
The Inkjet printing head is another accessory that can be purchased and does not come with the M1 Ultra.
Step 1: Set up inkjet printing module
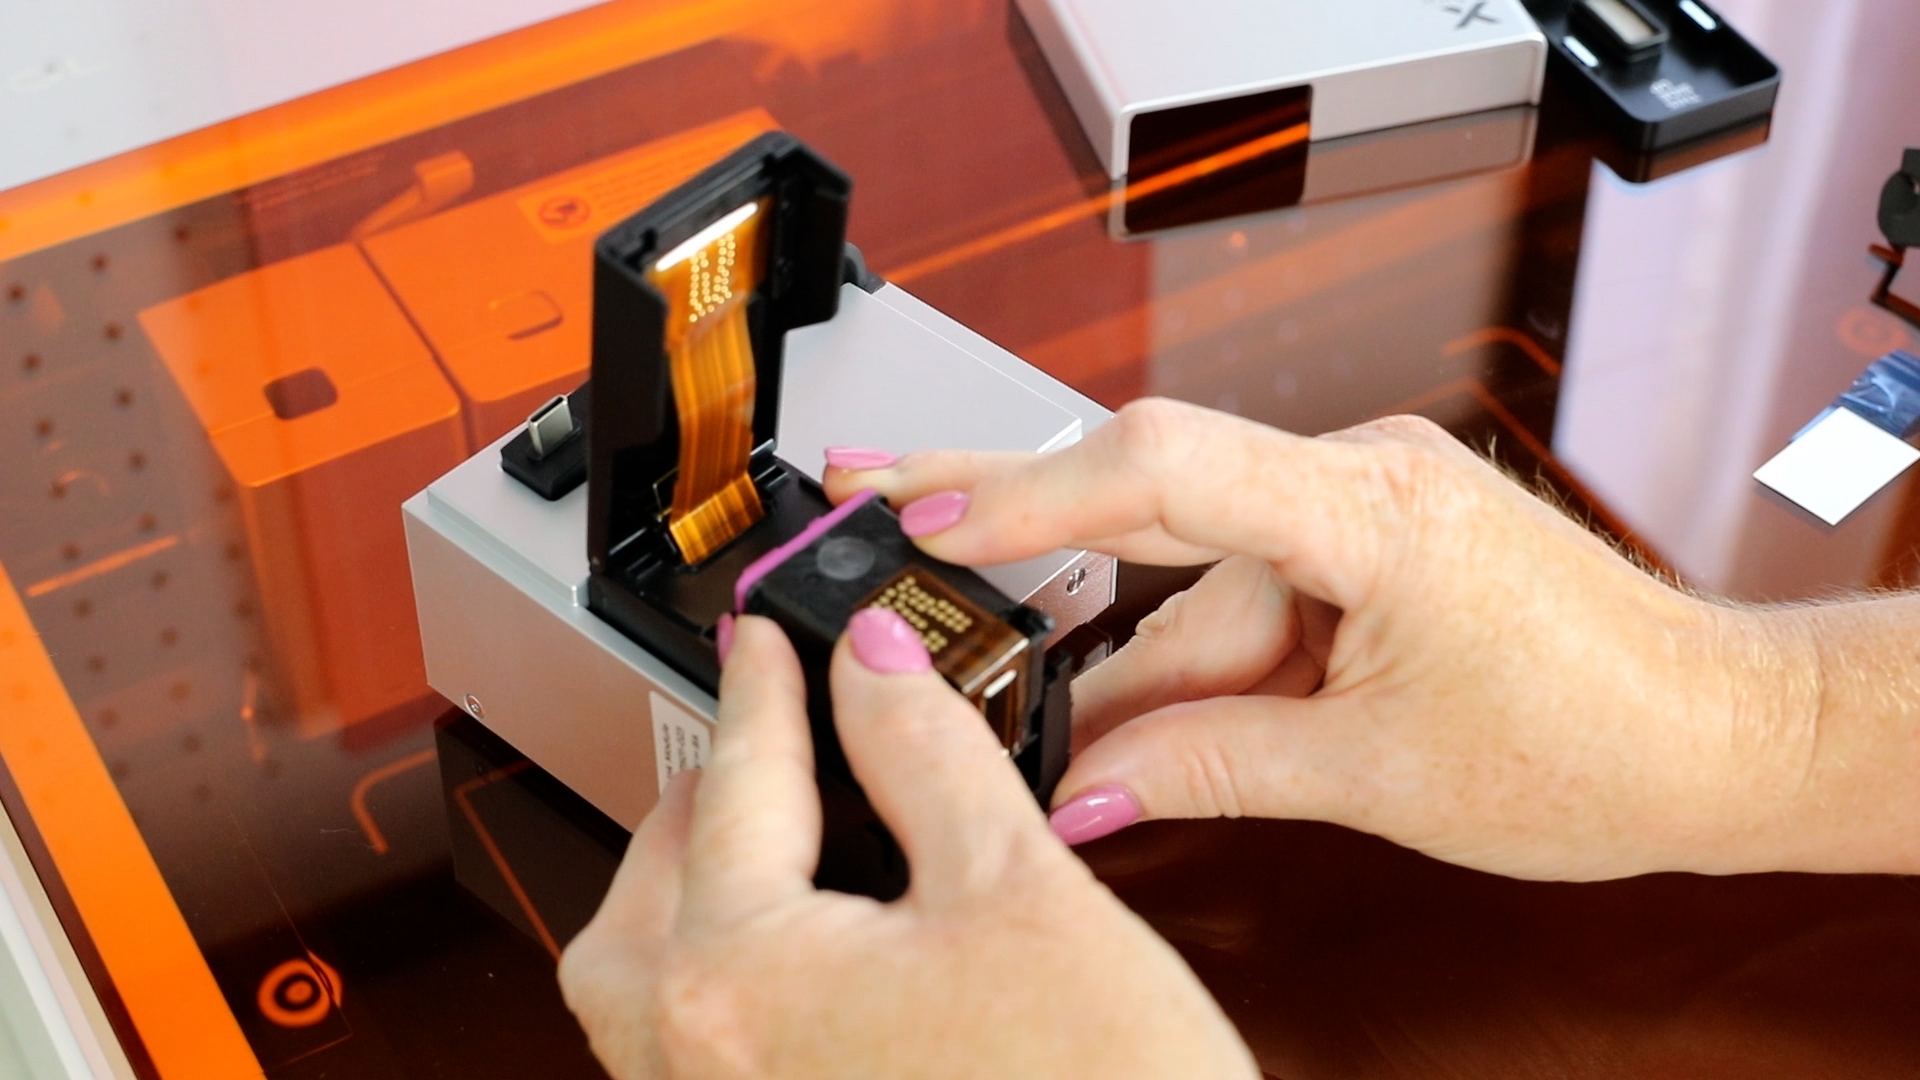
When you get the printer head out of the box you will need to do a little assembly. This only needs to be done one time.
Open the module and add the print cartridge and make sure you don’t let the print cartridge dry out. When you start the assembly process make sure you have time to finish it and then add the cover to the bottom of the head. Keep the cover on when it’s not in use.
The process is fairly simple and it’s all explained within a manual that comes with the print head.
Step 2: Add module to machine
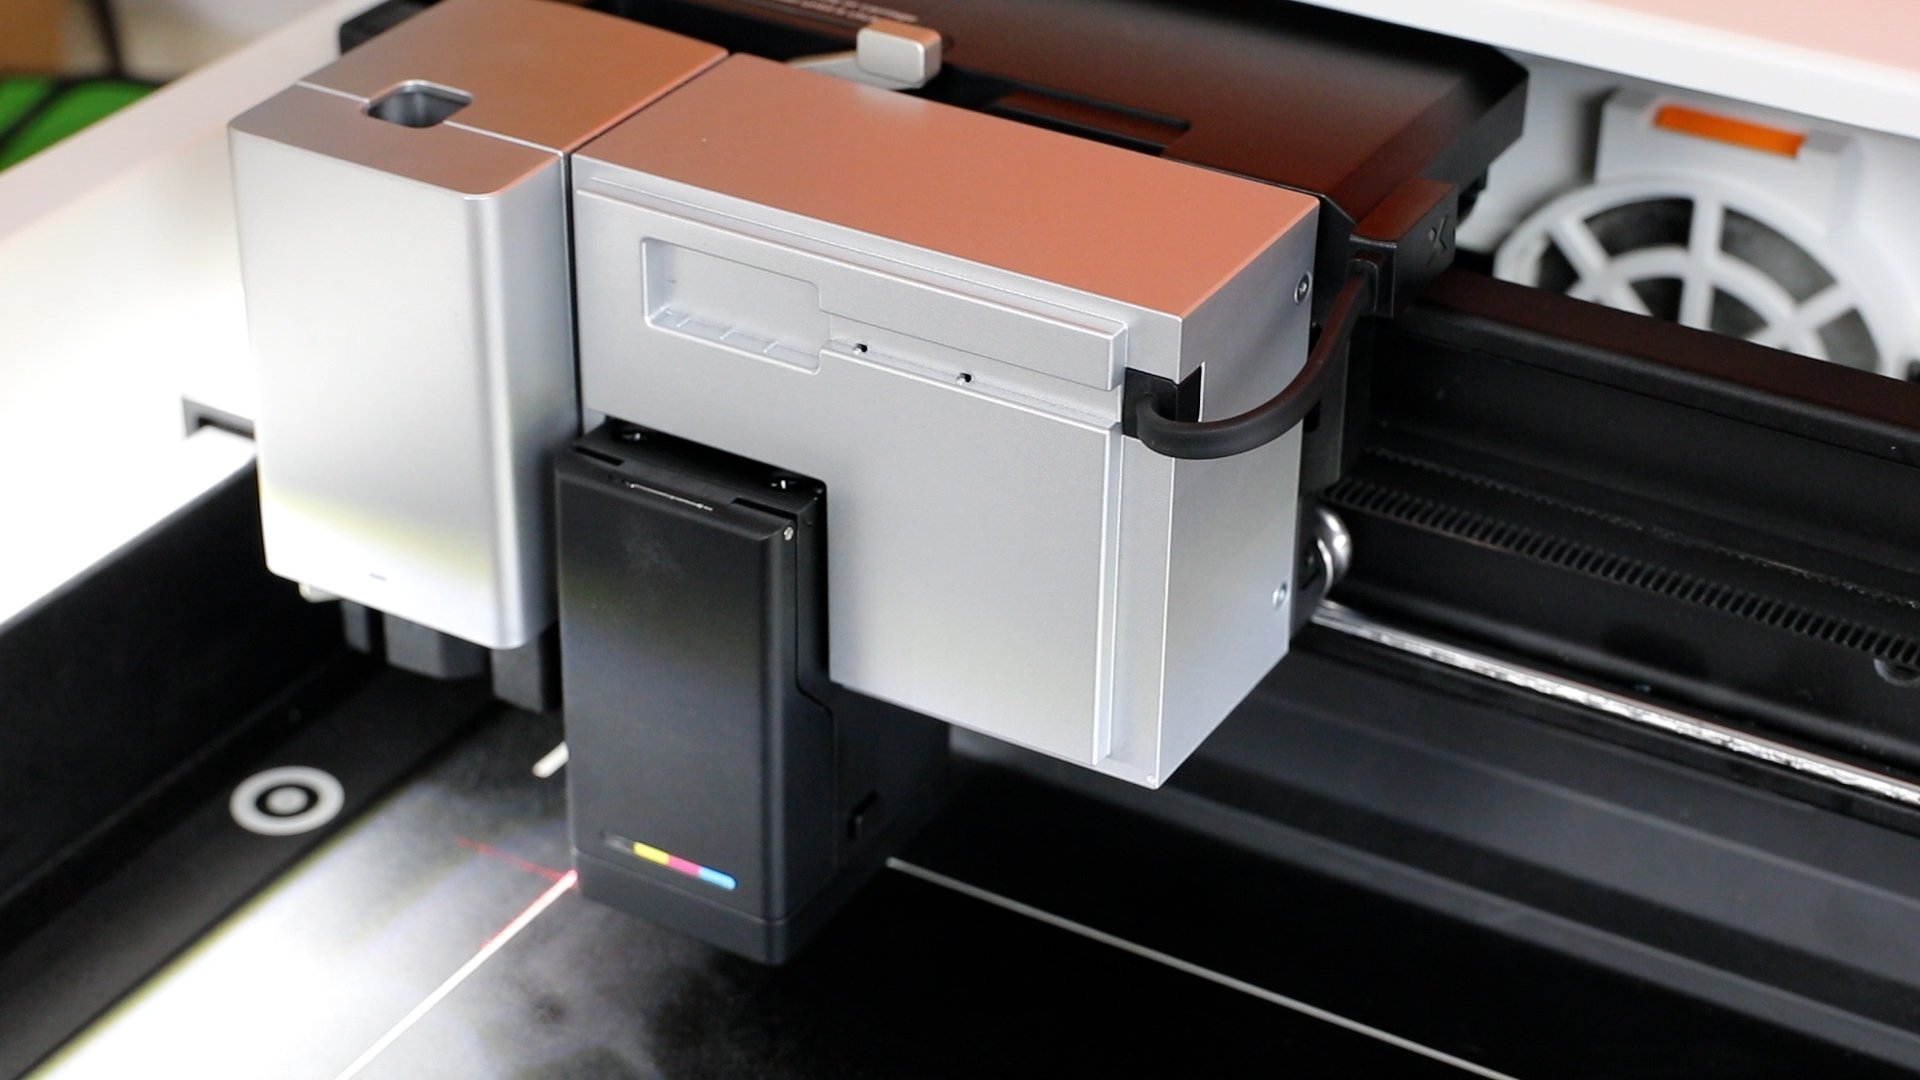
To install the print module remove the other module and then slide the print head in and lock it in place.
This module has a cord that connects to the laser after you have it installed. Plug the cord in and replace the front of the module.
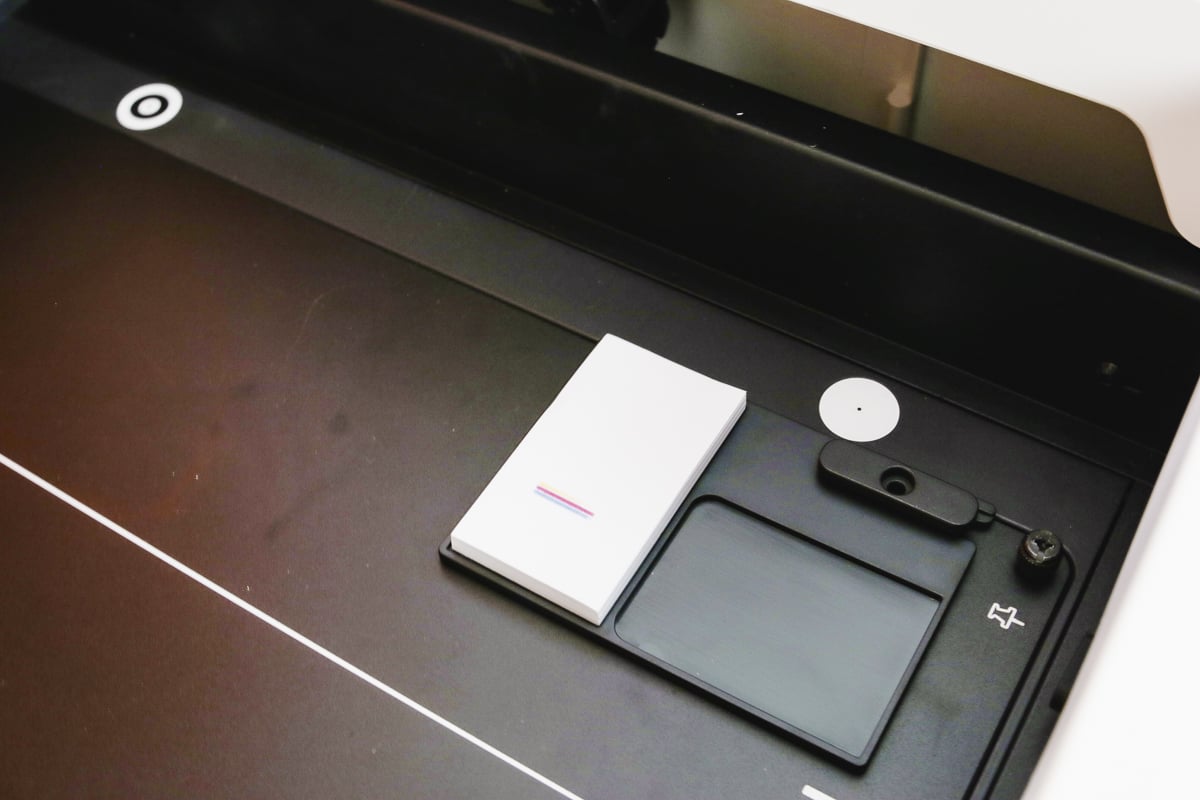
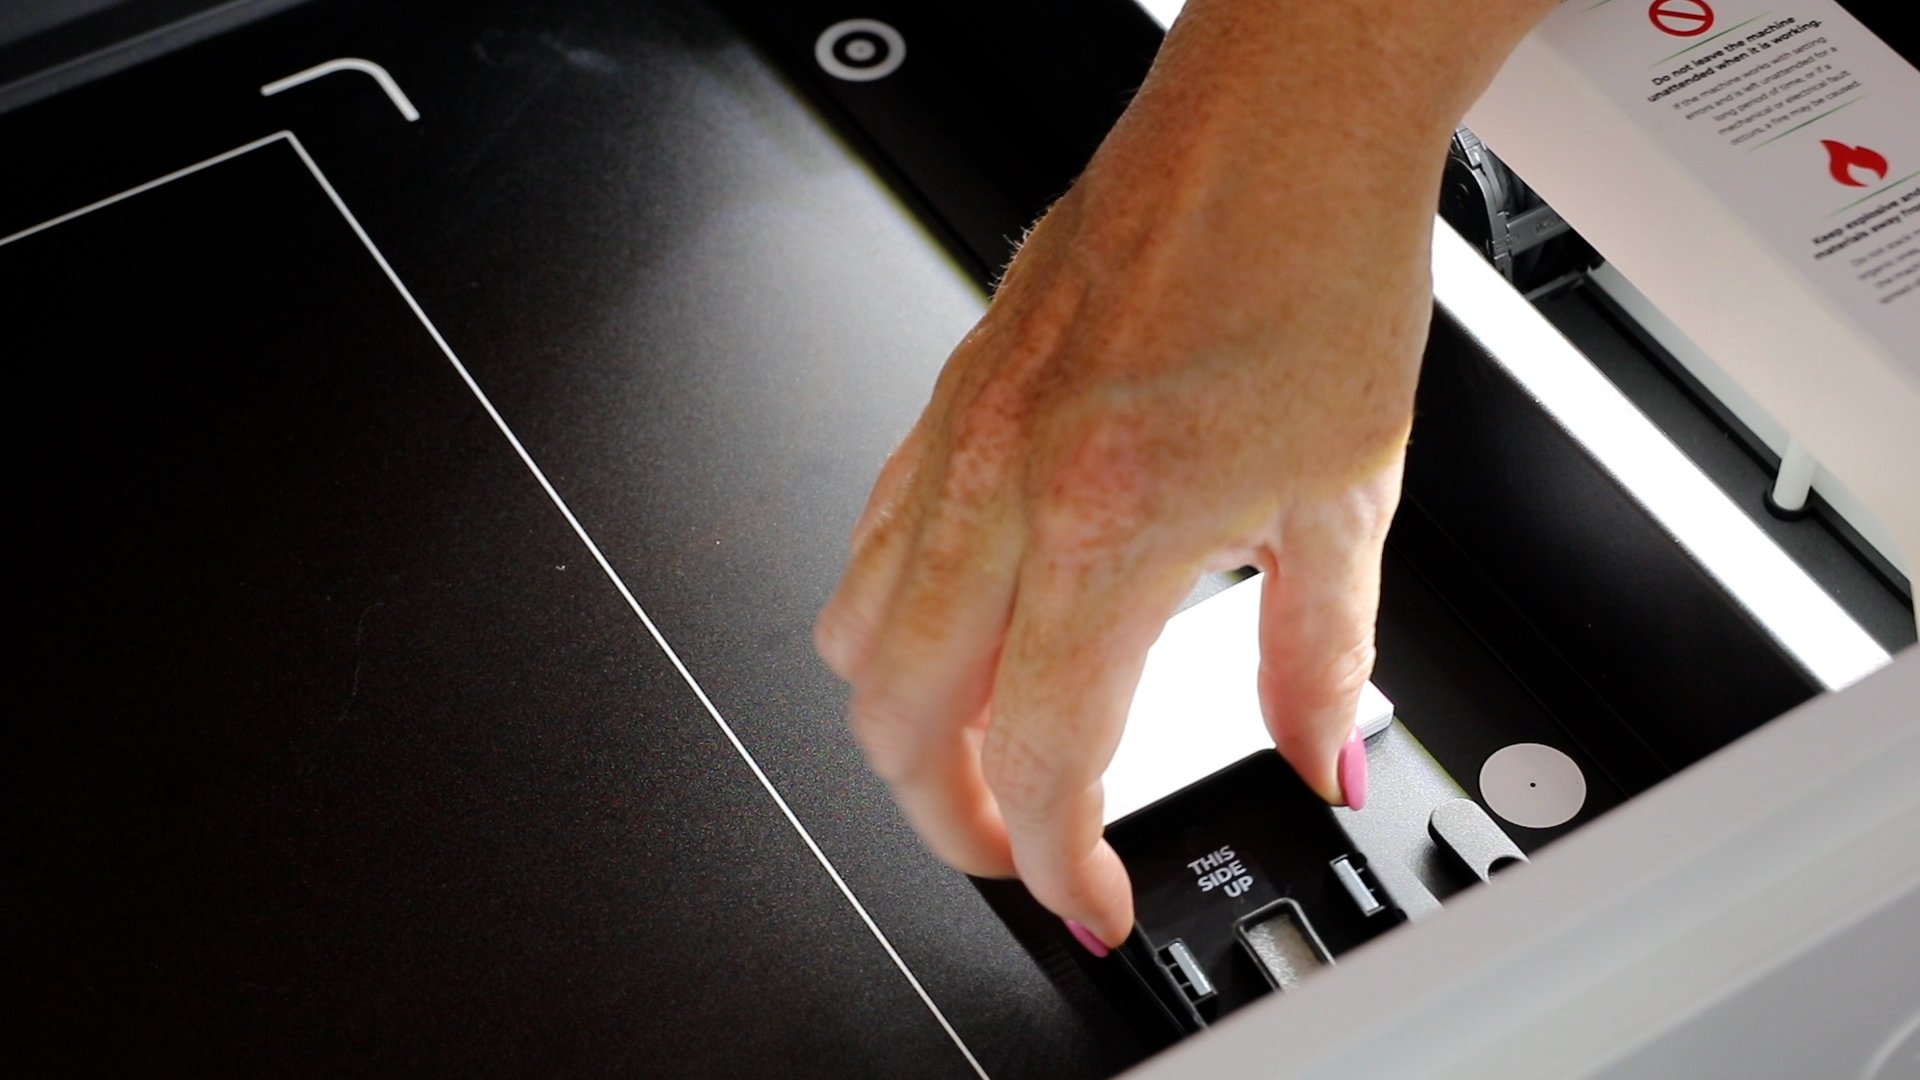
This module comes with a plate that you install in the lower right-hand corner inside the laser. The print head comes with a pack of paper that you add to the square on the plate.
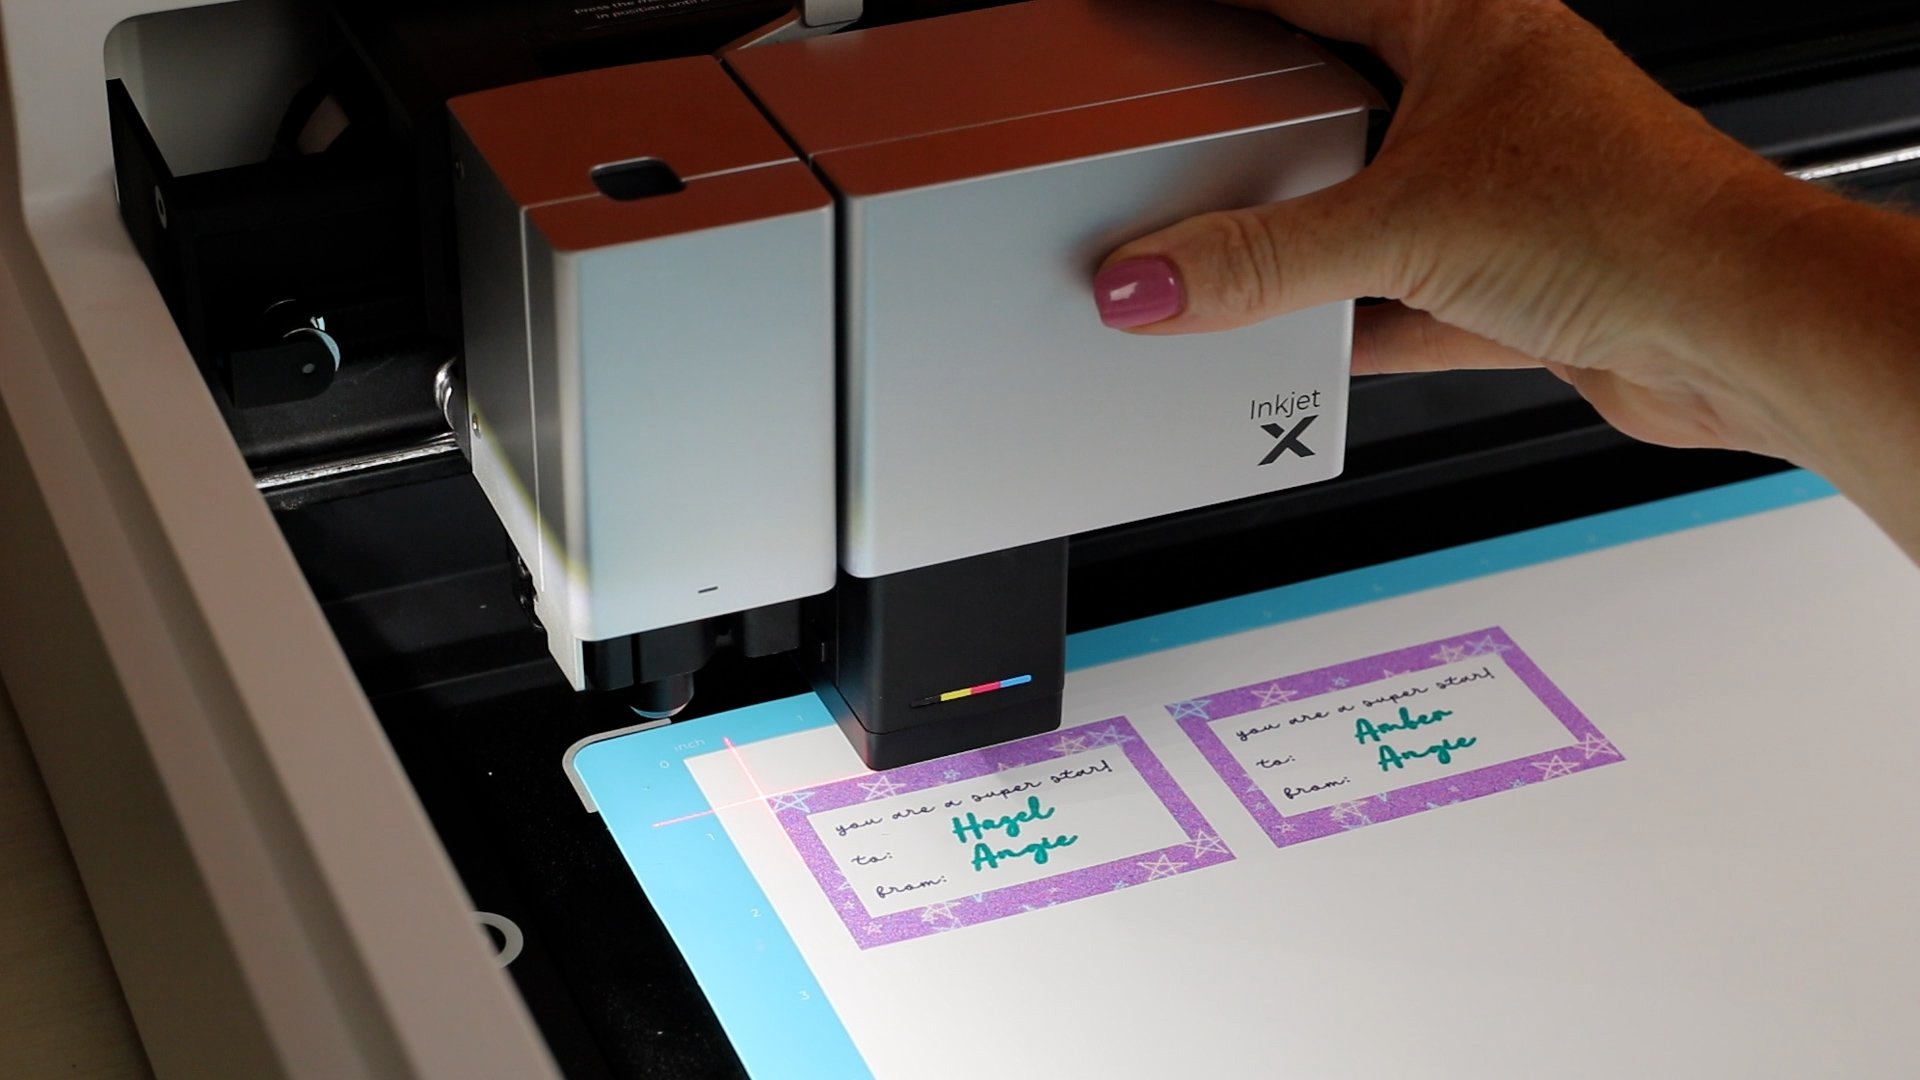
When you’re ready to print, take the cover off the bottom of the head and place it on the plate. The xTool M1 Ultra will replace the cover when it’s done printing.
For the printer, we are using the mats again to hold the paper in place.
Step 3: Set up design
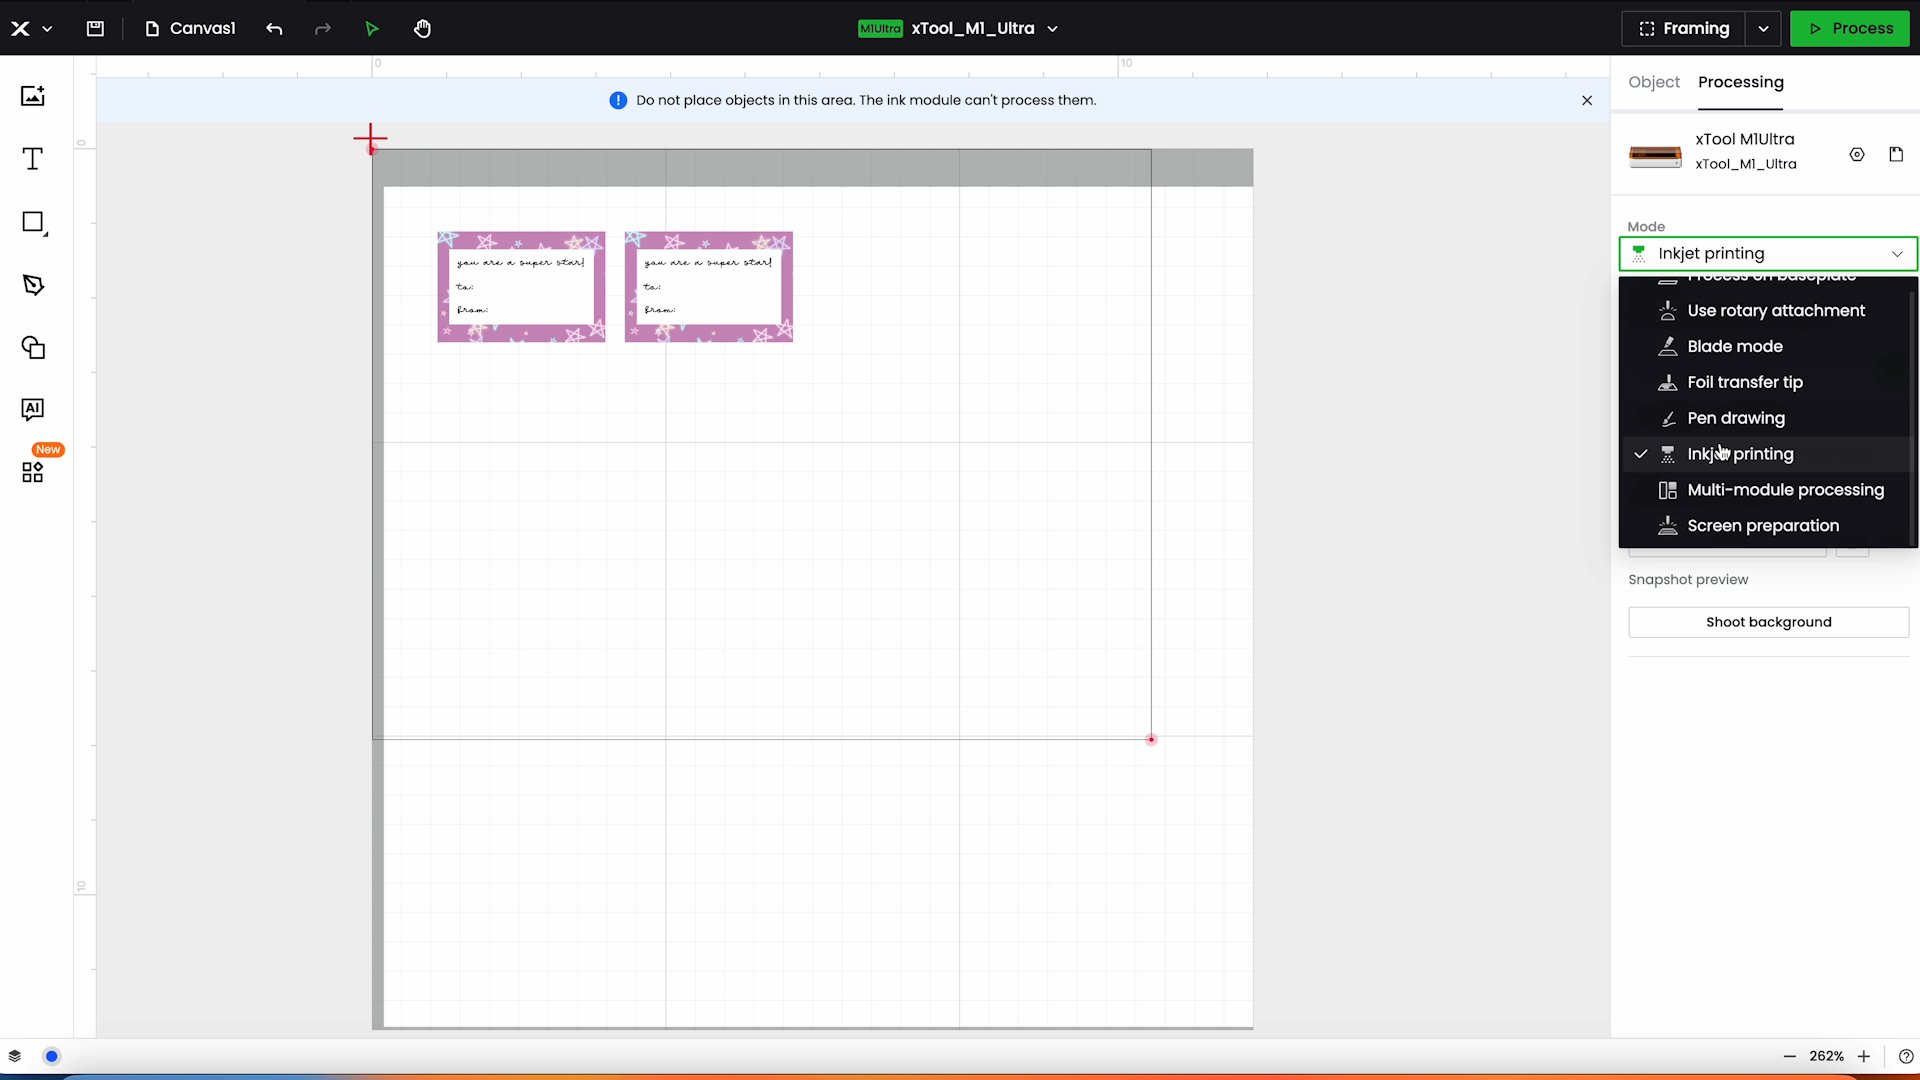
Upload the design into Creative Space and make sure the mode is set to Inkjet Printing. On the screen you’ll see there is an area where the ink module can’t process. Don’t place your blank in that area.
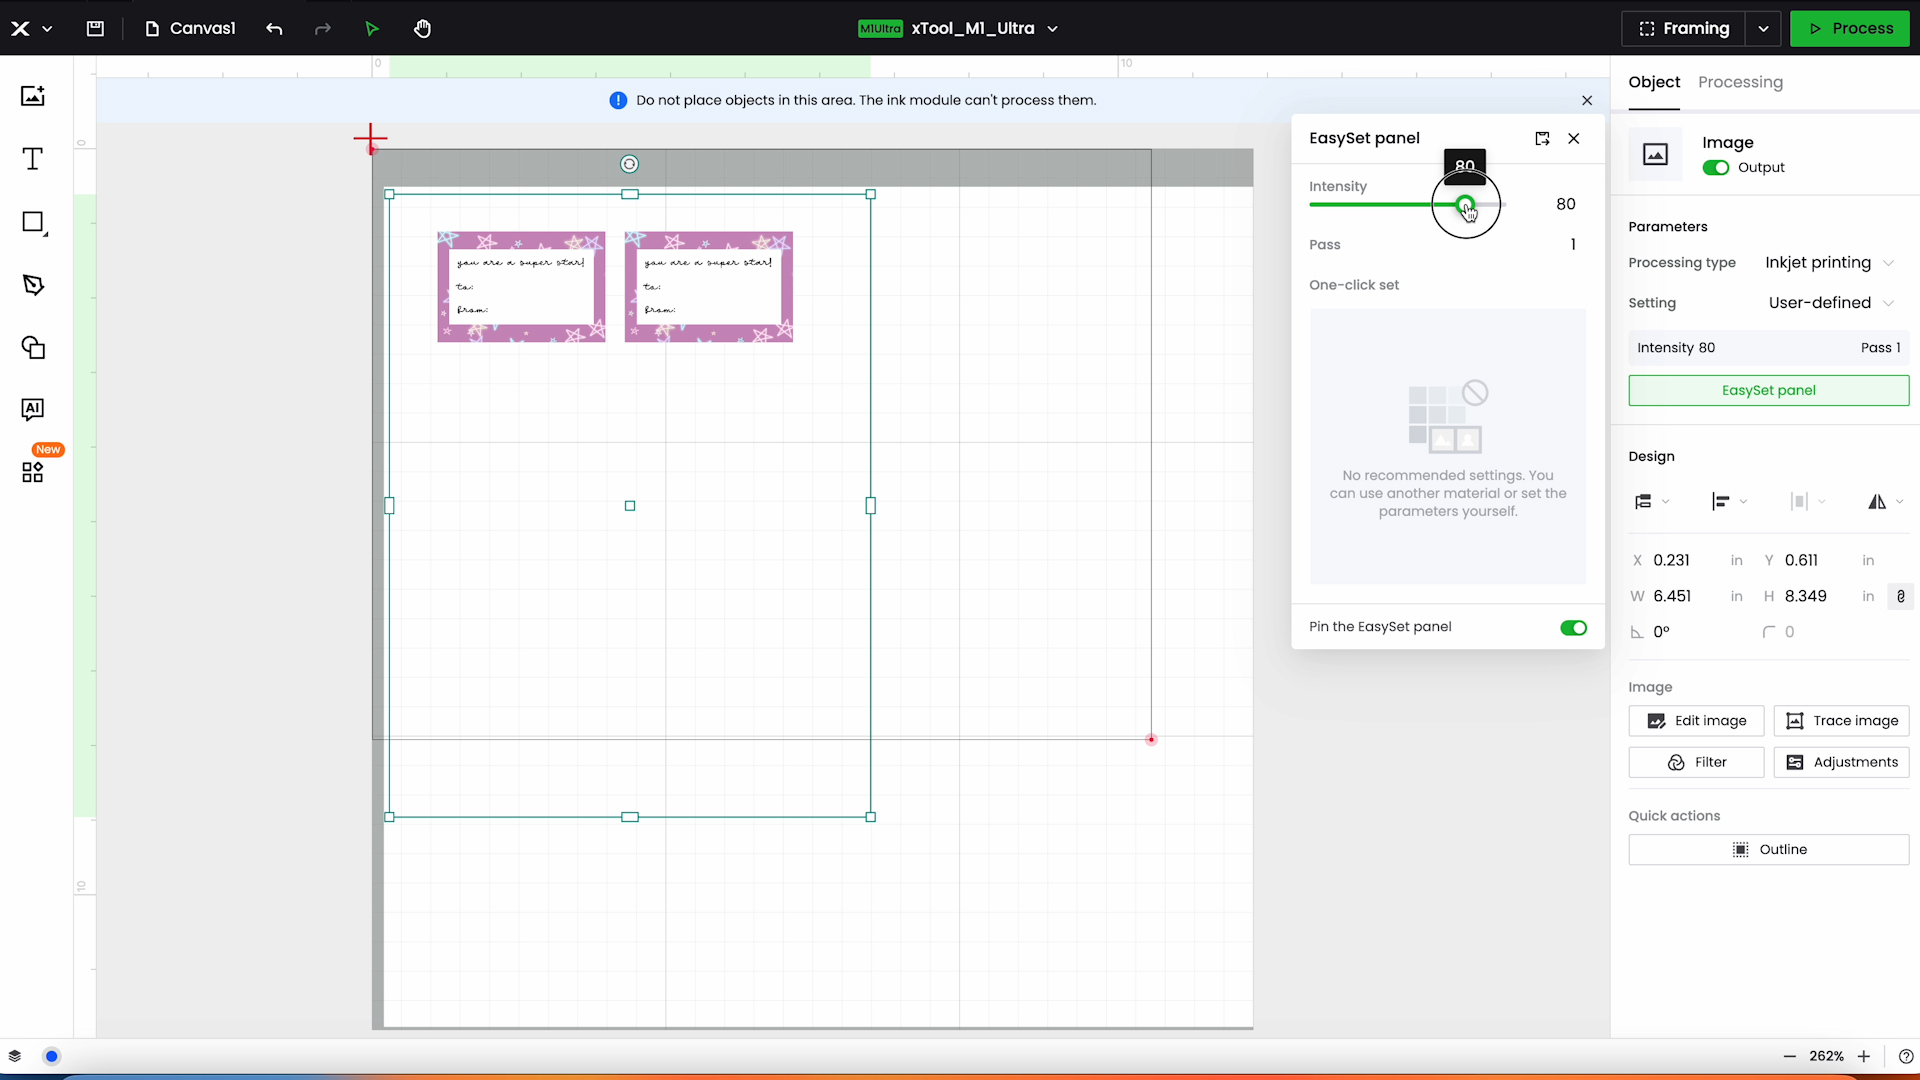
In the Easy Set Panel you can adjust the intensity to be more or less intense. I tried an intensity of 80 and Quick Close.
Step 4: Mark and process your design
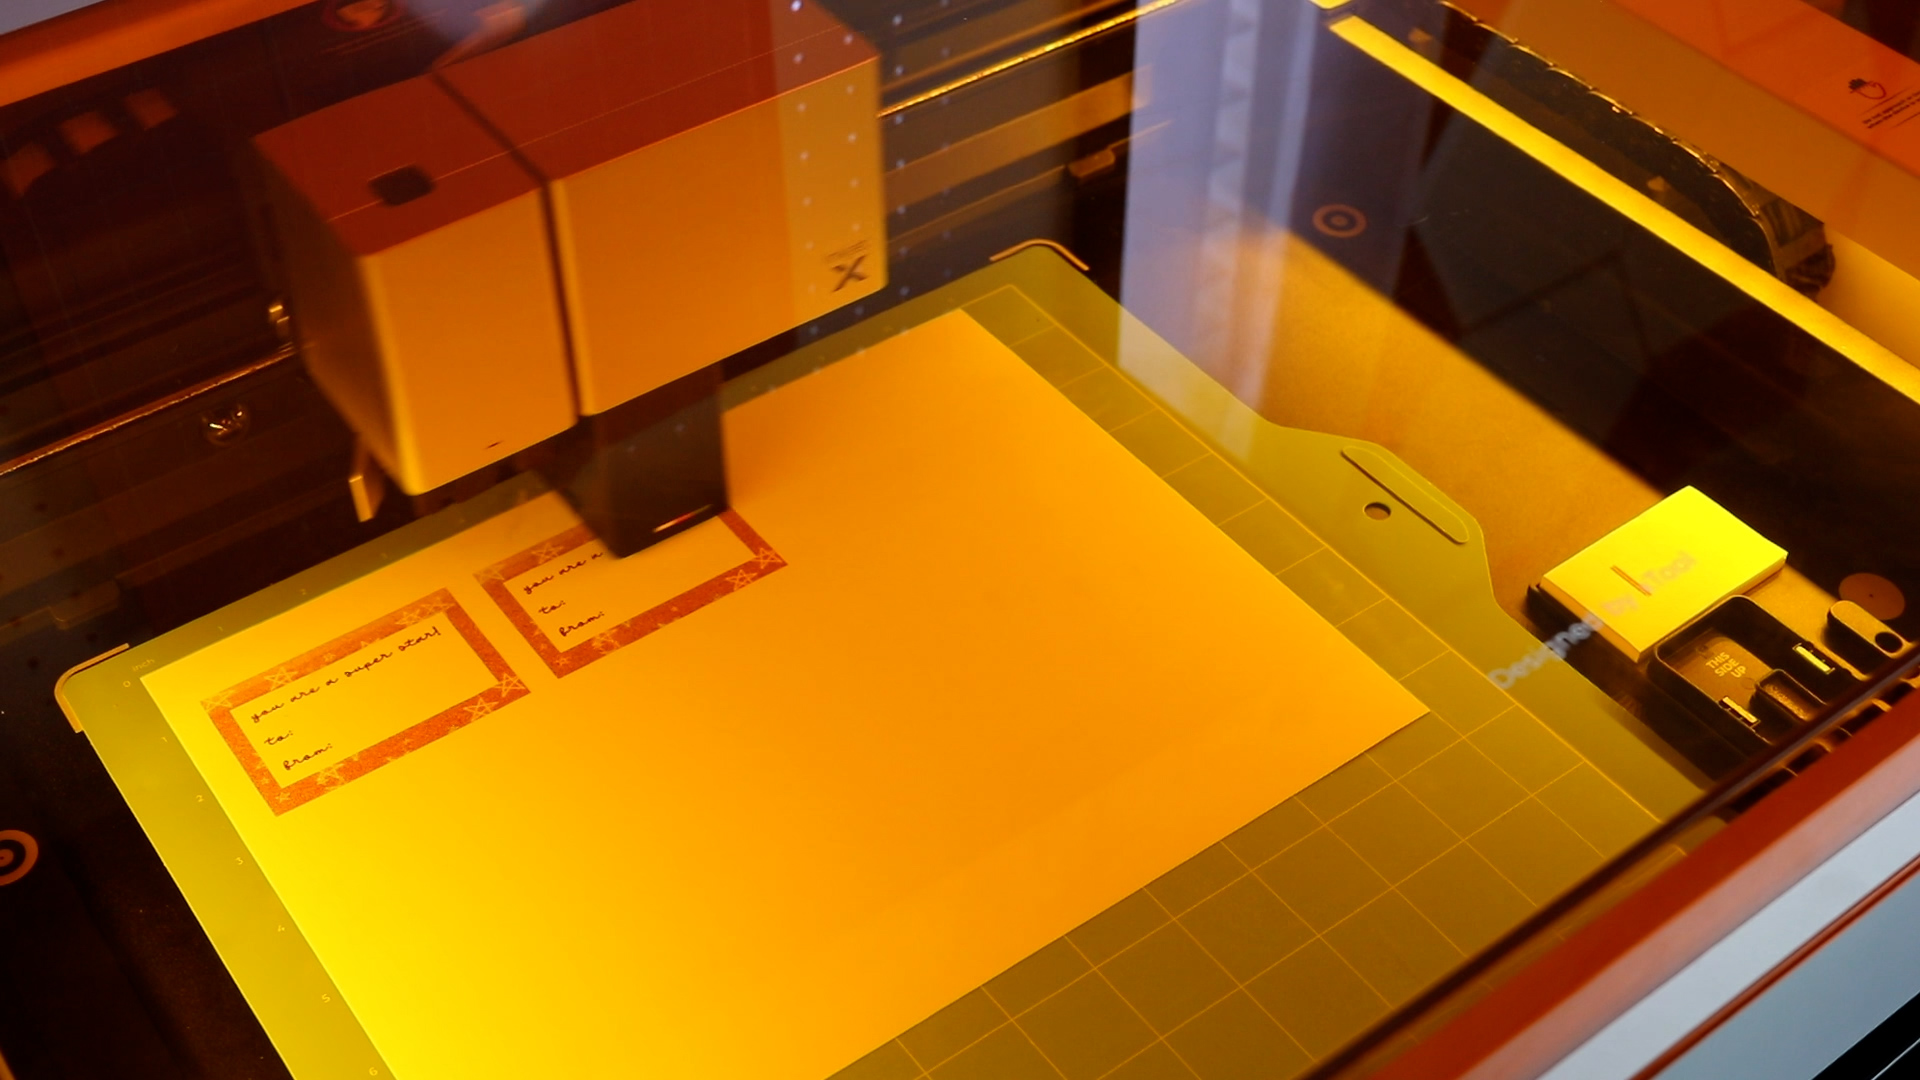
To mark the processing area, I am marking the paper where it’s located within the laser. Click Process to start the processing and printing on the paper. Be sure to remove the cover from the inkjet head and place on the place before printing.
After you click Process you may be prompted to calibrate the print head, especially if it’s your first time using the Inkjet Print Head. To calibrate, follow the instructions on the screen and use a scrap piece of paper for the calibration process.
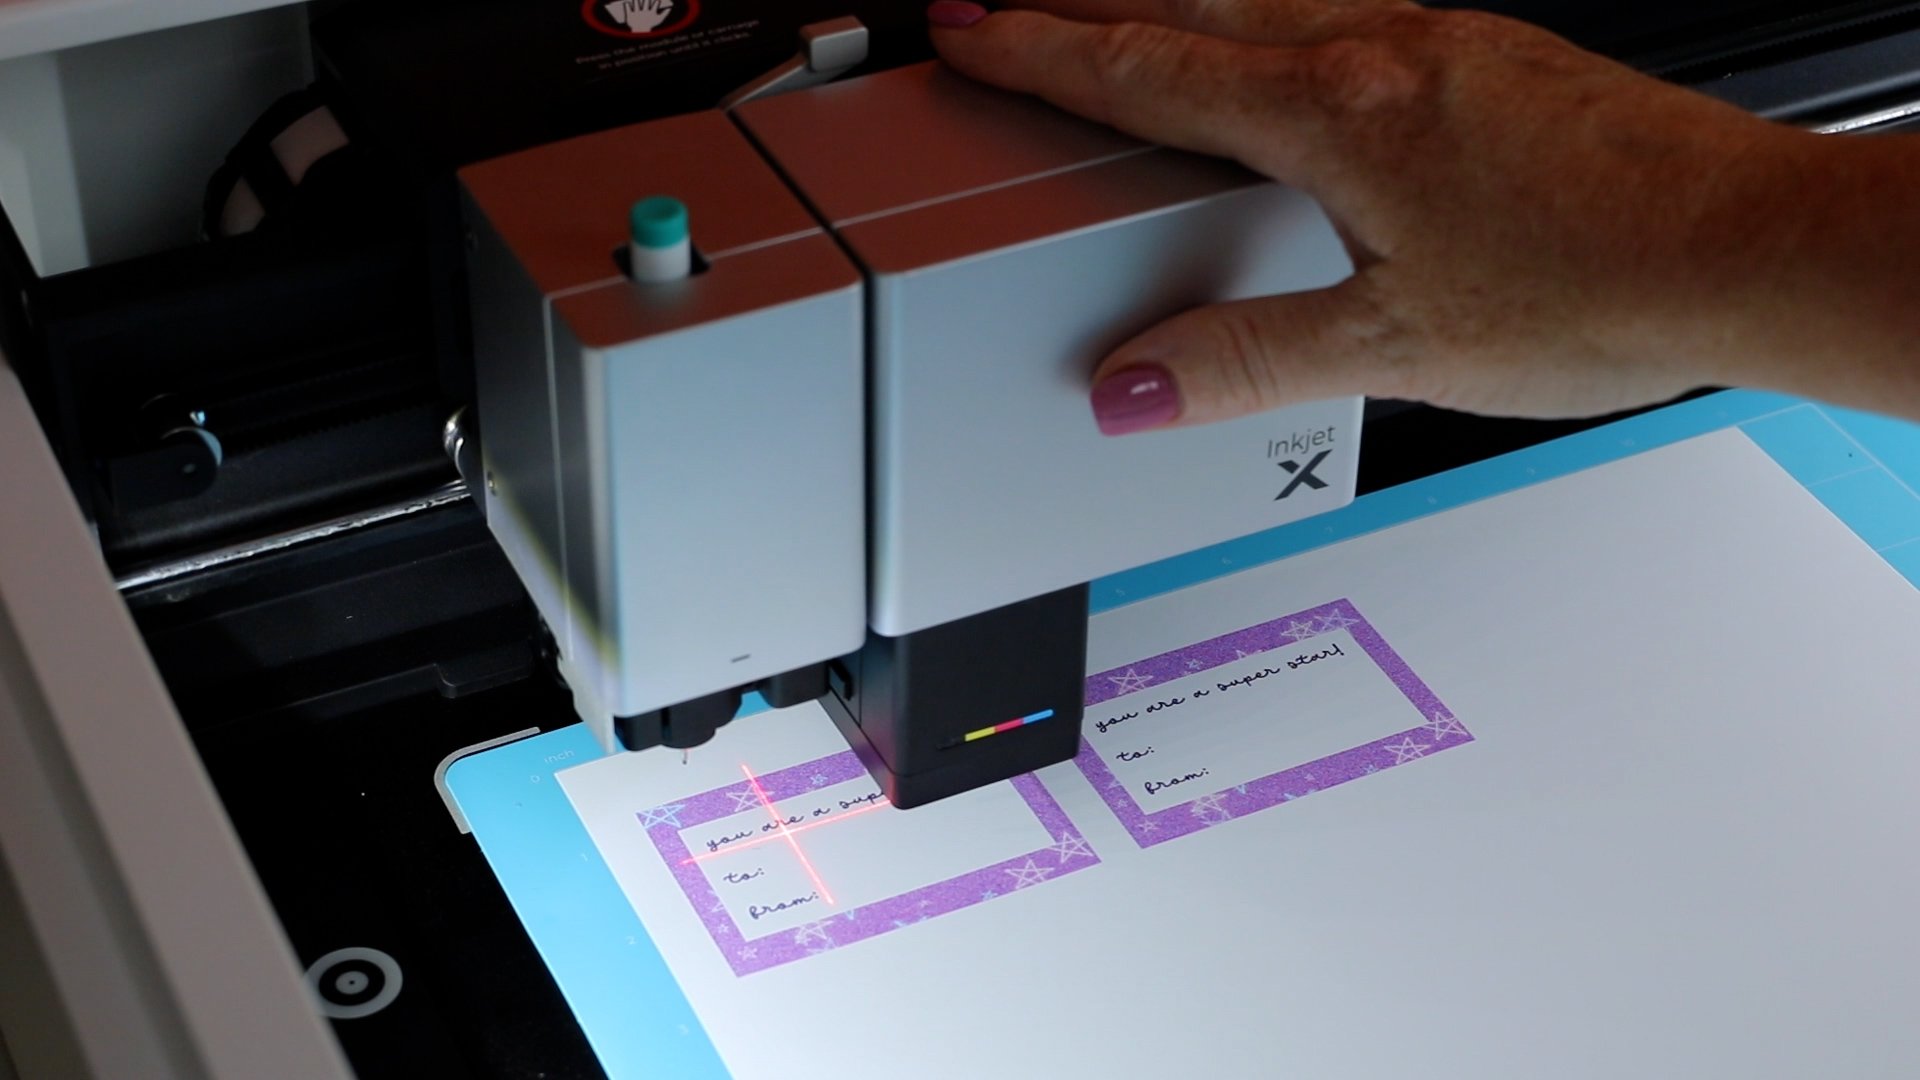
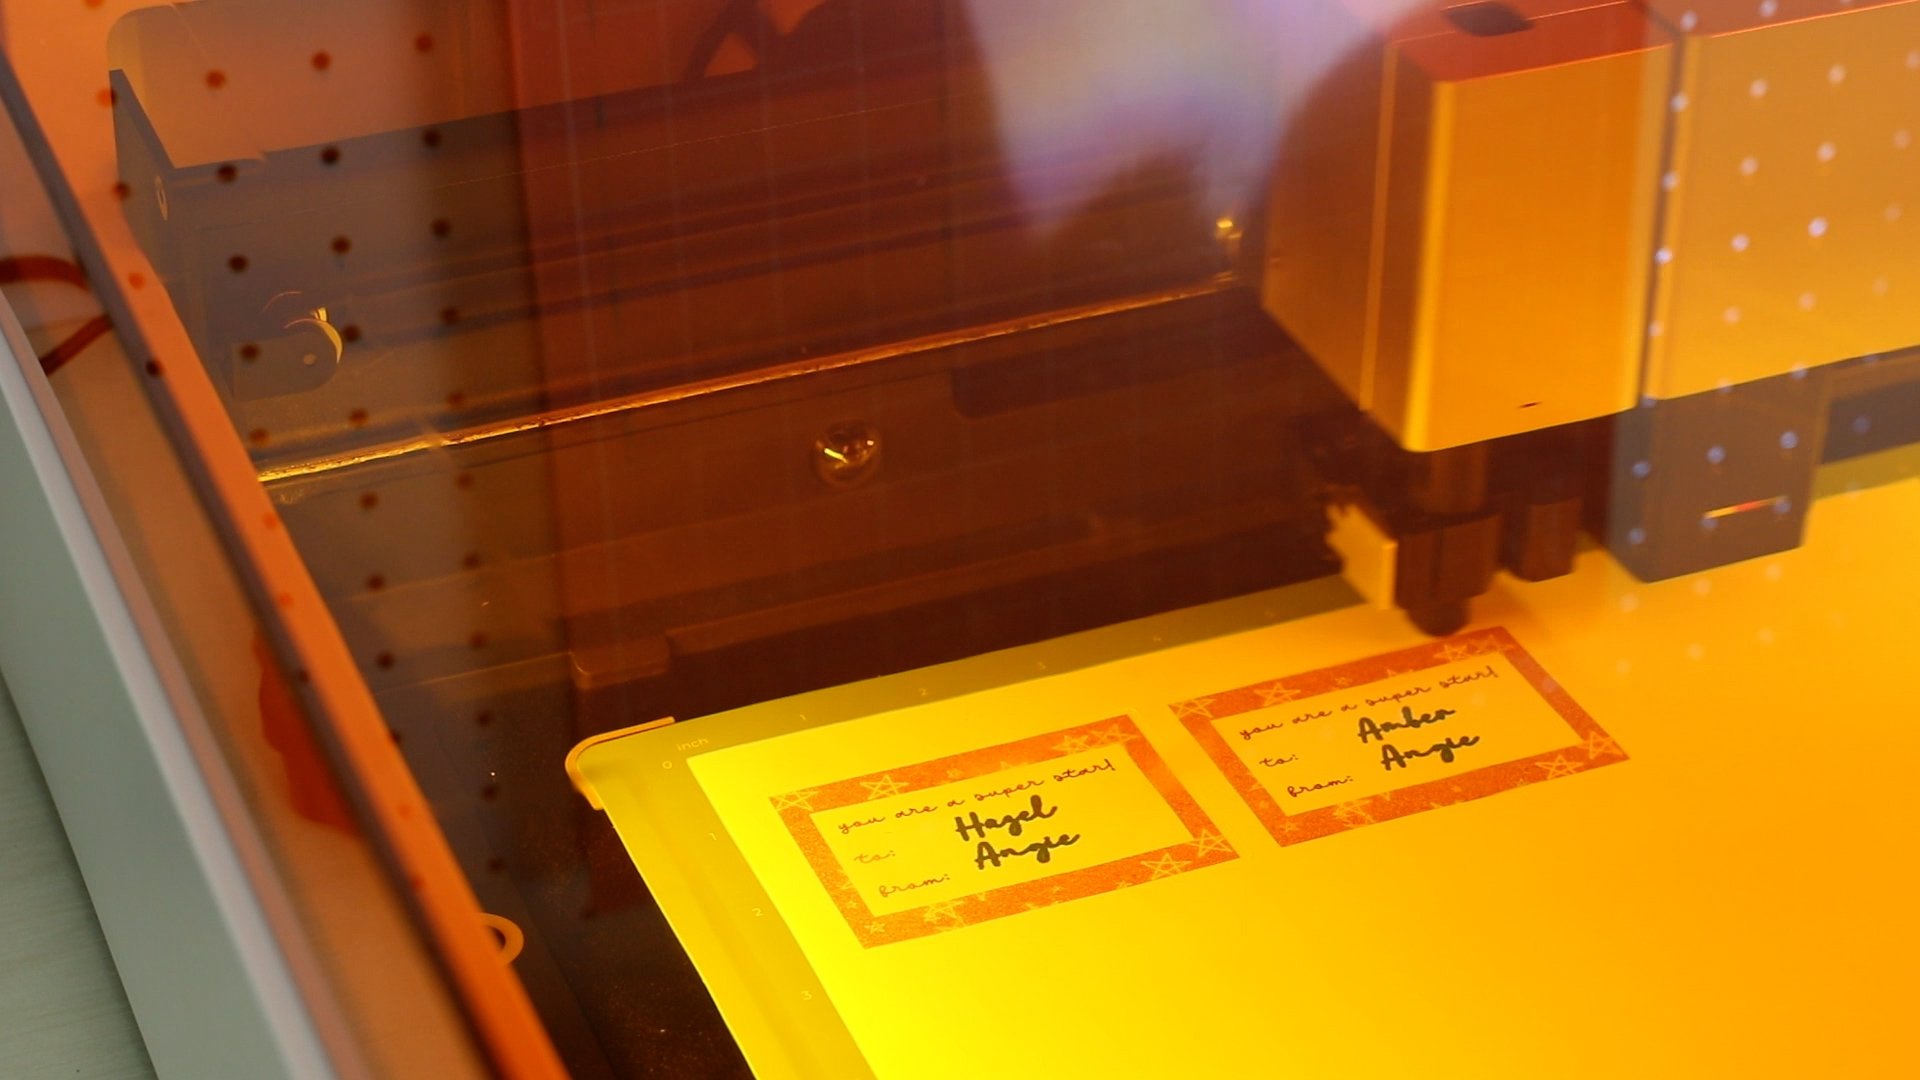
The laser will first move to the paper pad to test the inkjet head.
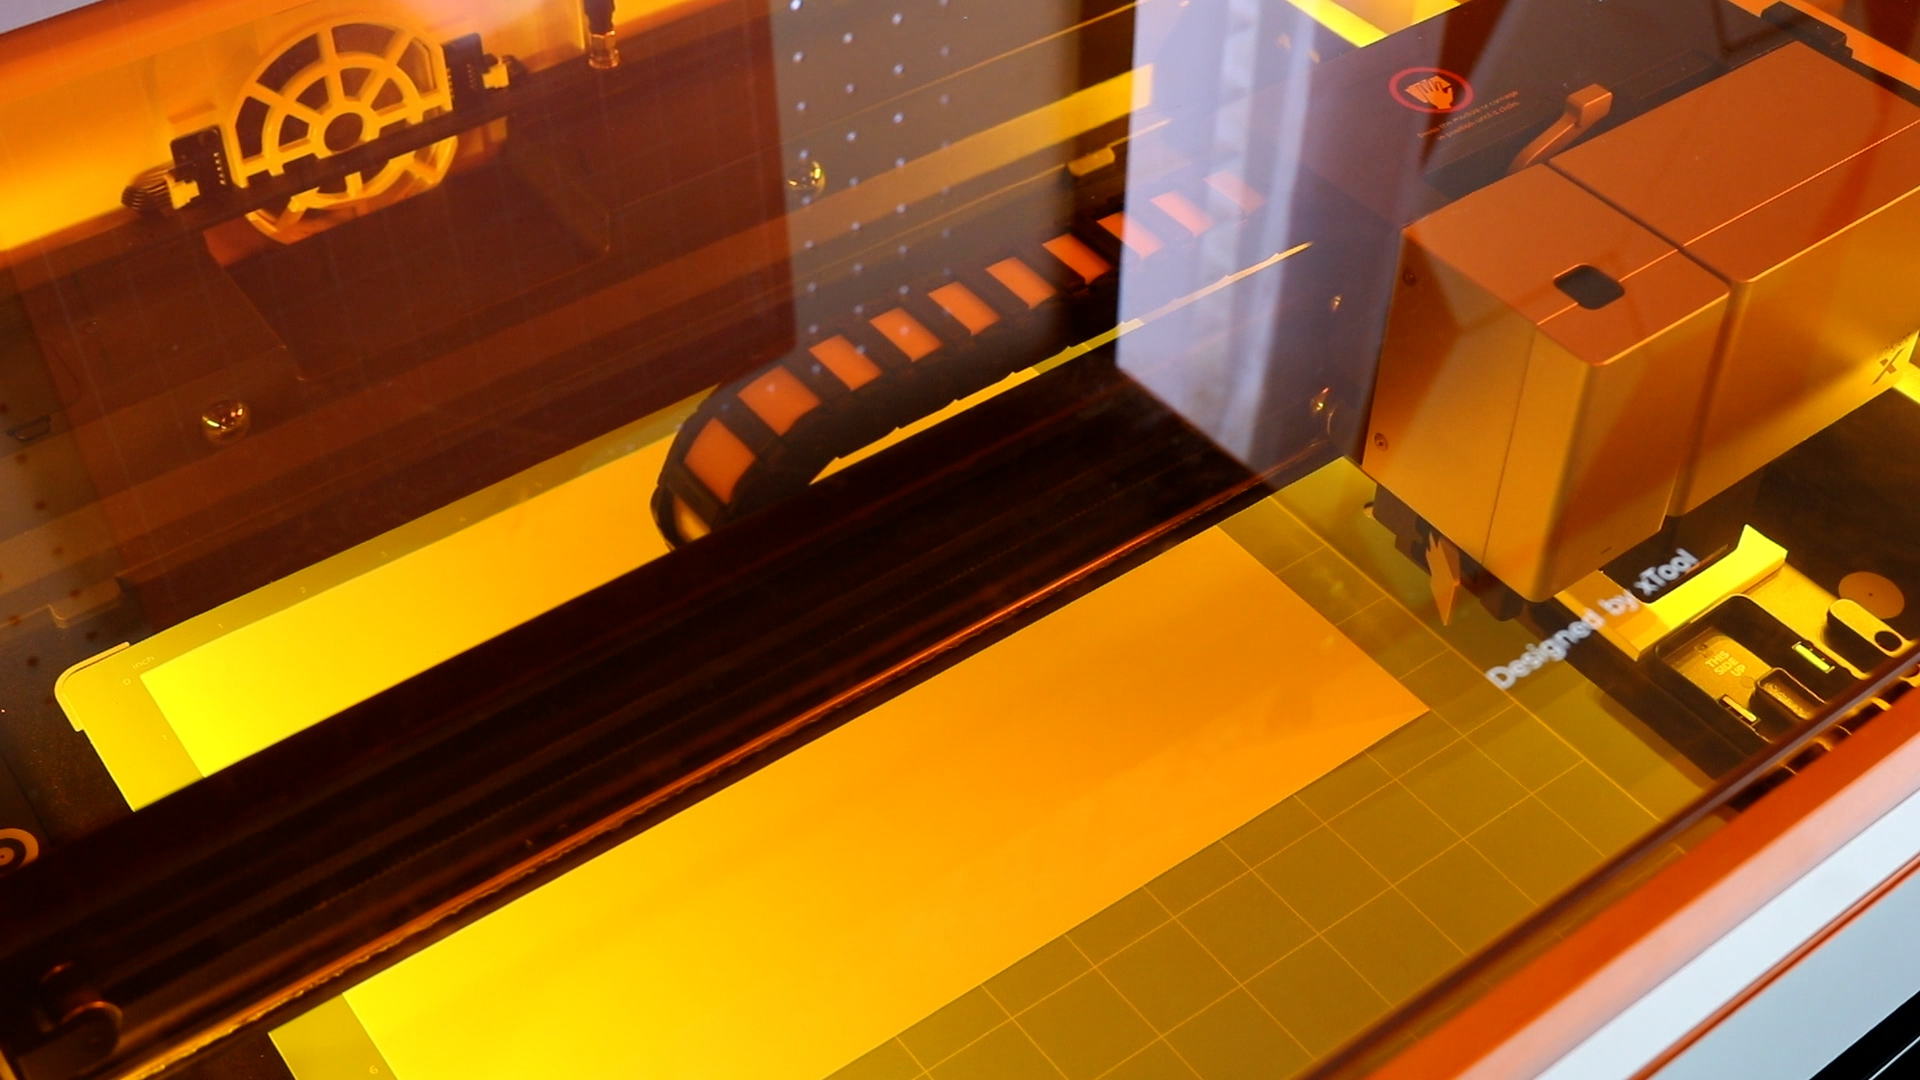
It will then print onto your material.
After printing is complete, the module will move over and add the cover back into place automatically.
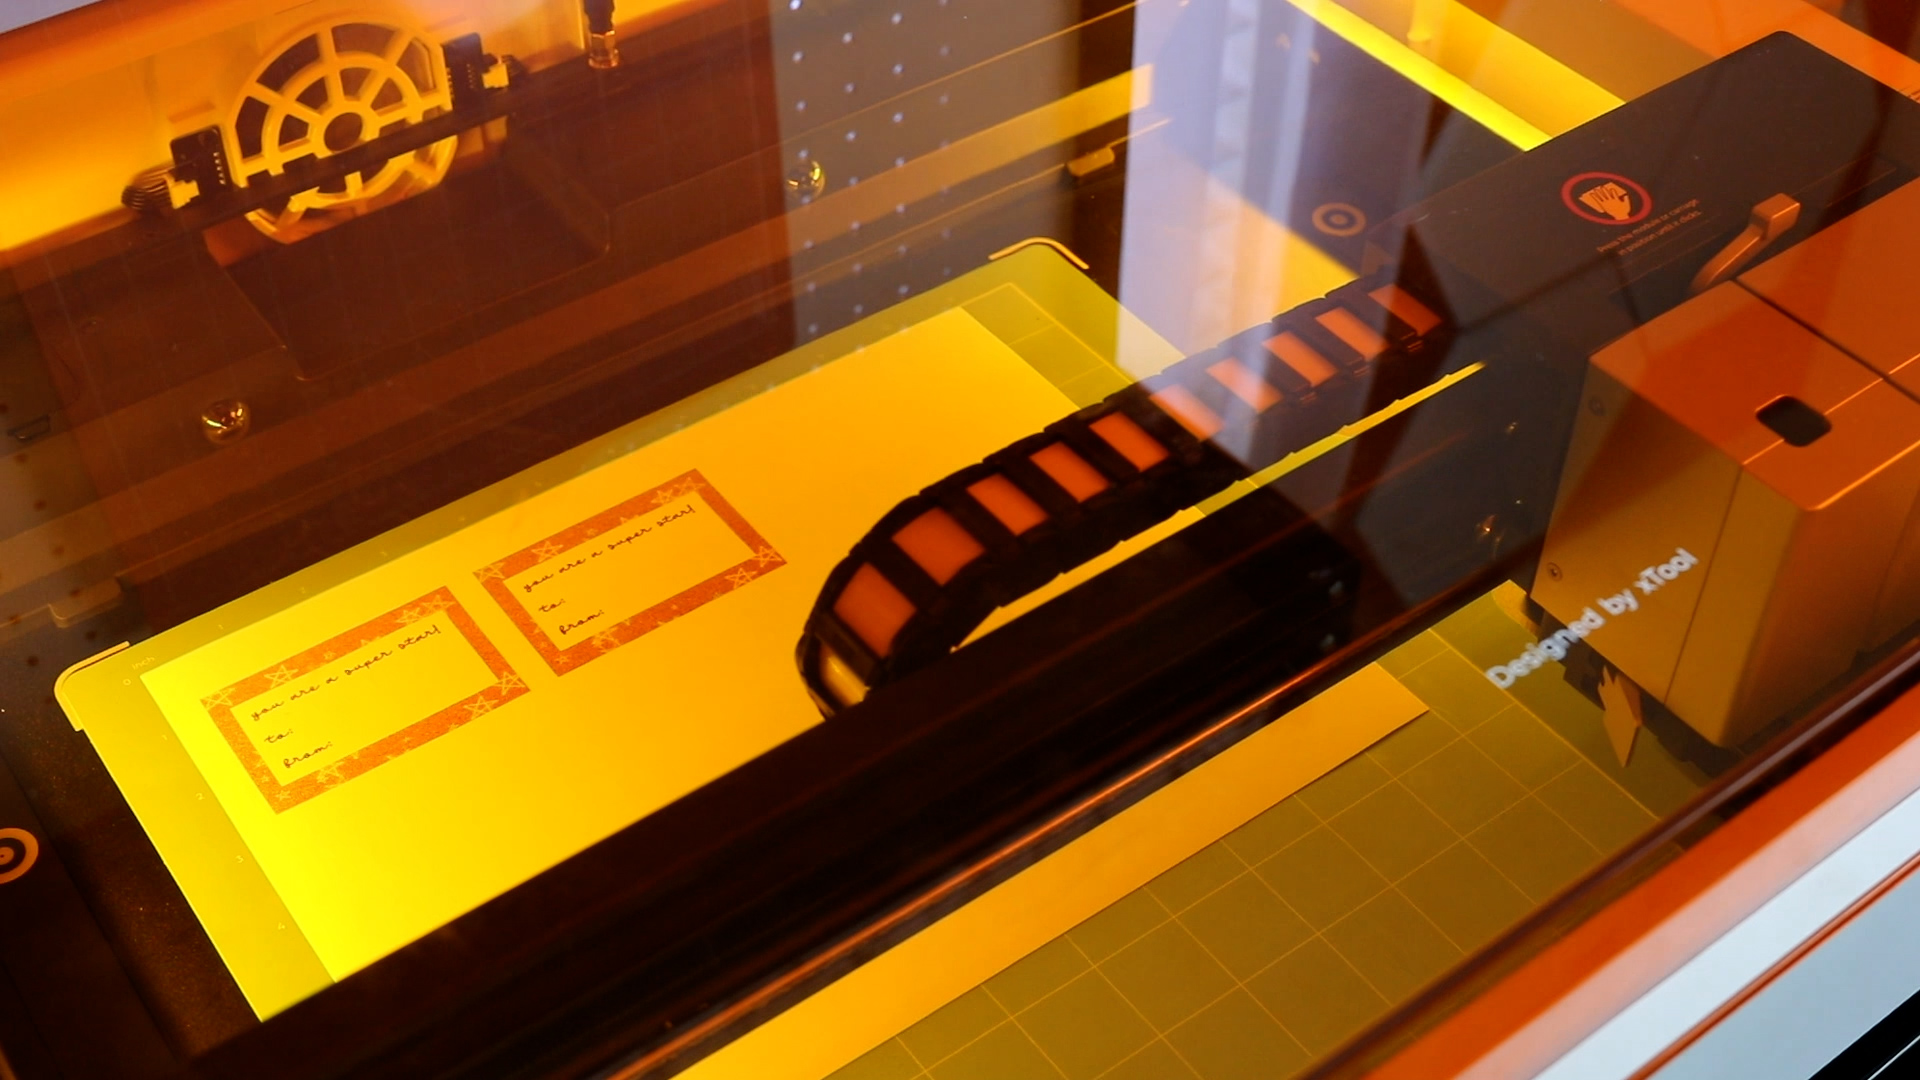
Once printing is complete, you can remove your design from the machine. In this case, we are going to continue on and write on these tags as well as cut them out. Leave the tags in the machine if. you will be doing more steps.
Now we’re going to use the pens with the Basic Module to write on the tags we printed.
Step 1: Add pen to basic module
To add a pen, open the Basic Module and place the pen with the adapter inside the module and make sure the adapter is sitting down on the base. Close the clamp and replace the cover.
Step 2: Make design with text
In xTool Creative Space I am using the Text Tool to add text.
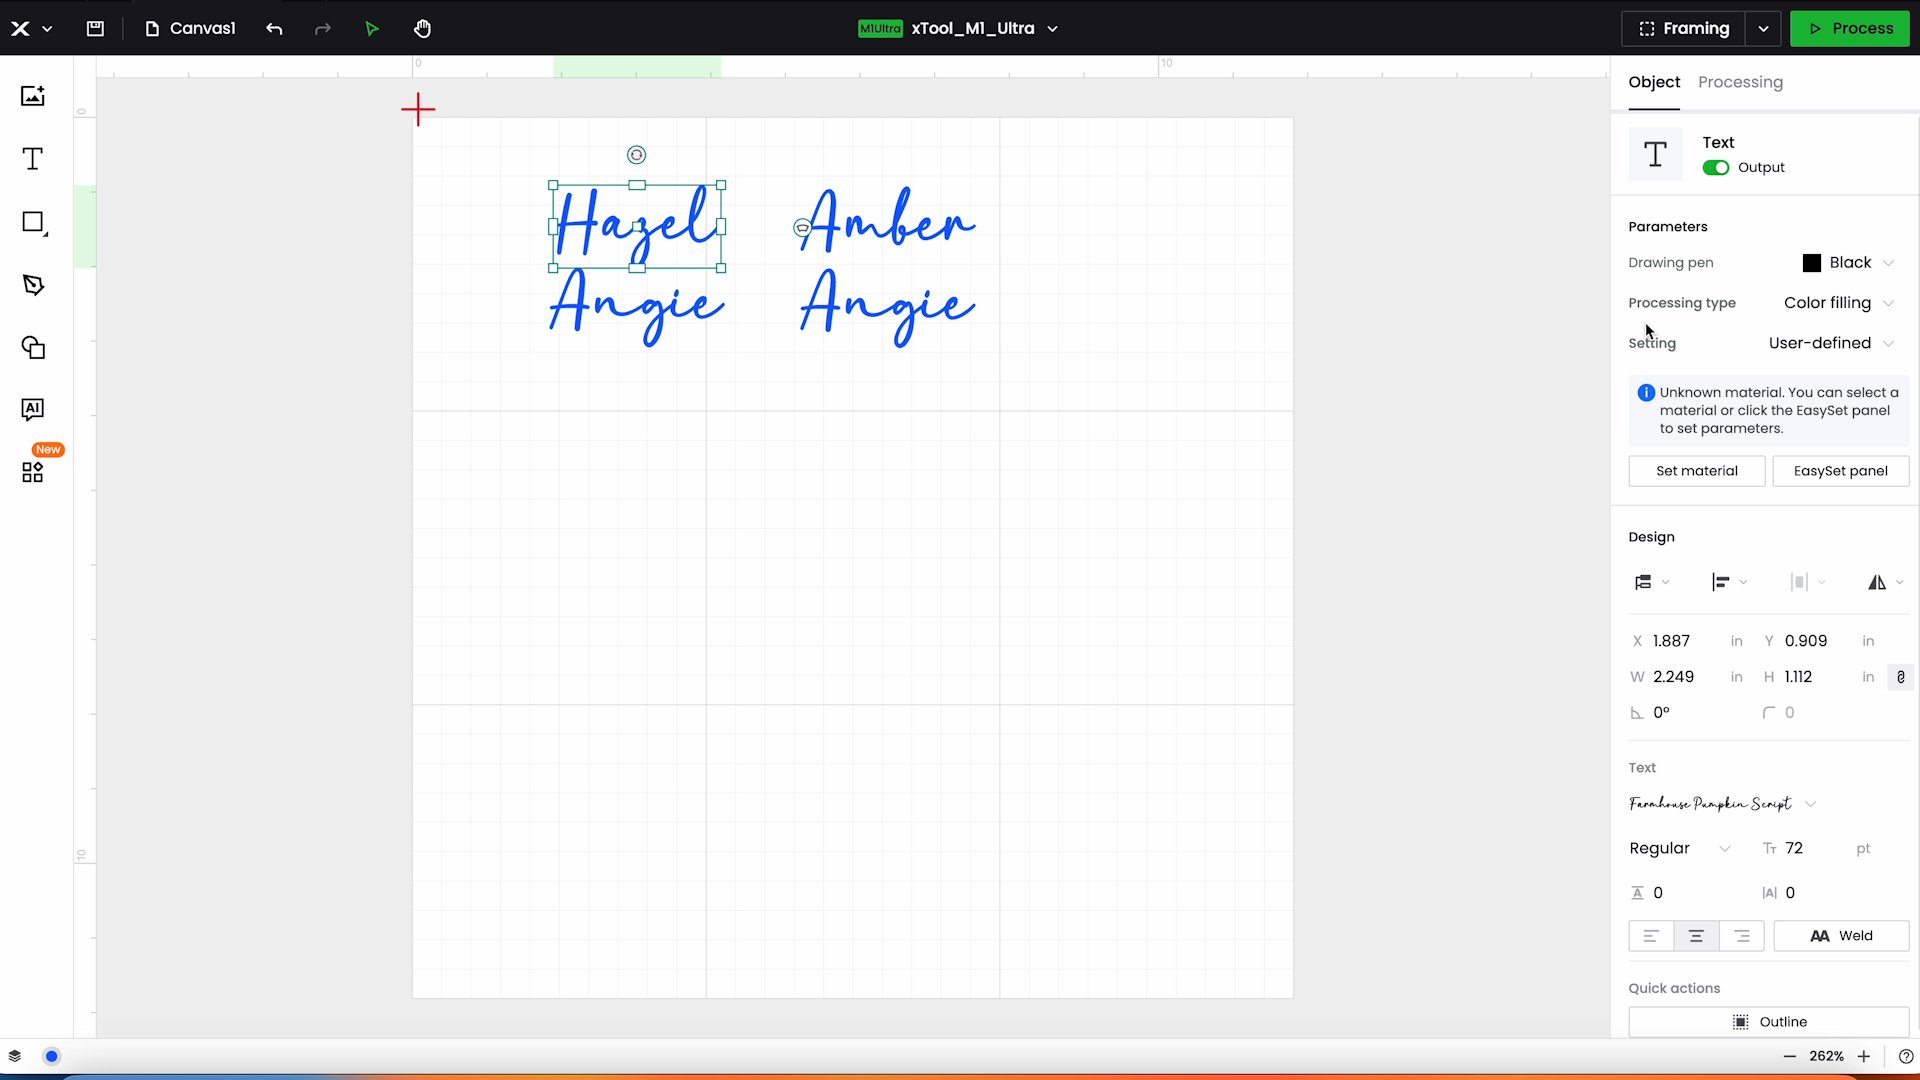
Click on the outside area of the design and make sure it’s set to Pen Drawing. Add the text you want drawn.
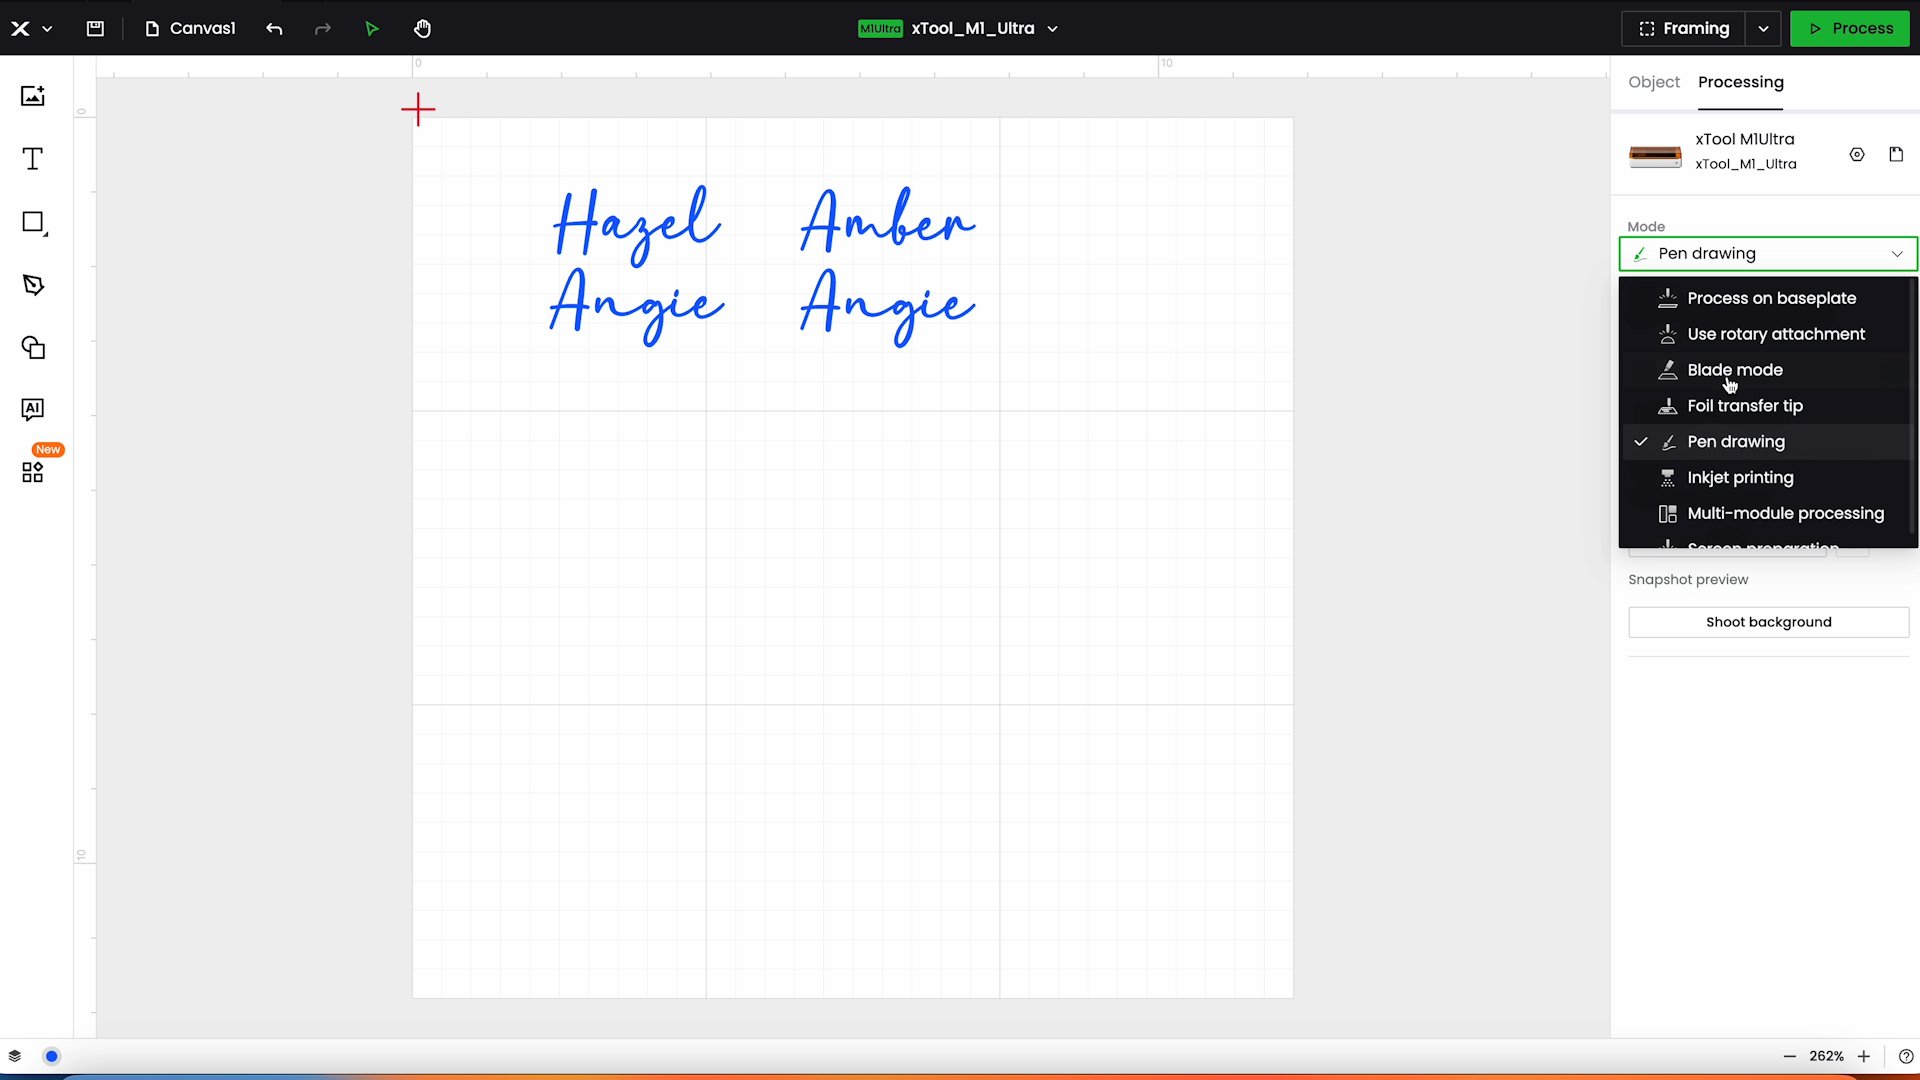
You can choose either Line Drawing which will outline the text or do a Color Fill and it will use the pen to color in the text. The color fill looks like the image below.
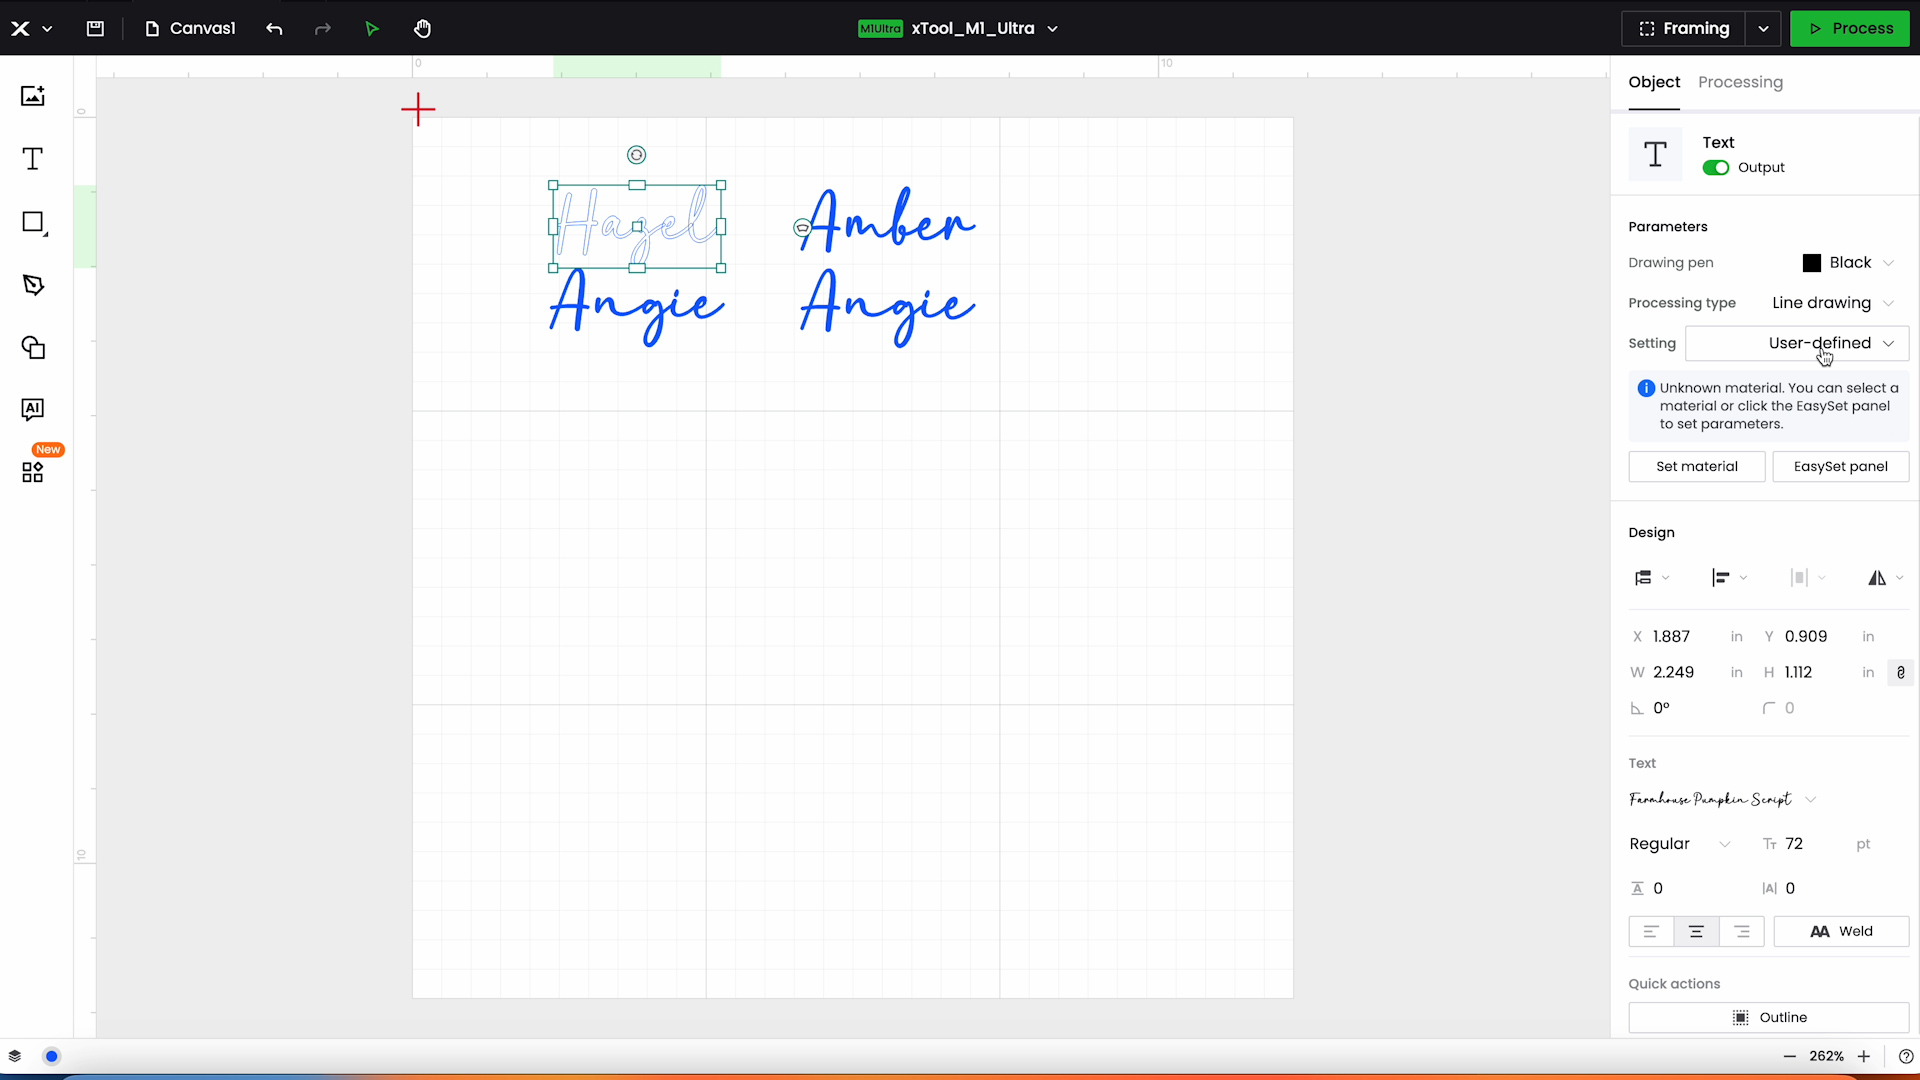
If I was to change one of those names to the line drawing option, there would be an outline around the outside as shown below.
Step 3: Mark processing area and resize
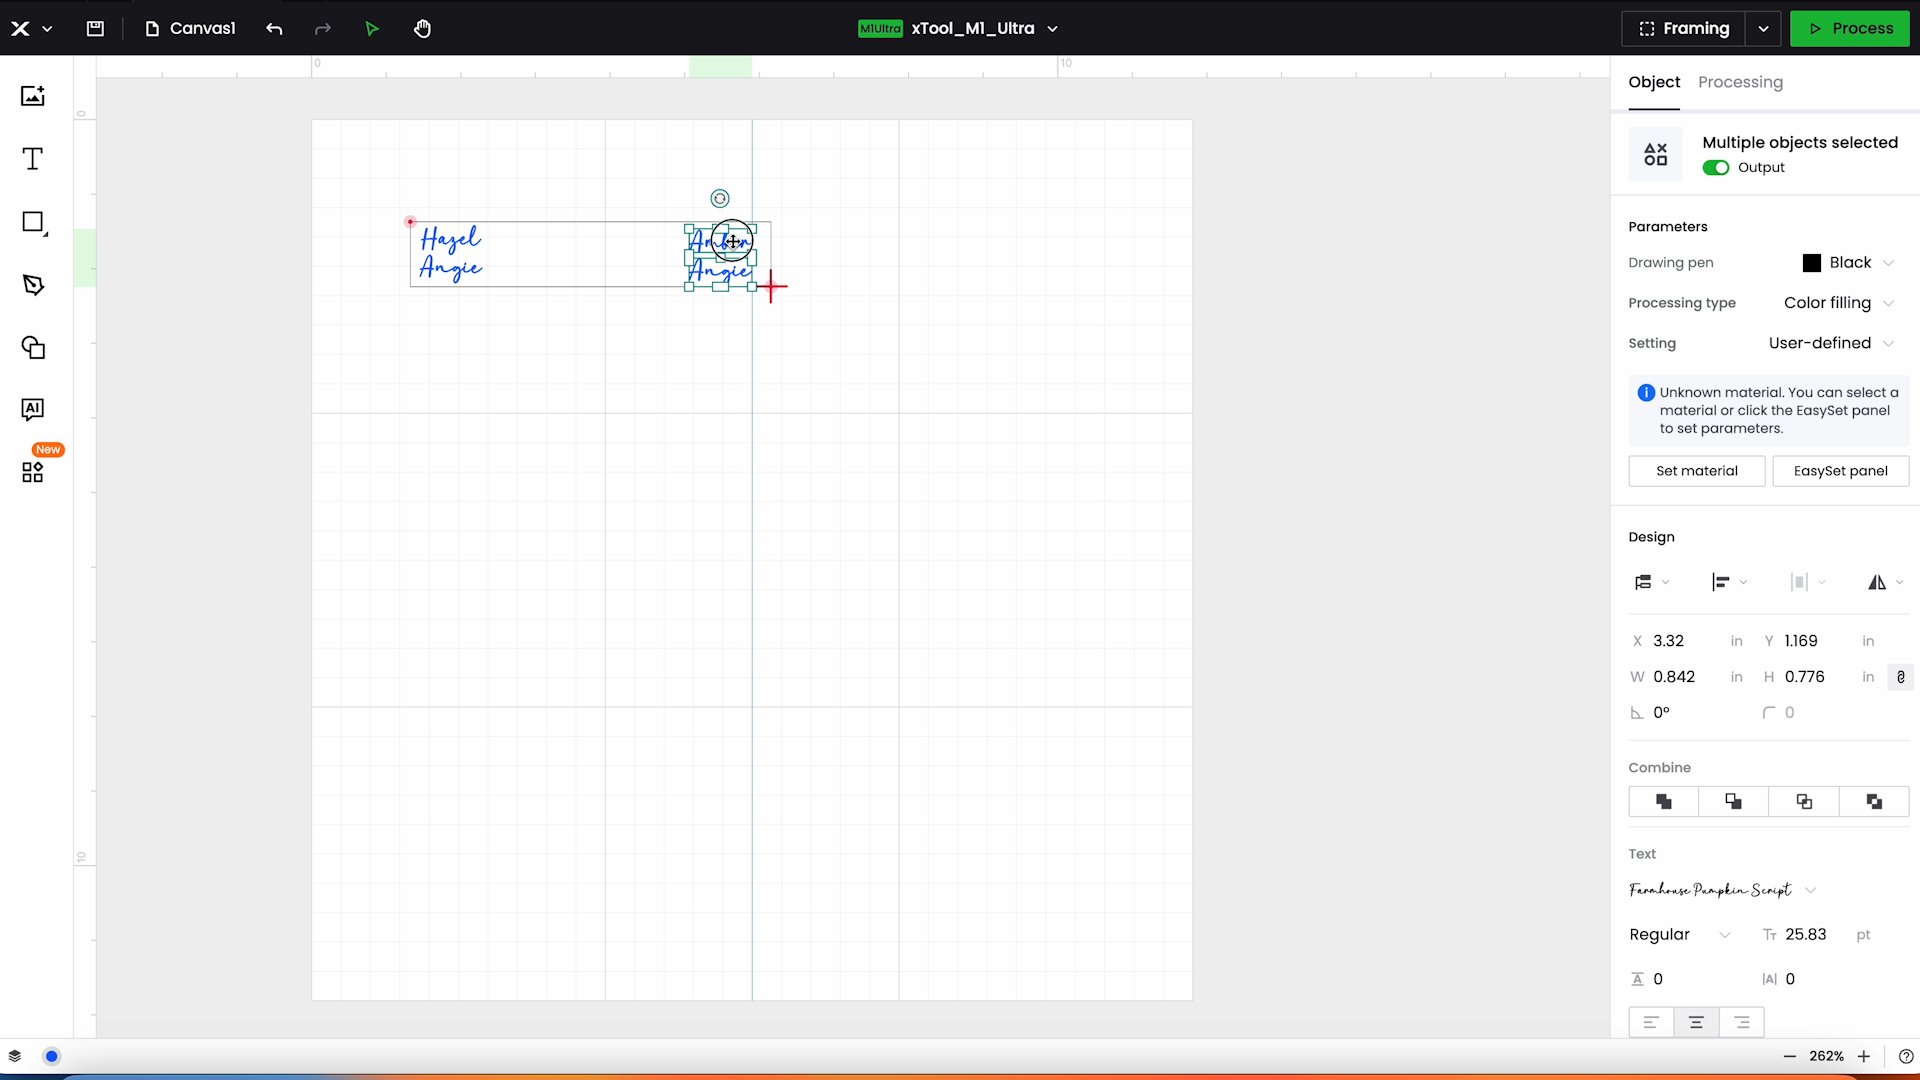
I am using the Color Fill option. Next you need to mark the processing area. I marked the first corner near where I want the writing to start and the second corner where I want the writing to end.
Now I can resize the text to fit within the processing area. Because of how I setup the processing area I want the first set of names close to the left side and the other set of names further to the right.
Step 4: Process and draw with pens
With the names typed in and the pen installed in the xTool M1 Ultra, I can click Process and then Start to start the process. The color fill option can lead to a long processing time so do be aware of this.
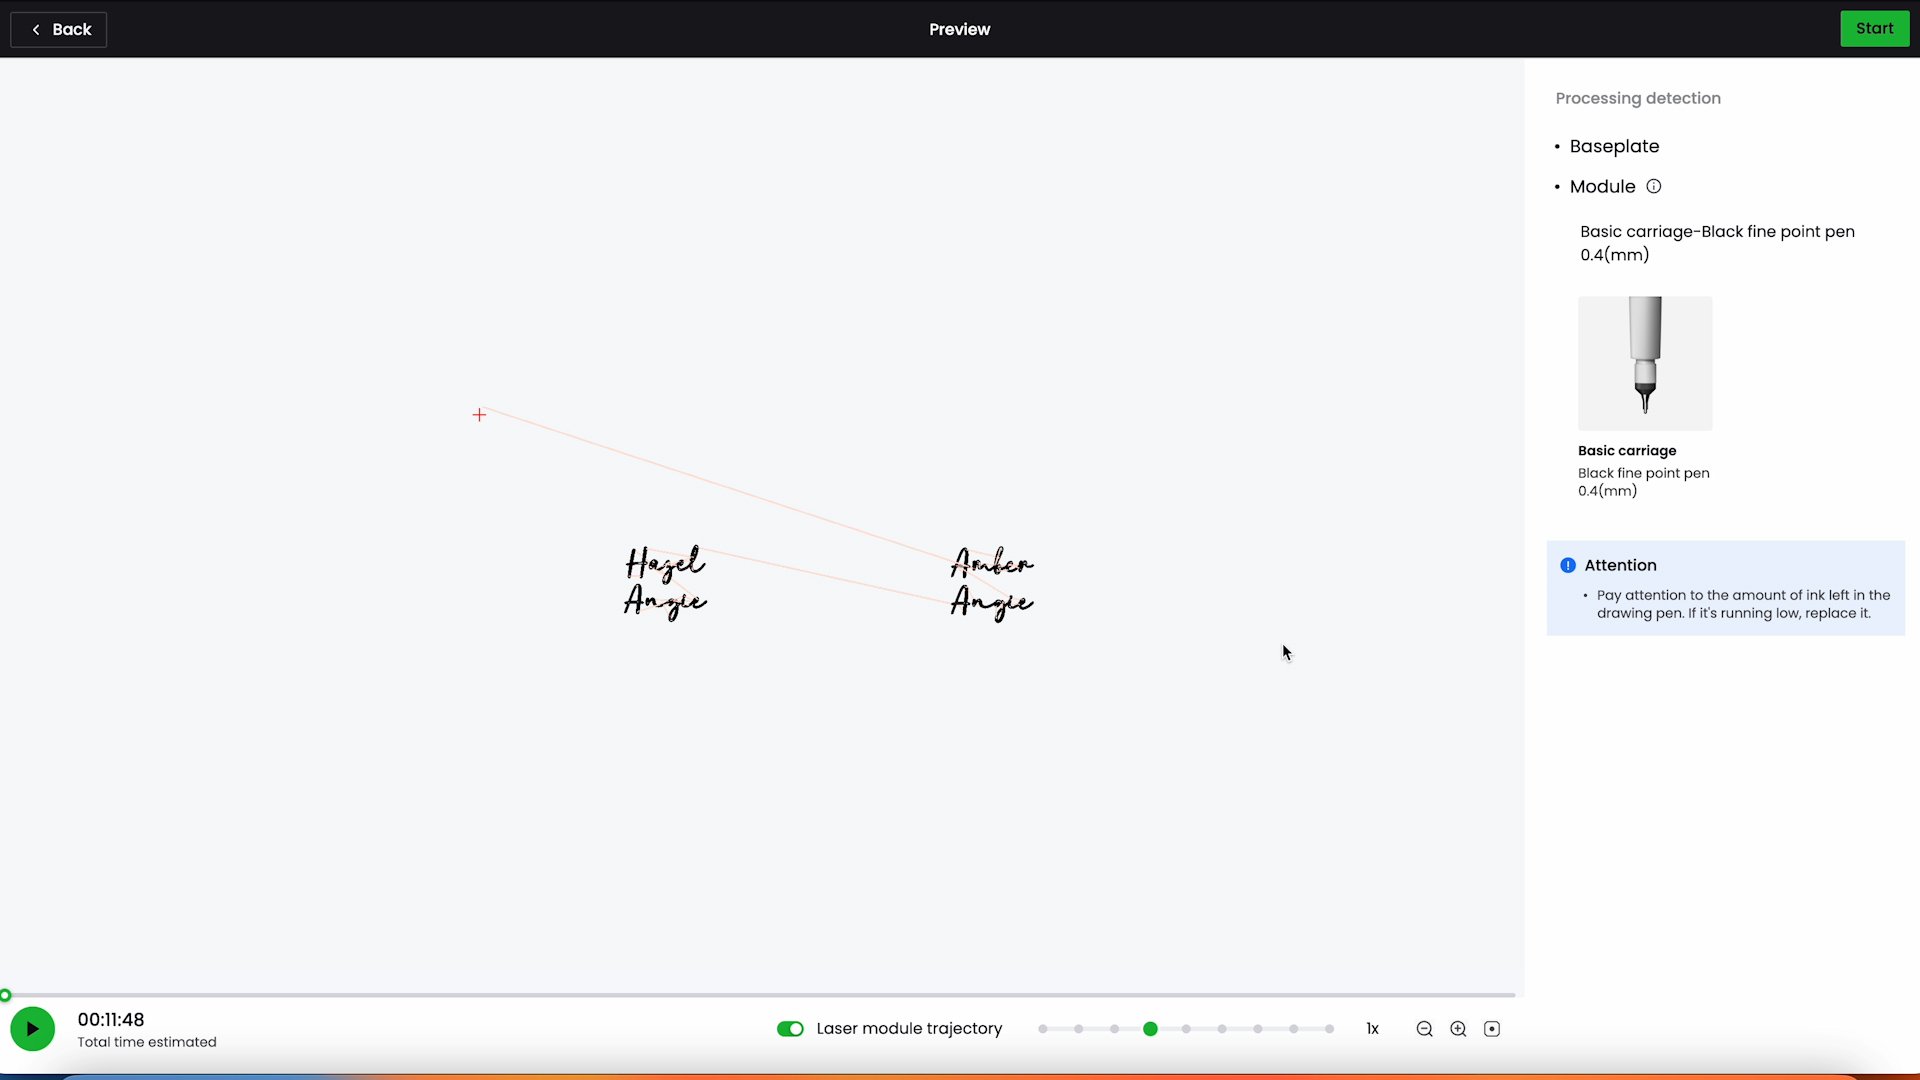
Your machine will then draw the lines and fill it in if you picked the color fill option.

You can remove your project from the machine once complete, however, I am going to cut out these tags in the next section so I left them in location.
Within the xTool M1 Ultra, I have printed two tags and written on them with a pen and now I can use the M1 Ultra to cut the tags out.
Step 1: Install fine point blade
To cut out the tags remove the pen and install the fine-point blade. You can use the same process as we did for the HTV above when installing the blade.
Step 2: Set up file and mark material
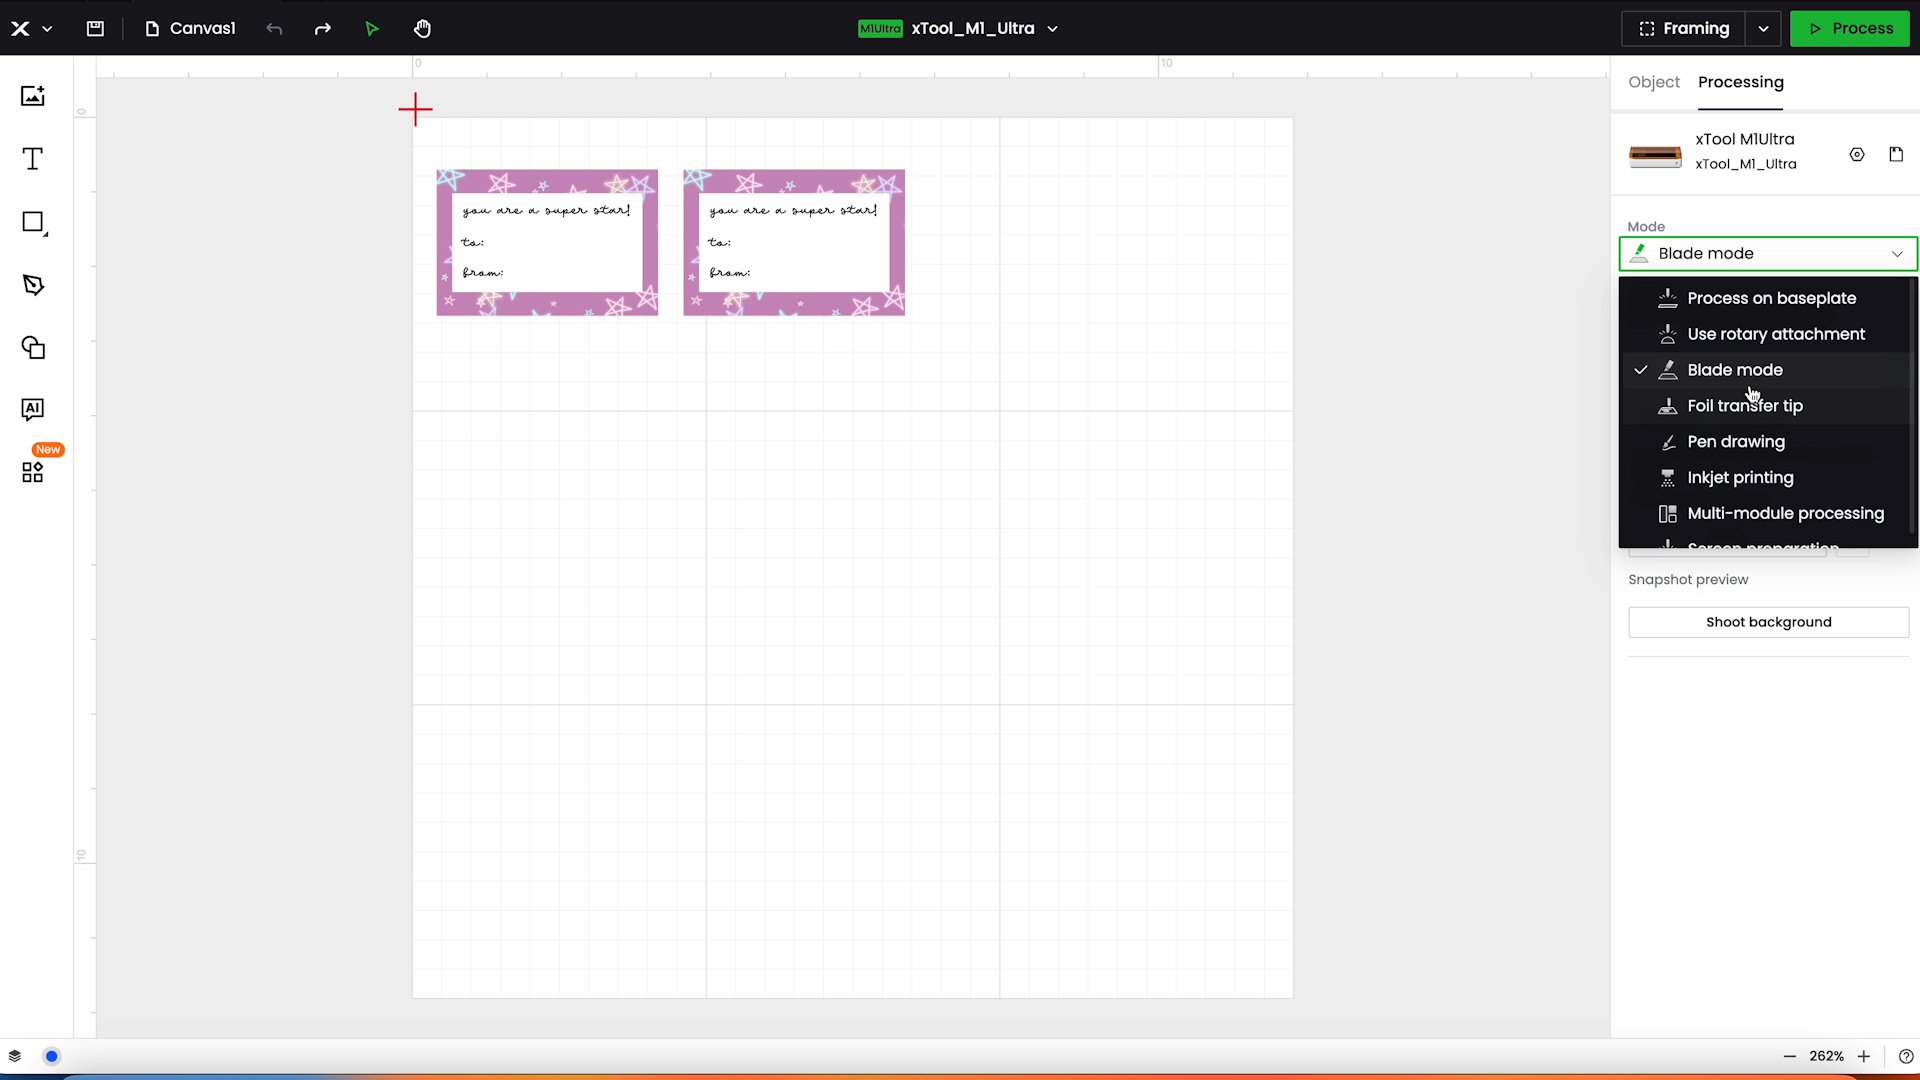
Use the same file you used to print the tag and then click on the outside of the design and change it to Blade Mode.
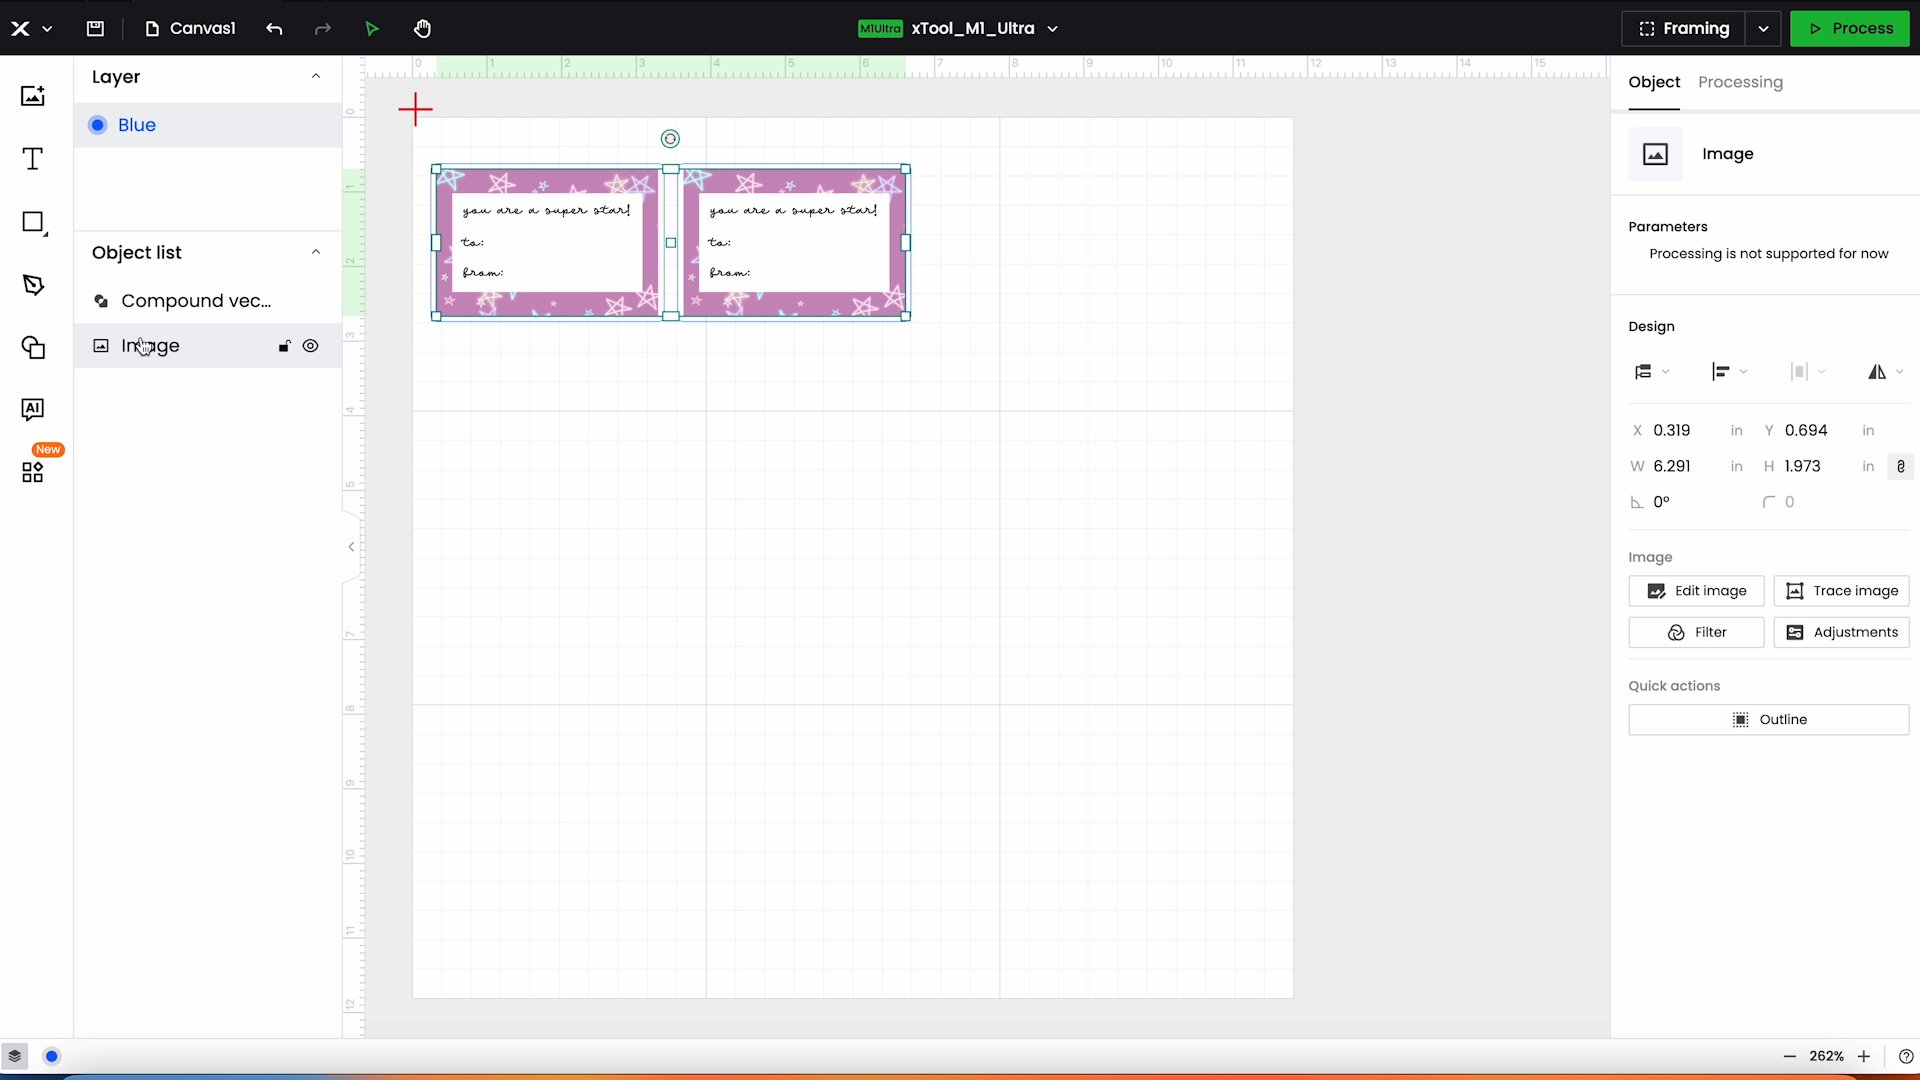
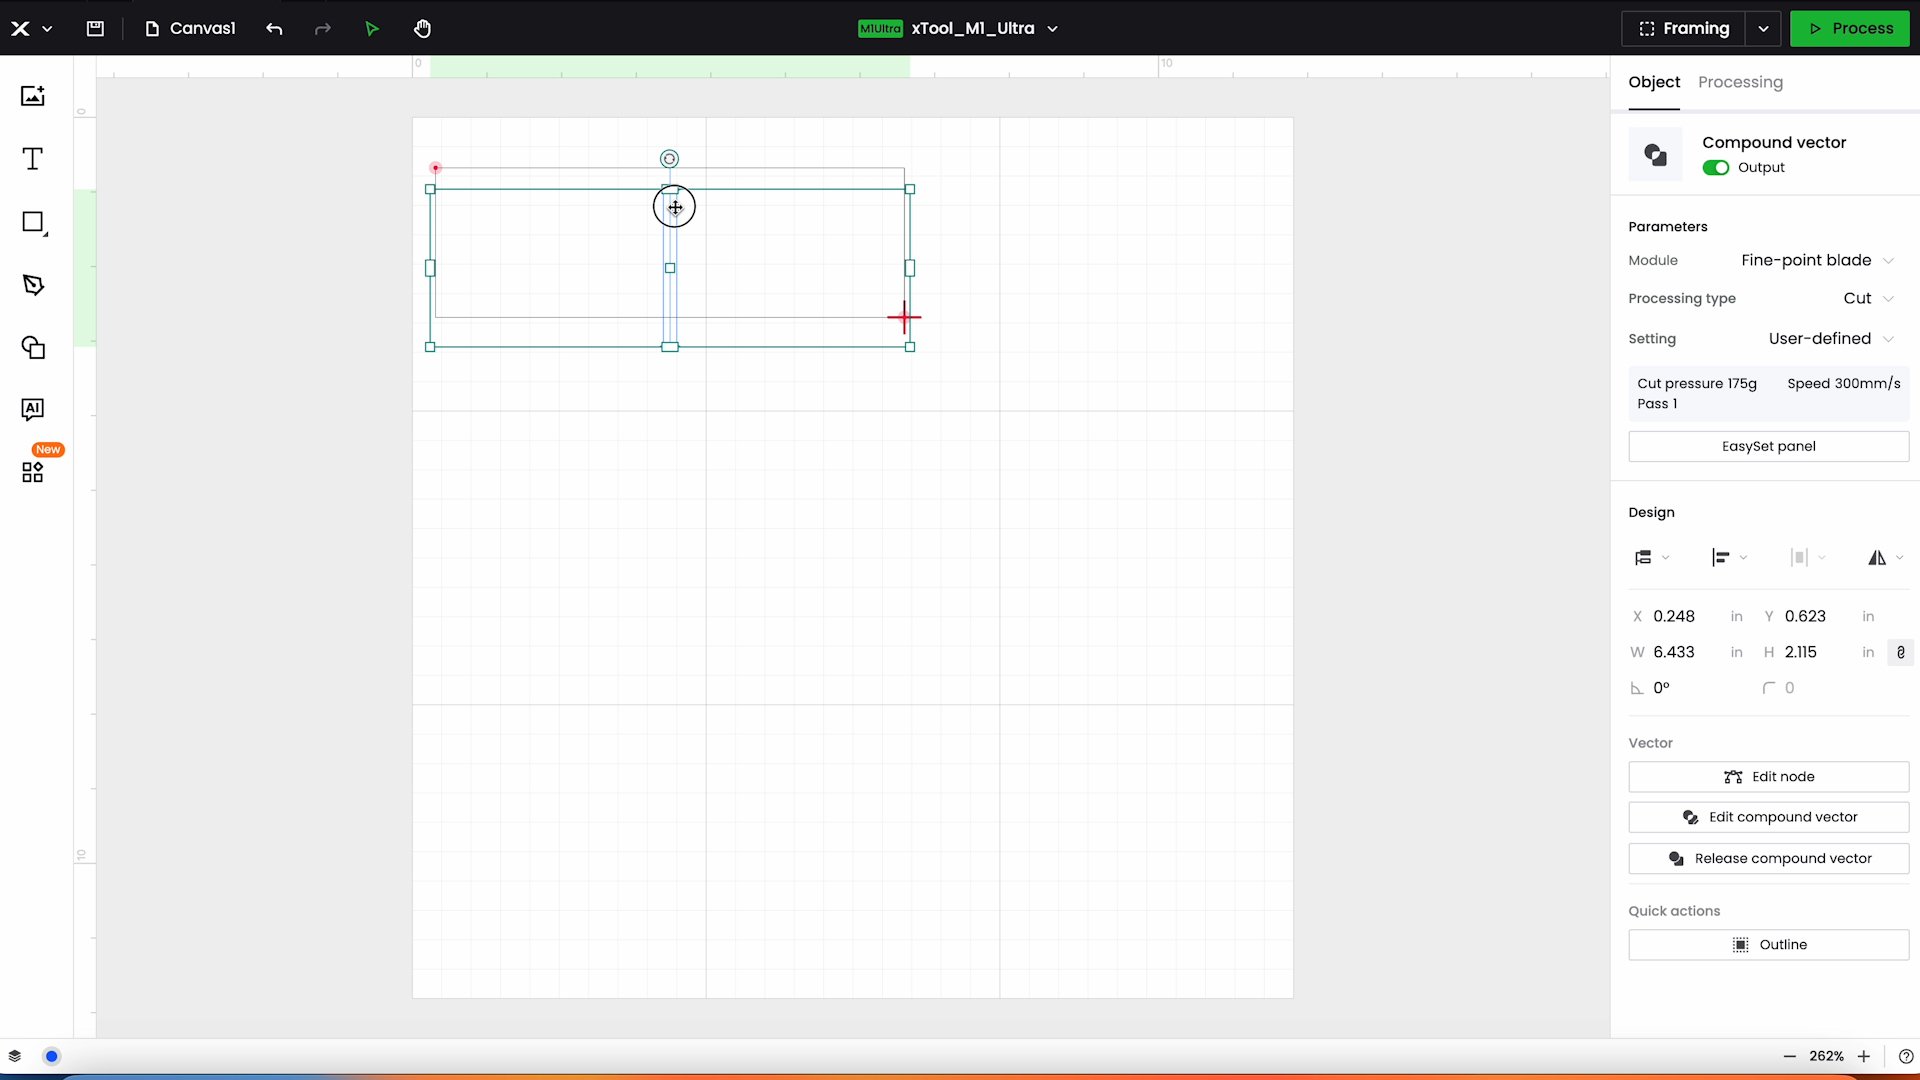
Next, click on the file and select Outline. I added a small offset to give it a white outline and set the offset to 079. Make sure the Add Inner Outline box is checked and click Confirm.

Click the Layers Panel and then click the image and click Delete on your keyboard. On the screen you should see the two squares that are the cut lines.
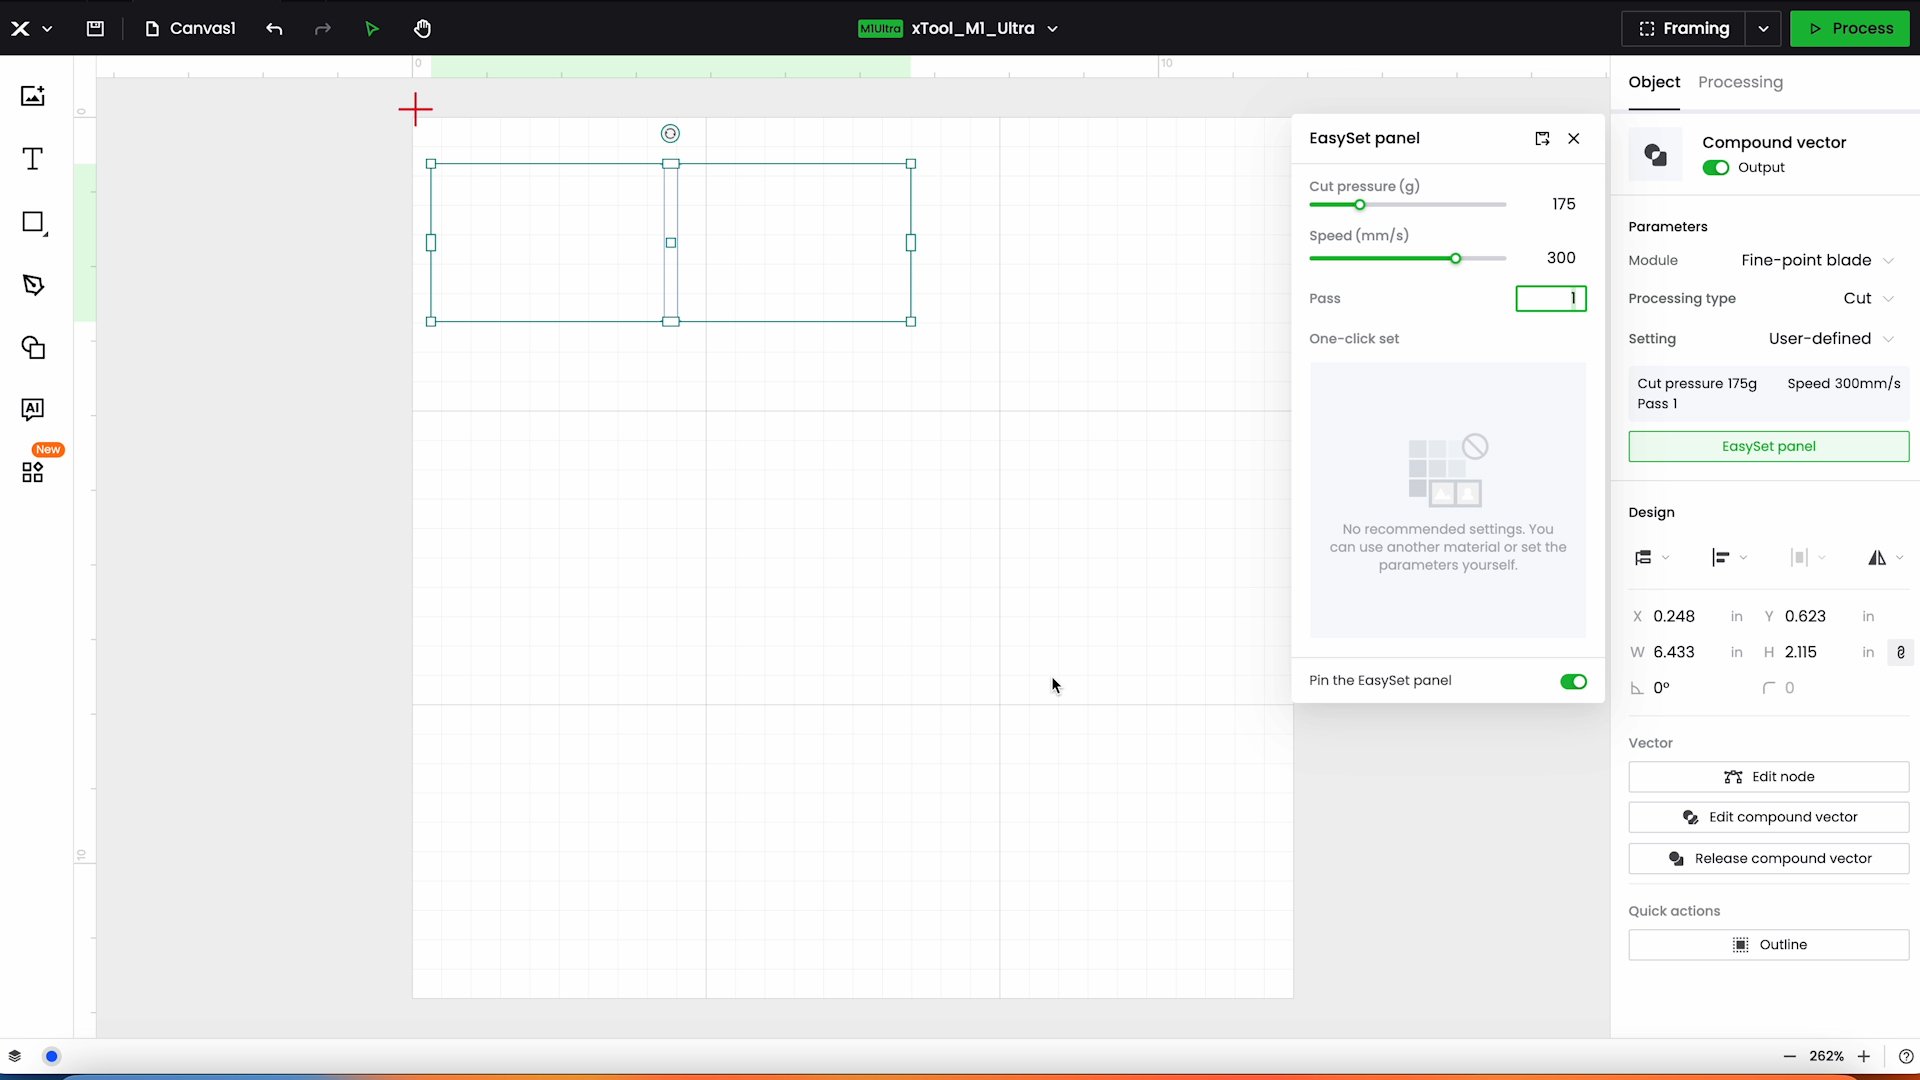
I used the settings of 175 grams and 300 millimeters per second for the speed.
Step 3: Mark the material
Mark the processing area next and locate it directly over the printed area.
If needed, you can move the cut so it lines up exactly with the area we marked.
Step 4: Cut out the printed tags
Click Start to process the cut. The machine will then cut around the tags.
You can now remove your finished gift tags from the machine and add to any gift you may be giving!
Project Results
Now that we have cut, drawn, engraved, and printed with the xTool M1 Ultra we can look at how everything turned out.
The wood that I cut and engraved with the laser looks really good. I think wood works best with a masking on it. With the masking, there isn’t as much charring around the outside edges.
I used acrylic to cut out the Xs and Os with the laser and the acrylic I used had masking on both sides that needs to be removed. It cut really well and looks great.
Next, we have the HTV that I cut with the fine-point blade. The settings I used cut a little deep so I’ll need to play with that more to get the settings right. I like that I can alter the settings easily and I have total control over the cut settings for any material.

Unlike the HTV, I don’t think I had enough pressure for the fabric I cut with the rotary blade. There are some skips in the cut so I think there wasn’t enough pressure.
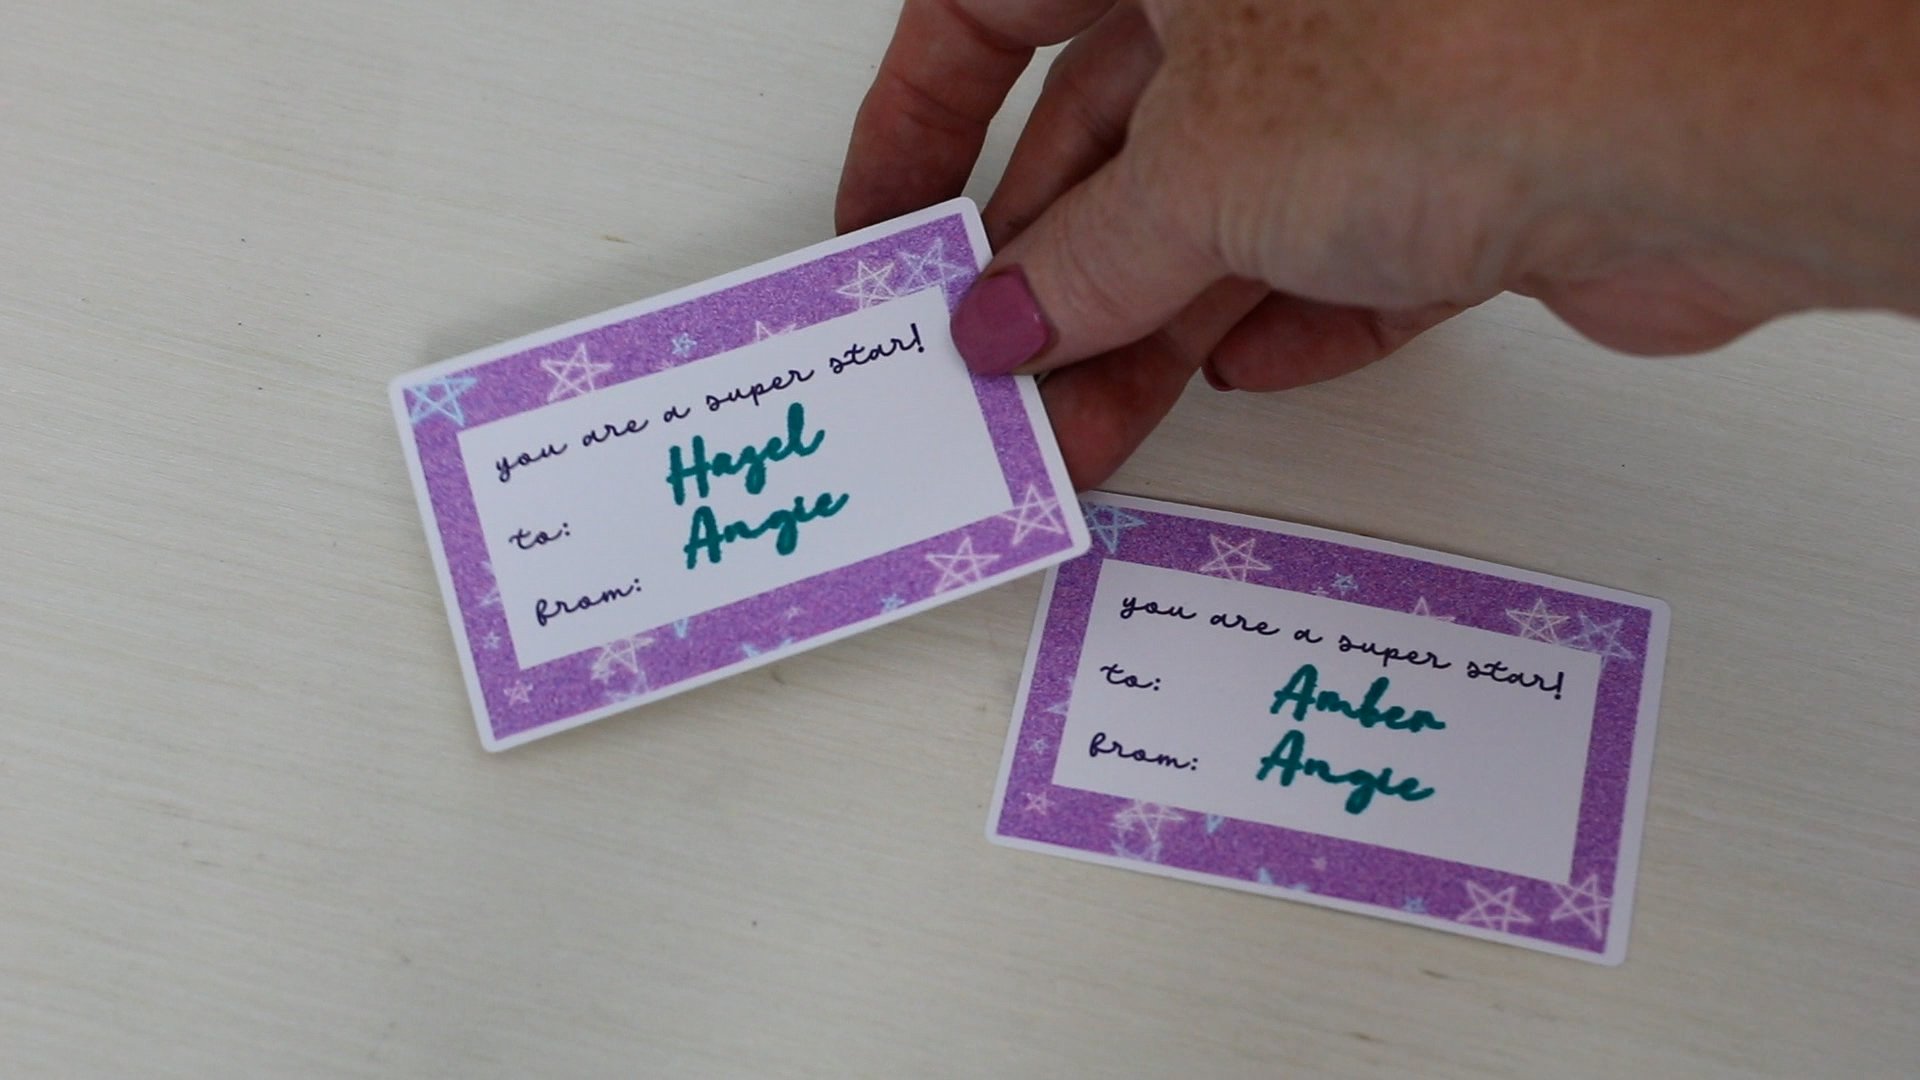
Now we can look at the tags we printed and cut with the xTool M1 Ultra. While I don’t love the font I used I am a fan of how well the M1 Ultra wrote and filled in the font with the pens. I think you’ll find some fonts work better than others with this tool.
The tags turned out great and the print then cut feature is very precise with the M1 Ultra.

Today I showed you the base xTool M1 Ultra and a few additional add-on accessories. There are additional accessories you can purchase that would allow you to do even more projects.
There is a riser base that you can add to the M1 Ultra that will raise it up and that will expand the thickness of the materials that you can engrave.
The xTool M1 Ultra has an 11.8 x 11.8 inch working area. That is the area that you can actually cut with the laser head. The riser base doesn’t alter that working area. There is no pass through slot on this machine so you can alter the thickness but not the overall material size.
With the purchase of the riser base, you also get the honeycomb tray. This can be added to various slots to vary the height of your material.

With the riser base, you can also use the Rotary Tool to engrave things like tumblers.
There is another accessory you can add called Air Assist. This accessory will help with char marks and help you get the best cuts possible with your laser. You may even get deeper engravings with the Air Assist accessory.
How are the xTool M1 and M1 Ultra different? Let’s look at those differences.
- With the Ultra, you can get a 20-watt laser module that will give you an increased power capacity.
- The Ultra has the easy Quick-Swap Modules. It’s very easy to swap out the different modules. These modules won’t work with the original M1. Those include the inkjet printing module and the Multifunction Module that works with the Rotary and Knife Blades.
- The pens that work with the M1 Ultra do not work with the original M1.
You can see there are a lot of features that work with the Ultra that the original M1 did not have.
Pros and Cons of the M1Ultra
Let’s talk about the pros and cons of the xTool M1 Ultra.
M1 Ultra Pros
- The machine was very easy to set up and use. I think that is great for a beginner laser crafter.
- I like that it has all these features in one machine. From laser cutting to drawing with a pen.
- If you’re limited on space, this one machine takes up a lot less room than 4-5 other machines that you may need to do the same things.
- This machine is very versatile, you can make a wide variety of projects with this one machine.
- The marking process is easy with the xTool and with the marking you get great accuracy even with a print then cut project. I found that I got very accurate locations with the machine and the marking system.
- You have the option to add a 20-watt laser head which will give you increased power. Even though it’s a diode laser with that increased power I can cut thicker materials.
M1 Ultra Cons
- The biggest con would be that it’s a diode laser. A diode laser cannot cut clear materials like acrylic and engraving on certain metals may be difficult and require a laser that is not a diode laser.
- The other con would be that the Air Assist doesn’t come with it. I would prefer that the Air Assist come with it because it gets you better cuts. I do recommend the Air Assist so if you’re purchasing the xTool M1 Ultra I would keep that in mind. Look for a package that comes with the Air Assist or purchase it when you purchase the laser. I believe you will be happier with the cuts you get from the machine with the Air Assist accessory.
- With any new machine there is a learning curve that you will go through. With the xTool M1 Laser you’ll work on getting the cut settings right for each material you’re going to use. You will also need to learn how to use the different modules and all the different accessories. I found it easy to learn how to use but I will keep the manuals nearby for reference, especially with accessories or materials you don’t use often.
Now that we’ve looked at the M1 Ultra and all it can do all that is left for you to do is decide if this is the right laser for you. You can start with the laser and then add additional accessories over time as your crafting needs expand.
I really like this laser and would recommend it to someone who is looking to start laser crafting. Use the links below to purchase directly from xTool.
I hope I’ve answered any questions you have about the xTool M1 Ultra. If you have any other questions, leave them in the comments and I’ll be happy to answer them for you.