This post and photos may contain Amazon or other affiliate links. If you purchase something through any link, I may receive a small commission at no extra charge to you. Any supplies used may be given to me free of charge, however, all projects and opinions are my own.
Today I’m going to show you how to find the best laser material settings by using test grids. If you’re using a new material in your laser or want to dial in the best settings for any material or blank, a test grid can be very helpful.
You can create test grids for cutting, scoring, and engraving. You will want a test grid for each different material you regularly use.
If you’re trying to decide if a laser is right for you, my Laser Ready Guide is a great place to start!
I am going to show you how to create a laser material settings test grid for the xTool, WeCreat, and Glowforge lasers. If you use a different type of laser, the process may be a little different.
You can watch me walk you through each of the programs by pressing play on the video below.
How to Create a Laser Material Settings Test Grid
Test grids can help you save time and material which is why I recommend having one for your commonly used blanks.
With a test grid, you will no longer need to waste material testing settings over and over again.
I will be showing you how to create a laser material settings test grid using wood today but you can use this process for any material you might use in your laser.
For blanks like wood and acrylic, I would use a small piece of material to create the test grid. For blanks like tumblers, I would order an extra blank and use it to create the test grid.
Test grids on tumblers are especially helpful because different brands have different thicknesses on their coating and knowing which setting works best can save you a lot of wasted blanks.
How to Use a Test Grid
A test grid works by showing you how a certain setting looks compared to other settings. You may want a darker engraving for a project and by looking at the test grid you can choose which one would be best.
You can also see which setting will get you the cleanest cuts. Some settings may not cut all the way through, you don’t want to waste materials with bad cuts.

With a laser material settings test grid, you can also see how much char is left on the material with the different settings. This can help you decide if you need to use a mask or if you can use the material without masking.
In the future, any time I use these materials I can refer to the test grid and pick the settings that are right for the project I’m making.
How to Create a Test Grid with WeCreat Software
Within the WeCreat software click New Project and I like to draw a rectangle on the canvas.
I am going to set my setting as Engraving and then set the material to the material I am using.

Next, select the rectangle, and in the top toolbar where it says Array click on Material Testing Array. This will open a window that allows you to set up the material testing array.
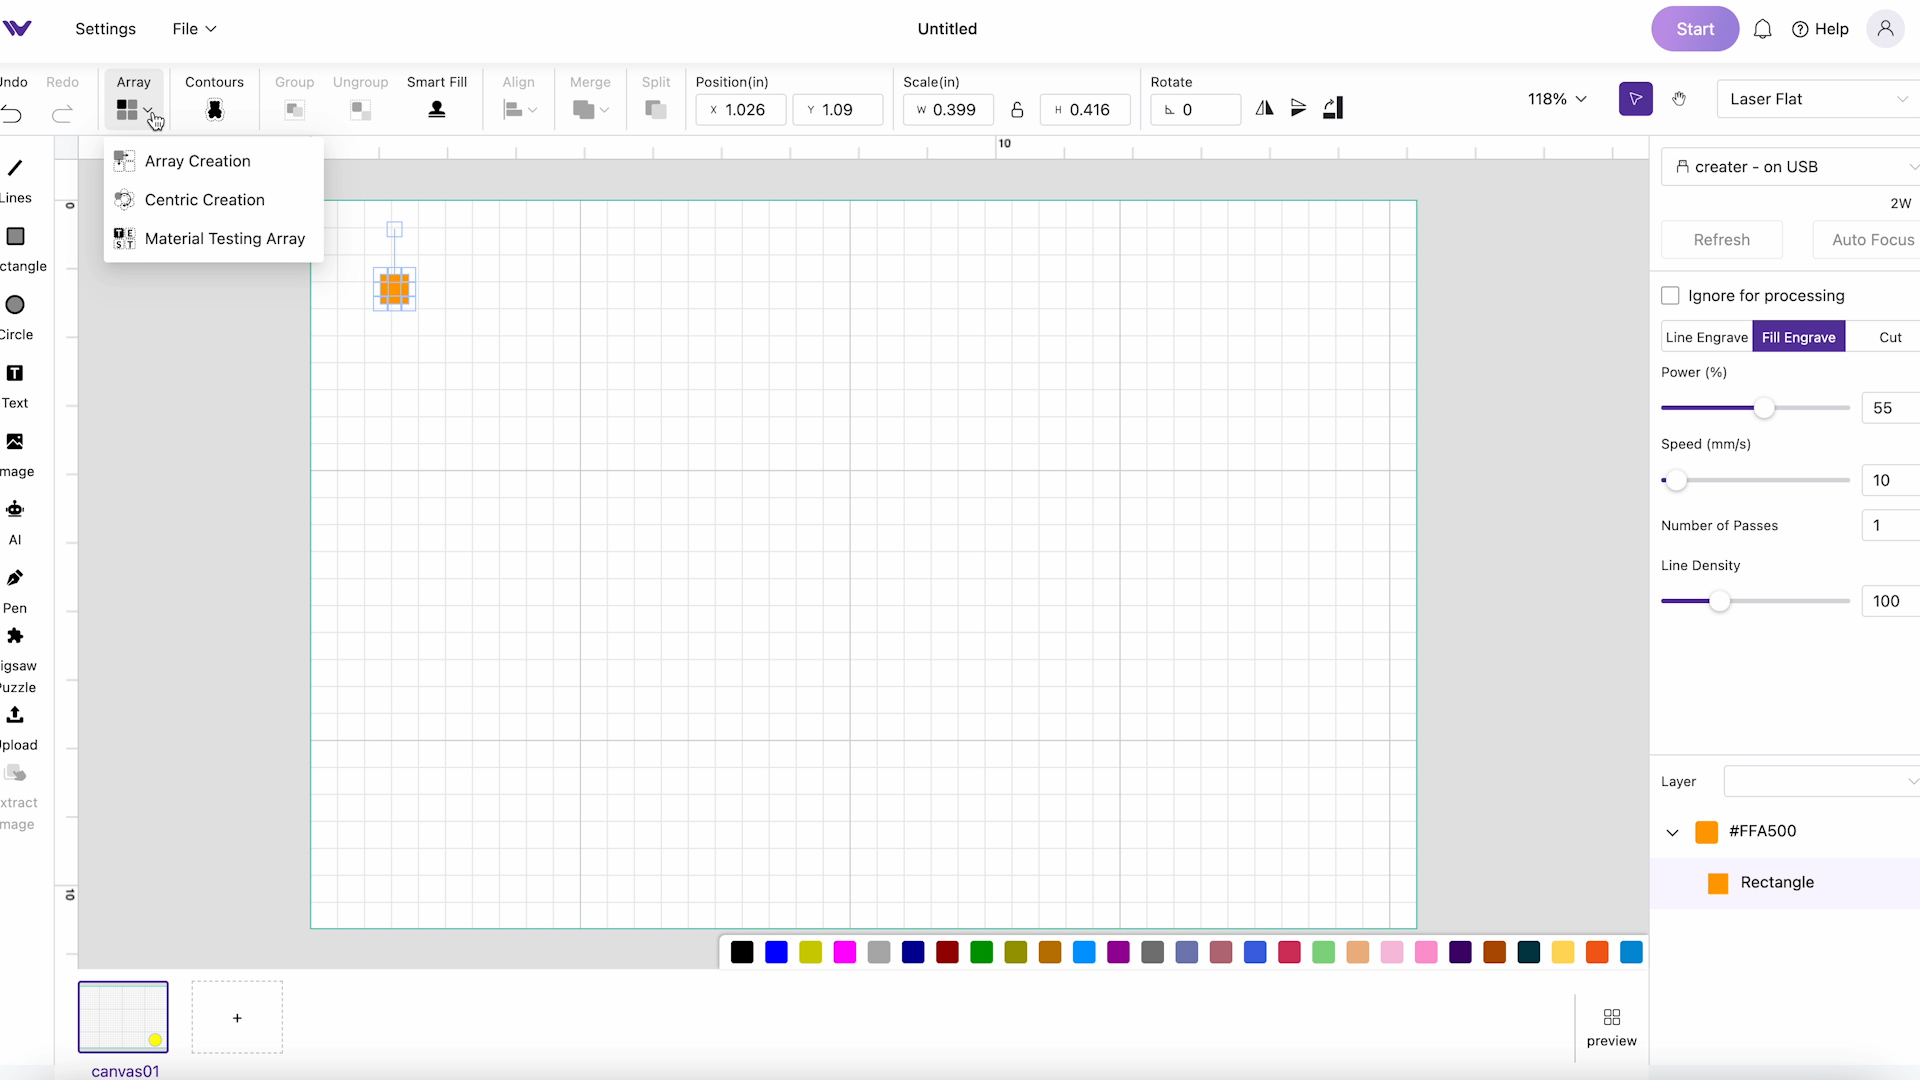
I can set the number of columns and rows, the spacing, and the minimum vs maximum for Speed and Power. When I change things in the new window it will change it on the canvas.

Click Confirm and that’s it. It’s that easy to create a laser test grid within the WeCreat software. You can change the text or add additional information by right-clicking the text and selecting Ungroup.
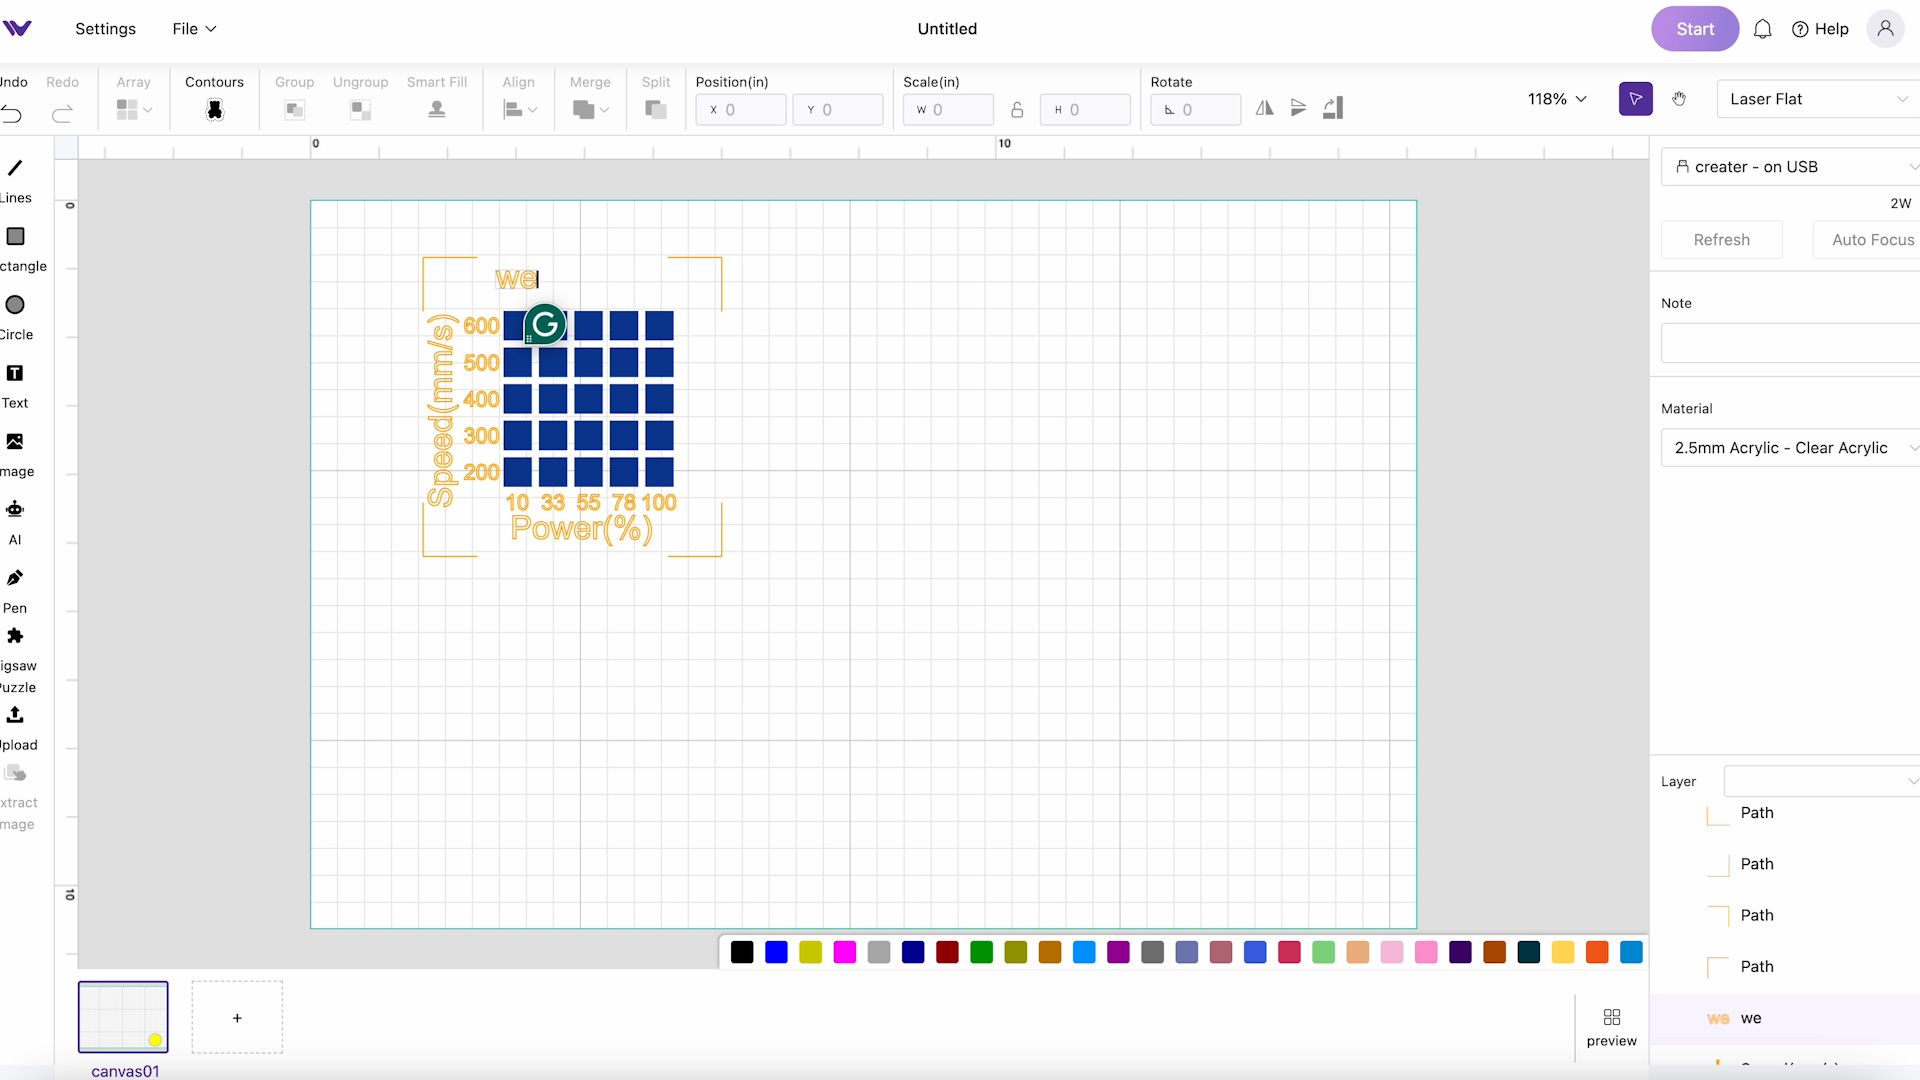
Now you can add any additional information you want to help you remember the laser brand and the material.
The Material Testing Array has a Line Engrave around the outside. I wanted to cut the test grid out so I added a rectangle around the grid and made that a Cut layer.
That is all you need to do to create a laser material settings test grid with the WeCreat software.
Do You Need a Test Grid with WeCreat?
Within the WeCreat software, you may not need to make your own test grid. When I click Material and then choose the material I am using you can see that a test grid shows up in the bottom corner.
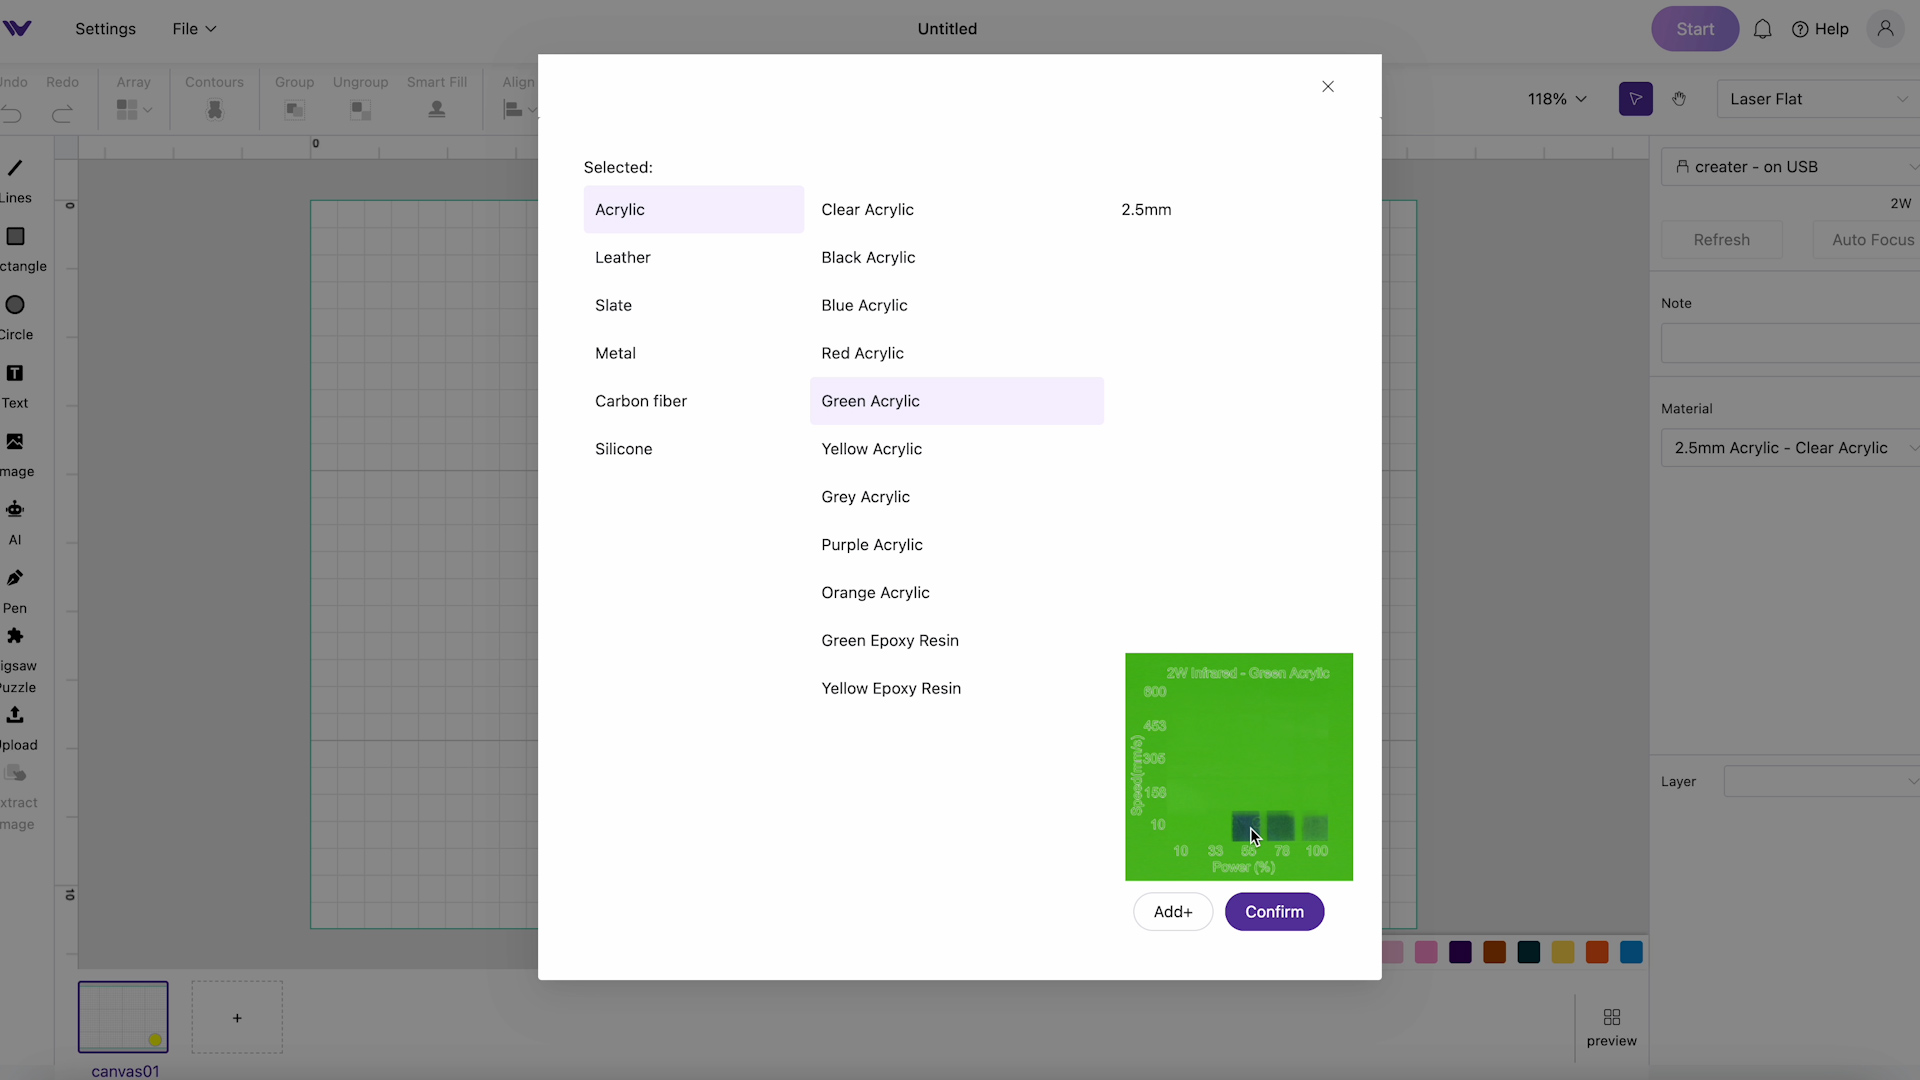
This can give you a good place to start without having to make your own laser material settings test grid. The results may vary depending on the brand of blank you’re using but it is a good starting place.
How to Create a Laser Material Settings Test Grid with xTool Software
In xTool Creative Space, click New Project and then draw a rectangle or a square and set that to engraving.
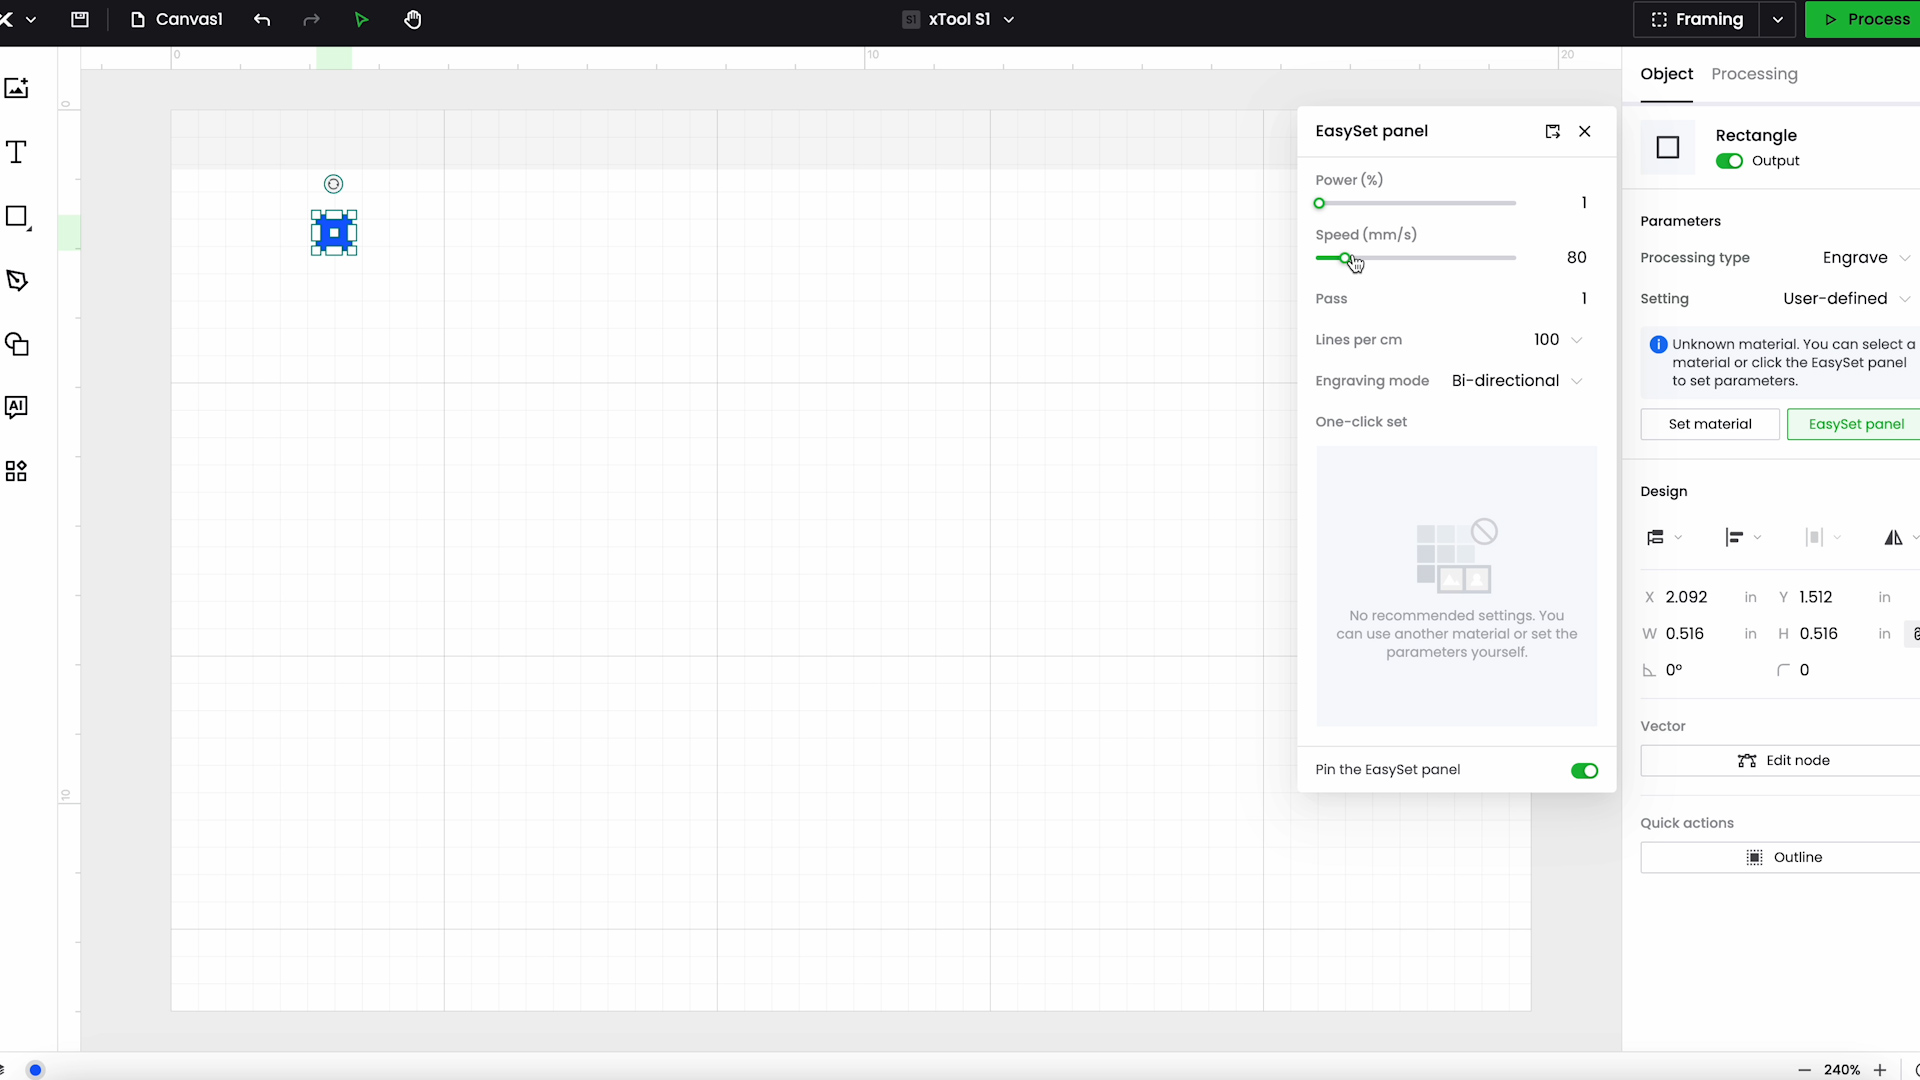
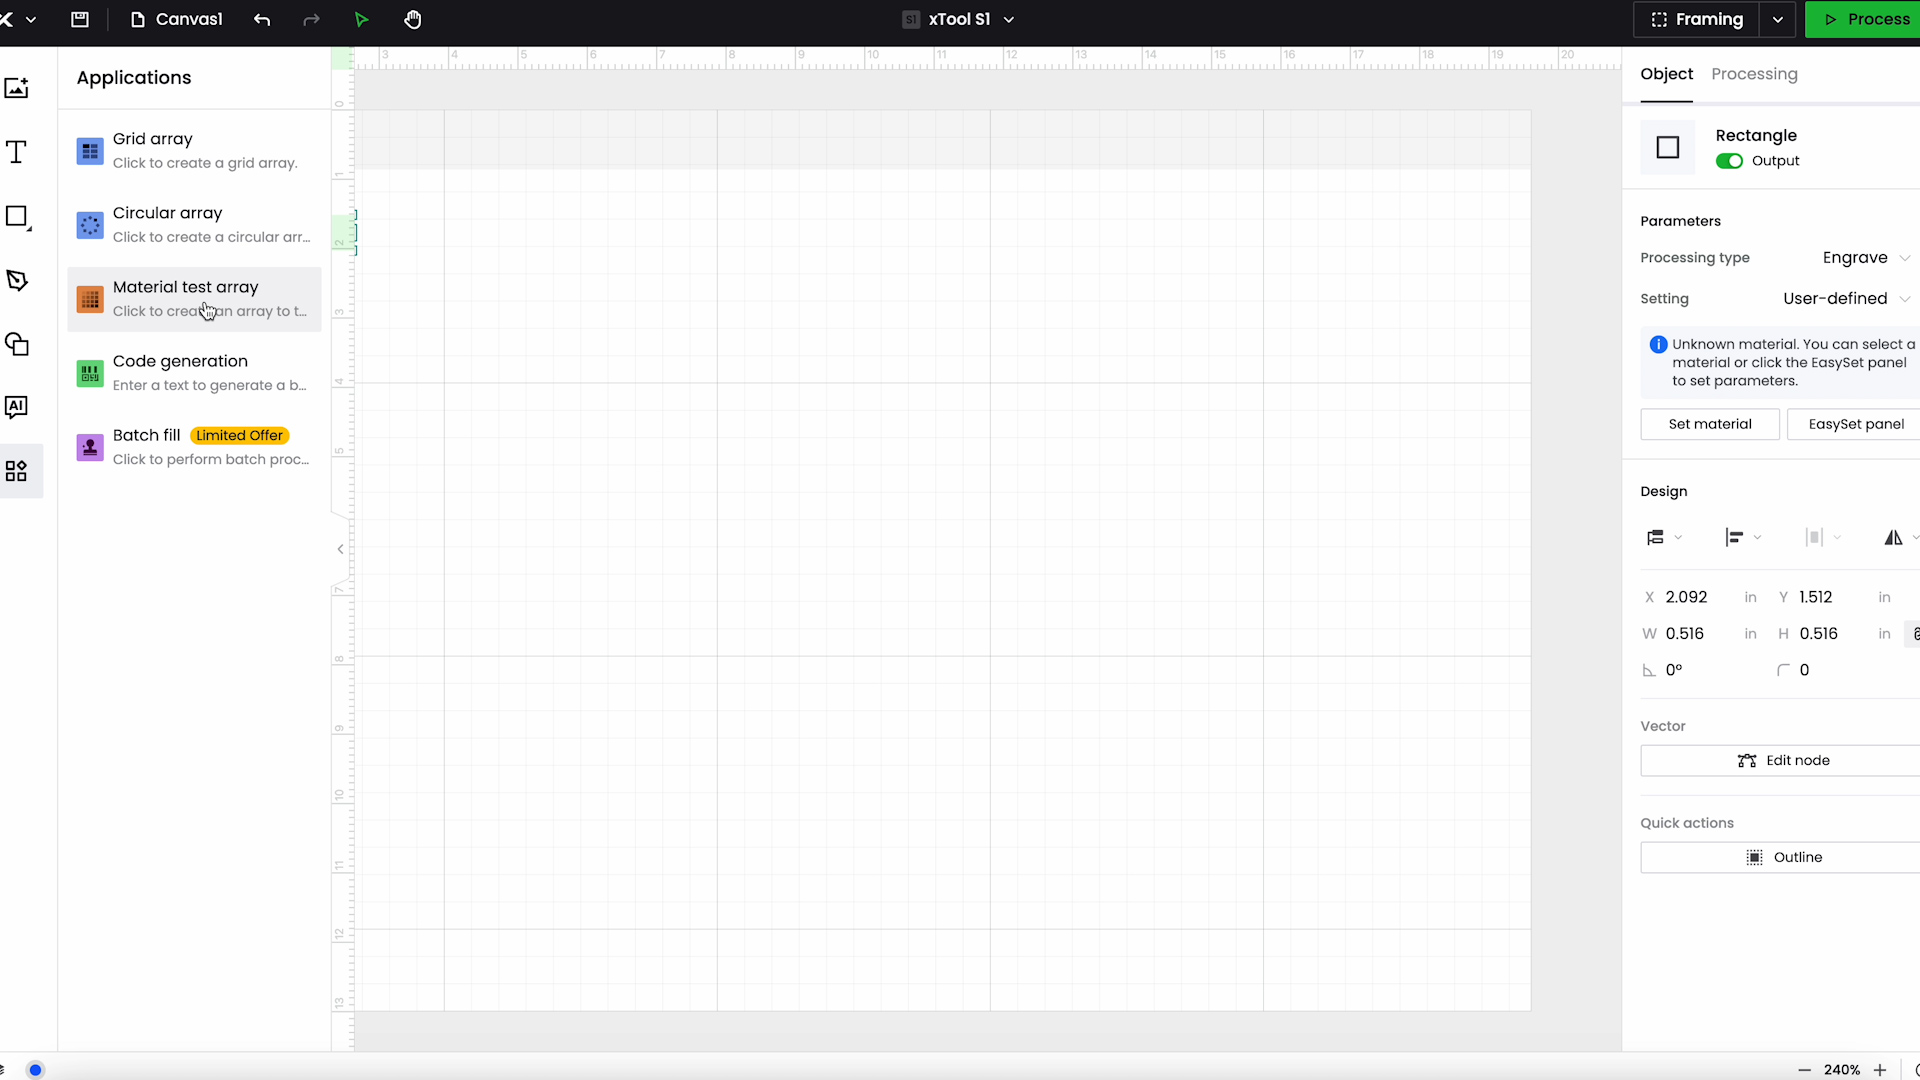
Click the rectangle, then Applications, and then select Material Test Array. This is similar to what we just did in the WeCreat software.
You can change the number of columns and rows and adjust the minimum and maximum for Speed and Power. As you make those adjustments, they will be reflected on the laser test grid.
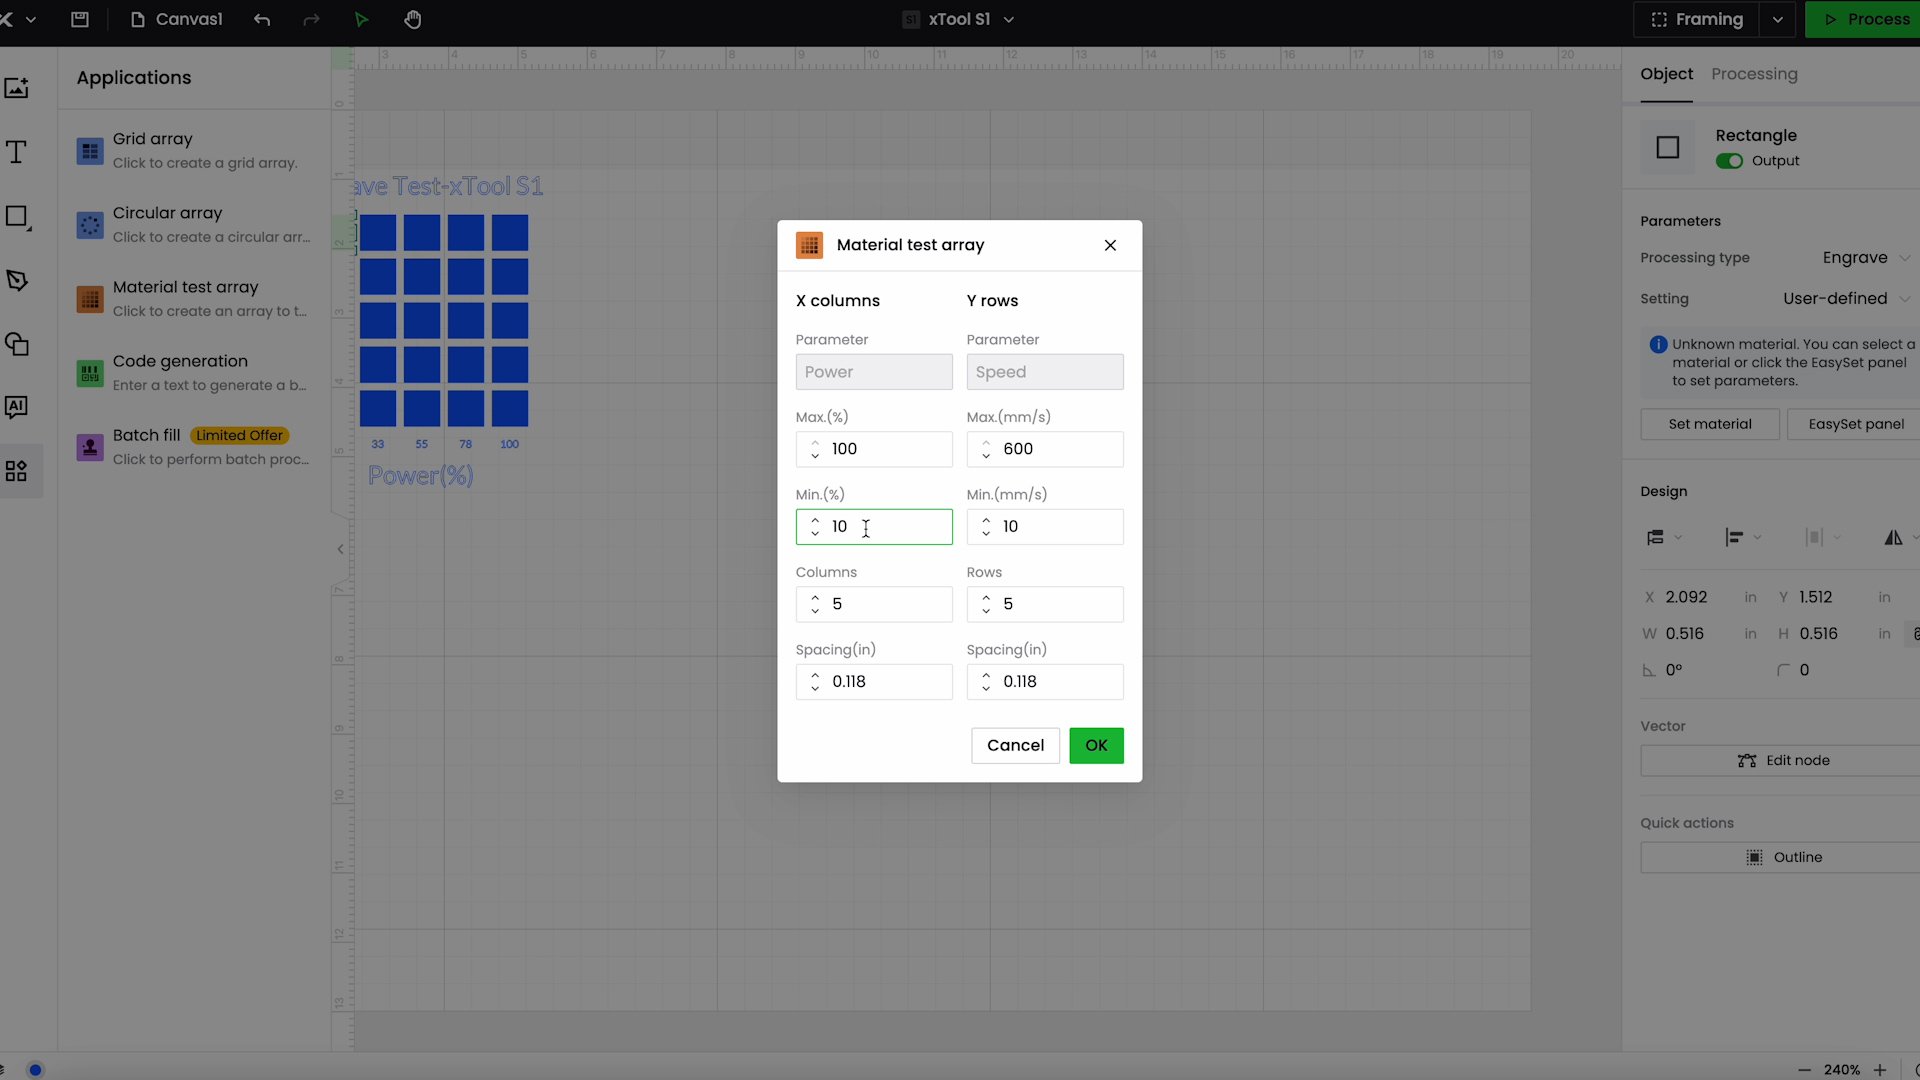
Click OK and there now you can see the test array. If you want to make any changes to the text, click Ungroup and make those changes.
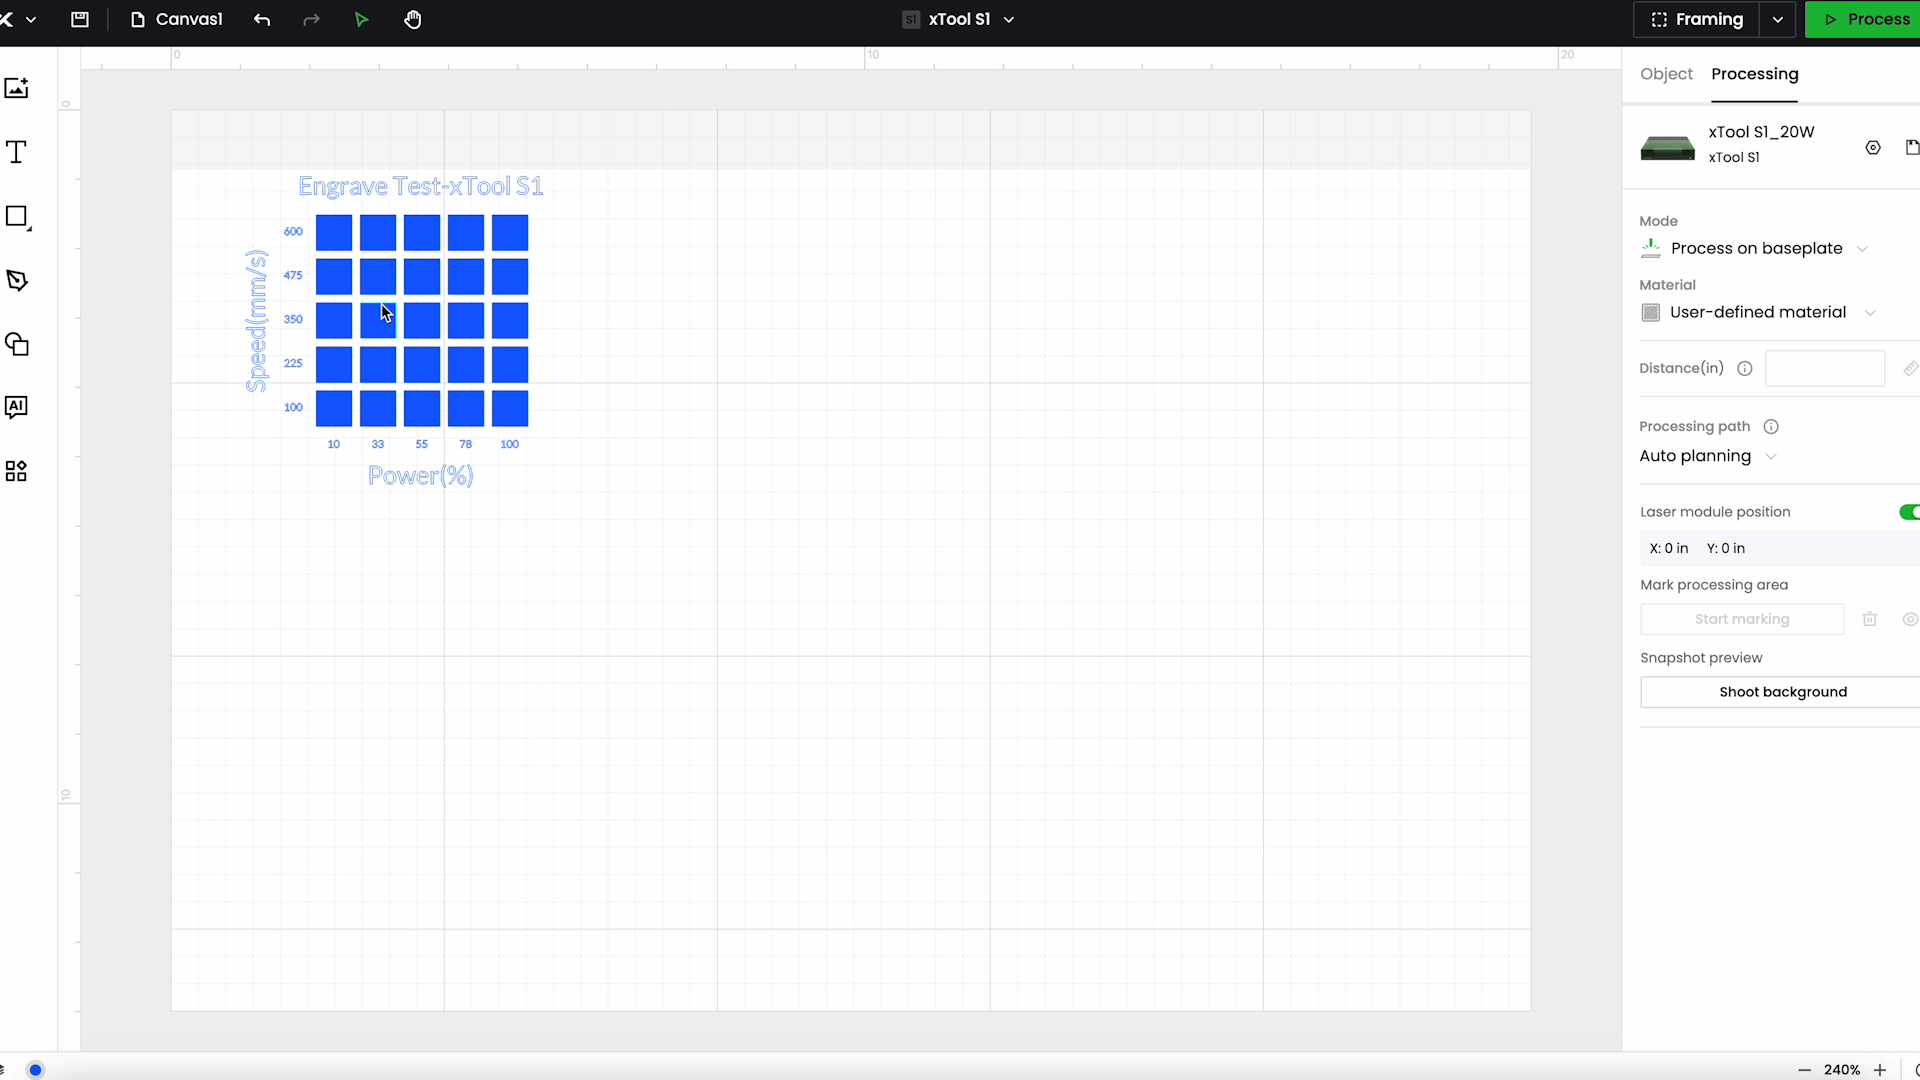
This test array also does not have a cut box around it so you can use it on blanks like tumblers. To cut it out, add a box around the outside and change it to a Cut layer.
Do You Need a Test Grid with xTool Creative Space?
Just like the WeCreat software you may not need to create test grids with xTool Creative Space.
Click Material and then click Material EasySet Library and you’ll see that when you select a material there is a test grid in the software. This will give you an idea of what the different settings will look like and what the preferred settings are to get that look.
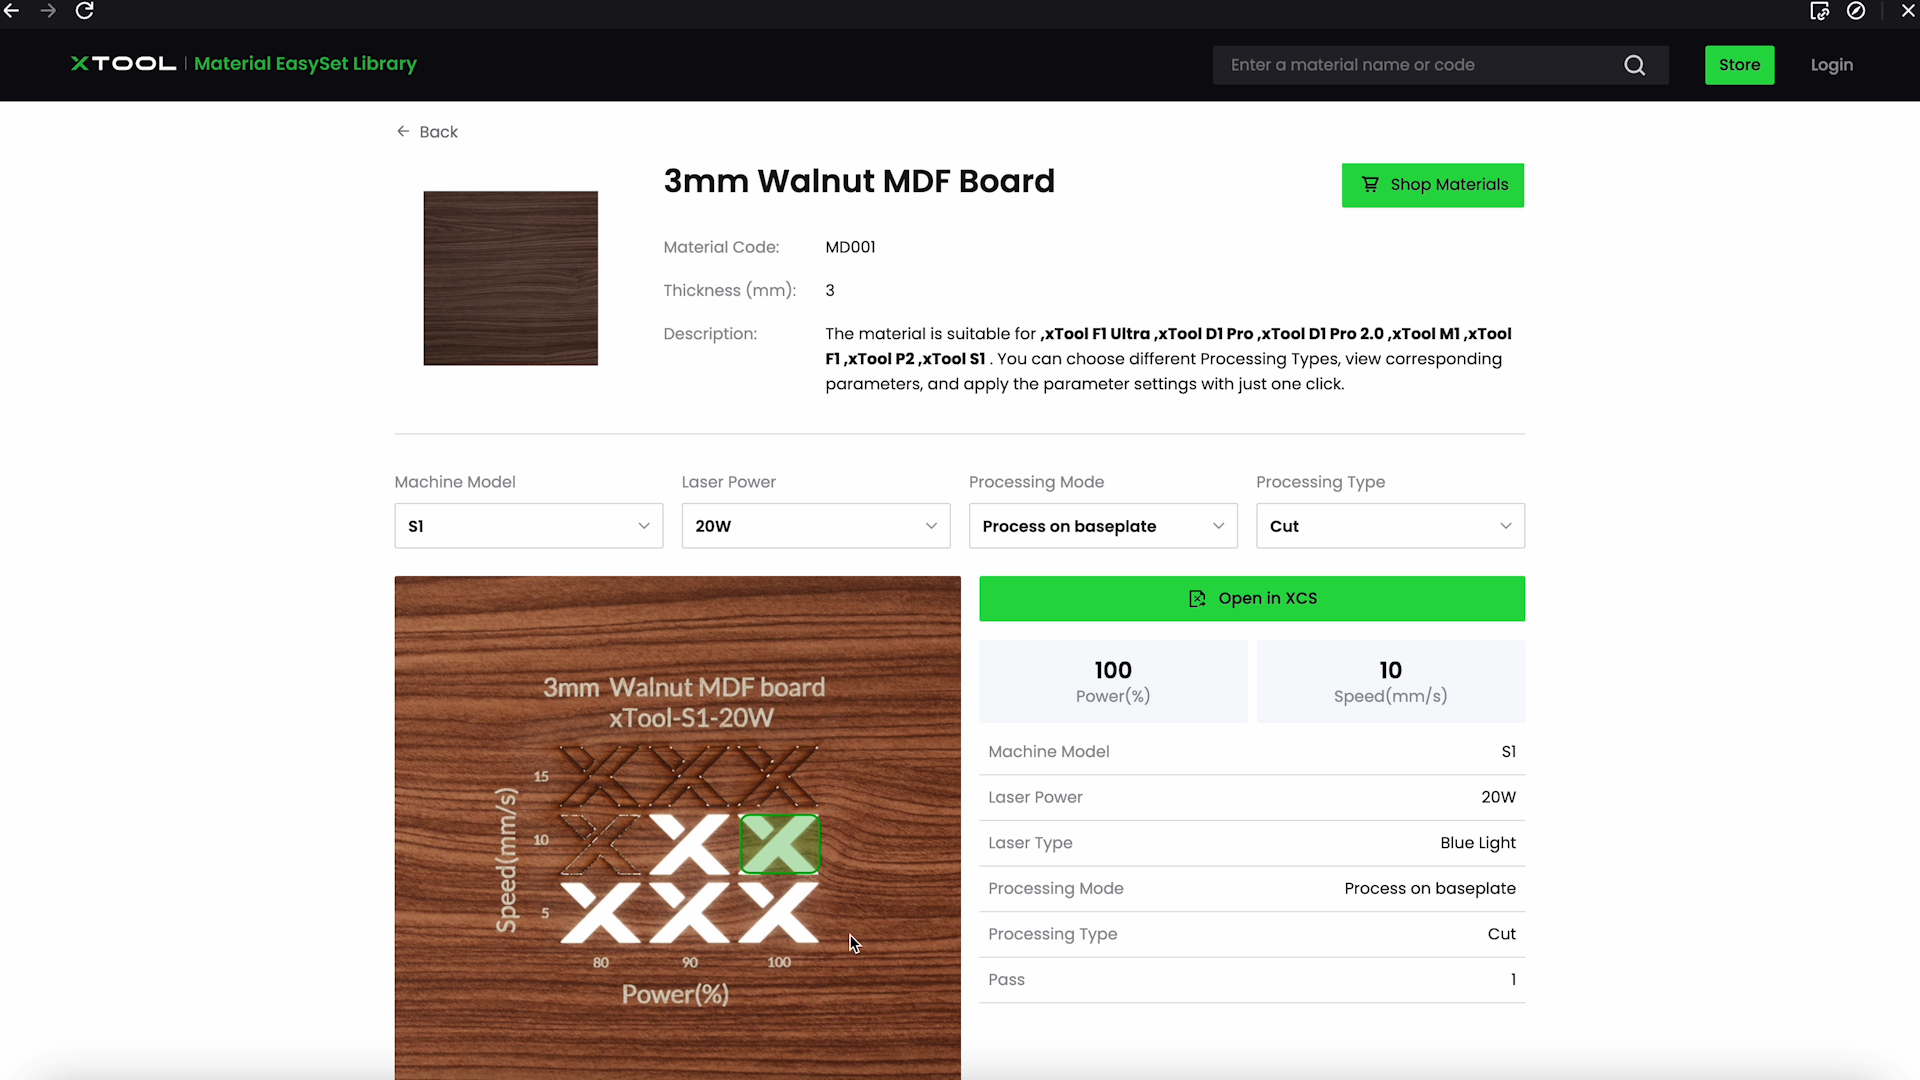
To see the test grid for different settings, change the Processing Type and it will load a different test grid.
You can use these as a place to start instead of creating a test grid.
Glowforge Laser Test Grids
Glowforge is definitely the hardest place to create a laser test grid. You may choose to buy a file off Etsy or something like that to make the process easier.
How to Create a Laser Test Grid with Glowforge
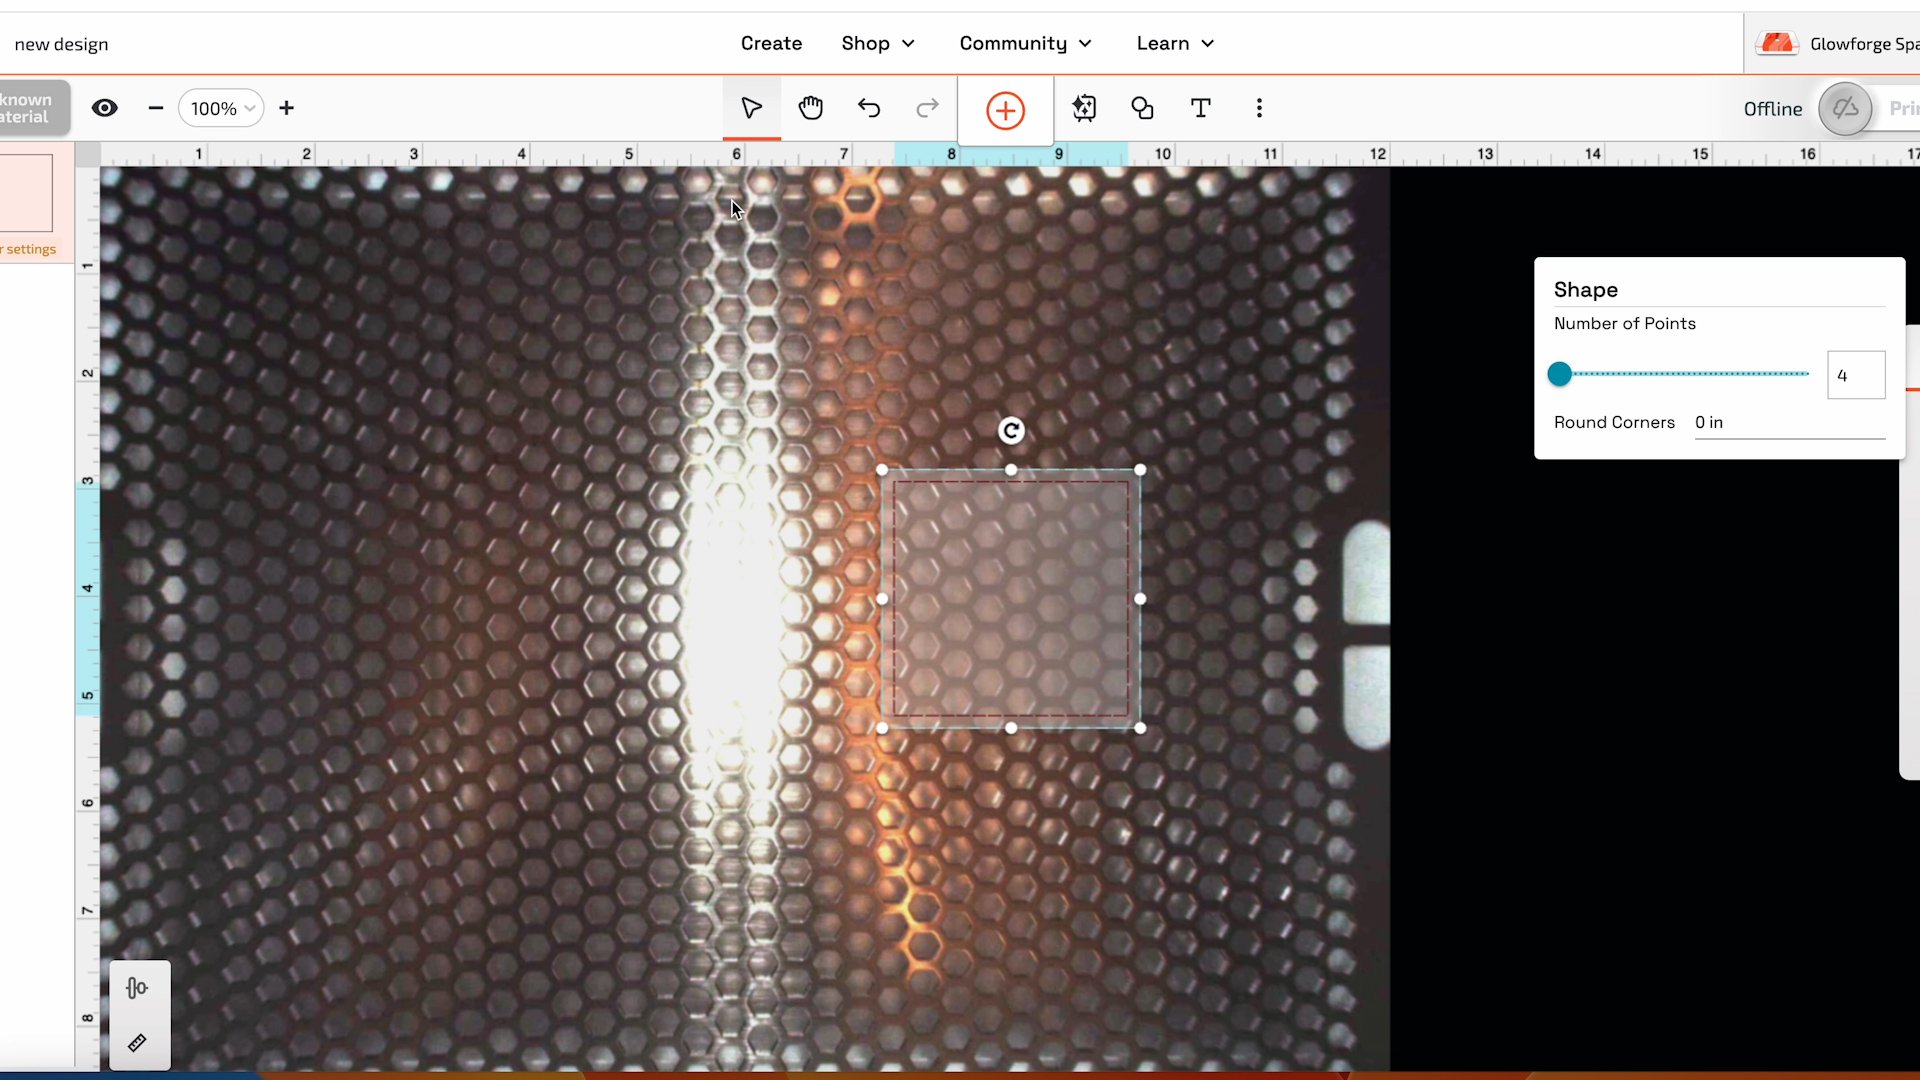
To create your own, Click Create a Blank Design and I am going to insert a rectangle and make it pretty small.
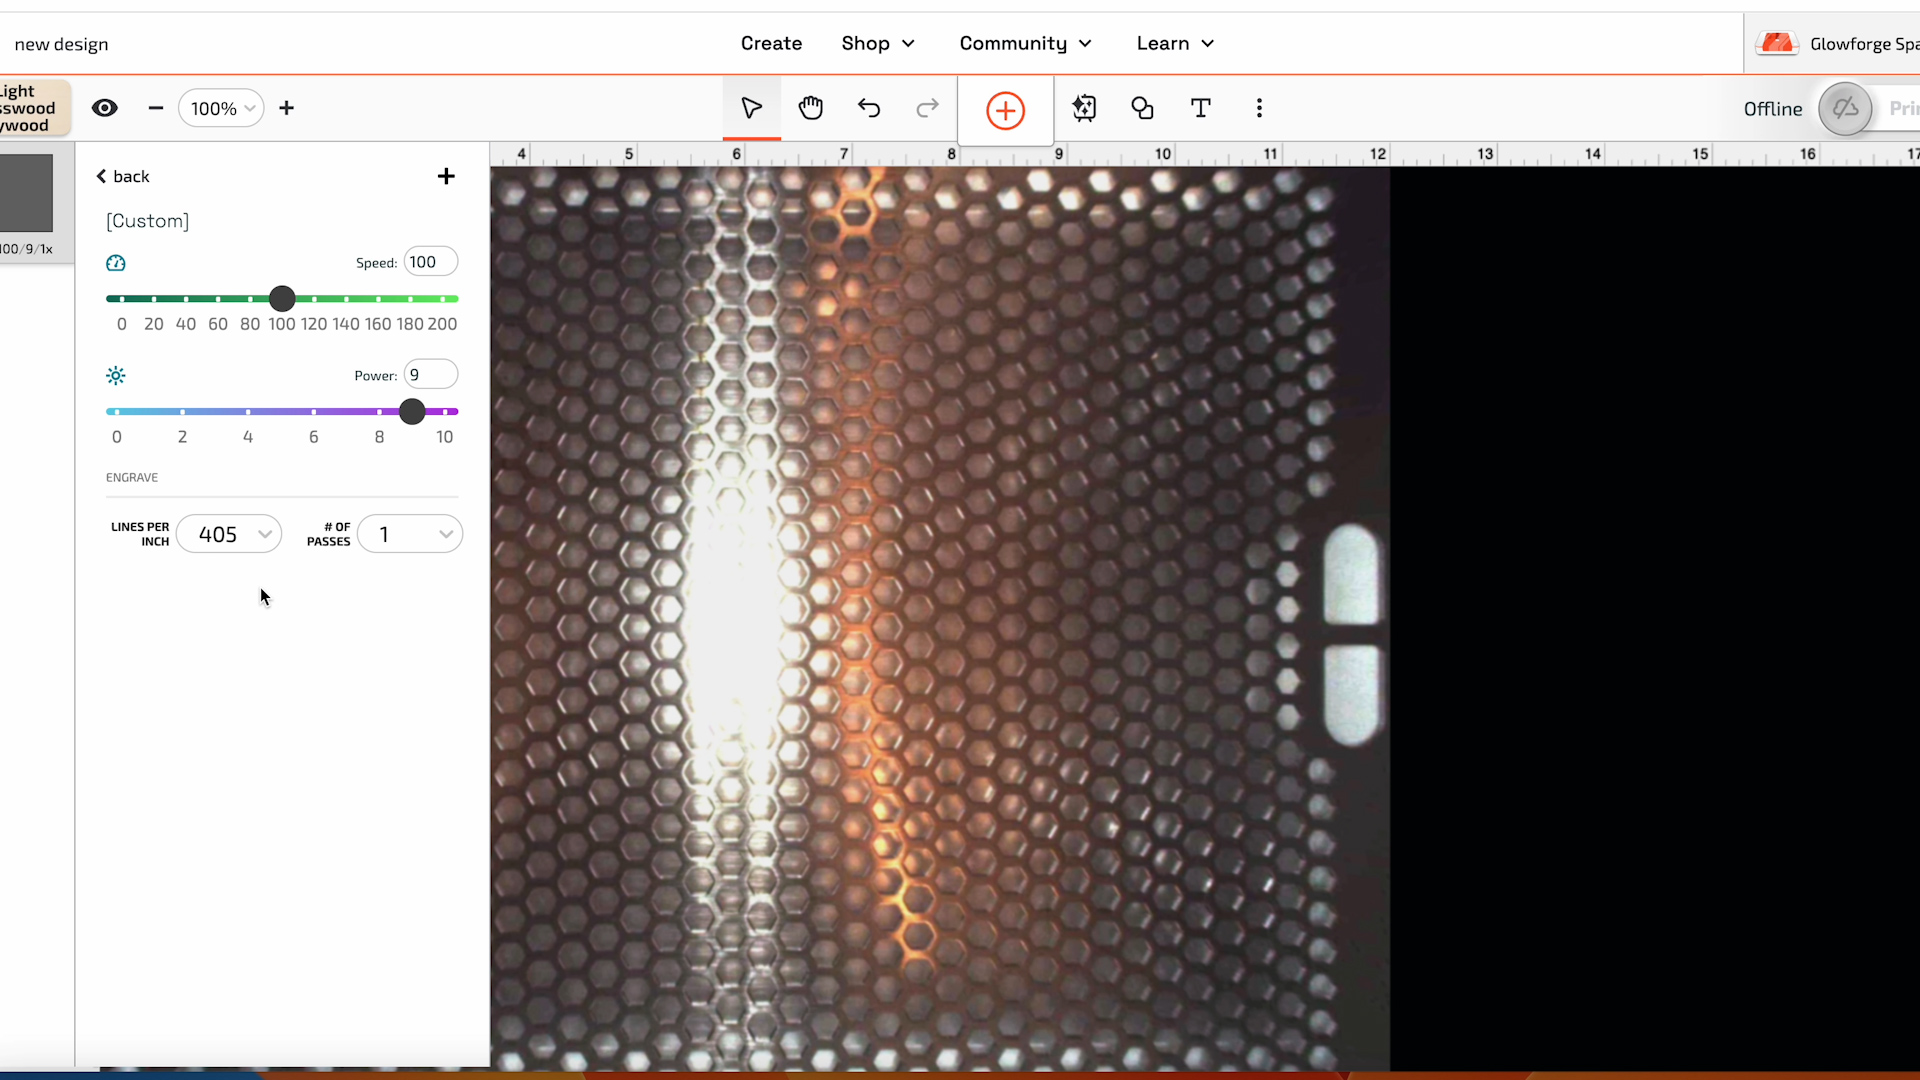
Next, I’m going to enter the settings for that rectangle. For this example, I am going to select Engrave and choose a material that is similar to what I want to cut.
The settings in Glowforge are for their proof-grade materials. Select something that is close to the material you’re using.
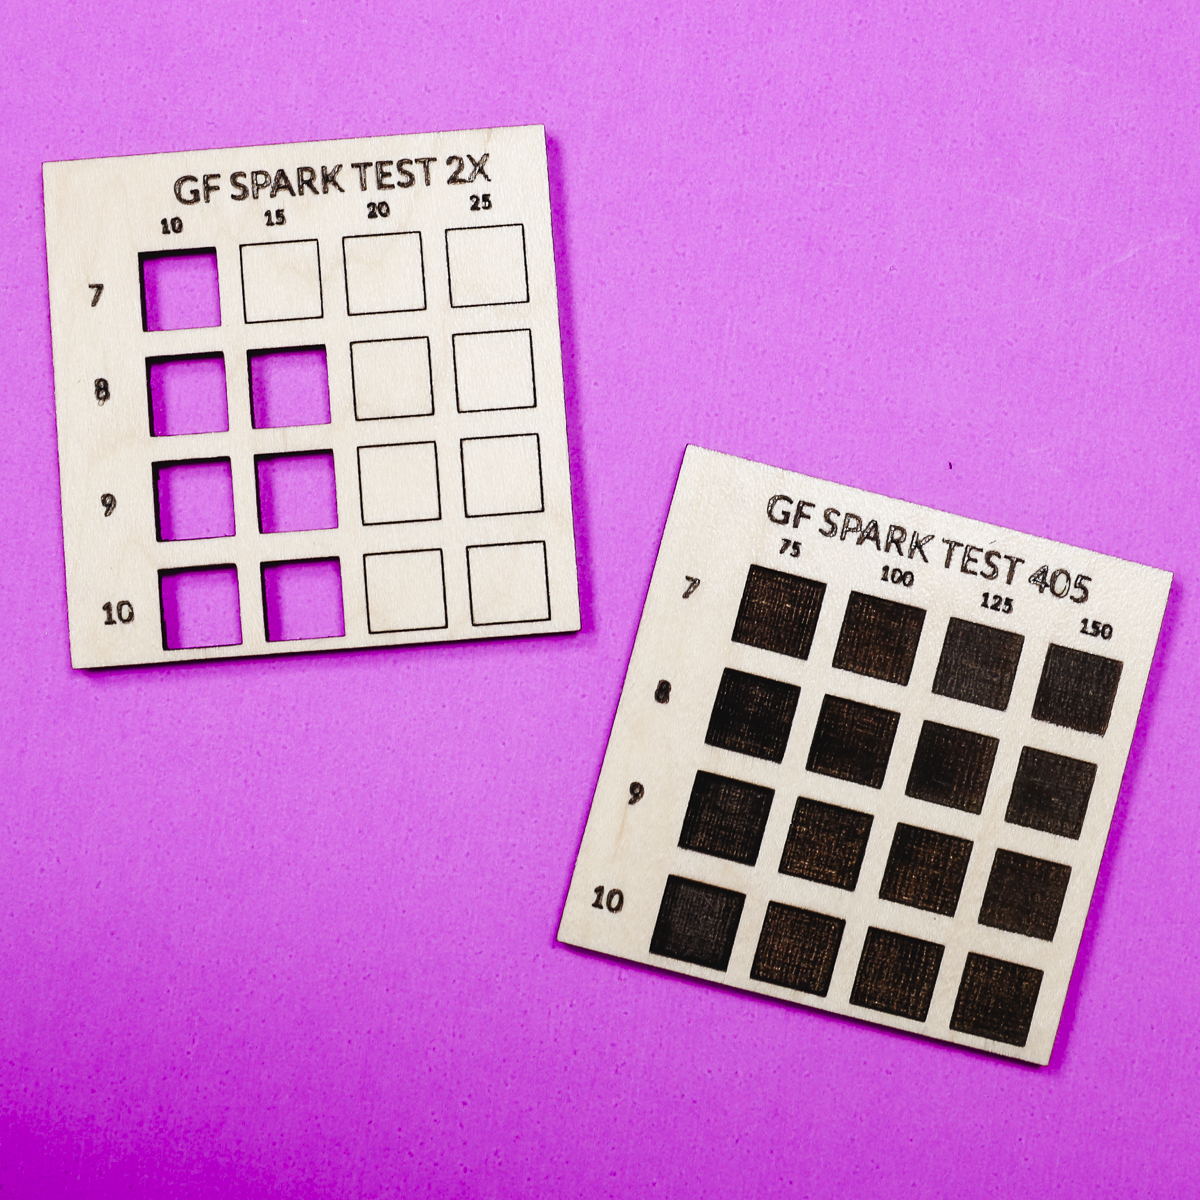
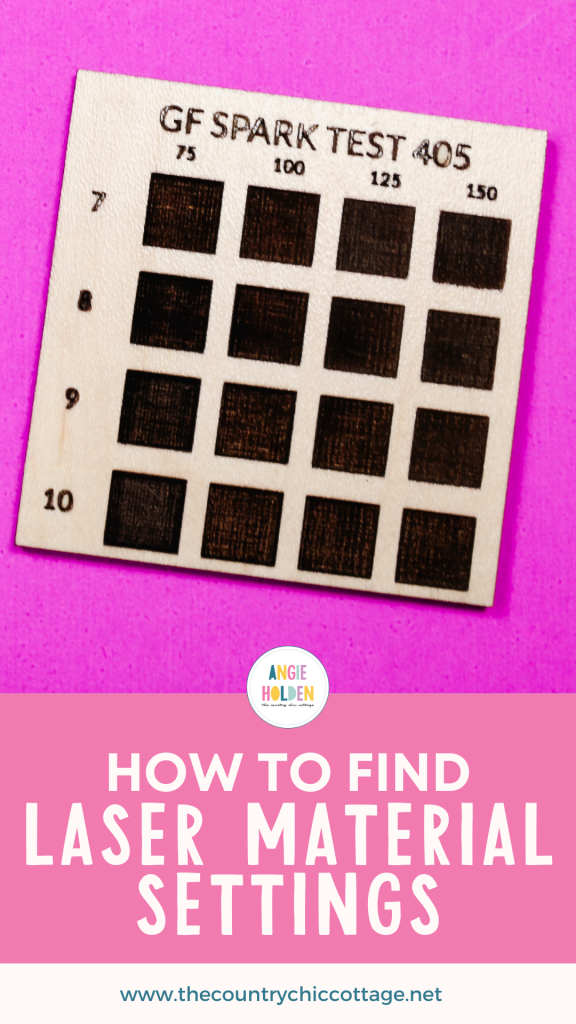
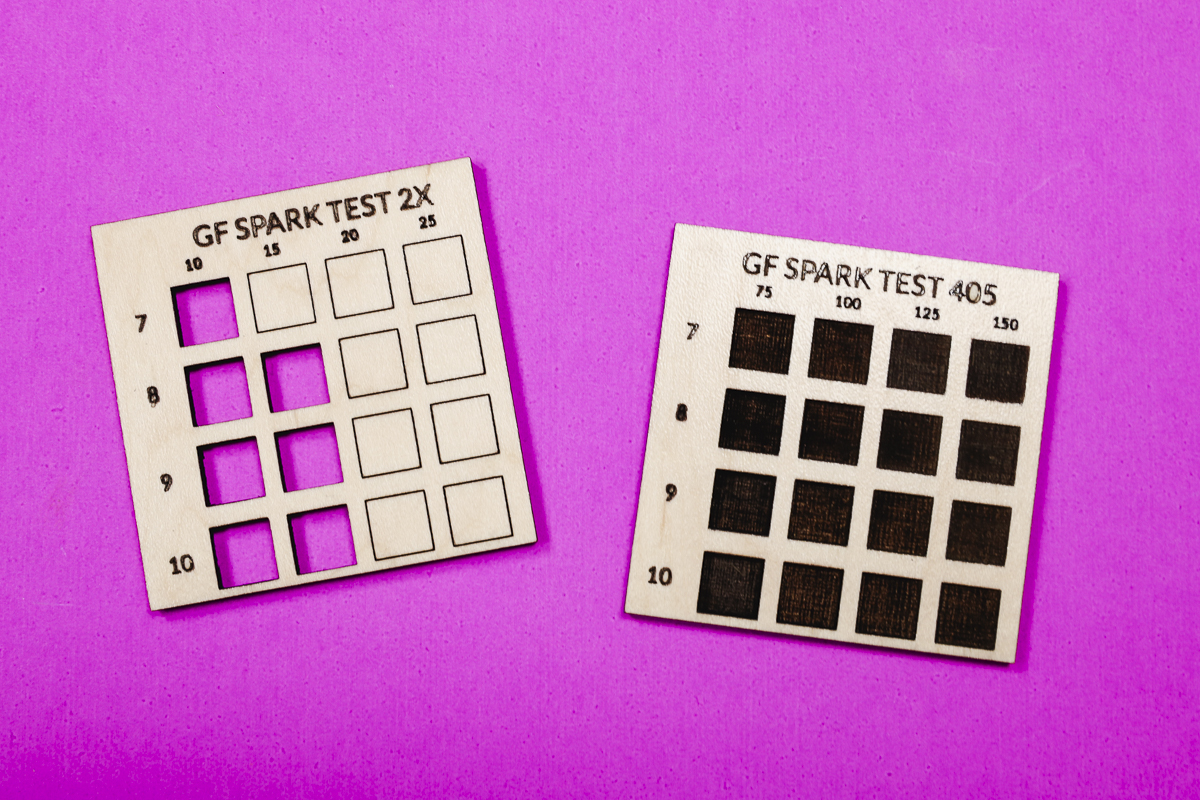
Click Engrave and here you can see the settings for SD Graphic. Those settings are 100 Speed, 9 Power, and 405 Lines Per Inch. I am going to use those settings as a starting point for my laser test grid.
To save the custom settings don’t click the Back button. Click back on the canvas and the settings will be saved.
Now we’re ready to duplicate the shape and repeat the process for the next settings. Copy and Paste the shape onto the canvas as a new step. This time I will set the Speed at 125 and keep the Power and Lines Per Inch the same.

Click on the Canvas again to save those settings and continue to repeat the process for as many rows and columns as you want.
To finish the test grid, use the text tool to add any notes that will help make it useful for you.
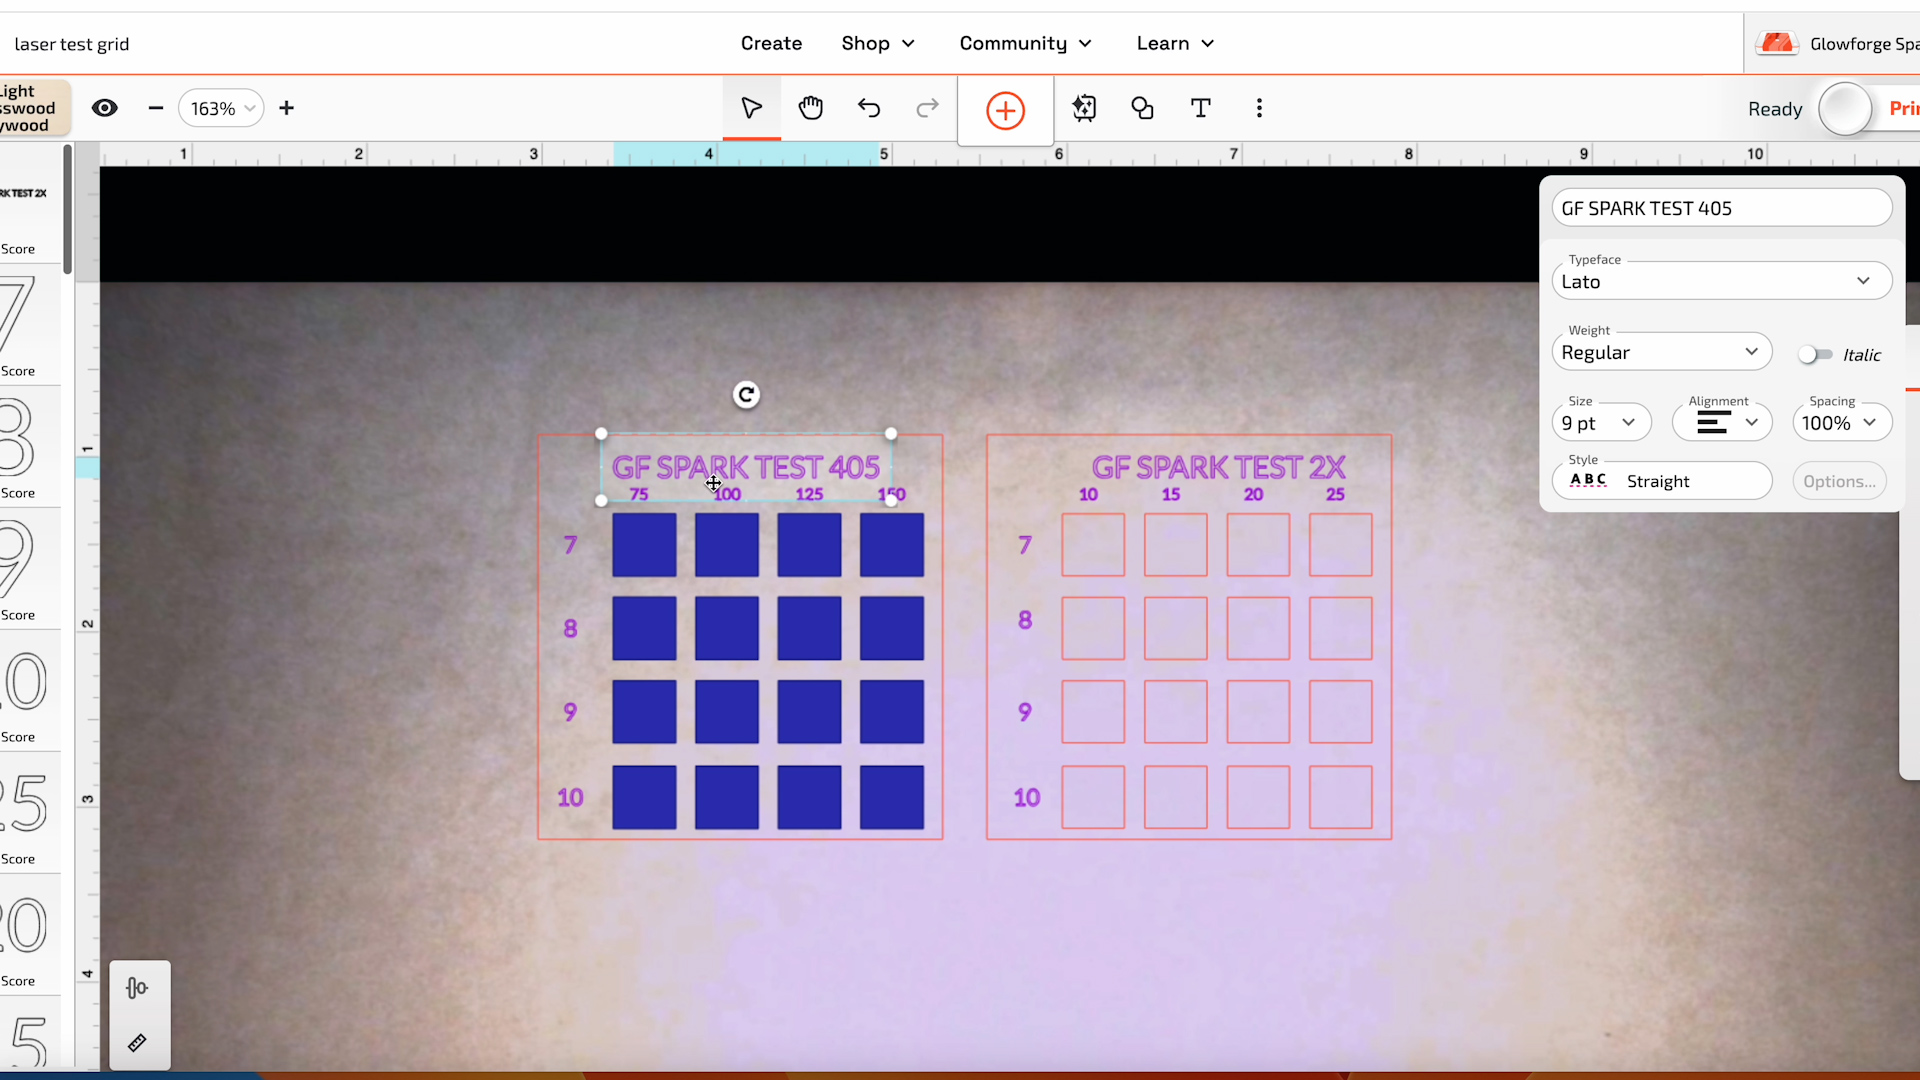
I added scored text lines across the top and side to mark the columns and rows and to label the test grid.
The 405 on the engraving test grid is a note for 405 Lines Per Inch. Because that is something I may want to test in the future I want to have the notes to help me remember what I used.
Do You Need a Test Grid with Glowforge?
As you can see, it is more difficult to make these test grids within the Glowforge software.
I have been through the software and I didn’t find any test grids already loaded into the program.
Should You Use Test Grids to Find Laser Material Settings?
Creating laser test grids within the xTool and WeCreat software was very simple. It would be an easy process to do for different materials.
The Glowforge program however is not as easy. You would need to either purchase a file from somewhere like Etsy or create your own test grid from scratch.
You can use this process to create test grids that you cut out of materials or etch them into the side of tumblers or other blanks.

I have found that creating these material setting test grids helps me waste fewer blanks because I know what my laser will do with each setting on the different blanks.
With more expensive blanks, you may not want to waste a blank to create a test grid, in that case, I would find a similar material that is less expensive and do a test grid on that.
This will give you an idea of what settings to use to hopefully not waste those more expensive blanks.
Hopefully, I’ve answered any questions you may have about creating laser material settings test grids. If you have any additional questions, leave them in the comments and I’ll be happy to answer them for you.