
I’m back, y’all! Last week was a long and busy week for me. I hope you saw my note that I put at the top of the previous post when I realized I was going to be away from the blog for an extended period of time. I needed last week away from the computer, and away from bloggable projects, so that I could laser focus on getting ready for workers to be in the house beginning today.
I was notified on Sunday, August 26th, that the guys would be able to start ripping up the floor and subfloor in the home gym on Monday, September 2nd. We didn’t realize that that day was a holiday, so the start day was actually pushed to today. But that gave me a week to clear out the home gym, find a place to put all of the equipment we want to keep, get rid of what we don’t want to keep, and be ready for them to start on the floor today.
So I spent every day last week doing just that. I had to start by clearing out a large enough space in the sunroom to store most of the home gym equipment. That was NOT an easy job. That sunroom has been an out-of-control mess for years now. And the side of the room where I wanted to store the exercise equipment (i.e., the side where I have the washer and dryer) was piled with boxes that were filled with stuff that I hadn’t gone through for years.
Since this sunroom needs to be completely cleared out before we do our kitchen addition (because the sunroom will actually be torn down completely), I didn’t want to simply move the boxes from one side of the room to the other. I wanted to actually open the boxes and deal with the contents. That was the slowest job of the entire week.
I had boxes filled with papers that were 20+ years old! There were big files filled with all of my classroom work from when I lived in Istanbul and went to Turkish language school. I hadn’t thrown away a single paper from those classes, and that was back in 2001!! I had more files filled with receipts from every bill I ever paid while living in Turkey, from rent, to gas, to electricity. Other files were filled with the letters that Matt and I wrote to each other before we got married.
I also came across boxes filled with items from my old interior decorating business when I officed out of a local furniture and decor store called Spice here in Waco. Anyway, you get the idea. So much of the week was like a trip down memory lane. I enjoyed the memories, but going through boxes of papers, and making sure I didn’t throw away anything important, is such a boring and tedious task.
But I finally got it done, and then I was ready to move everything out of the home gym. So here’s our home gym packed away in the corner of the sunroom for now.

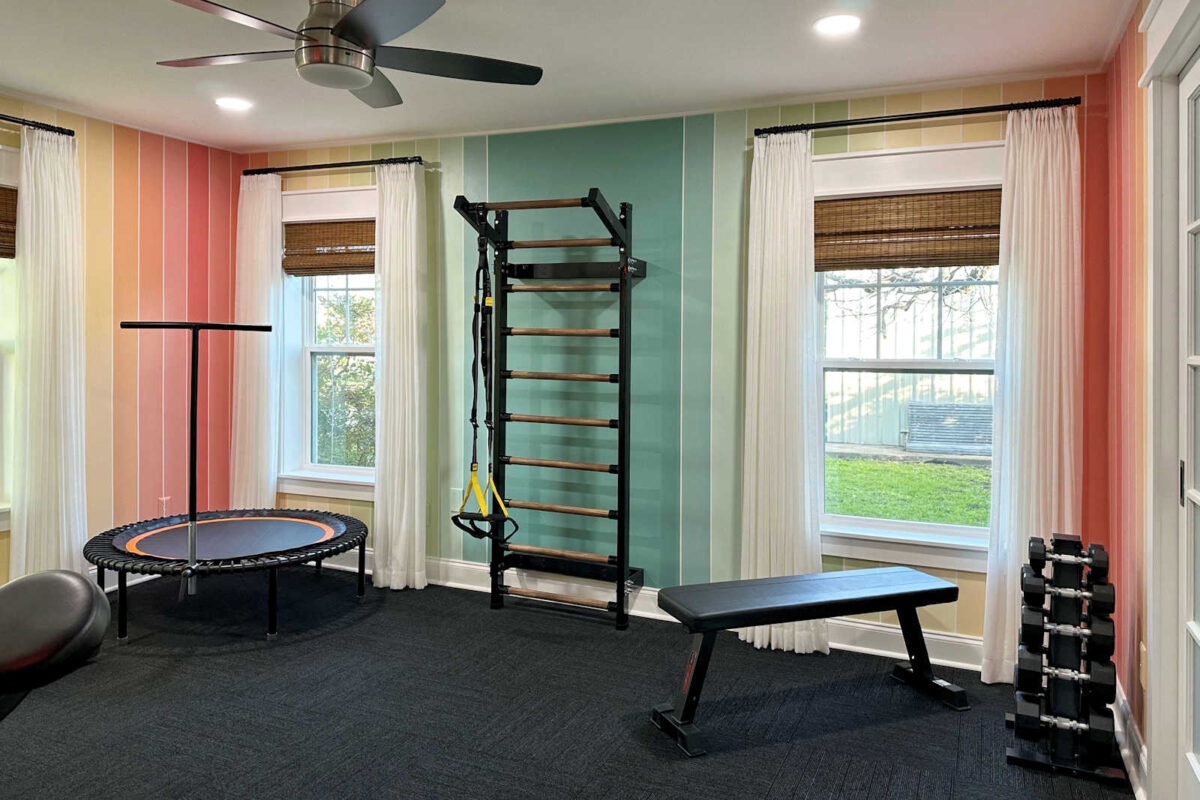
This whole process was bittersweet. I so enjoyed having this home gym for the 17 months that we had it. It was so functional and convenient, and I loved being surrounded by so much color. I’ll miss it. At the same time, I’m also very excited about turning this into our permanent bedroom.
But it was a little sad taking this room that I had poured so much time into…
…and undoing, and ripping out, and going backwards. So here’s what I’m left with after last week.

Once all of the carpet tiles were up, I could see all of the damage they had caused to the hardwood floor. It’s a bit shocking to see it all at once. The floor was in rough shape when I put the carpet tiles down, but other than the one floor board that was damaged, the rest of the hardwood floor just needed to be sanded and refinished. But now, sanding and refinishing couldn’t save these floors.

It’s hard to capture the extent of the damage in pictures. If you’re not standing in the room and walking on the floor, it’s hard to get an idea of just how unlevel and uneven the floor is.

But just imagine that everywhere there’s a floor joist, there’s a pretty high ridge, and then there are valleys on either side of those ridges. And once I got all of the carpet tiles up, I realized that there are way more ridges that I had previously thought.

I thought the one that I had previously showed y’all was the worst.

As it turns out, it was just more noticeable because it was closer to the middle of the room, so it was in the path where I walked the most.
There’s another one that’s far worse. This ridge is so high that it cracked the hardwood floor board.

And again, just to be clear, that is not the hardwood floor buckling and being pushed up towards the ceiling. That high ridge is the floor sitting directly on the floor joist, and the flooring on either side bowing towards the ground. The strange thing is that the floor still feels strong. It doesn’t feel spongy or weak.
What really shocked me is that when I took the carpet squares up around the perimeter of the room, there was quite a bit of moisture under them. I’ve had the carpet tiles removed from the entire center of the room for weeks now. The middle of the floor had completely dried out. For some reason, I thought that having the large center area of the room uncovered would be enough for the moisture to escape and evaporate, but that wasn’t the case. There was still quite a bit of moisture being trapped under these perimeter tiles. All of the dark streaks in the photo below are from water.

I just can’t believe the damage done to these floors. It’s so disheartening.

But at the same time, I find myself feeling thankful. It’s this floor damage that caused me to pause, take another look at our house floor plan, reevaluate how we’re using the spaces we already have, and change course on the long-term plans I’ve had for our house for years now. This floor damage saved us from taking on quite a bit of debt, and it made us reassess the scale of the addition we want to build.
I’m so thankful for that. If it weren’t for this floor damage, I’d still be pushing to do a big 1350 square foot addition, which would put us in debt by about $120,000. And now, because of this floor damage, we’ll be living with the space we have for the most part, only adding a kitchen, and doing all of that while staying debt-free. It’s a good life lesson, isn’t it? Sometimes those terrible things that happen are actually blessings in the end. Not always, but definitely sometimes.
It was a very productive week. I still have the other half of the sunroom to go through, organize, and purge before the room can be torn down. But we’re not ready to start the kitchen addition just yet, so there’s no time crunch to get that half of the room done. For now, I’ve done all I need to do in there.
So for now, the work will get started in the gym (soon to be bedroom). It will probably take a few days for them to get their part done, and then it will be up to me to install and finish the new flooring. In addition to that, we’re probably one to two weeks away from my workshop being built. My permit was approved, so my storage building is in production. They’ll build it on site, but I think they’ll have things like the trusses pre-built before they arrive on site, so those things are in the production line right now. And then after the gym-to-bedroom conversion is finished, and we’re moved into that room, I’ll start turning the current guest bedroom into our closet and workout space. And probably while that’s being done, the work on the kitchen will start, and that project will begin with the tearing down of the sunroom.
Things are about to ramp up around here. It’s going to get exciting!

Addicted 2 Decorating is where I share my DIY and decorating journey as I remodel and decorate the 1948 fixer upper that my husband, Matt, and I bought in 2013. Matt has M.S. and is unable to do physical work, so I do the majority of the work on the house by myself. You can learn more about me here.