
I can’t even express how much I hated working on this project. 😀 But I’m so glad to have it finished! I wanted to cut corners so badly. I tried to get away with not installing door casing on the backside of the doorway, and not painting the backside of the door, and not framing out the vent in the wall. But in the end, my mind wouldn’t let me get away with that.
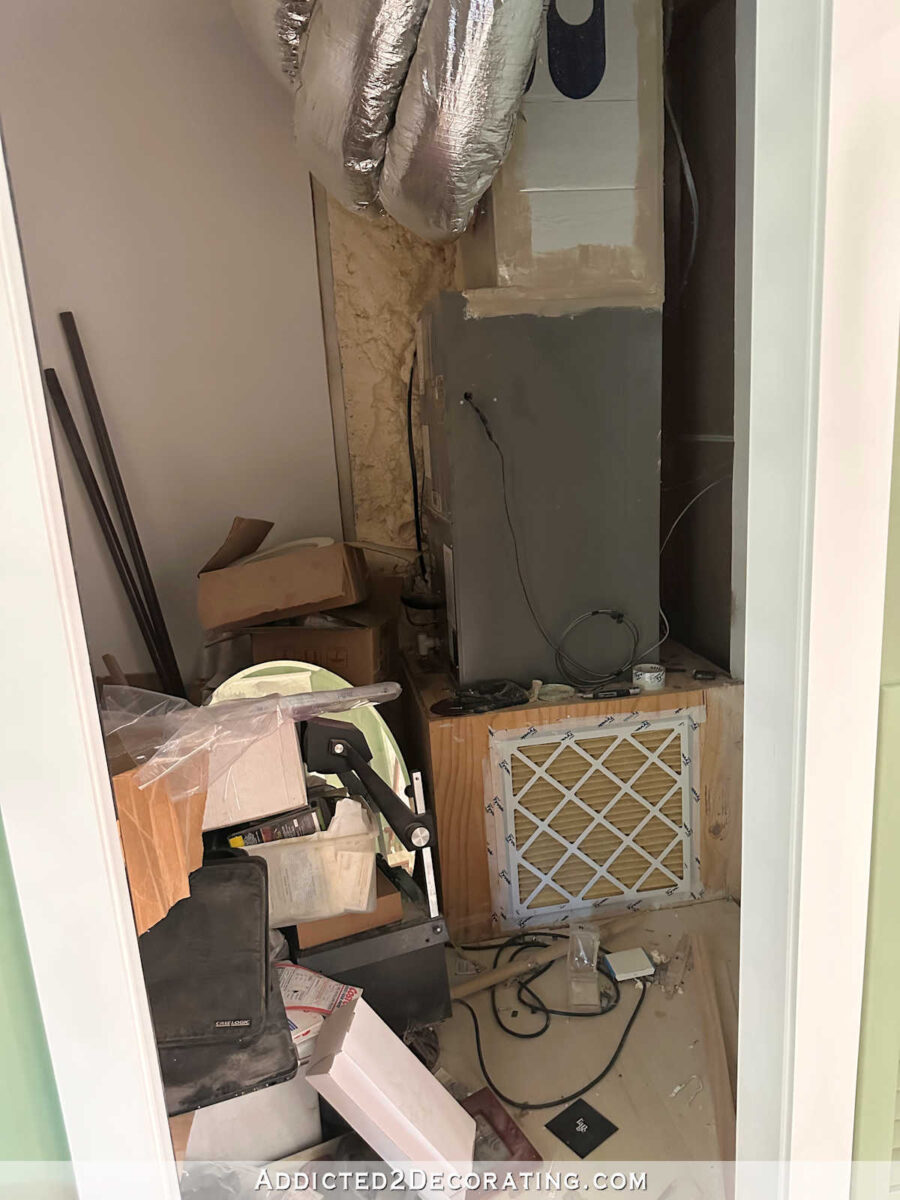
So let me remind you what this closet looked like before…
And now, after some paint, trim, and a piece of plywood to hide the HVAC unit, it looks like this…

In a perfect world, I’d have built-in shelves in here that utilize every spare inch of space. But since this isn’t a perfect situation, and I have to be able to easily move the shelves out of the way if the HVAC unit needs service, I had to stick with these shelving units on casters.
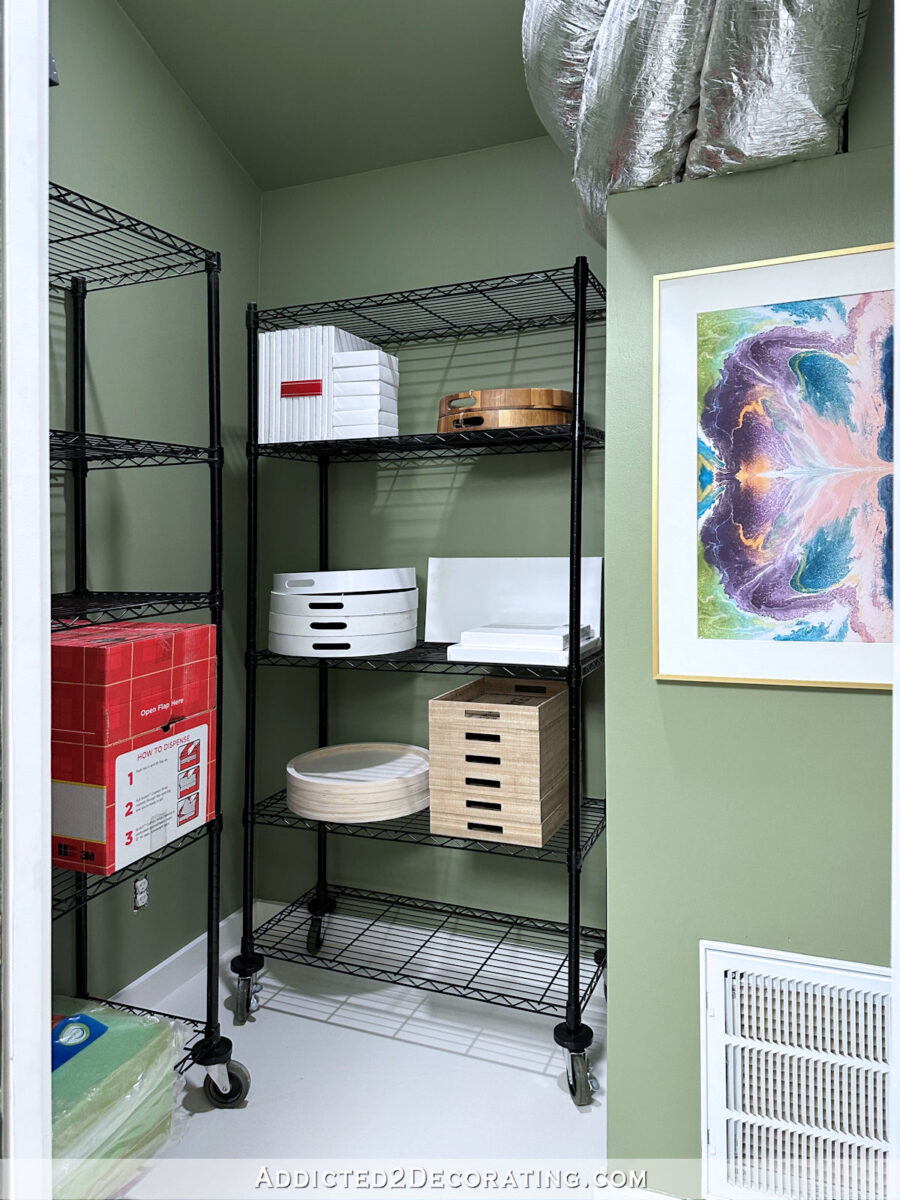
I was able to fit two of them in here. I’m not exactly sure yet what I’ll be storing in here. I still need to organize the whole studio, and for now, I think I’ll have more than enough storage space. So this might be space I’ll grow into as I begin to actually use the studio.

Since I didn’t want to have a plain green wall, I decided to hang one of my acrylic art prints here to add a little bit of color and interest to an otherwise very boring space. I love opening the closet door and seeing that colorful print.

I had initially planned to add some shelves to the area to the right, but since I haven’t even filled the shelves I have, I decided to hold off on that for now.

It was a pain having to work around this mass of air ducts, so I did the best I could. It’s still not pretty, but at least I no longer have to look at the ugly side of an HVAC unit. Adding this piece of plywood here, and notching out the area for the ducts, made a big eyesore a bit more tolerable.

And now, you have to go into the closet and peek around the plywood to see the ugly HVAC unit.

I had planned to leave it as it was when I showed you my progress last week. It looked like this…

But that’s another thing my brain wouldn’t let me leave alone. I ended up covering the plywood box with a nicer piece of sanded plywood, adding some trim, and painting it to match.

I also ended up doing the door casing the same as the other doors.

I didn’t do this because I just couldn’t help myself. I actually planned to do a much simpler trim on the closet side of the door, but as it turned out, I didn’t have the lumber on hand to do a simpler trim. I did happen to have what I needed to do this style in my scrap pile, though, so I went with it. It’s not the highest quality lumber. It had gotten rained on and was warped, so I put it through the planer a couple of times to make it look better. It’s fine for the inside of a storage closet, but I wouldn’t have used it in a prominent place in the house.
And then I did a quick and easy frame around the wall vent.

I really wanted to just leave it undone, but that’s just not me. I’m okay with imperfection and not using the highest quality materials inside a closet, but as it turns out, I’m not okay with leaving projects completely undone in a closet. Here’s what it looked like before…

And here it is now. I used lumber from my scrap pile for this, too. I wanted things to look finished in here, but I wanted to spend as little money as possible.

This is the area where I had originally planned to put up some shelves, but I changed my mind since I have more than enough shelves for now. And I may find that I need hooks to hang things instead of needing more shelves, so this is a great area for that. But for now, I don’t need any additional storage.

Anyway, this was so boring to work on, and I really had a hard time keeping myself motivated to finish it. But now that it’s finished, I’m so glad that I have this clean, organized space to use! This is one of those projects that’s been hanging over my head for far too long. It feels good to finally have it finished.
Side note: I finally got a new laptop computer and I’ve spent the last two days getting the new one set up, transferring all of my files, and installing my programs. After months and months of using a laptop with a keyboard that wouldn’t work normally (the W, L, K, O, and 2/@ keys would only work intermittently, and sometimes not at all), I finally have a new laptop with a keyboard that actually works. So hopefully that means that my posts from now on will contain about 99% fewer typos than what they’ve had over the last few months. 😀

Addicted 2 Decorating is where I share my DIY and decorating journey as I remodel and decorate the 1948 fixer upper that my husband, Matt, and I bought in 2013. Matt has M.S. and is unable to do physical work, so I do the majority of the work on the house by myself. You can learn more about me here.