This post and photos may contain Amazon or other affiliate links. If you purchase something through any link, I may receive a small commission at no extra charge to you. Any supplies used may be given to me free of charge, however, all projects and opinions are my own.
You’ve probably heard me talk about DTF printing before, today I’m going to talk to you about UV DTF and how it is different than regular DTF prints. I’m going to show you how you can order UV DTF stickers and walk you through making a project so you can see exactly how the prints work.
If you haven’t heard about DTF printing yet, check out my DTF Printing Beginner’s Guide to learn all about why it’s becoming one of my favorite heat transfer materials.
Currently, UV DTF printer technology is expensive so I ordered my prints and would recommend doing the same. I expect to see UV DTF printing technology that is affordable for the home crafter. When that happens you know I will be reviewing those printers.
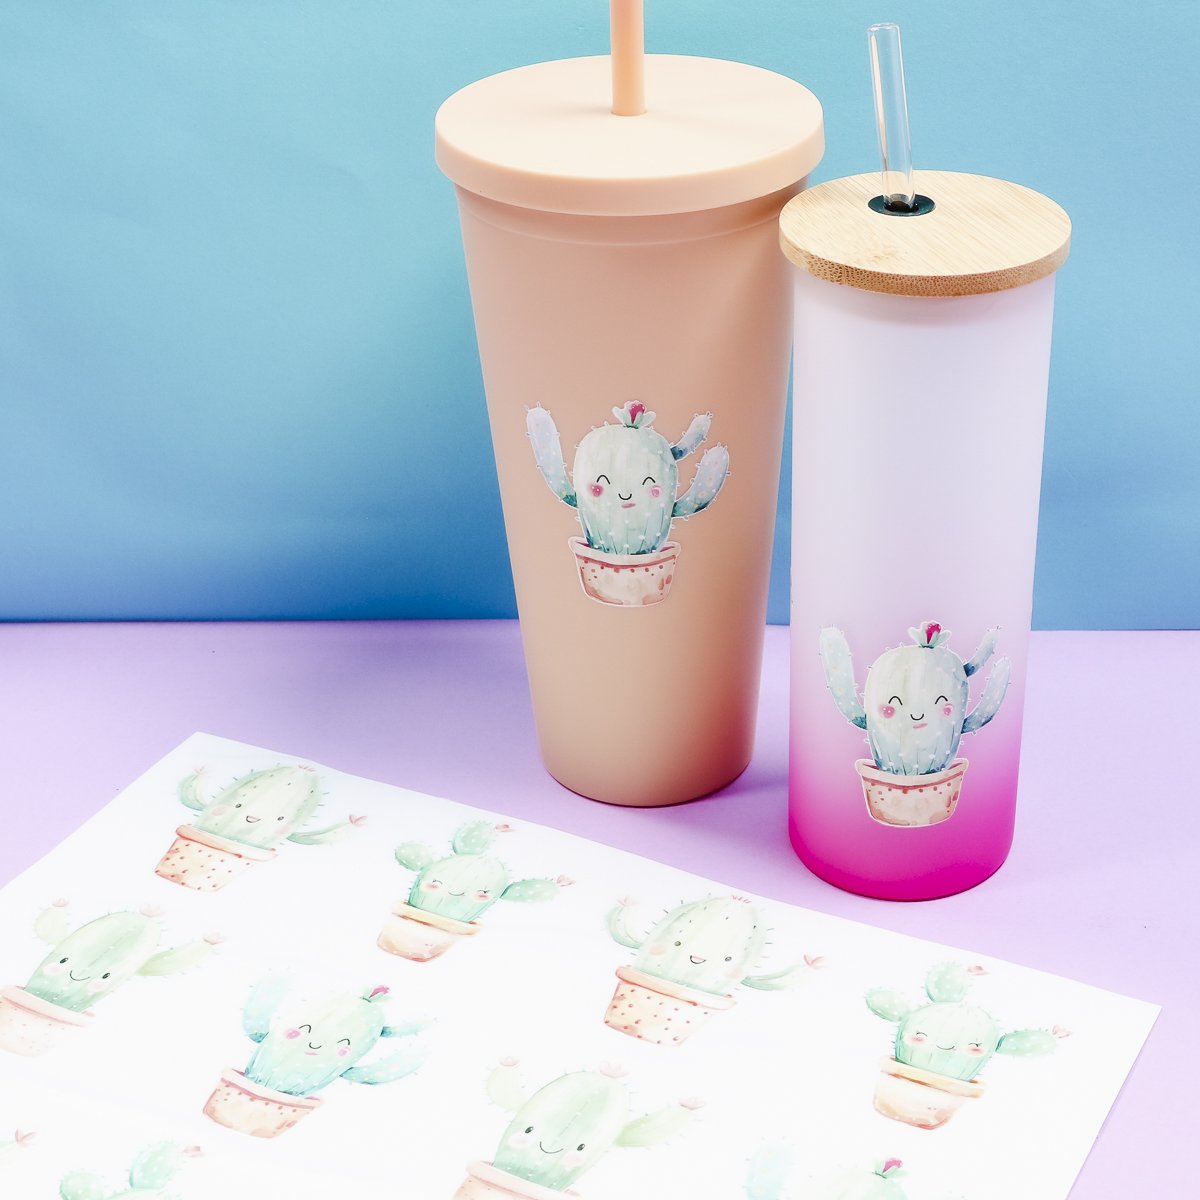
You can watch me walk through the whole process of making these cute tumblers with UV DTF stickers by pressing play on the video below.
What is UV DTF
DTF stands for Direct to Film. UV DTF is a printer that prints on film with ink that is then cured by a UV light. A laminate is applied over the top and you have UV DTF stickers, UV DTF tumbler wraps, and other products that can be applied to hard surfaces with amazing results.
Just like regular DTF prints, UV DTF prints are opaque. The printers print the regular CMYK and white ink so you can add them to blanks that are light or dark in color.
How is UV DTF Different than Regular DTF?
Regular DTF prints are made to add to garments. Designs are printed onto film and then an adhesive powder is added to the ink and cured with heat. You apply the print to a soft surface and apply heat to adhere it.
I tried applying regular DTF prints here to hard surfaces and wasn’t successful at all.
UV DTF prints are made for hard surfaces. The adhesive doesn’t require heat and once applied they are permanent, waterproof, and UV resistant.
How to Order UV DTF Stickers
There are a variety of places that sell UV DTF stickers. I ordered mine from Pro World here. I think most websites will operate similarly. At Pro World, they call them ColorPro UV DTF 3D Stickers. UV DTF has a 3D-like feel to it so you’ll usually see it referred to as a 3D sticker.
Step 1: Upload Design
You can check the pricing and any setup fees and then click on design stickers.
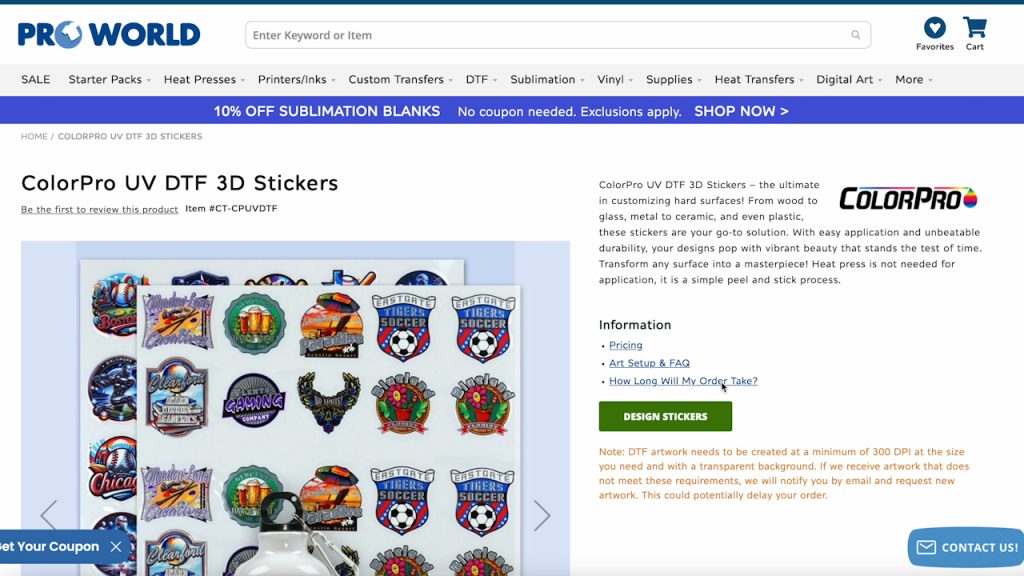
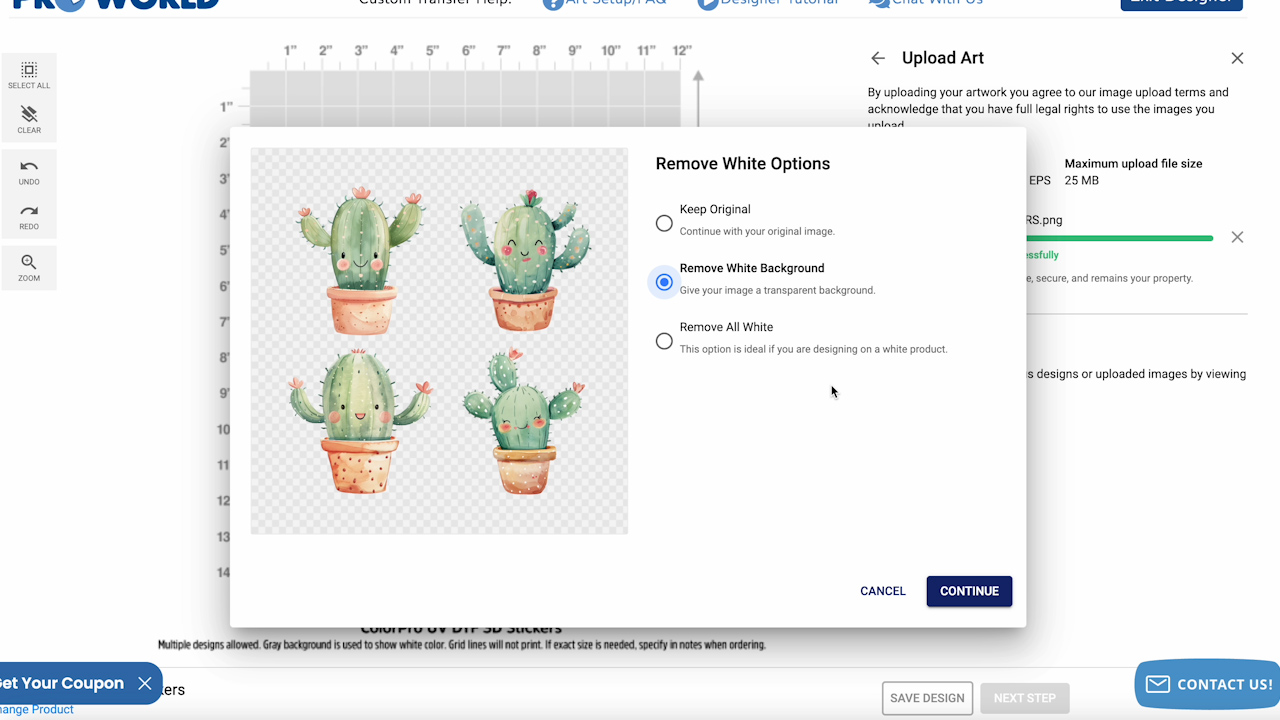
Upload the design you want to use and, when the file is uploaded, there are a couple of different options you can choose. I clicked Remove White Background to make sure there was no chance of a background color printing. If you’re adding the sticker on a blank that is white, you can actually remove all of the white if you’d like and click Continue.
I want full-color stickers so I am choosing that option for my color profile.
Step 2: Fill Sheet
In this program, you can upload individual images or a full sheet if you already have your images laid out how you want them. There are options for resizing, copying, and pasting. You can duplicate the design and create a sheet right in the software.
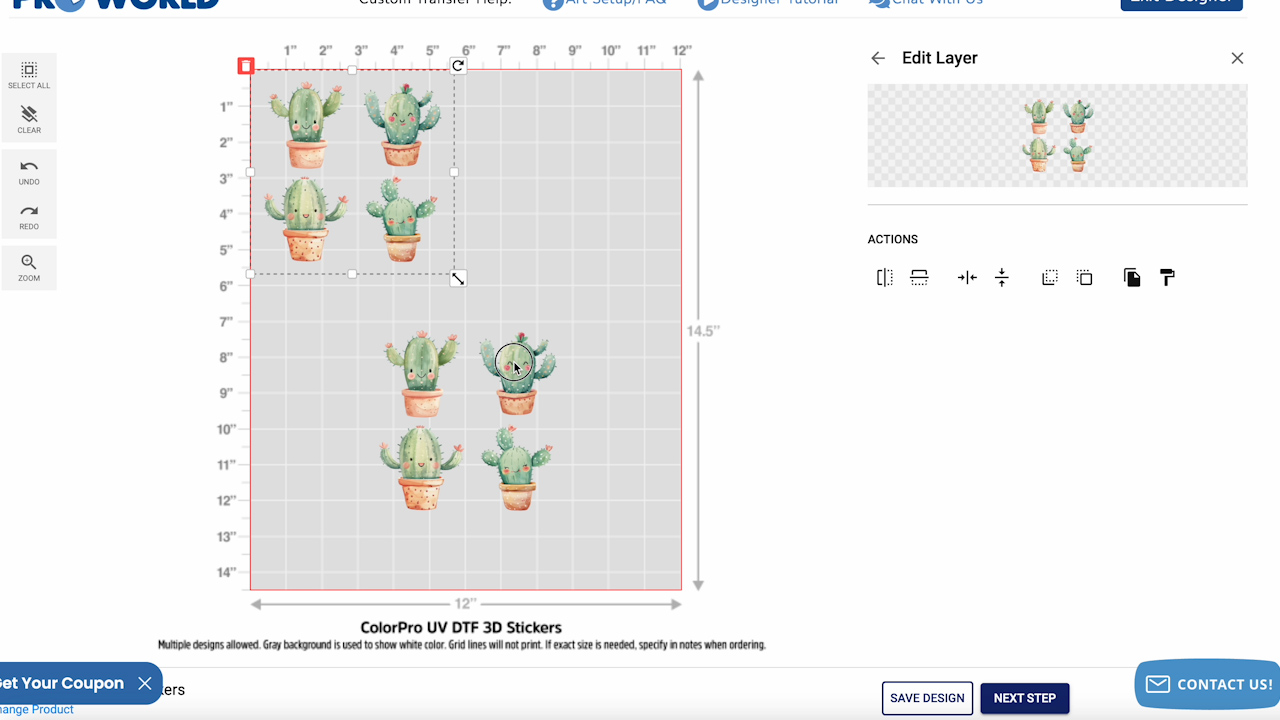
I did not have a particular size in mind, I just wanted a full sheet of stickers. If you want to print a particular size, you can use the grid lines to size your design correctly.
You can also tell them during the ordering process what size you want the artwork to be and they can take care of that for you.
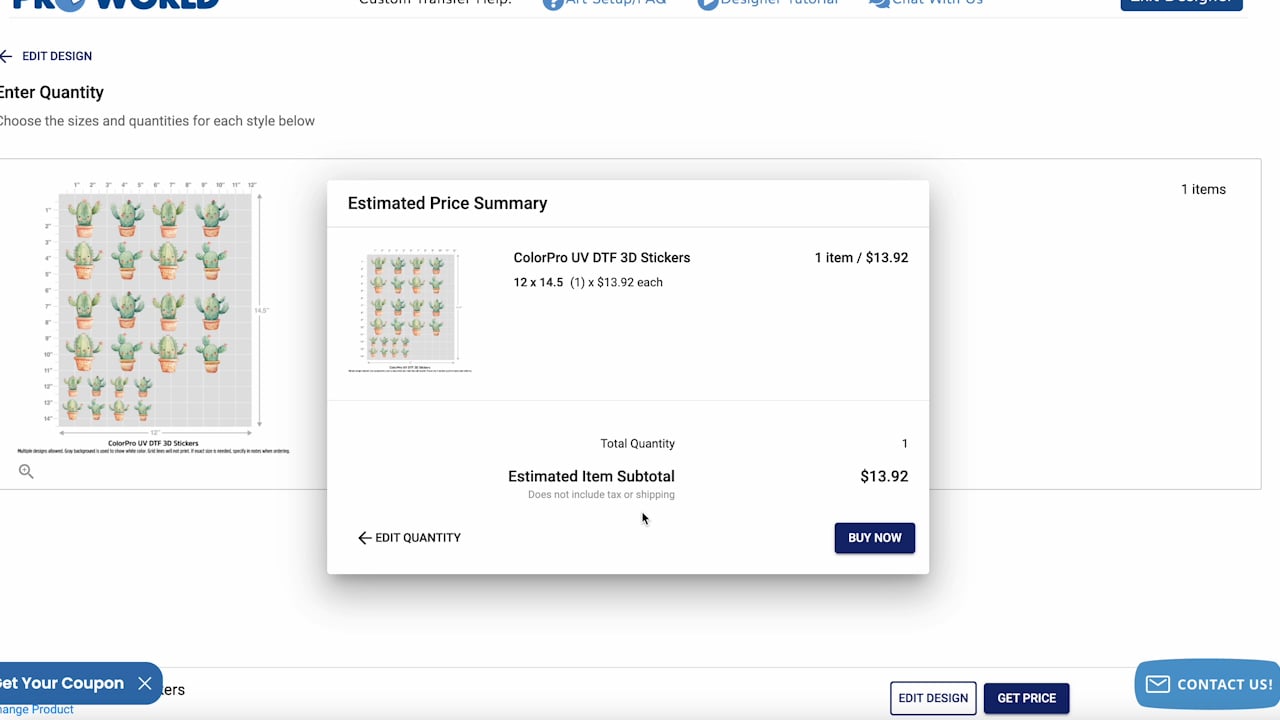
Step 3: Place Order
Like regular DTF prints, shipping is often a flat rate and can be expensive if you only order one sheet. I recommend ordering several sheets at once or getting someone else local to order with you.
If your design isn’t set up correctly there may be a setup fee. They will let you know about any fees before they charge you. My design was not set up correctly and they waived the setup fee for my first order, it will not be waived on future orders. This was my experience with Pro World, I can not speak for the experience of other companies.
After placing my order I was sent several emails for approval of the design and once I gave the approval the printing and shipping process was very quick.
How to Use UV DTF Prints
The application process for UV DTF prints is different than a traditional sticker so we’re going to walk through the whole process.
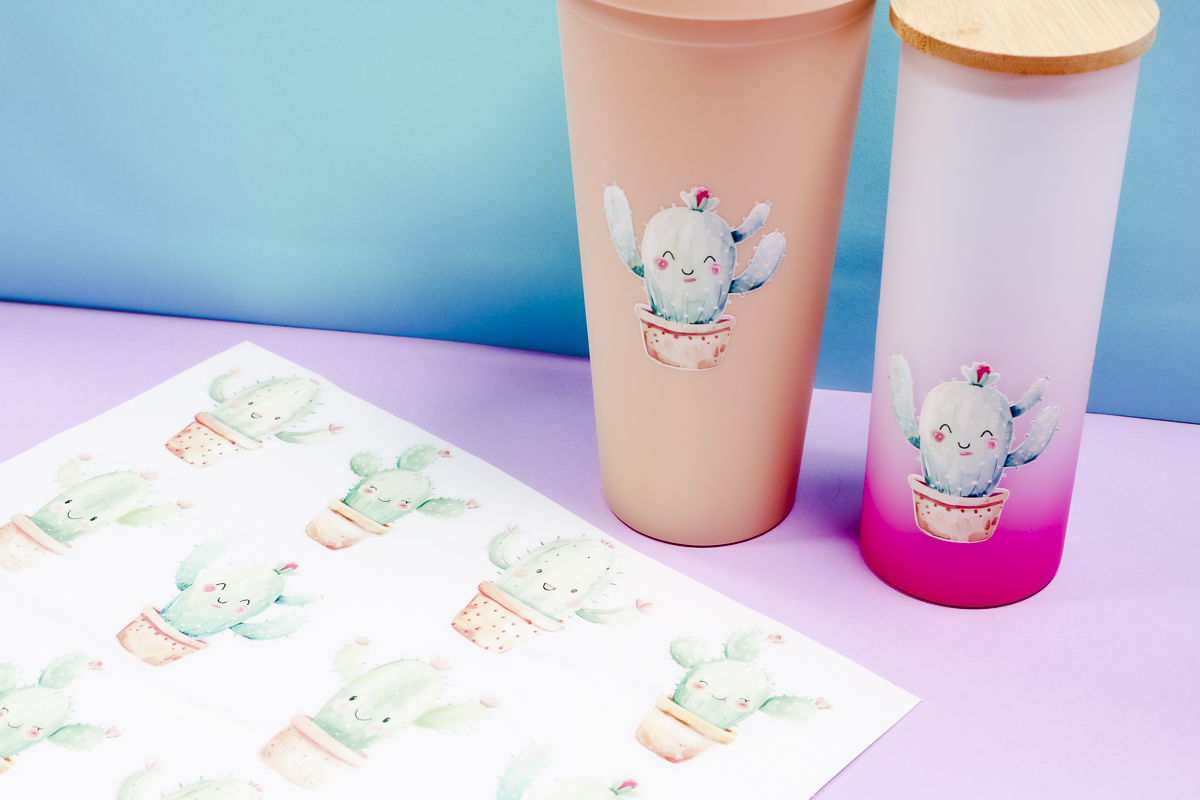
One of the things I love about this process is that I can add these stickers to any solid surface I want. I don’t need the blank to have any special coating or to be a particular color.
Supplies Used
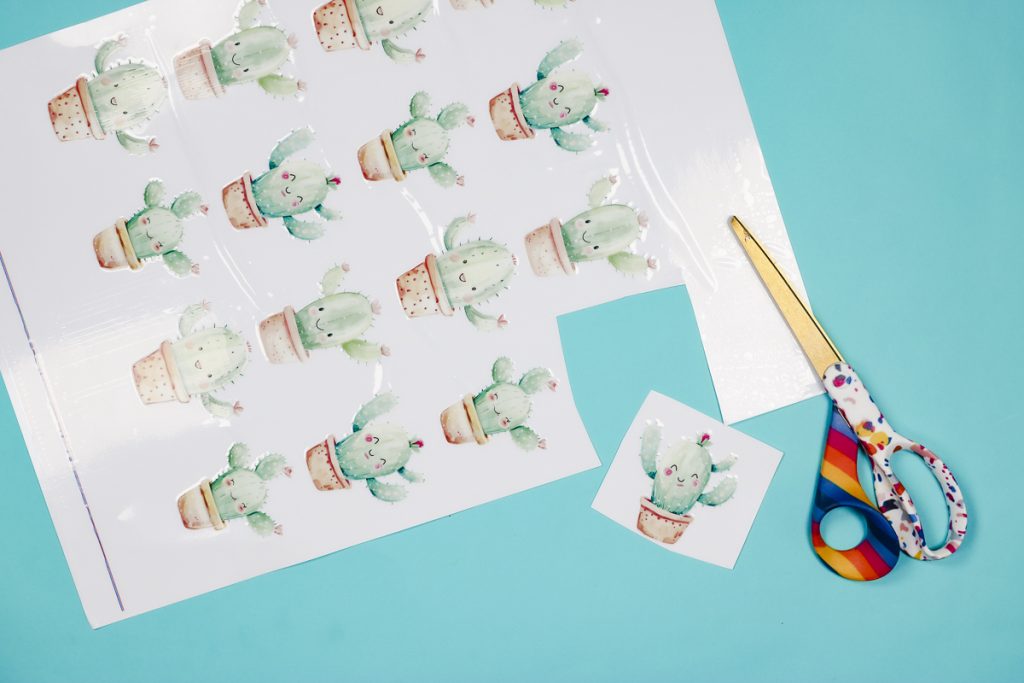
Step 1: Trimming UV DTF Print
When you receive your UV DTF print, you’ll see that there are three layers.
First, there is what I’ll call the carrier sheet, that is what the machine prints onto. Next, is the printed layer, for my design it is the cactus. That ink goes through a UV light to cure it. The last layer is the laminate which is like a transfer tape.
When the stickers come to you, they are already assembled you don’t have to add any of the sheets.
If your design isn’t a full wrap you can use a pair of scissors to cut the stickers apart, you don’t have to use them all at once. Cut out one or as many as you’d like to use on your project.
Step 2: Clean the Surface
Before adding any UV DTF stickers to the blank it needs to be very clean. Use something like rubbing alcohol and a lint-free cloth to make sure the surface is clean and allow it to dry.
Step 3: Prep the UV DTF Print
When working with UV DTF, I recommend using a scraper that has felt wrapped around the edge.
I like to run the scraper over the top laminate piece to make sure it’s stuck down well to the sticker. You should only need to do this once.
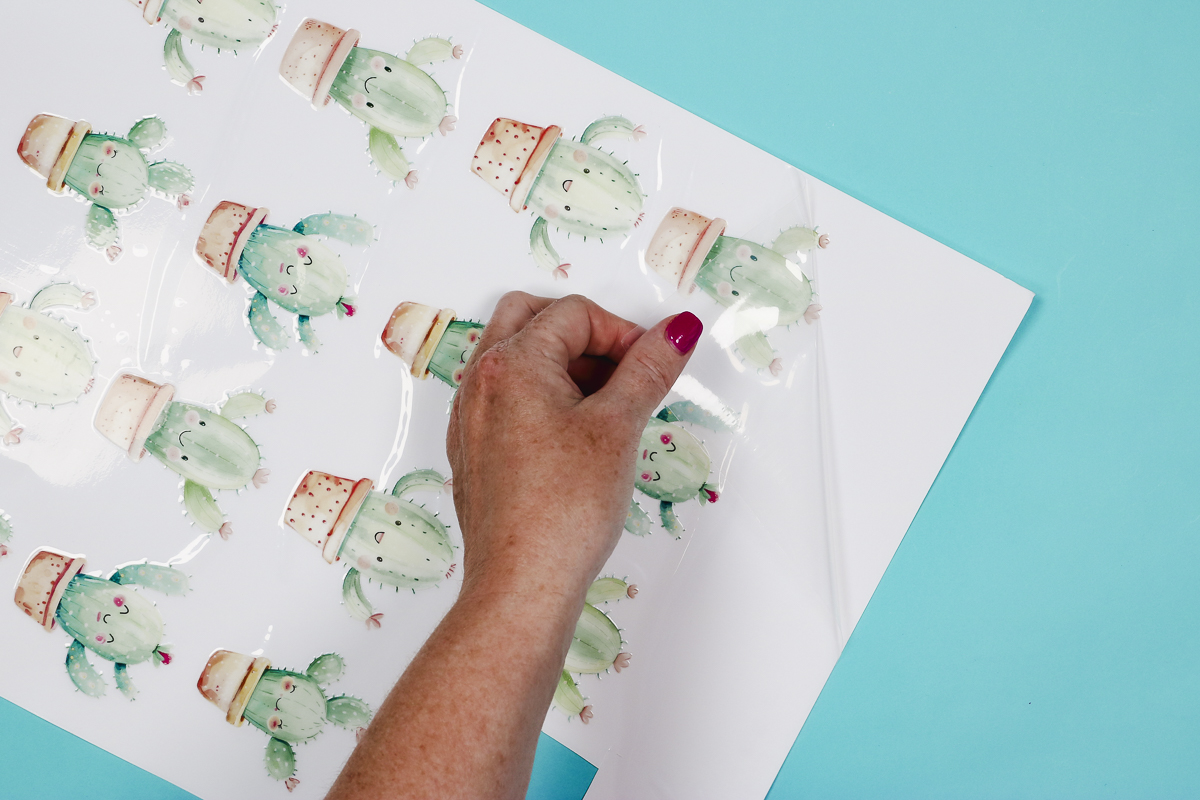
Step 4: Peel Back the Sticker
Peel the laminate and sticker away from the carrier sheet. The laminate acts as a transfer tape so you want the sticker to be stuck to it completely.
Step 5: Locate the Sticker in Place
Before you begin, the adhesive on UV DTF stickers is very strong. Once it touches the surface, you will not be able to move it so make sure the location is right before you set it down.
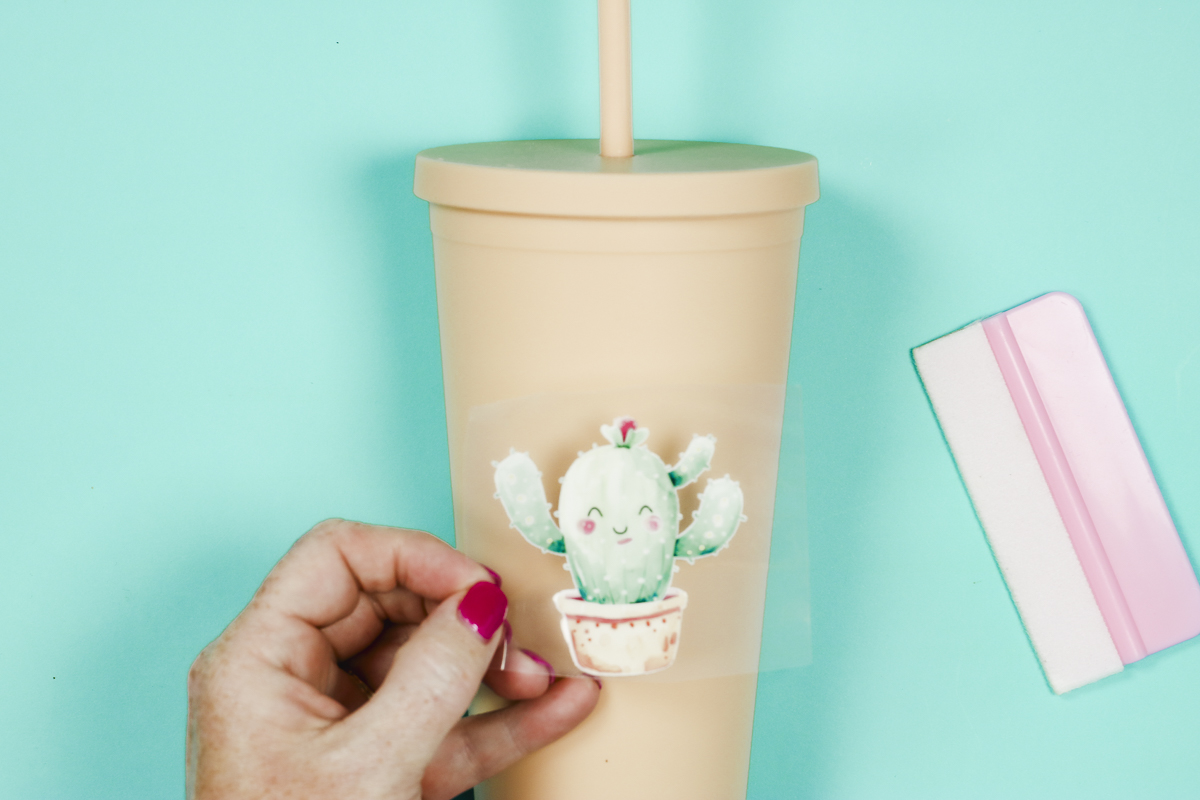
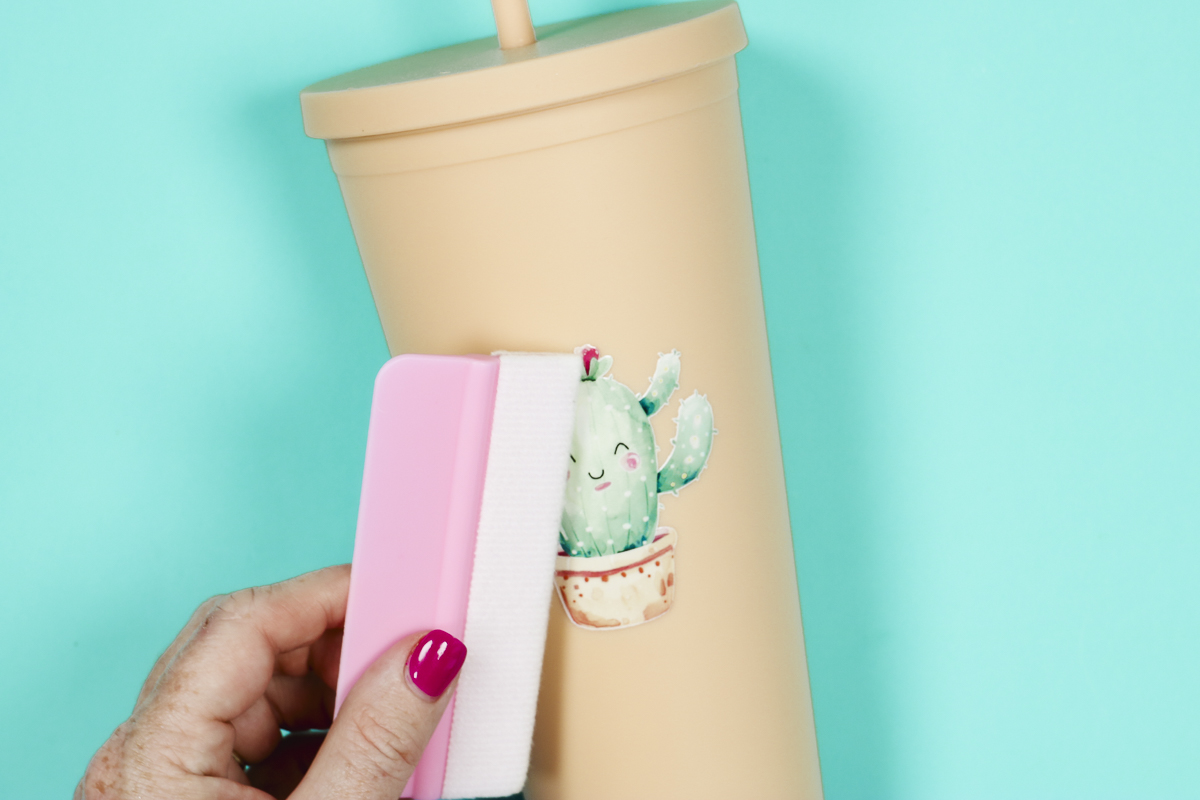
Step 6: Apply UV DTF Sticker
I like to use the taco method to apply UV DTF stickers. Gently bend the sticker so you have the middle section ready to place and then roll one side down and then the other.
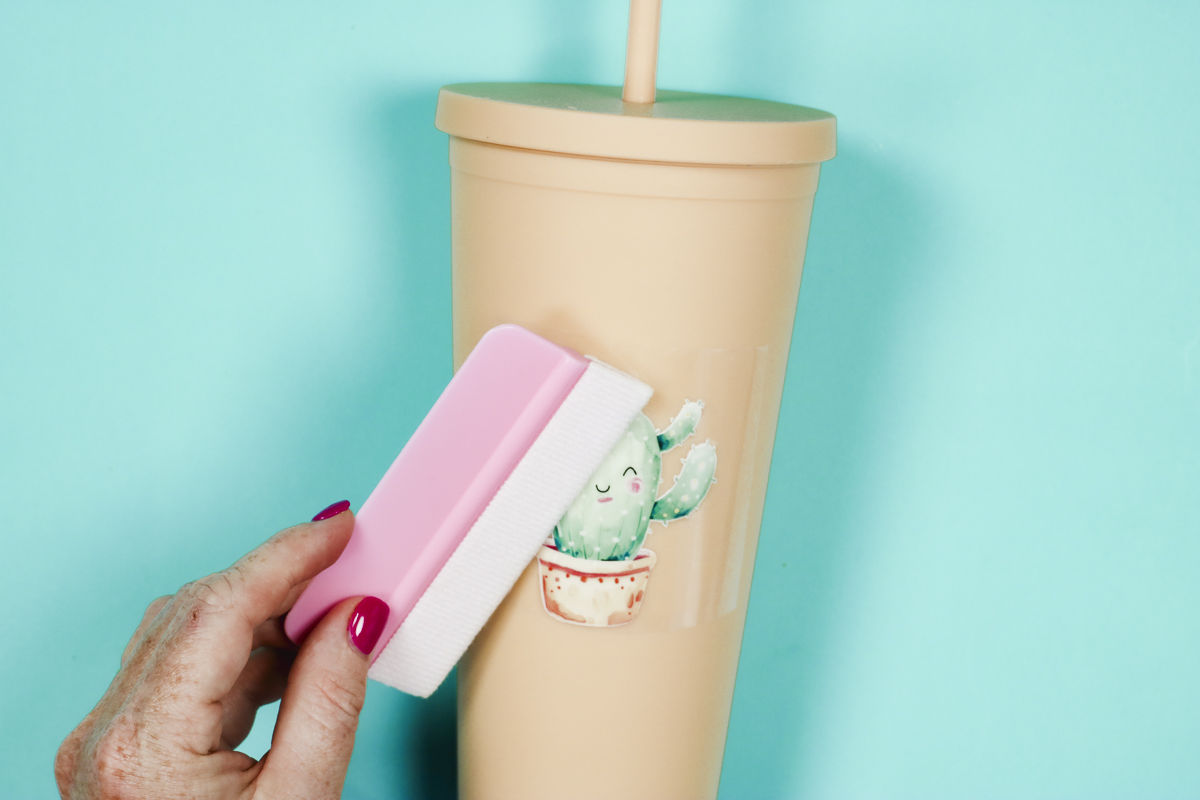
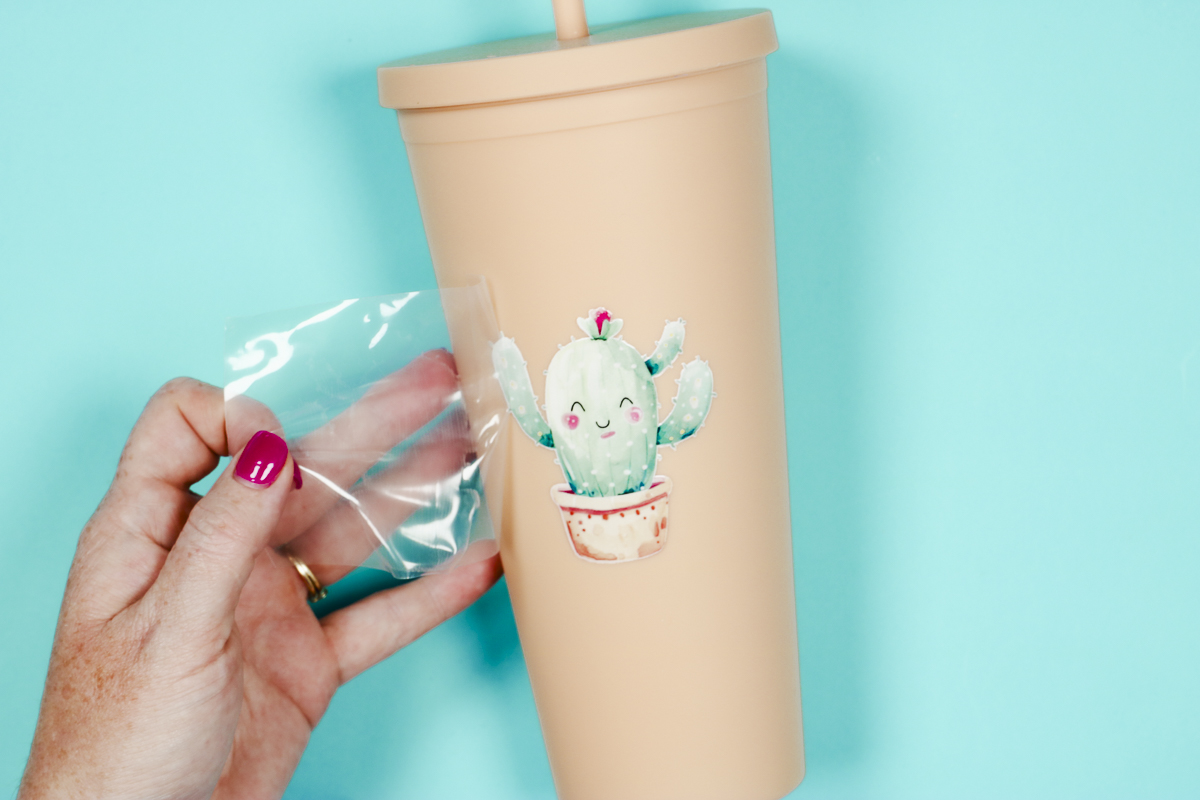
Use the felt-covered scraper to burnish the sticker onto the surface and peel back the liner.
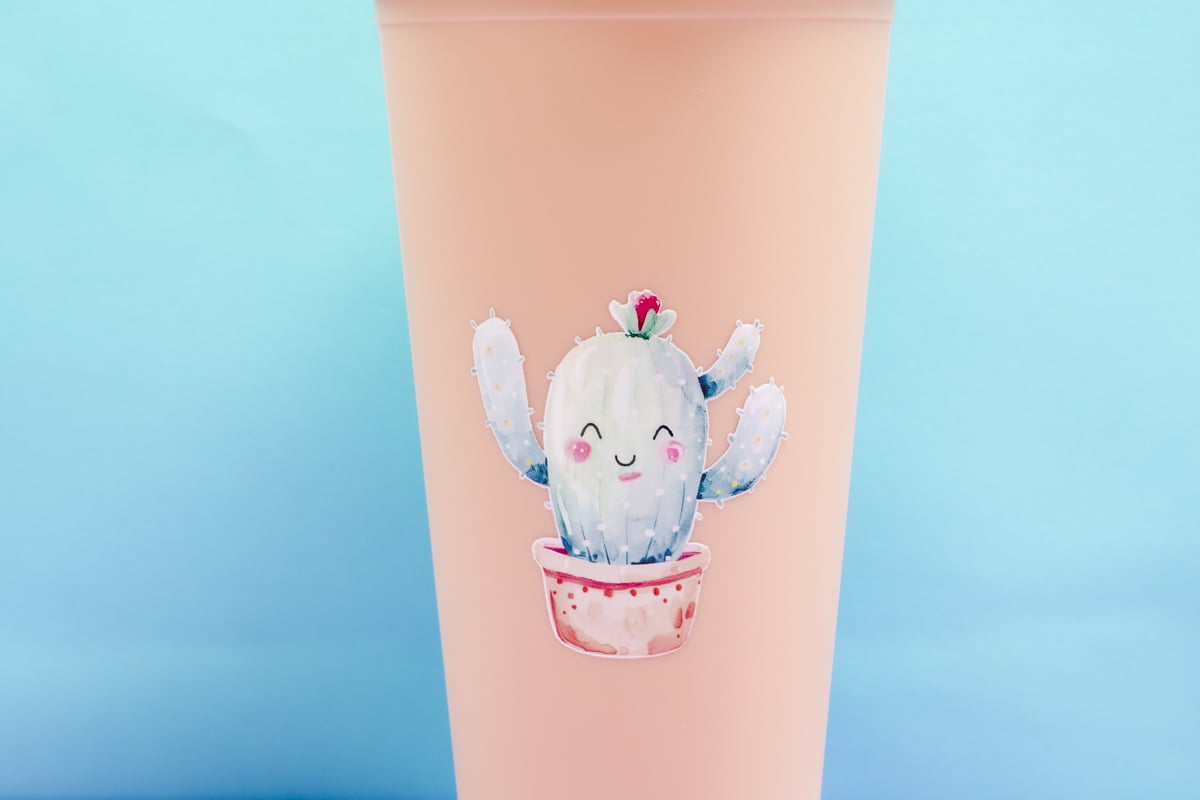
Go over the sticker with the felt-covered scraper to make sure it is stuck down without any bubbles.
With the sticker in place, there is nothing else you need to do. The sticker is stuck permanently to the surface and is UV-resistant and waterproof.
Optional: Add Multiple Stickers to a Tumbler
The process for applying multiple stickers or a design that is a wrap is the same as adding a single sticker.
Follow all the steps above and make sure you take your time applying the stickers so they stay located where you want them.
The taco method can really help with this process. Lay down one side and then the other smoothing the stickers down as you go.
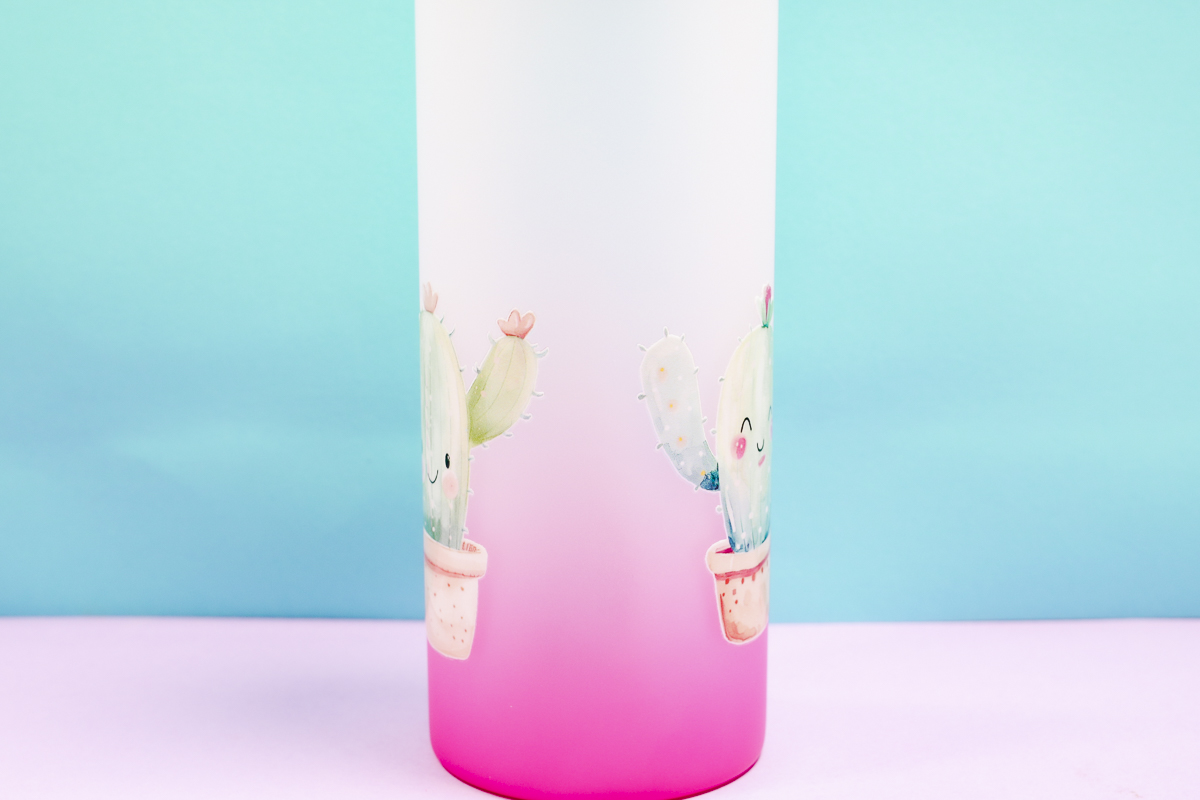
Burnish everything down with the felt-covered scraper and your tumbler is done and ready to go.
Pros and Cons of UV DTF
Now that you have see how easy these stickers are to use, should you give them a try for yourself? Let’s look at the pros and cons!
What are the Benefits of UV DTF Prints?
- UV DTF stickers are permanent and dishwasher-safe.
- These stickers are waterproof and UV-resistant.
- You don’t have to have a specific blank. You can add UV DTF stickers to any hard surface, in any color, even items from the dollar store.
- Once in place, these stickers aren’t going anywhere. They are permanent on tumblers, cars, mailboxes, and more.
- UV DTF printers use all the colors including white. This means you can add stickers to blanks that have color without the blank showing through the sticker or impacting the design at all.
What are the Drawbacks of UV DTF Prints?
- Unlike sublimation, these stickers sit on top of the surface. You can feel them as they almost have a 3D effect.
- The adhesive is very sticky and cannot be repositioned after applying. When I tried lifting a sticker, it completely ripped.
- While these stickers are dishwasher safe, I would only place them on the top rack of a dishwasher and don’t use high heat cycles. For the most lasting results, I recommend handwashing.
- If you like a matte finish to your projects, UV DTF prints are probably not for you. These do have a glossy finish with a laminate over the top.
- These stickers don’t work well on soft fabrics.
My UV DTF Review
I am a fan of UV DTF stickers. Currently, the most cost-effective way to get the stickers is to order them from a seller like Pro World.
Pro World is not the only seller of UV DTF stickers, you can find these stickers on other sites including Etsy. I would recommend shopping around and checking prices because depending on what you’re ordering the prices may vary.
DTF technology is very new. I anticipate further advancements in the near future and I can’t wait to see what they come out with next.
I hope I’ve answered any questions you have about UV DTF stickers. If you have any additional questions, leave them in the comments and I’ll be happy to answer them for you.