My studio desk is finished! I had initially planned a quick and easy desk makeover, but in the end, I basically ended up rebuilding the desk. I built the original desk a few years ago. For some reason, I thought I wanted a very basic, modern desk. It had a black base and a dark stained top. But the desk didn’t look right in the studio, where I was making a point to make things lighter, brighter, and more feminine. So I set out to turn the original desk into something more fitting for my studio.
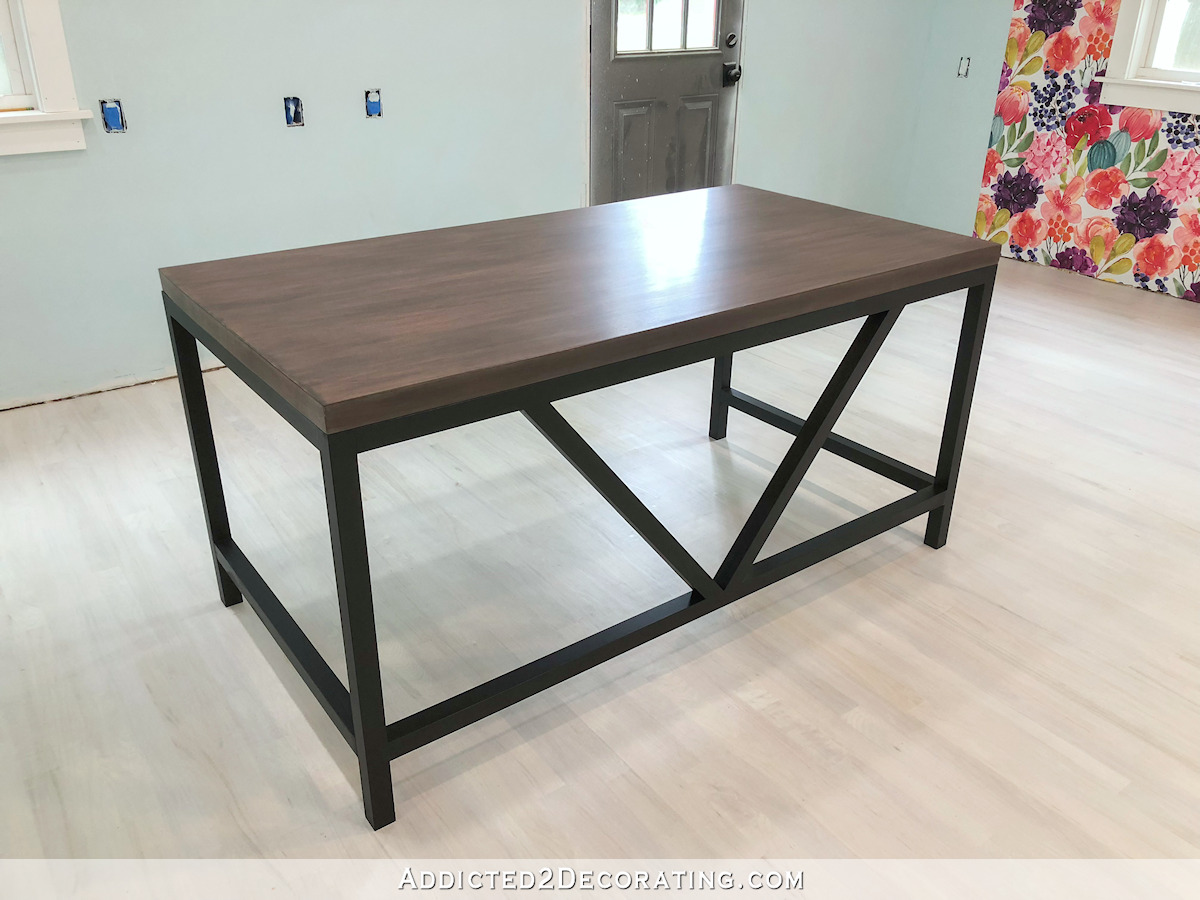
Here’s a look at how the desk looked after I built it a few years back…
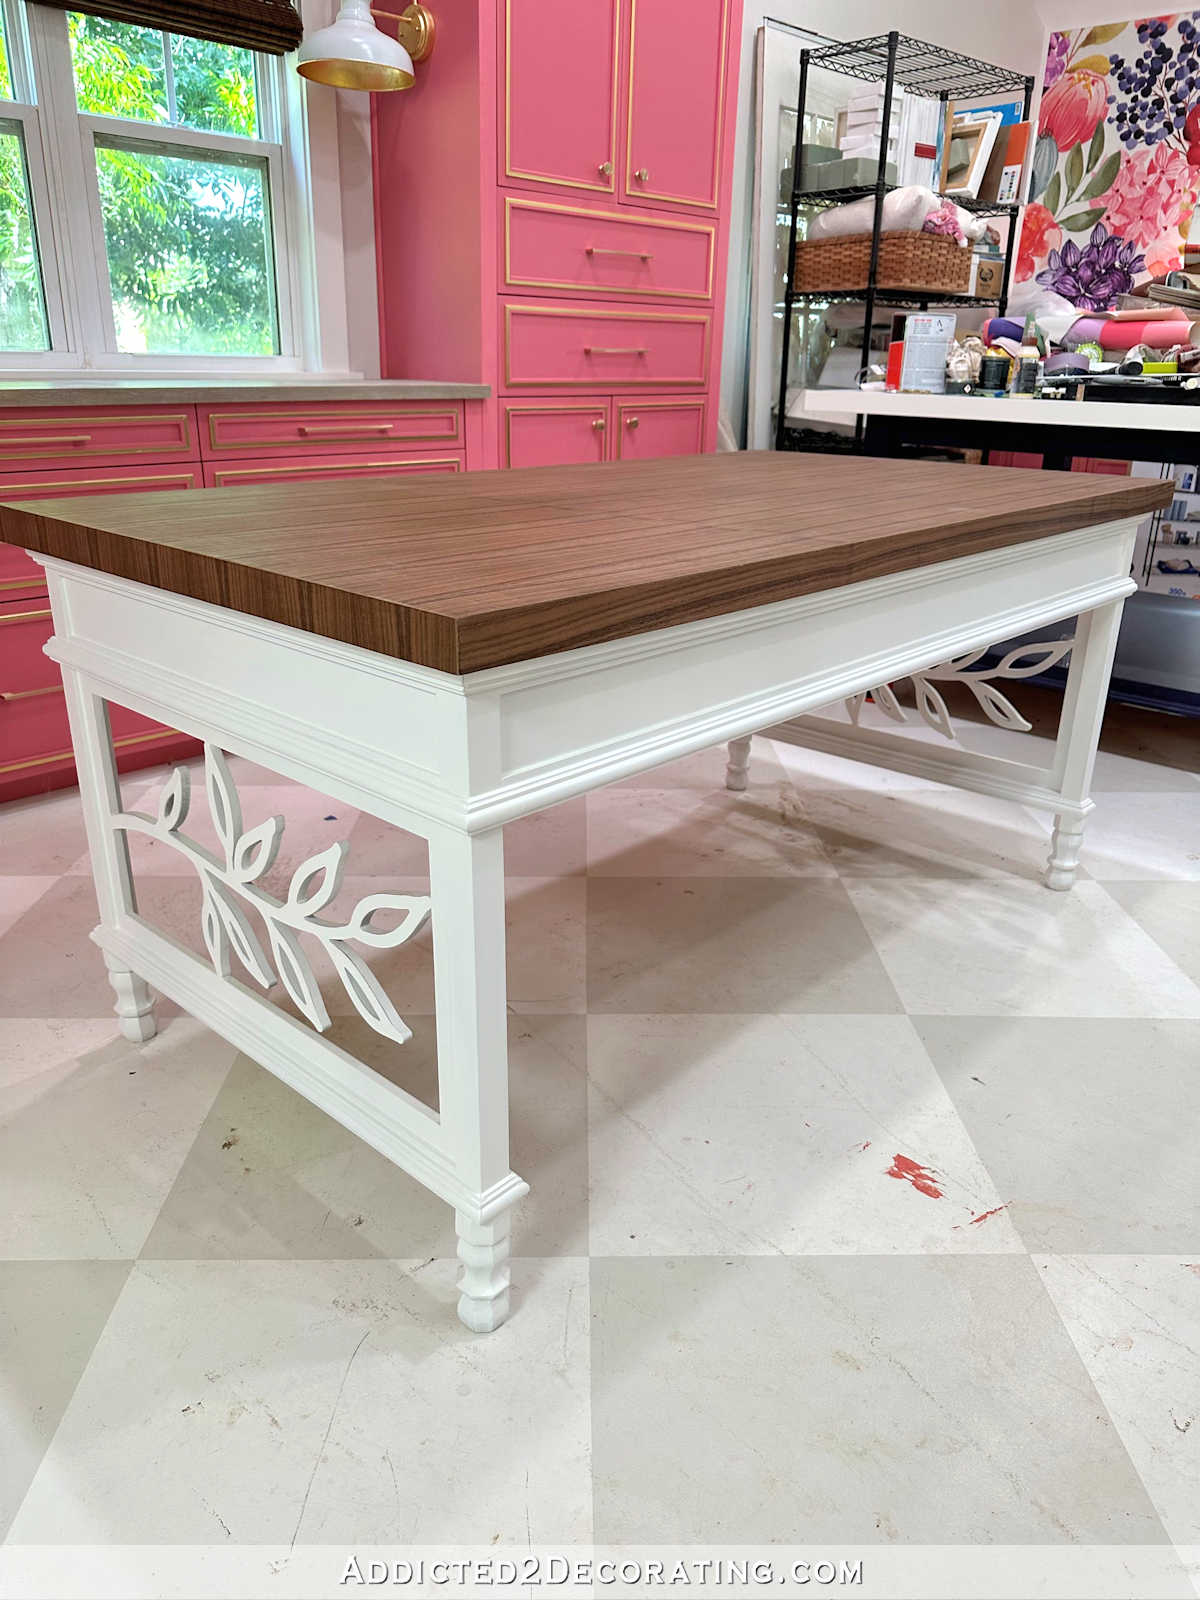
And here’s what the desk looks like now…

In my last post on this project, I had finished the desk base. Once it was all painted one color, it looked like this…

The next step was to finish the desktop. The original desktop was the same dimensions as the base. That gave it a modern look. But on this version, I wanted the desktop to extend past the base to give it a more traditional look. I didn’t want to start from scratch, though. The original desktop was a solid core door, which was very heavy and durable. I wanted to use it, but I needed to add to the edges before gluing on the veneer.
So I cut strips of 1-inch lumber, ripped to the correct width using my table saw so that these strips would cover the edge of the desktop. And then I nailed these strips onto the edges of the desktop using 16-gauge, 1.5-inch nails.

Here’s what it looked like with the strips attached to all four sides…

Since all of this would be hidden under veneer, there wasn’t any need to miter the corners…

But just one strip wasn’t enough. That only extended each side an additional 3/4-inch, and I needed double that. So I added a second strip to each side…

Again, I didn’t bother mitering the corners. But I did use my sander to make sure the corners where the boards met were very smooth.

Here’s what it looked like with two strips attached to all four edges.

Next, I gave the top a quick sanding with 100-grit sanding discs, not only to remove the paint and glue that were on the desktop, but also to make sure the transition from the original desktop to the newly attached strips on the edges was very smooth with no high spots.

Then I was ready to attach the veneer. I used a 4′ x 8′ sheet of quartered walnut veneer for this desktop. I started by placing the sheet flat, and then cutting off a 2.25-inch strip from the right end of the veneer. This piece would be for the right edge, but I didn’t want to attach it just yet.

Next, I cut off a 2.25-inch strip on the front edge of the veneer. This is the piece I glued on first. I attached the veneer using Weldwood Contact Cement and a 6-inch roller for smooth surfaces. I always put two coats of contact cement on both surfaces (the back of the veneer and the edge of the desk in this case), letting it dry completely between coats, and then letting it dry completely before attaching the veneer. I attached the strip of veneer so that it stuck up above the desktop about 1/4-inch. At least, that was the goal. It wasn’t perfect. Once it was attached, I used a floor roller to make sure it was securely attached, and then used a utility knife with a brand new blade to cut off the excess 1/4-inch (or more) from the top edge of the veneer.

The next piece that I attached was the top. After coating both surfaces with two coats of contact cement and letting it dry, I placed strips of scrap wood on the desktop about six inches apart, spanning the whole desktop, and then placed the veneer on top. These strips kept the veneer from touching the desktop before I was ready. I lined up the right edge and the front edge so that the veneer overlapped about 1/4-inch, and then pressed the veneer into place from right to left, removing one strip of wood at a time and pressing the veneer into place. And then I used my utility knife to trim the right edge and the front edge.

The back edge and the left edge had a whole lot of overlap. I needed to be careful in cutting off this excess because, as much as I could, I wanted to reduce waste so that I could get the grain on the edges to line up with the top as much as possible. And if I cut away too much, and had too much scrap between the pieces, the grain wouldn’t line up.

I ended up losing about 1/2 inch of veneer between the two pieces once I carefully cut off the excess and then trimmed each one…

You can see here that after I cut off the large piece of excess veneer from the left side, trimmed the veneer on the desktop, and then attached the veneer to the left edge, the grain still matched up pretty well, even though I lost about 1/2-inch of veneer in that process.

Also, sanding makes all the difference when it comes to working with veneer. This is one reason I love working with real wood veneer. For example right after attaching the veneer to the left side and trimming off the excess from the top edge, look how rough it looked…

But after burnishing it down a little more, and then sanding that corner, this is how it looked…

And then once I got the excess veneer trimmed off of the bottom, this is how that left edge turned out…

And here’s a look at the finished top, and the two finished edges (left edge and front edge), at that point…

Next, I added the right edge piece. This was the first piece I cut from the big piece of veneer, but I needed to attach the top before adding this edge. It’s a lot easier to match up a small piece to a large piece that’s already in place rather than trying to match up a large piece to a small piece that’s already in place.

And then finally, I attached the back edge (i.e., the desk chair side).

And here’s how it looked once everything was trimmed and sanded.

And here’s a better view of the desktop. Quartered veneer often has interesting patterns in it, and this piece had quite a few. Those don’t bother me, but just note that if they do bother you, and you’re wanting to use veneer on a project, you might want to look for a different cut of veneer.

To seal the desktop, I used the same product that I used on all of the walnut in our bathroom — Rubio Monocoat Oil Plus 2C in Pure (affiliate link). This stuff is AMAZING. It’s an oil plus a hardener, and it’s incredibly durable. All of the walnut in our bathroom looks just as good today as it did the day I finished it, and I’ve never had to recoat.

After mixing the two parts together in a 1:3 hardener-to-oil ratio, I wiped it on with a paper towel. Just note that this is NOT the proper way to do this. It’s so much easier to apply with something like one of those white spongy applicator things that won’t soak up (and waste) a lot of oil, and that won’t leave behind little bits of white in the oil. But I didn’t have one of those applicators, so I just used a paper towel. It wasn’t ideal, but I made it work. Here’s the difference that the oil made in the color…

I wiped oil onto the whole surface, let it set a few minutes, and then used a clean white rag to buff the entire surface. It leaves a gorgeous matte finish on the wood.
And here’s the oiled desktop. Isn’t that pretty?! I love walnut. I just love how deep and rich the color is without being too dark.

Here’s a comparison of the scrap piece of unfinished veneer on top of the oiled veneer.

And with that, the desk was done.

I’m so pleased with how this desk turned out. I love being in the kitchen and looking into the studio to see a glimpse of the desk, pendant light, and pink cabinets. Now I just need my red velvet chair!

My mom came over yesterday, and when she saw the desk with its new top, she said, “Wow! I knew it was going to be pretty, but I didn’t know it was going to be THAT pretty!” 😀

I have to agree with her. I knew it would be pretty, and I could make it work. But I think the final look far exceeded my expectations.

And I just love sitting at this desk, with my arms resting on this smooth wood desktop, and looking up to see that beautiful pendant light. I’ll be spending many hours here, and it’s just perfect.

After all was said and done, I ended up not adding drawers to the desk. I had one problem after another with that plan, so I ended up carrying the top trim all the way across the back (chair side) of the desk, and then I wrapped the other trim around just like I did on the bottom below the leaf panel.

That gives it a finished look for now, while also allowing for the possibility of adding drawers later if I change my mind.

Anyway, I’m so pleased with how this turned out. I was very happy with the original desk for many years. It was a good, sturdy, useful, utilitarian desk.

But I think the new looks is so much better. It fits the studio so much better, and it’s much more “me”.
So that’s one more big project checked off of my “to do” list for this room. I have just a few more, including some electrical work, some trim and door casings, and reupholstering my desk chair.

And then getting this room all cleaned up and organized is going to be quite the job. The thought of tackling that job is a little overwhelming right now.

But at least this one is finished. And I’m just so happy with how it turned out!


Addicted 2 Decorating is where I share my DIY and decorating journey as I remodel and decorate the 1948 fixer upper that my husband, Matt, and I bought in 2013. Matt has M.S. and is unable to do physical work, so I do the majority of the work on the house by myself. You can learn more about me here.