This post and photos may contain Amazon or other affiliate links. If you purchase something through any link, I may receive a small commission at no extra charge to you. Any supplies used may be given to me free of charge, however, all projects and opinions are my own.
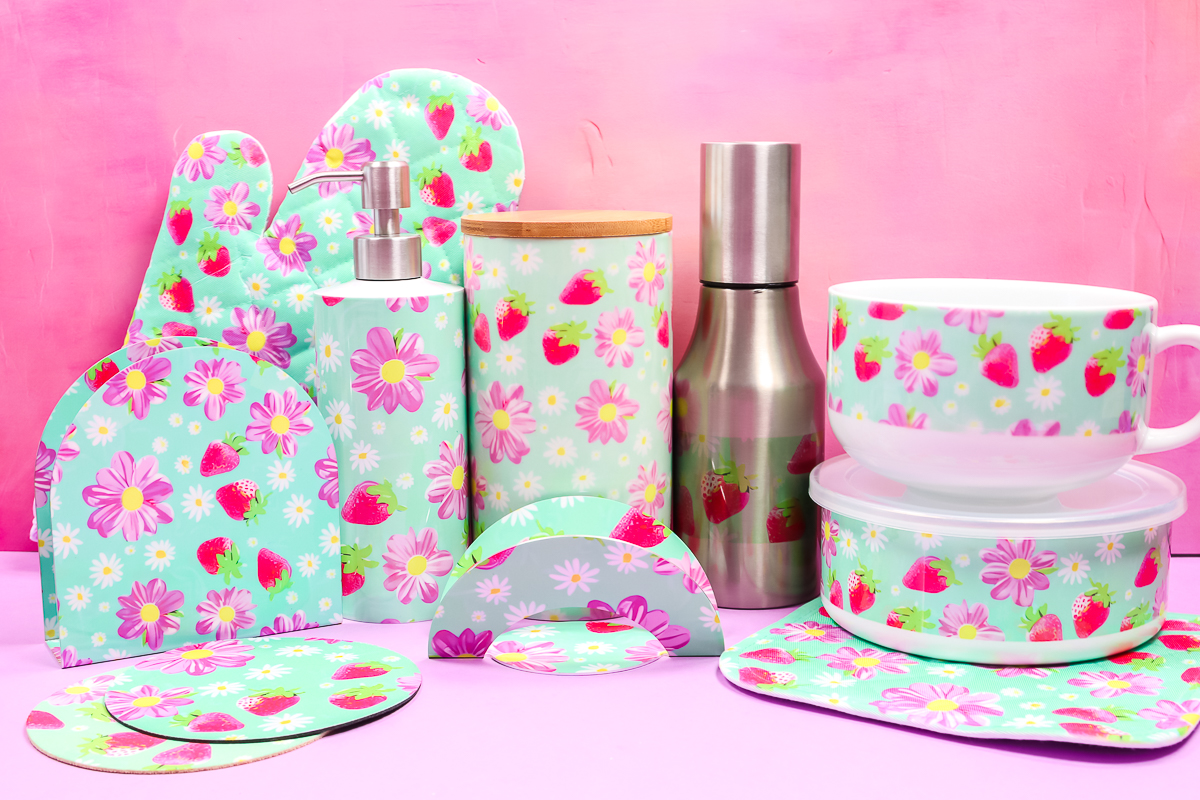
Today we’re going to learn all about sublimation items for the kitchen. I’ve tried so many different sublimation blanks I decided it would be fun to collect different kitchen items and put them all in one article.
I’ll be sublimating on fabric, ceramic, metal, and even rubber. All of these blanks would make great gifts or you can make them and keep them for yourself.
Are you brand new to sublimation? My Sublimation Beginner’s Guide will help you get started today!
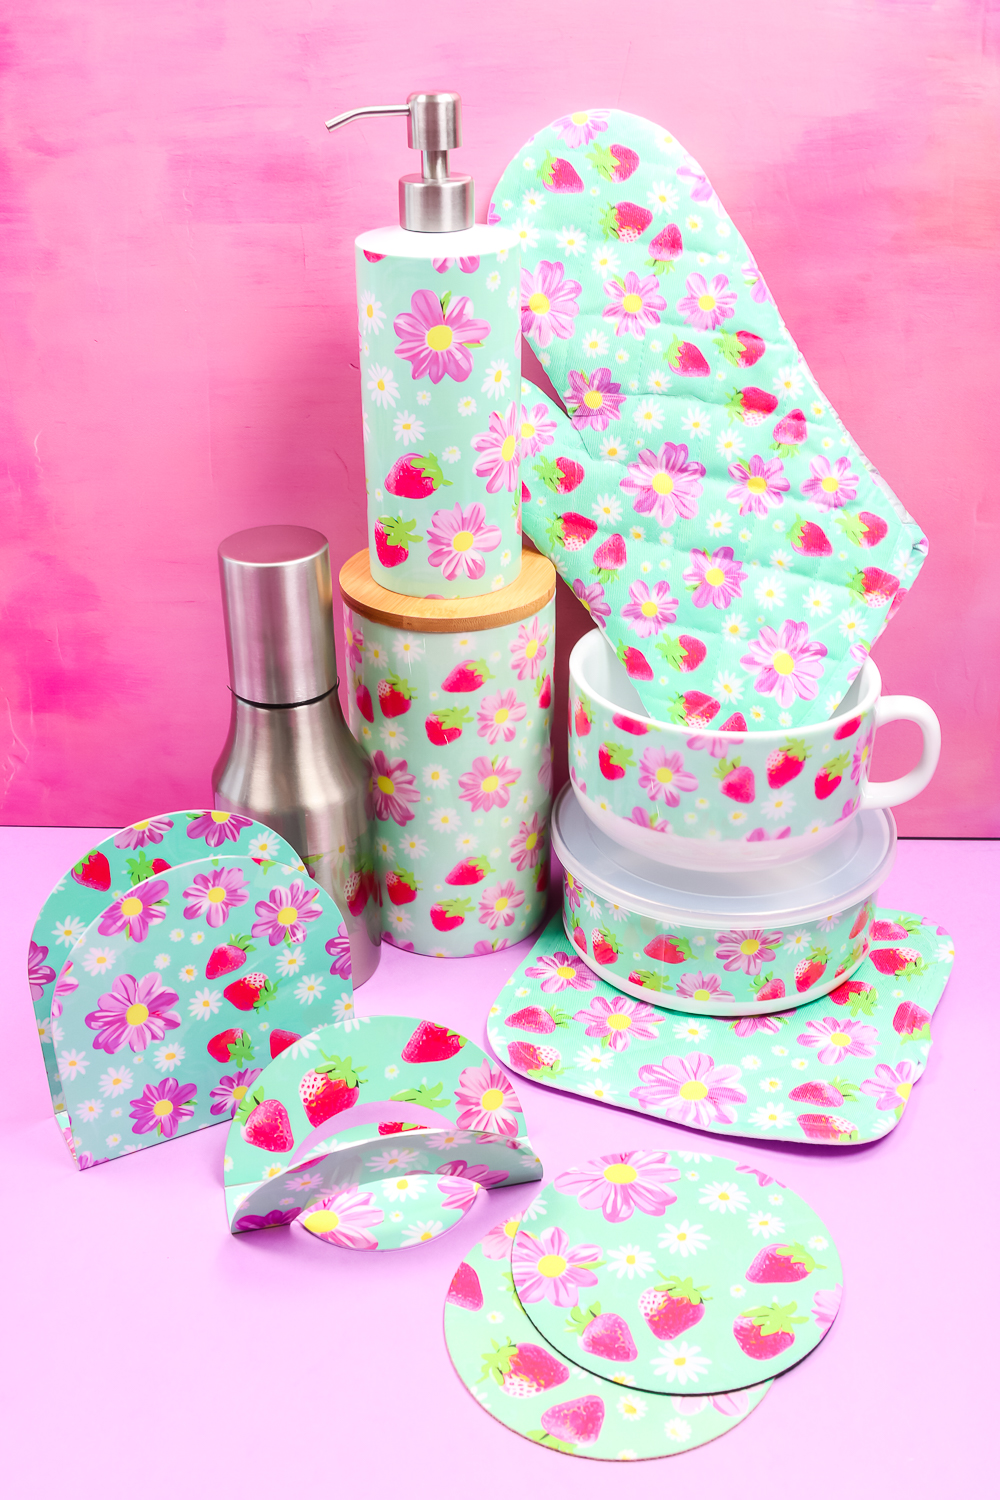
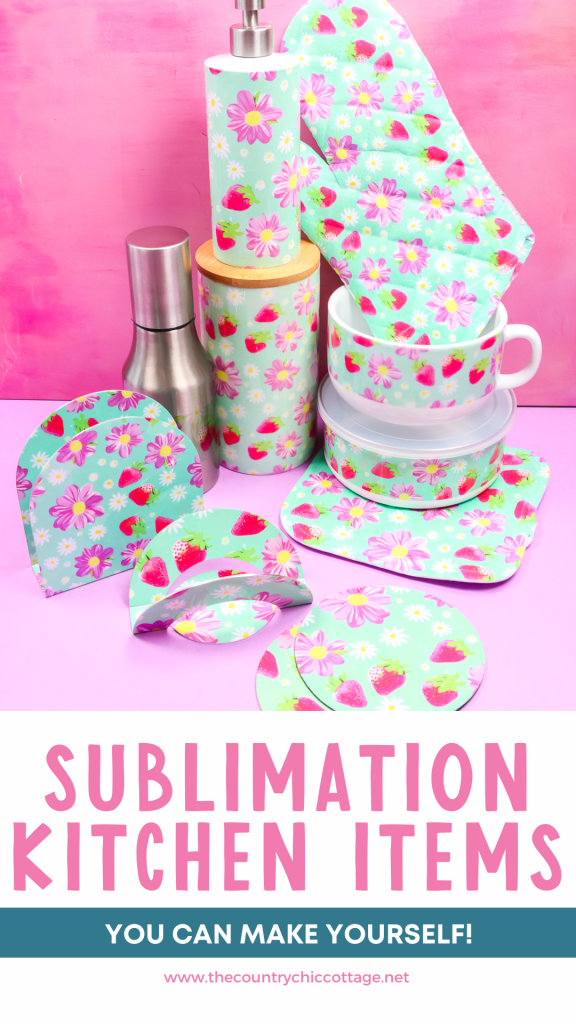
Sublimation Items for the Kitchen
You can watch me show you how to make these different sublimation kitchen items by pressing play on the video below. You’ll see my process for each blank and learn my tips and tricks for getting the best finished product.
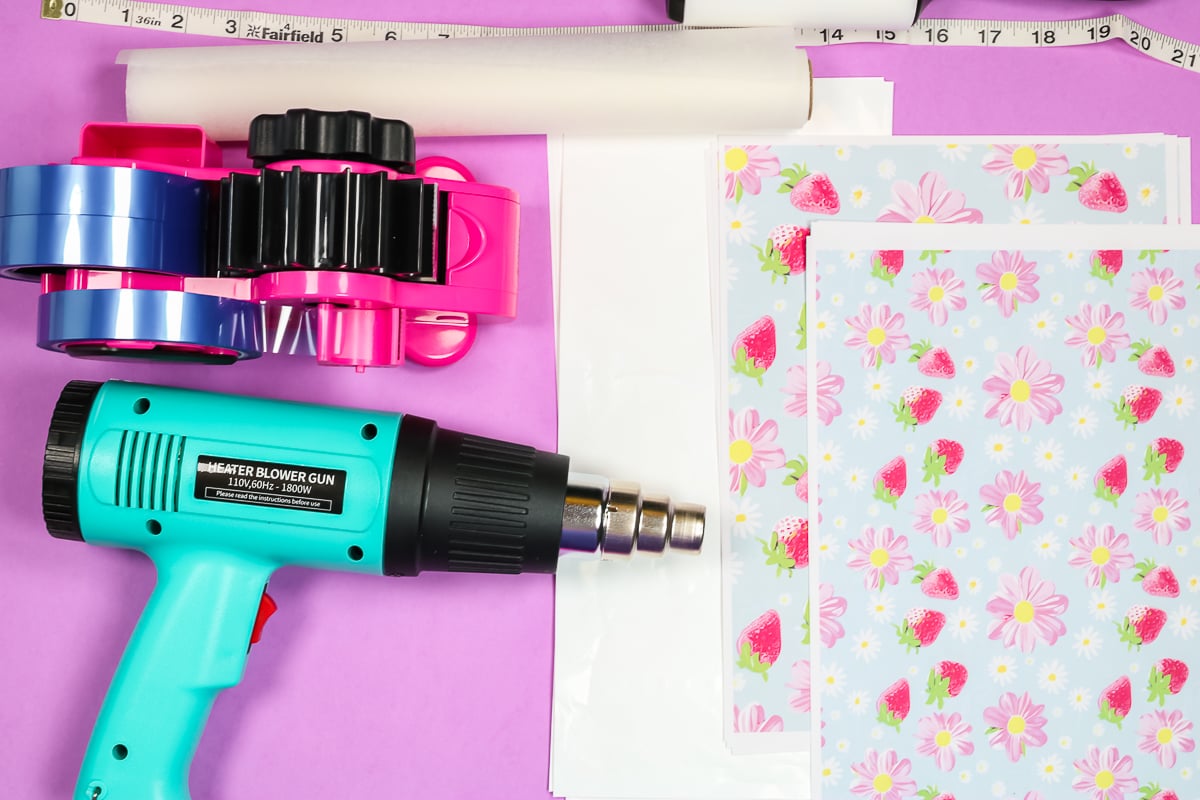
Supplies Needed
NOTE: You will likely not need all of these supplies unless you’re sublimating on each of these same blanks. Read through the instructions for each project before purchasing the supplies to learn what you need for your specific project.
Sublimation Prints Used:
Sublimation Blanks Used:
Other Supplies:
How to Sublimate Kitchen Blanks
When it comes to sublimation kitchen items, each blank will have different settings but some of the process is the same.
For each blank, you will need a sublimation print. A sublimation print is sublimation ink printed onto sublimation paper from a sublimation printer.
If you don’t have a sublimation printer, you can use Infusible Ink. Cricut Infusible Ink is similar to sublimation, you can make all of these projects with Infusible Ink if you don’t have a sublimation printer.
You will also need a heat source. Today I will be using a heat press and sublimation oven as my heat source. For the flat items, I’m using the heat press and for round items, I’ll be placing those in the oven.
Always follow the instructions for your sublimation blank. You should be able to find the time, temperature, pressure, and any other special instructions on the website where you purchased the items.
Sublimation Jar Opener
First up we have these sublimation jar openers. These are really fun and a great beginner sublimation project. I am using two different blanks, one is black on the bottom and the other is tan. One side is white and that is the side that can be sublimated.
- Preheat the blanks for about 10 seconds to remove any moisture. Before adding the sublimation print, lint roll the surface to remove any hair, dust, lint, etc.
- Place the jar opener white side down on the sublimation print. I printed a full sublimation sheet so I can press both of these items at the same time.
- Use heat-resistant tape to hold the jar openers in place and then put protective paper on the top and the bottom of the sublimation.
- Press at 400 degrees for 60 seconds with light pressure in a heat press.
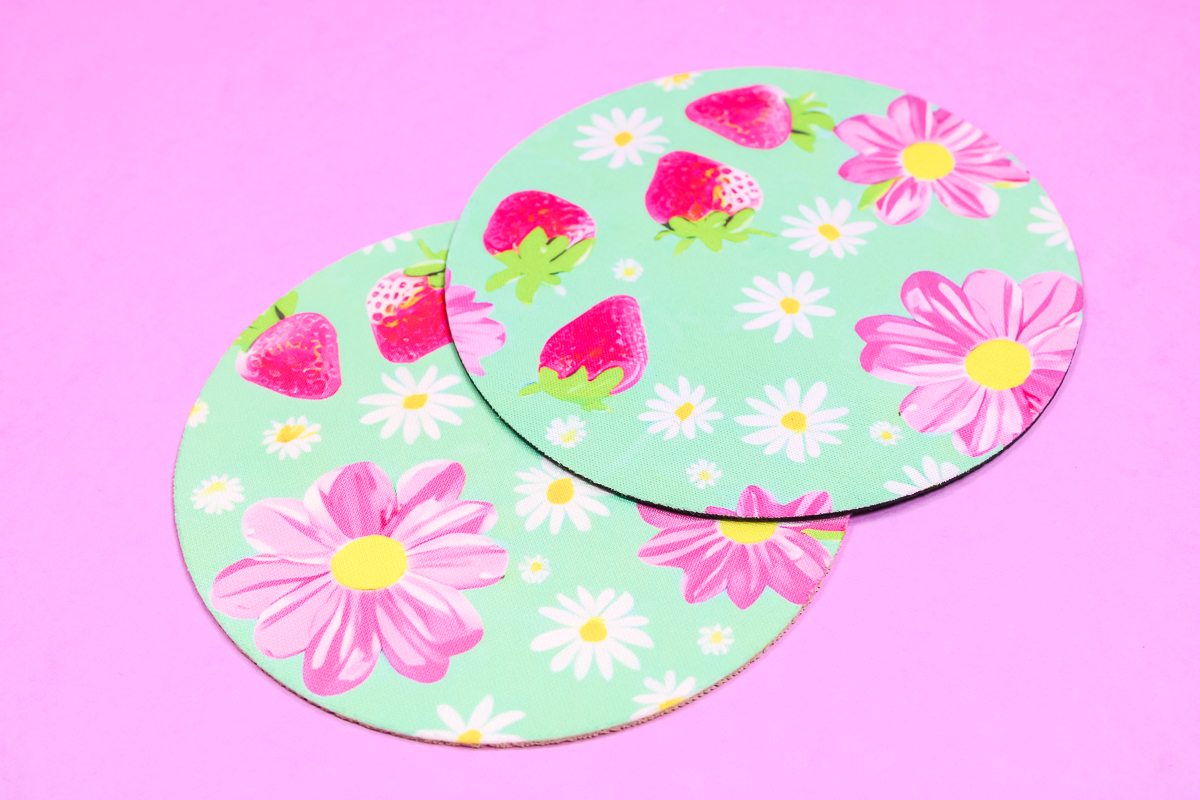
I love how both of these turned out. I didn’t notice a difference in how the sublimation print looked with the different colored bottoms. They both look great. The colors are vibrant and the lines are crisp.
These are easy to make and this print looks great on them. I think these would be great as party favors or even business swag.
Sublimation Pot Holder
Next, we’re going to sublimate a pot holder.
- Pre-press for about 10 seconds and allow to cool completely.
- Once cooled, lint roll the surface to remove any debris.
- This pot holder is white on one side and silver on the other. You will sublimate on the white side.
- Tape the hot pad onto the sublimation print and put protective paper on both the top and the bottom.
- Press at 400 degrees for 60 seconds. When the time is up, remove the hot pad from the heat press and remove the sublimation print.
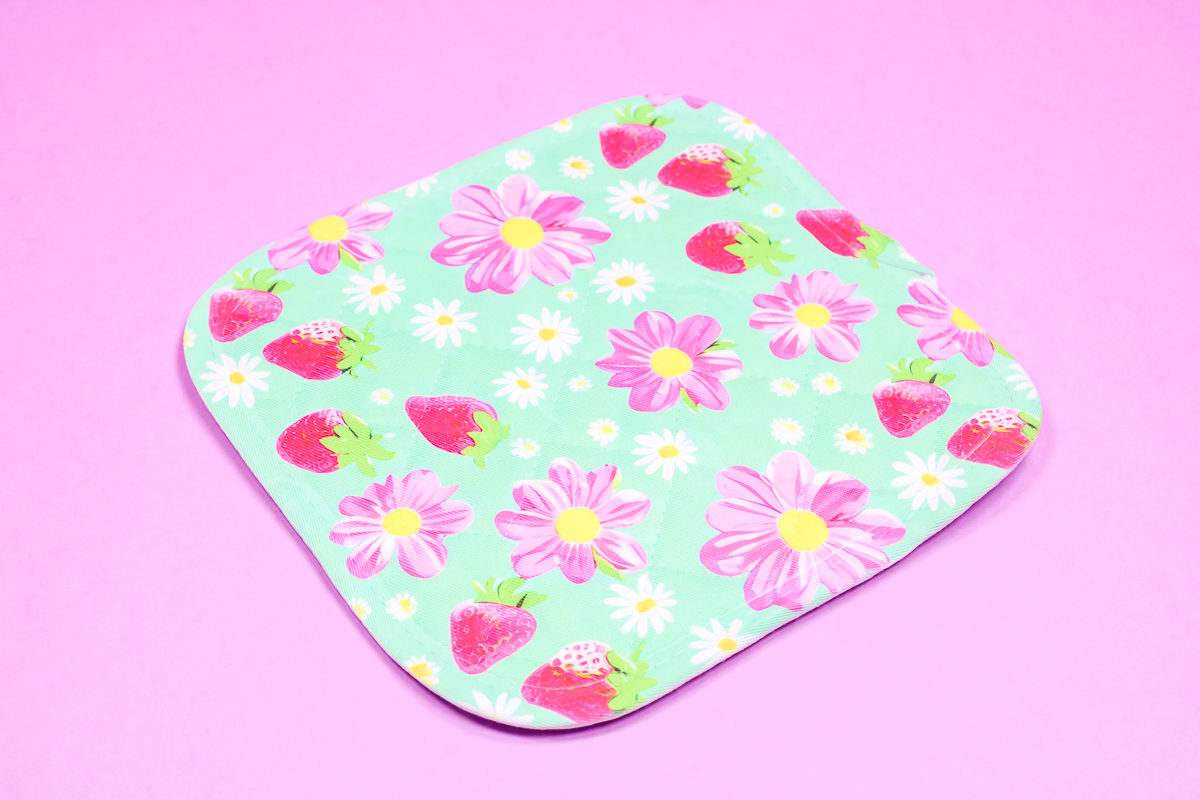
I love the way this one turned out. The edges on this blank also sublimate which is nice. This allows the print to go from top to bottom and side to side.
On the top, there is a loop you can use to hang the pot holder. I had it folded under when I pressed it. I think I might have liked it better if I had it out so it could have been sublimated too.
This was the first full bleed potholder I’ve made and I think it’s great.
Sublimation Oven Mitt
Our next sublimation kitchen item is an oven mitt.
- Pre-heat for about 10 seconds.
- Lint roll to remove any debris. The time and temperature for this blank is 400 degrees for 60 seconds. This oven mitt calls for firm pressure so I recommend using a heat press.
- This oven mitt is pretty large so I am using a 8.5 x 14 inch sublimation print. Put the white side of the oven mitt onto the sublimation print and tape into place.
- Wrap the whole thing with protective paper. Make sure it covers the entire top and bottom.
- Then press at the recommended time and temperature.
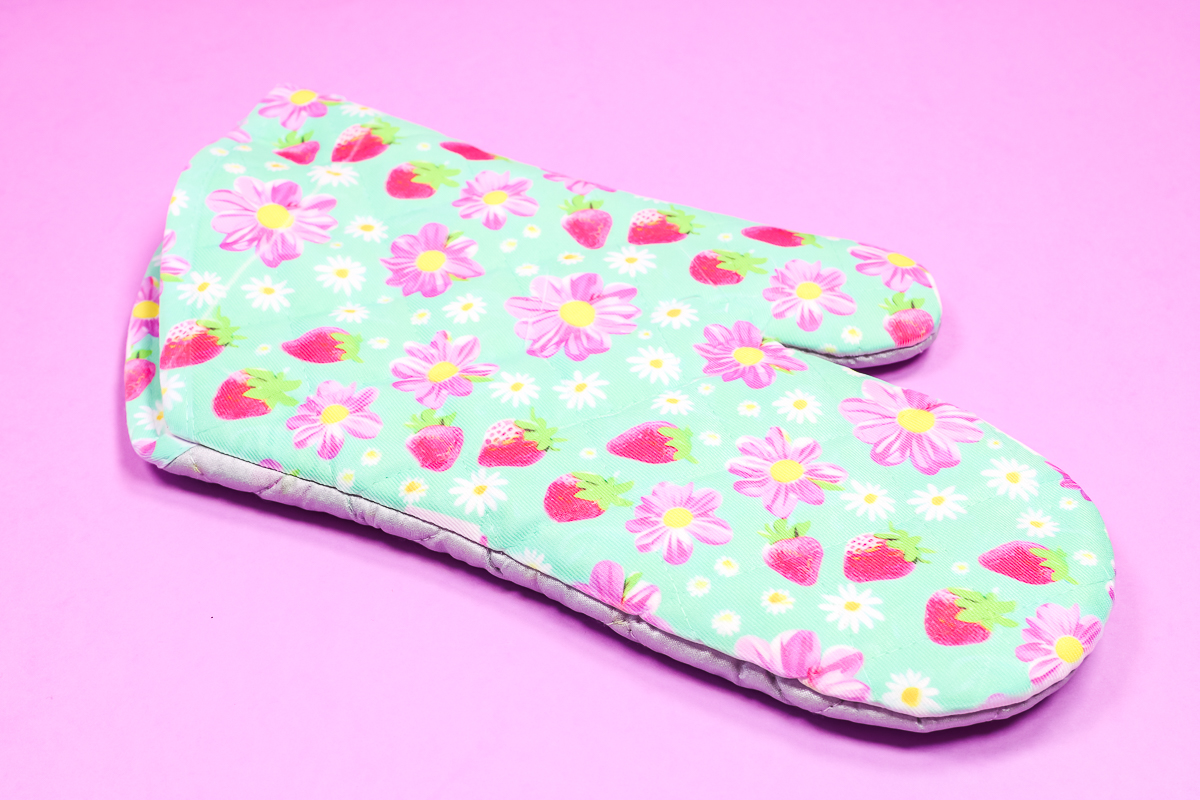
This is the first full-bleed oven mitt I’ve ever tried and it turned out beautifully. There are some things I do want to point out with the way I taped down my sublimation oven mitt.
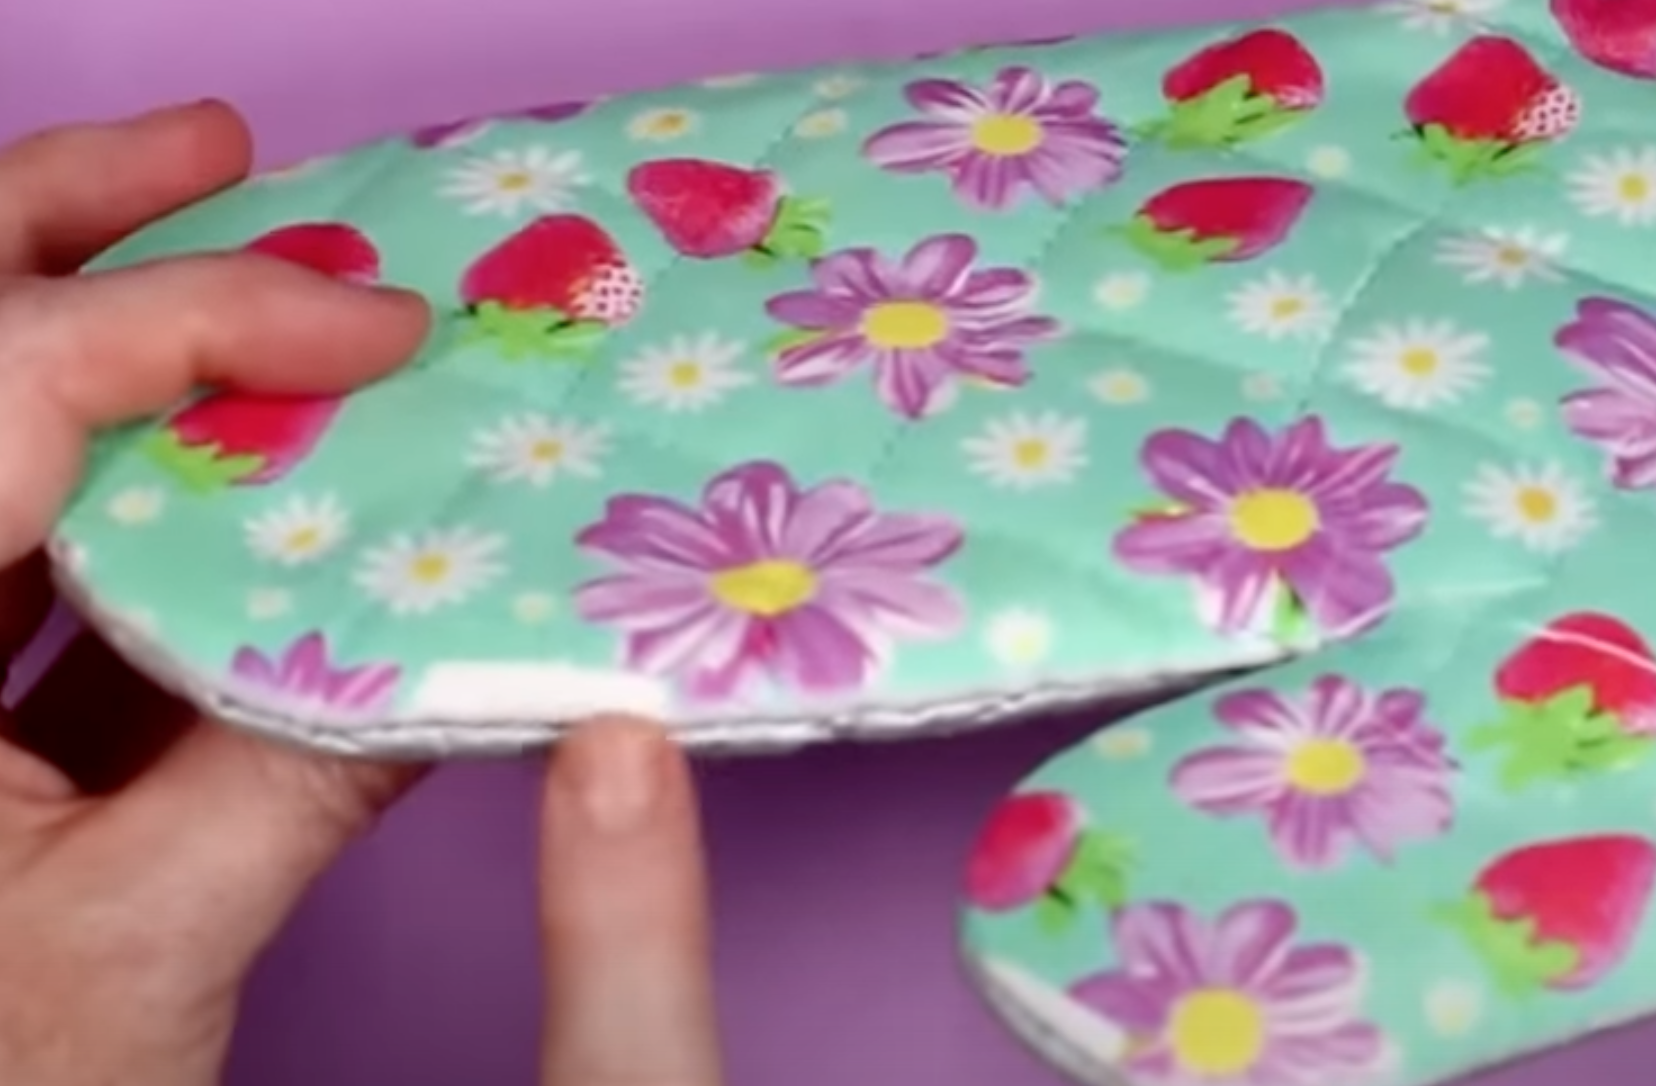
If you look at the photo above, near the seam you can see a small white rectangle. This is because my heat-resistant tape was on the sublimation surface.
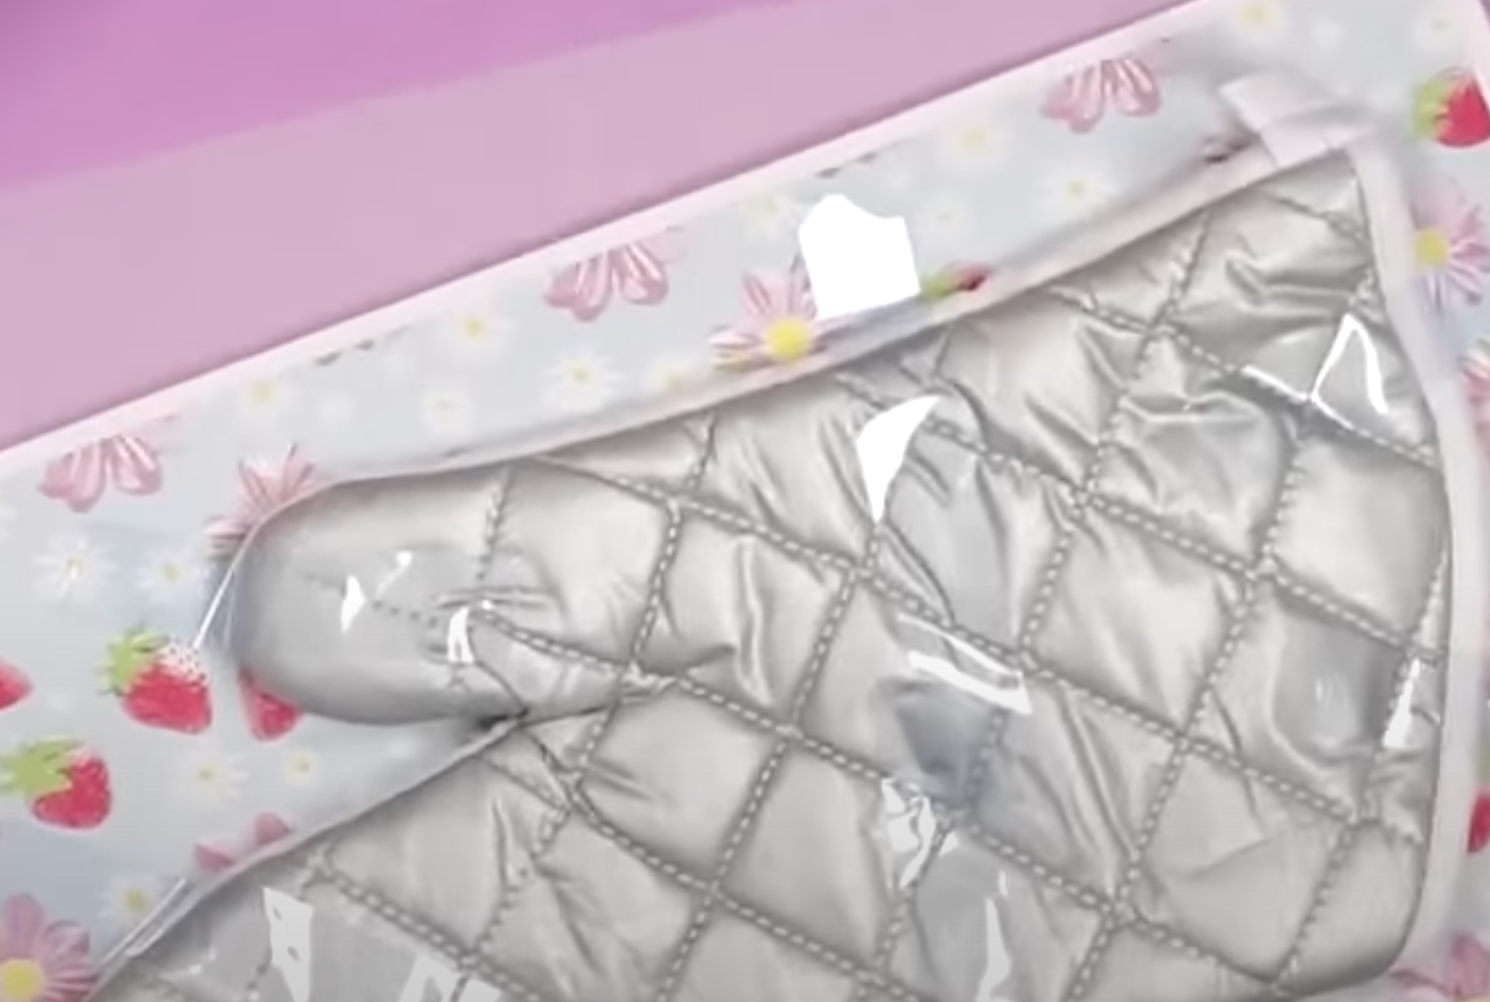
When I was taping my oven mitt down, I pressed the tape onto the back of the oven mitt and then wrapped it onto the sublimation print.
In some places, the tape pressed under a little and onto the white sublimation area. When taping your oven mitt down make sure you keep the tape straight out, don’t press it down onto the white.
3D Sublimation Kitchen Items
With metal sublimation blanks, you want to go over it well and make sure there is no film on either side.
There is no need to pre-heat metal surfaces but you do want to lint roll the entire thing well. These 3D sublimation kitchen items come flat. You’ll see the creases in the metal where you can bend them.
Sublimation Napkin Holder
I am going to sublimate both sides of this napkin holder one side at a time.
- Tape the napkin holder to the sublimation print using heat-resistant tape. Cover both sides with protective paper and place in the heat press. This sublimation blank is a little larger than my press so I will need to press it in two steps.
- I am using my Nomex pad for these projects. I pre-heat the Nomex pad before adding my sublimation blank in the heat press.
- This blank calls for 385 degrees for 120 seconds with medium pressure.
- When the first side is done, remove it from the heat press and then repeat the process for the other side.
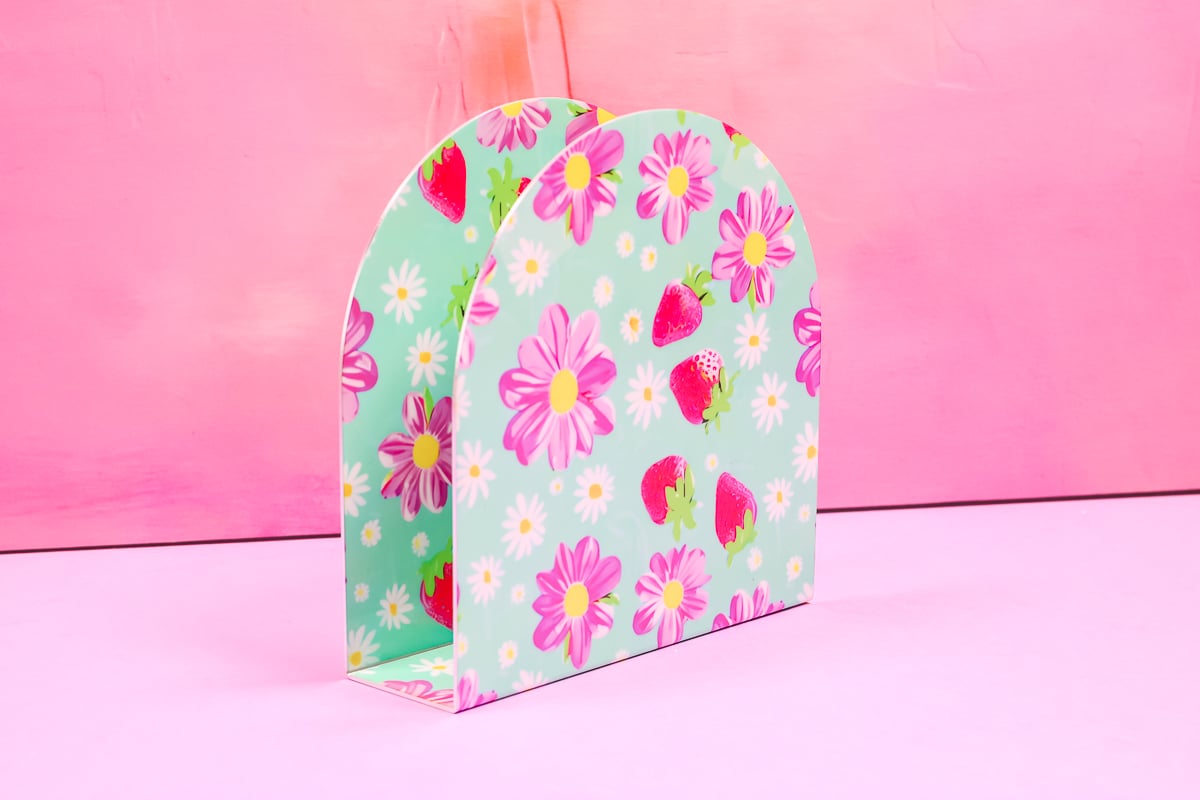
When both sides are done and the sublimation print is removed, you can fold the napkin holder into shape.
I love how this turned out. However, I did see some slight tape marks from using this method of application. I actually prefer to sublimate blanks like these with the method below.
Sublimation Taco Holder
The sublimation taco holder is very similar to the napkin holder. The main difference is that this sublimation blank is small enough to sublimate both sides at the same time.
- Lint roll the taco holder on both sides and then place it on the sublimation print. Fold the sublimation print over the taco holder and then trim off the excess print.
- Use heat-resistant tape to tape the sublimation print in place like an envelope. It should cover both sides.
- I am using the Nomex pad again for this project. The settings for this sublimation blank are 385 degrees for 120 seconds using medium pressure and the Nomex pad.
- As soon as the time is up, flip the taco holder over and press again for the full-time.
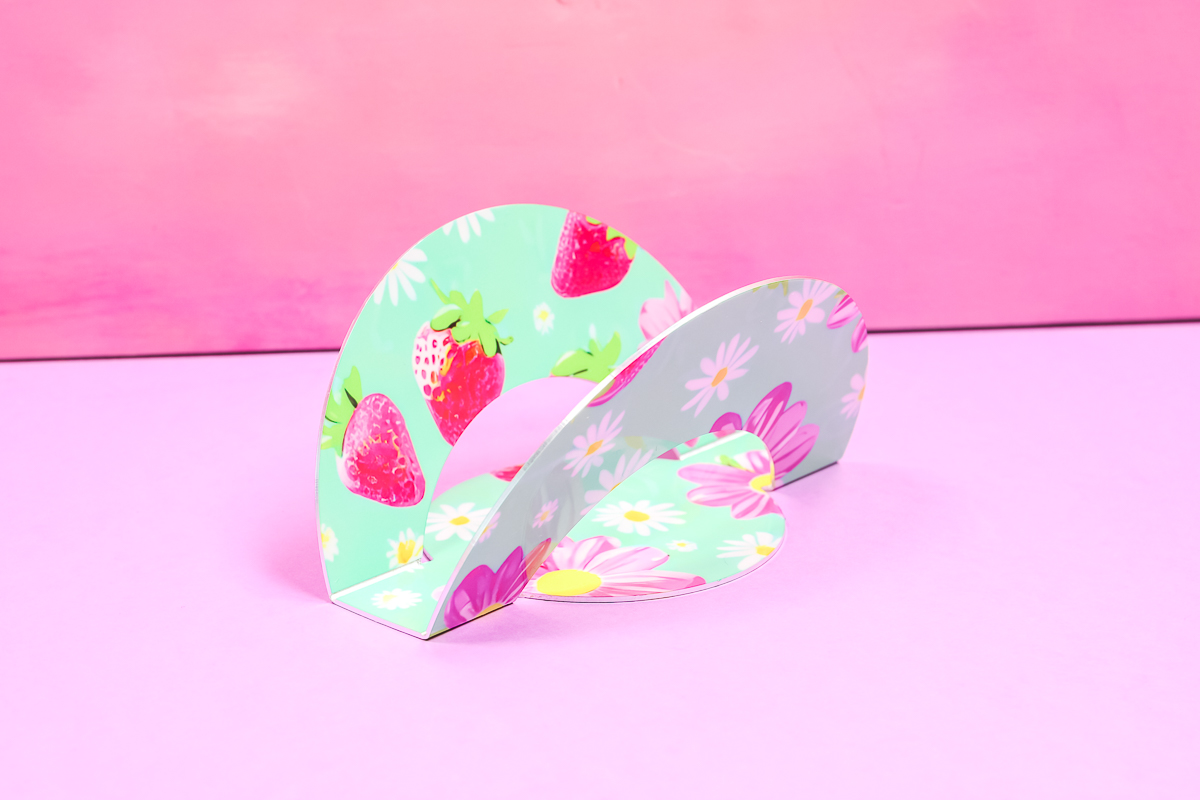
When the sublimation print is removed, you can fold the taco holder. The taco holder folds slightly differently than the napkin holder. The napkin holder’s sides fold straight up. With the taco holder, you want the sides to be folded up but out a little bit.
This turned out so cute. I used the same strawberry print I am using for everything else but you could definitely use a fun fiesta print or a design that matches your party decor.
How to Sublimate Round Kitchen Items
Now that we’re done with the flat sublimation kitchen items it’s time to move on to the round kitchen sublimation items.
I am using a sublimation oven for these items. That means I’ll need shrink wrap to add pressure to the sublimation print. I am using 2 different sizes of shrink wrap for these projects. If you only want to purchase one size, make sure it’s large enough for your largest sublimation blank.
You also need to be sure to remove anything from the sublimation items that won’t go in the oven.
Sublimation Kitchen Canister
Before adding the sublimation print, make sure you clean the canister with either a lint roller or a lint-free cloth and rubbing alcohol.
For my sublimation kitchen canister, I am going to wrap my sublimation print all the way around it. Trim the sublimation print so it’s just slightly larger than the canister.
I want my seam to look really good so I’m going to add a line of tape on the back of one end to make sure I can pull the sublimation print tight without having a double layer on the seam.
You can learn more about my tips for getting really great sublimation seams here.
Sublimation Canister Troubleshooting
I had quite a bit of trouble with this canister. With ceramic canisters, it’s fairly common for them to be uneven in size.
I pulled and taped and pulled some more. I finally got it to where it was pretty tight and taped it into place. You might have some issues getting it really tight, I just did the best that I could.
When you have it as tight as you can, tape down the entire seam and burnish it really well with a burnishing tool like a scraper.
When the seam is taped and burnished, tape around the bottom and top and burnish that tape down. I like to roll the whole thing on a firm surface to make sure the tape is stuck down really well and then it’s ready for the shrink wrap.
How to Finish Sublimation Canisters
Add the canister to the shrink wrap and use a heat gun to heat it up and shrink it to the surface.
This canister calls for an oven temperature of 385 degrees for 20 minutes. This is a very long time in the oven. If you have a tumbler press that is large enough, you could press this in a tumbler press.
When the time is up, remove the canister from the oven and try to remove the shrink wrap immediately so it comes off easily.
This canister is very, very hot when it comes out. Make sure you’re wearing heat-resistant gloves and have a heat-resistant pad to set it on.
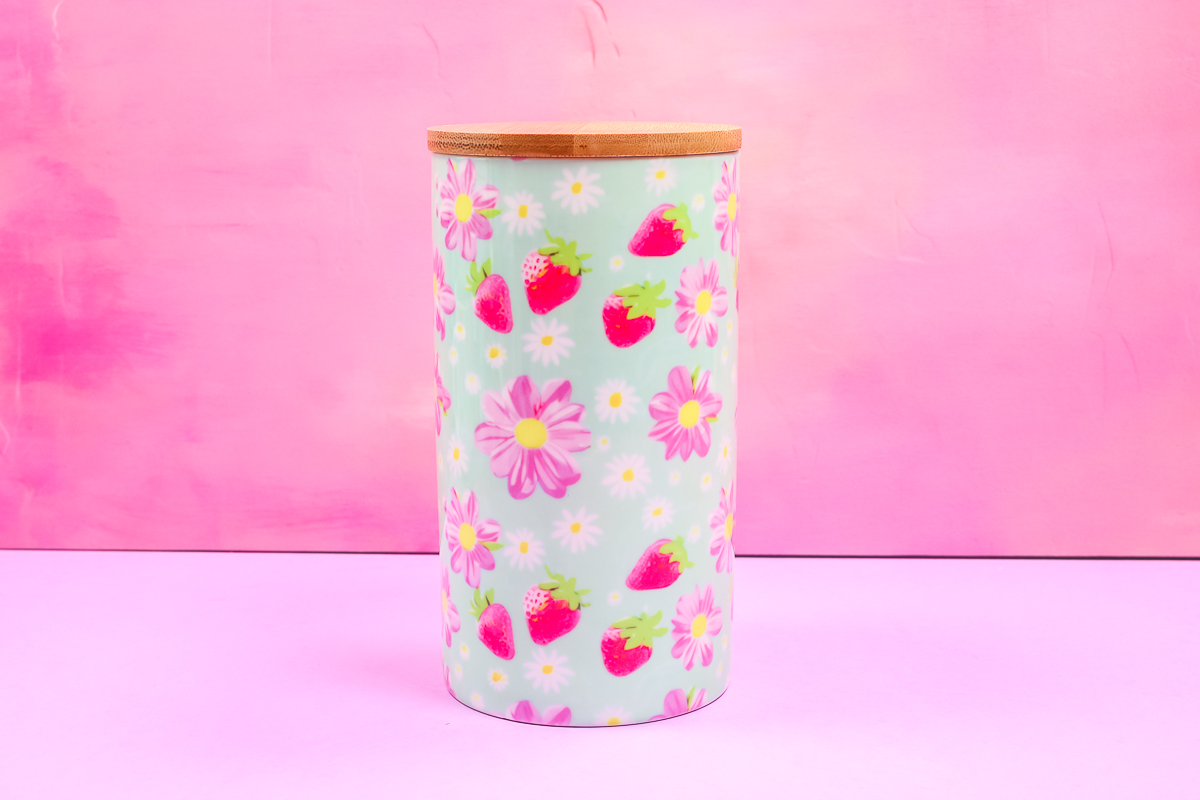
In the photo above, you can see that the sublimation print looks really good. The seam can barely be seen. This is not a seamless print so you can see it but there is no gap and the overlap isn’t dark.
Overall the print is a little faded and maybe a little blurry. I don’t think I got it as tight as I needed. Because ceramic surfaces often have imperfections you may not be able to get them perfect.
Even with the slight imperfections, I love the way this canister turned out. This canister comes in three different sizes, this is the largest size and I love it. Wouldn’t it be fun to create the full set?
Sublimation Soap Dispenser
Just like with the canister, I am going to do a full wrap sublimation print on this soap dispenser. This sublimation soap dispenser is metal. It is similar to doing a sublimation tumbler and the canister I did above. To begin, remove all of the pieces that won’t go in the oven.
Follow all the same steps for cleaning and wrapping your sublimation print. This soap dispenser would fit in a 20oz tumbler sleeve.
The soap dispenser calls for 360 degrees for 6 minutes in the oven. When it’s done, remove it from the oven and peel off the shrink wrap and the sublimation print revealing a beautiful sublimation soap dispenser.
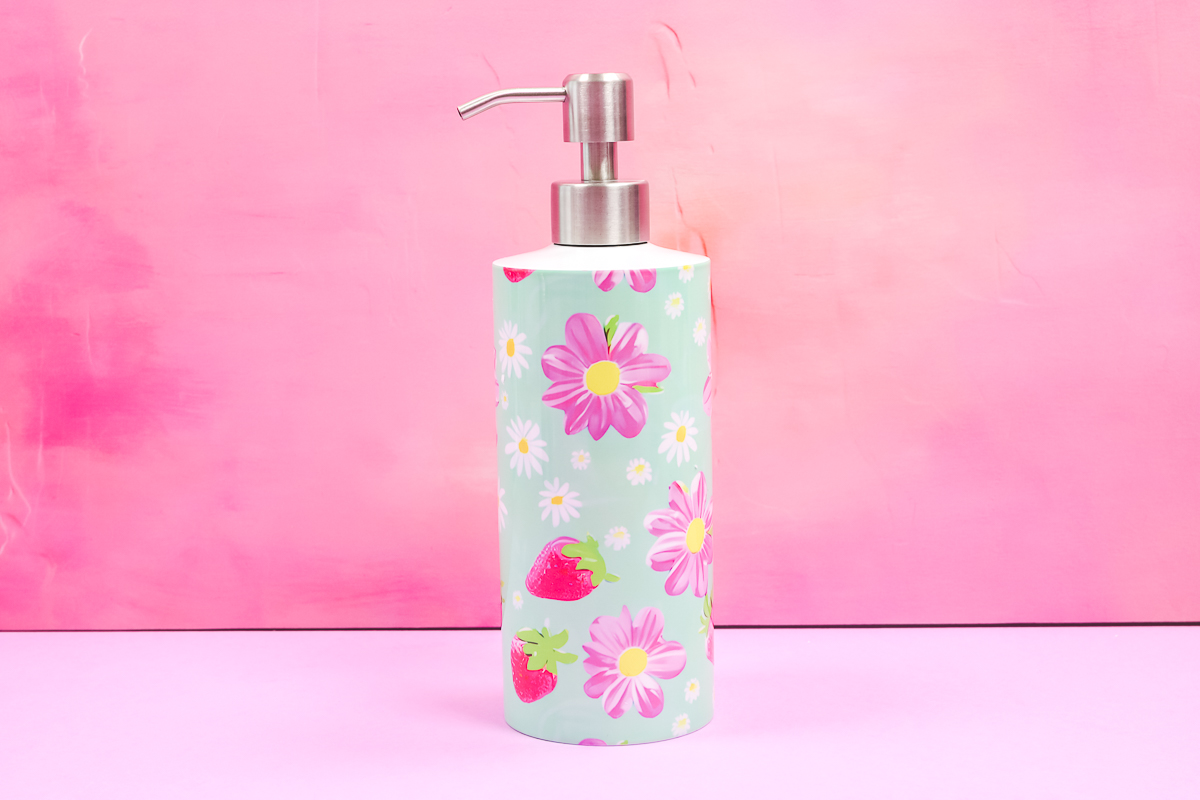
I am so happy with how this project turned out. Because I took my time learning how to create seamless tumblers this was one of the easiest projects I made today. It was very similar and turned out perfect.
Sublimation Oil Dispenser
Next up we have a sublimation oil dispenser. This is one of my favorite kitchen sublimation items.
The strawberry and flower design will look different on this blank because it is not white. That means the silver will show through the print a little bit and the white daisies will be silver since there is no such thing as white sublimation ink.
Another thing that will be different with this project is that instead of doing a full wrap I’m adding a band around the middle.
The prep will be the same. Clean the surface and remove the pieces that won’t go in the oven.
Cut the band to whatever size you want it to be and then tape it into place like we did with the projects above. If you wanted, you could add the design to the entire flat side like we did with the canister and soap dispenser.
Add shrink wrap to the entire thing and place it in the oven for 6 minutes at 360 degrees.
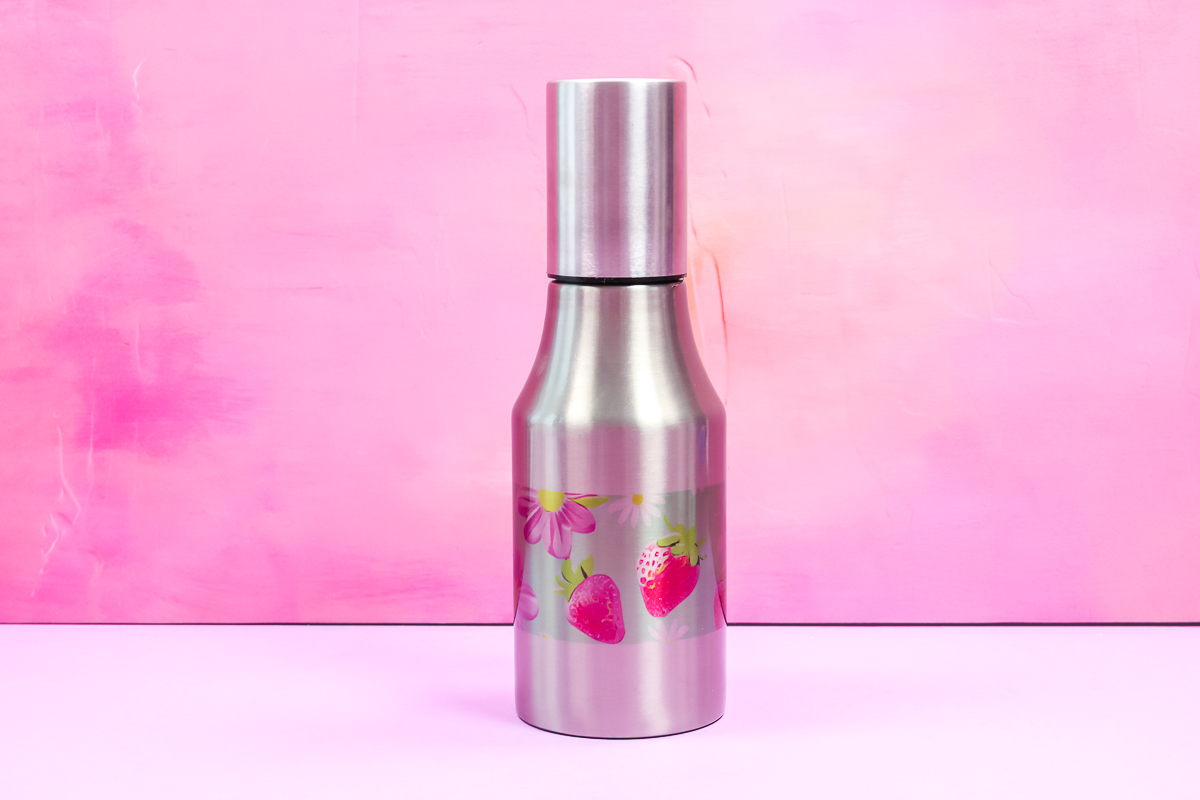
Remove the sublimation print and reveal your finished project. You can see how different the design looks on a silver blank.
If you don’t like the look of the silver sublimation oil dispenser, they do have it in white and your print would look the same as it does on the other designs.
Sublimation Bowl with Lid
Now we have a sublimation bowl that has a lid. Before we begin we need to remove the plastic lid, that cannot go in the oven.
For this project, I am going to add a band around the entire bowl. I don’t want to get down in the area that has the curve toward the bottom.
Even with an 8.5 by 14-inch sheet of paper, it’s not long enough to wrap all the way around this bowl. If you have a sublimation print that can print larger than 14″ long, you could wrap this with one piece.
I’m piecing two pieces together for this bowl. This means we’ll have two seams instead of one.
On one end I am lining the design up so you can’t see that seam. Following the same steps I used to create other seamless designs I’m taping this design together.
With the sublimation print taped into place, shrink-wrap the bowl. The shrink wrap for this bowl is open on the top and bottom. Wrap the shrink wrap around the bowl and use a heat gun to shrink it to fit.
My shrink wrap was large, with the heat gun I was able to shrink it to fit snuggly all the way around the bowl.
When the shrink wrap is in place, place it in the sublimation oven for six minutes at 360 degrees. When the full-time is up, remove the bowl from the oven with a heat-resistant glove and remove the shrink wrap while it’s still hot.
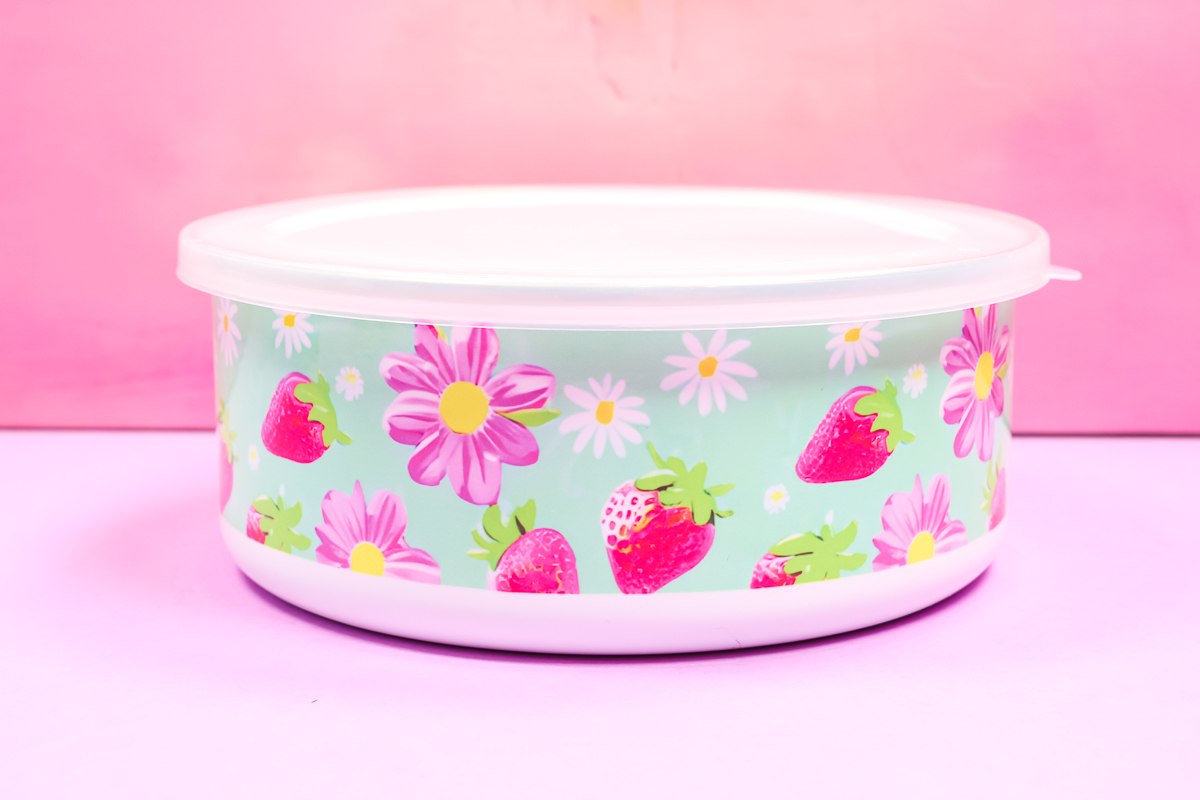
My finished bowl turned out so cute. I will say, in the video, you can see that I didn’t get my seams lined up perfectly. It still looks so cute but you can see the seams.
The print looks perfect all the way around the bowl, there is no fading or ghosting so the shrink wrap did its job well.
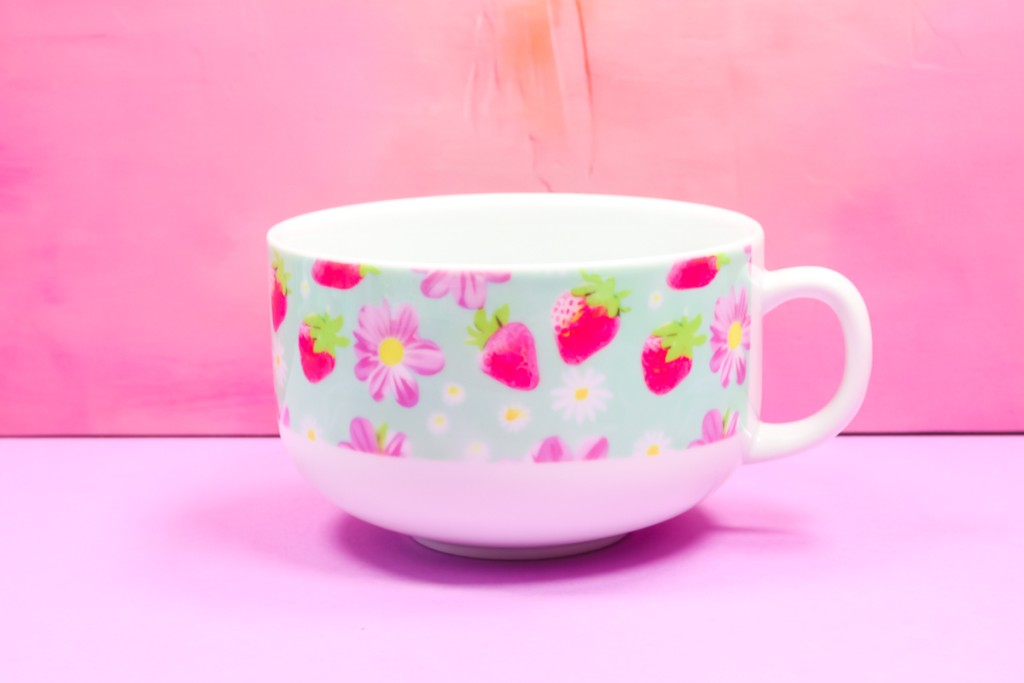
Large Sublimation Soup Bowl
Lastly, we have the large sublimation soup bowl. This kitchen sublimation blank is a ceramic bowl with a handle.
I am going to prepare this bowl exactly the same way I did the bowl above. The difference is, this time I am not going to wrap around the handle area. This bowl is also large enough that I am having to piece two bands together so it’s large enough to wrap around the bowl.
Clean the bowl before adding the sublimation print. I’m adding my print to the top of the bowl and then taping it into place.
To add the shrink wrap, place the bowl inside the shrink wrap and then cut a slit for the handle to fit through. I like to tape the shrink wrap under and around the handle to keep it from pulling apart while adding heat.
Use the heat gun to shrink the shrink wrap all the way around the soup bowl. Now it can be added to the oven.
This blank calls for a temperature of 400 degrees for 14 minutes. My small sublimation oven only goes up to 390 degrees so I am going to set the temperature to 390 and increase the time a little bit.
When the time is up, remove the bowl from the oven using a heat-resistant glove and place it on a heat-resistant mat.
This mug is really really hot. I had to use another hot pad to remove it from the oven. Remove the shrink wrap while it’s still hot so it’s easier to remove.
I am actually really sad about this one. The shrink wrap became loose on one side while it was in the oven so one side is blurry.
How to Prevent Blurry Sublimation Prints
Be aware, if your shrink wrap becomes loose the pressure won’t be there to make sure your print is clear and crisp. If you notice that the shrink wrap becomes loose, you can take the blank out of the oven and replace the shrink wrap.
As long as you don’t move the sublimation print, you should be able to place the bowl back in the oven and bake it again.
Final Thoughts on Sublimation Items for the Kitchen
I hope you enjoyed learning how to make sublimation items to use in the kitchen. I don’t think any of these are hard to make, whether you want to make all of them or just a couple you’re going to love how they turn out.
If I had to pick a favorite project from today, it would probably be the canisters. I love how they look and the fact that they come in different sizes.
Next would be the bendable metal projects, they’re fun and different from the other projects. I was also really excited about the jar openers with the grippy back. I’ve been waiting to film this video so I could take the photos and use them in my kitchen.
I hope I’ve answered any questions you have about sublimation items for the kitchen and gotten you excited to try one or more. If you have any additional questions about anything we’ve talked about today, leave them in the comments and I’ll be happy to answer them for you.