This post and photos may contain Amazon or other affiliate links. If you purchase something through any link, I may receive a small commission at no extra charge to you. Any supplies used may be given to me free of charge, however, all projects and opinions are my own.
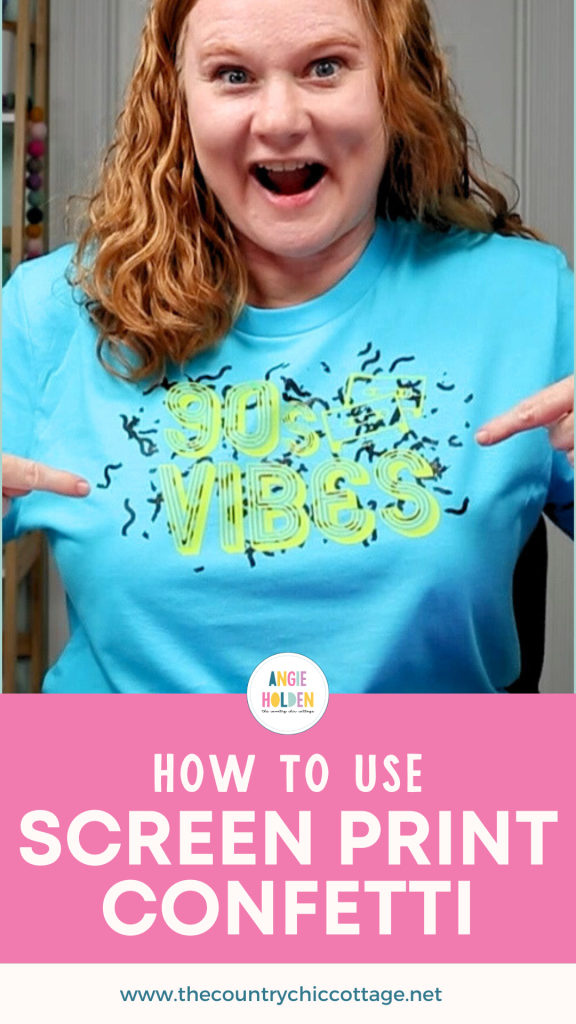
Do you love the 90s-inspired fashion that is popping up everywhere? If you’re feeling drawn to those fun bright 90s designs, you’re going to love today’s project. I’m going to teach you how to use screen print confetti to create a perfect 90s tee!
I am using shirts from the new Bella+Canvas Baby Tees line which is perfect for all things 90s! You can also try this bleach splatter shirt for a fun addition to this project!
If you love crop tops and 90s fashion, you’re going to love this new line from Bella+Canvas. There are so many options including 3/4 sleeves, short sleeves, tank tops, and so much more. See me using one of the options below!
What is Screen Print Confetti?
Screen Print confetti is screen print ink in confetti form. You can sprinkle it randomly on shirts and get amazing designs. It really reminds me of the 90s.
I’m actually teaming up with Jennifer Sanderson from Pigskins and Pigtails for this project. She is going to show you how to make your own screen print confetti and make a project. I’m going to show you how to use the confetti you made or even purchased to create a fun 90s-inspired t-shirt.
If you’re interested in learning more about screen printing, I have a post all about how to use your Cricut to create screen print designs.
You can watch me make this fun 90s-inspired screen print confetti t-shirt and see all my tips and tricks by clicking play on the video below.
Supplies Used for 90s-Inspired Tees
Bella+Canvas shirts are my favorite, I love the way they feel and how they hold up over time. Plus, I am a sucker for any shirt that has sleeves that are a different color. Every time I see one it pulls me in.
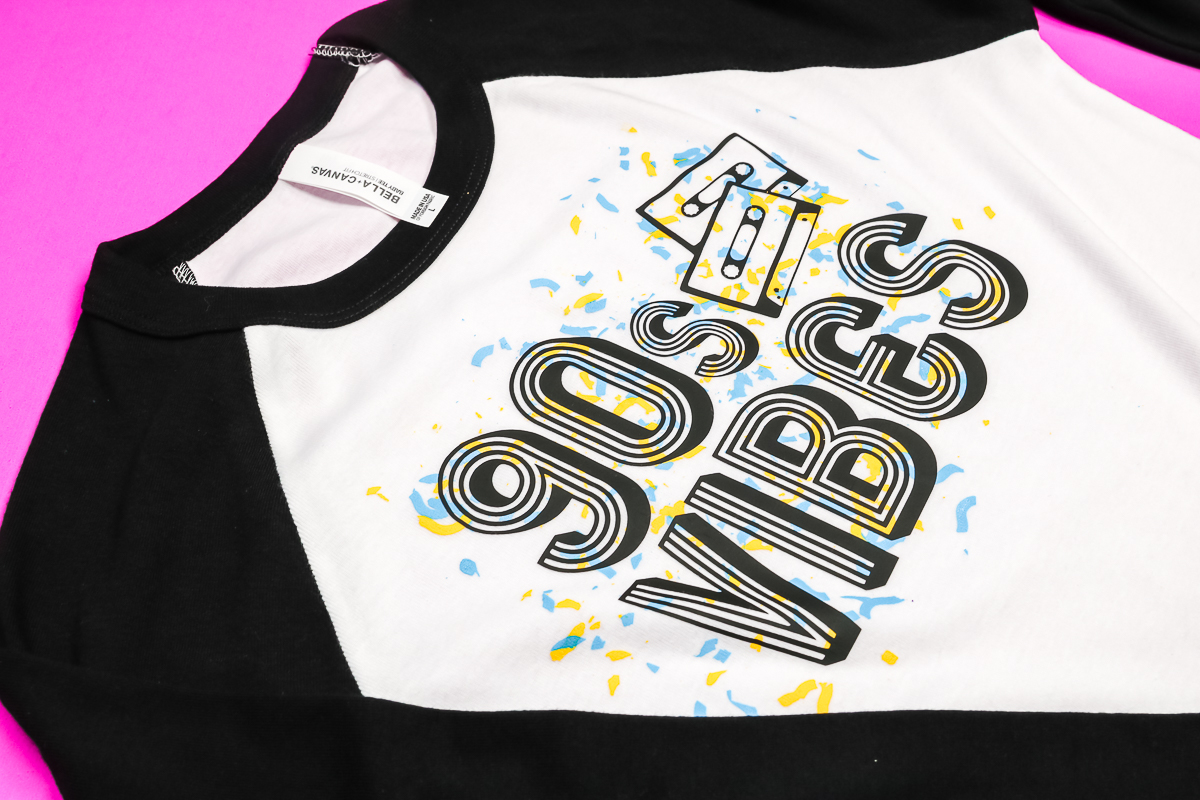
The shirts I have chosen for this project are from the Baby Tees line and are the micro rib stretch fabric that I love. The Baby Tees are cropped which is so on trend right now. When I first received these tees, I knew I needed something 90s inspired to put on them. The Screen Print confetti was a perfect choice.
How to Make a Screen Print Confetti T-shirt
Now that we have our supplies gathered we can make our shirts! Download the 90s Vibes SVG to your computer and then upload it into Design Space.
Cutting HTV Design with a Cricut
Add the uploaded design onto your canvas and then resize it to fit the shirt you’re going to put it on. If you’re not sure about the size, I recommend measuring across the front of your shirt to see how big you would like it.
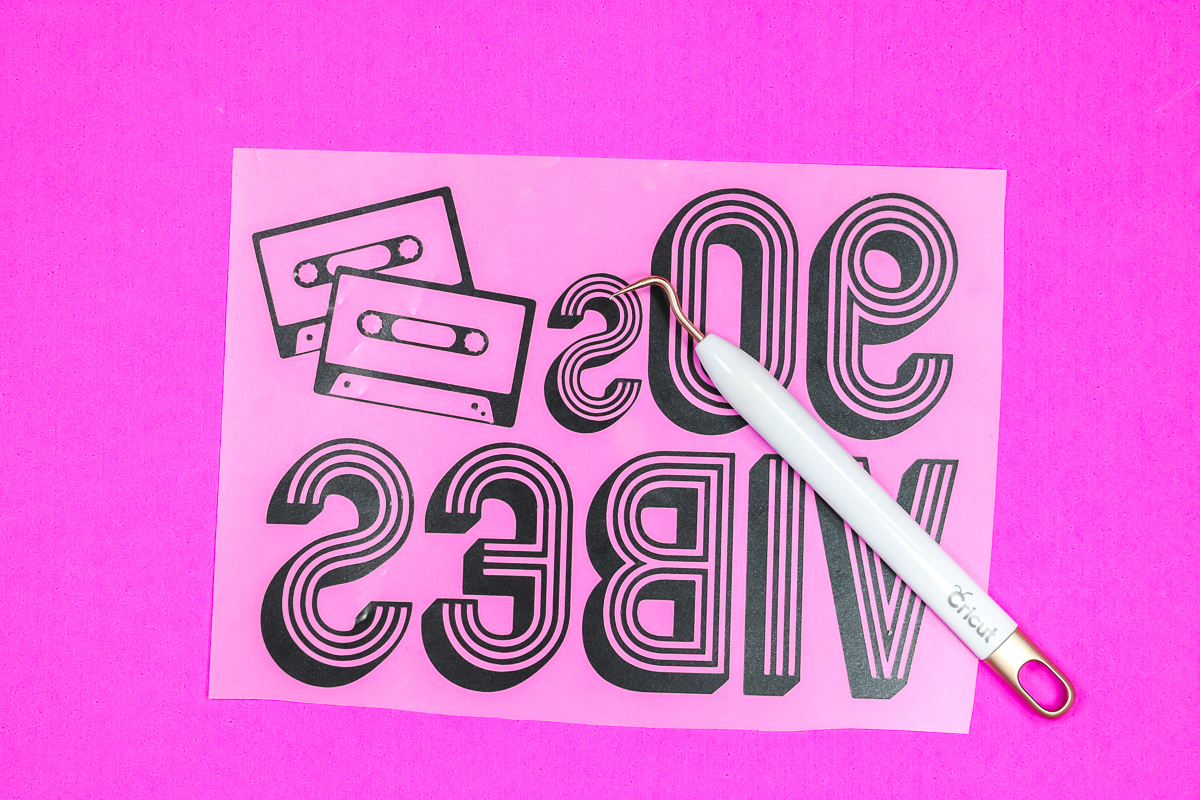
Make sure you have the layers attached and then click Make It. Make sure your image is mirrored and then continue. Since we’re using HTV, we need to mirror it as HTV is always mirrored.
I cut my material on my Cricut machine using the Everyday Iron-on setting. This is a stretch HTV product but that setting worked fine for me. I am using the stretch HTV as the shirts are micro-rib that stretch quite a bit.
Using a weeding tool I removed all the HTV that I don’t want to be pressed onto my shirt.
How to Apply Screen Print Confetti to T-shirts
Now that I have my HTV cut I’m ready to start putting my shirt together. I am going to apply the screen print confetti to my shirt before applying the HTV.
Note – I do want to note that I did experiment with adding the HTV first and then applying the screen print confetti over the top. I did not have good results. I would say to always apply the confetti first.
To apply the screen print confetti, I am using the Cricut Auto Press and have it set to 350 degrees for 10 seconds. Any heat source would work for this project.
These are the settings for my screen print confetti. If you purchase confetti, follow the instructions that they give you.
Preheat your shirt to remove any moisture. Allow it to cool and then sprinkle your confetti. How you apply the confetti is totally up to you. I like to use my HTV as kind of a guide and sprinkle it all around that area.
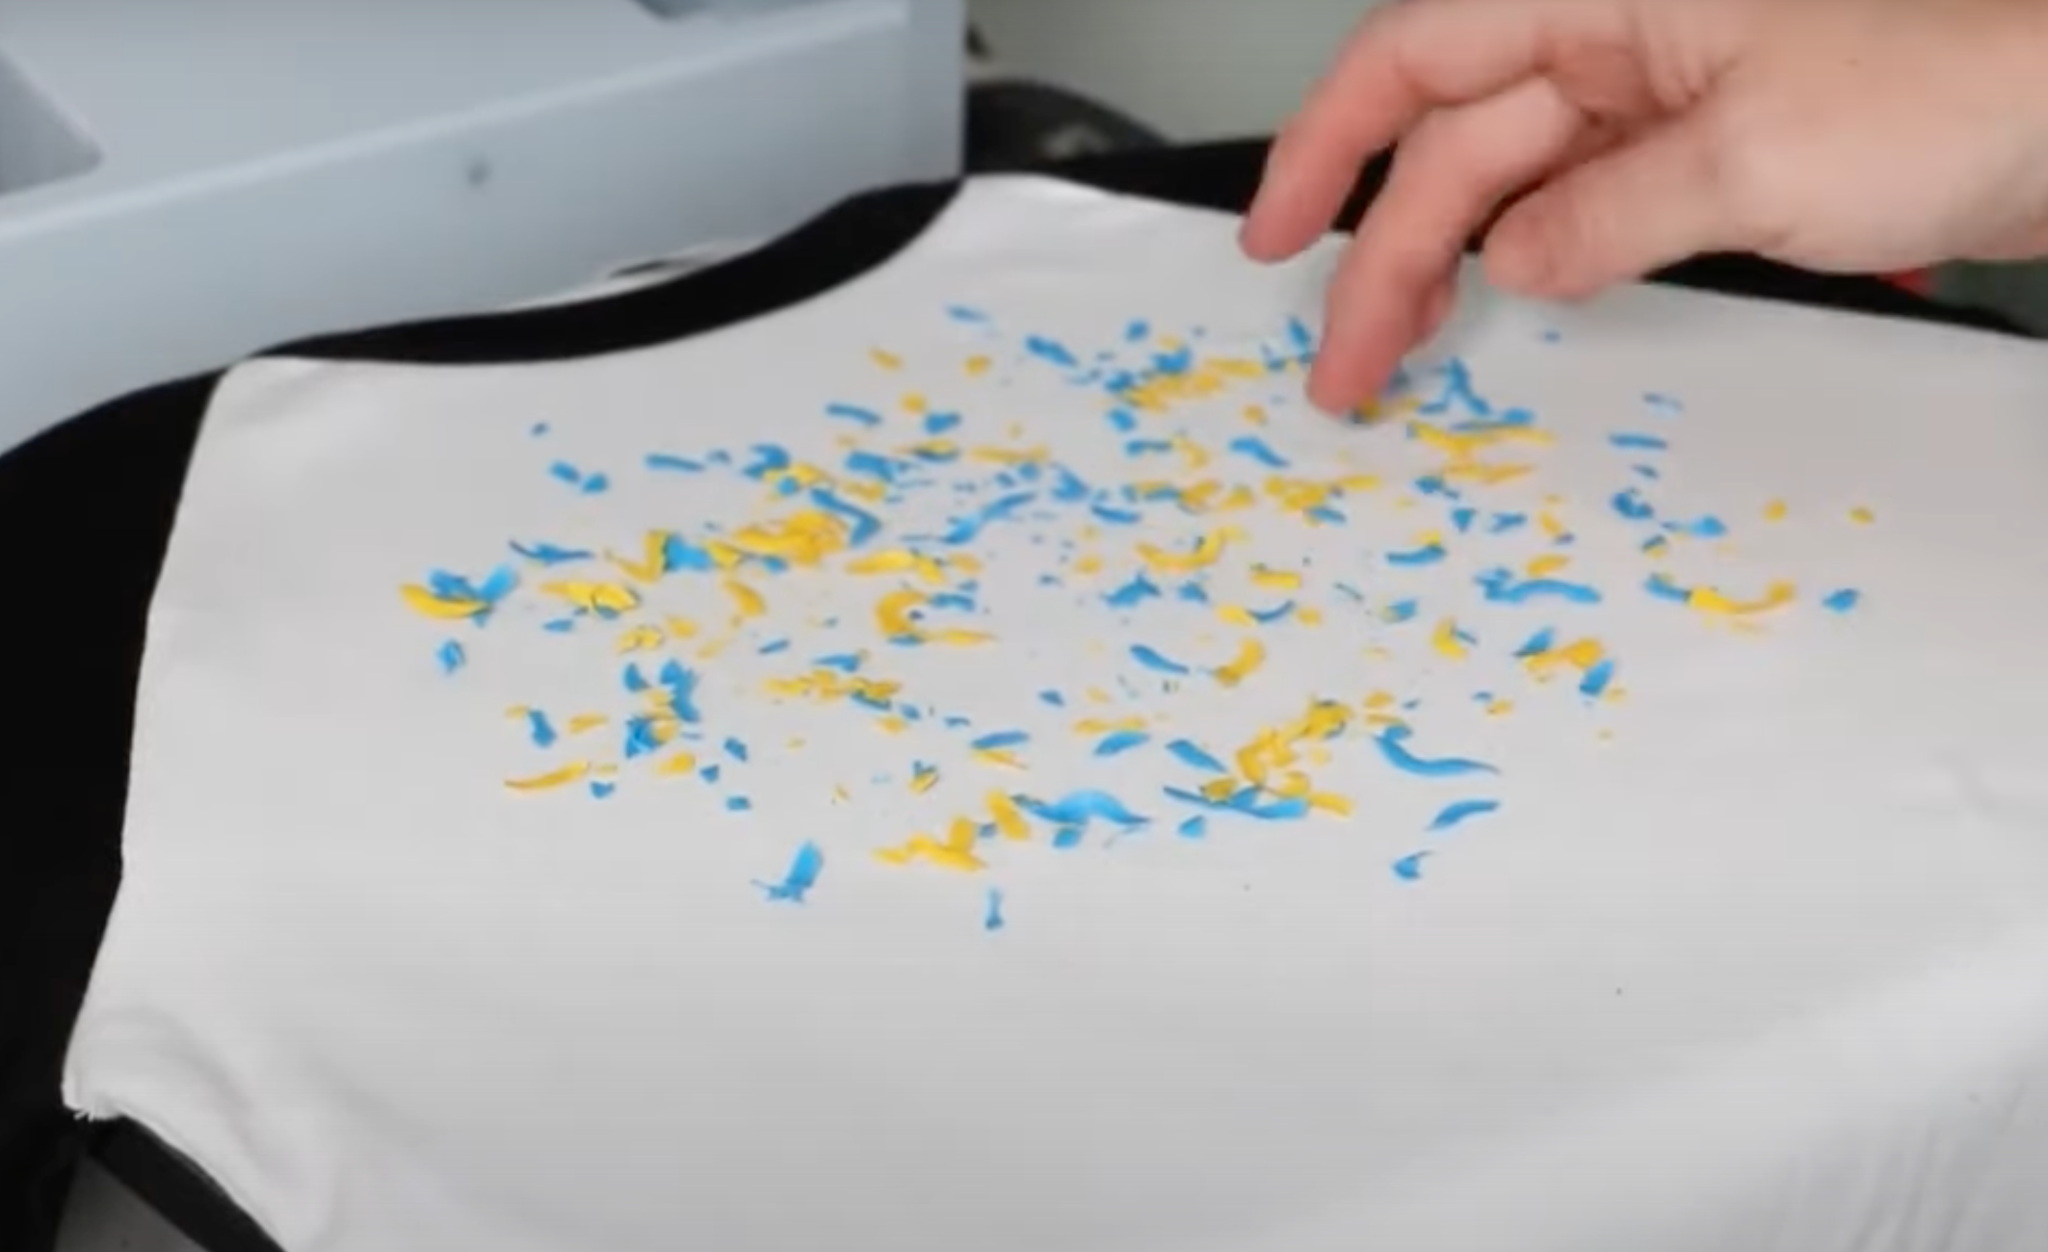
Once you have your confetti where you want it, cover it with parchment paper and apply heat for 10 seconds. Once it’s done, allow it to cool for 10 – 20 seconds then peel back the parchment paper.
You may find that some of the confetti sticks to the parchment paper, that’s okay. Peel it back and throw away the parchment paper if any confetti is stuck to it.
Note – I found parchment paper worked best for this. I tried butcher paper but almost all of the confetti stuck to it so I definitely recommend using parchment paper.
It’s okay if your confetti isn’t fully stuck down at this point. We are still going to apply the HTV on top of it.
How to Apply HTV to Screen Print Confetti
Before you apply the HTV to your shirt, adjust the time and temperature to whatever your HTV calls for.
I do think an HTV with a lower temperature and less time is going to be best for this project. Siser EasyWeed would work or EasyWeed Stretch if your fabric is stretchy.
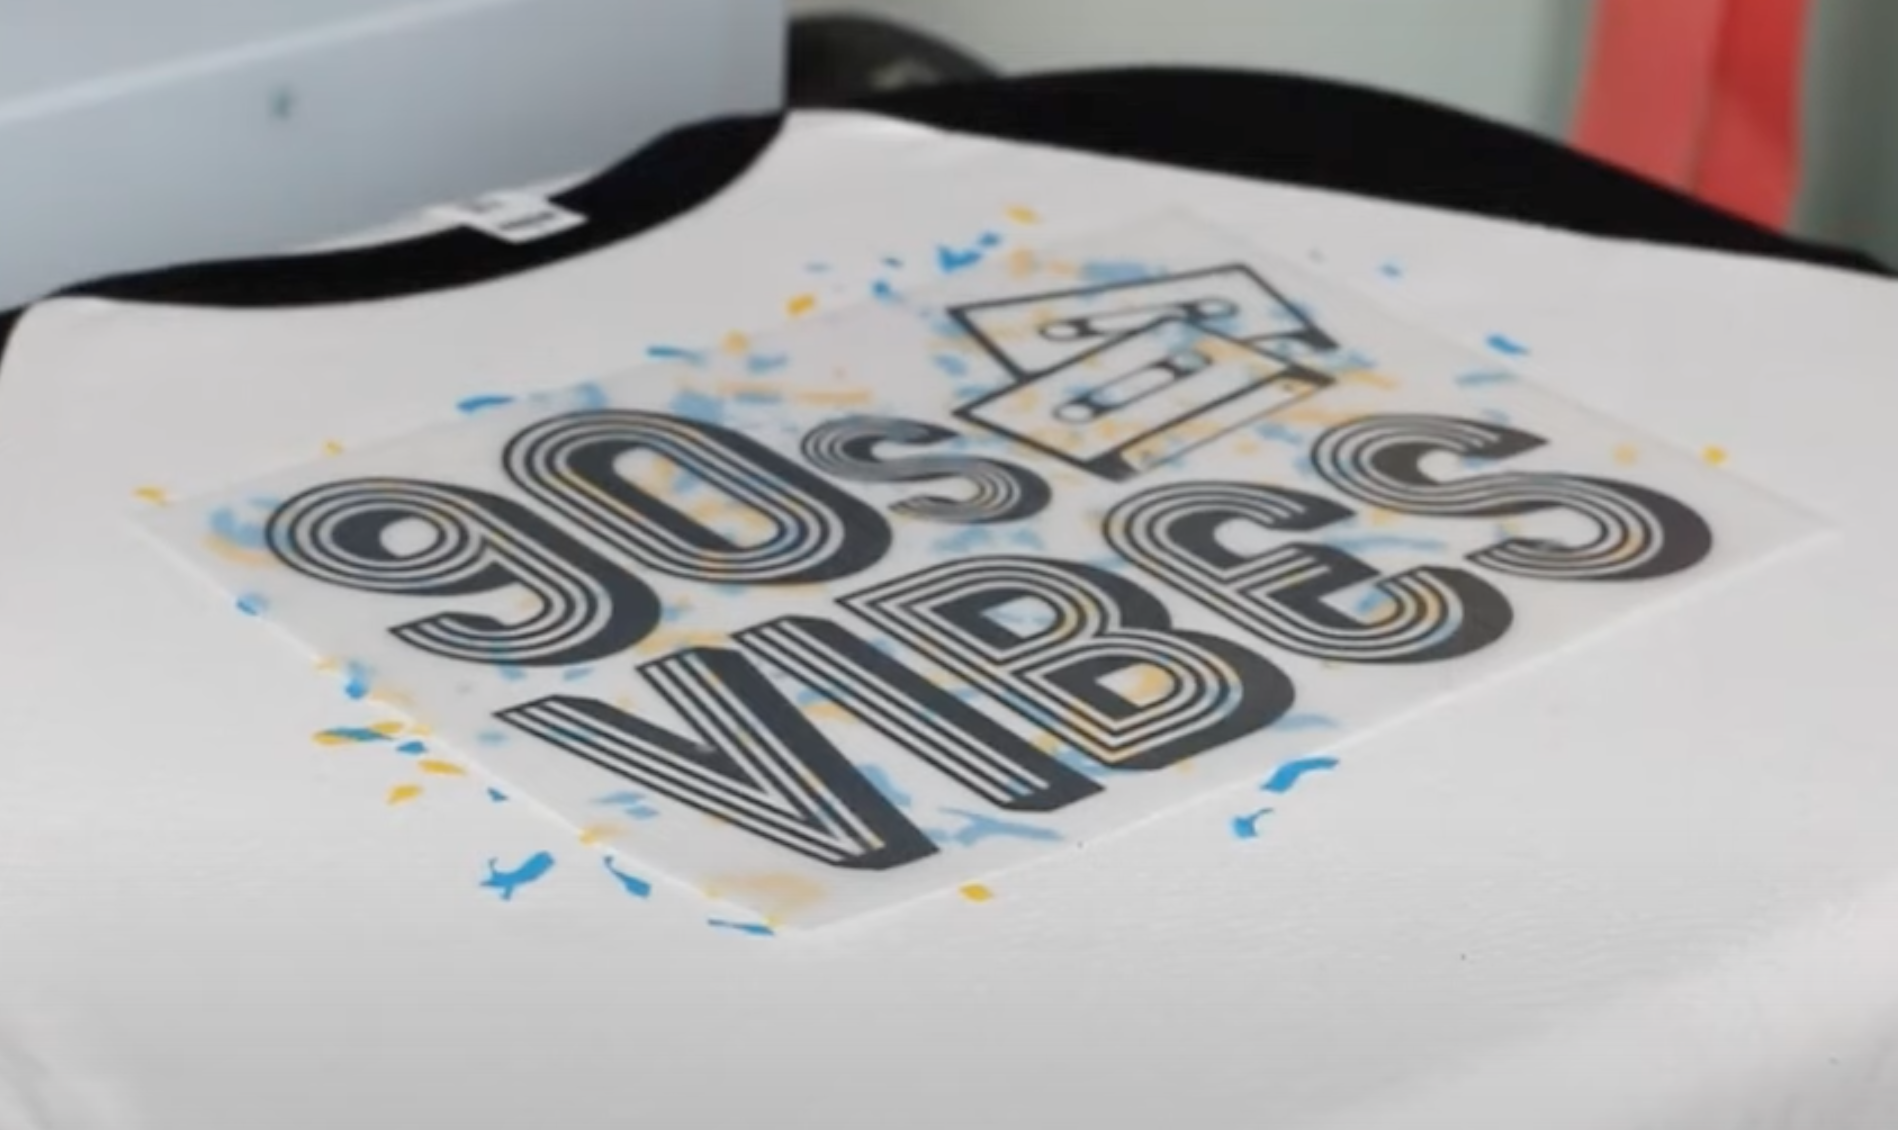
Now you can just simply locate the HTV right over the top of the screen print confetti. Place a clean piece of parchment paper over the top and press according to the instructions for your HTV.
Allow the HTV to cool a little and then peel back the parchment paper and the carrier sheet for your HTV. I have found that it depends on which brand of HTV you use how much of the screen print confetti sticks to it. Some carrier sheets are just stickier than others.
Go ahead and peel back the carrier sheet and then one more time add another sheet of clean parchment paper over the top.
How to Finish a Screen Print Confetti Design
To make sure the Screen Print confetti is all stuck down really well, press the whole design one more time. For this final press, I am going to press for the full-time and temperature for the HTV again, essentially doing a second press.
I have found that after this last press if you allow the whole thing to cool for about 10 – 20 seconds before you peel back the parchment paper it should peel back cleanly. If you’re still having some of the confetti stick to the parchment paper, you can press it again one more time following the same steps.
Once the design has cooled I like to run my hand over the surface of the shirt to make sure everything feels like it’s stuck down really well. Sometimes the confetti can land layered on top of itself and we want to make sure all of those are stuck down completely to the fabric of the shirt.
How to Care for Screen Print Confetti T-shirts
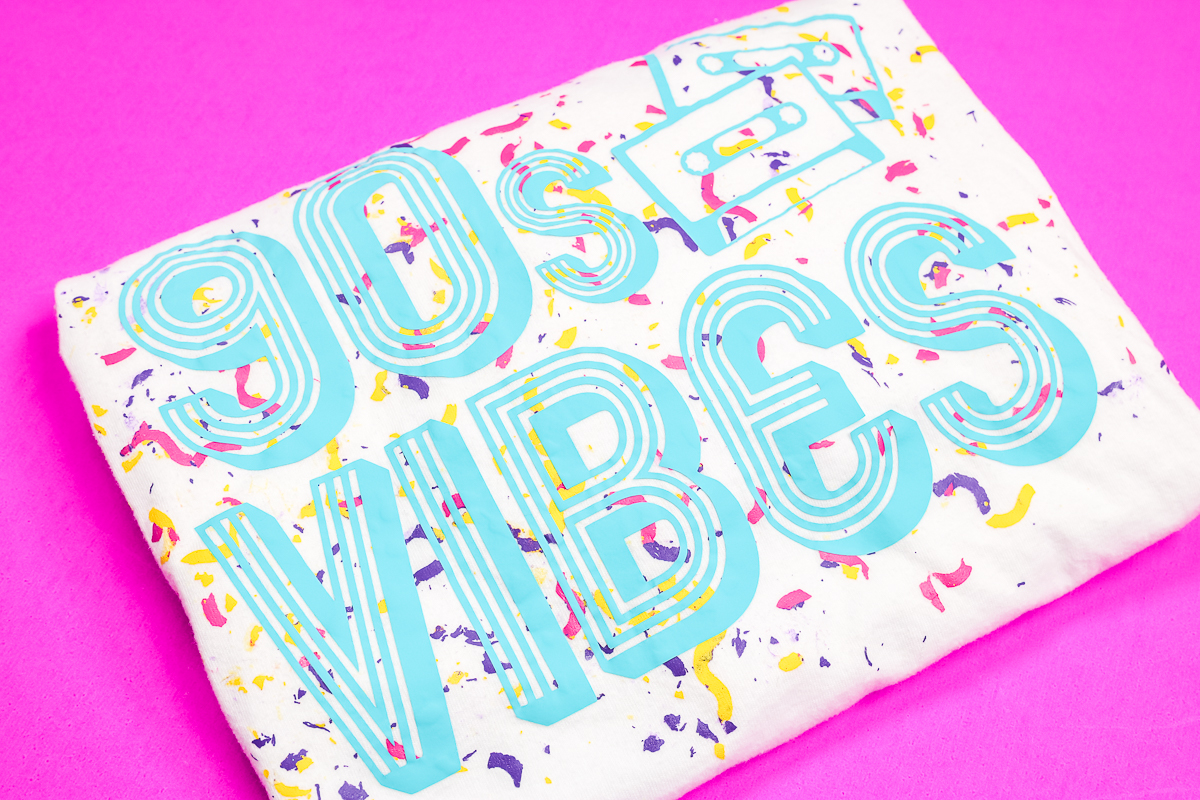
I absolutely love how this shirt turned out! It is a perfect retro 90s tee.
I have a shirt here with the screen print confetti design that I have washed multiple times and have even thrown in the dryer. The screen print looks just like it did when I applied it.
IMPORTANT: Most HTV calls for allowing the project to sit for 24 hours before washing or wearing.
I typically wash my shirts with HTV on them, inside out on cool, and if I dry them in the dryer I dry them on low. Follow the recommendations for the HTV material you’re using.
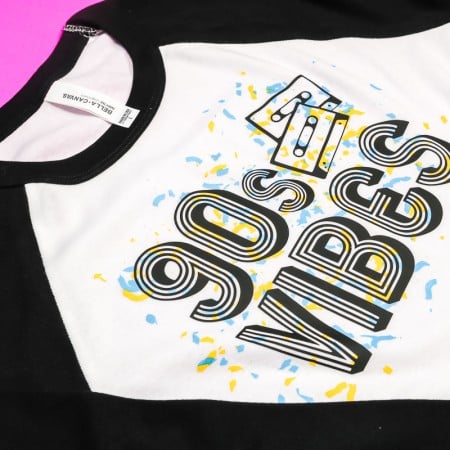
Can I Add Screen Print Confetti to Colored Shirts?
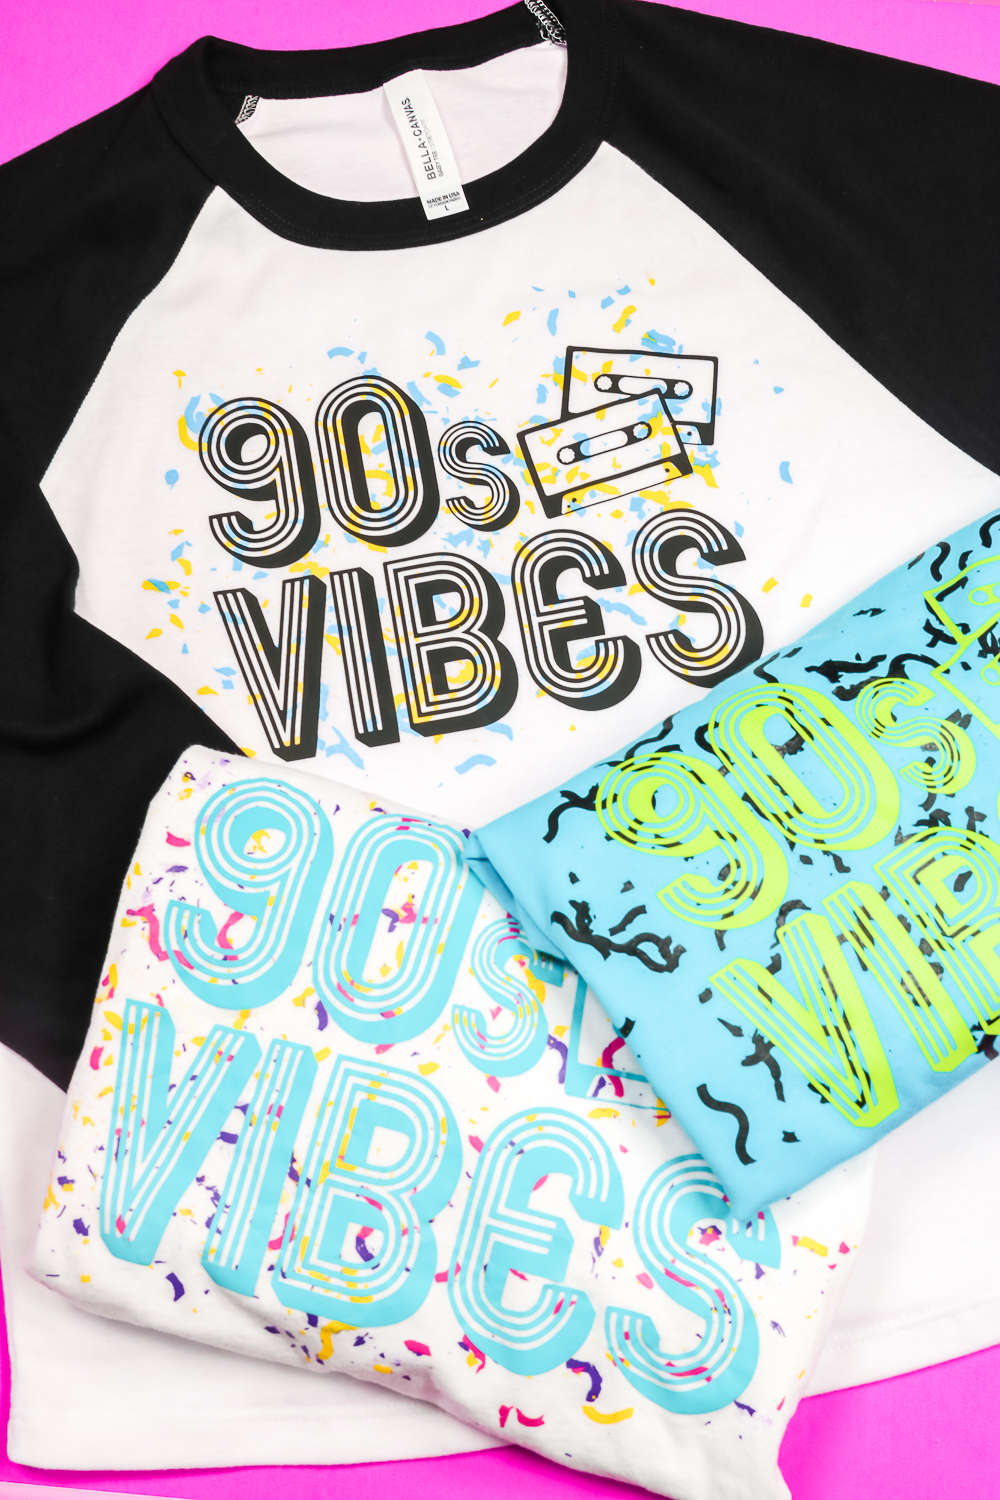
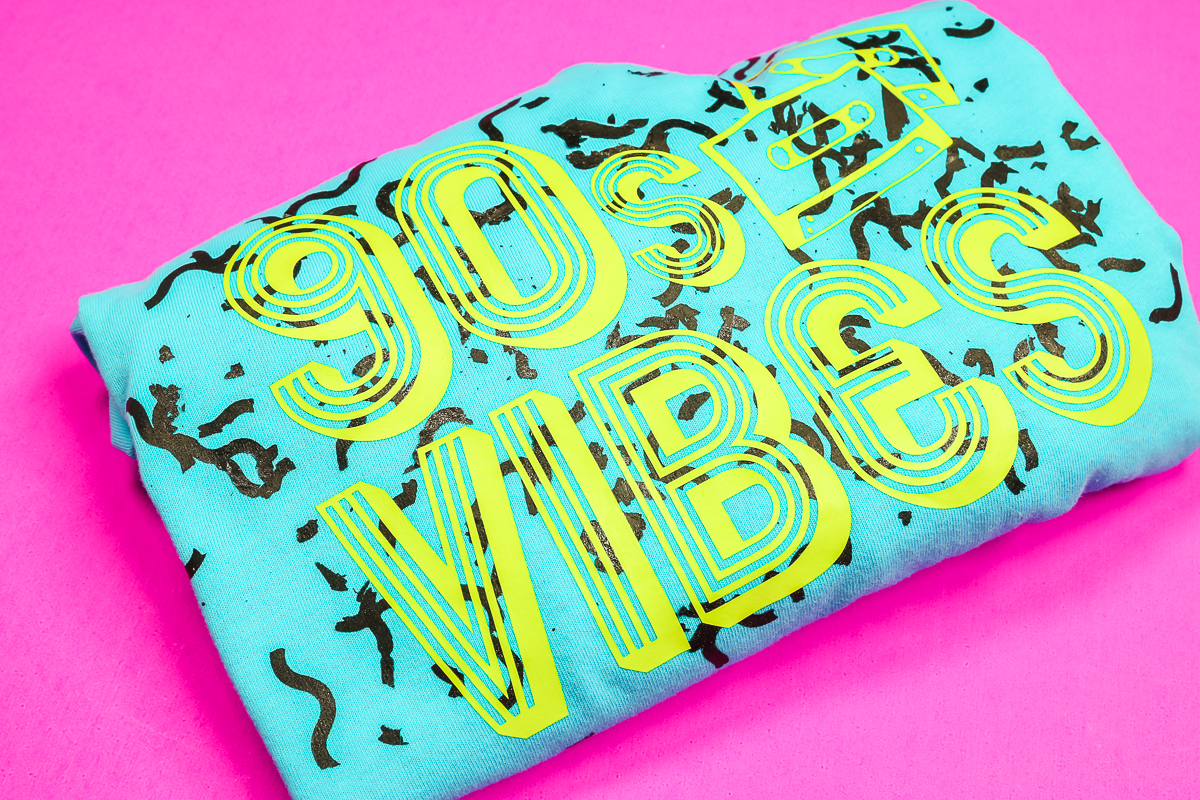
You can absolutely add screen print confetti to shirts that have a color. Because you can make or buy screen print confetti in a wide variety of colors there is sure to be something that will work for your product.
I actually made this same design on a colored shirt that turned out just as great as the ones with multiple colors on a white shirt.
What T-shirt Works Best?
Screen print works best on cotton fabrics. Polyester is not a great option for screen printing. You can screen print on silk and even wool but I believe cotton is the best option.
The screen print stretched really well on my stretchy shirt. Pairing it with the stretch HTV ensured that I don’t have to worry about stretching the shirt. It all worked really well together.
You can also use screen print confetti on a shirt that doesn’t have a lot of stretch, you don’t have to use a fabric that stretches.
Final Thoughts on How to Make a 90s-Inspired Screen Print Confetti Shirt
I love this shirt! I’m so happy with how it turned out. If you’re inspired by 90s fashion right now, you need to grab my free 90s Vibes SVG and of course a Baby Tee from Bella+Canvas.
If you haven’t shopped Bella+Canvas wholesale section make sure you check it out. You can shop wholesale right on their site without a wholesale license. Bella+Canvas shirts are the softest shirts on the market and they have so many options you’re sure to find exactly what you’re looking for.
As a reminder, parchment paper was the best option I found for protecting the screen print confetti. Butcher paper really didn’t work at all. I hope this is helpful since parchment paper is easy to find and most of us likely already have it in our kitchen.
Hopefully, I’ve inspired you to create a bit of 90s fashion! I promise you, if you don’t want this tee yourself any teen/pre-teen in your life will LOVE it.
If you have any questions about creating your own screen print confetti baby tee leave them in the comments below and I’ll get those answered for you!
Want to print the instructions for using screen print confetti with HTV? Try the card below!
How to Make a Screen Print Confetti T-shirt
Do you love the 90s-inspired fashion that is popping up everywhere? If you’re feeling drawn to those fun bright 90s designs you’re going to love today’s project. I’m going to teach you how to use screen print confetti to create a perfect 90s tee!
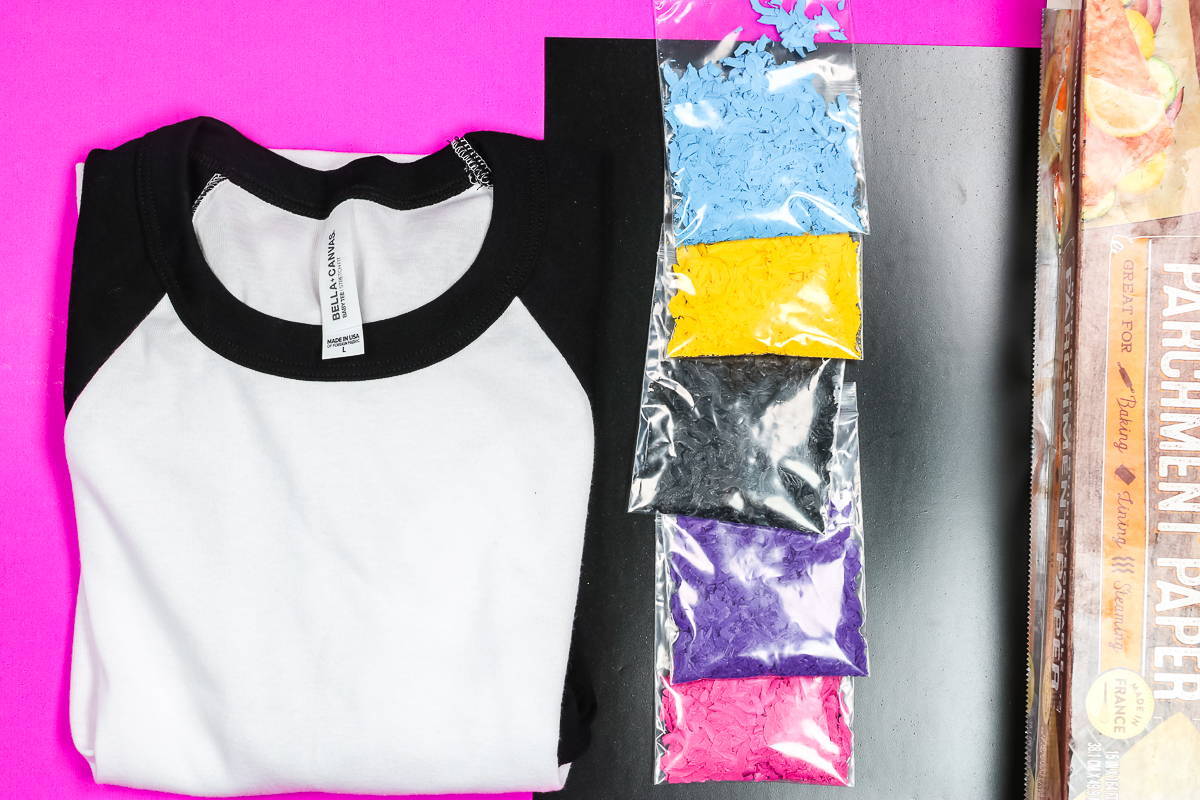
Supplies
- Stretch HTV
- Screen Print Confetti (Make your own or purchase it here)
- Parchment Paper
- T-shirt
Instructions
Cutting HTV Design with a Cricut
-
Add the uploaded design onto your canvas and then resize it to fit the shirt you’re going to put it on.
-
Make sure you have the layers attached and then click Make It. Make sure your image is mirrored and then continue. Since we’re using HTV we need to mirror it, HTV is always mirrored.
-
I cut my material on my Cricut machine and used the Everyday Iron-on setting. This is a stretch HTV product but that setting worked fine for me.
-
Using a weeding tool I removed all the HTV that I don’t want to be pressed onto my shirt.
How to Apply Screen Print Confetti to T-shirts
-
To apply the screen print confetti I am using the Cricut Auto Press and have it set to 350 degrees for 10 seconds.
-
Preheat your shirt to remove any moisture. Allow it to cool and then sprinkle your confetti.
-
Once you have your confetti where you want it cover it with parchment paper and apply heat for 10 seconds. Once it’s done peel back the parchment paper.
-
You may find that some of the confetti sticks to the parchment paper, that’s okay. Peel it back and throw away the parchment paper if any confetti stuck to it.
How to Apply HTV to Screen Print Confetti
-
Before you apply the HTV to your shirt adjust the time and temperature to whatever your HTV calls for.
-
Now you can just simply locate the HTV in place right over the top of the screen print confetti. Place a clean piece of parchment paper over the top and press according to the instructions for your HTV.
-
Allow the HTV to cool a little and then peel back the parchment paper and the carrier sheet for your HTV. I have found that it depends on which brand of HTV you use how much of the screen print confetti sticks to it. Some carrier sheets are just stickier than others.
-
Go ahead and peel back the carrier sheet and then one more time add another sheet of clean parchment paper over the top.
How to Finish a Screen Print Confetti Design
-
For this final press, I am going to press for the full time and temperature for the HTV again, essentially doing a second press.
-
I have found that after this last press if you allow the whole thing to cool for about 10 seconds before you peel back the parchment paper it should peel back cleanly.
-
If you’re still having some of the confetti stick to the parchment paper you can press it again one more time following the same steps.
-
Once the design has cooled I like to run my hand over the surface of the shirt to make sure everything feels like it’s stuck down really well.