This post and photos may contain Amazon or other affiliate links. If you purchase something through any link, I may receive a small commission at no extra charge to you. Any supplies used may be given to me free of charge, however, all projects and opinions are my own.
Making a Cricut reusable stencil is probably easier than you think and you can use it with Testors Craft Paint to make something amazing! Just wash the stencils once your project is complete and use them over and over again. This is a great way to save money by making your own custom stencils right at home.
This post is sponsored by Testors, however, all projects and opinions are my own.
These stencils are best for hard surfaces like wood. If you want to see how I stencil on fabric, try this post on freezer paper stenciling.
Cricut Reusable Stencil
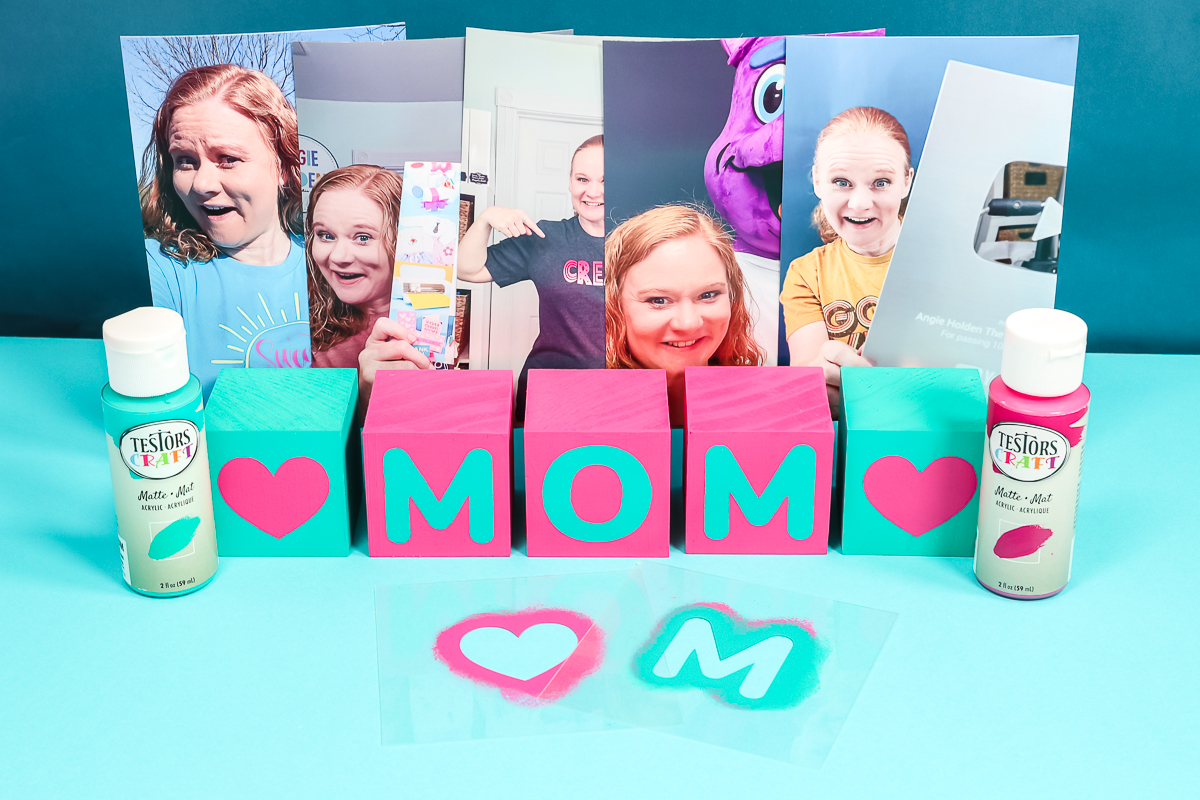
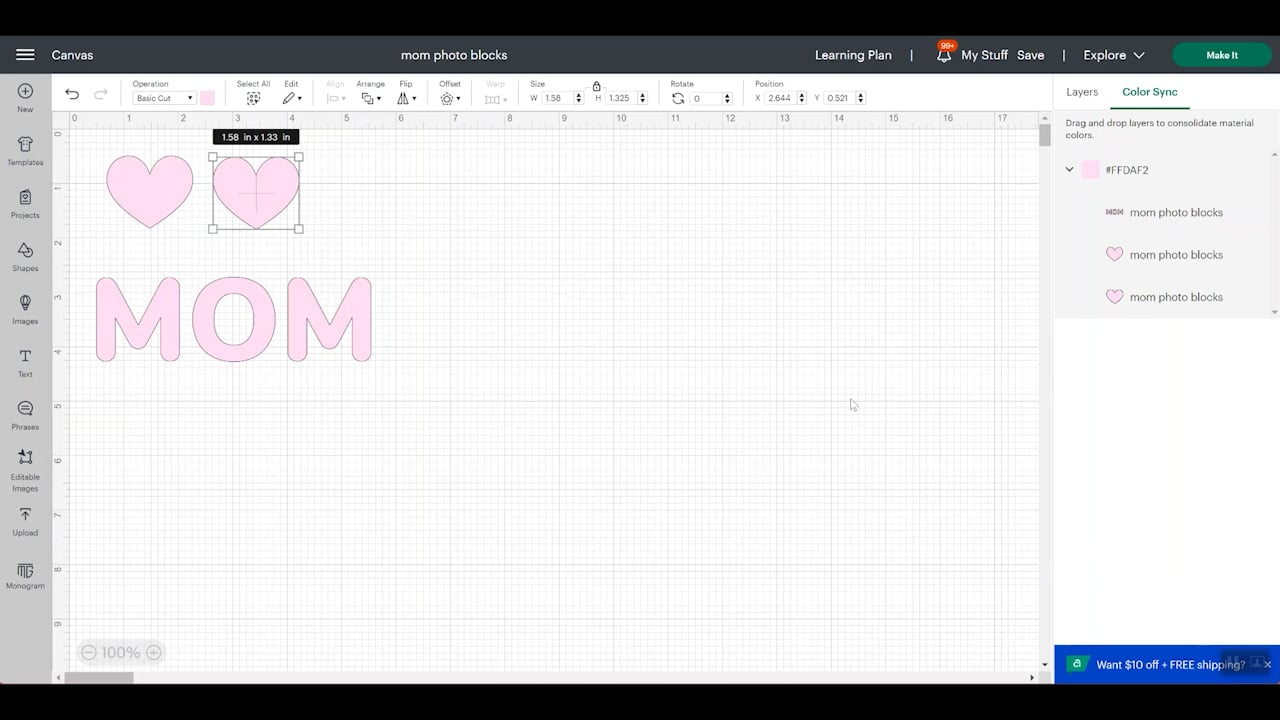
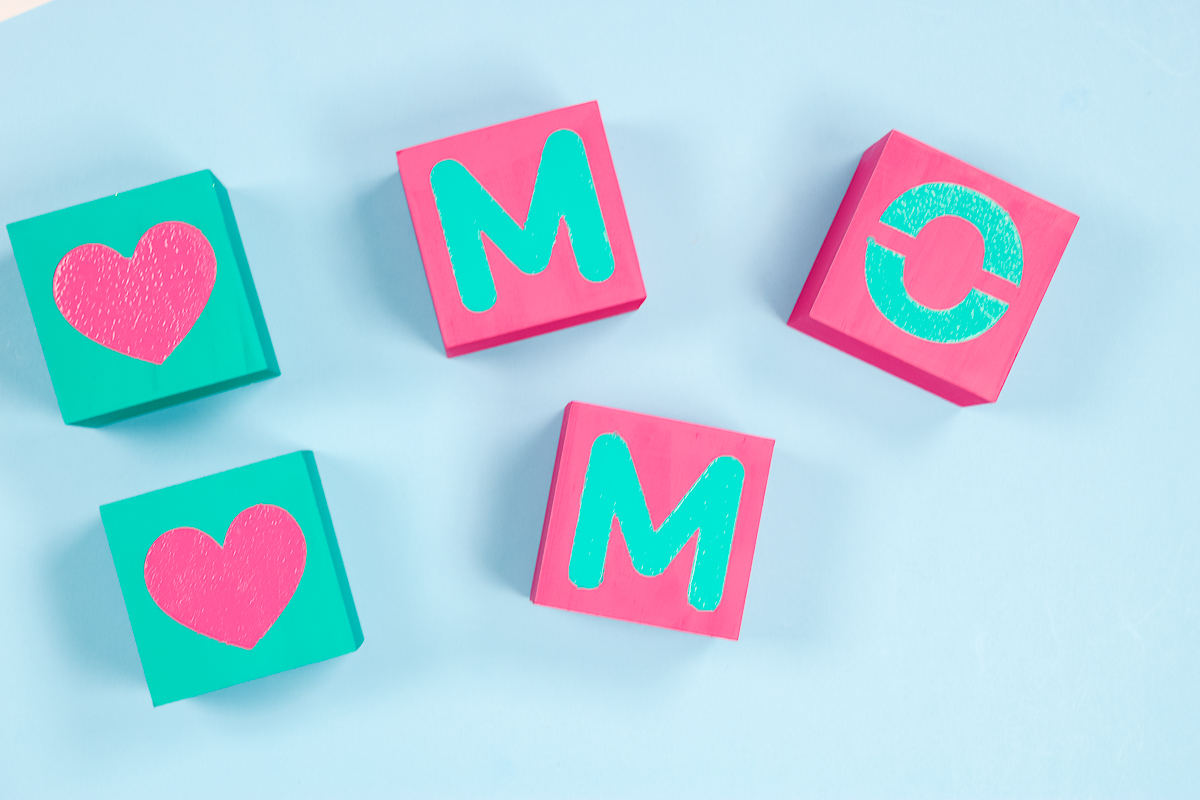
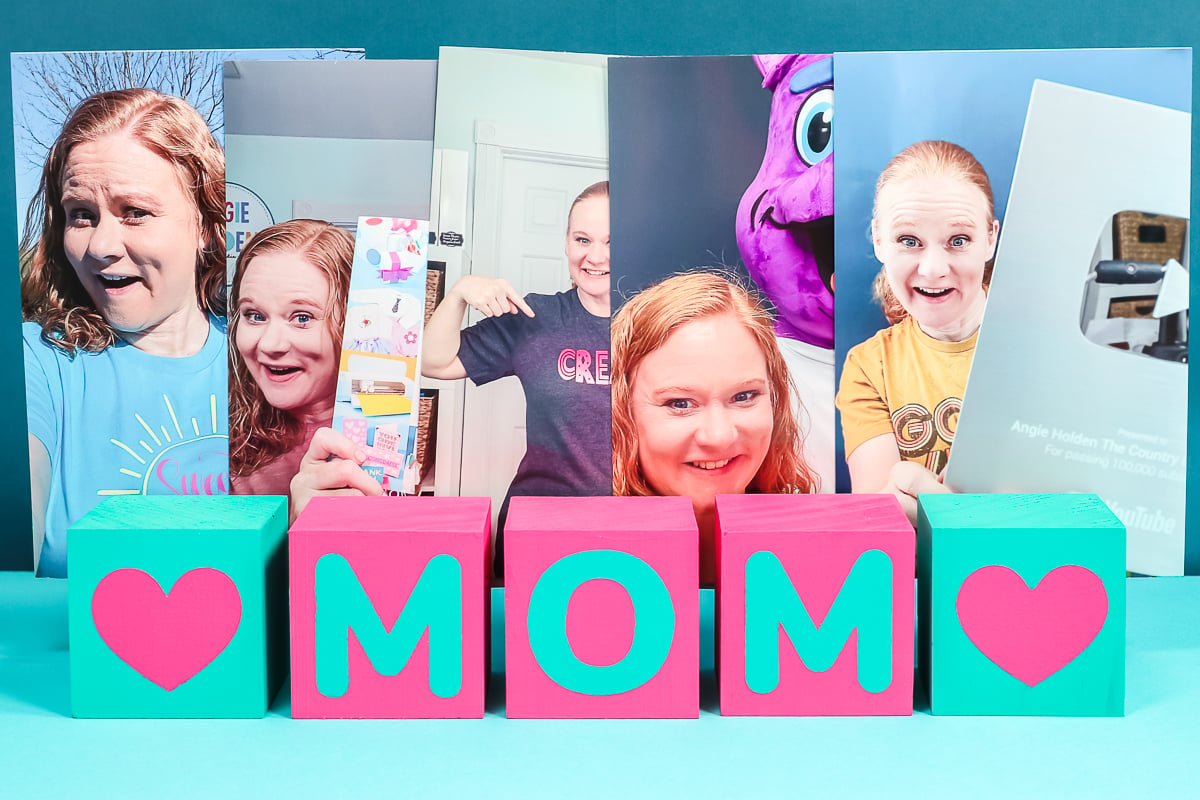
I am going to use the stencils I make to create some Mother’s Day photo blocks. You can use this method for any project large or small but I wanted to give a quick and easy example of a fun project in this post!
Want to watch me make reusable stencils with my Cricut machine and then use Testors paints to make something amazing? Just click play on the video below and I will walk you through the process.
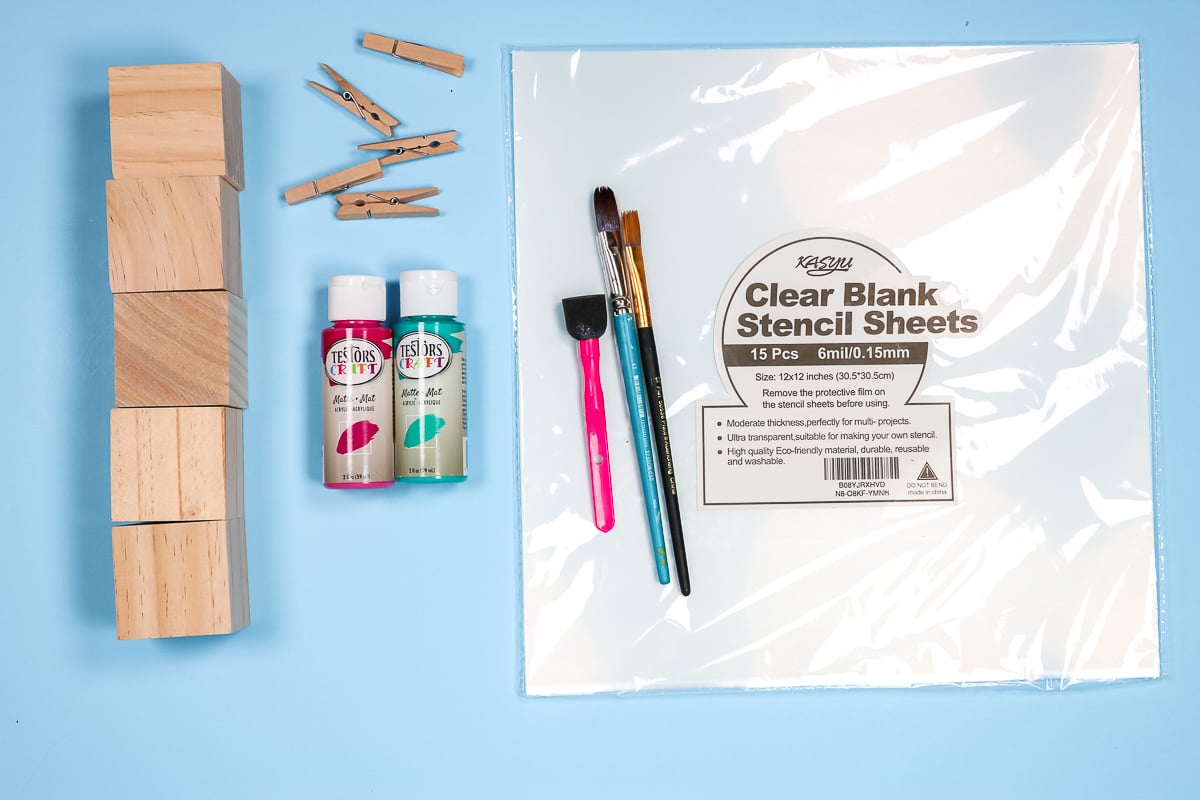
Supplies Needed to Make a Custom Stencil:
Designing Your Stencil
I will be walking through the steps for making the MOM stencils that I am using below. You can use these same steps to make a Cricut reusable stencil for any SVG file or even your own fonts.
Separating the Layers
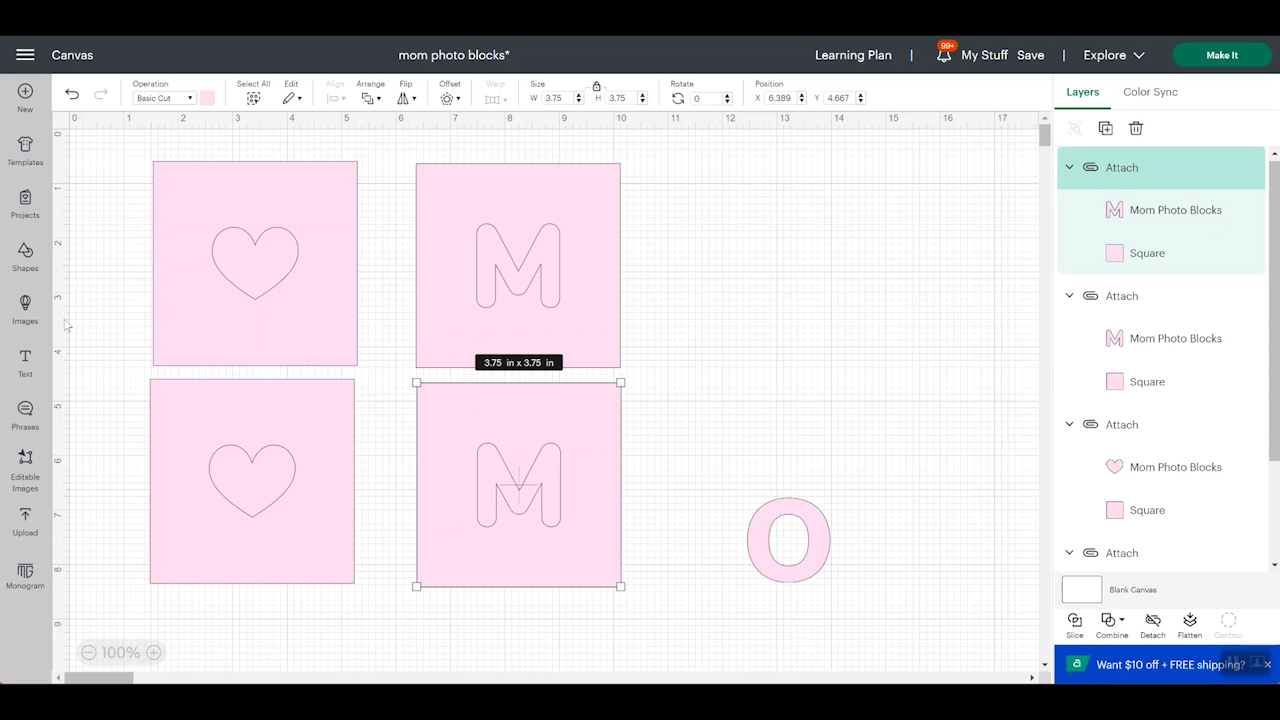
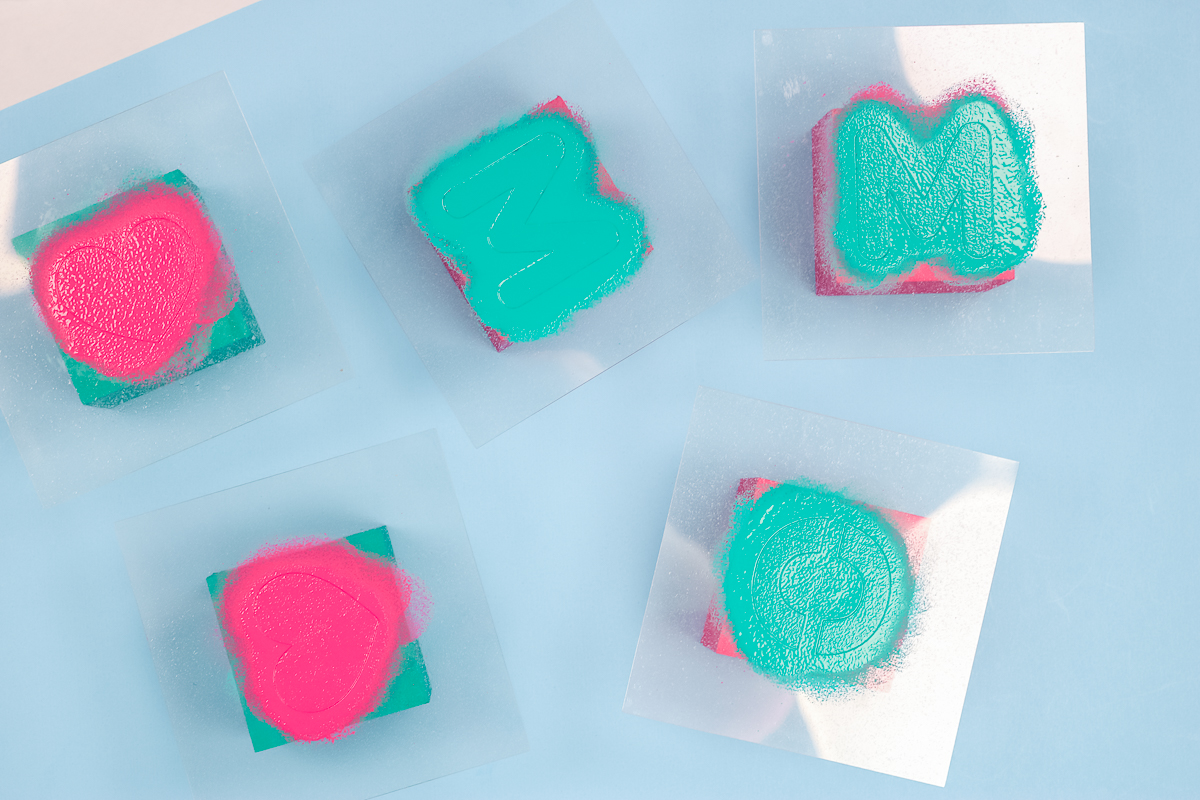
I want to make 5 different stencils so I can paint all of my blocks at one time. So, I need to separate the word “MOM” into three different layers. I duplicated the layer and then used the contour feature to remove unwanted cuts. You can see more about using contour here.
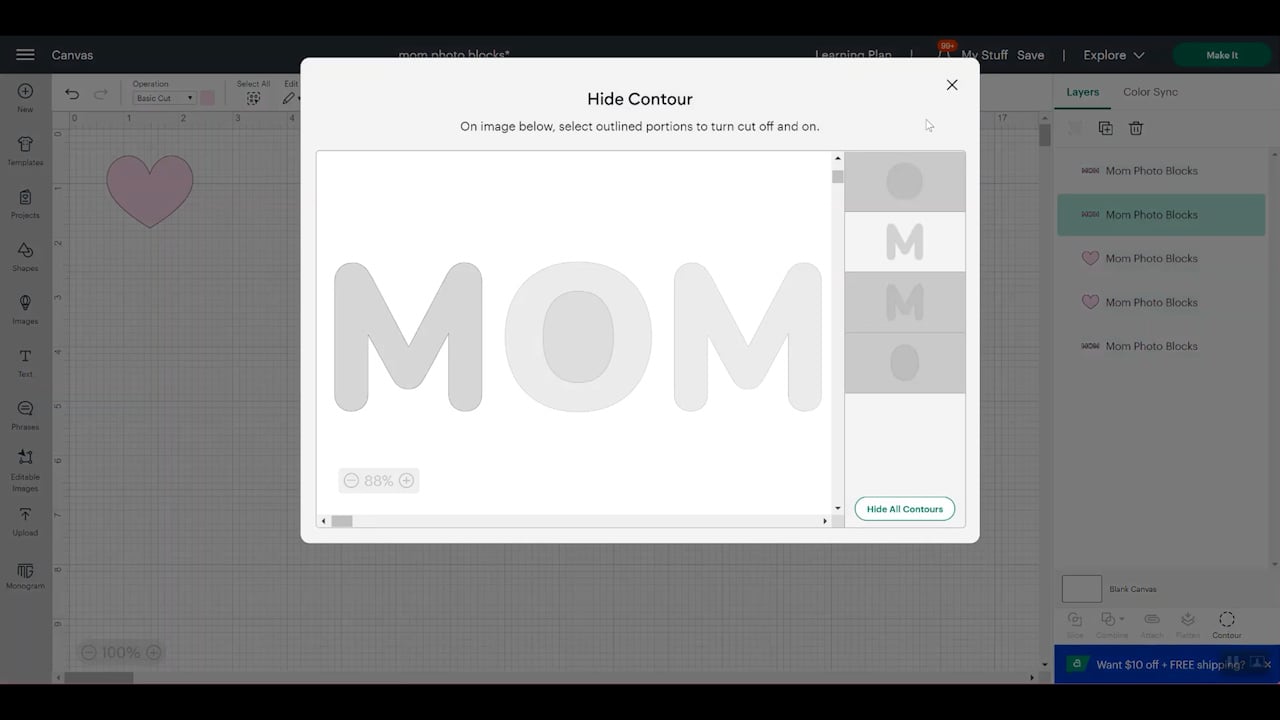
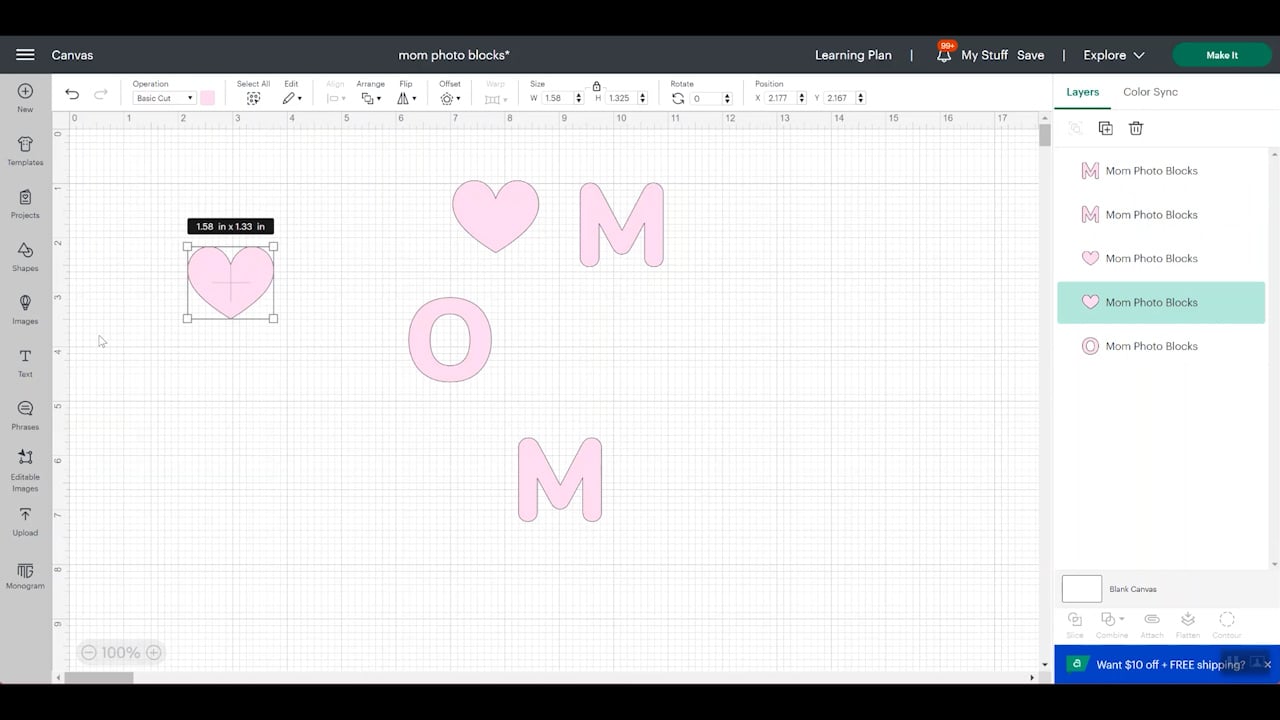
After that, I had five separate layers that I can then use them make my stencil.
Adding a Box to Make a Stencil
For each stencil you want to make, draw a square. My versions are 3.75 x 3.75 inches. Choose the object as well as the square and click align and then center.

Then click attach to cut the object out of the center of the square. You now have a stencil design that is ready to cut.
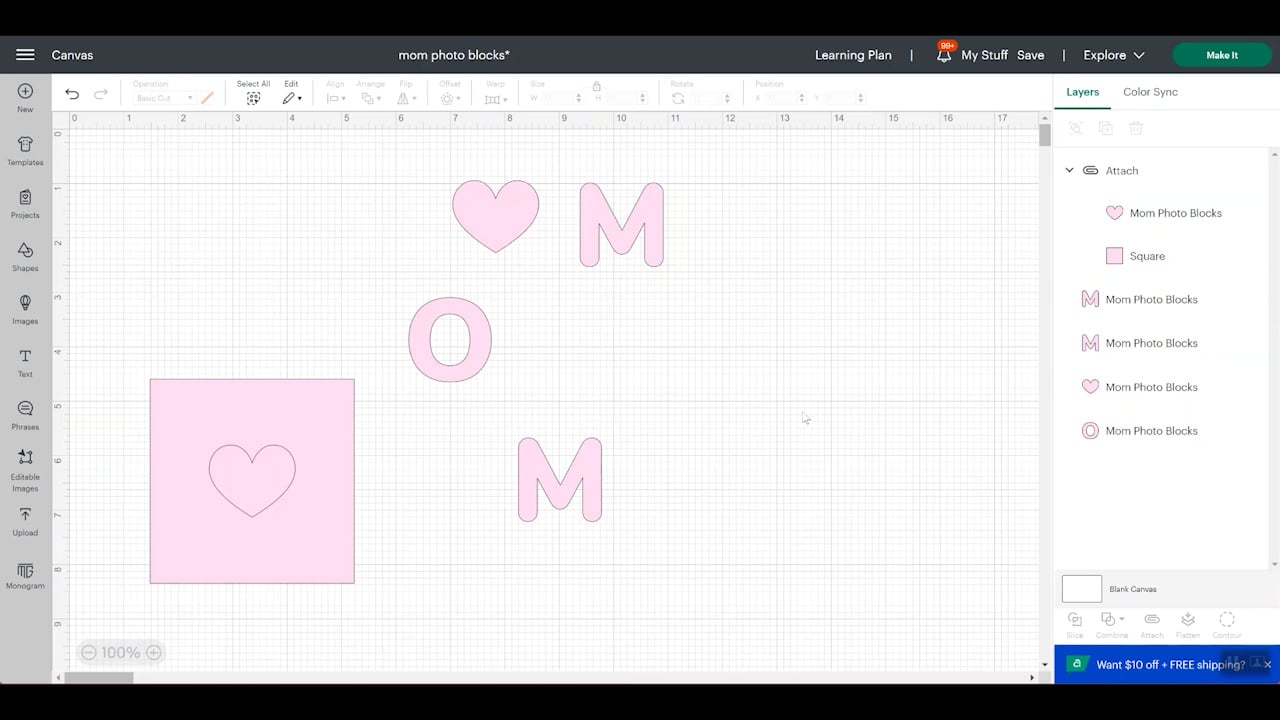
Repeat with all of your other objects to make individual stencils. Ensure that all of these are the same color so they will cut out of the same sheet of material.
NOTE: I am making each letter/object a stencil so I can paint all of my blocks at one time. Since they are reusable, you really only need one of the hearts and “M” stencils in this case.
Adding Bridges to Stencils
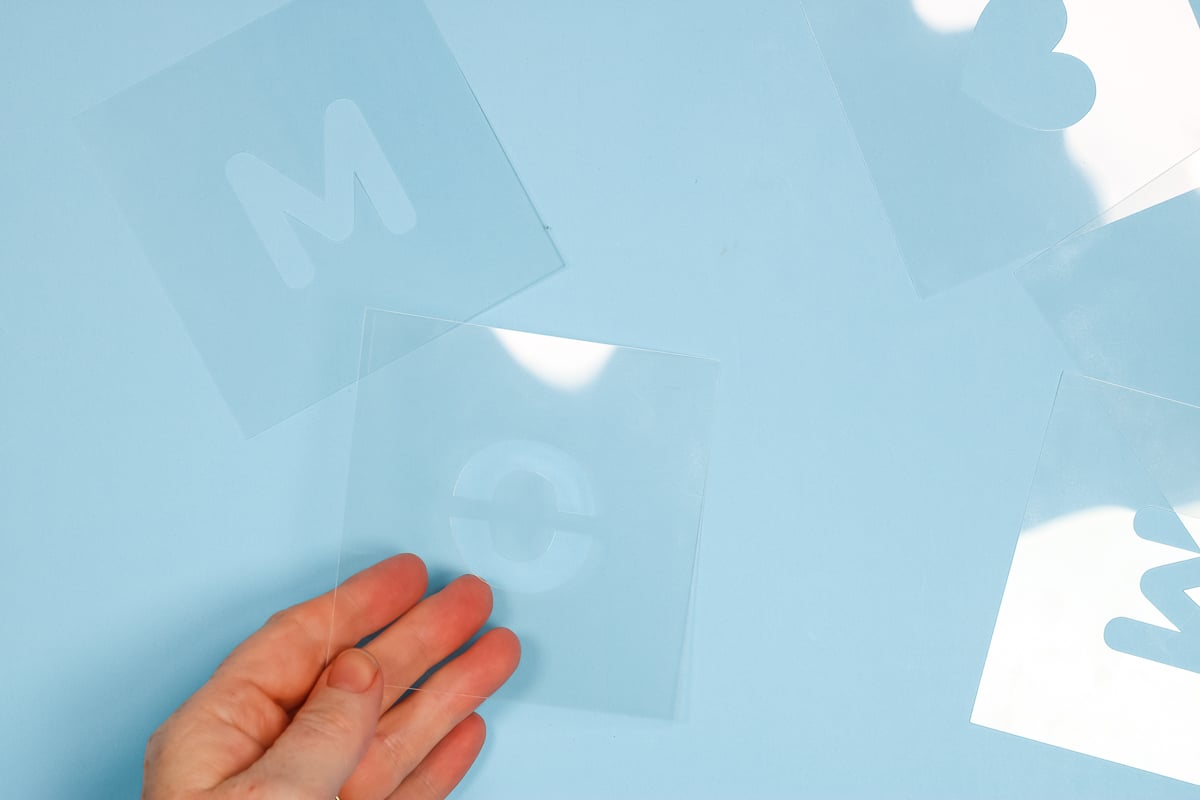
If you have center pieces in your design, you will need to add bridges so that those center pieces come with your stencil and stay in place. My example here is the “O” in MOM. We would need the center of that “O” in the stencil.
To do that, adding a bridge is the easiest way. To do that in Cricut Design Space, add a long and skinny square and locate it in the center of your “O”.
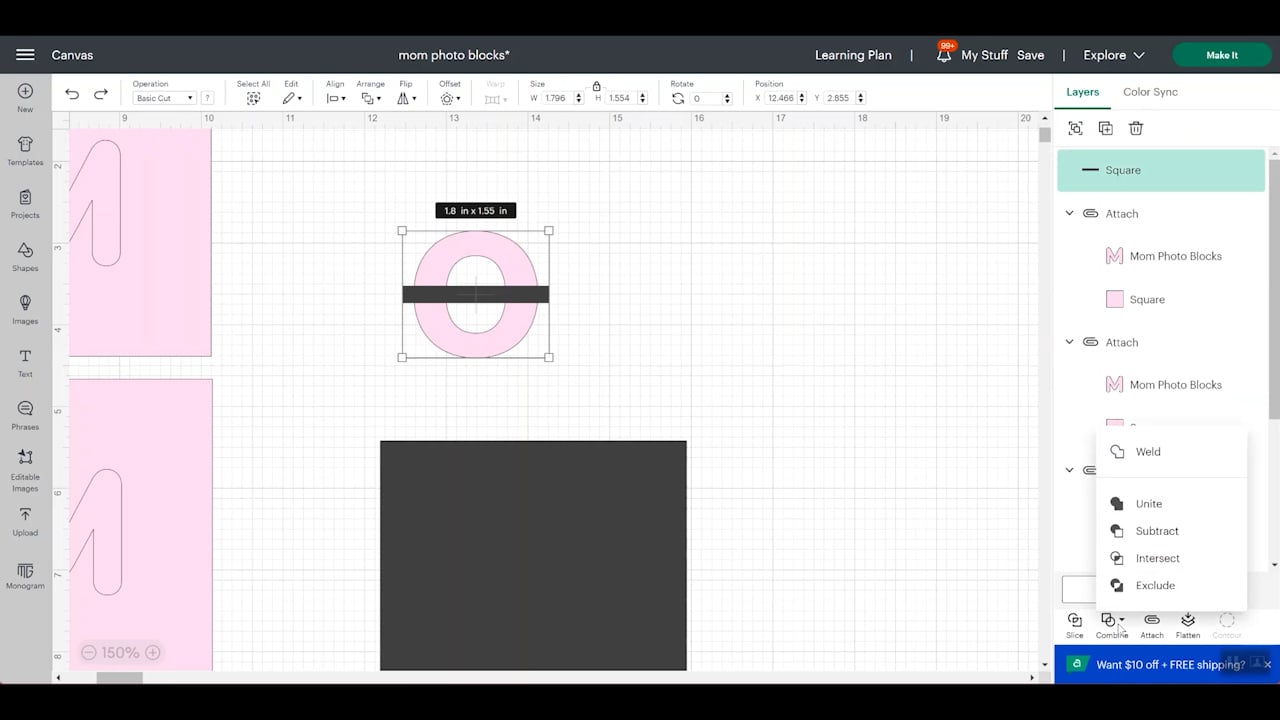
Then pick both the square and the O and choose “combine” and then “subtract”. As long as the square is in the front of the O, Design Space will remove those areas that overlap from the bottom layer. That makes bridges in the design that will hold the center of the O in place.
See more about the new combine menu in Cricut Design Space!
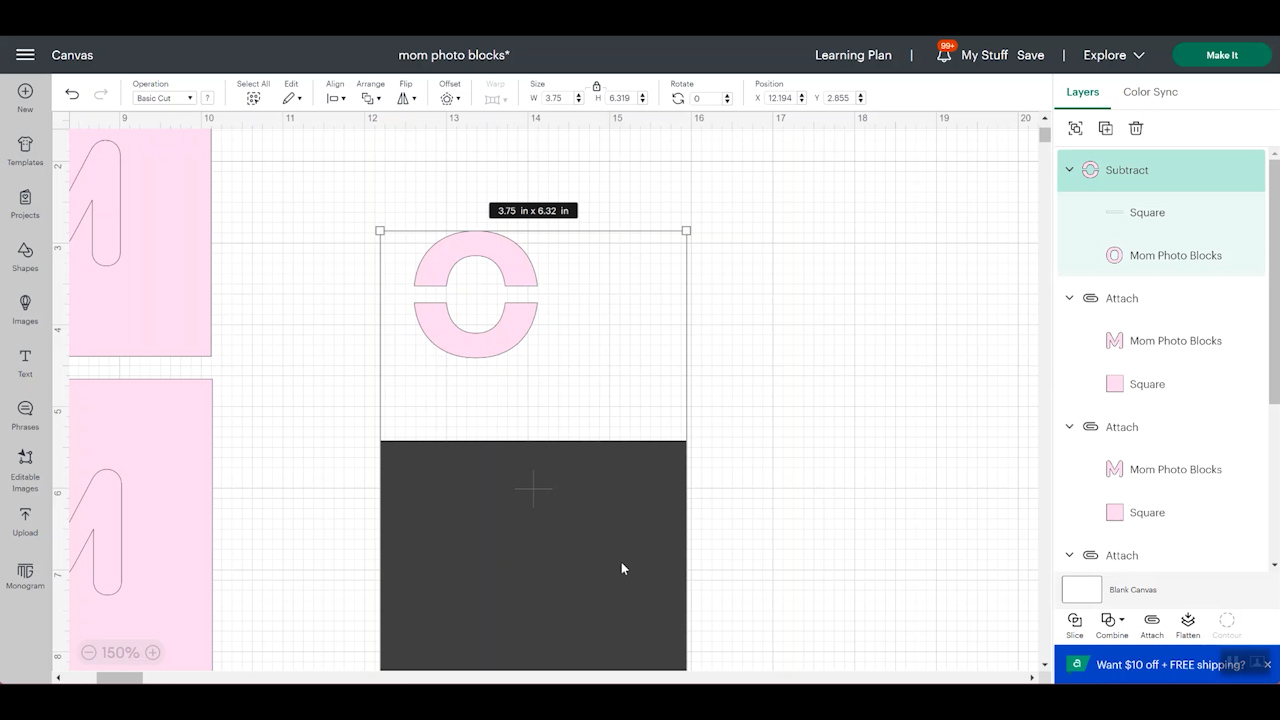
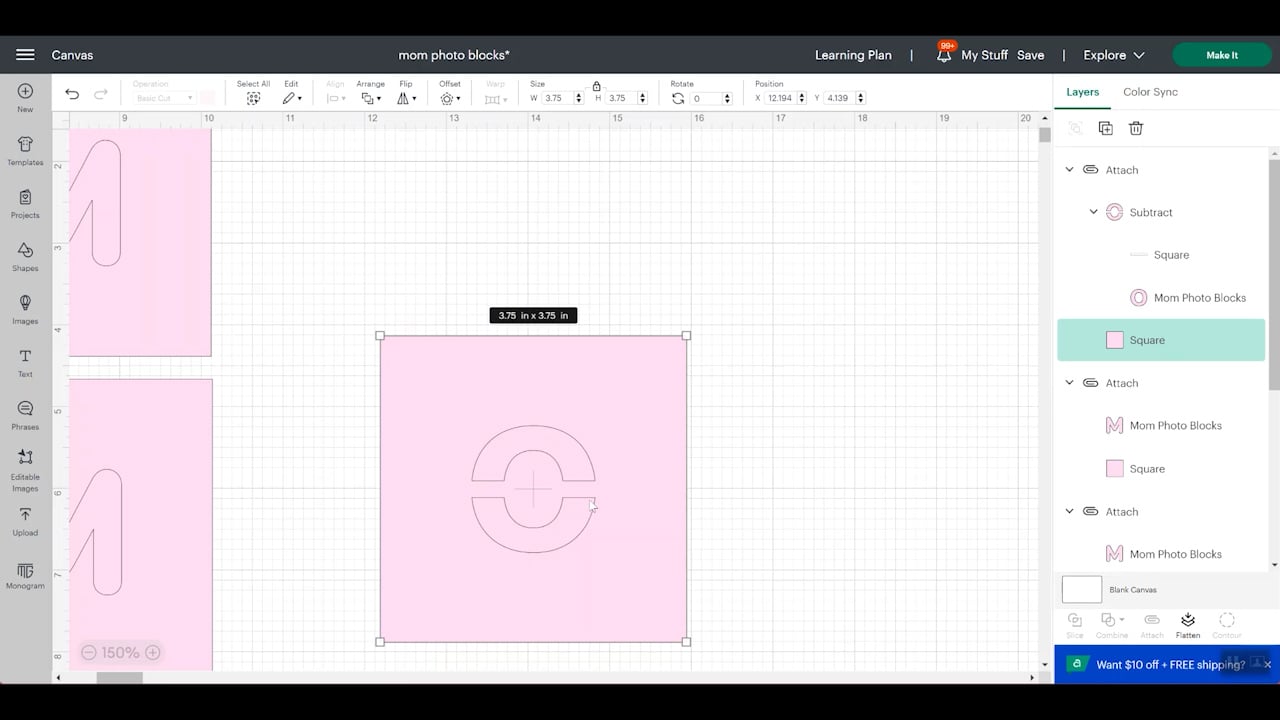
Then pick the pieces of the “O” you have remaining and the square you made to create the stencil and align those in the center as you did before. Click attach as before and you have a completed stencil but this time the center of the O will remain in place thanks to the bridges that we just added.
Design Considerations
There are a few things to consider when picking a design for a Cricut reusable stencil.
- Your design size is important as anything too intricate will be difficult to make into a custom stencil like this. You would have way too many bridges and probably not be able to get the entire thing correct. Those intricate designs may be better off with a vinyl stencil as shown here.
- You want the bridges you add to be the smallest size possible, however, you also need them to be sturdy enough to hold your pieces in place. You can play with the size of the bridges but keep in mind that you can make them too thick or too thin.
- They do make fonts specifically made for stenciling. These fonts already have bridges and will save you some steps on your design. You can choose one of those instead of a regular font if you wish.
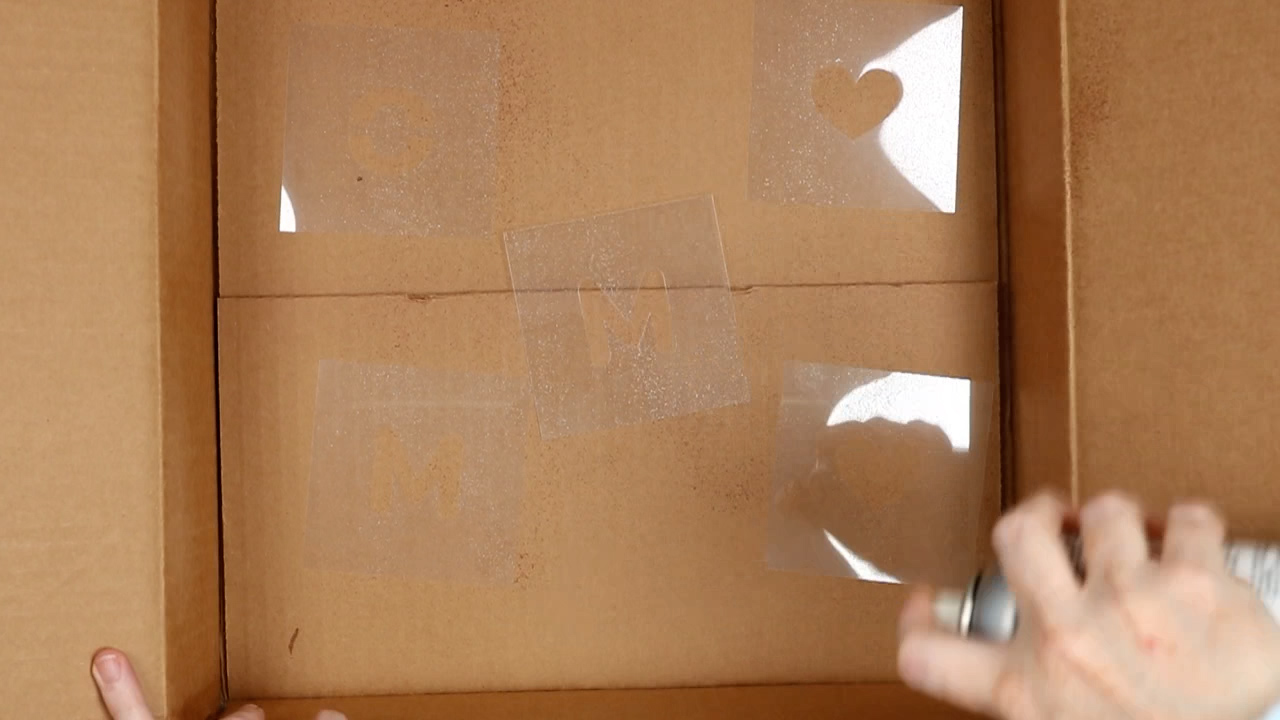
Cutting a Reusable Stencil on a Cricut Machine
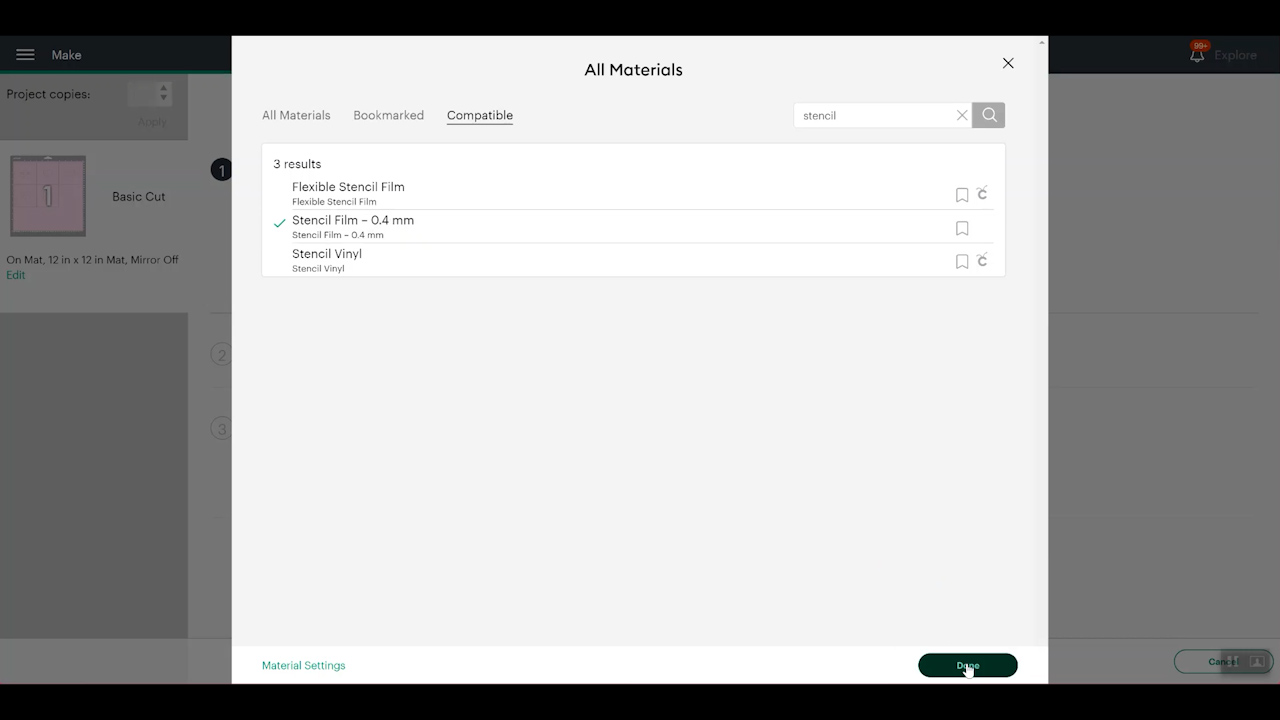
Now that you have a design in Cricut Design Space, it is time to cut it out! Click “make it” in Cricut Design Space. Then click continue. You will then need to pick a material.
Material Cut Settings
The stencil materials available in Design Space include Flexible Stencil Film, Stencil Vinyl, and Stencil Film 0.4 mm. The first two are for Cricut vinyl products and will not work for the material we are using here. I like to choose the Stencil Film setting, however, the number of passes may vary depending on the brand of stencil film you are using.
NOTE: To see this menu on a Cricut Explore Air 2, you will have to turn your dial to custom.
Adding to the Mat
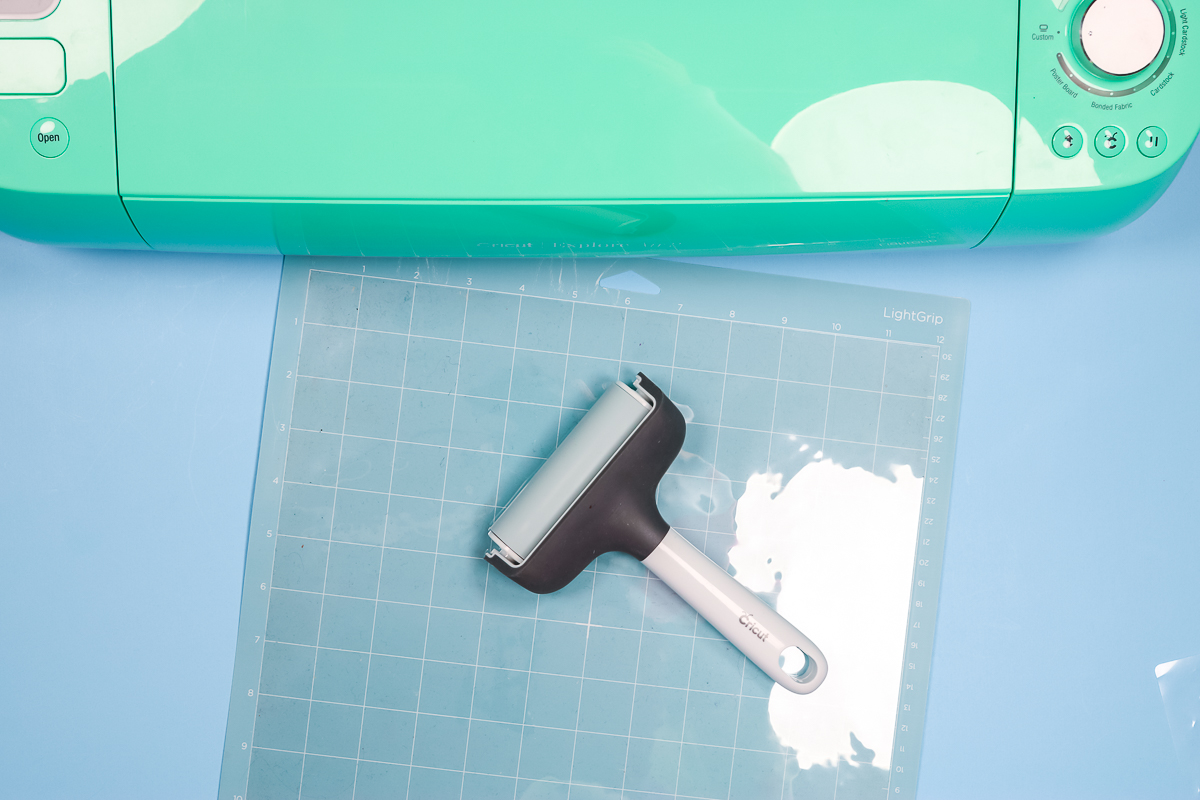
On the material I use, there is a protective sheet on both sides. I peel those both back before cutting.
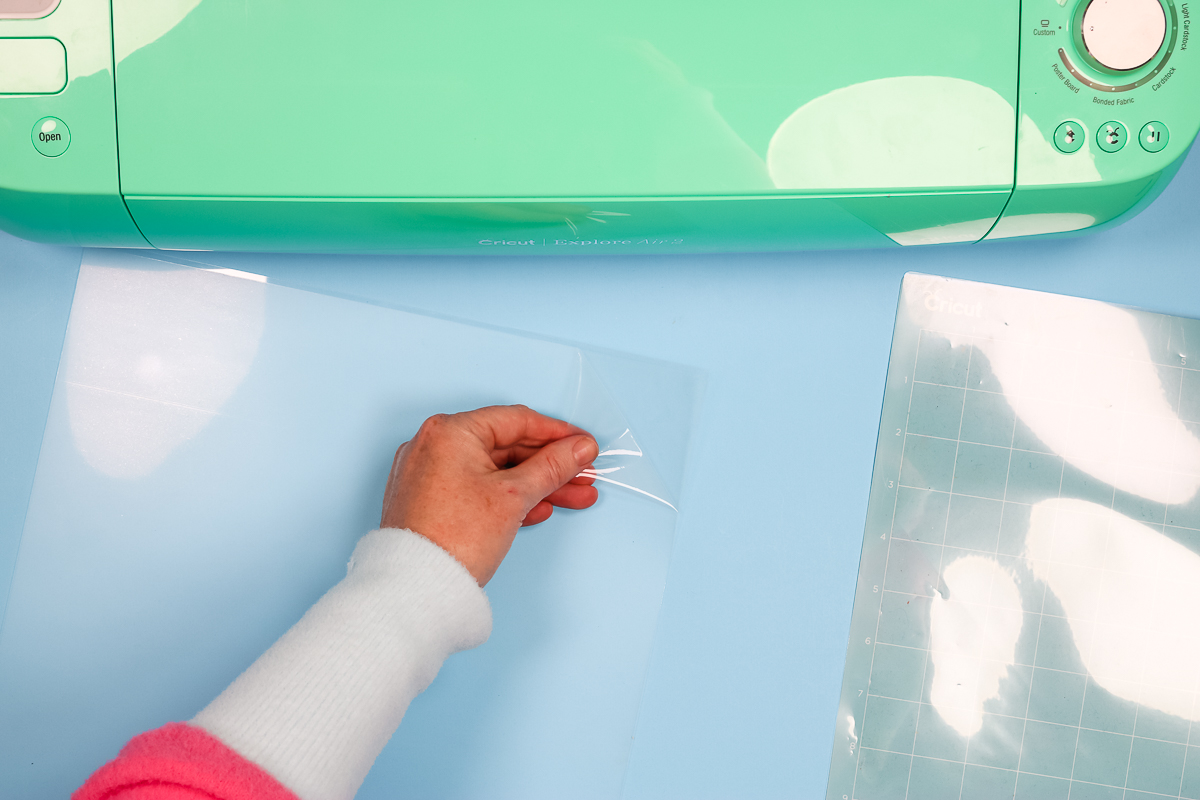
Then add the material to a Light Grip Cricut mat. Use the brayer to press it down really well on the mat.
Cutting a Cricut Reusable Stencil
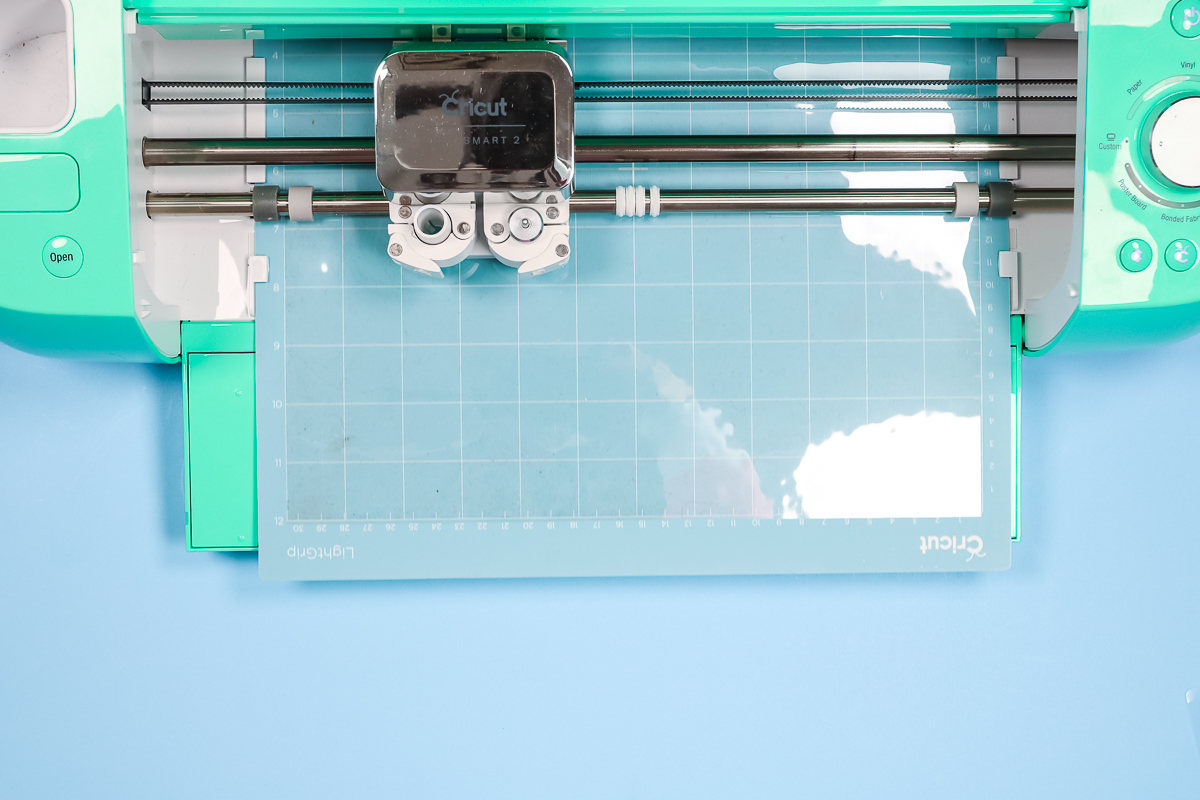
Load the mat into your Cricut and press go to cut. The machine will go over the area and make your cuts.
Since every brand of this material seems to be different, checking your cuts BEFORE unloading the mat is important. DO NOT UNLOAD THE MAT!
Pick up the corner of your material and see if the material is cut all the way through. If it is not, press the “go” button on the machine again to go over the material with another pass. If it is cut through, press the arrow button to unload.
The material I am using I did need to use two passes to get a cut I was happy with. I find that every brand of this material is a bit different so testing to be is the best option.
Removing the Stencil from the Mat
This material is sturdy, however, you could potentially rip it. I recommend flipping the mat over and slowly removing it from the back of your stencils.

You may need to remove some of the inside pieces as well. Sometimes they get stuck inside of the stencil but they should be easy to just push out with your fingers.
How to Use a Stencil with Testors Craft Paints
Now that you have your stencils, it is time to put them to work making a project. Again, the steps below are for my photo blocks but you can use your Cricut reusable stencil in the same way on the project of your choice.
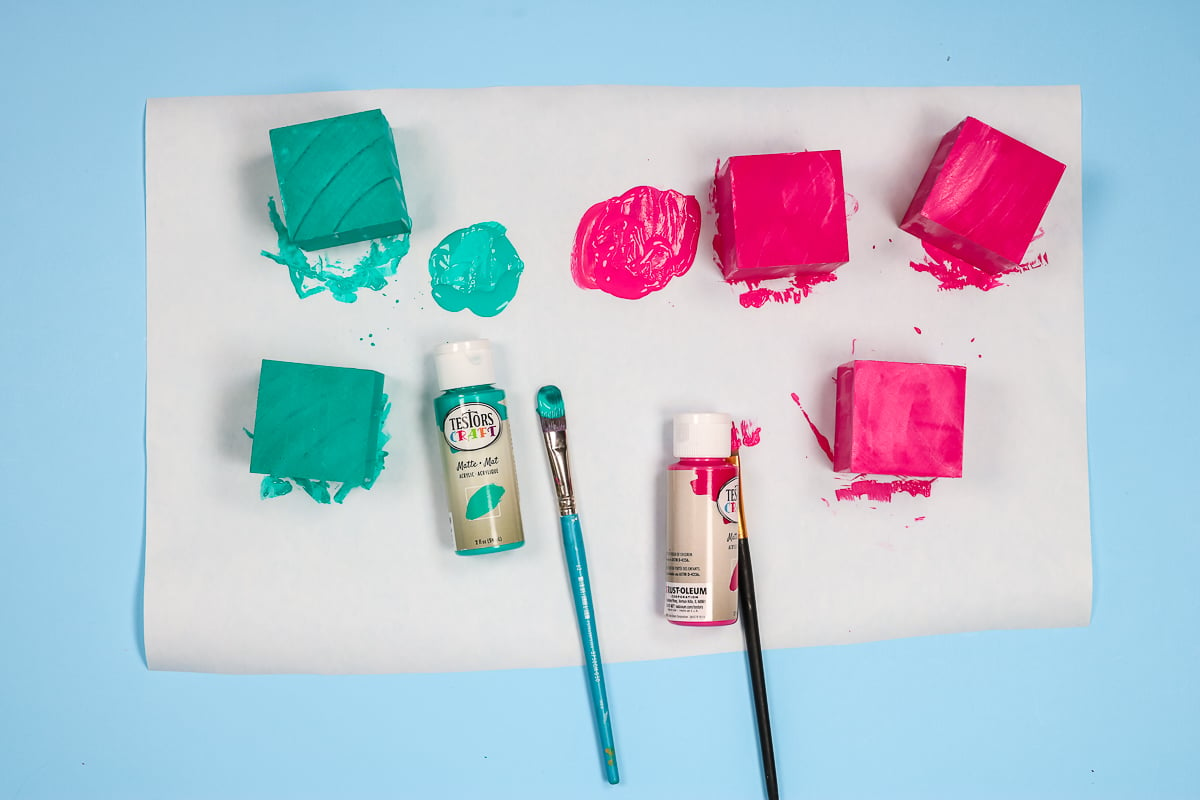
Painting Wood Blocks with Testors Craft Paints
Paint the entire surface of your wood blocks with 1 – 2 coats of Testors Craft Paints before stenciling. You will also want to wait a minimum of 24 hours before using the stencil on these blocks after painting.
I like to coat all sides to give more of a finished appearance. With the wide variety of colors available in Testors Craft Paints, you can choose whatever colors work for your project. I happen to love the Fuchsia and Turquoise.
Adding the Stencil
I like to use a stencil adhesive to add this type of stencil to my surface. Spray the back of the stencil with a light coat of the adhesive and allow it to dry.
Painting Using a Stencil
The adhesive should be sticky but not wet. Apply the stencil to your surface and press down well. Then apply a light coat of your base coat color to the stencil. These two steps will help to prevent your paint from bleeding under the stencil.
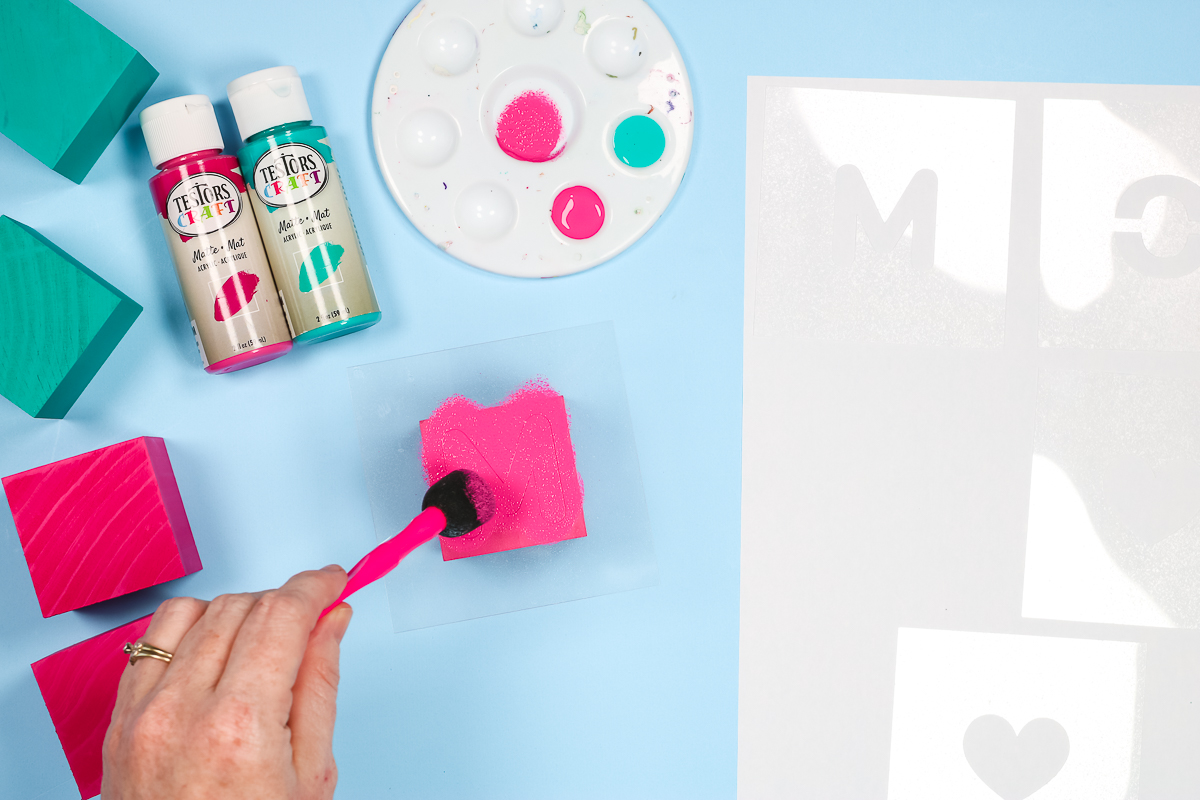
Once that coat dries, start adding light coats of paint to the stencil in any color you desire. I am using a pouncer brush with very little paint on it. Go over the stencil openings working from the outside in.
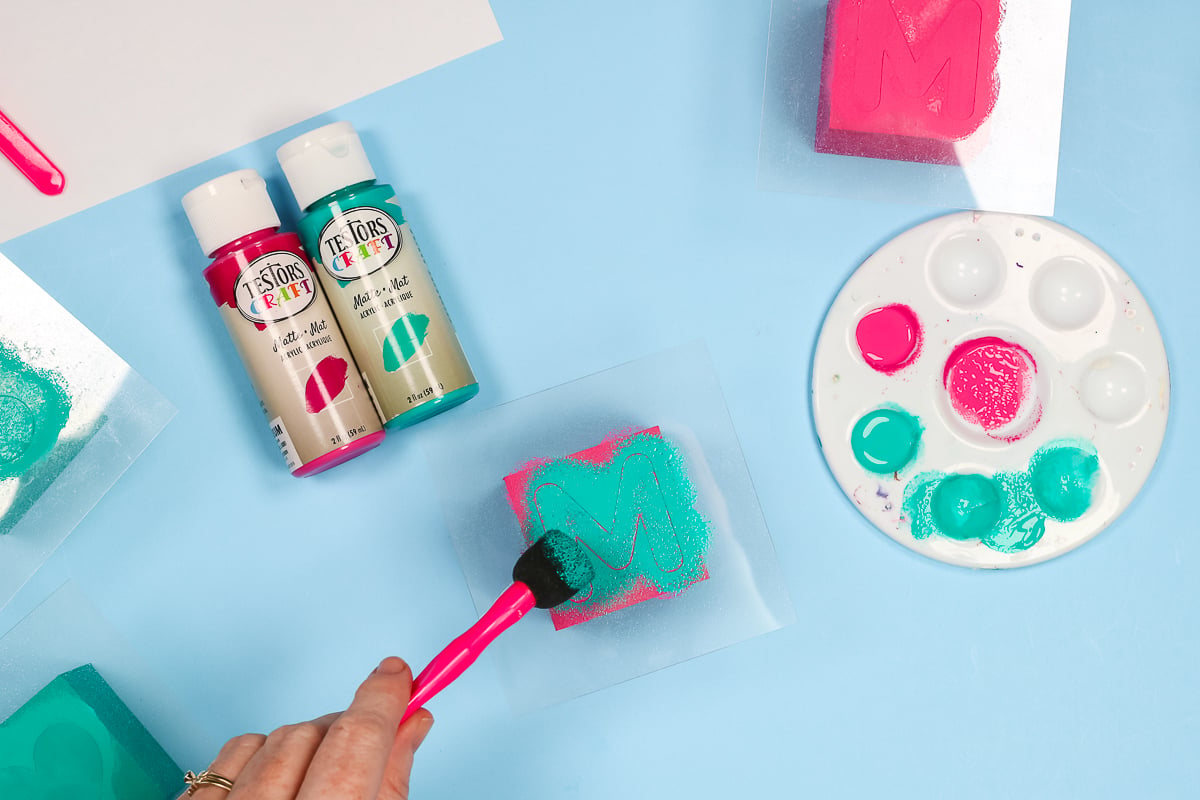
Repeat until you get the coverage you desire. I used 4 – 5 light coats to get the best results. Allow to dry.
Remove the stencil by just peeling it back.
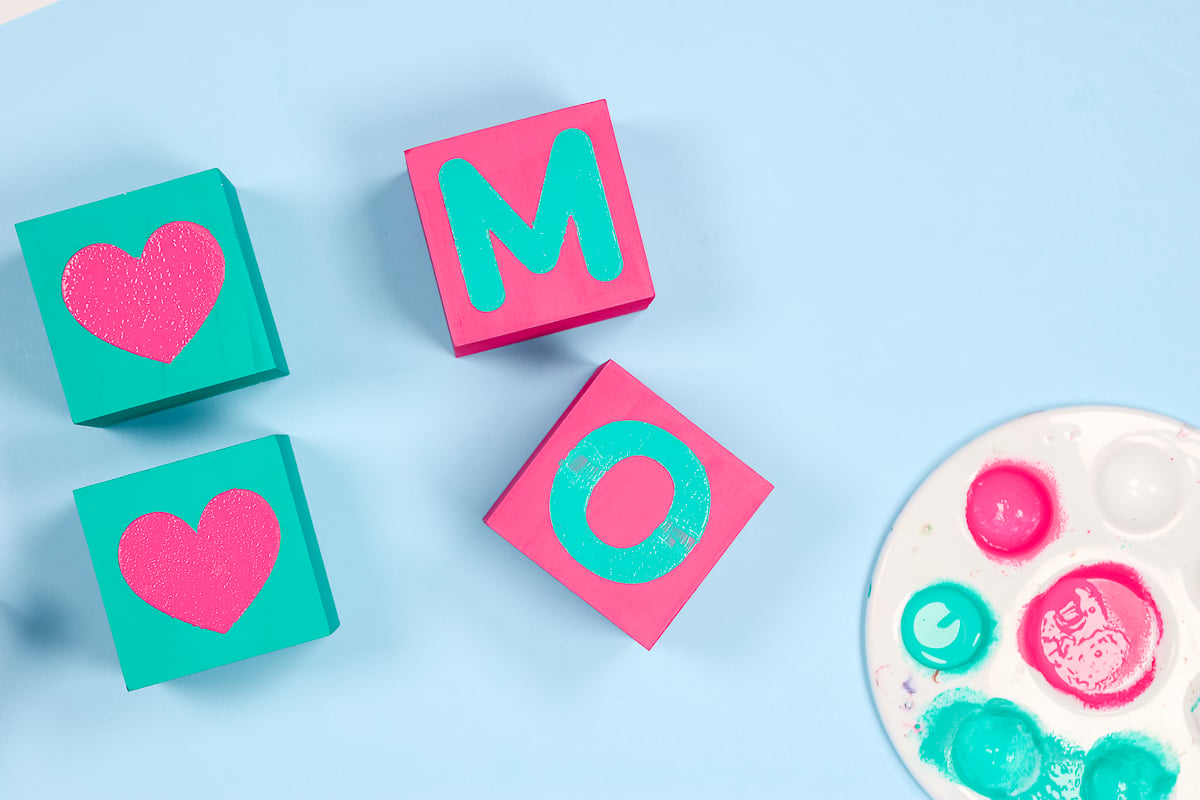
Touch Ups and Fixing Bridges
If you have any areas where the paint bled under the Cricut reusable stencil, you will need to use a small paintbrush to touch those up. Just paint over the areas until you get a perfect-looking project. I had very few areas to touch up but there were a few.
You will also want to use a brush to fix the bridges in your design. Just paint over those with the craft paint. Again use light coats and paint over the area several times.
Finishing Your Project
Allow your blocks to dry completely. I generally do not add a finishing sealer for indoor projects like this one. If you are using outdoors or where the project will see a lot of wear, consider adding a spray sealer over there.
Also, I love the matte finish of the Testors Craft Paint. If you do not, you can also add a sealer in a gloss or satin finish to change the look of this project.
Finally, if you are making the photo blocks, I used hot glue to attach a clothespin to the back of each one.
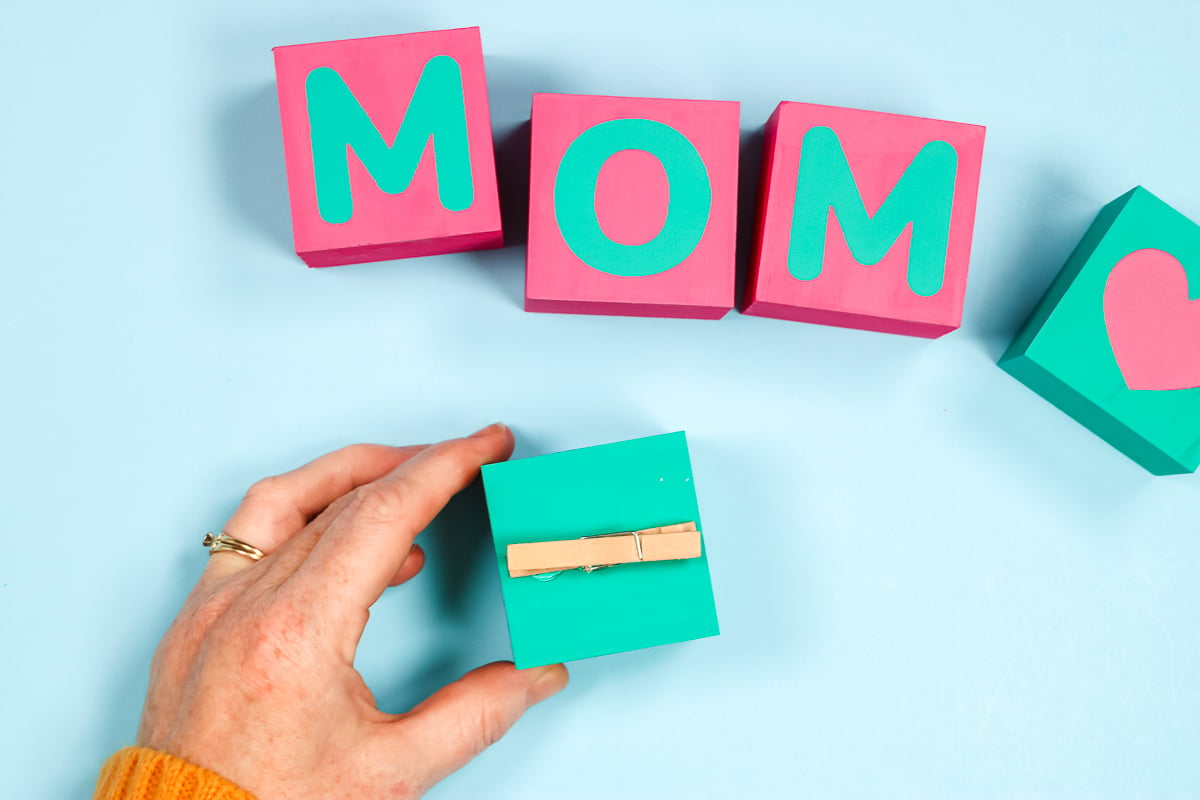
Then I added my photos to the clips. You could also cut a slit in the top of each block with a saw or drill a hole for a wire to make a photo holder as well.

Cleaning and Storing Reusable Stencils
You will want to clean the stencils after use to get the most life out of them then store them properly. Here are a few tips and tricks:
- Clean the paint off of the front with a household cleaner and a scrub sponge.
- Clean the adhesive from the back of the stencil with a product like Goo Gone.
- Then dry your stencils completely.
- Store where they will not get bent or damaged. File folders are an option or any flat plastic container.
- For something like this project, you may want to use clips to hold the stencils for one project together so you can easily find them later.
More Paint Project Ideas
Now that you know how to make a Cricut reusable stencil, you can use it to make cute photo blocks like these to give as a gift. Or you can use the same idea for your other paint project ideas. Custom stencils are a great way to get the most out of your Cricut machine.
You can also use your Testors Craft Paints to make these other great projects as well! I know you will find ideas that you will love creating!
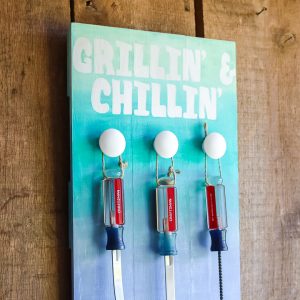
Make this DIY grill storage with just a few supplies and some simple steps!
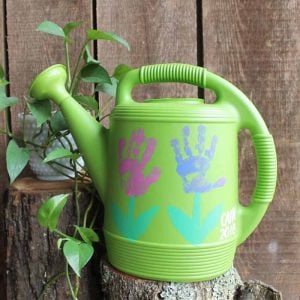
Add handprint flowers to a watering can and make the perfect Mother’s Day gift idea. This one would actually be perfect for anyone that loves gardening. Grab a few supplies and the hand of your infant or toddler to make a cute gift that they will treasure forever. This post is sponsored by Testors however all projects and opinions are my own.
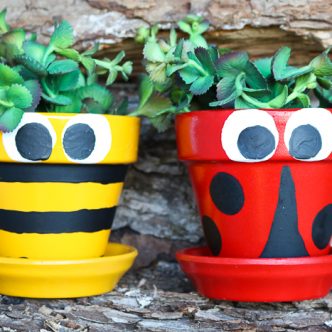
Make your pot planters beautiful with this ladybug design! This upcycled flower pot doesn’t get much easier than this! Testors Crafternoons has excellent paint options for all of your flower pot decorating ideas.This adorable decoration will brighten up your outdoor space and have you ready for spring in no time.
So grab some paints and get started creating! Paint is one of my favorite ways to craft with my Cricut machine and without. Testors Craft Paints make that easy and I love the color choices that they offer.