This post and photos may contain Amazon or other affiliate links. If you purchase something through any link, I may receive a small commission at no extra charge to you. Any supplies used may be given to me free of charge, however, all projects and opinions are my own.
Have you ever wanted to make customized pens to take to an event or to give as a gift? Today I’m going to teach you how to make customized pens with sublimation.
This is such a fun project that makes a great gift. This is also a perfect project for small business owners. Having your own branded items for trade shows, to send as gifts, or even to use yourself is a great way to get your brand out for people to see.
I’ll be using specialty pens that have a sublimation coating for this project. If you’re new to sublimation, check out my beginner’s guide to learn all you need to know.
Customized Pens with Sublimation
Making these customized pens using sublimation is a pretty simple process. Because the project is small I did run into some difficulties that I want to share with you so you can get it right the first time.
With this pen blank, you actually take the pen apart, add your sublimation print, and then with shrink wrap added you’ll sublimate them in a sublimation oven.
I would recommend you watch the video to see the whole process to help you have success the first time. Click play on the video below for the full tutorial.
Supplies Used to Make Customized Pens with Sublimation
For these sublimation pens, I’m using these sublimation watercolor floral patterns. They’re included free at the link above.
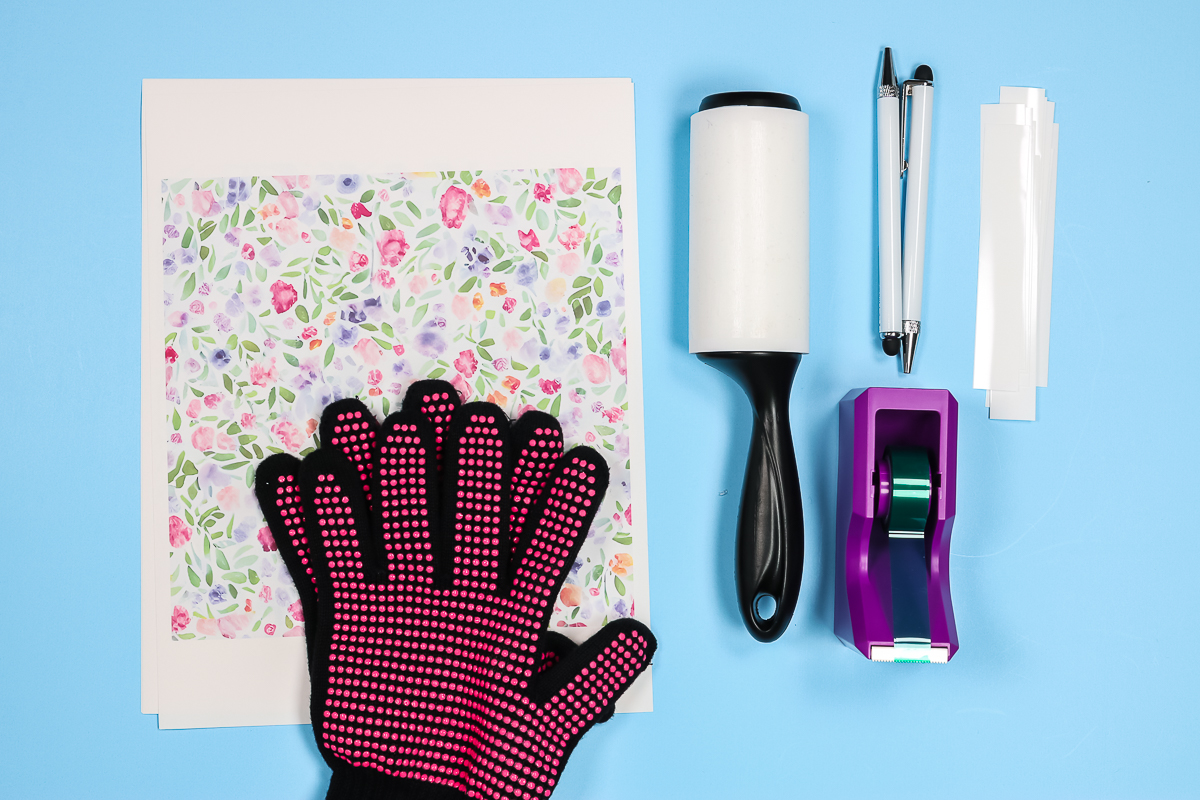
The great thing about this sublimation pen blank is that it comes with the shrink wrap you need to apply the sublimation before adding them to the oven. So you don’t need to purchase those separately.
Also, as a reminder – a sublimation print is sublimation ink printed on sublimation paper out of a sublimation printer.
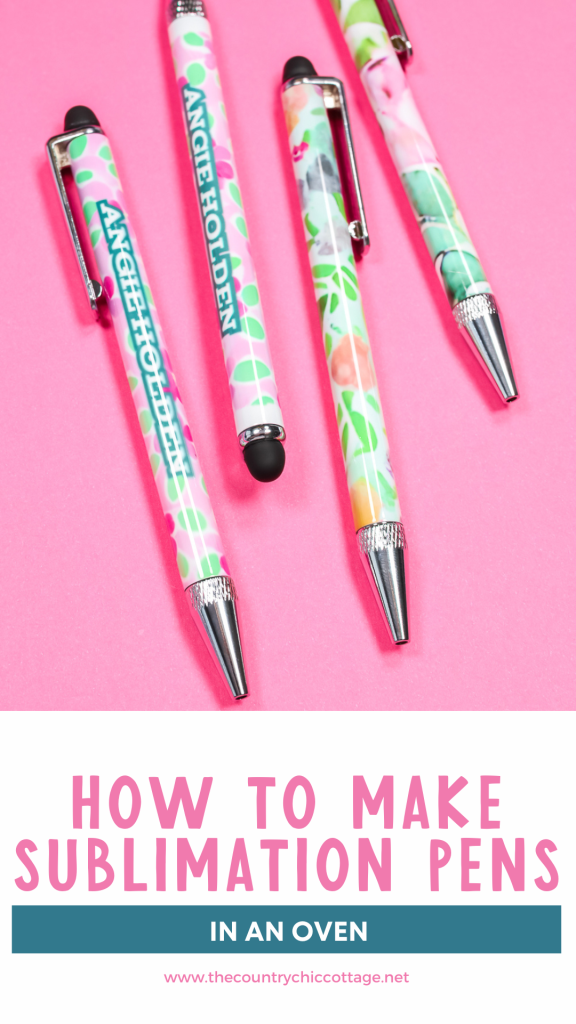
How to Make Sublimation Pens
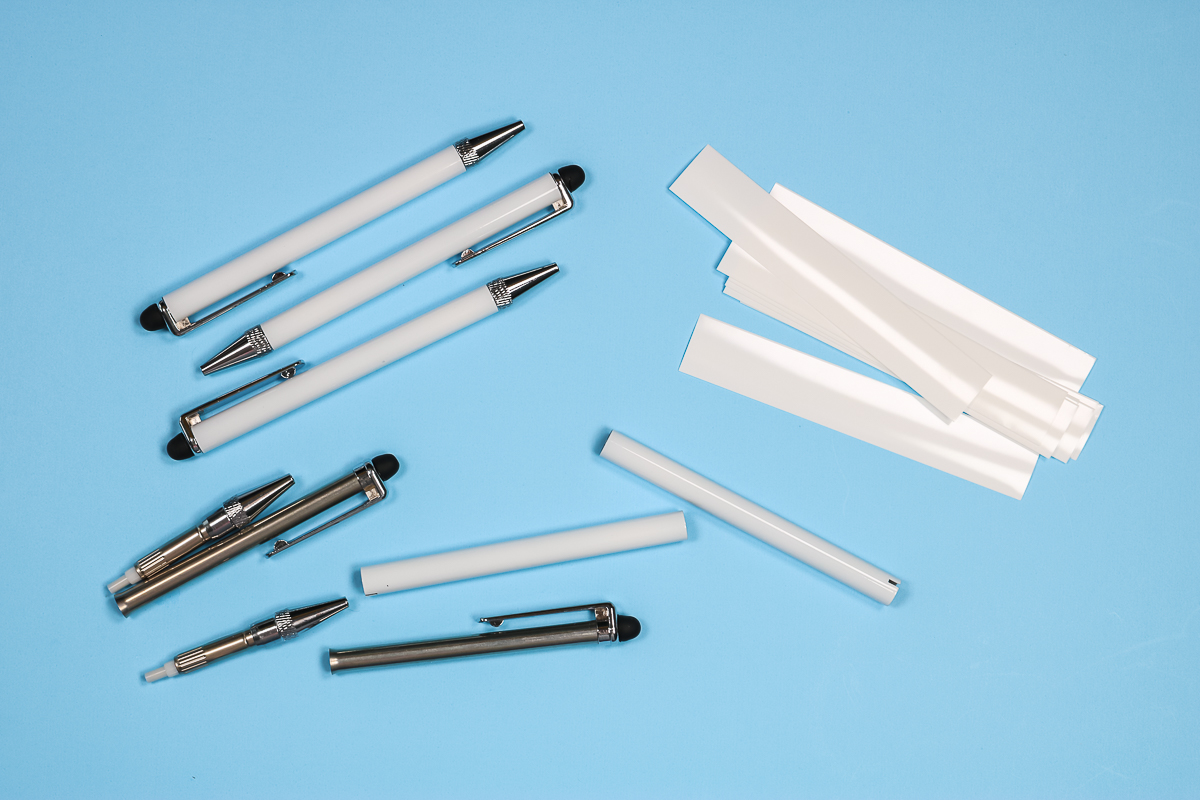
The pens I am using came in a kit. Included were 5 pens and 10 shrink wraps. The pens come completely assembled so we will need to take them apart.
These pens are a sublimation blank. The white portion has a coating on it that allows the sublimation print to bond to it.
Taking Apart Sublimation Pens
These pens are not the easiest to take apart. The pen opens and closes by twisting the bottom of the pen. To remove that portion, I closed the pen all the way, and then while twisting it closed, I pulled the bottom portion out of the barrel.
You actually need to use a little force to get that portion of the pen out. I was afraid I was using too much pressure but that is how it comes apart.
With the bottom portion removed, the top comes off easily. We’ll only be sublimating on the white barrel of the pen. Everything else needs to be removed.
How to Add Sublimation Prints to Pen Barrel
I printed a full-page floral sublimation print. I used a paper cutter to trim it close to the size of my pen.
For this specific pen, the length is just over 4 inches so I cut my length to 4.25 inches. To wrap all the way around the pen barrel with a little overlap, I cut the size to 1 3/8 inches.
NOTE: Because these floral prints do not repeat there will be a seam where the edges come together.
To get away from that seam I tried a couple of different options. The first option was to rip the paper along the long side. With the paper ripped, they don’t meet exactly so there will be a white area that is kind of jagged. I thought it would be a cool effect.
How to Personalize Floral Sublimation Prints
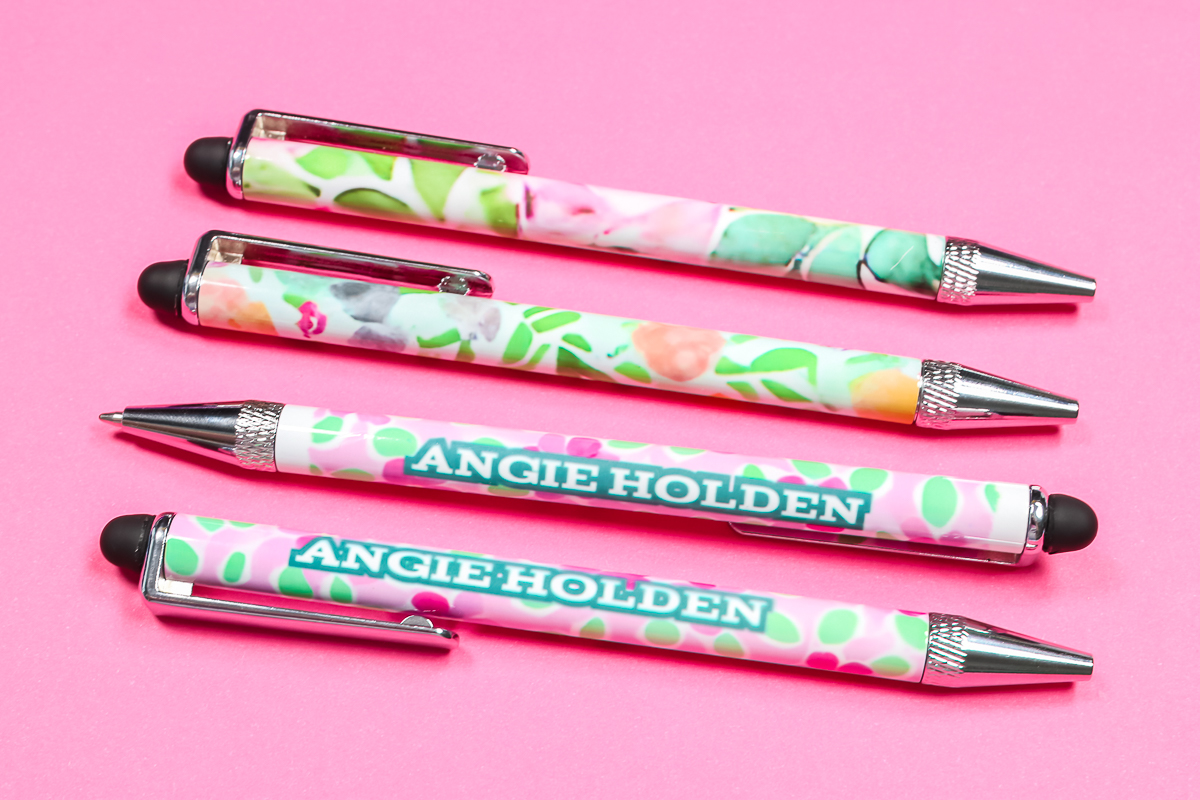
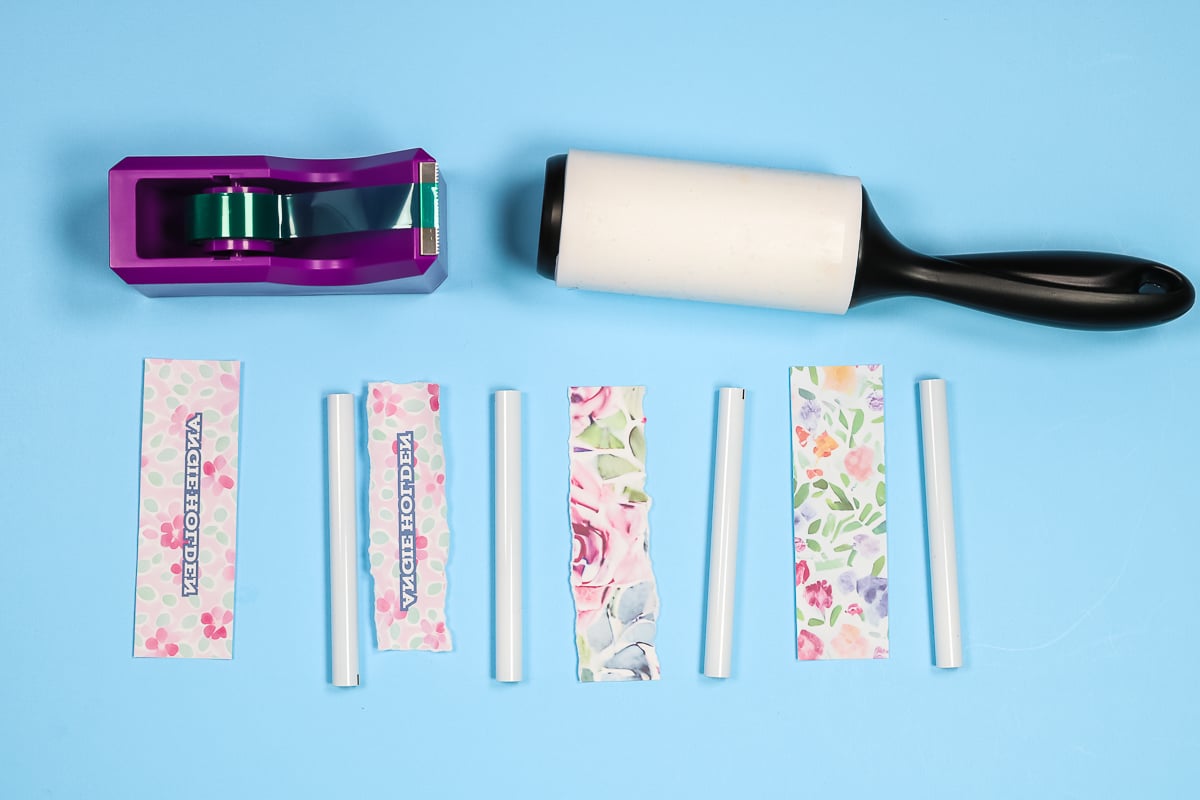
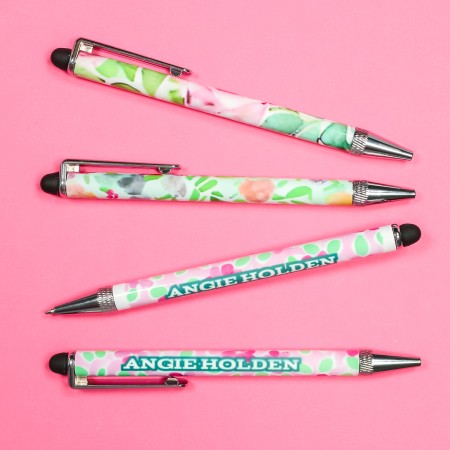
As you can see in the photo above, I have four different pen design options.
- In the first design on the left, I added my name to a floral print. Using a paper cutter, I trimmed it to the right size for my pen with my name centered on the design.
- The second pen from the left has that same design but this time I have torn all four sides to give it a different look.
- The third pen design is just floral but I tore the long edges so they don’t like up perfectly.
- The final design is a floral print trimmed to the right size to overlap slightly on the long side.
Reminder – these floral prints don’t have a specific direction. If you add text or any design that is directional you need to make sure you mirror your image.
How to Wrap a Sublimation Pen
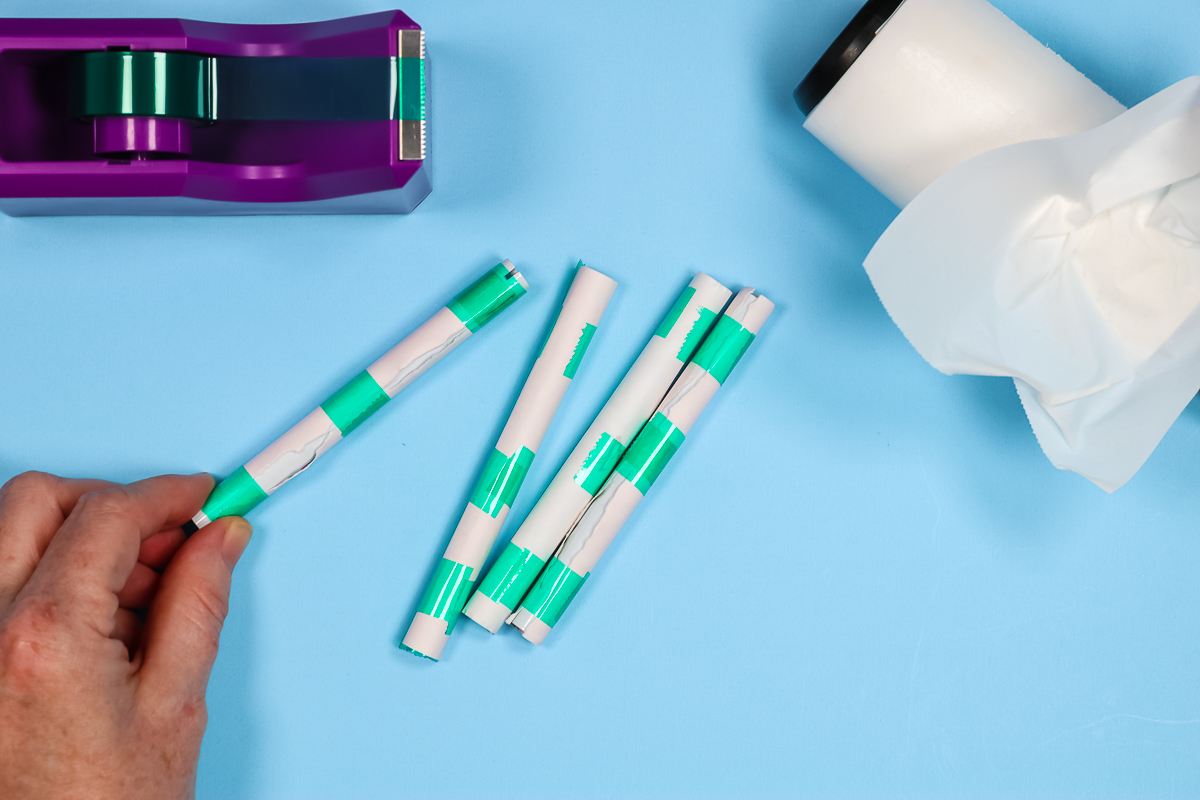
Before applying the sublimation print to the pen barrel, we need to clean it really well. Using a lint roller can be difficult so I like to just tear off a sheet and wrap it around the pen to clean it.
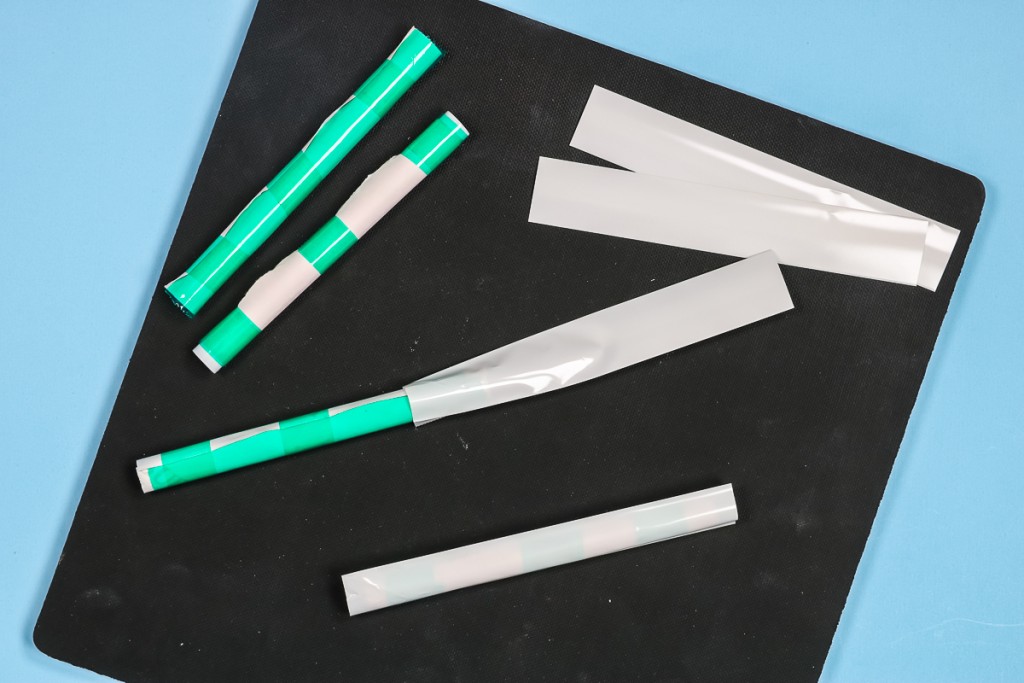
With the sublimation print that is cut full size, to keep the design from bleeding through where it overlaps I found that adding a piece of heat-resistant tape to the back of one long side will keep the seam nice and crisp.
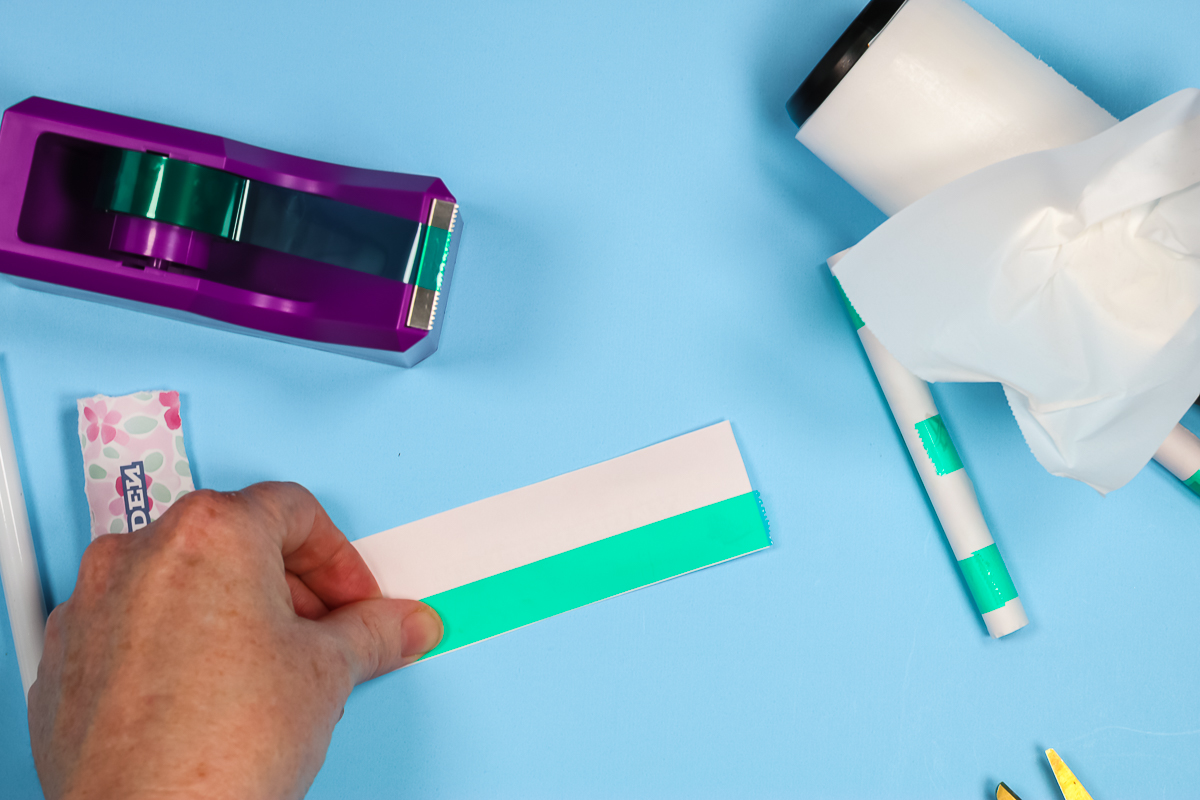
The sublimation print won’t transfer through the heat-resistant tape. Since the pen is so small, the seam will be visible. I want to make it look as nice and clean as possible and this is a great way to do that.
With the tape on the back of one edge of the print, we want to wrap the print around the pen. Make sure the taped edge is on the bottom.
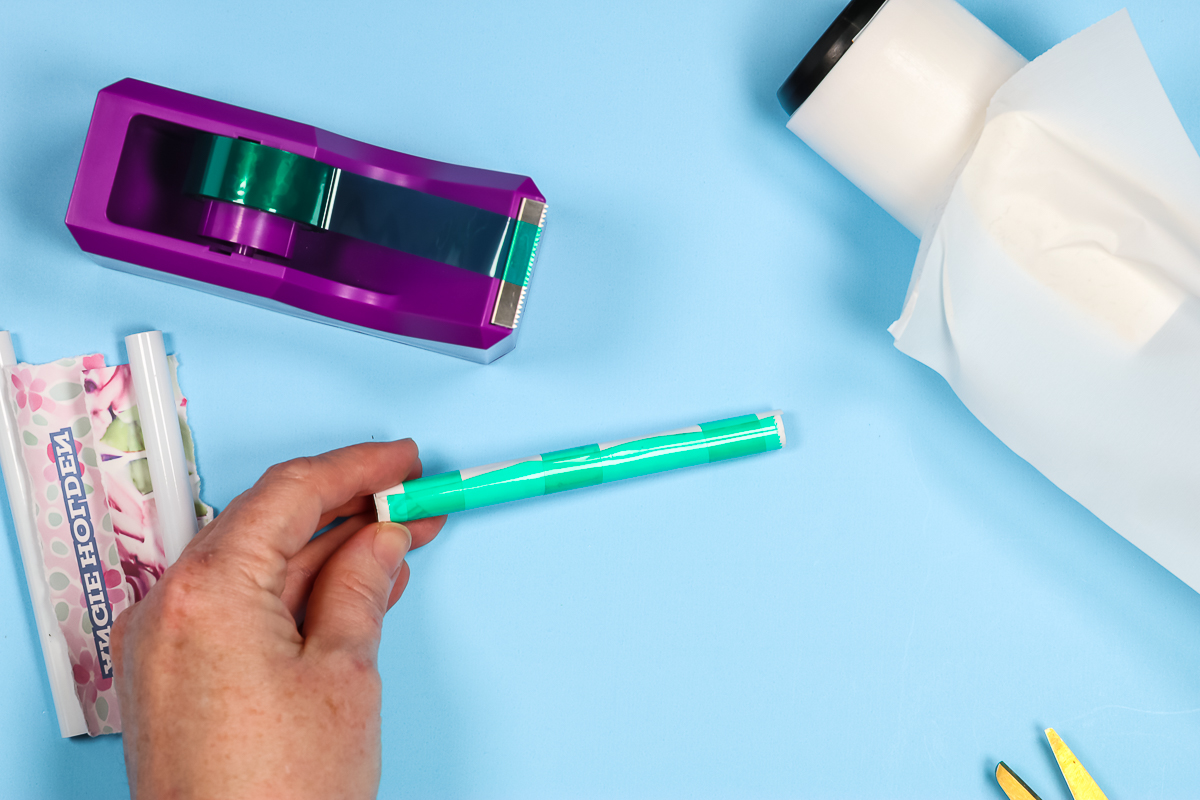
Use at least three pieces of tape to pull the print tight around the pen barrel.
For the designs that don’t overlap you can use a few pieces of tape to secure the print around the pen. You can see in the photo below that some of the pens will have a white area along the seam and some will overlap a little.
How to Apply Shrink Wrap to Sublimation Pens
With the sublimation prints taped into place, we can add the pens to the shrink wrap. Just slide the wrapped pen into the shrink wrap sleeve making sure they are centered into the wrap.
How to Apply Heat to Shrink Wrap
With all the pens in the shrink-wrap sleeves, it’s time to shrink them. Using a heat gun, go over the whole pen. You’ll see the sleeve shrink down tight.
Don’t hold the gun in one place too long, the heat gun can melt a hole in the shrink wrap if held in one place too long.
I applied heat until there were no wrinkles. We want everything tight on the surface of the entire pen barrel.
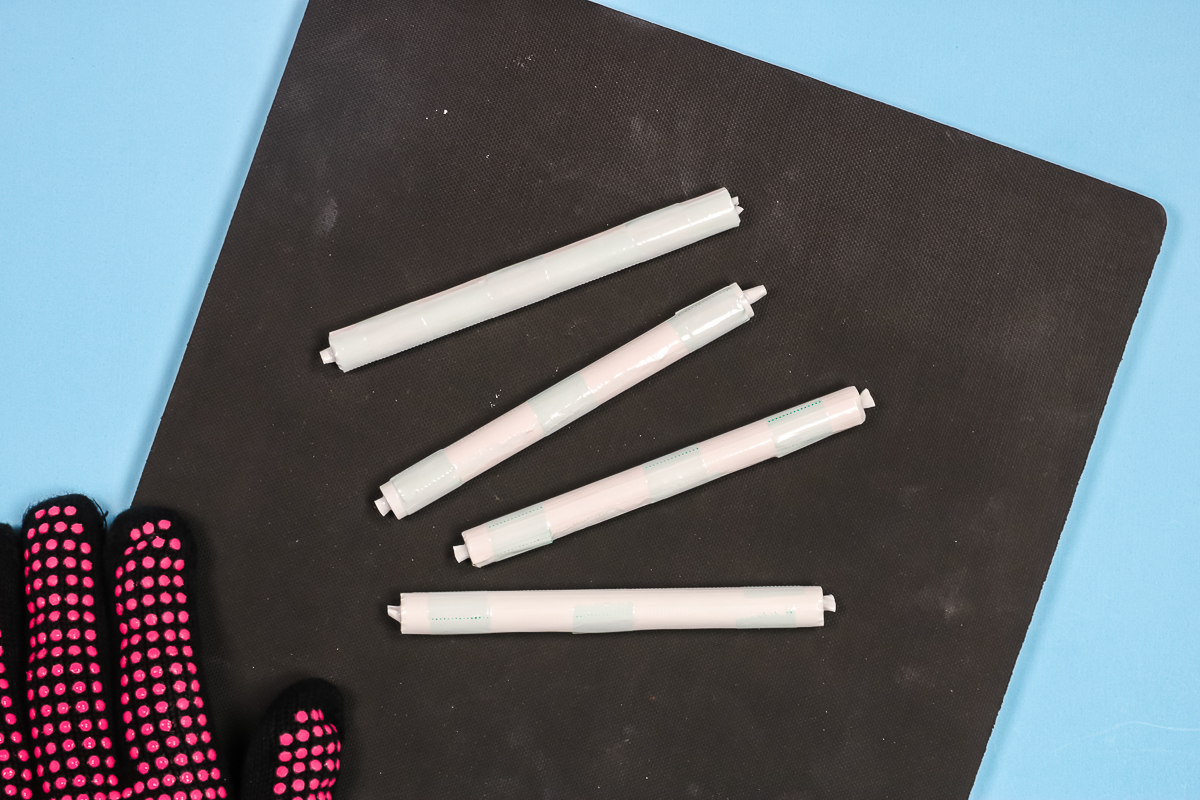
I wear a heat-resistant glove to hold and move the pens and I recommend a heat mat to protect your table surface.
How to Sublimate Custom Pens in a Sublimation Oven
With the shrink wrap finished, it’s time to add them to the oven. I am using my PYD Life sublimation oven but any type of convection oven would work. For this size project, you could even use an air fryer.
IMPORTANT: If you’re going to use any oven or air fryer for sublimation you can never use it for food again. Due to gasses being released into the oven, it is no longer food safe.
My oven temperature is set to 375 degrees. These pen instructions say to bake for four to six minutes. I am going to try for five minutes.
As soon as you remove them from the oven, put them on a heat-resistant mat. You can see that the tape is more visible after baking. You may even see some of the sublimation print through the shrink wrap.

How to Remove Shrink Wrap from Sublimation Pens
You should remove the shrink wrap quickly after taking the pens out of the oven. Shrink wrap can become more difficult to remove as it cools.
I wear heat-resistant gloves so I can remove the shrink wrap and sublimation print while the sublimation pen blank is still hot.
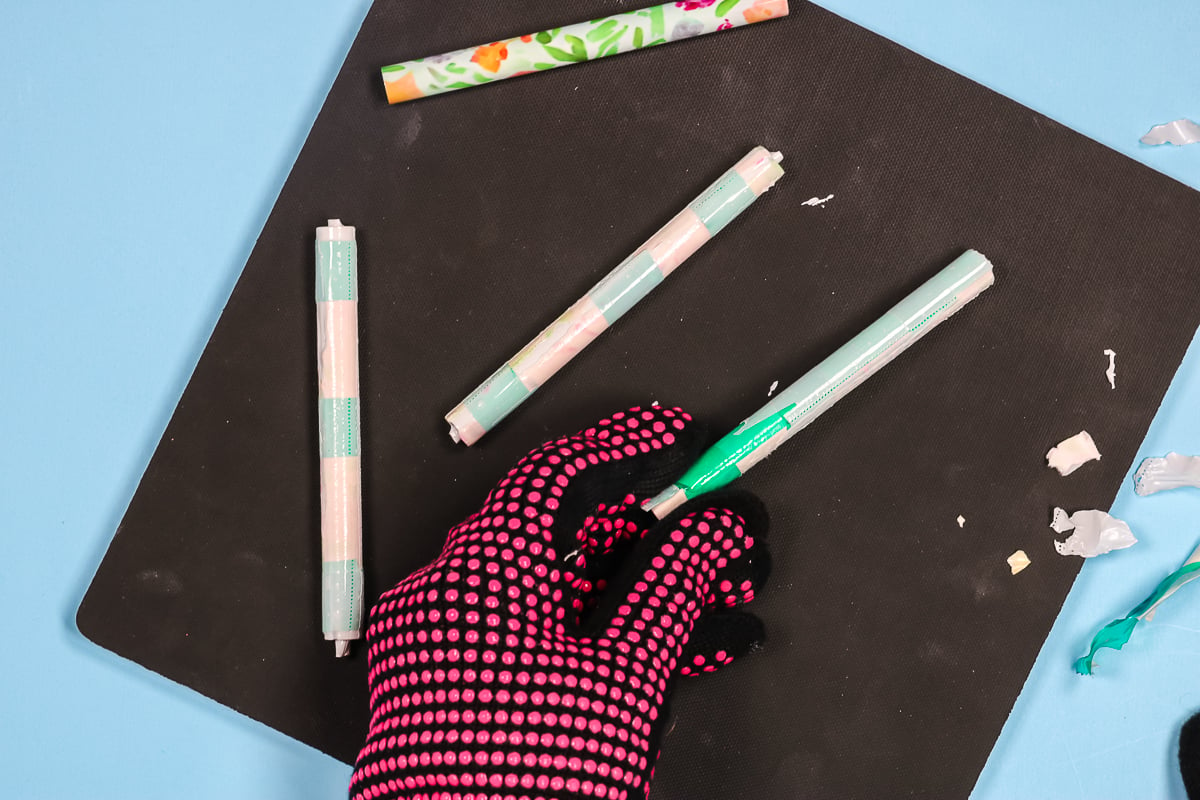
Because of how small these pens are they cool very, very quickly. Thankfully the shrink wrap that came with the pens is sort of perforated so that is helpful.
The more the pens cool, the harder it is to get the shrink wrap off. These aren’t horrible but not what I would call easy. If you can remove the shrink wrap as soon as it comes out of the oven, that would be best.
Note – when hot, the shrink wrap was really soft. I would keep the pens separate in the oven so they don’t melt/stick together.
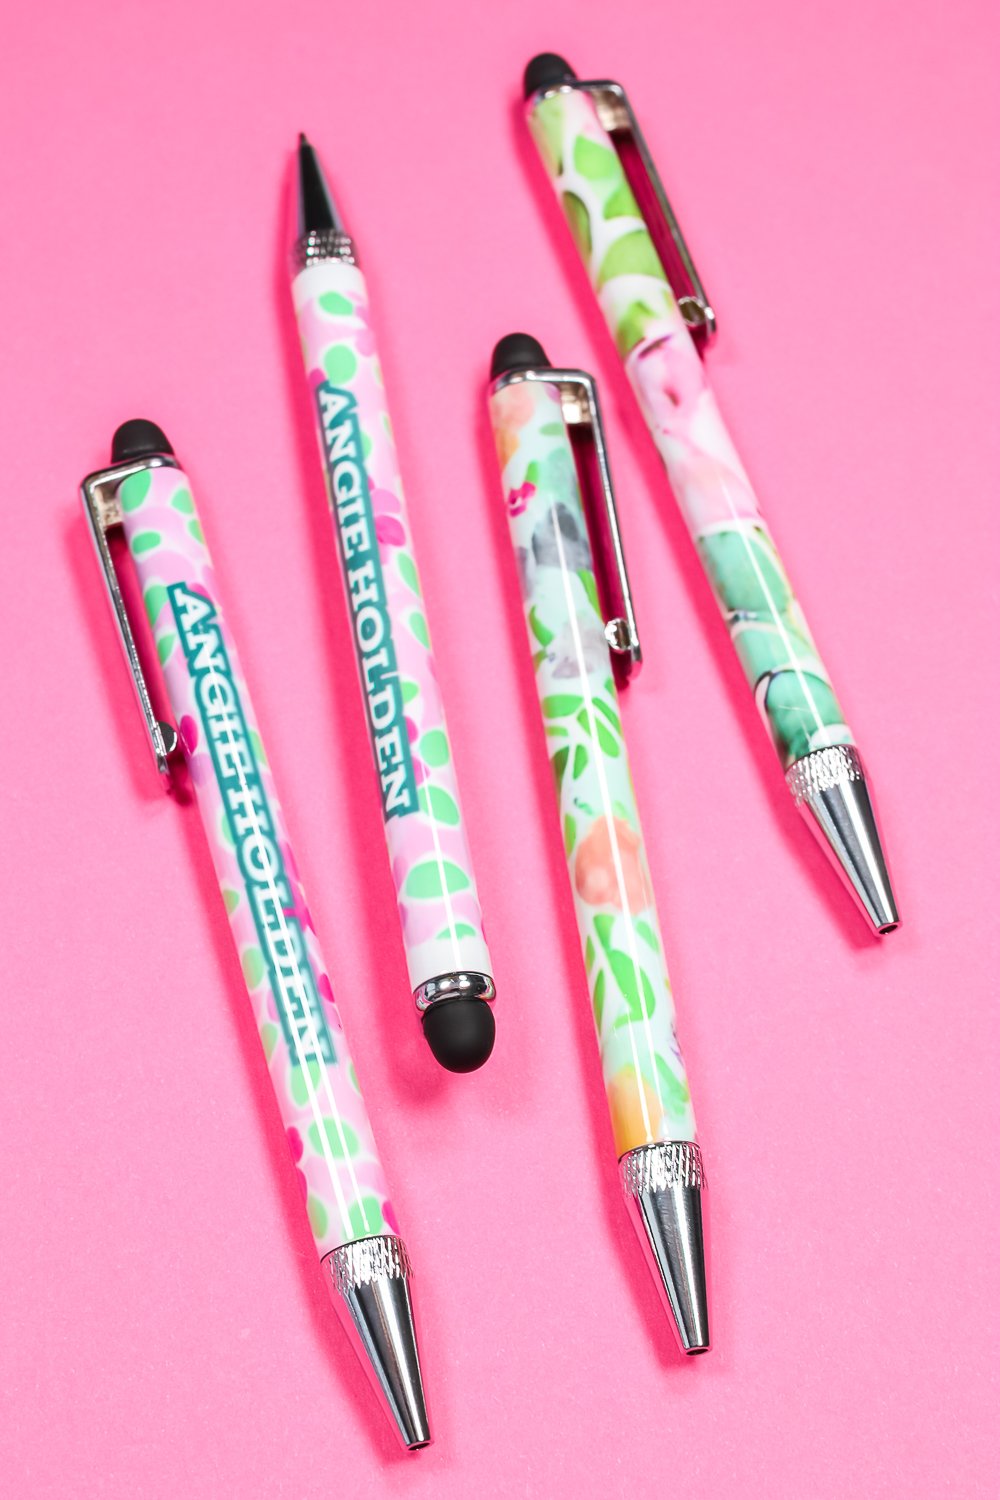
Close Up of Customized Pens
Let’s look closely at each of these different sublimated custom pens. I used a different technique with each pen and want you to see how each one turned out.
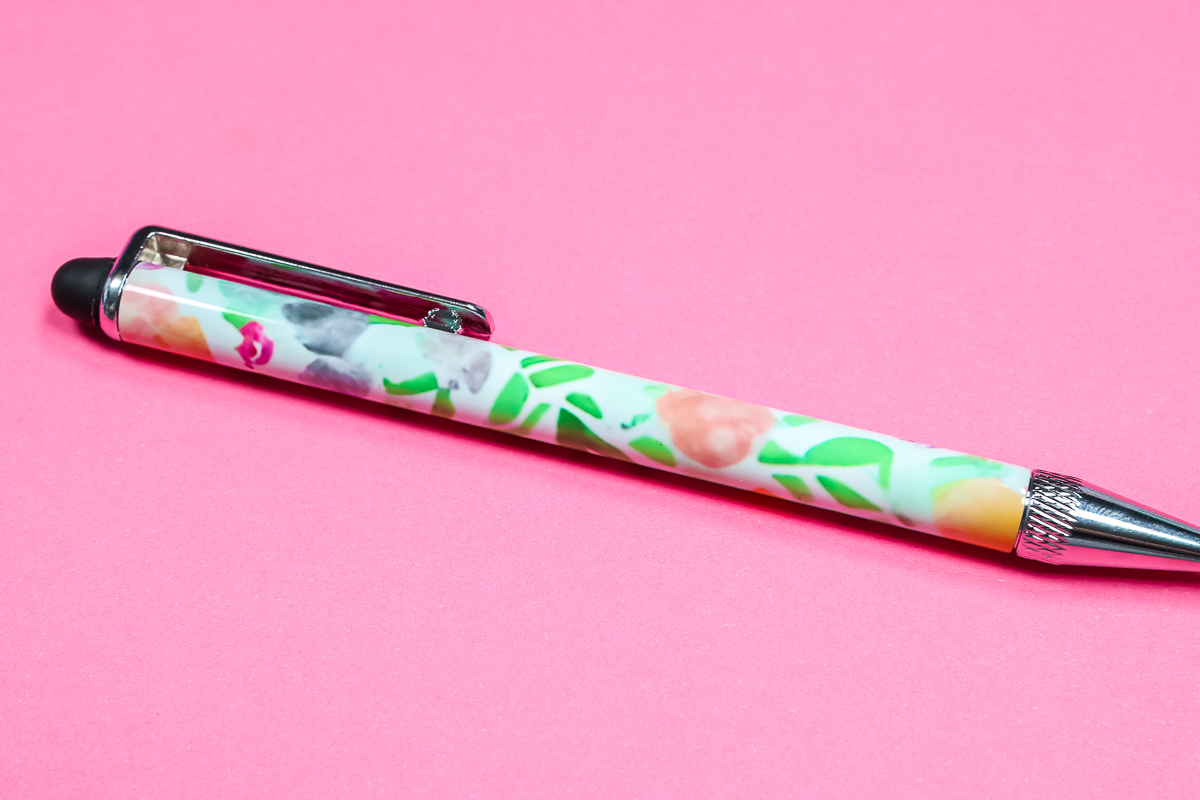
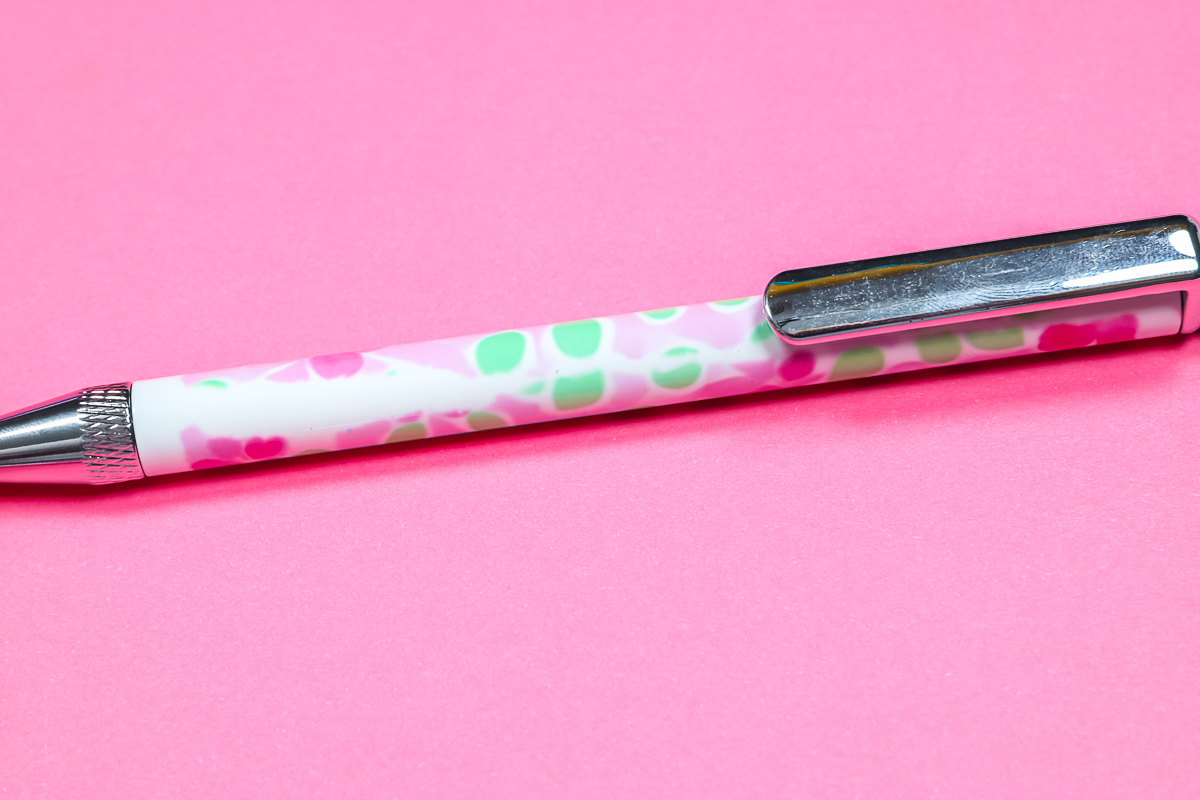
Full Wrap Sublimation Pen
The first pen is the full-wrap version. For this pen, I trimmed my sublimation print to just longer and wider than the pen itself.
Because of the all-over watercolor floral pattern, you can hardly see the seam at all. I really think this print is a great option for a full-wrap pen.
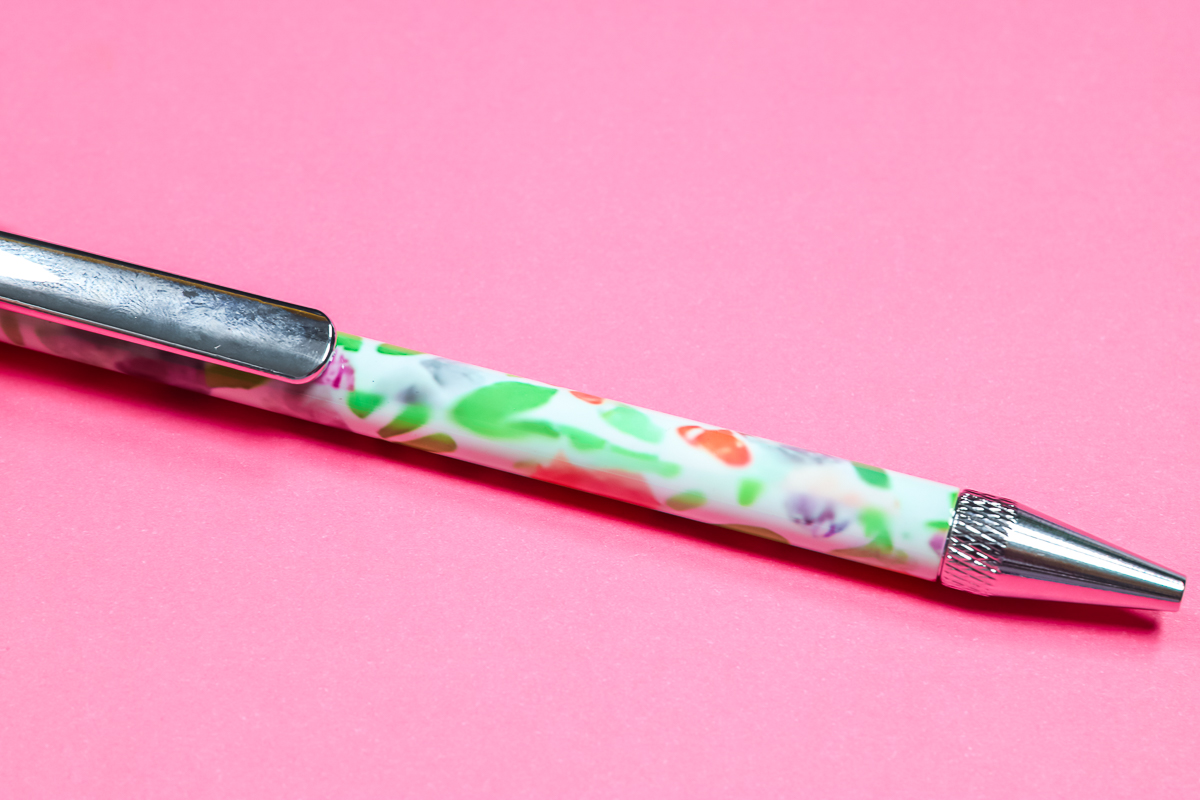
Customized Pen with Ripped Seam
For the second pen I used another watercolor floral design but this time I tore the long edges of the print so there isn’t a seam where the two sides come together.
I really love how this version turned out. If I was going to make more of these pens, this is the technique I would choose to use.
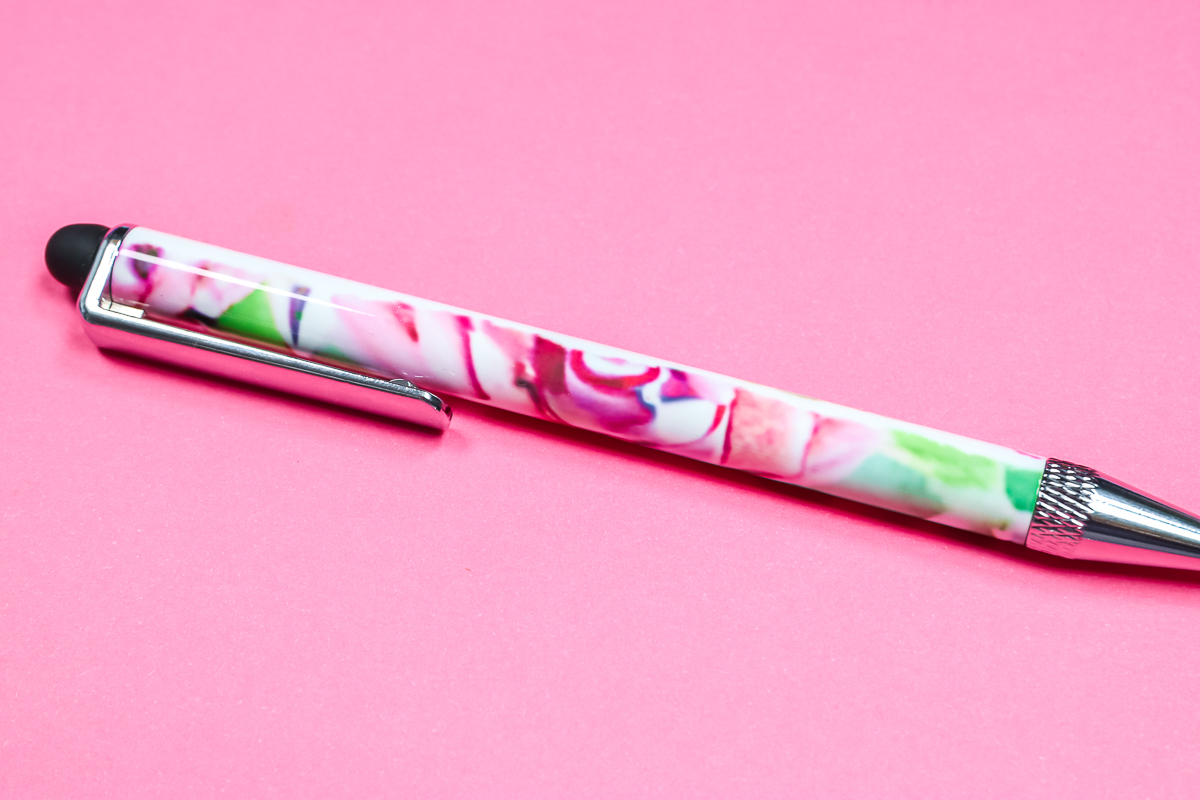
Full Wrap Customized Pen with Name
This next version is really fun. Adding my name to the sublimation print is a fun addition. I do want to make you aware of some ghosting on this version.
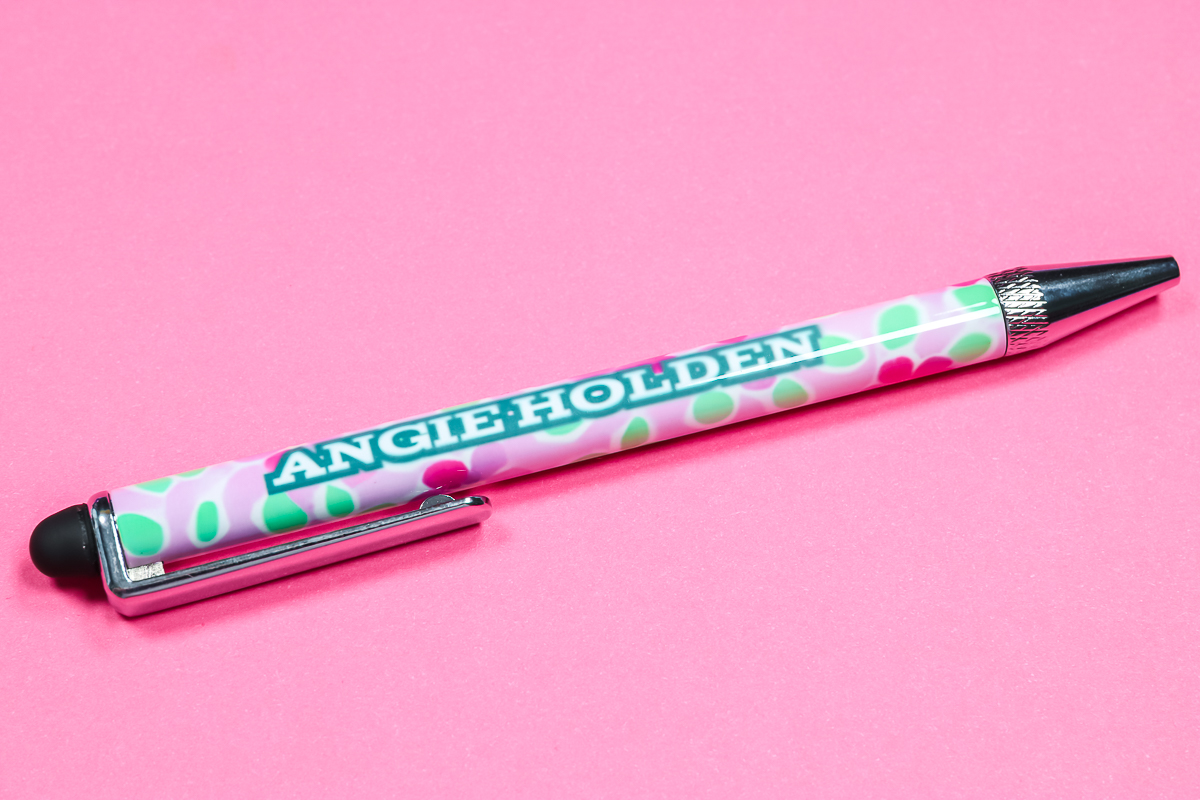
As you can see, in the photo below – along the top of my name the lines aren’t all crisp. I think this is because I couldn’t get the whole print tight on the pen.
To fix this I would recommend that you make sure you get the whole seam taped down tight. Don’t just use the three pieces of tape as I did.
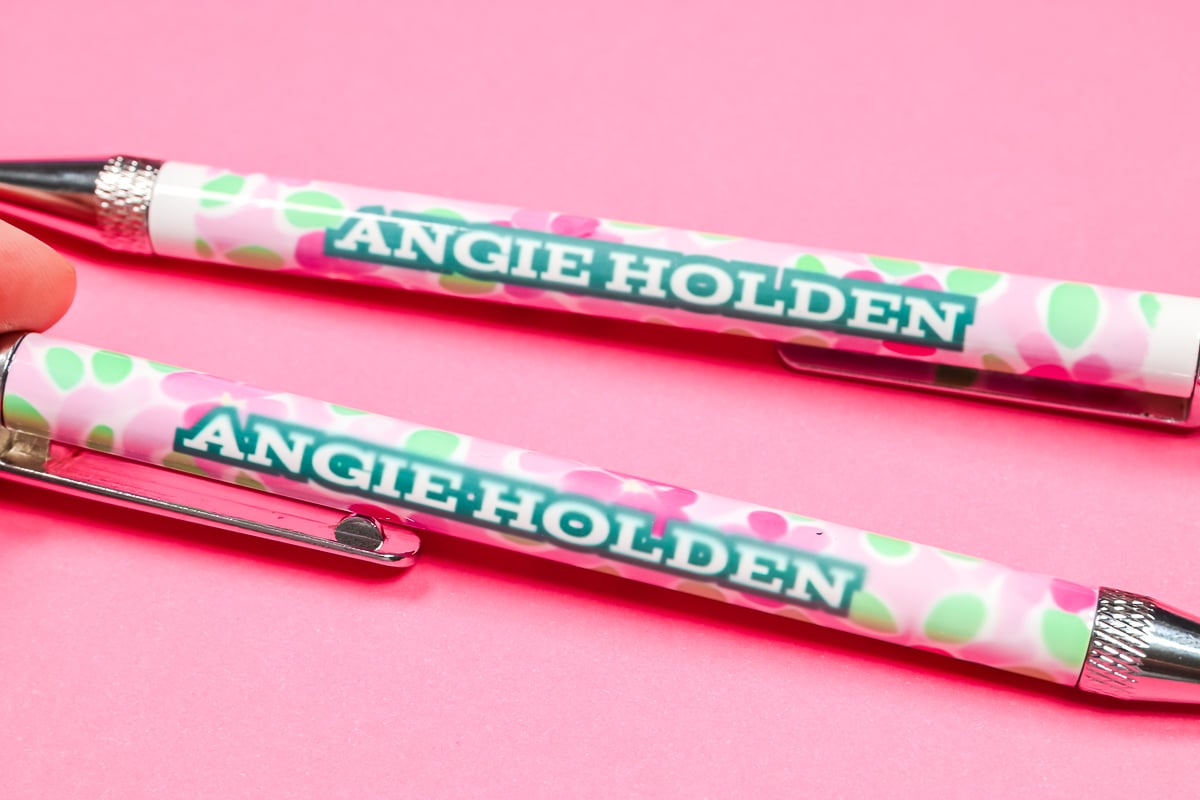
Name Sublimation Pen with Ripped Edges
The customized pen with the ripped edges and my name looks much better. The lines are crisp and clear.
I think this is because I did the same ripped edge I did before. This allows me to tape the sublimation print to the pen and pull it tight.
On this version, I also ripped the short edges of the sublimation print.
Personally, I like this look as well. Whether you want to do that or not is totally up to you. I do think ripping the long edge creates a crisper final project.
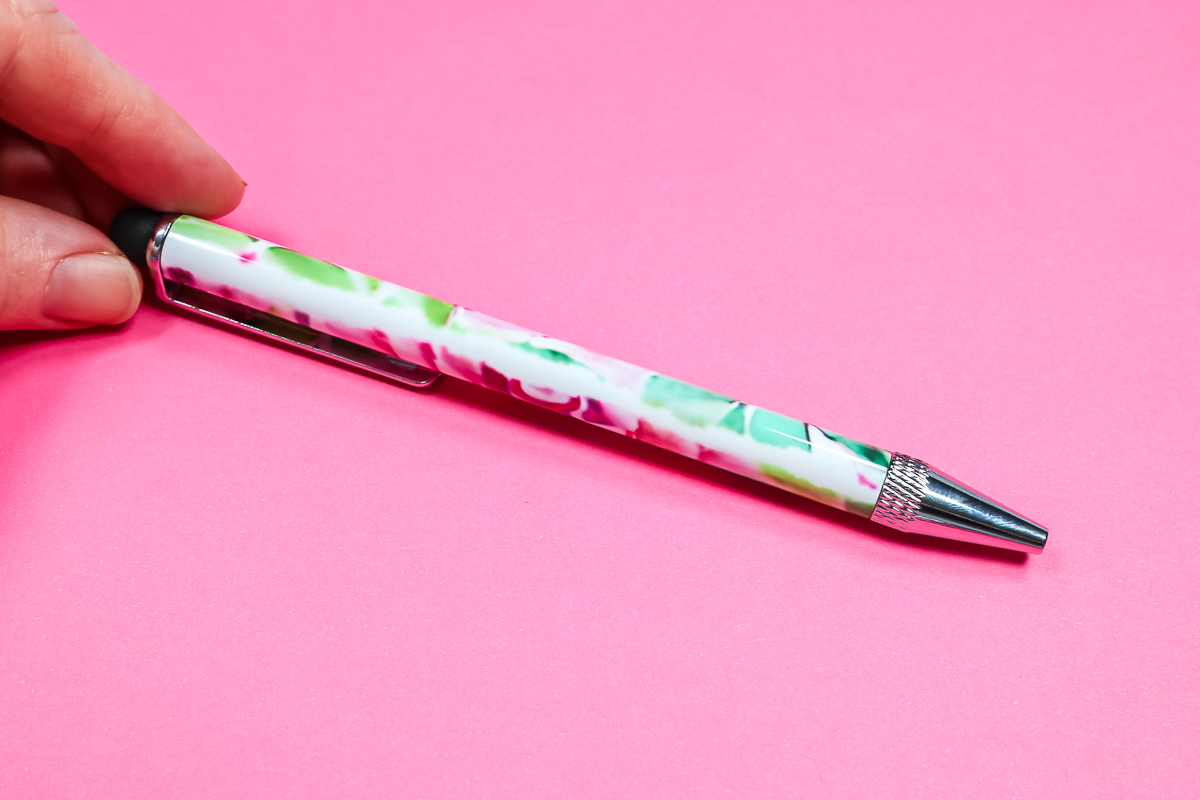
How to Locate Your Sublimation Design on Customized Pens
Now that I have all of the pens finished I want to talk about locating your sublimation print on the pen barrel. Looking at the photo below you can see that when laid down the pen naturally rests on the clip.
Because of this, I should have paid closer attention to the location of my name. Ideally, it would have been on one side of the clip or the other but mine is somewhere in the middle.
The top of the barrel has a notch in it so you would locate the name about 45 degrees to one side or the other of the notch.
With the all-over print, it probably doesn’t matter as much unless you care where it’s ripped. If you’re doing the ripped seam and want it in a specific location, pay attention to the notch and line it up appropriately.
Final Thoughts on How to Make Customized Pens with Sublimation
I actually had a lot of fun making these customized pens. I think they would make an amazing gift. They’re easy to customize with names or you could add something like #1 Teacher as a gift for a teacher or World’s Best Grandma for a grandma. You could easily customize them for just about anyone on your list.
Another great thing is the pen kit itself is very inexpensive and sublimated well.
I do recommend the ripped seam method for the crispest finished project. I believe being able to tape the print to the pen I was able to get it tighter. That is why that version has a lot less ghosting and looks much better.
I also think the watercolor prints shared here are perfect for these pens since they don’t have a lot of solid lines and the watercolor look helps hide any potential ghosting that may happen.
If you’re using a more graphic print, text, or logos, you may have a little more trouble dialing everything in to get it right.
I would definitely make sure you have extras on hand to test.
Hopefully, this helps you understand how to make customized pens with your sublimation printer. If you have any questions leave them in the comment section below and I’ll get those answered for you.
You can also print the instructions for this project using the card below.
Instructions
Taking Apart Sublimation Pens
-
These pens are not the easiest to take apart. The pen opens and closes by twisting the bottom of the pen. To remove that portion I closed the pen all the way and then while twisting it closed I pulled the bottom portion out of the barrel.
-
You actually need to use a little force to get that portion of the pen out. I was afraid I was using too much pressure but that is how it comes apart.
-
With the bottom portion removed the top comes off easily.
-
We’ll only be sublimating on the white barrel of the pen. Everything else needs to be removed.
How to Add Sublimation Prints to Pen Barrel
-
For my customized sublimation pens I am using floral sublimation prints.
-
I printed a full-page floral sublimation print. For the full page, I used a paper cutter to trim it close to the size of my pen.
-
For this specific pen, the length is just over 4 inches so I cut my length to 4.25 inches. To wrap all the way around the pen barrel with a little overlap I cut the size to 1 3/8 inches.
-
Because these floral prints do not repeat there will be a seam where the edges come together.
-
To get away from that seam I tried a couple of different options. The first option was to rip the paper along the long side. With the paper ripped they don’t meet exactly so there will be a white area that is kind of jagged. I thought it would be a cool effect.
How to Personalize Floral Sublimation Prints
-
As you can see in the photo above I have four different pen design options.
-
In the first design on the left, I added my name to a floral print. Using a paper cutter I trimmed it to the right size for my pen with my name centered on the design.
-
The second pen from the left has that same design but this time I have torn all four sides to give it a different look.
-
The third pen design is just floral but I tore the long edges so they don’t like up perfectly.
-
The final design is a floral print trimmed to the right size to overlap slightly on the long side.
-
Reminder – these floral prints don’t have a specific direction. If you add text or any design that is directional you need to make sure you mirror your image.
How to Wrap a Sublimation Pen
-
Before applying the sublimation print to the pen barrel we need to clean it really well. Using a lint roller can be difficult so I like to just tear off a sheet and wrap it around the pen to clean it.
-
With the sublimation print that is cut full size, to keep the design from bleeding through where it overlaps I found that adding a piece of heat-resistant tape to the back of one long side will keep the seam nice and crisp.
-
The sublimation print won’t transfer through the heat-resistant tape. Since the pen is so small the seam will be visible. I want to make it look as nice and clean as possible and this is a great way to do that.
-
With the tape on the back of one edge of the print, we want to wrap the print around the pen. Make sure the taped edge is on the bottom.
-
Use at least three pieces of tape to pull the print tight around the pen barrel.
-
For the designs that don’t overlap you can use a few pieces of tape to secure the print around the pen.
-
You can see in the photo below that some of the pens will have a white area along the seam and some will overlap a little.
How to Apply Shrink Wrap to Sublimation Pens
-
With the sublimation prints taped into place, we can add the pens to the shrink wrap.
-
Just slide the wrapped pen into the shrink wrap sleeve making sure they are centered into the wrap.
How to Apply Heat to Shrink Wrap
-
With all the pens in the shrink-wrap sleeves, it’s time to shrink them. Using a heat gun, go over the whole pen. You’ll see the sleeve shrink down tight.
-
Don’t hold the gun in one place too long, the heat gun can melt a hole in the shrink wrap if held in one place too long.
-
I applied heat until there were no wrinkles. We want everything tight on the surface of the entire pen barrel.
-
I wear a heat-resistant glove to hold and move the pens and I recommend a heat mat to protect your table surface.
How to Sublimate Custom Pens in a Sublimation Oven
-
With the shrink wrap finished it’s time to add them to the oven.
-
I am using my PYD Life sublimation oven but any type of convection oven would work. For this size project, you could even use an air fryer.
-
You do need to know that if you’re going to use any oven or air fryer for sublimation you can never use it for food again. Due to gasses being released into the oven it is no longer food safe.
-
My oven temperature is set to 375 degrees. These pen instructions say to bake for four to six minutes. I am going to try for five minutes.
-
As soon as you remove them from the oven, put them on a heat resistant mat. You can see that the tape is more visible after baking. You may even see some of the sublimation print through the shrink wrap.
How to Remove Shrink Wrap from Sublimation Pens
-
You should remove the shrink wrap quickly after taking the pens out of the oven. Shrink wrap can become more difficult to remove as it cools.
-
I wear heat-resistant gloves so I can remove the shrink wrap and sublimation print while the sublimation pen blank is still hot.
-
Because of how small these pens are they cool very, very quickly. Thankfully the shrink wrap that came with the pens is sort of perforated so that is helpful.
-
You can see that on the first pen, the floral sublimation is beautiful.
-
The more the pens cool, the harder it is to get the shrink wrap off. These aren’t horrible but not what I would call easy. If you can remove the shrink wrap as soon as it comes out of the oven that would be best.
-
Removing the shrink wrap from all four pens did take a long time. Don’t allow it to cool if you can avoid it.
-
Note – when hot, the shrink wrap was really soft. I would keep the pens separate in the oven so they don’t melt/stick together.