This post and photos may contain Amazon or other affiliate links. If you purchase something through any link, I may receive a small commission at no extra charge to you. Any supplies used may be given to me free of charge, however, all projects and opinions are my own.
Did you know that you can cut cardboard with a Cricut machine? With the Cricut Maker and the Knife blade, you can cut thicker corrugated cardboard, like packaging materials! Today I will show you how to cut cardboard with a Cricut machine and turn it into a donut pinata!
NOTE: You can use the Fine Point blade in any Cricut machine you can cut thinner cardboard like cereal boxes. This post is about thicker cardboard pieces, however.
If you’ve never used the Knife Blade before, learn how with my Knife Blade and cutting thick materials tutorial.
How to Cut Cardboard with a Cricut Maker
Today we’re going to be talking specifically about how to cut thicker cardboard with the Cricut Maker and the Knife blade. Because cardboard comes in all different thicknesses I will say you’ll want to make sure and do test cuts before you try to cut out an entire project to make sure you know the settings to use.
You can actually watch me test all these different cardboard options by clicking play on the video below.
What Types of Cardboard Can You Cut with a Cricut
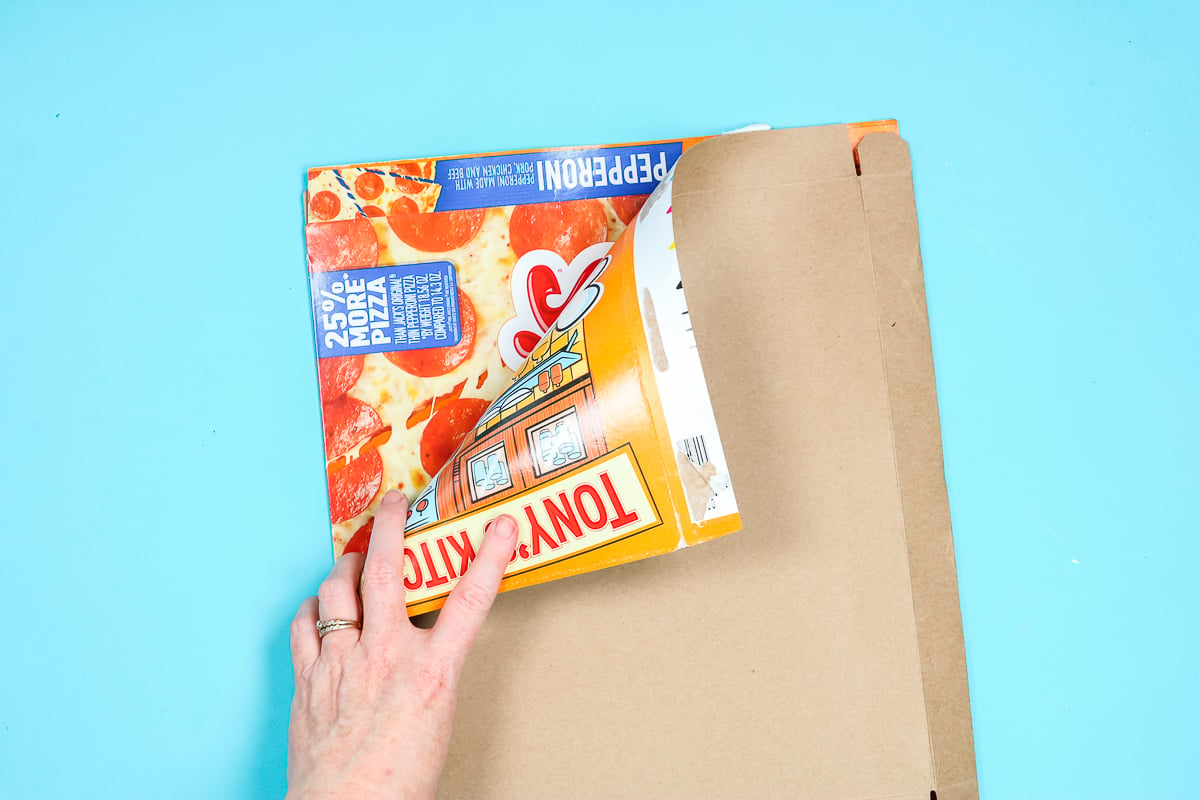
You can actually cut a lot of different cardboard with your Cricut machine. Thin cardboard like the pizza box in the photo below and things like cereal boxes can all be cut using any Cricut machine and the Fine Point blade.
These types of cardboard are almost more like thick paper. I’d start with the craft board setting in Design Space when cutting cardboard like those.
If you want to cut thicker cardboard, like the boxes you receive in the mail, I recommend using the Knife Blade in the Maker. I think it’s much easier to cut those thicker options with that blade.
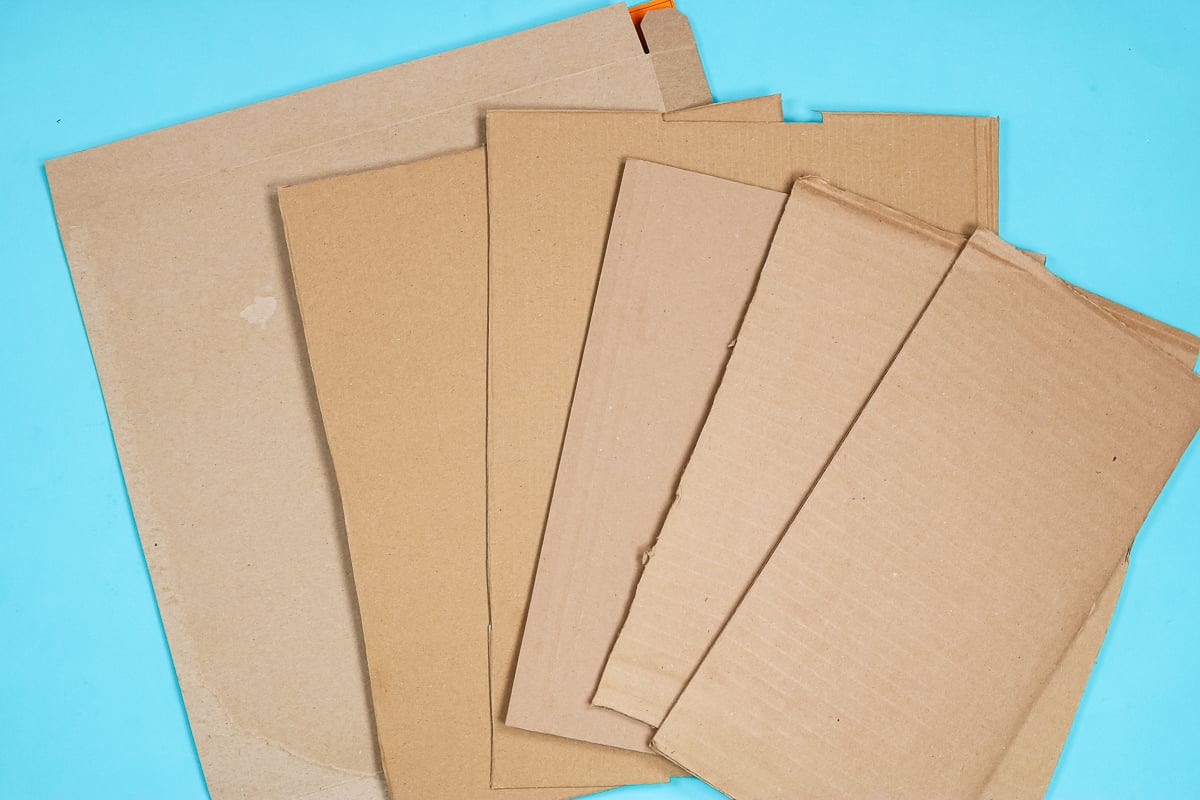
In the photo above you can see I have a variety of different cardboard options. These are all from boxes I had around my house. Because they are all a little different we need to test them to see if they can be cut with a Cricut machine.
Each of the cardboard options in the photo above is single-wall corrugated cardboard. As you can see, while they’re similar they are all different thicknesses.
The top option is pretty thin and will cut easily on a Cricut machine. The thicker options we need to test to see if they can be cut with a Cricut.
How Do You Test Cardboard Thickness?
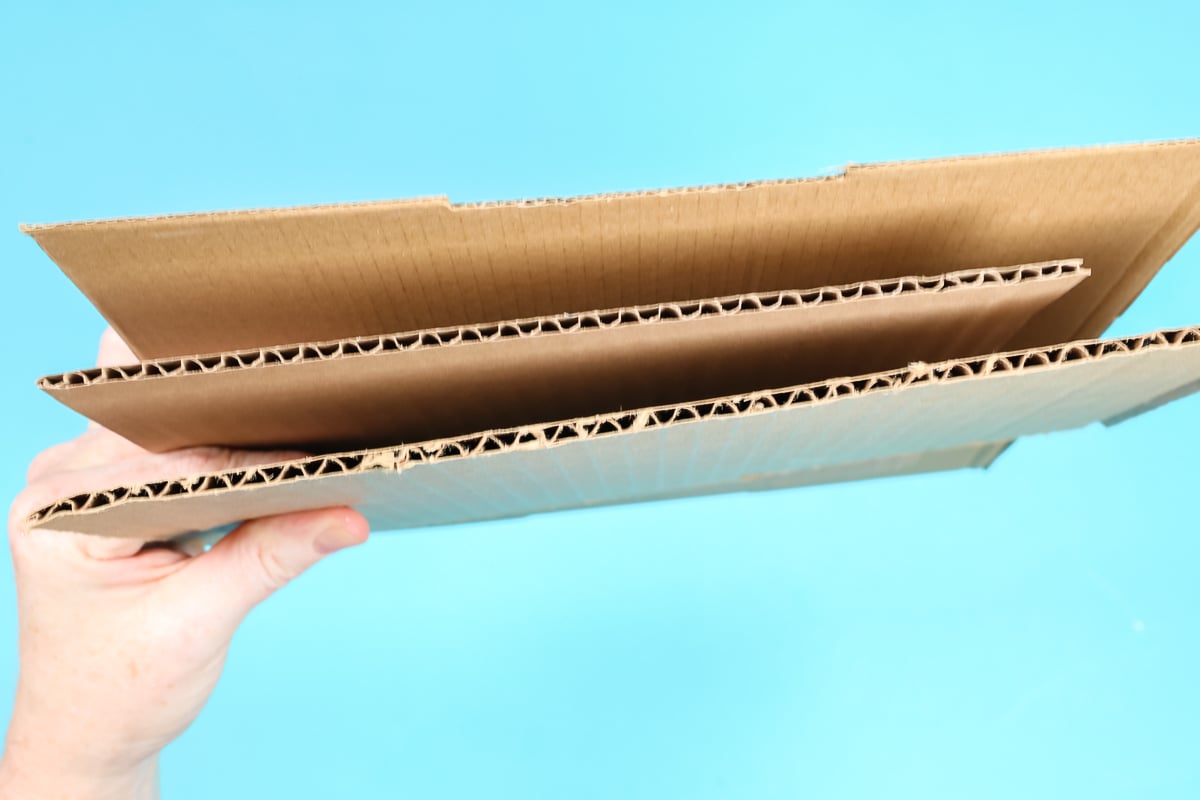
To determine which of these options will work we’re going to test them in my Cricut Maker. The process is easy. Simply move the star wheels over to the right and load your Knife Blade into your machine.
Now we’re going to try sliding the cardboard under the bar. If the cardboard slides under the bar easily you can cut it with your Maker. If the cardboard doesn’t fit or you have to force it, it’s too thick.

Remember, we do need to add the cardboard to a mat so it needs to easily slide under the bar without a mat for it to fit with one.
The thicker cardboard was too thick to fit under the bar of my Cricut. The Cricut Maker has a higher maximum thickness than the Explore machines have, so the bar is a little higher. Make sure you’re testing with the machine you’re going to be using.
Supplies Needed for Cardboard Pinata
To make a cardboard pinata you’ll need the following supplies:
Test Cutting Cardboard
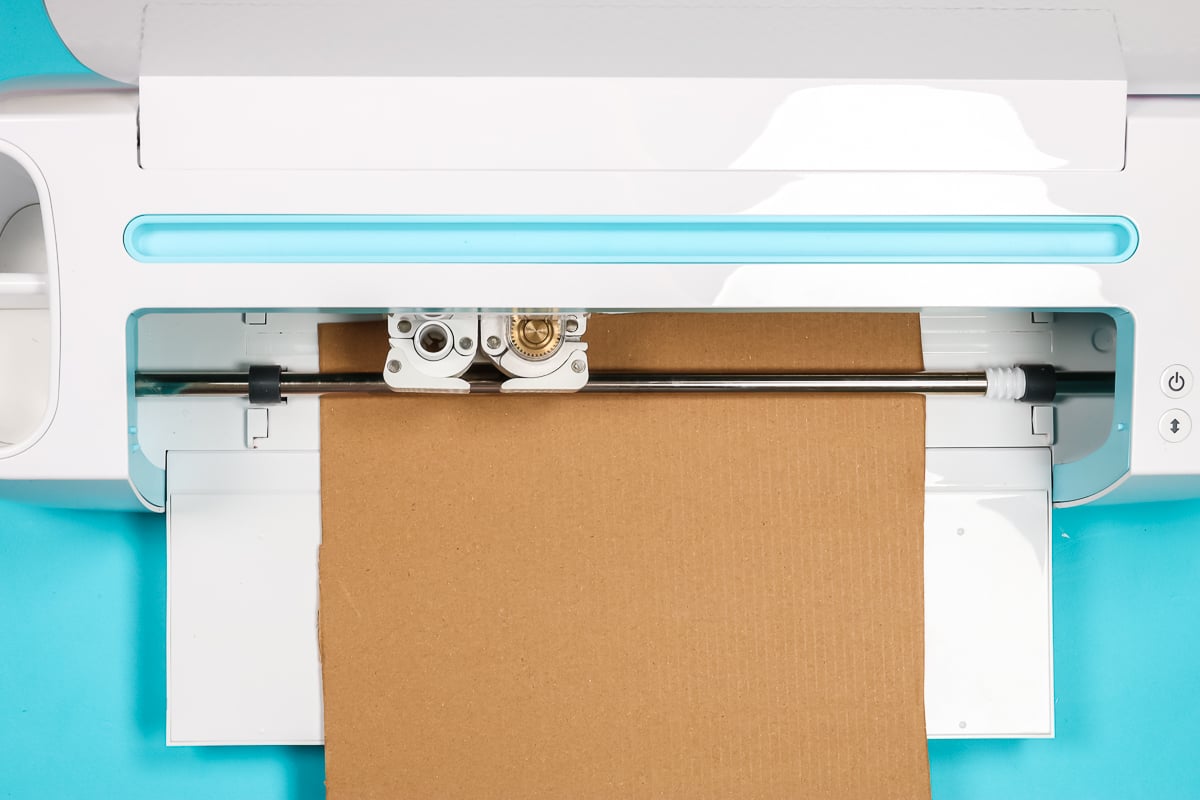
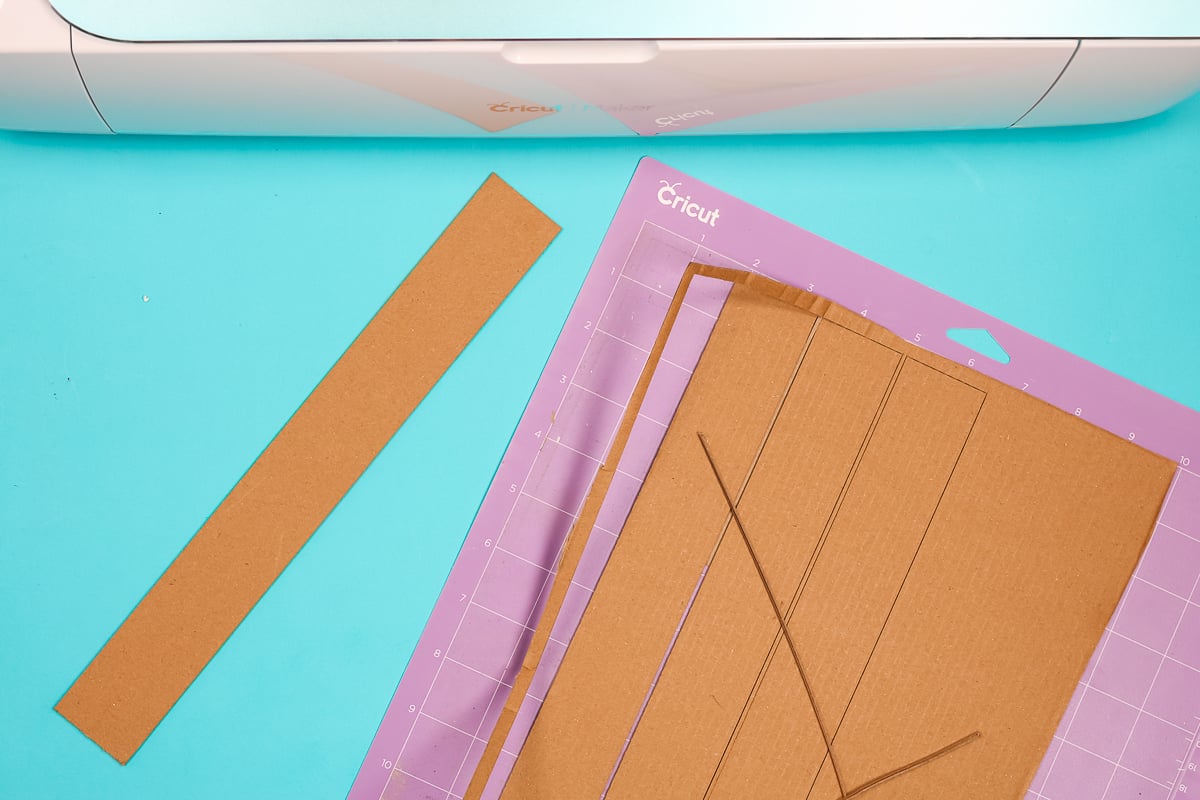
I have a couple of pieces of cardboard that slide under the bar easily that I am going to use. They’re corrugated cardboard that was a shipping box that I trimmed to fit on my mat.
Apply the cardboard to a StrongGrip cutting mat. Make sure the cardboard is cut so it doesn’t try to go under the star wheels that we’ve moved over to the side.

My StrongGrip mat was strong enough to hold the cardboard in place. You want to make sure it’s stuck down really well. I used a brayer to make sure it was secured and wouldn’t move while cutting.
Cricut Cut Settings for Cardboard
If you search in Design Space, you’ll see that they have a corrugated cardboard setting. This is actually for the Cricut brand of corrugated cardboard and it’s much thinner than what comes from a box that is shipped to you.
To begin, I am choosing the Chipboard 1.5-millimeter setting. I do not recommend walking away from your machine while you’re cutting cardboard. You will likely need fewer passes than the chipboard setting calls for.
If you think you’ve cut through the cardboard, you can pause your machine to check it. To begin, we’re going to test a couple of basic shapes to see what setting works best.
How Do I Check My Cuts?
Load the mat into the machine and press go. Allow the machine to complete one pass and then press pause on your machine.
I like to make sure I’m pressing pause when the mat is as far out the front of my machine as possible so I can lift the edge. With the machine paused, lift an edge near where you’ve cut and see if it’s cut through. I think my machine is going to need about 3 passes with this setting.
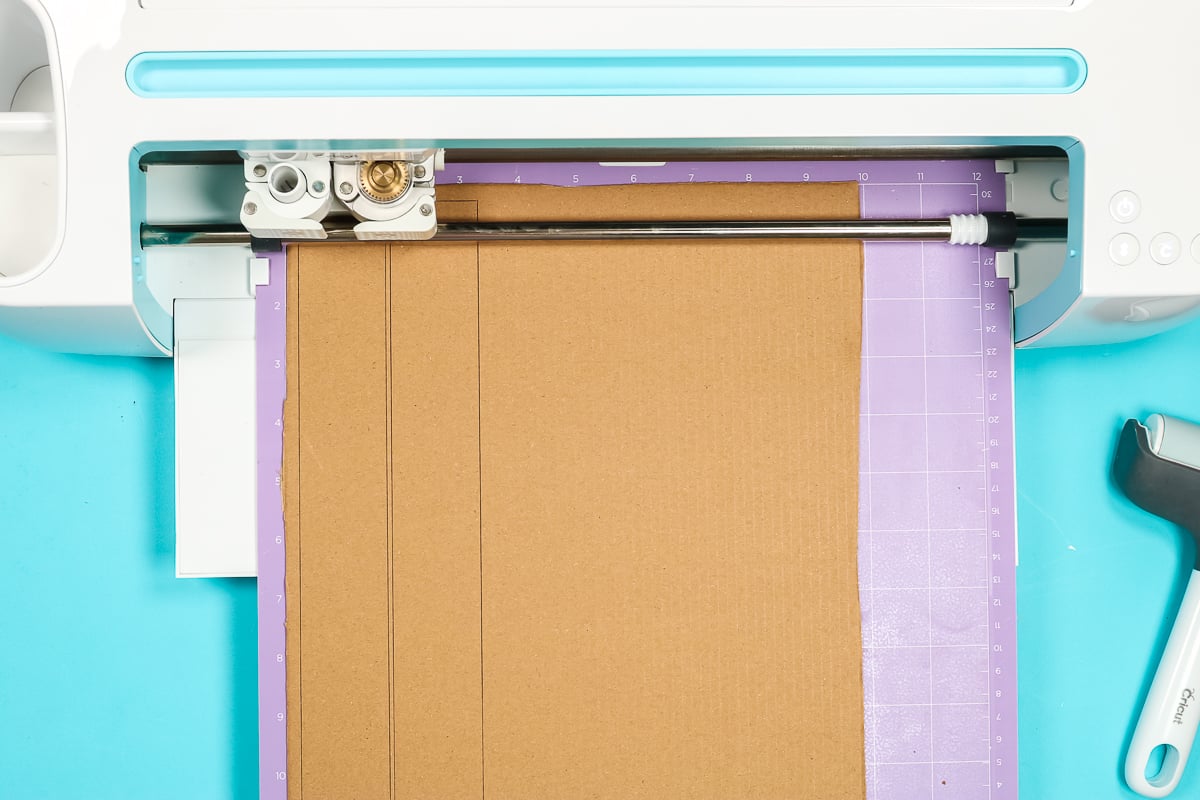
Since cardboard is layers of paper we want to make sure any pieces that may come loose are moved out of the way so they don’t jam the machine. My machine cut this piece of cardboard really cleanly with 3 passes on the light chipboard setting.
You can see that it cut really nicely with this setting. You could try a different setting if you wanted to but I am really happy with these results and it’s easy to just stop the machine after 3 passes.
Check Your Mat for Any Cuts
I do recommend that after using the Knife blade you check your mat. We want to make sure the blade isn’t cutting through the mat.
My mat looks fine. There are some marks on the mat but nothing has cut through the mat. We really don’t want to cut into our machine itself.
If your mat has cuts that are through the mat or close, I would either toss the mat or make sure future cuts don’t go over that same area.
How to Make a Cardboard Pinata
Now, you may be thinking “It’s cool that you can cut cardboard but why would I need to?”
First of all, I firmly believe everyone needs a donut pinata in their life! Second of all, if you don’t like donuts you can use this same process to create other fun mini pinata projects. Let’s jump into Design Space and find our donut file to create this cute mini pinata.
I think this little pinata would make a perfect party favor. It is fun and relatively easy to make. Once you know how to make this pinata, you can make others.
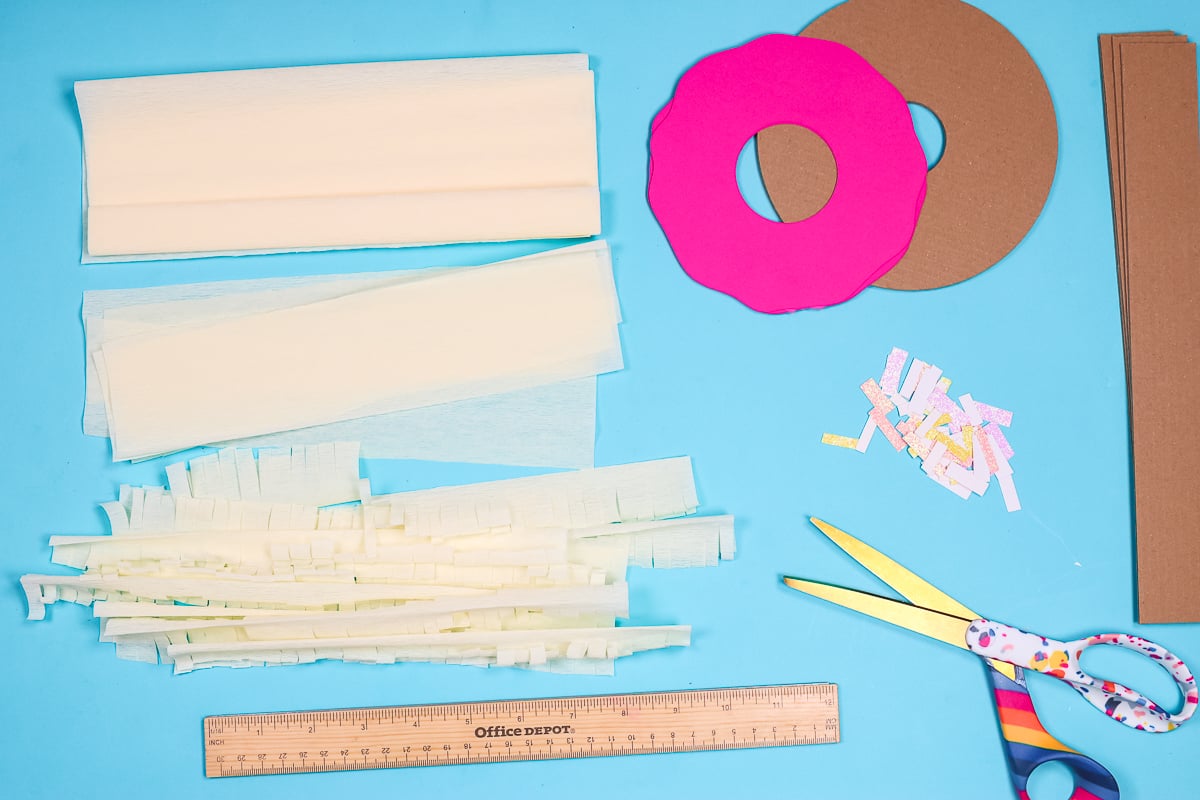
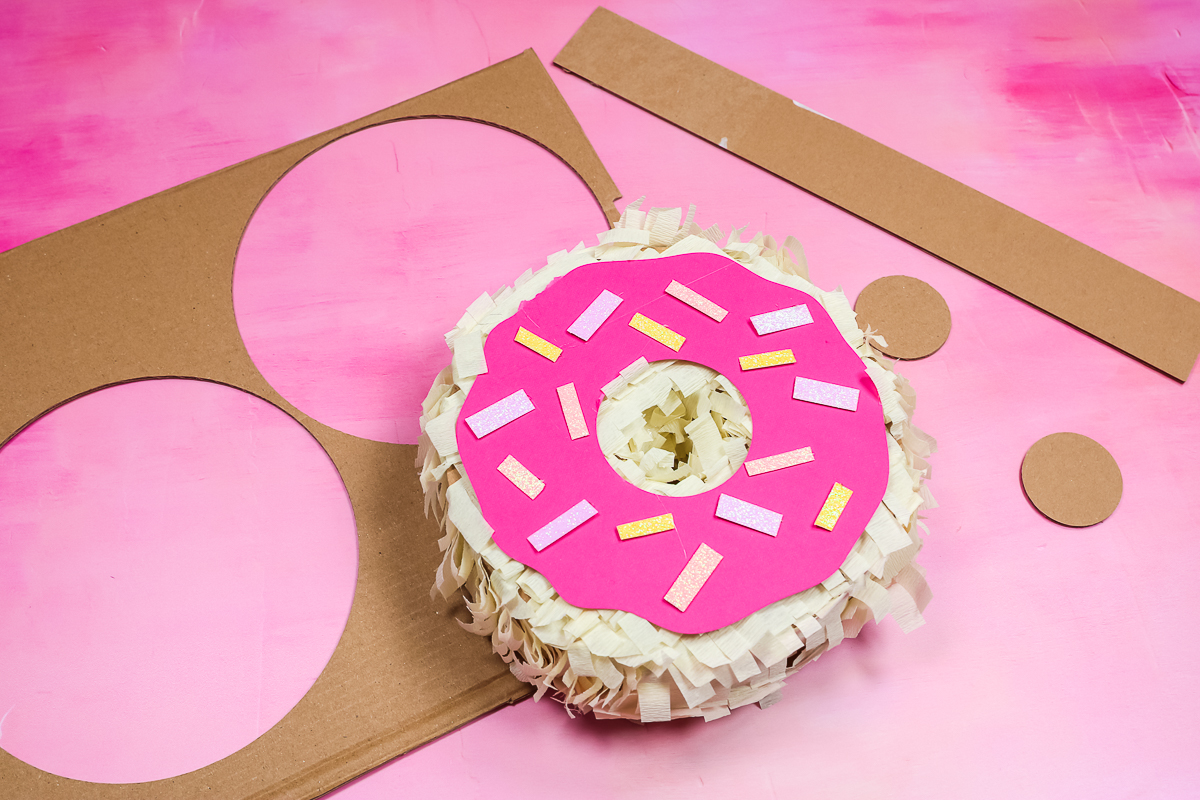
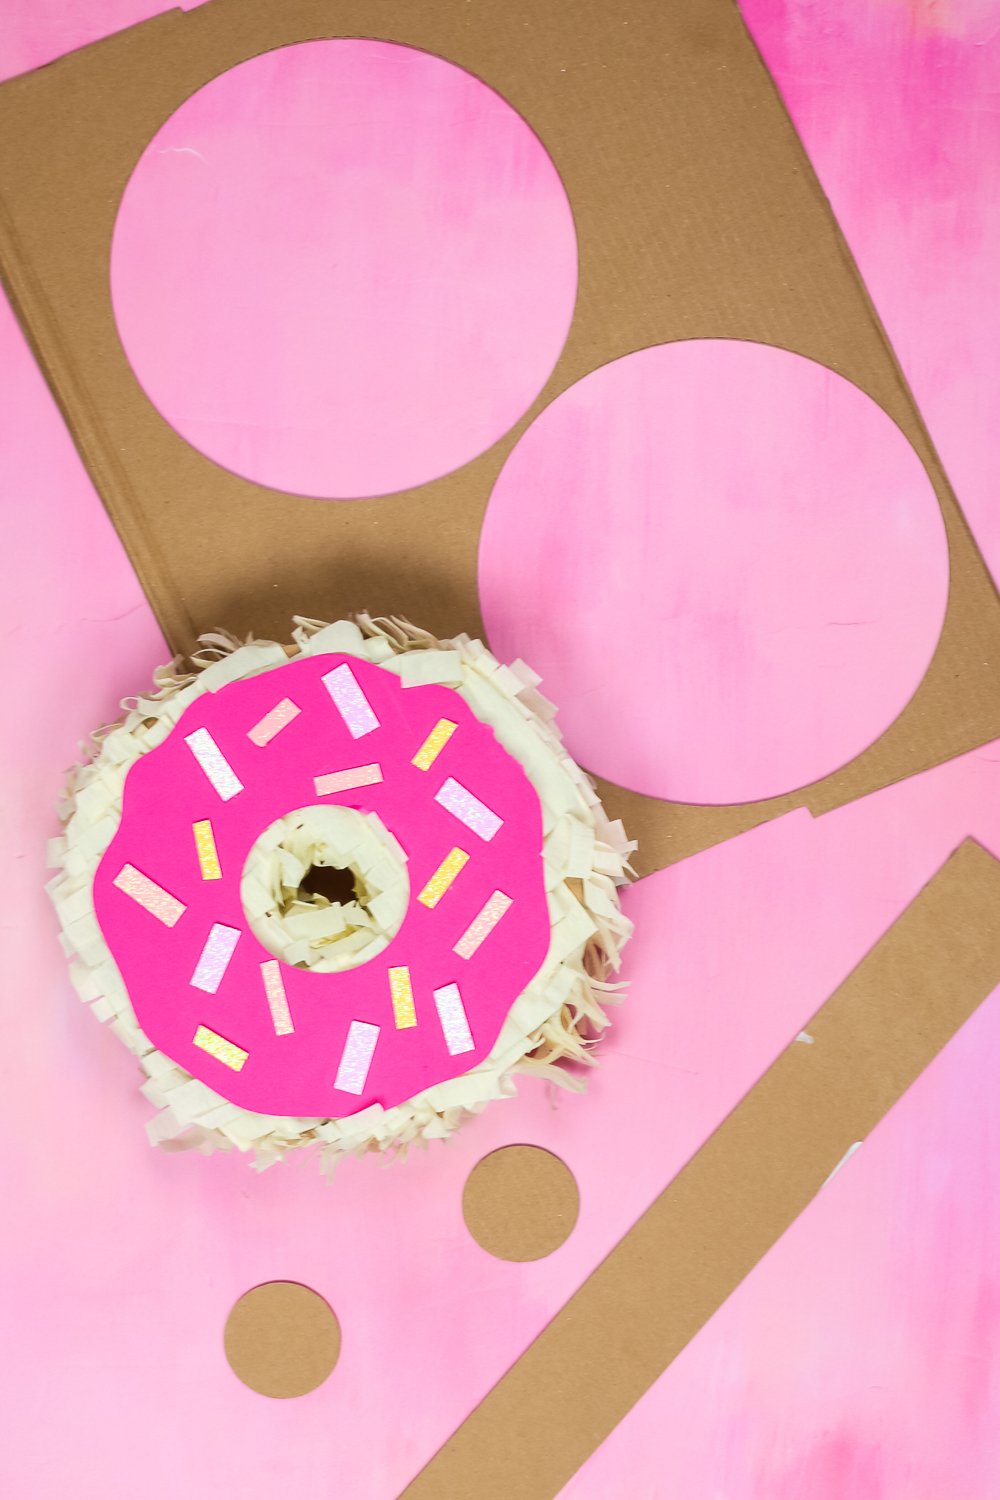
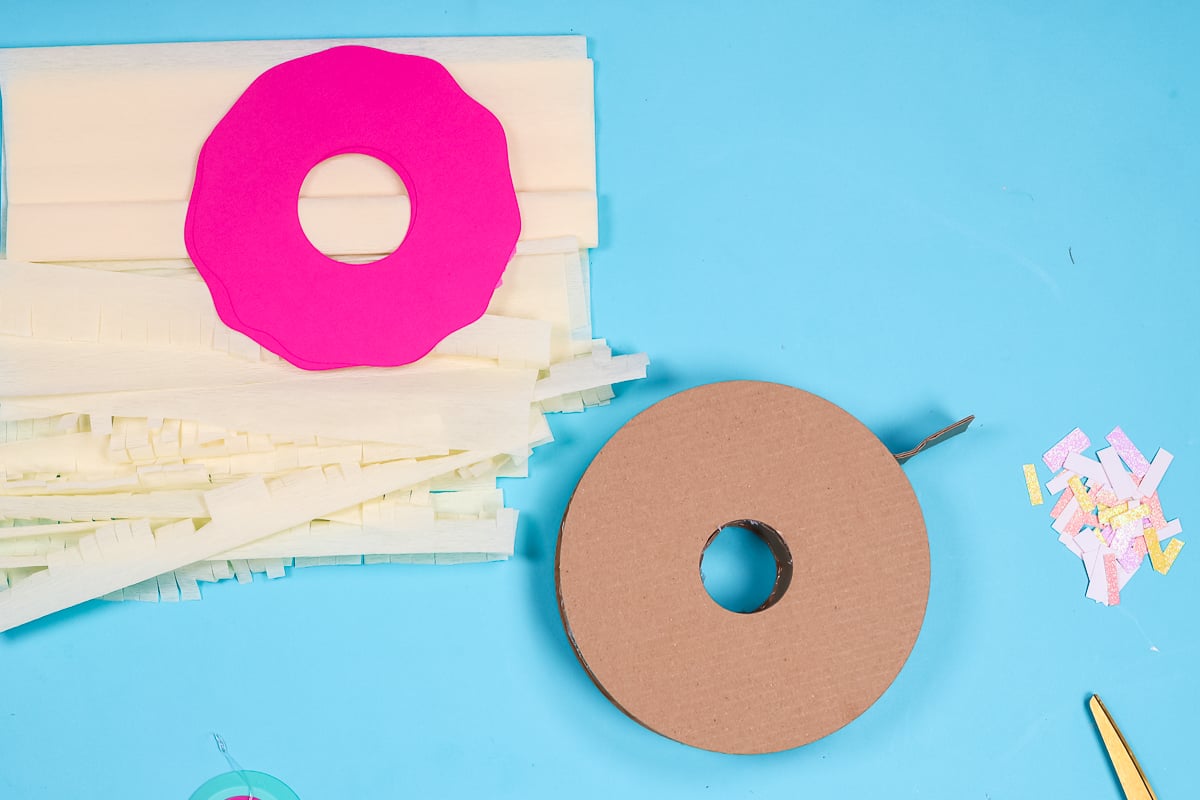
If you click the link here, you can find my Donut Pinata cut file and it’s all ready for you to get started. I cut the frosting piece out of pink cardstock and the rest out of cardboard.
Cut Out All Project Pieces
I am going to use my Cricut Maker to cut out all the pieces. Make sure you select the correct setting for the pieces you’re cutting.
This cardboard was from the same box I did my test cut on so I am using the same chipboard setting I used before. Make sure you’re following all the same steps we did in the test cut. Trim the cardboard so it doesn’t run under the star wheels and make sure it’s stuck down on the mat really well.
Watch your machine and stop it once the three passes are done. Pause it after the third pass to make sure it’s cut through.
Once the cardboard is cut, load your cardstock to cut the icing layer. For my sprinkles, I just used some scrap paper and cut them into sprinkles with a pair of scissors.
How to Create Pinata Fringe
To create the fringe for my pinata I am using crepe paper. You could also use tissue paper if you wanted. I trimmed my crepe paper to two-inch strips. Don’t stress about this too much, they don’t have to be perfect.
I folded the crepe paper in half and used the edge of a ruler to really crease that fold so it will lay flat.
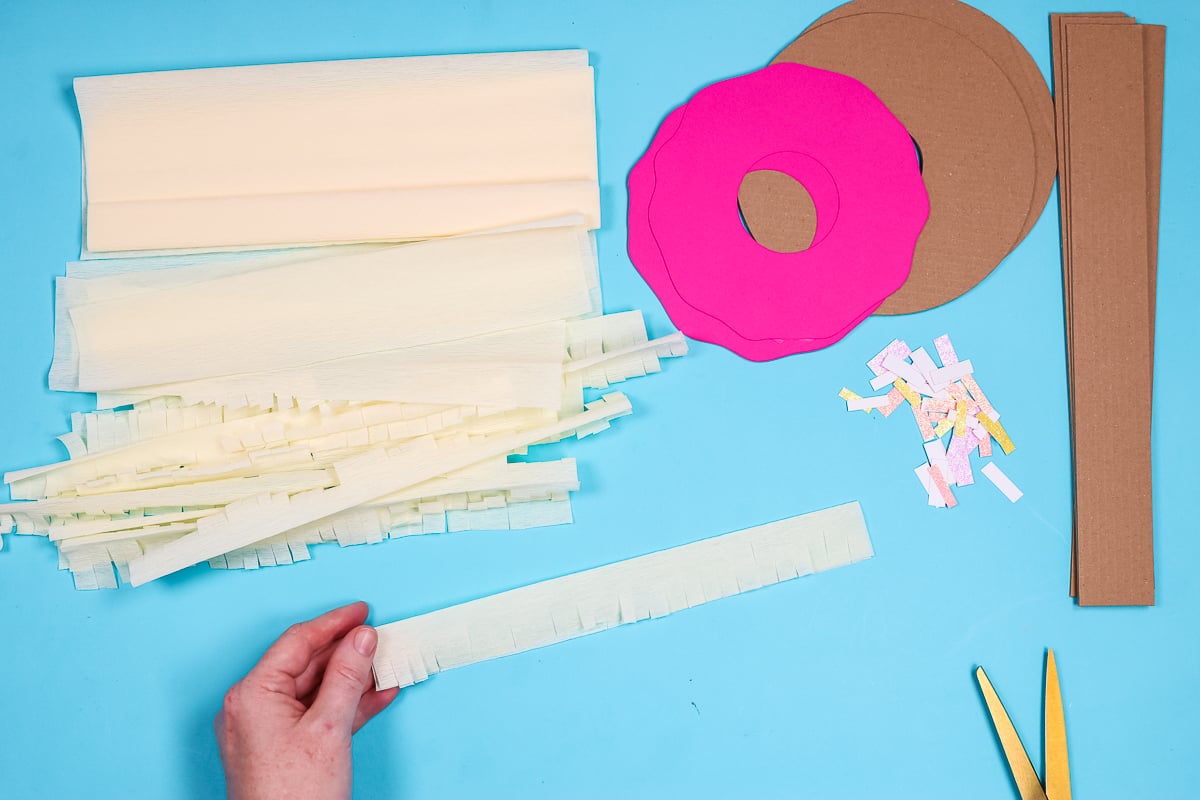
Use a pair of scissors to cut the fringe strips across the length of the crepe paper. I used a two-inch measurement because it worked well for this size pinata. If you’re making a larger or smaller pinata, you may need to adjust the size of the fringe.
The fringe on my pinata is not uniform at all, so you don’t need to worry about that.
How to Assemble a Mini Cardboard Donut Pinata
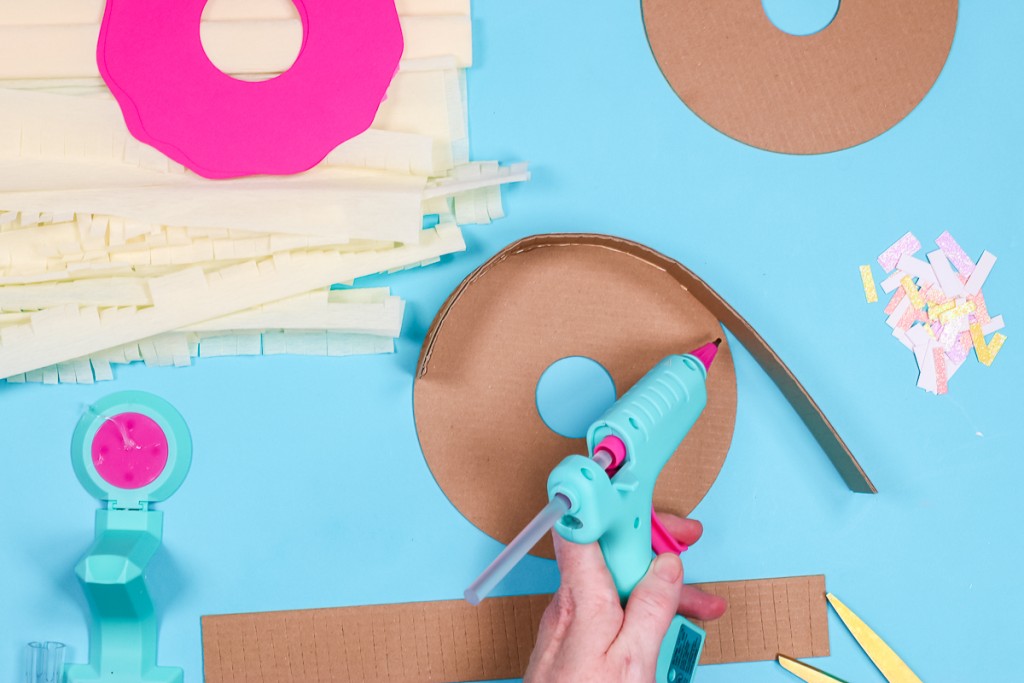
Now that we have all the pinata pieces cut out and the crepe paper prepped we can begin to assemble our pinata. To make the rectangle strips bend easier around the circle shape, I am going to use my craft knife to cut slits through one layer of the cardboard.
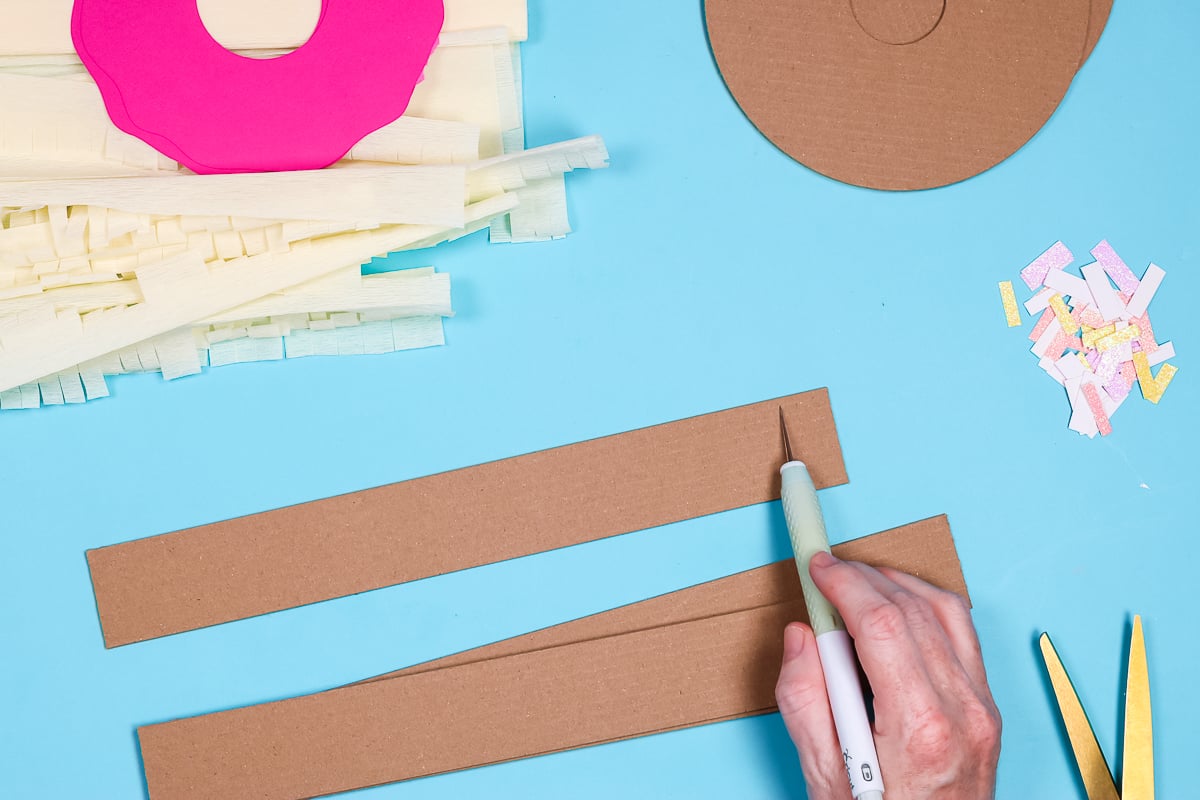
This does not have to be done in exact measurements. I cut slits randomly all the way down the rectangle strips about every half to a quarter inch. The closer you get the tighter the bend will be.
For the portion inside the donut, you’ll want to cut the slits very closely to get them to bend into that space.
Hot Glue Cardboard Pieces Together
To assemble my pinata I’m using hot glue to attach the rectangle pieces to the outside and inside edges of the donut piece. With the slits in the rectangle, it should be fairly easy to curve. Make sure you hold the pieces in place long enough for the glue to cool and hold it in place before moving on.
On the outer edge, you want to leave a flap to insert your candy, and for the recipient to remove it since it’s a mini pinata. I left a flap at the very end where the two pieces came together.
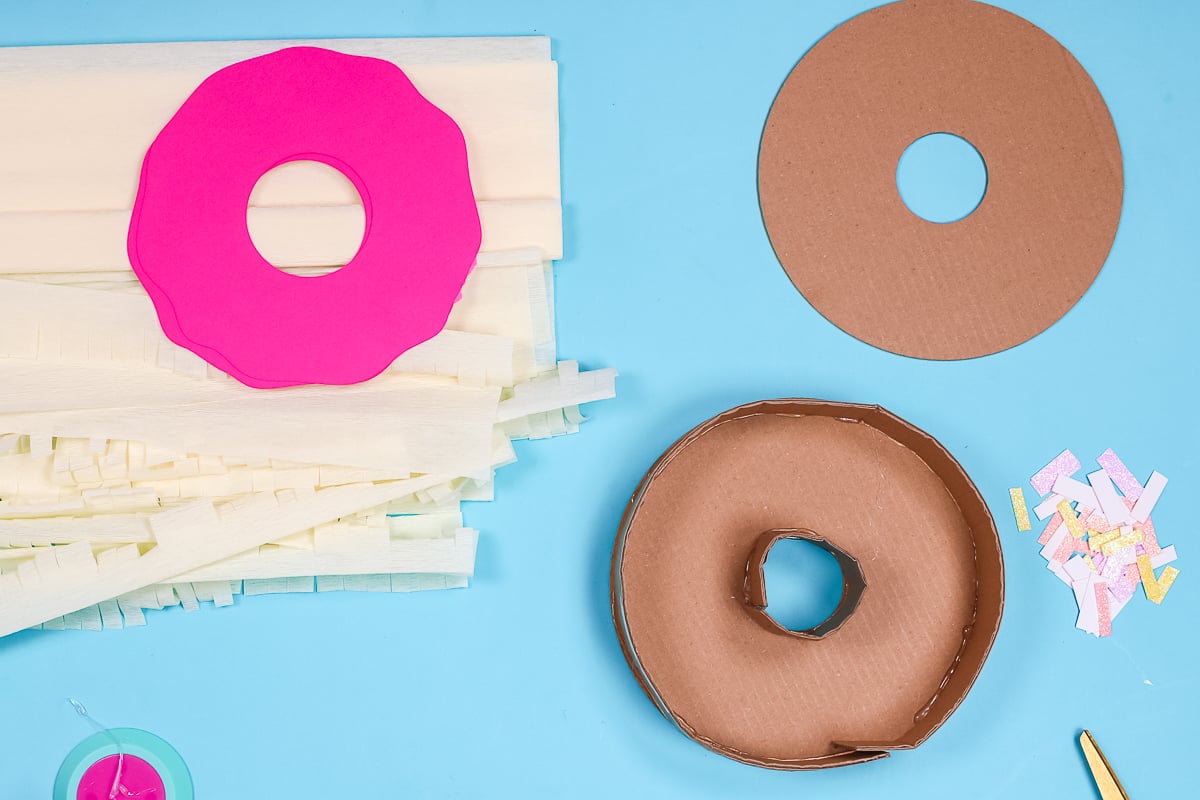
You want the flap to be long enough that you can tuck it inside but short enough that you can pop it back out to get things in and out of it. With the flap out, we can glue the other side to the donut and finish it off. Make sure you don’t glue down the flap.
How to Decorate a Mini Cardboard Pinata
Now that we have the pinata assembled we can start decorating. I am starting in the center of the donut and wrapping the fringe strips around the donut. Wrap them around so they overlap a bit and make sure you’re adding glue only to the top of the strip so the fringe isn’t glued down.
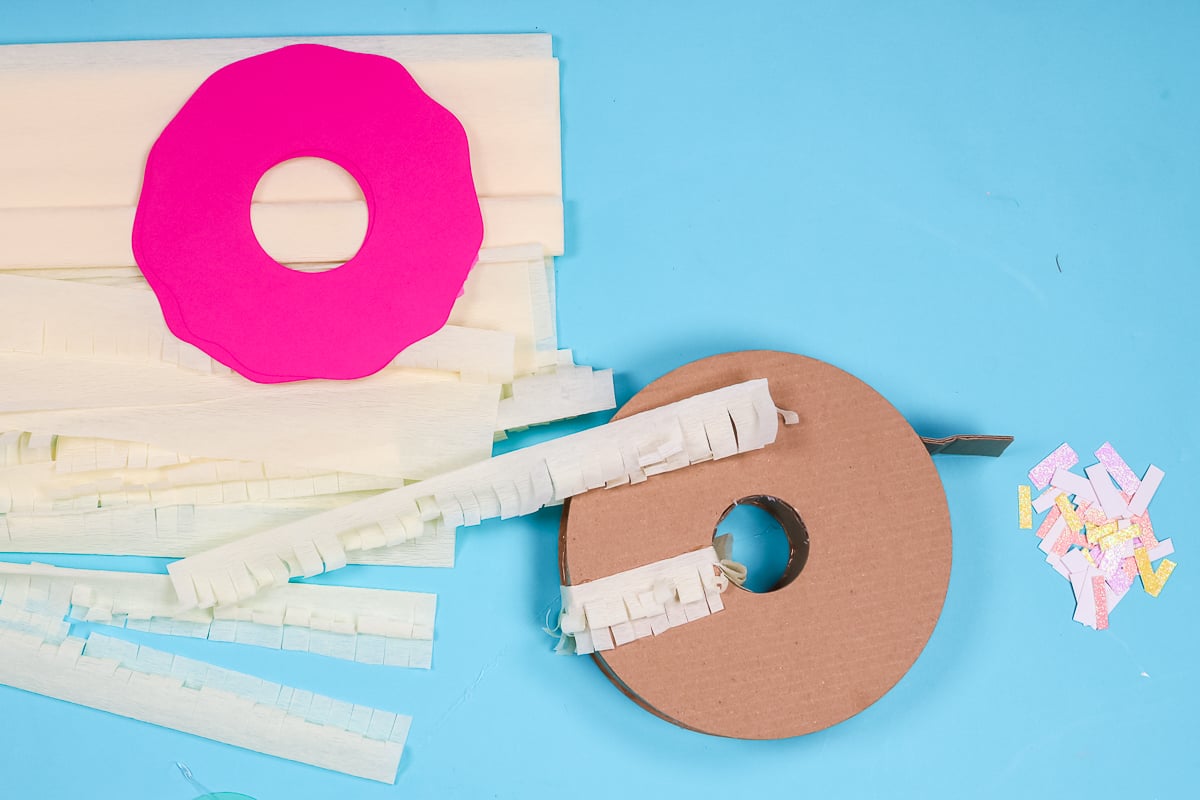
Remember crepe paper and tissue paper are very thin. You may want one of those hot glue fingertips to protect you from the heat that will come through the thin paper. Continue to glue the fringe all the way around your donut to cover the whole thing.
This does not have to be perfect, just keep going and make sure not to glue your flap closed. To keep from gluing the flap closed I added a separate strip onto that piece.
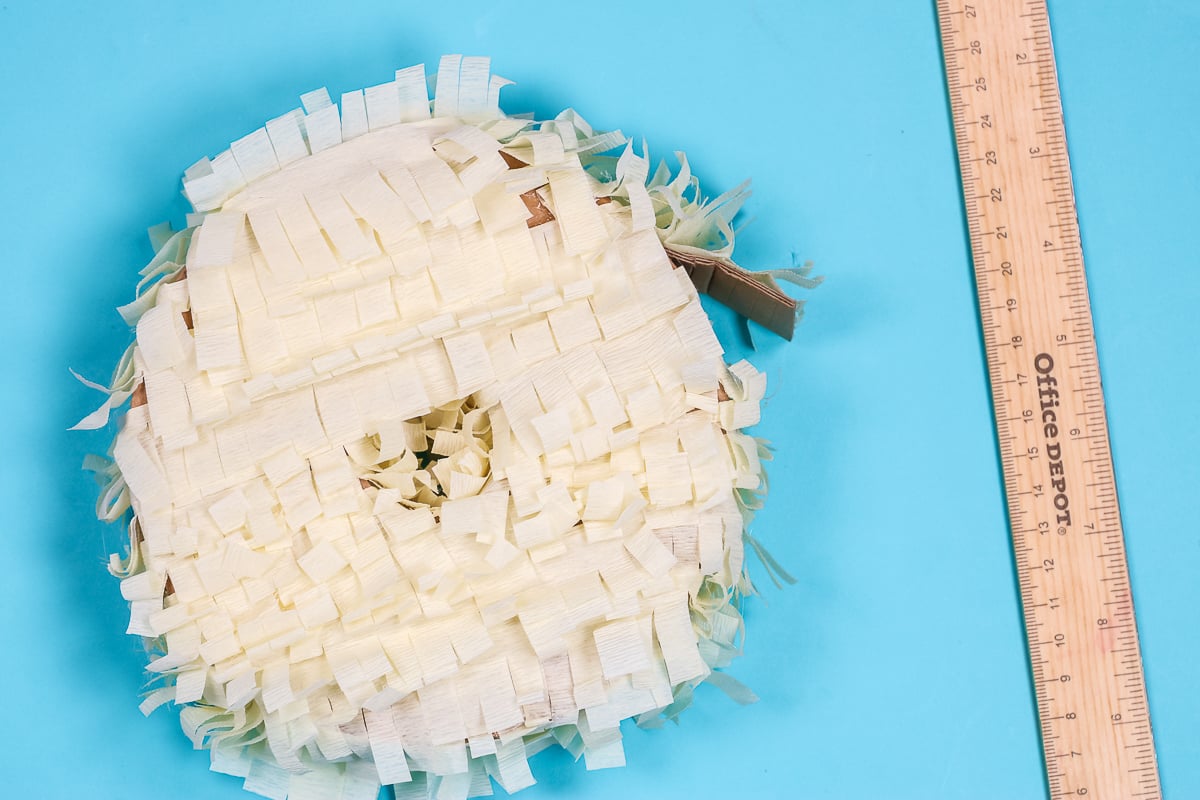
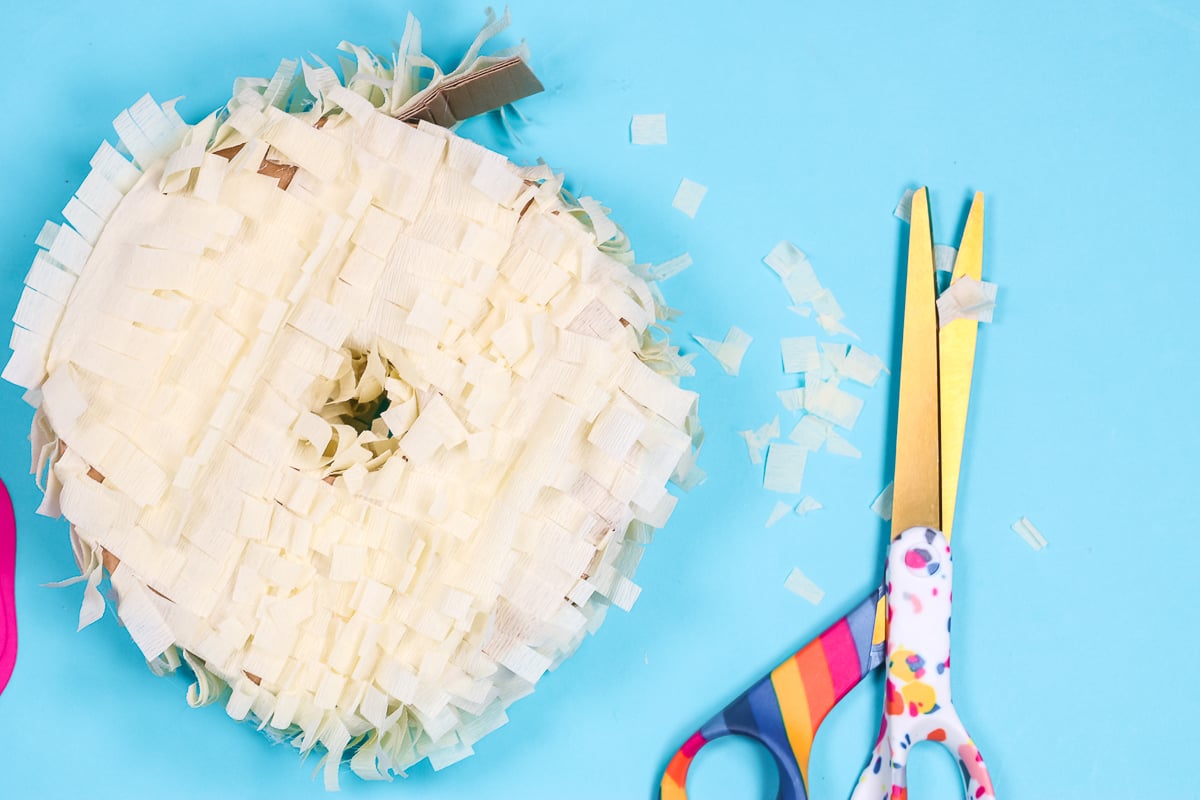
In the photo above, you can see the donut with the fringe wrapped all the way around it. I feel like the middle is a little too full to really get the donut look. Using scissors I am going to trim the fringe so it opens a little more to make it look more like a donut.
You can also use a little dab of glue to tack down some of the fringe pieces to make sure the cardboard stays covered. I am also going to go around the whole pinata and trim up any long pieces to make it look round and more like a donut. This is totally up to you and how you want it to look.
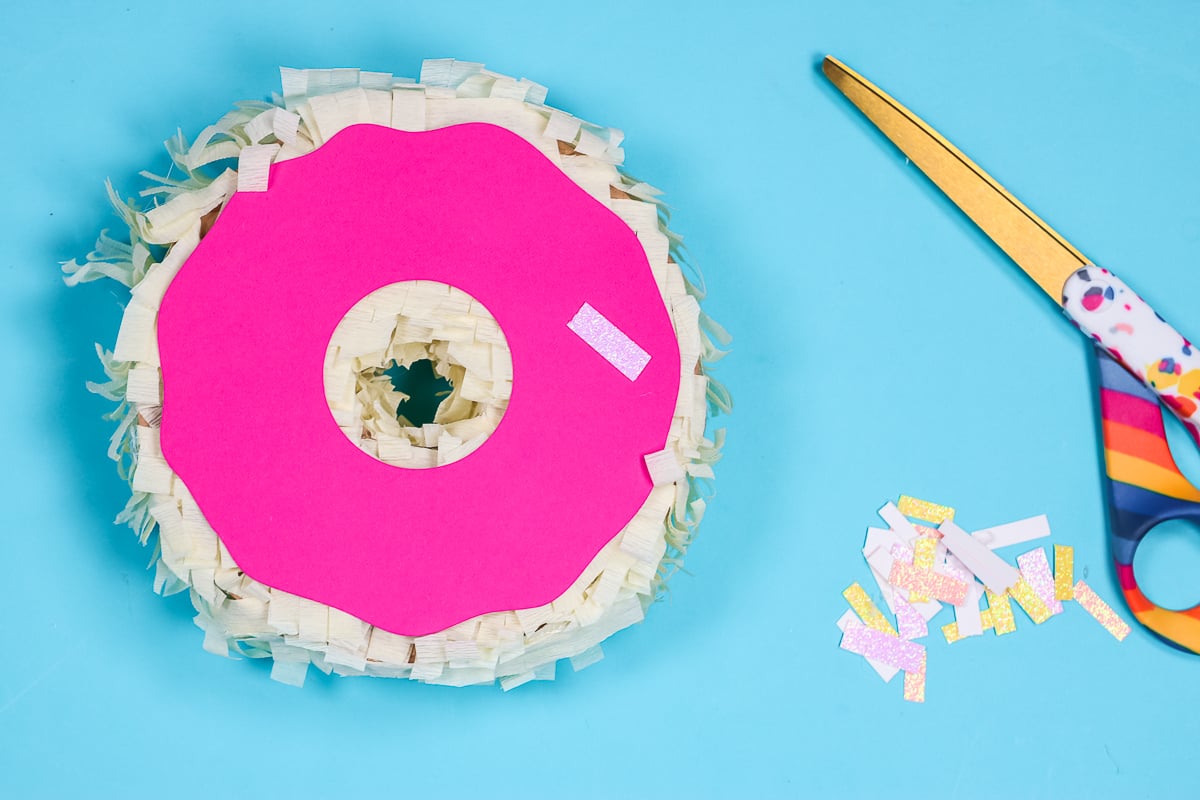
Adding the Finishing Touches
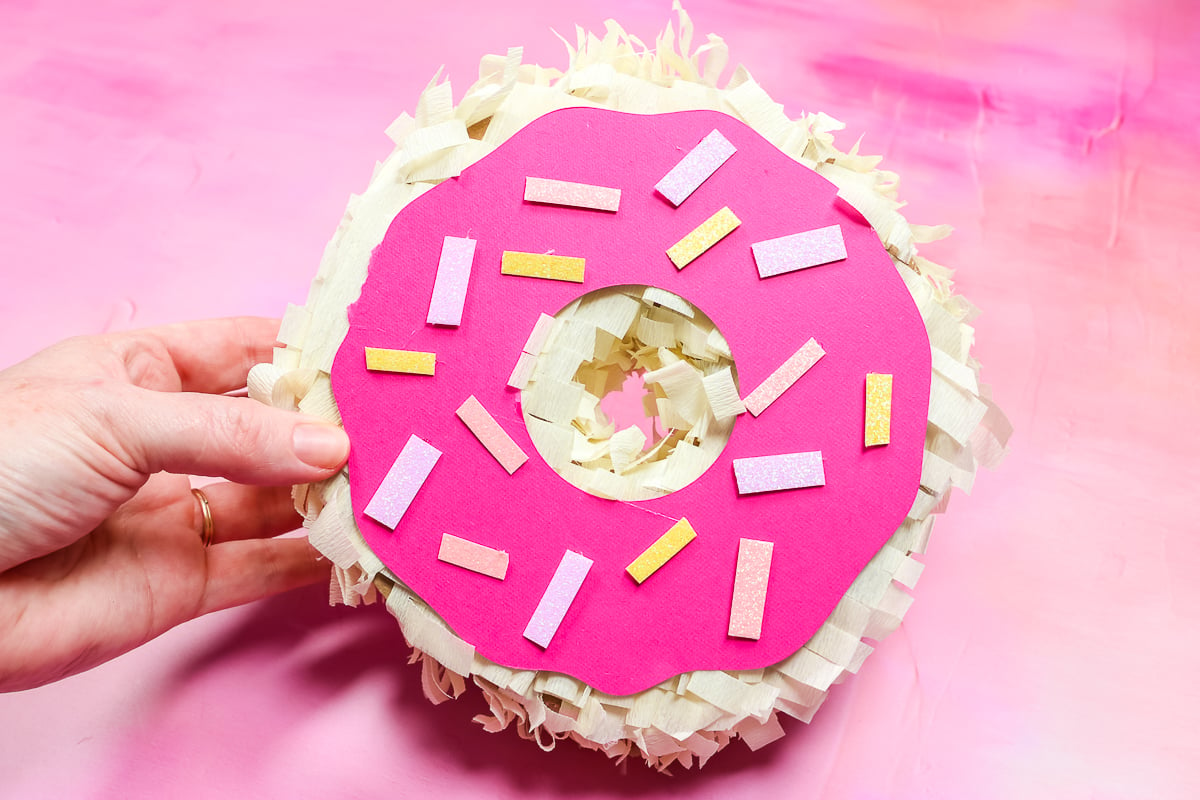
To really make this pinata look like a donut, we need to add the icing and sprinkles. I used hot glue to apply the pink paper frosting and to add all the little sprinkles. You can use another glue if you’d prefer.
When you’re done your pinata should look like the photo below. Now all that’s left to do is fill it with candy and close the flap. This is such a fun little project. Use it as a party favor, as a gift, or even just decor.
Final Thoughts on How to Cut Cardboard with a Cricut Machine
Now that we’ve made our pinata let’s talk about the process. Remember, not every piece of cardboard you get is the same. Even if it does fit under the bar of the Maker it may be denser than others so you will need to do a test cut each time.
How many passes the Knife blade will take can vary and we want to make sure we don’t cut through the mat and into the machine.
Other than dialing in the correct settings for cutting the cardboard, this project is simple. It’s also inexpensive. What’s better than using up some of those Amazon boxes that find their way to your door?
If you have any questions on how to cut cardboard with a Cricut machine leave them in the comments below and I’ll answer them for you. I cannot wait to see what you create with this process!