This post and photos may contain Amazon or other affiliate links. If you purchase something through any link, I may receive a small commission at no extra charge to you. Any supplies used may be given to me free of charge, however, all projects and opinions are my own.
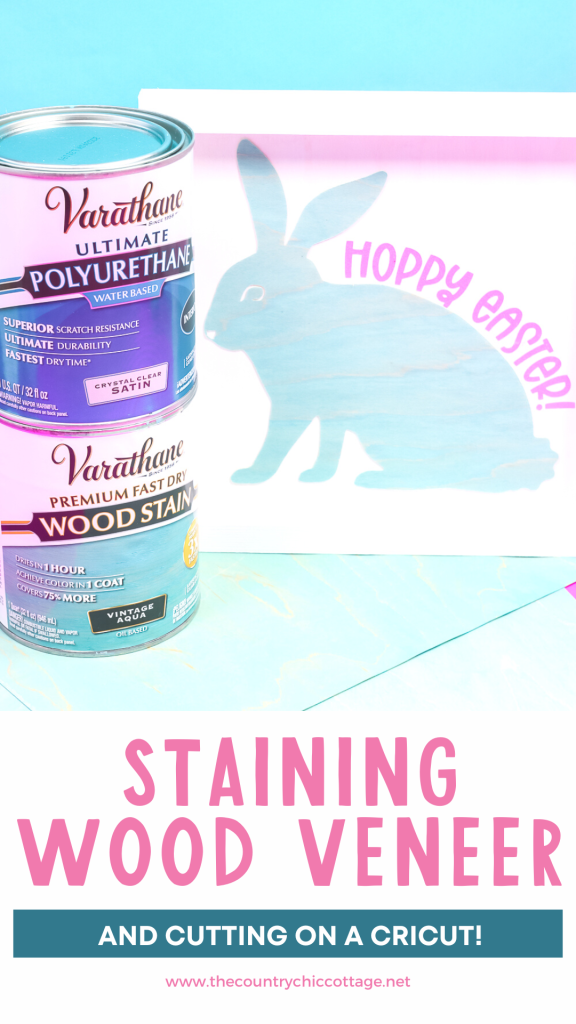
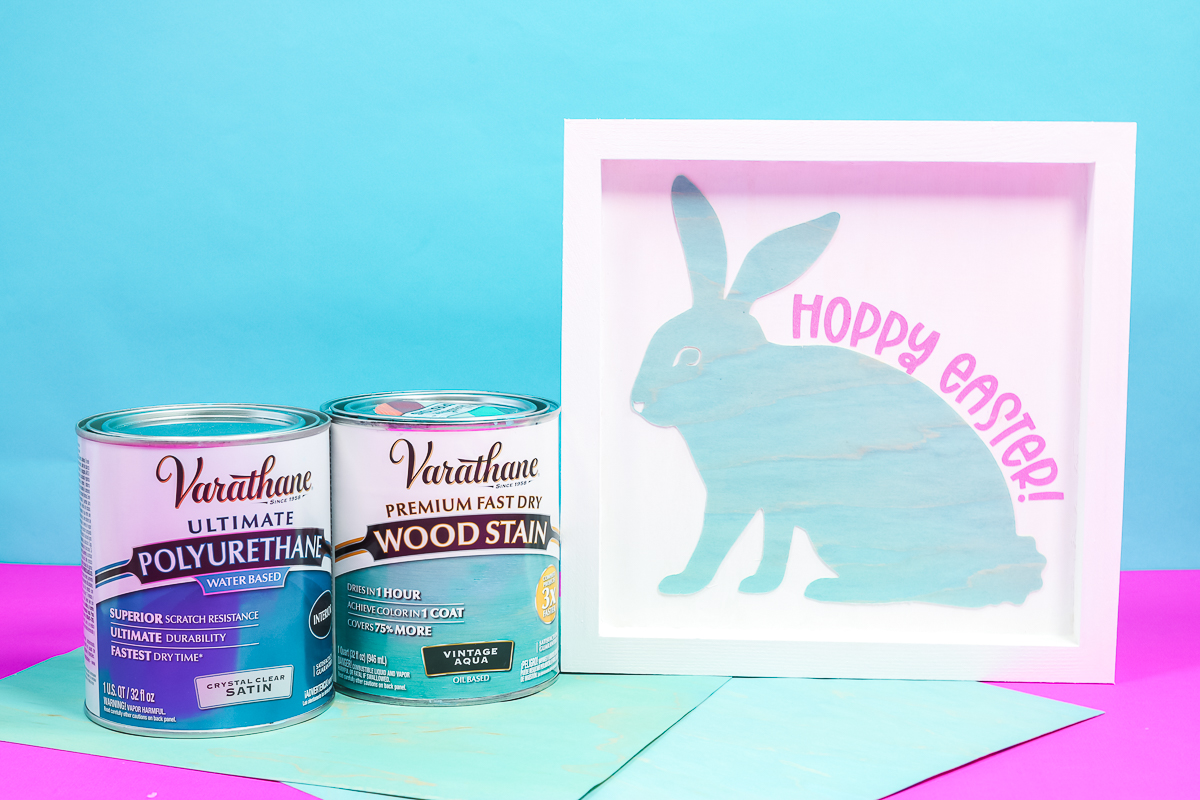
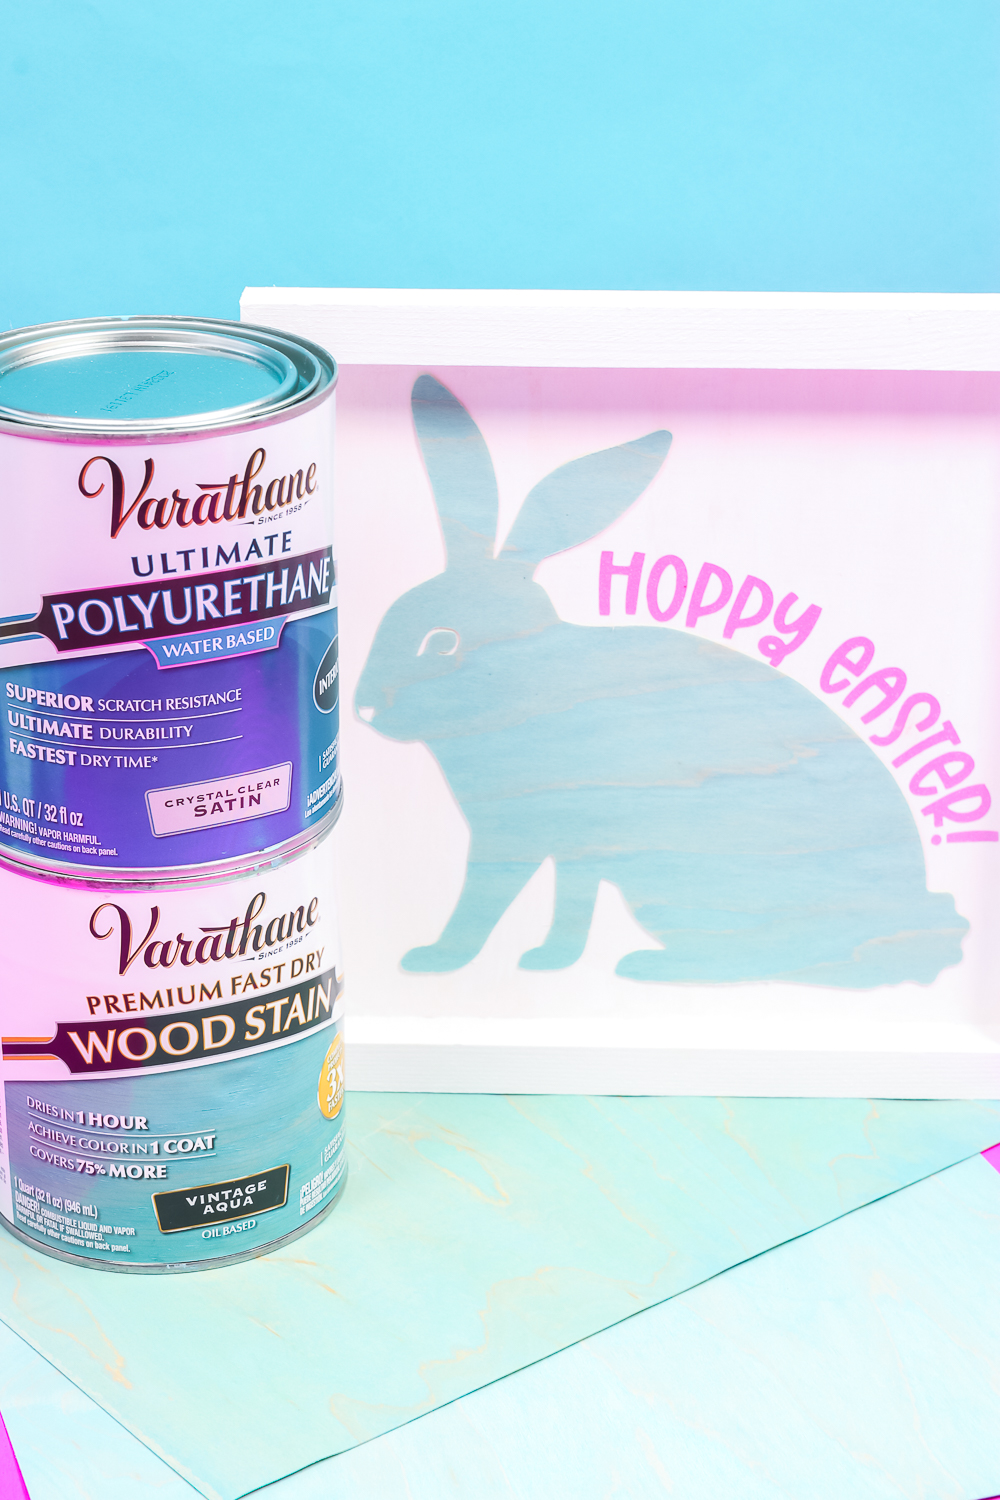
Did you know that staining wood veneer is possible? With the colorful stains from Varathane, you can make wood veneer crafts in a wide variety of colors and shades. I am choosing a gorgeous Vintage Aqua stain for an Easter sign today but you can pick any color or wood tone you would like. Then just cut the wood veneer on your Cricut for intricate designs and projects with gorgeous wood grain showing through!
The post is sponsored by Varathane, however, all projects and opinions are my own.
Staining Wood Veneer
You can watch me stain wood veneer and use it to make this project in the video below. I know you will love seeing this project come together!
Can’t watch the video or miss some of the steps? You can also follow along below!
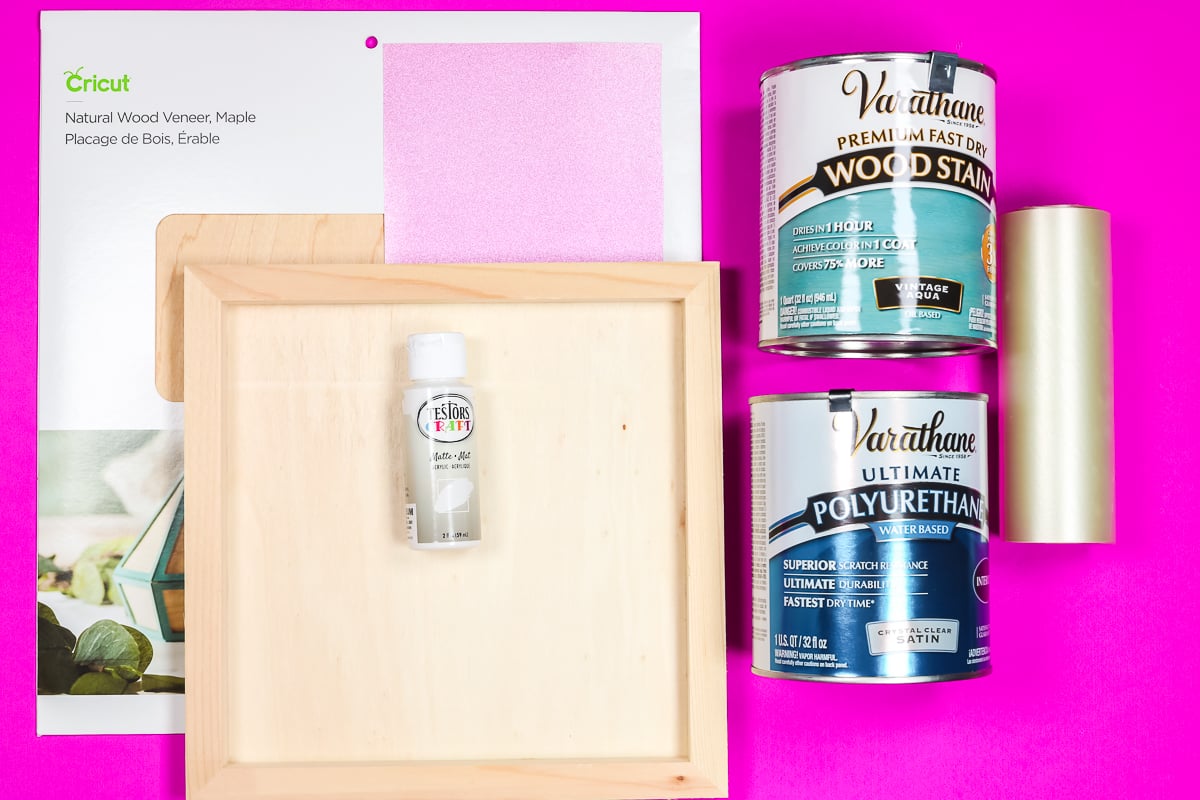
Supplies for Staining Wood Veneer
How to Stain Wood Veneer
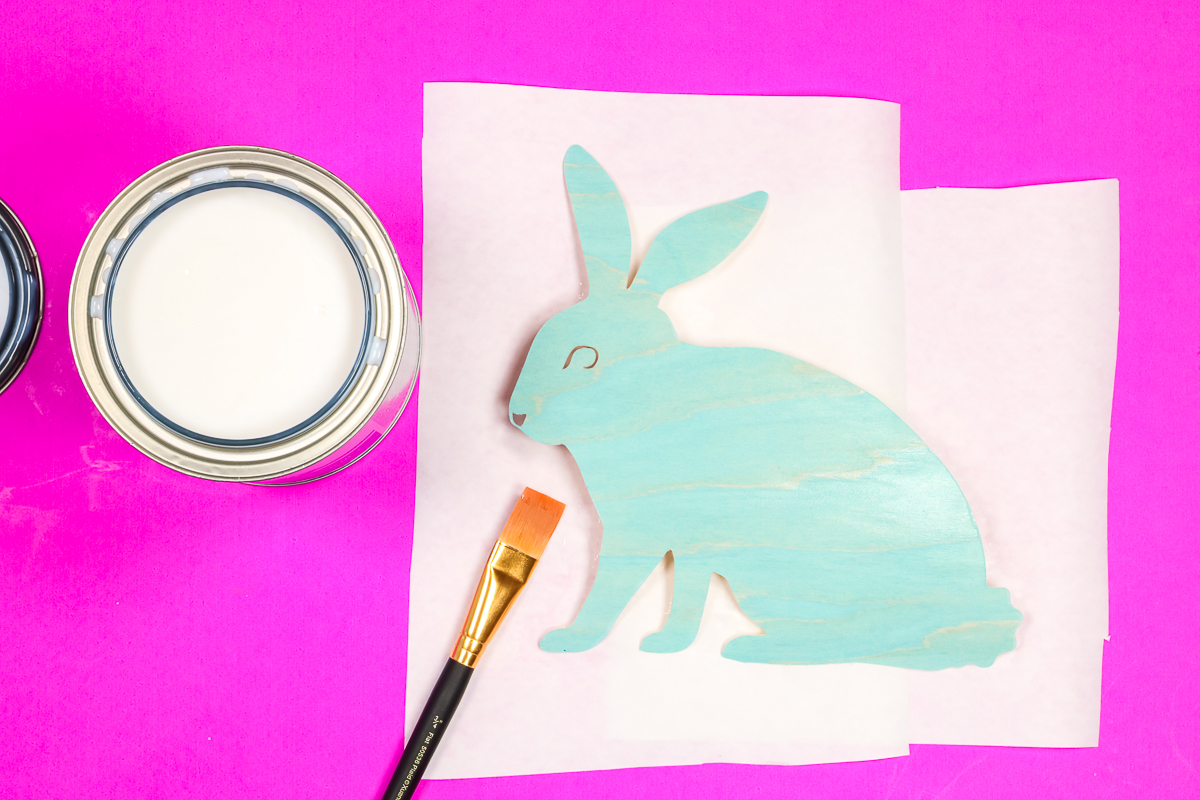
First, you will need to stain your wood veneer sheet. I like to do this before cutting on my Cricut machine. Wood veneer sheets are very thin (often as thin as a thick cardstock) and they will curl with the stain application. I find that staining while the veneer is still a full sheet minimizes this curling.
Varathane Premium Fast Dry Wood Stain Application
First, you will need to stir or shake the stain well. I placed my veneer sheet on some paper to protect my surface.
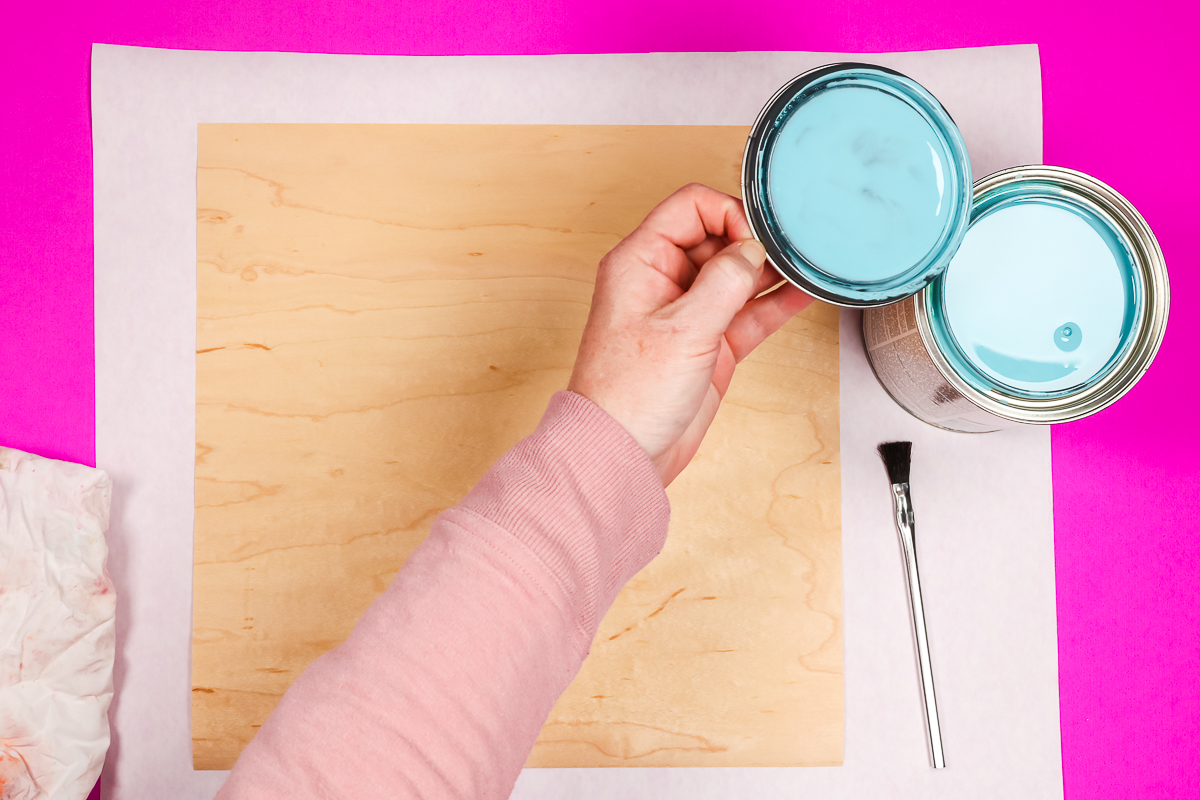
Then paint the wood stain onto the wood following the wood grain. I like to use a disposable brush so I can throw it out after I am done adding the stain.
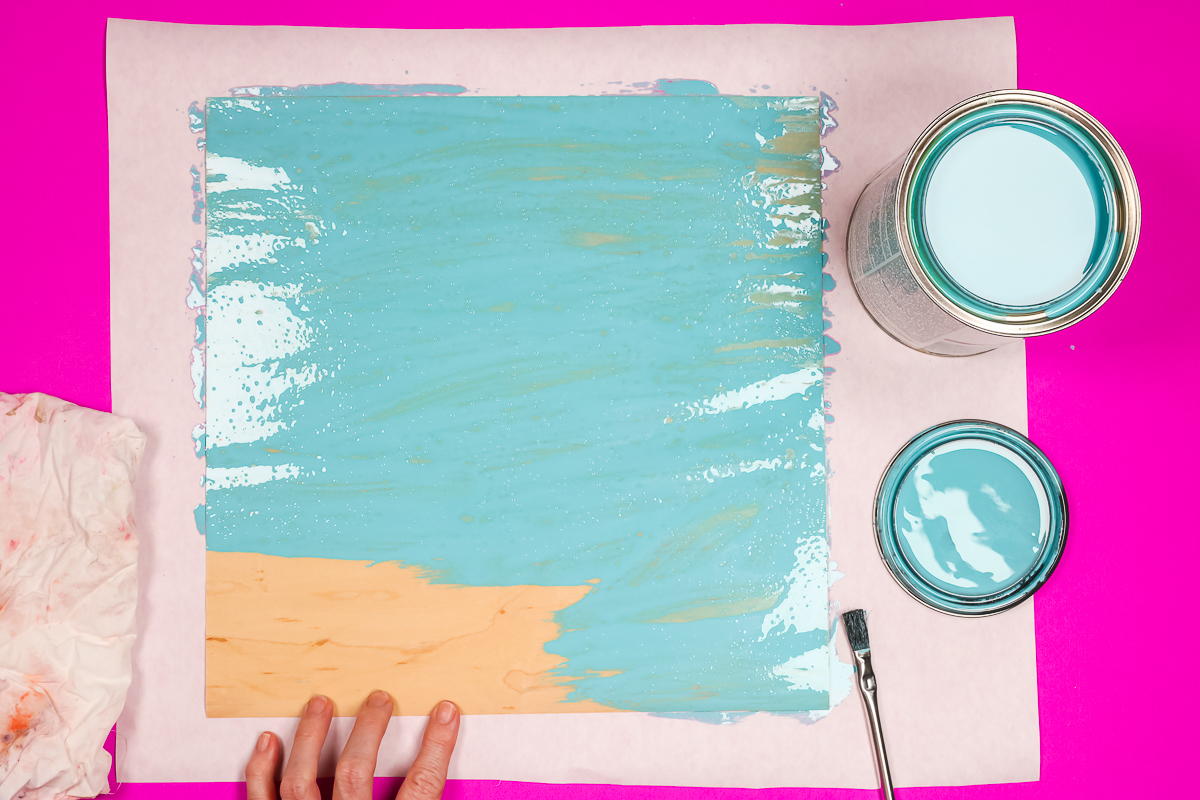
Allow it to sit for 3 – 5 minutes. The longer you let it sit the darker the final color will be. Then wipe away the excess stain with a rag. I allowed my stain to sit for right at 5 minutes.
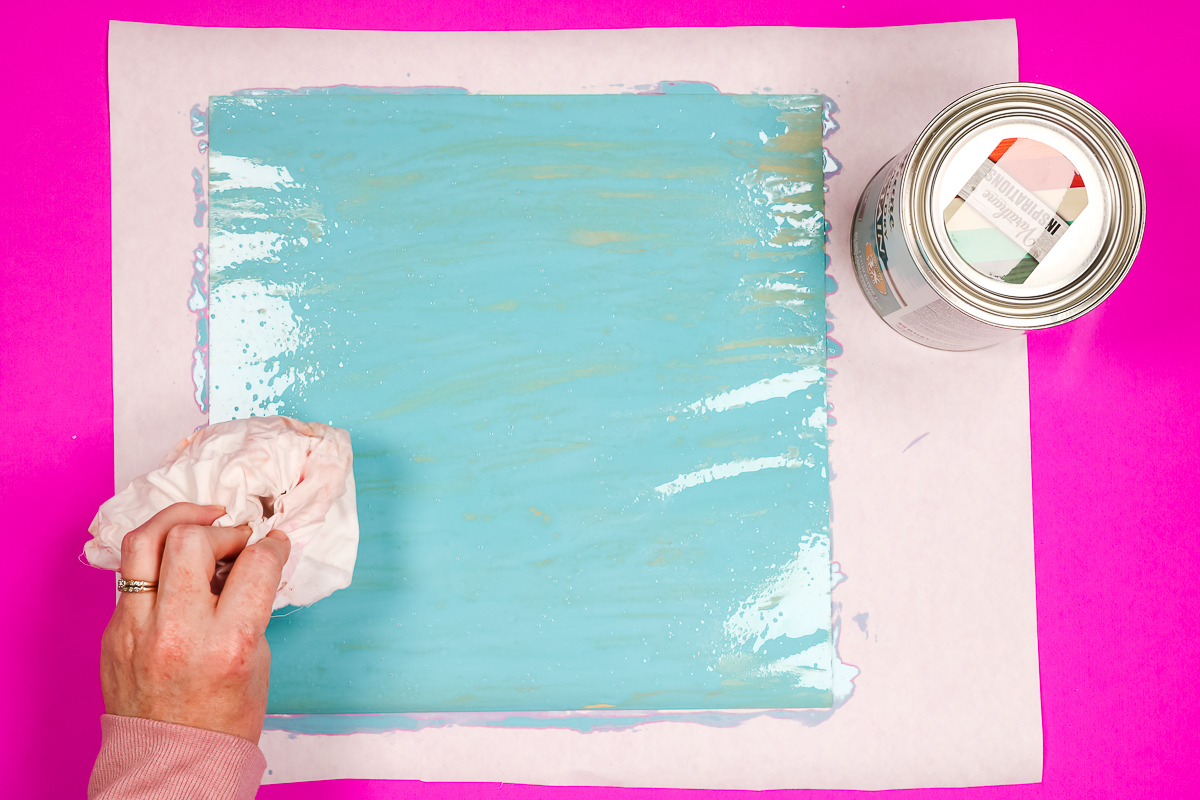
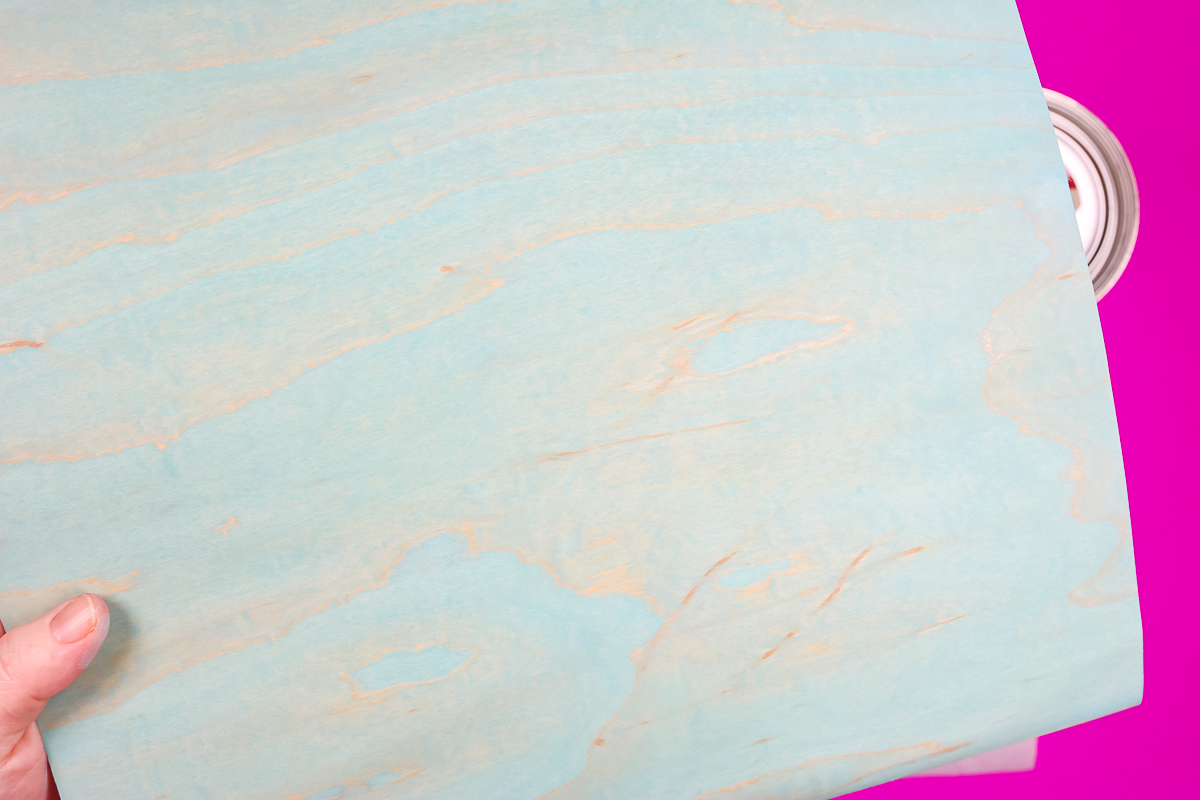
As you wipe, you can see the gorgeous color with that amazing wood grain. Be sure to remove all of the excess stain so the piece will dry quickly. These great fast-drying stains from Varathane are ready in just 1 hour.
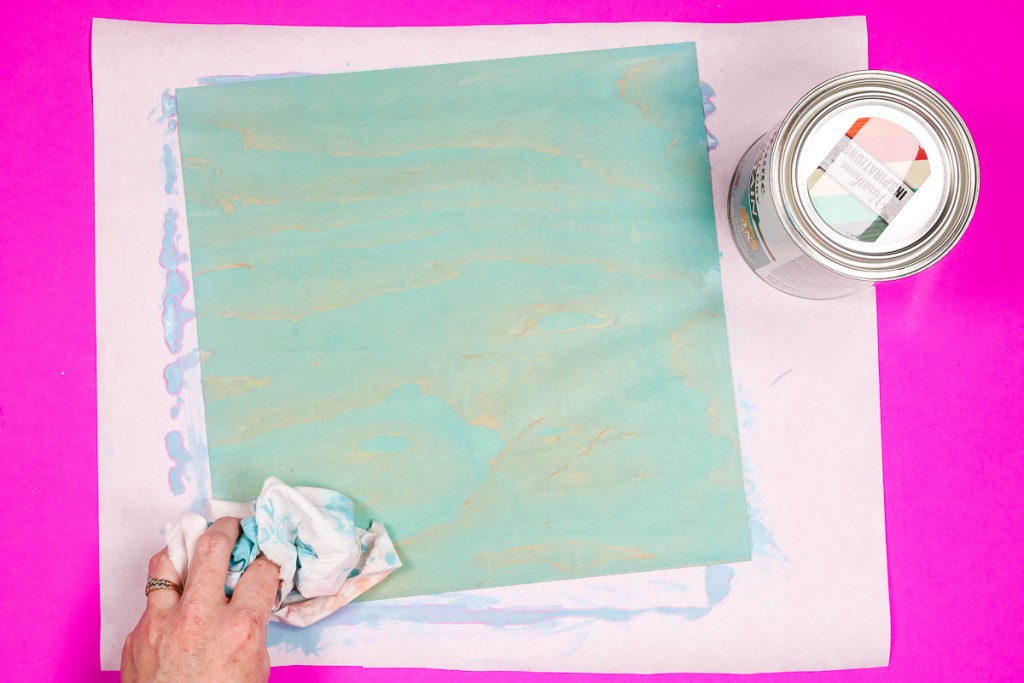
I personally love this vintage aqua color for spring. It adds some fun color to my project while still having the wood grain for my farmhouse-style loving heart!
How to Cut Wood Veneer on a Cricut
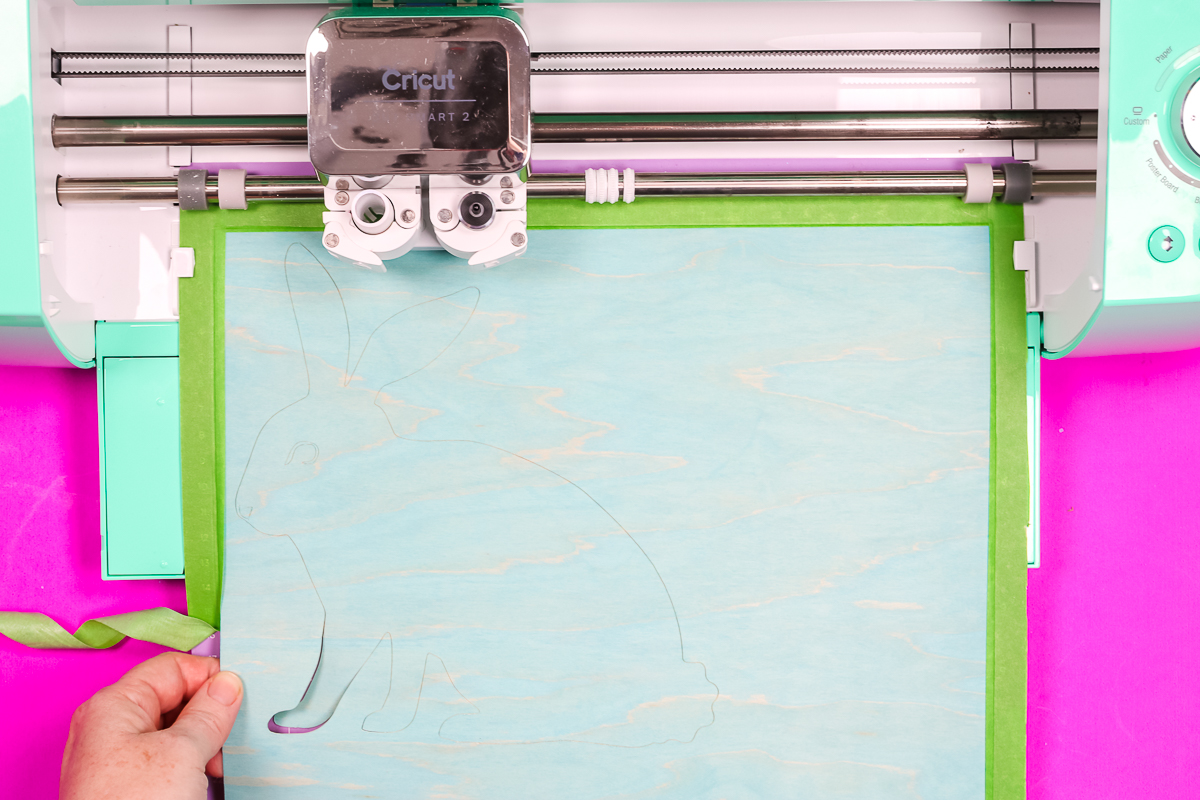
Now that you know all about staining wood veneer, you can cut these pieces on your Cricut machine into any shape. I will be using this free Hoppy Easter cut file but you can choose any shape you would like.
Want more information about cutting wood veneer on a Cricut? Try this post as well!
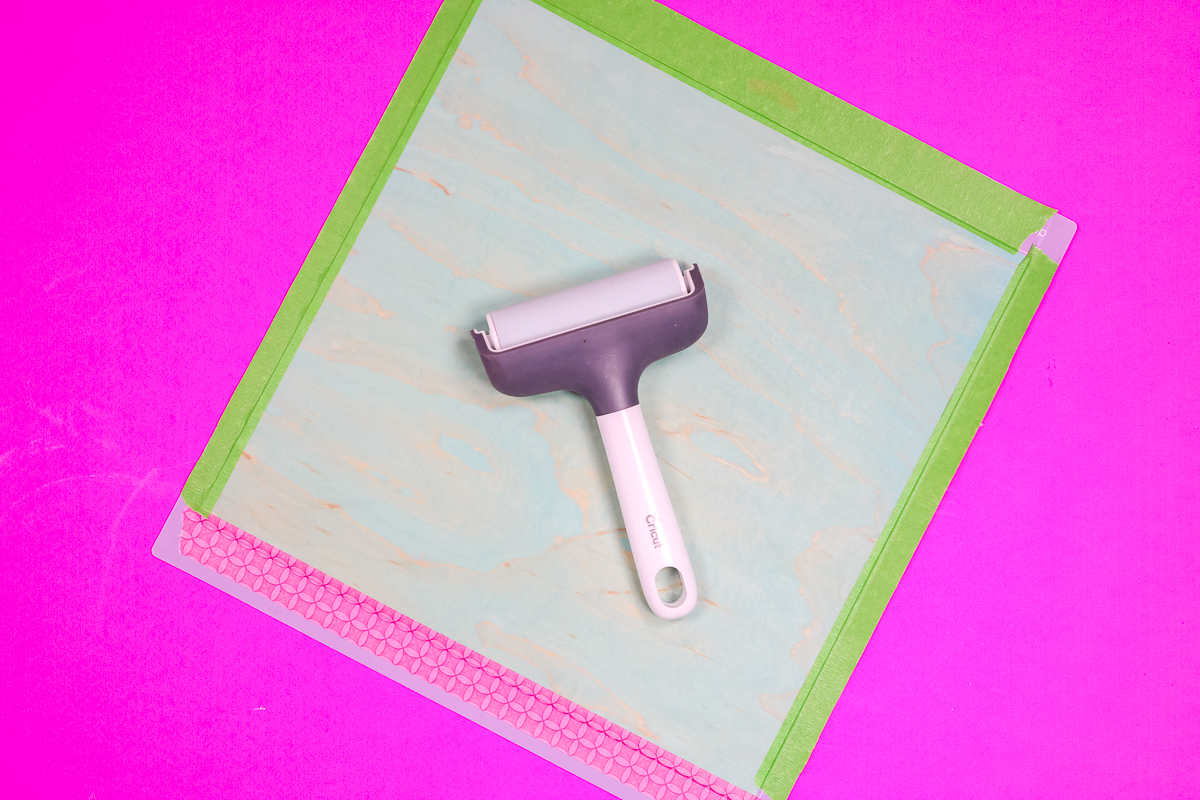
Adding Wood Veneer to the Mat
Add the sheet to a strong grip Cricut mat then use the brayer to press it down well. Add painter’s tape all the way around the outside edge. Just grip the very edge of the material and make sure that your tape does not hang over the edge of the mat. This will ensure that the wood veneer does not move while you are cutting it.
Cutting Wood Veneer on a Cricut
Upload your design to Cricut Design Space then click Make It. Pick on a mat and then your cut settings. You do want to use a wood veneer cut setting and I have more on that below if you are unable to find it. Add the deep point blade to your machine. Then just add your mat to your machine and press the go button to cut.
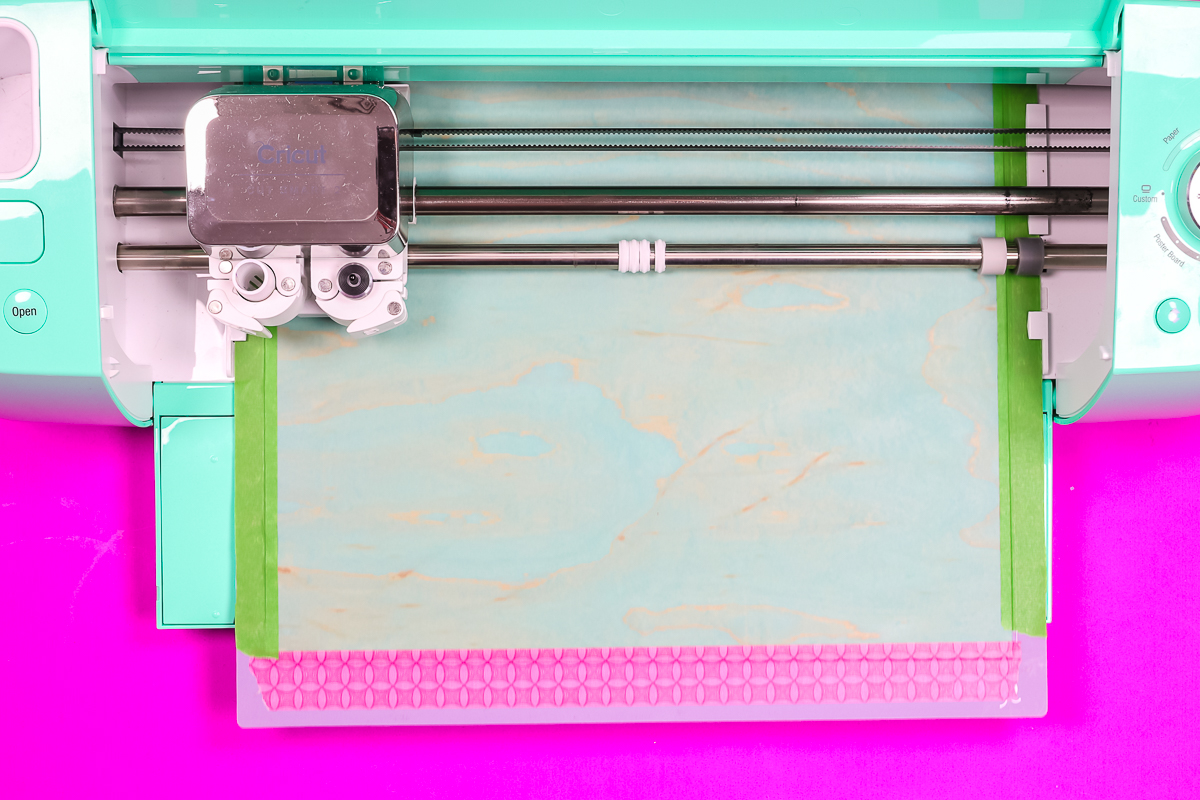
The machine will make several passes over the design. Once the machine stops, DO NOT eject your mat. Instead, pick up the edge of your project and make sure it is cut through. If it is, remove the mat from the machine. If it is not, press the go button again to go a few more passes.
Wood Veneer Cut Settings
Just a note about the settings for wood veneer. Currently, the wood veneer cut setting is only appearing on computers and not on mobile. I assume it is mixed up with the other wood products that are for the knife blade only. I experimented with other settings on mobile and did not have any luck with cutting wood veneer so I would use a computer for now.
Once cut, remove your project from the mat carefully and remove any internal pieces. You are now ready to use your wood veneer cutout in a project!

How to Seal Wood Veneer
I get asked about sealing options all of the time and Varathane Ultimate Polyurethane is a great option! Stir the product well before using it (DO NOT SHAKE). Then apply it with a brush in the direction of the wood grain. The product needs to dry for two hours then you can re-coat it if needed.
Assembling an Easter Sign
Once you learn about staining wood veneer, you will want to make a project. Here I am making a cute Easter sign but you can let your imagination run wild!
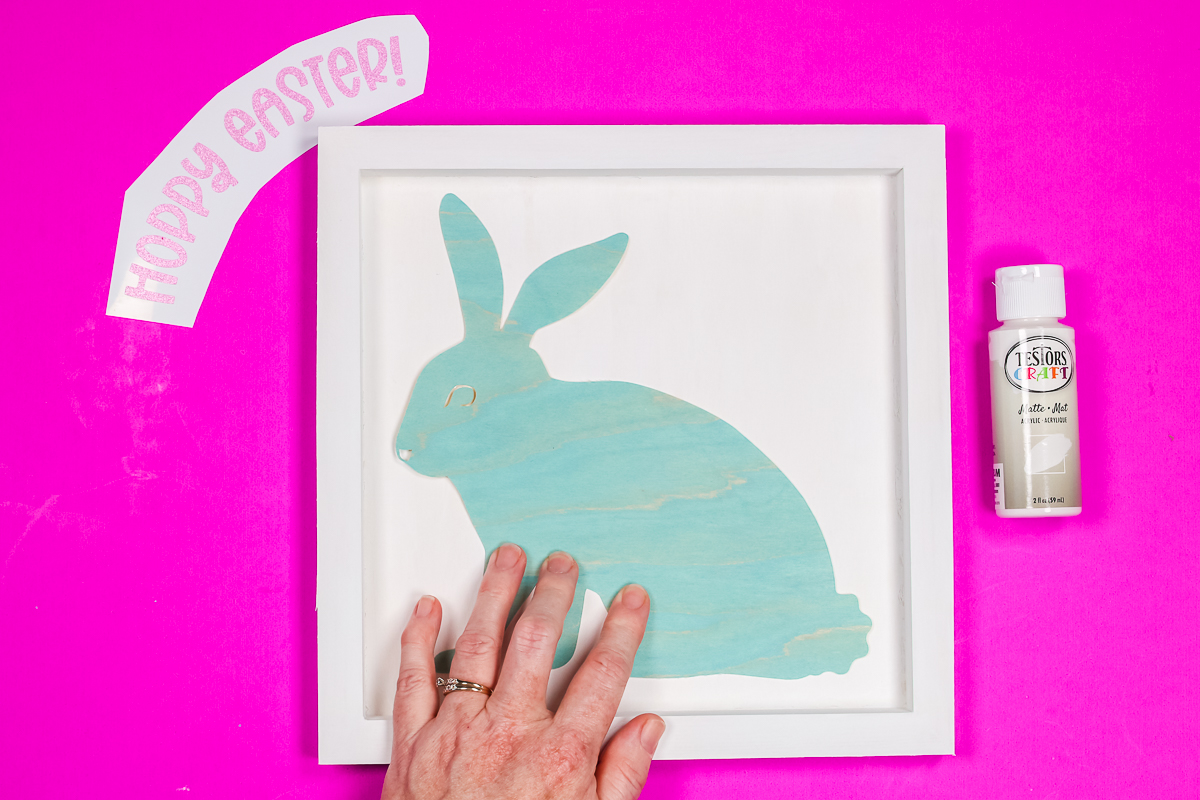
Adding Wood Veneer to the Sign
I painted my wood panel with two coats of Testors Craft Paint in Matte White. Once that is dry, I used fast-drying wood glue to add my wood veneer. Because the piece will probably be curled at this point, something that dries fast is best. Then you can add objects on top of the wood veneer to weigh it down as it dries.
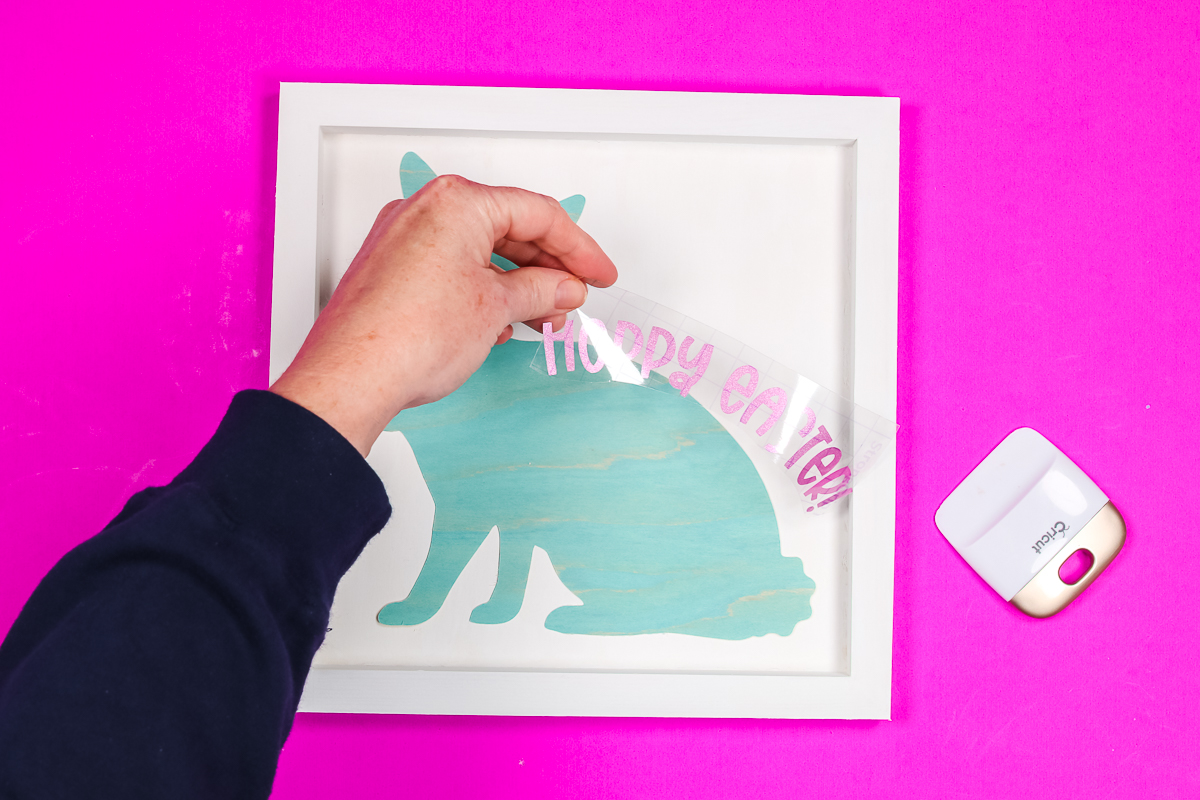
Adding Vinyl Words to the Sign
Once the glue is dry, you can add vinyl to the sign if you would like. Here I cut vinyl lettering on my Cricut and I am using transfer tape to add it to the Easter sign to complete the project. You can seal over the vinyl letters with polyurethane if you want but I find that is not necessary for indoor applications.
Now your project is complete and you are ready to use these techniques to make your own crafts. Whether you use my instructions for staining wood veneer to make this Easter sign or you make something entirely different, I really think you will love the possibilities this opens up!
FAQ
Here are answers to a few common questions I get about this method of staining wood veneer.
Why use stain instead of paint?
Stain allows the wood grain to show through after application. If you want a more solid look, a paint would be needed. However, I would probably cut BEFORE painting in the case of wood veneer.
What colors of wood stain can I use?
You can use ANY color for this project! The Varathane Premium Fast Drying Wood Stain comes in a wide variety of shades and you can pick and choose the ones you love for your wood crafts.
Why stain before cutting the wood veneer?
Any product applied to the wood veneer sheet is going to cause some curling or warpage of the sheet. I like to stain the entire sheet whenever possible to minimize this distortion.
Do I need a sealer?
If you are using the stained wood veneer indoors, you can probably get away with not using a sealer, especially for something like this sign that will not be handled. However, sealing stained wood is always a good idea and a best practice.

Love this project and want more ideas? Try the links below as well!

Making your own mason jar Easter Baskets is so easy to do! Give them a try following the instructions below.


Make your pot planters beautiful with this ladybug design! This upcycled flower pot doesn’t get much easier than this! Testors Crafternoons has excellent paint options for all of your flower pot decorating ideas.This adorable decoration will brighten up your outdoor space and have you ready for spring in no time.

Want to print the instructions for staining wood veneer? You can do that with the card below!

How to Stain Wood Veneer
Grab your Varathane wood stain and add some color to plain wood veneer for all of your projects!
Supplies
- Varathane Premium Fast Drying Wood Stain: Find wood stain at the following retailers: Home Depot, Ace Hardware, and Amazon.
- Varathane Ultimate Polyurethane Water Based Find polyurethane at the following retailers: Michael’s, Home Depot, Ace Hardware, and Blain’s Farm & Fleet.
- Wood veneer
Instructions
-
First, you will need to stain your wood veneer sheet. I like to do this before cutting on my Cricut machine. Wood veneer sheets are very thin (often as thin as a thick cardstock) and they will curl with the stain application. I find that staining while the veneer is still a full sheet minimizes this curling.
-
First, you will need to stir or shake the Varathane Premium Fast Dry Wood Stain well. I placed my veneer sheet on some paper to protect my surface.
-
Then paint the wood stain onto the wood following the wood grain. I like to use a disposable brush so I can throw it out after I am done adding the stain.
-
Allow it to sit for 3 – 5 minutes. The longer you let it sit the darker the final color will be. Then wipe away the excess stain with a rag. I allowed my stain to sit for right at 5 minutes.
-
As you wipe, you can see the gorgeous color with that amazing wood grain. Be sure to remove all of the excess stain so the piece will dry quickly. These great fast-drying stains from Varathane are ready in just 1 hour.
-
At this point you can cut into shapes on your Cricut machine then seal with Varathane Ultimate Polyurethane Water Based. Stir the sealer well the apply with the wood grain. Allow to dry for 2 hours before using.