This post and photos may contain Amazon or other affiliate links. If you purchase something through any link, I may receive a small commission at no extra charge to you. Any supplies used may be given to me free of charge, however, all projects and opinions are my own.
Have you ever wanted to create your own customized sublimation door mats? I’m here to walk you through adding sublimation designs to door mats, bath or kitchen rugs, and more! I have the tips and tricks you need to cover an entire rug with just a small sublimation printer.
Are you new to sublimation? Check out my Beginner’s Guide here.
Sublimation Door Mats and Rugs
Have you ever wondered if you could sublimate on a door mat or rug? Today we’re going to do it. We’ll test rugs that are an actual sublimation blank. I found the white sublimation door mats on Amazon. They’re white and cushy and the top is made of polyester.
We’ll also try a regular polyester rug. You can look for polyester rugs at places like Lowe’s, Home Depot, Amazon, and The Dollar Tree, just make sure that they say, “100% polyester” on them, and that they’re light enough in color for sublimation.
You can actually watch me create these rugs. Just click play on the video below:
Supplies used:
NOTE: As always, you will need a sublimation print that is sublimation ink on sublimation paper, printed out of a sublimation printer. I’m using an 8.5″ x 14″ sublimation paper for my prints.
What Heat Press to Use
Because the rugs are larger than regular blanks I am using the largest heat press I have (the Cricut Autopress.) I would suggest using the largest heat source available to you. I try to keep my design to something that can be applied with a single press. To create a full rug look, I tiled my design with each section of the design being smaller than the size of the heat plate.
Blanks used:
NOTE: I’m using a grey rug that is not a sublimation blank but has a high polyester count. I’m also using a white sublimation door mat with the exact same design so you can the difference between using a white rug and a grey rug. Scroll down to see more!
Designs used:
What Designs Work Best for Sublimation Rugs?
In order to get the best results when adding tiled sublimation designs to your sublimation rugs, I highly suggest using designs that have a white background. This gives you a buffer when pressing your designs so you don’t have overlap which should help prevent any ghosting that can happen when you press the same area more than once.
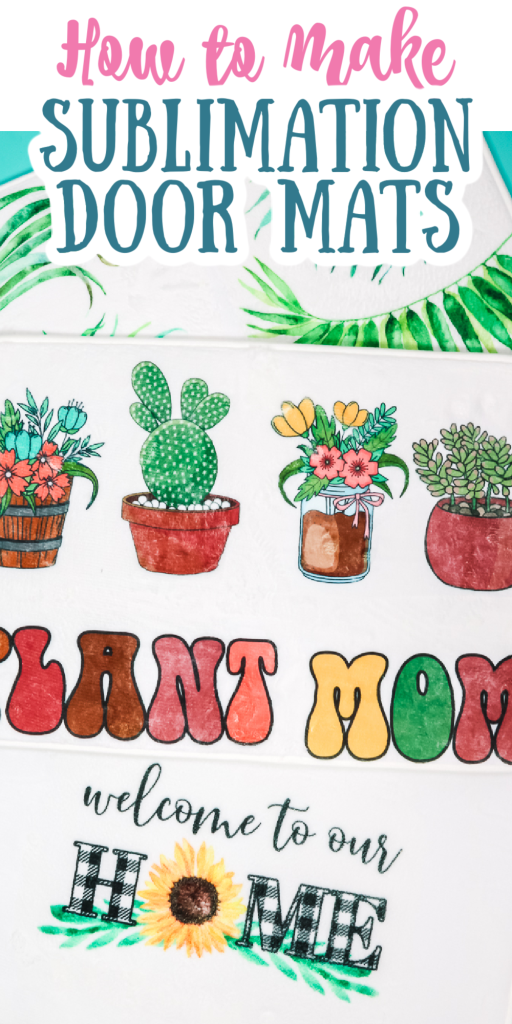
How to Make Sublimation Door Mats
Both my converted Epson Ecotank Printer and my Epson F170 accept 8.5″x 14″ paper. Using the larger paper allows you to get a larger design in a single print for making rugs. You can do this same project with smaller pieces of paper if you need to!
How to Turn a Single Print into a Tiled Print
Just recently I shared 3 different free programs you can use for printing sublimation prints. That post walks you through everything you need to know about printing your images any size and printing through their software. You can find the full video here. I am using the free Silhouette Studio program to turn one single image into multiple images.
How to Make a Single Print Sublimation Rug
The first rug we will make today is a white rug that is a sublimation blank rug. For this rug, we’re going to place one design in the center. I printed my design as large as possible on my 8.5″x14″ sheet of paper.
Sublimation on White Rug
We’ll prep the rug just like we do other sublimation blanks:
- Preheat the rug to remove any moisture from the rug. I’m pressing this rug blank at 385 degrees F so I will preheat for 10 seconds. The 385 degree temperature is a bit lower than it shows on Amazon but I had better luck at that setting.
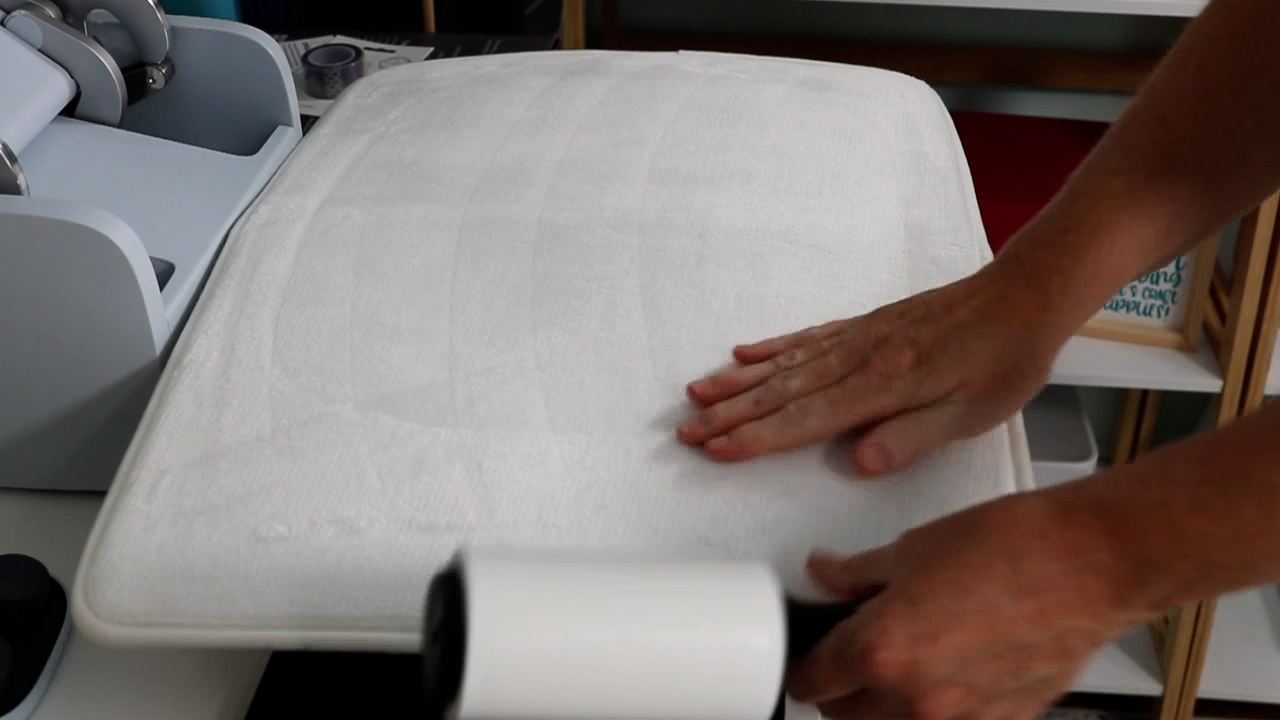
- Lint roll really well.
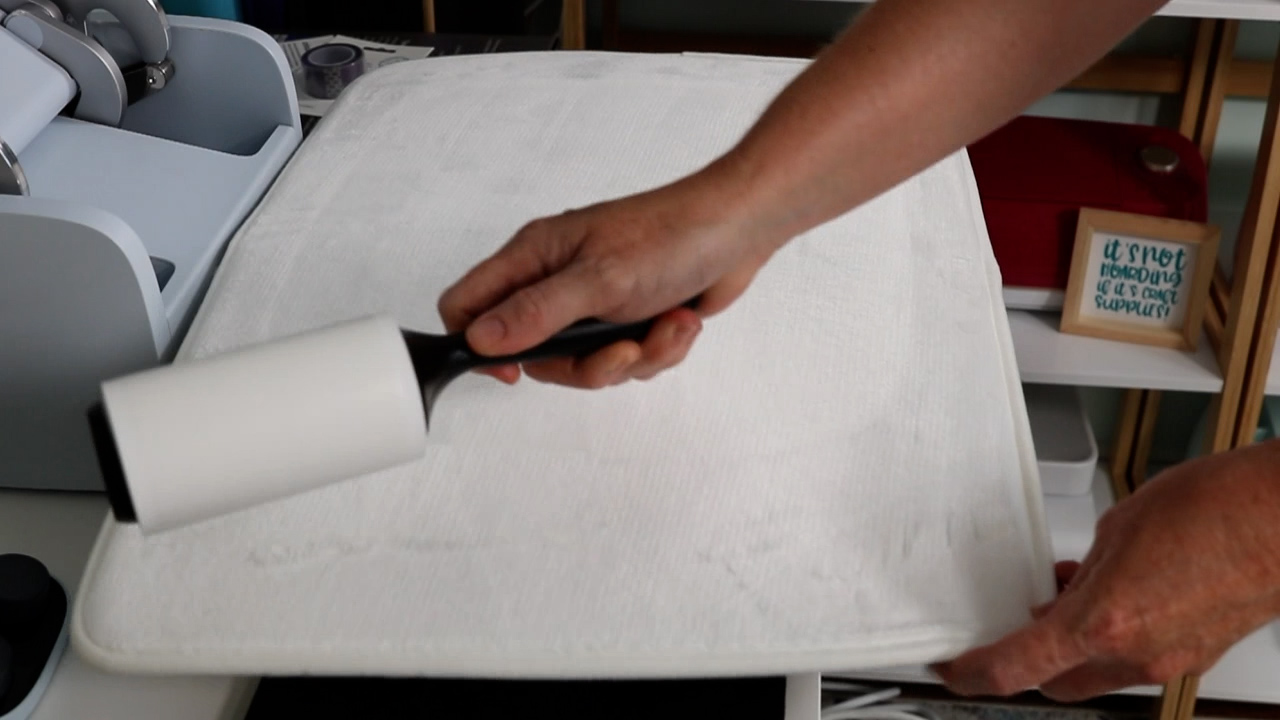
- After lint rolling use your hand to make sure the pile of the rug all lays in the same direction, even if the pile is not very deep. This will give you the best sublimation print possible.
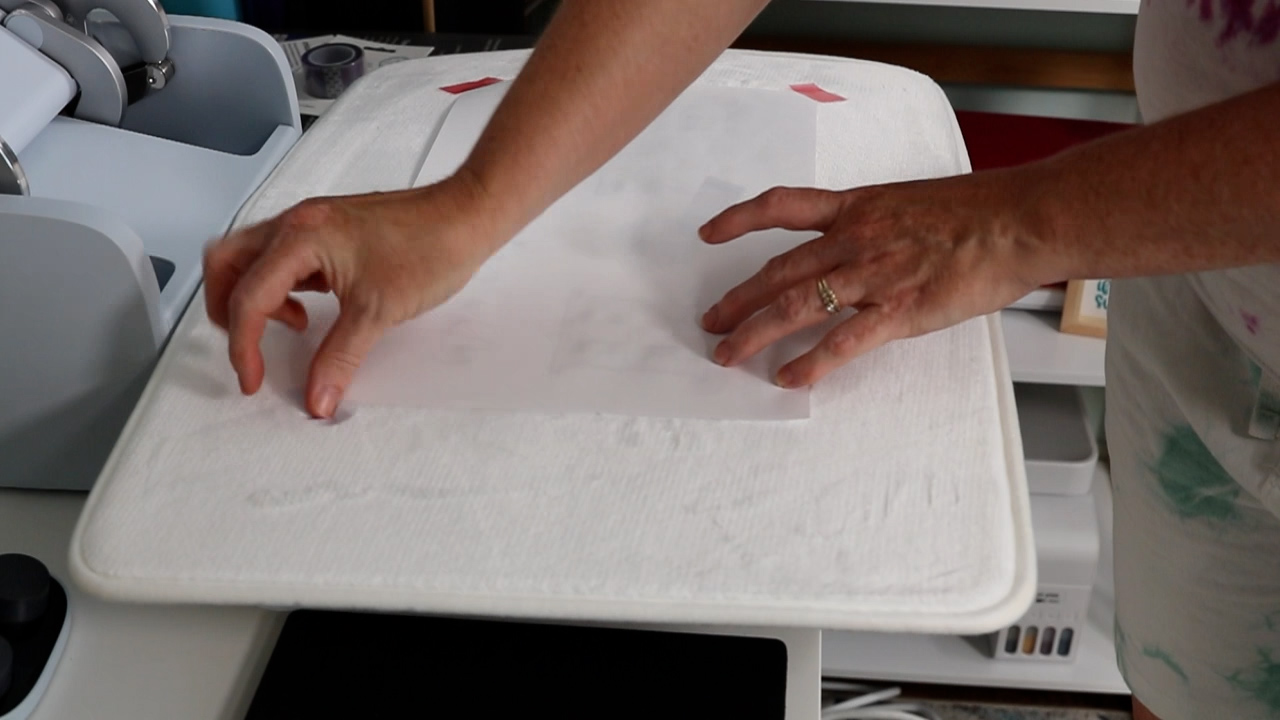
- Locate the sublimation print. Make sure it’s centered and straight and tape it down. To prevent possible heat press marks I used as little heat tape as possible right on the corners of my print. The tape can get stuck to these rugs and be hard to pull off. Use as little as necessary to hold your print in place.
- Add protective paper to your heat press then add your rug with the design attached. Place another piece of protective paper over the top. This will prevent any sublimation ink from getting onto your press on both the top and the bottom.

Press at 385 degrees F for 55 seconds. The AutoPress has automatic pressure. I think these rugs call for light to medium pressure so if you use a different heat press use light to medium pressure.
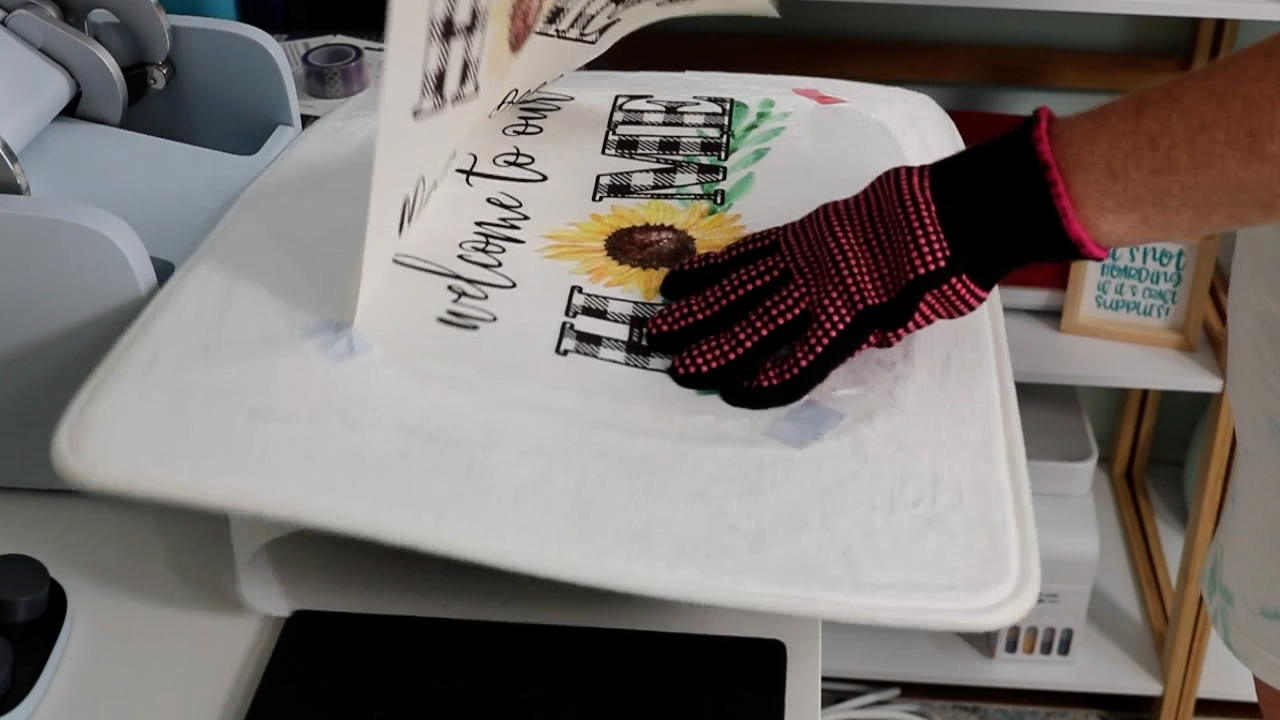
After pressing, before removing the whole image I like to lift one corner to check that the print transferred well. If it has, then remove the sublimation print and all the tape.
As I said before, the tape can be difficult to remove and I couldn’t always get it with my heat-resistant glove on but was able to get all the tape off by removing the glove and using the edge of my fingernail to pull the tape off.
Sublimation on Grey Rug
I wanted to show you what sublimation images look like on rugs that are not a white base. This grey rug is not a sublimation blank. I found it on Amazon. You can look for a polyester rug anywhere. Just make sure it is at least 65% polyester. I would recommend getting as high a polyester content as possible since this is a rug and you’ll be walking on it.
To sublimate on my grey rug I followed the same process as the sublimation rug:
- Pre-press at 385 degrees F for 10 seconds.
- Lint roll to remove any dust or dirt.
- Use your hand to make sure the pile is all facing the same direction. The pile on this rug is definitely thicker than the white one.
- Locate the design, and make sure it’s centered and straight. Use heat-resistant tape to secure in place.
- Apply protective paper below the rug and over the top of the sublimation print to protect your heat press from any sublimation ink.
- I pressed this one at 385 degrees F for 50 seconds. I wasn’t sure if it would melt since it isn’t intended for sublimation. I’m happy to say it worked great.
- Once the time is up, lift the corner and make sure it sublimated well. If it didn’t close the press again and press for a little longer.
- Remove the sublimation print and heat tape.
Removing Heat Press Marks
After removing your print and tape if you notice any heat press marks they’re easy to remove. I found with these rugs that the heat press marks were really just the pile being pressed down. By rubbing my hand back and forth across the surface the pile fluffed back up and I didn’t have any marks at all.
Comparing White and Grey Rugs
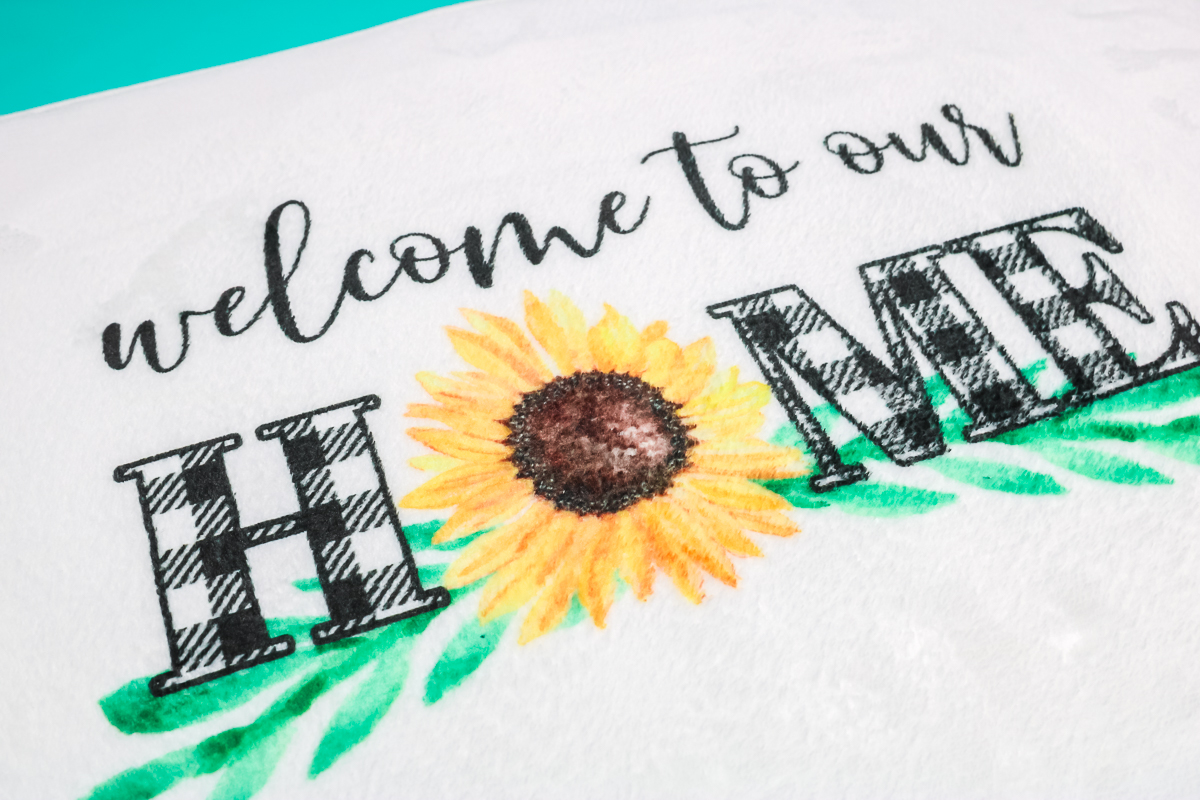
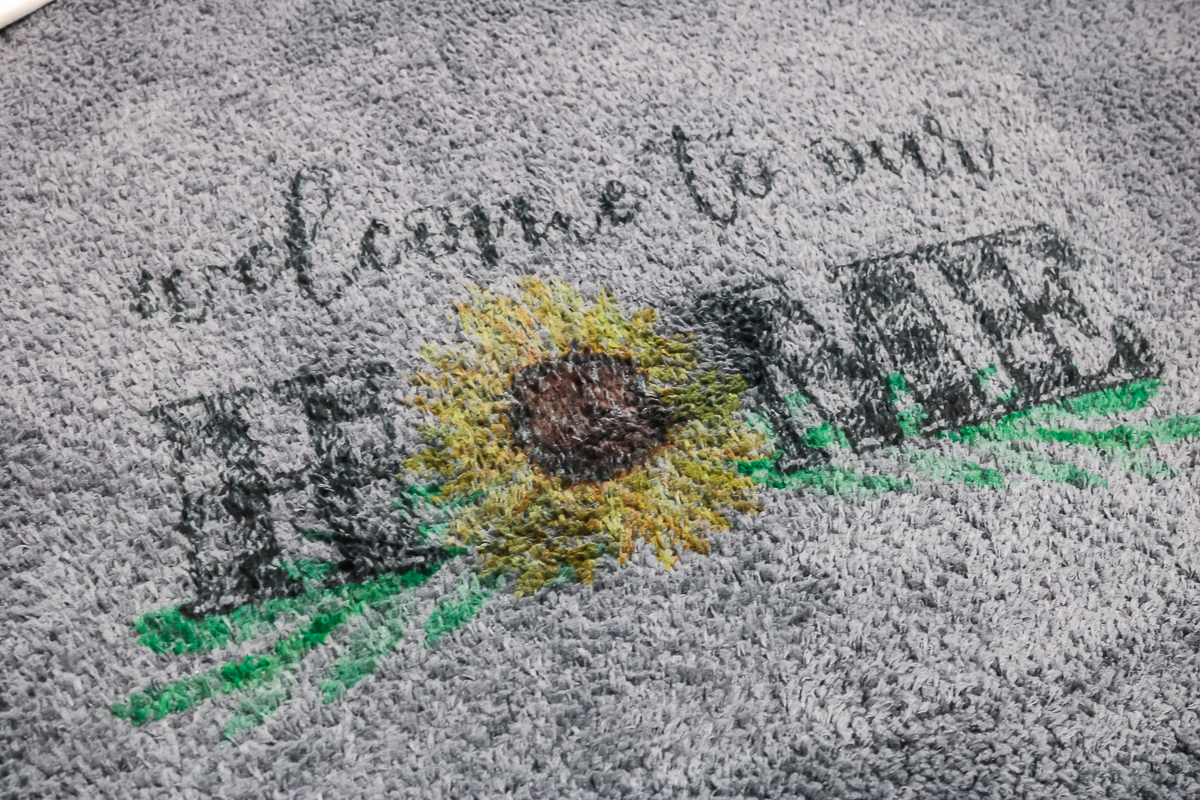
I did the same print on each of these rugs so you could see the difference between the white rug and the grey rug. As you can tell the sublimation print shows up really well on the white rug. All the colors are vibrant and beautiful.
On the grey rug, the black is noticeable but this design may have been a little too detailed to read easily. The yellow and green however are really hard to see. If I was going to use this dark grey rug again, I would pick a design that was bold and solid and uses just black so it would show up well.
This hopefully gives you an idea of what to be looking for in a sublimation rug, what color you should choose, and what your design colors should be.

Creating Tiled Sublimation Door Mats
Now that we’ve done a single sublimation print we’re going to look into using smaller prints to create an all-over pattern on your rug. I am using the sublimation door mats for these designs but the process will be the same for any polyester rug you’ve purchased. The rug itself is larger than the Autopress so I’m pre-pressing half the rug at a time.
Tiling Image in Silhouette Studio
For a full tutorial on using the free version of Silhouette Studio to print sublimation designs head to this video here. If you’re familiar with Silhouette Studio follow the steps below to turn one single image into 4 individual images. You can use this same process to do more tiled pieces if you need to.
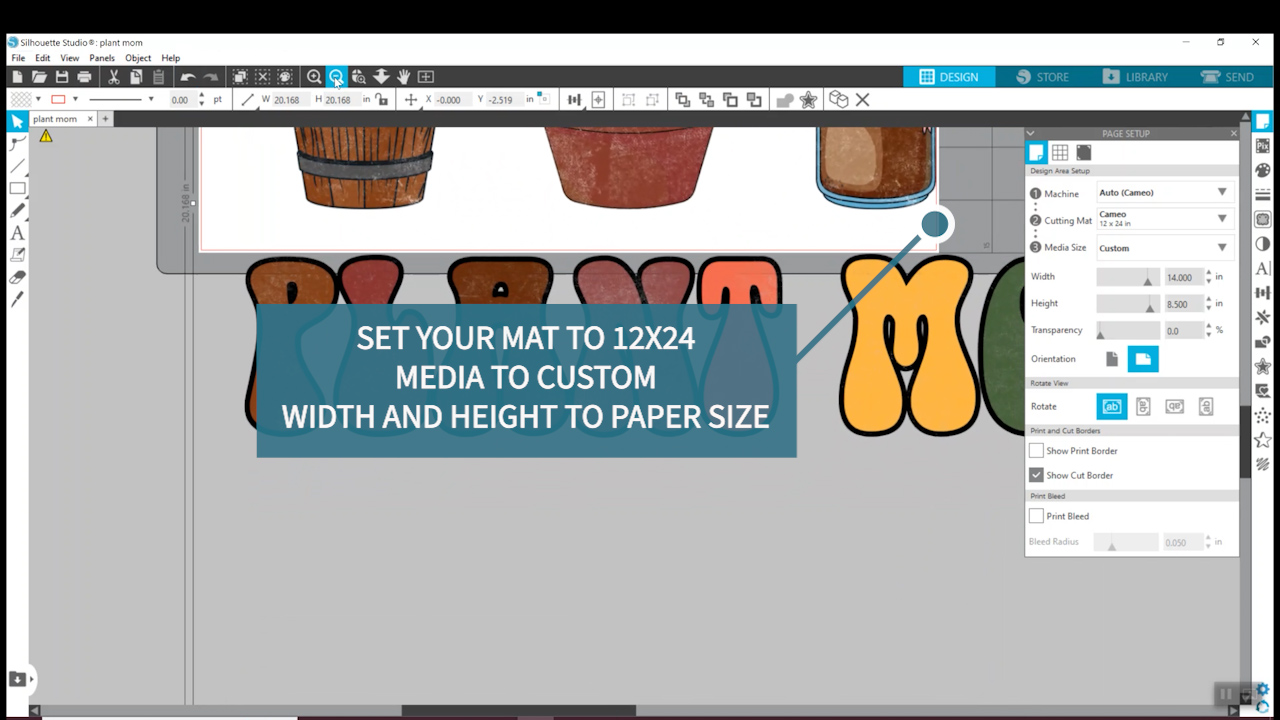
First, change your mat size so your material will fit on it. I am using an 8.5″x 14″ sheet of paper so my mat size needs to be set to 12″x 24″.
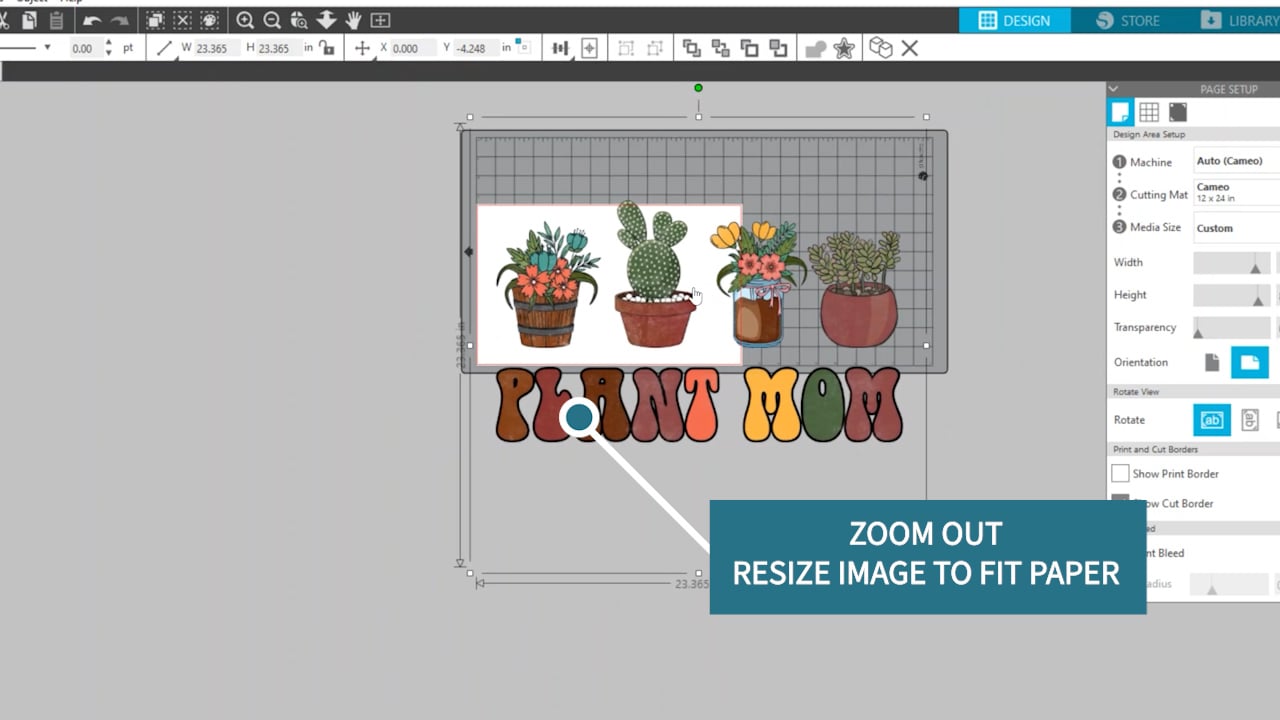
Next, I want my image to use as much of the room on the paper as possible so I am going to zoom out to make it larger. Make sure, before printing that you check that each section of your design fits onto the paper size.
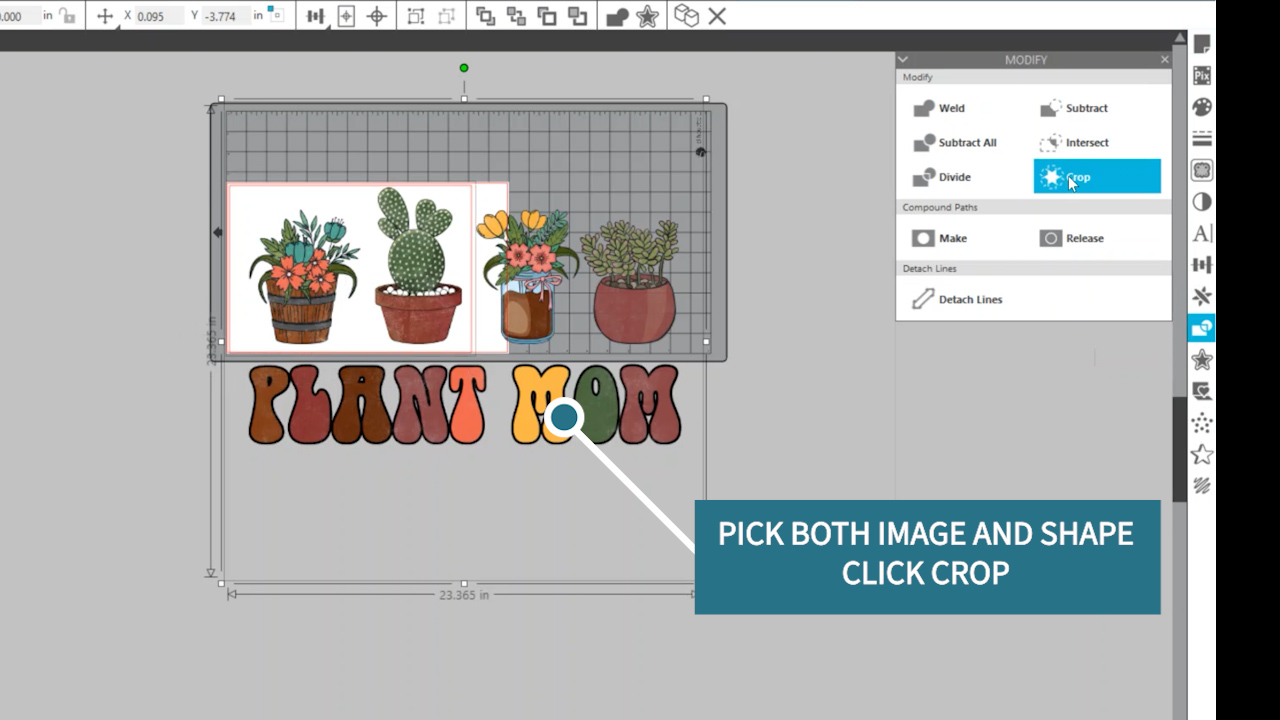
Use the rectangle tool and draw a rectangle around the first section of your design.
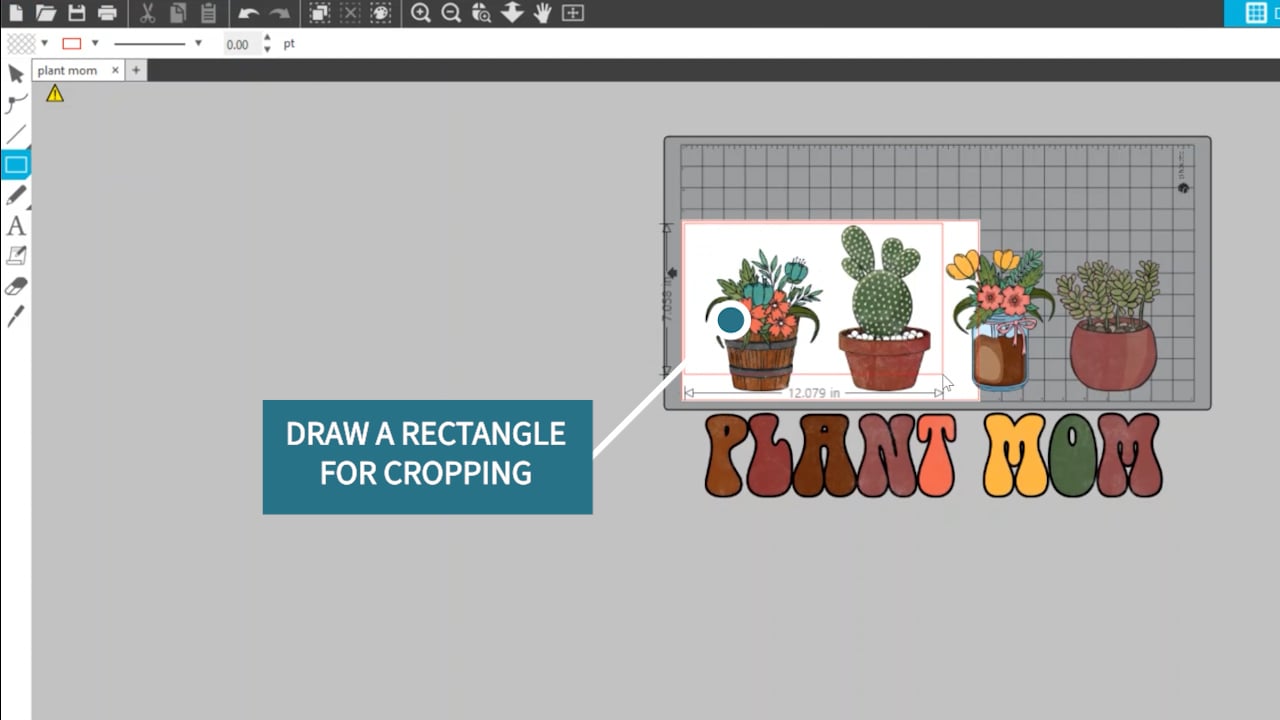
Select both the image and your rectangle shape and click crop.
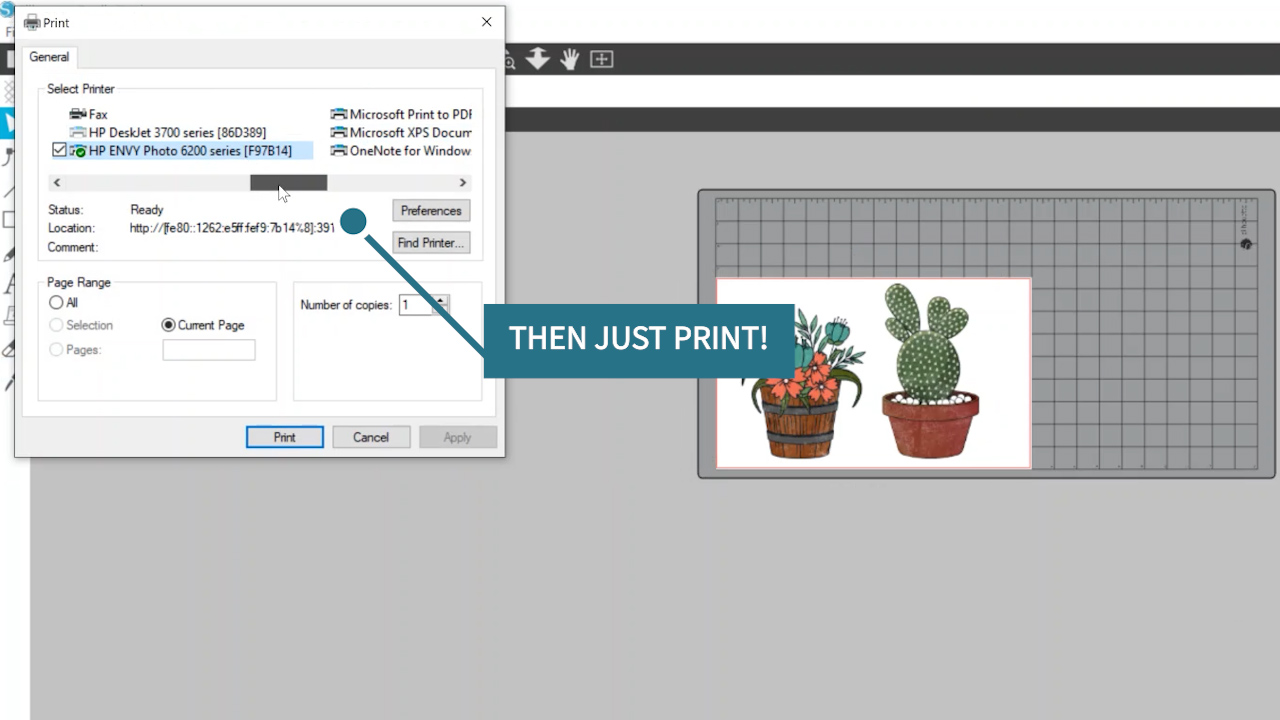
Print your cropped design!
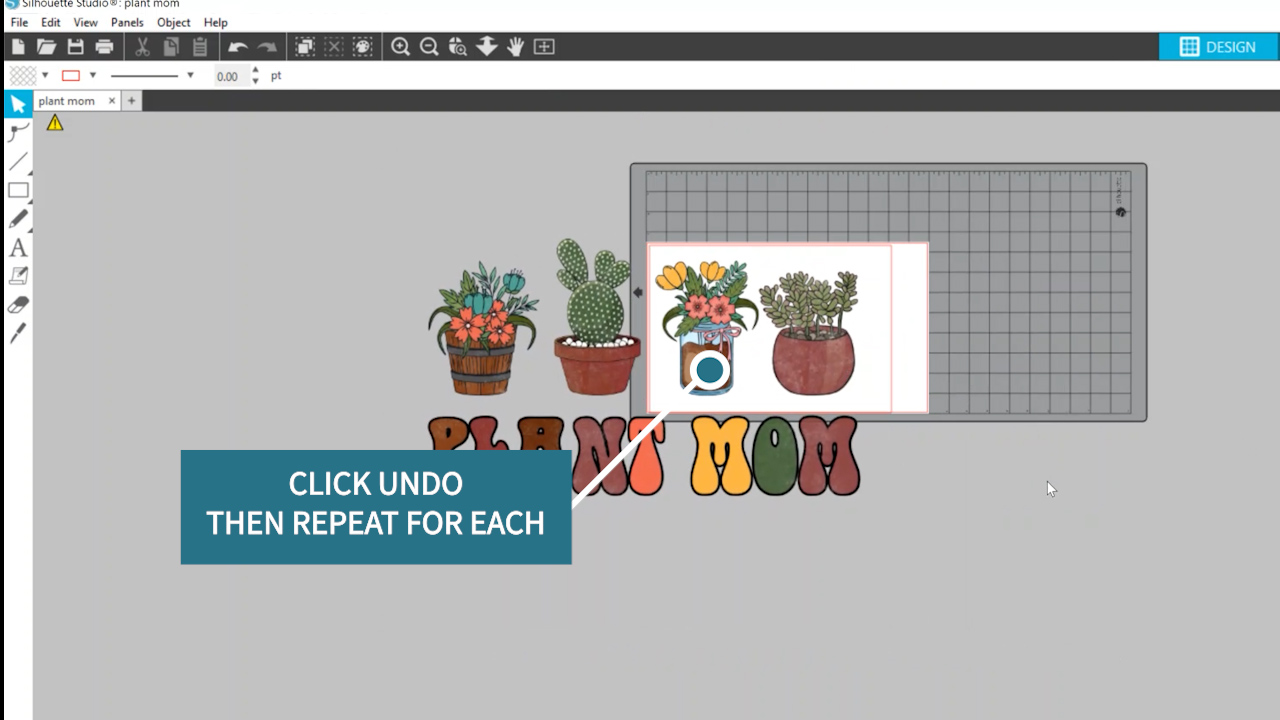
After you’ve printed your design click undo and then repeat the steps for each different section of your sublimation print.
Pressing Tiled Images onto Sublimation Door Mats
Even though we will be pressing multiple images onto one rug the process for each step is the same as we covered above.
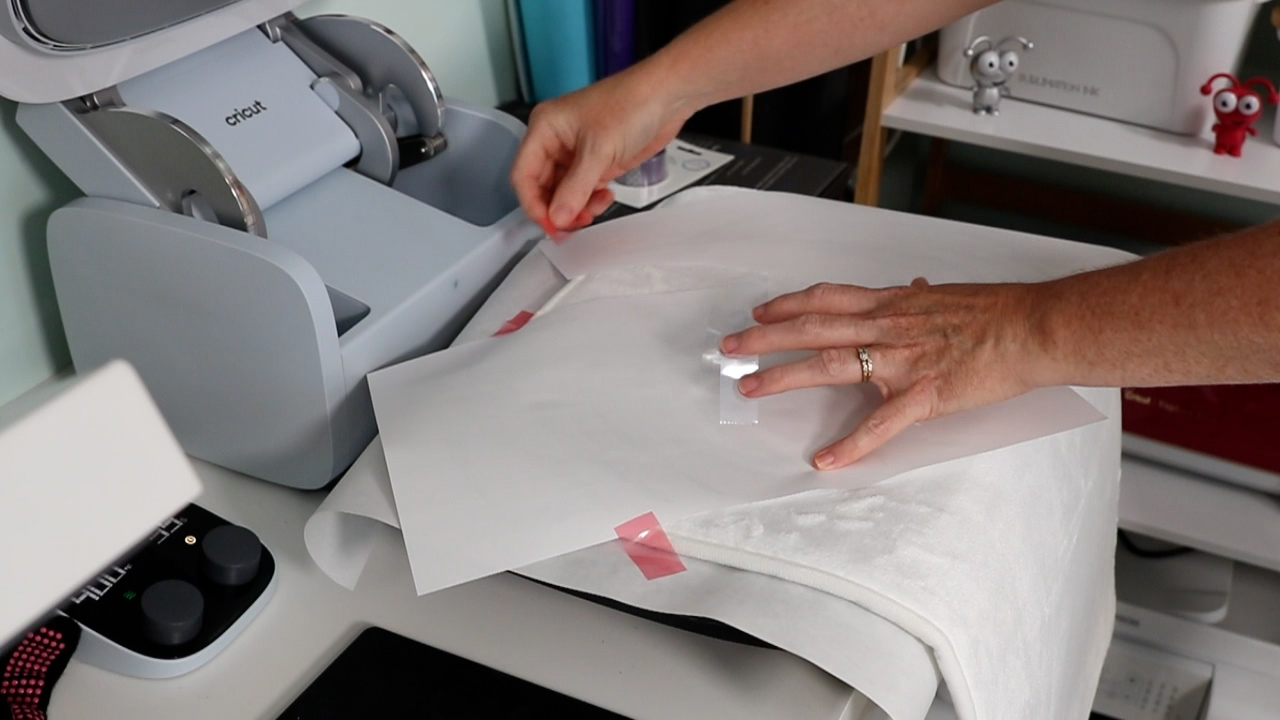
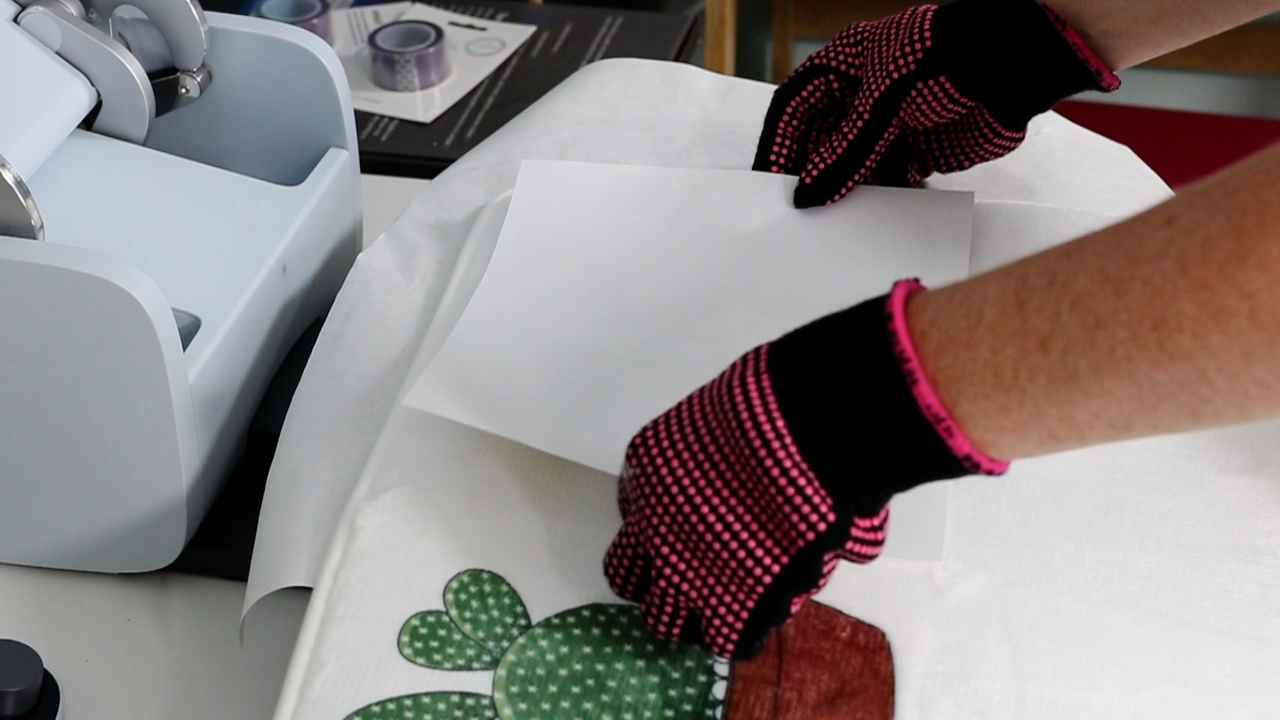
Pre-heat, lint roll, make sure the pile is all going in the same direction and apply a sublimation print. I did trim around my sublimation print to remove excess paper. Because I will be pressing in multiple steps it’s important to get the first image located correctly. Take the time to lay out all the pieces so you don’t start too far to one side or too close to the top or bottom.
Once you have the first piece in the right spot and taped down, apply it to your Autopress as we did before. Make sure you have a protective sheet under the rug and over the top of the sublimation print.
Before you close the Autopress, you want to feel around the rug and make sure your image is completely in the area that will have heat applied. Make sure your print isn’t hanging over the sides anywhere.
As you can see, my image doesn’t have a background color. I feel this is really important because it gives me blank space between the prints so I do not have to press any areas of the print a second time. Pressing a sublimation print a second time can cause the image to fade which can give you the ghosting look.
When the pressing time is up with these rugs, you may want to make sure you’re standing close to the Autopress. The Autopress will open automatically and if you have part of the rug hanging off the side the whole thing can slide off the press.
Check the corner of your print and if it’s sublimated well remove the print and move on to the next section of your design.
You’ll repeat the same steps for each additional piece of your design. Make sure you’re not taping on top of any of your pressed images and make sure the areas that are already pressed aren’t under the heat plate when you press again.
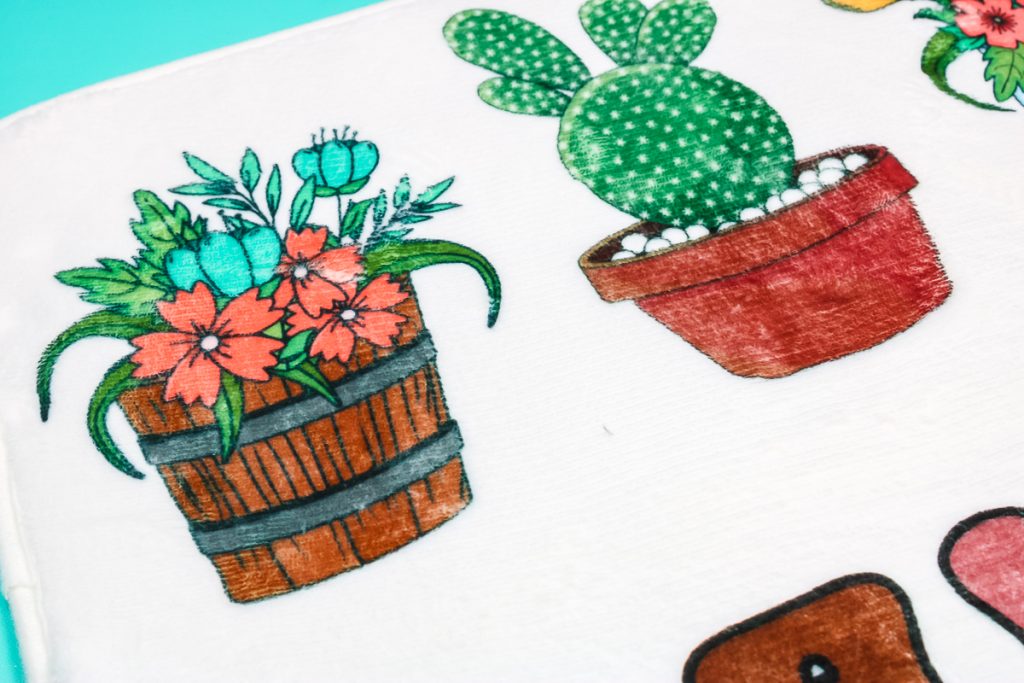
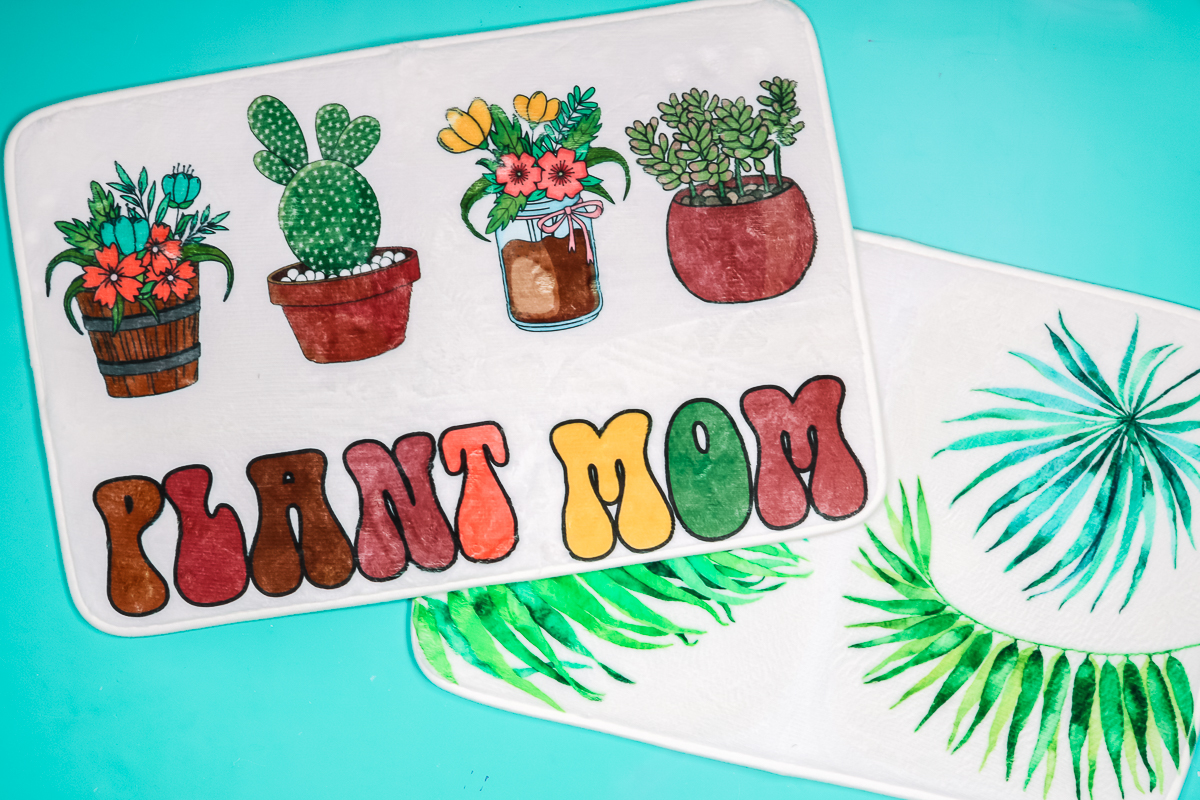
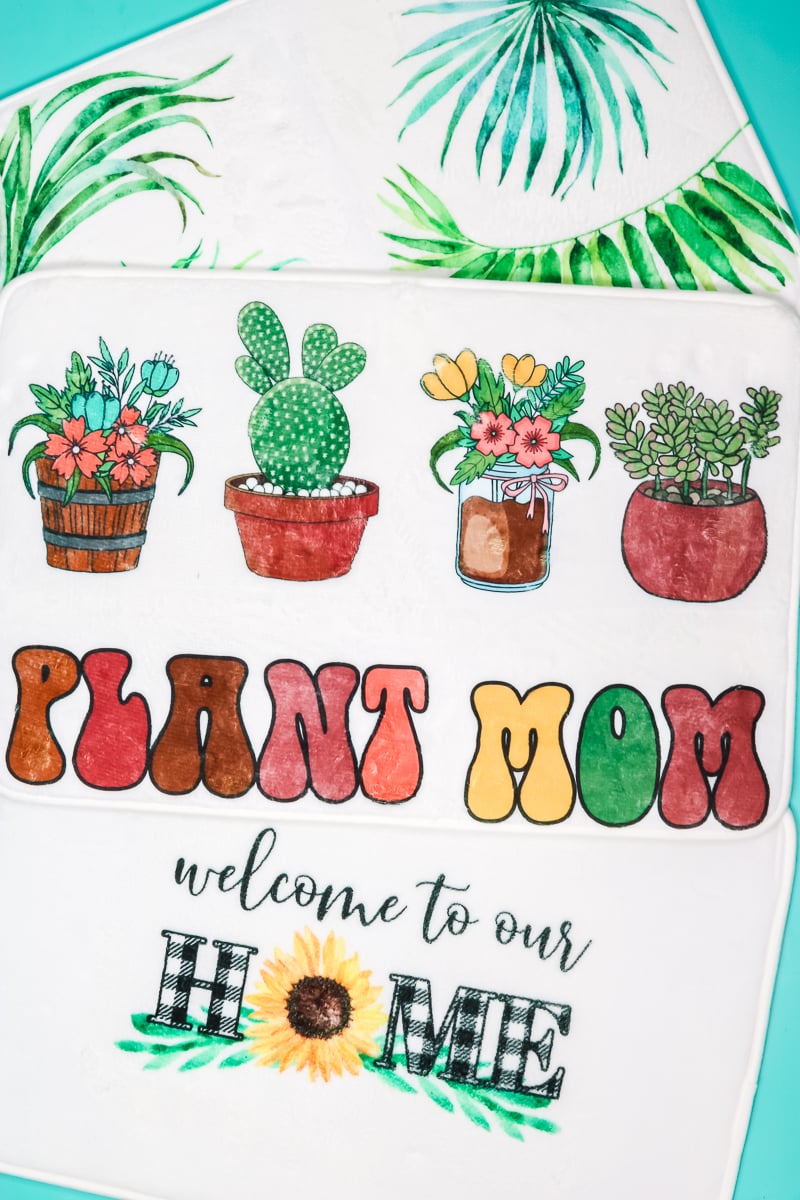
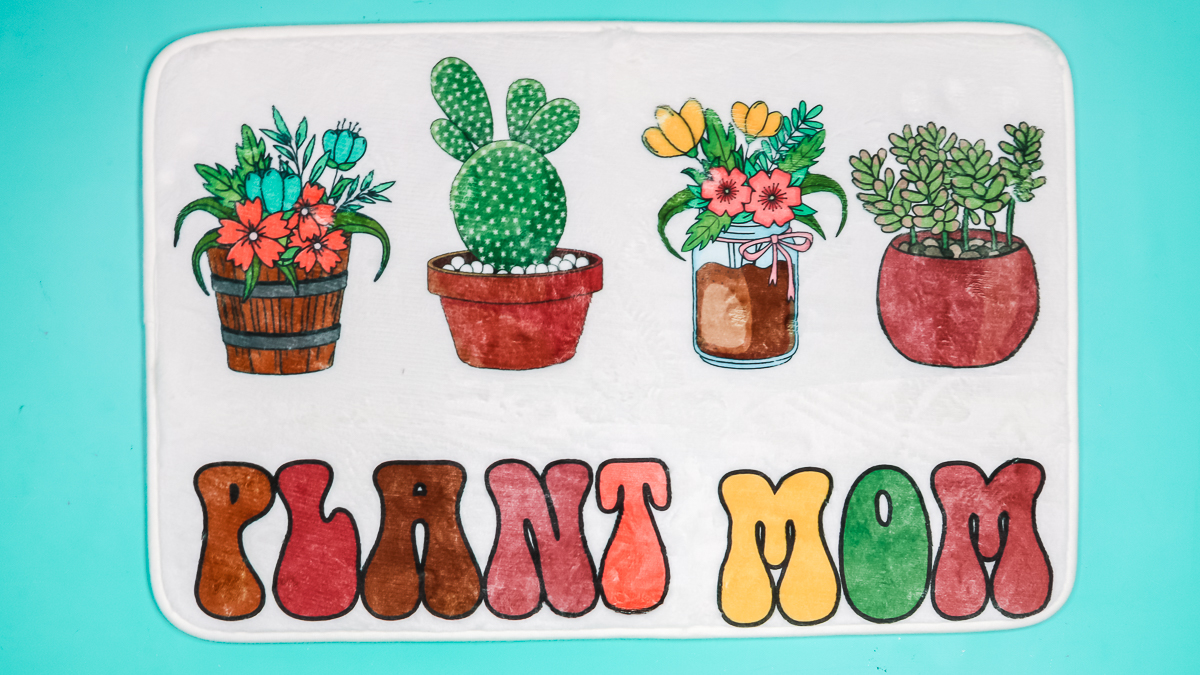
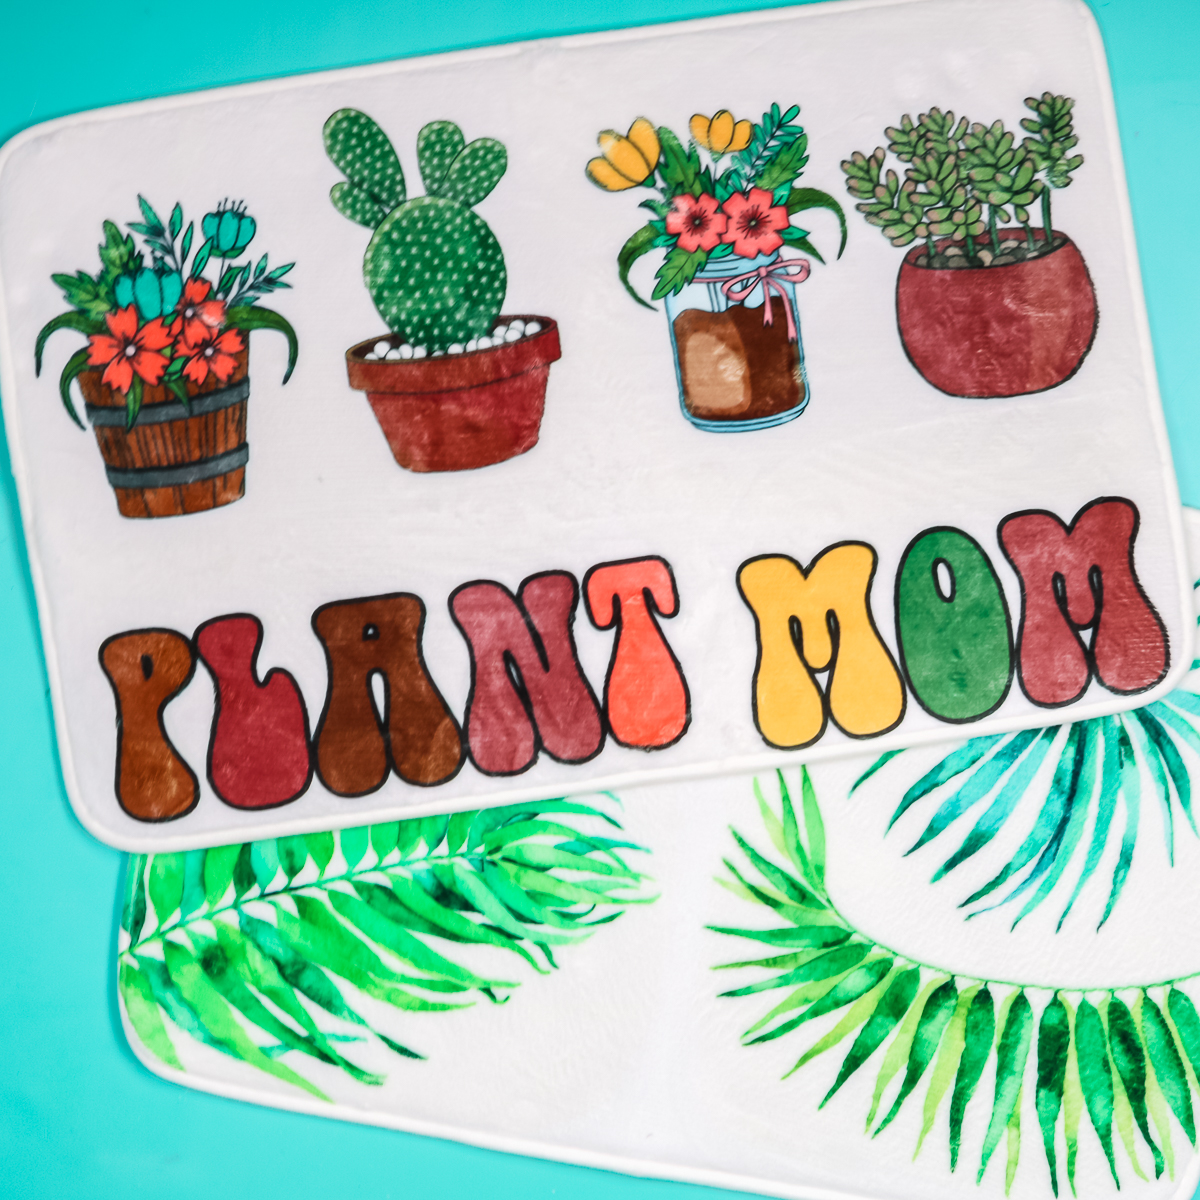
For my plant mom rug, I did the plants first and then pressed the words. This worked well and I didn’t have any overlapping on the prints. As you can see, the colors are all really vibrant and look so good on the white rug.
Pressing Multiple Images at Once
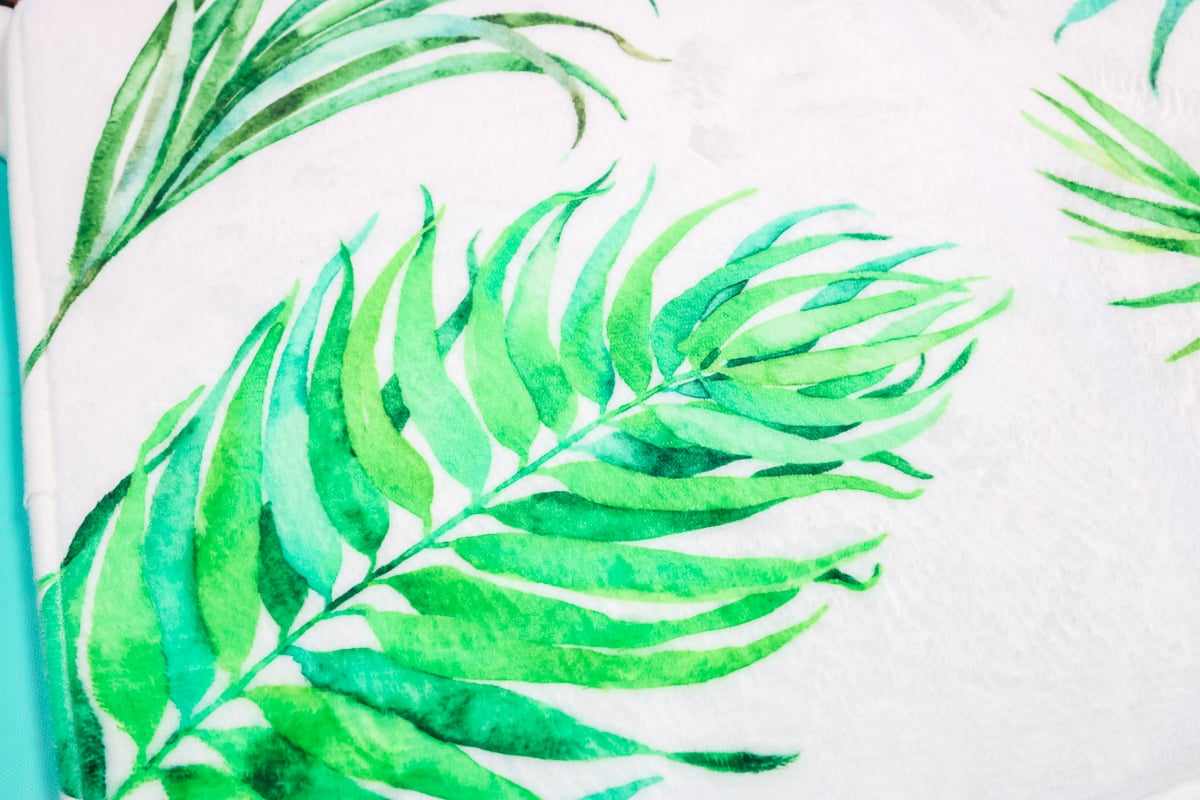
For my palm leaves sublimation door mat, I had multiple images of leaves printed out and I trimmed around each leaf to remove all the excess paper. Because of the space in the middle of this finished design, I was able to press a full half of the sublimation door mat at a time.
I arranged the leaves on one side of the door mat how I wanted them to look and then taped them in place making sure the images didn’t overlap and that tape didn’t interfere with the designs.
Follow all of the steps we did before. Lint roll, smooth pile in one direction, locate design, and tape into place. Add protective paper under the mat and on top of the sublimation design. You’ll press each side for the full pressing time. I did 385 degrees for 55 seconds.
This might be my favorite rug of the batch. I love how all the colors pop off the mat and how the leaves go all the way to the edges of the mat
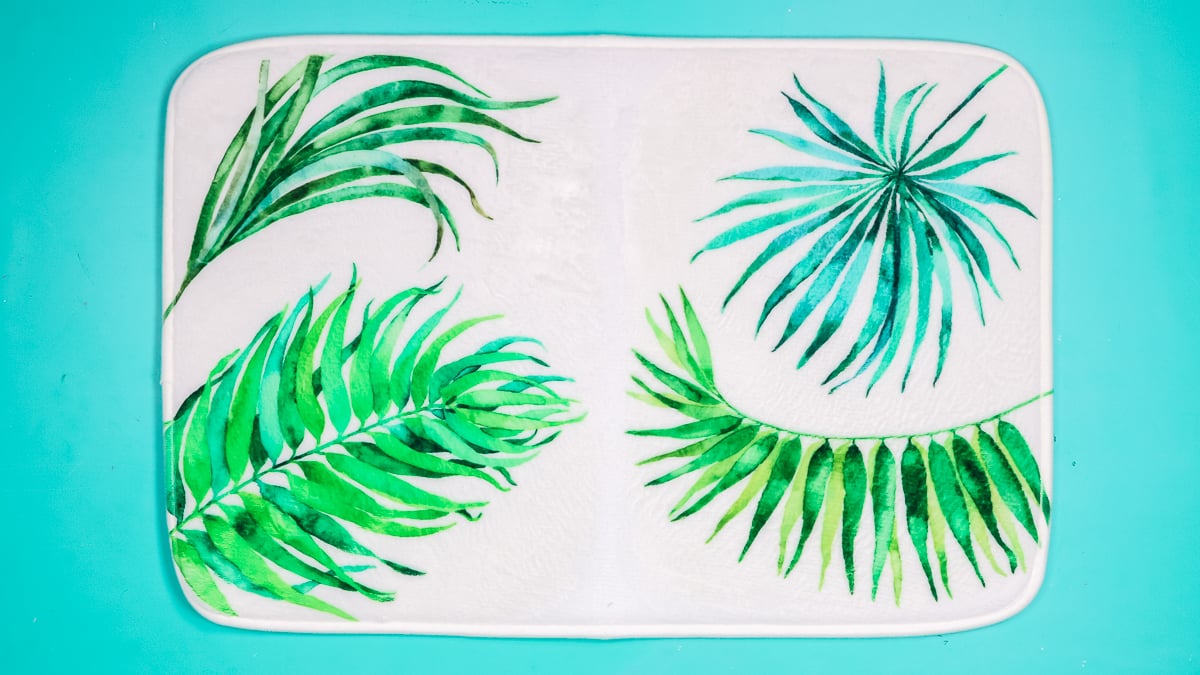
With a rug like the palm rug where the leaf prints go all the way to the edge, it’s incredibly important to make sure your protective paper covers your whole heat source. You want the protective paper to cover the entire sublimation image, even if it goes off the side of the rug a little bit. If sublimation ink gets on your heat-press, it can transfer to future projects ruining them.
Final Thoughts on Sublimation Door Mats
I was really impressed with how all of these sublimation door mats turned out. I think it’s a great way to get a customized rug and they’re fun to make. If I had to pick a favorite I think the palm leaves sublimation rug wins, the colors just look so good and I think it would be perfect for a kitchen or a bathroom.
Tips and Tricks for Best Results
- Before you start, you need to think about what your design is going to be. Can you divide it up into pieces or does it need to be pressed at once? This will determine how large you can make your print.
- Think about the rug you want to use, will your design show up well if you’re wanting to use a rug that isn’t white? Is it so big that your image will look small even if you tile it?
- If you want your design to have a color for the background, I recommend using a rug that is that color. Trying to line up sublimation prints that have a colored background is really hard and typically results in ghosting due to overlap or unintended blank spaces from not getting them pressed right against each other.
- I also want to remind you to make sure your rug is either a sublimation blank or a rug with at least a 65% polyester count. If you’re using a colored rug make sure it’s light enough for your design to show up and remember to consider the colors in your design and if they will be distorted being applied to a rug that isn’t white.
- And don’t forget, most sublimation printers allow you to use 8.5″x 14″ sublimation paper, this will allow you to print even bigger sublimation images if you tile your image to fit that sized paper. That being said, you can get pretty large finished projects using 8.5″x 11″ paper, just take your time laying out your design to see how many pieces you can tile it into.
I hope you’ve found this post helpful. If you have any questions at all, don’t hesitate to leave them in the comments.