
This post and photos may contain Amazon or other affiliate links. If you purchase something through any link, I may receive a small commission at no extra charge to you. Any supplies used may be given to me free of charge, however, all projects and opinions are my own.
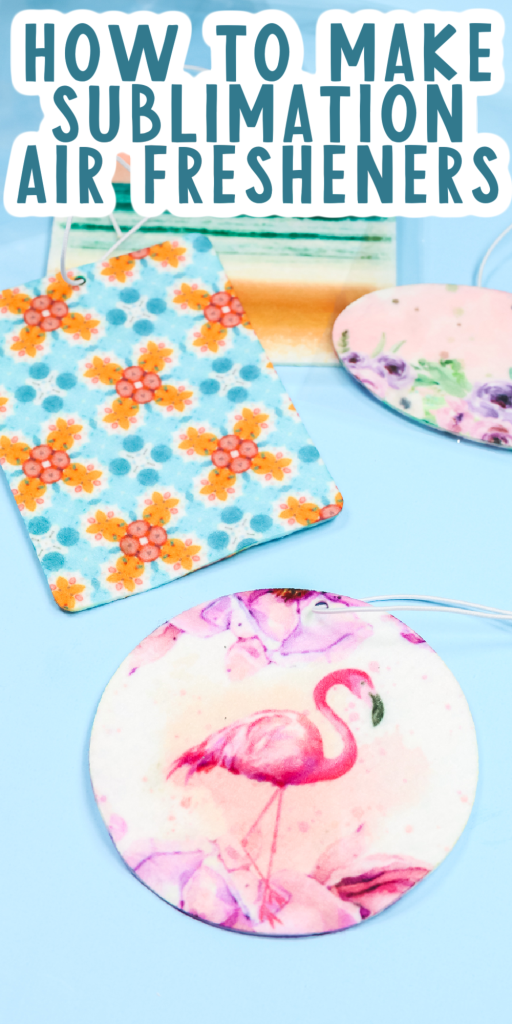
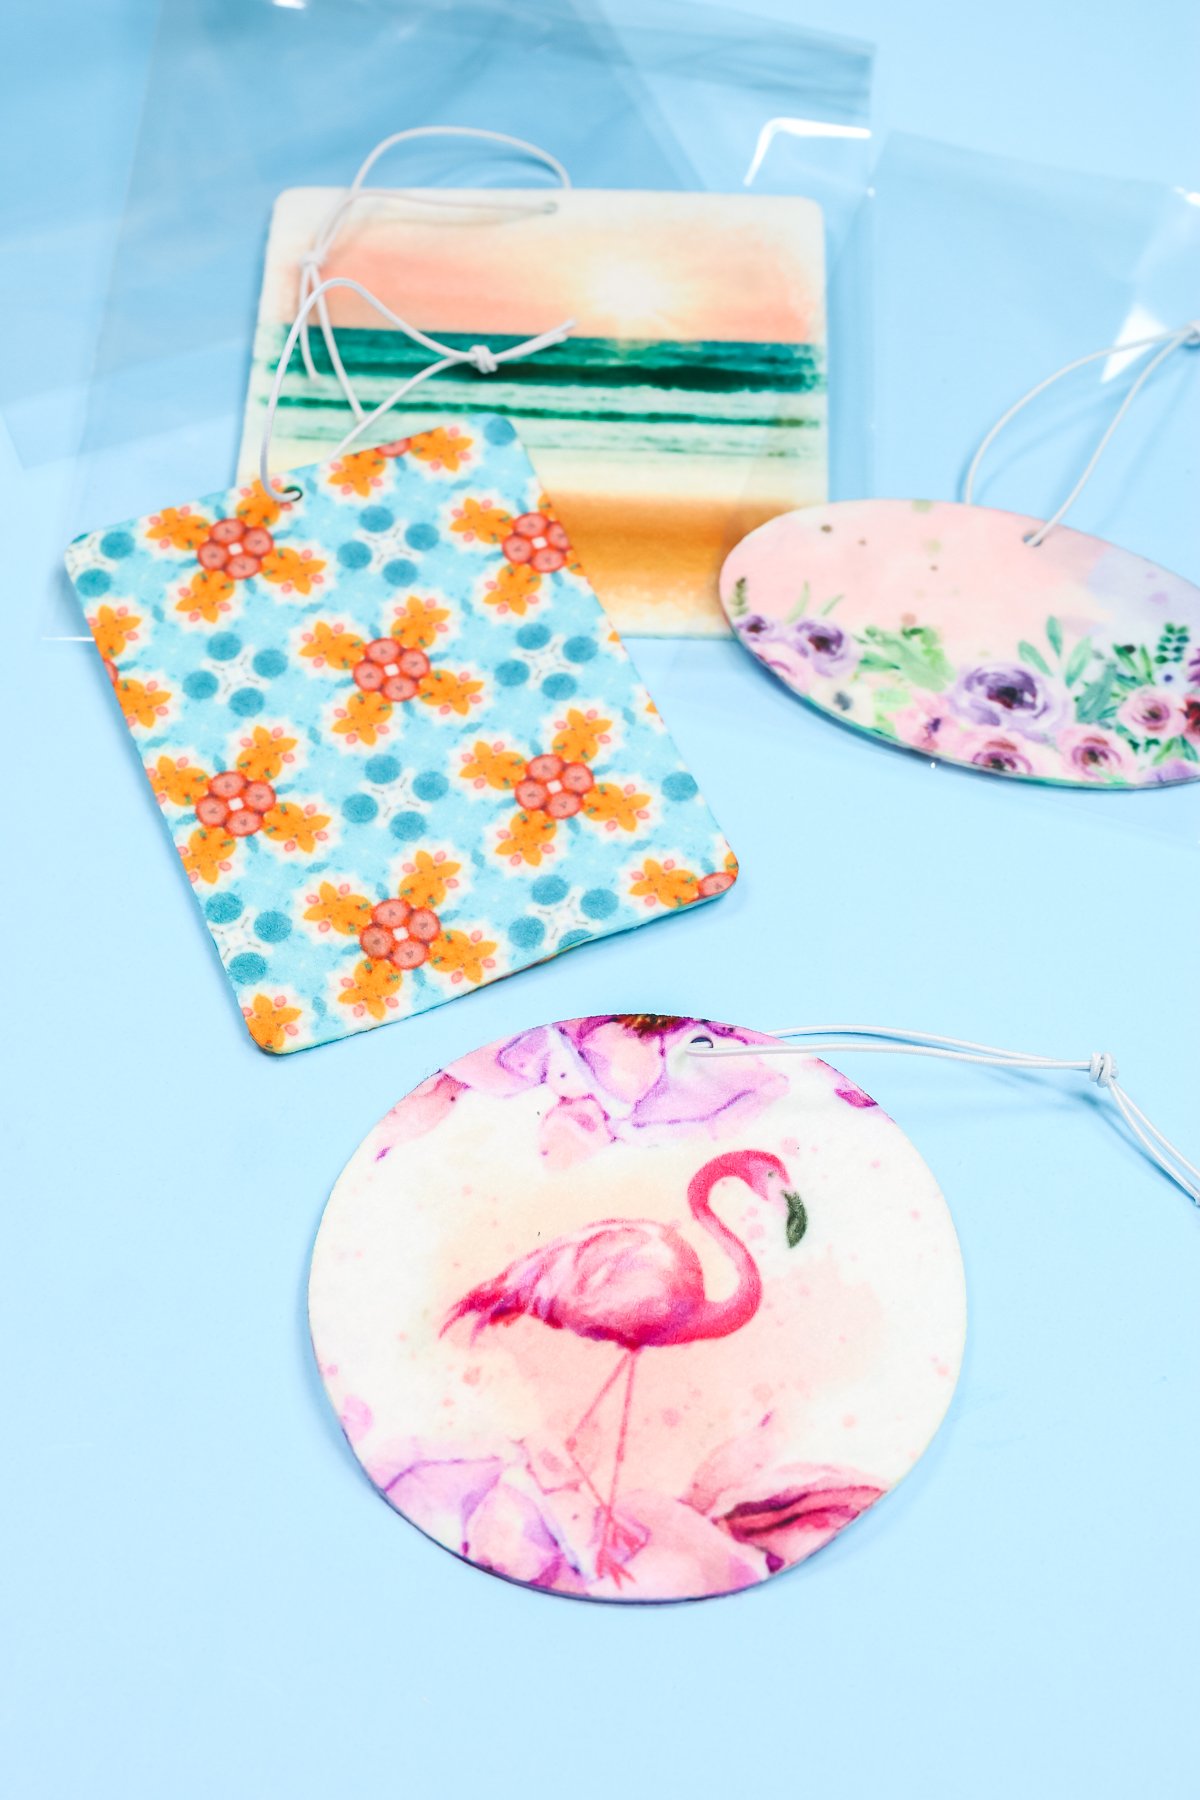
Did you know you can make sublimation air fresheners? Customized air fresheners make great gifts and can be personalized with images and scents. Plus, these are an easy way to get started with your sublimation printer. Pick up some air fresheners for sublimation and get started now!
New to sublimation? Check out my free sublimation class here.
Making Sublimation Air Fresheners
Today we’re going to make sublimation air fresheners! I’m trying out four different shapes and sizes to show you how to sublimate each of them. You can watch me make these sublimation air fresheners, just click play on the video below:
These air fresheners are another sublimation blank you can use with your sublimation printer or even Infusible Ink. Use them to create personalized air fresheners for yourself or gifts for friends and family. Let’s jump into what supplies we need:
Sublimation Air Freshener Supplies:
Blanks Used:
Designs used:
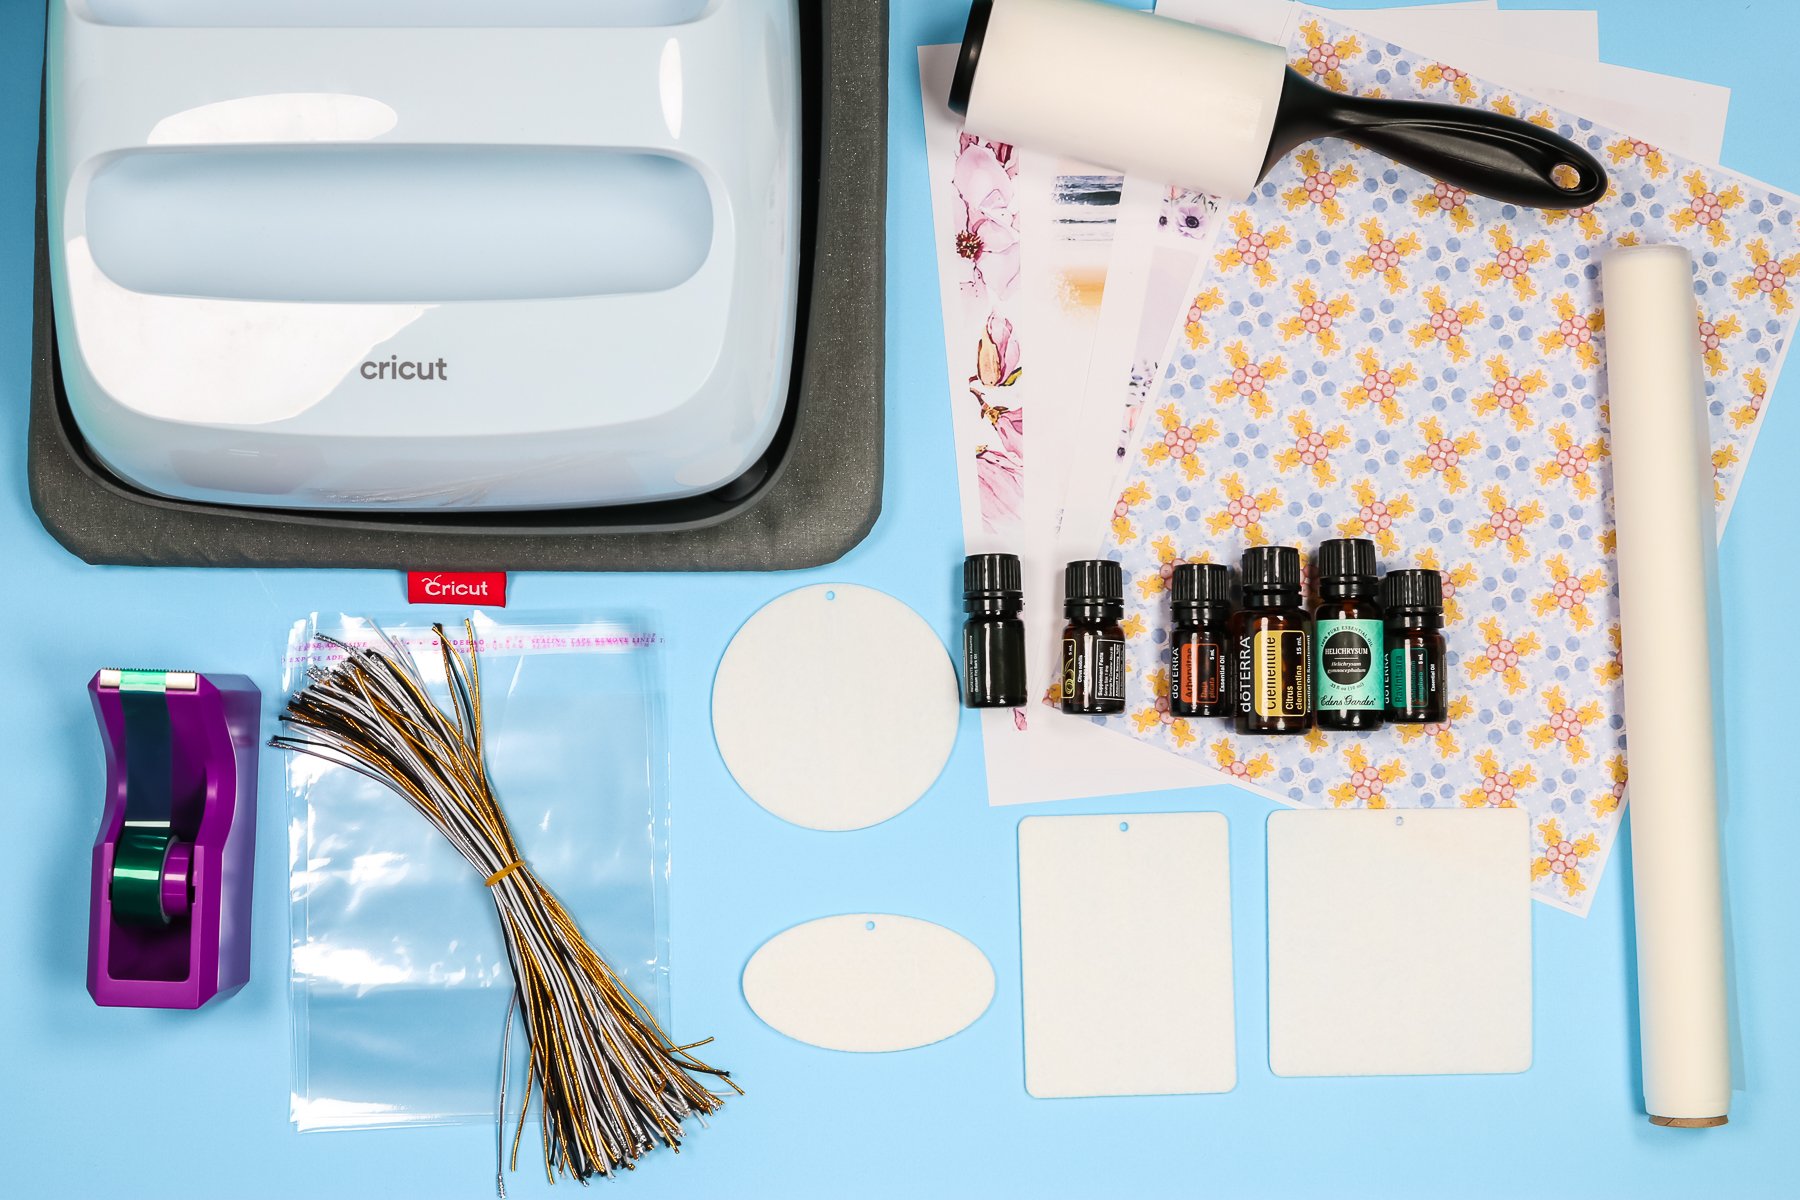
You do need to make sure you’re using sublimation air fresheners. Not just any sublimation blank will work for this project. My air freshener pack came with bags and elastic cords. After you add the scent you do need to keep the air freshener in an airtight bag until you’re ready to use it. These sublimation air fresheners are like a stiff felt, and they’re cut to size with the holes already in them so they came out of the package ready to use.
How to Apply Designs to Sublimation Air Fresheners
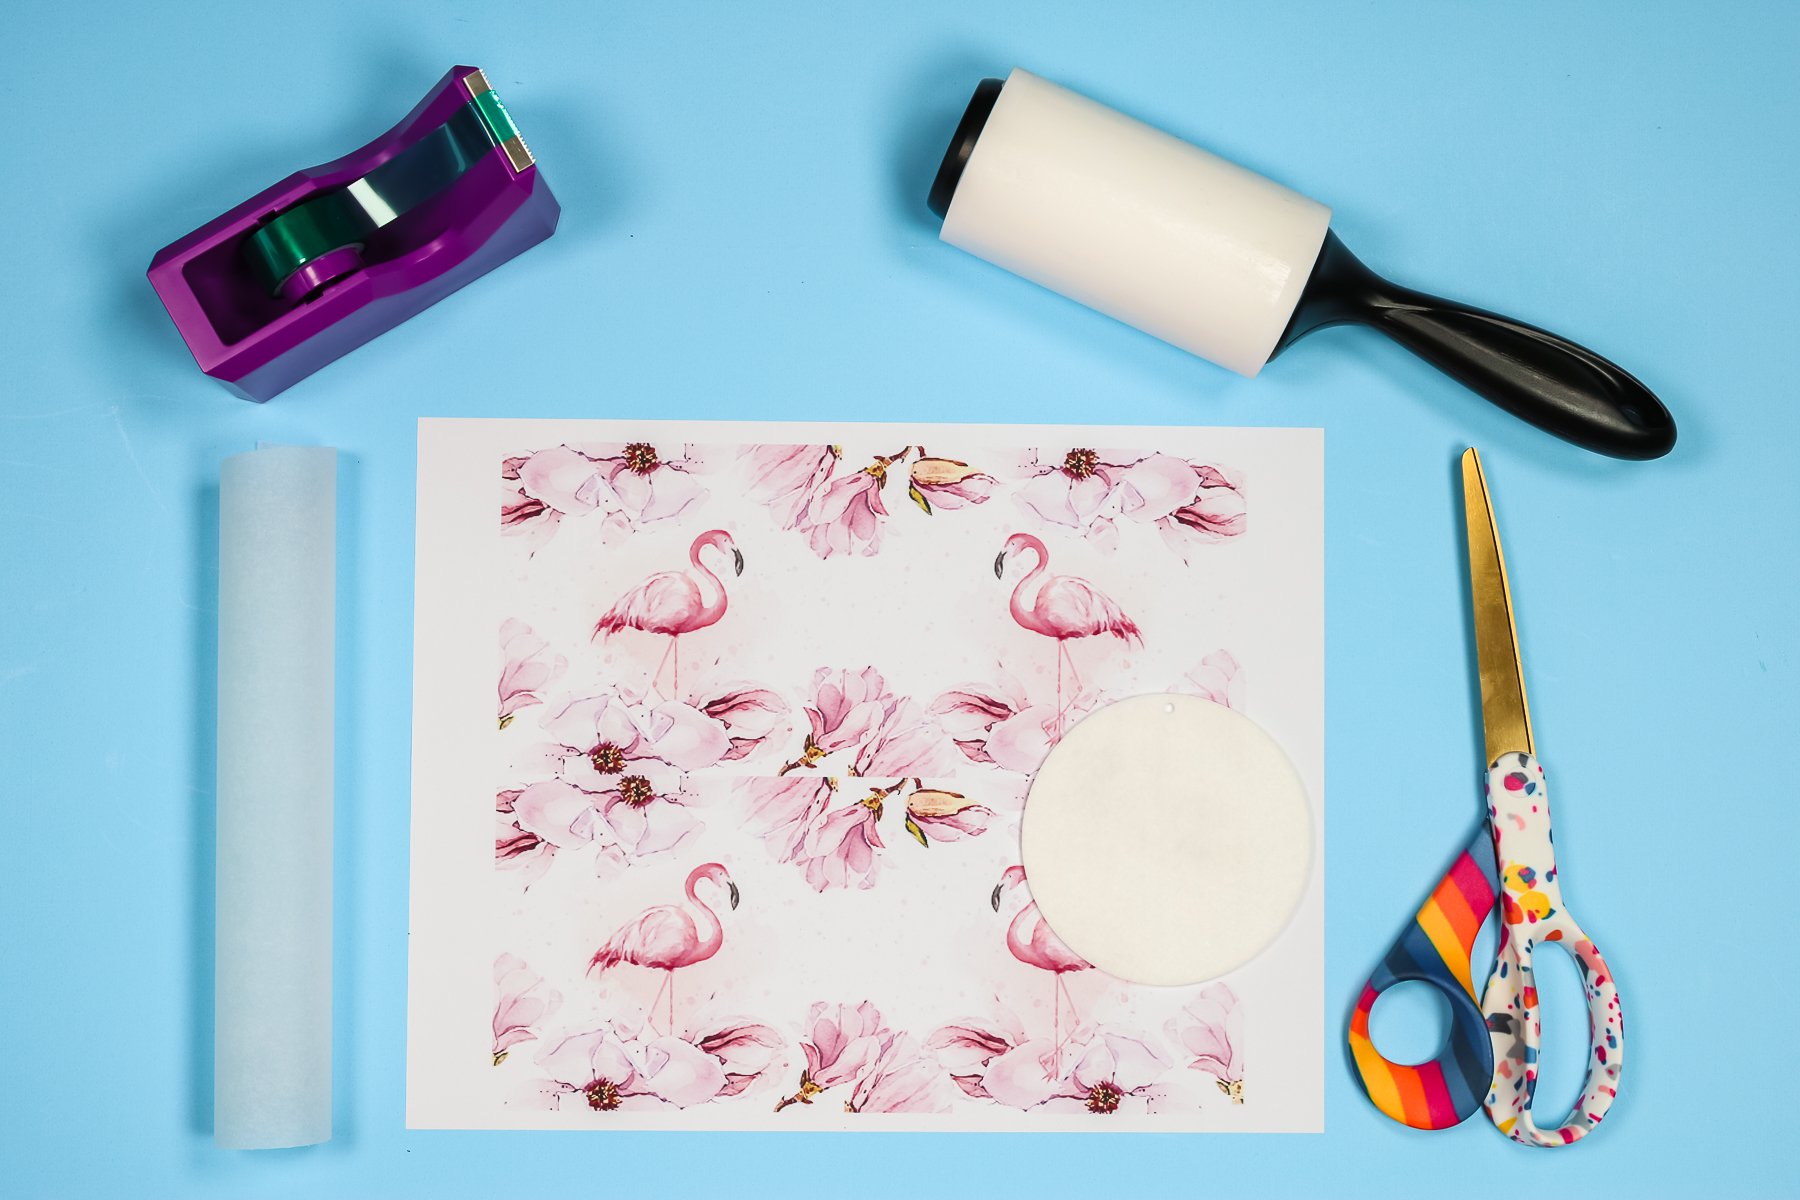
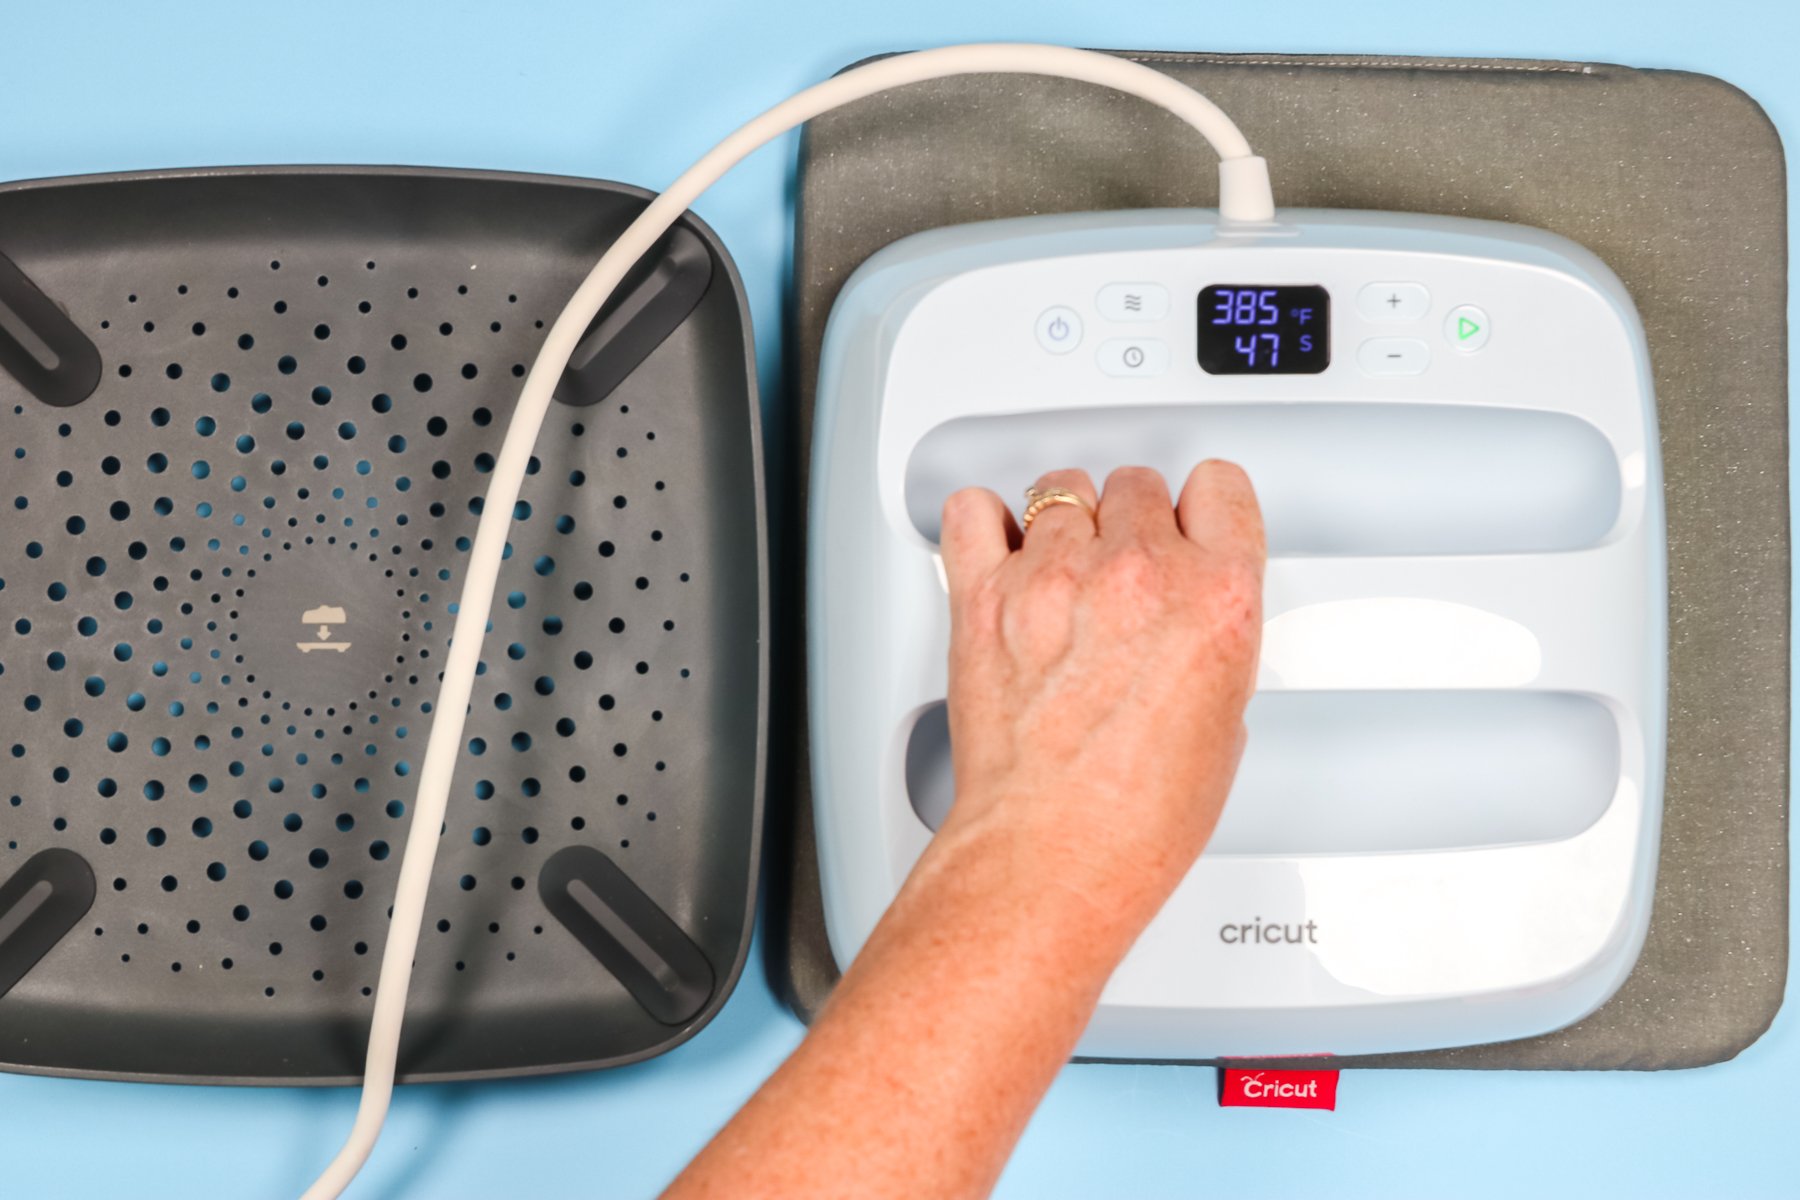
Before you begin you need to have sublimation prints. You can use either Infusible Ink cut out to the design you want or a sublimation print. I am using sublimation prints for my project. I have my EasyPress set at 385 degrees and the timer set for 60 seconds. Use your lint roller to clean your sublimation blank. You want to make sure the blank is free from any lint or dirt.
Locating Your Design
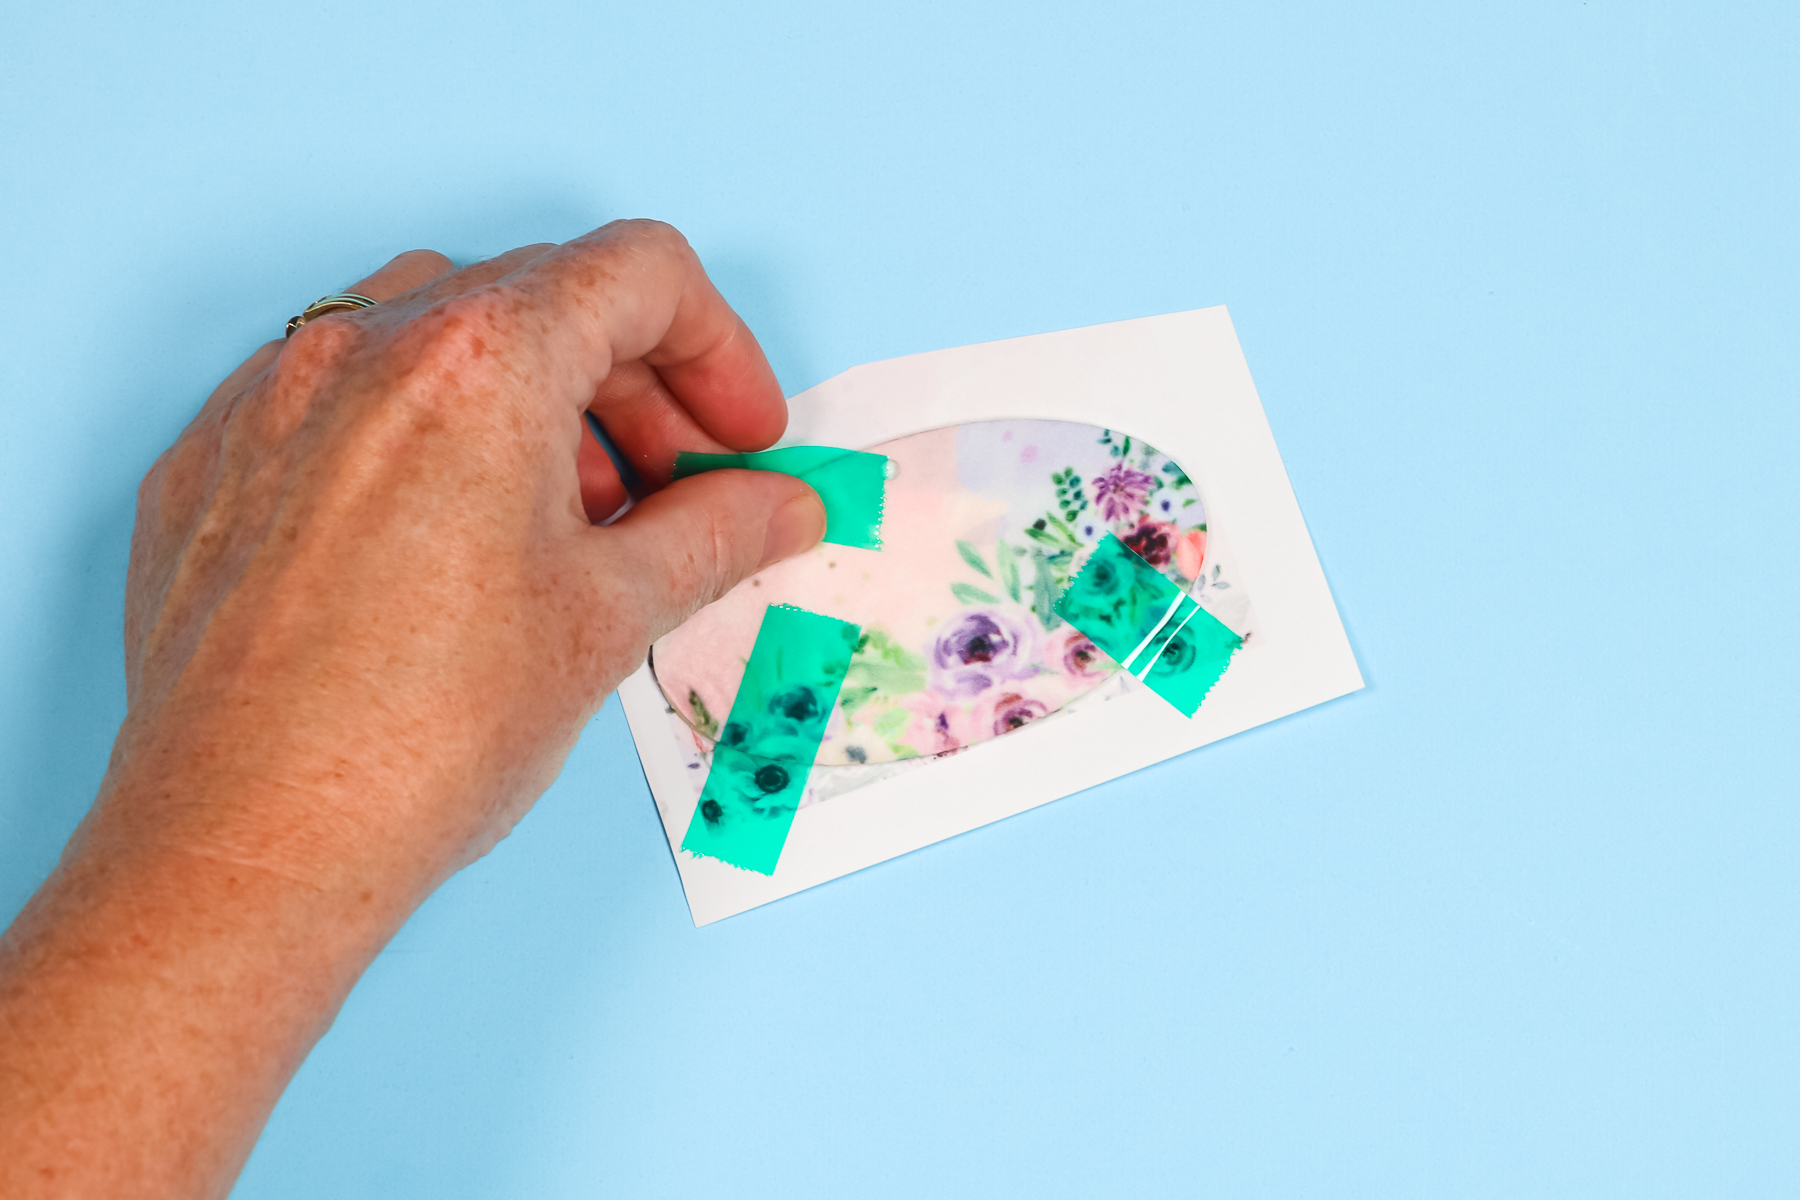
For this air freshener, I am going to add a sublimation design to both sides, one at a time.
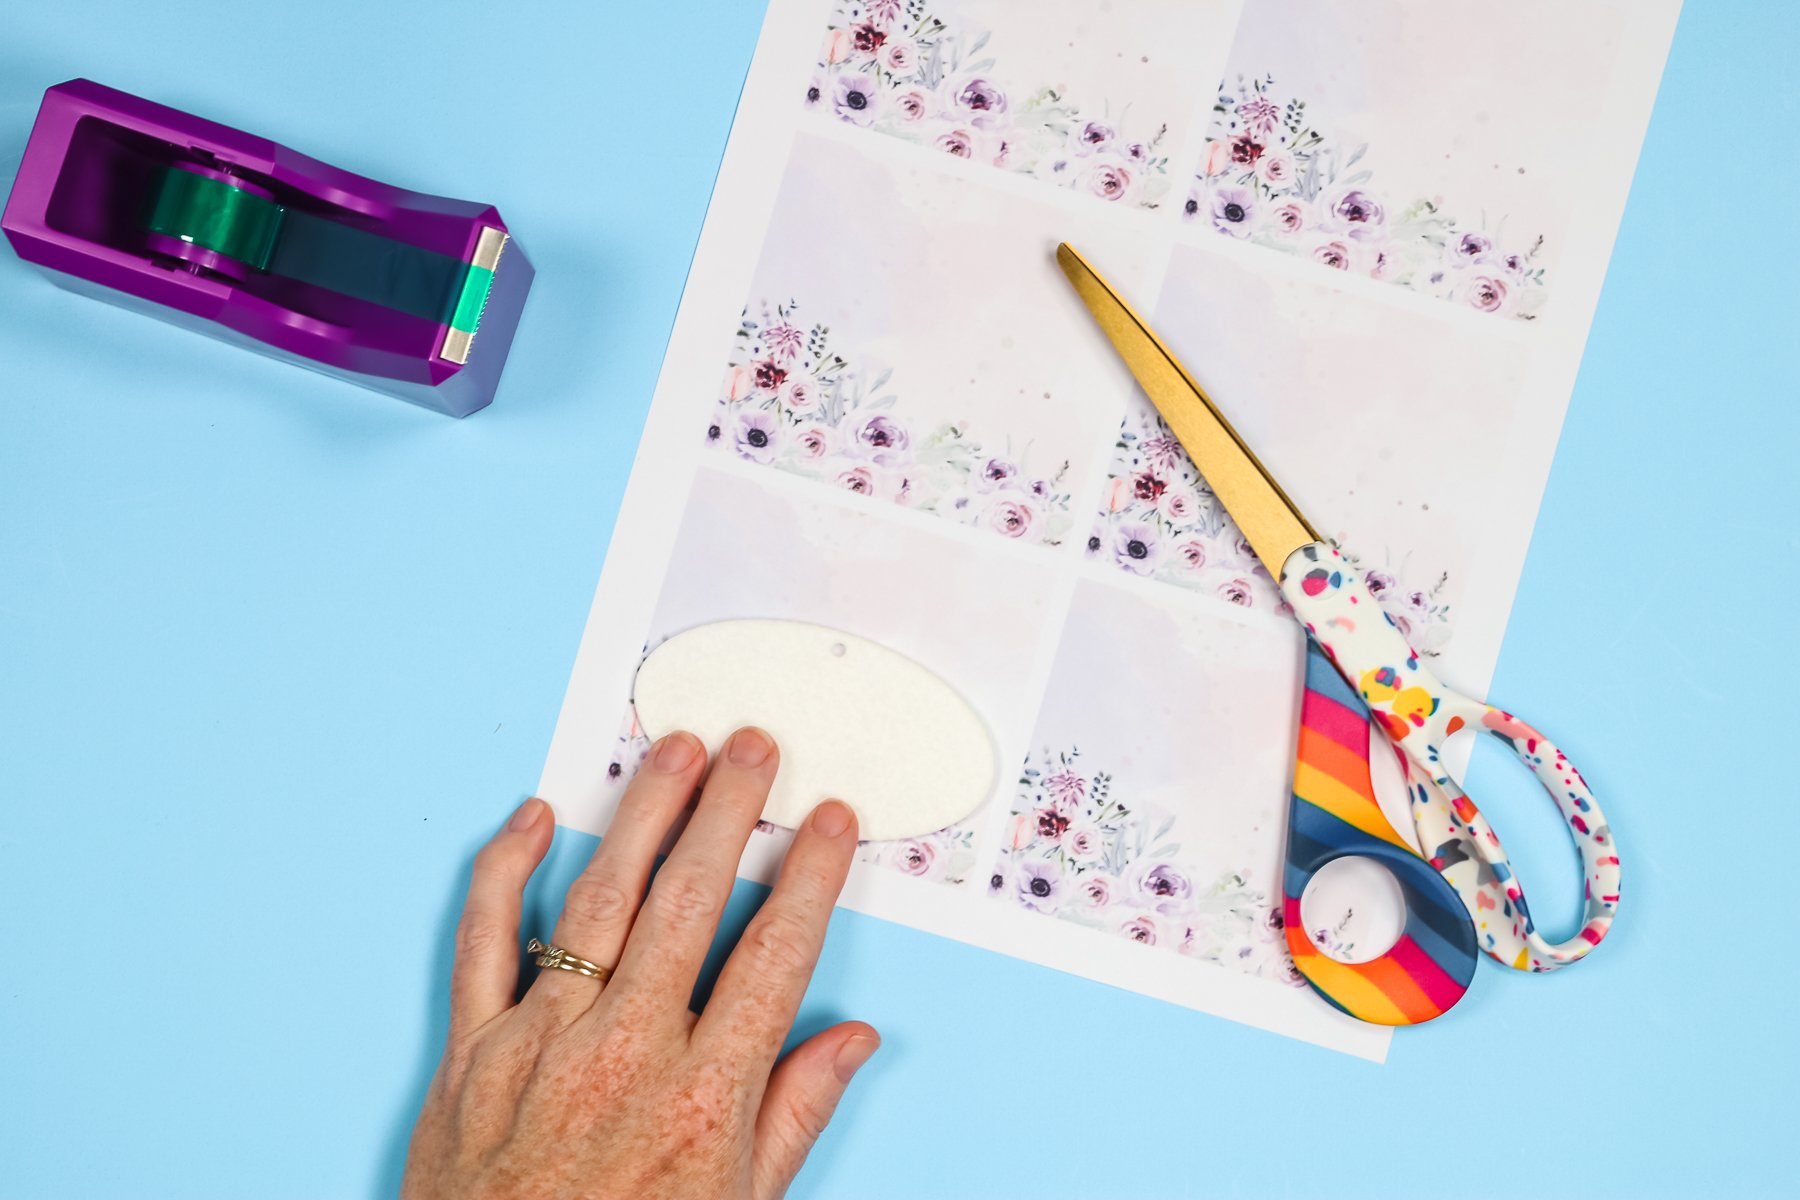
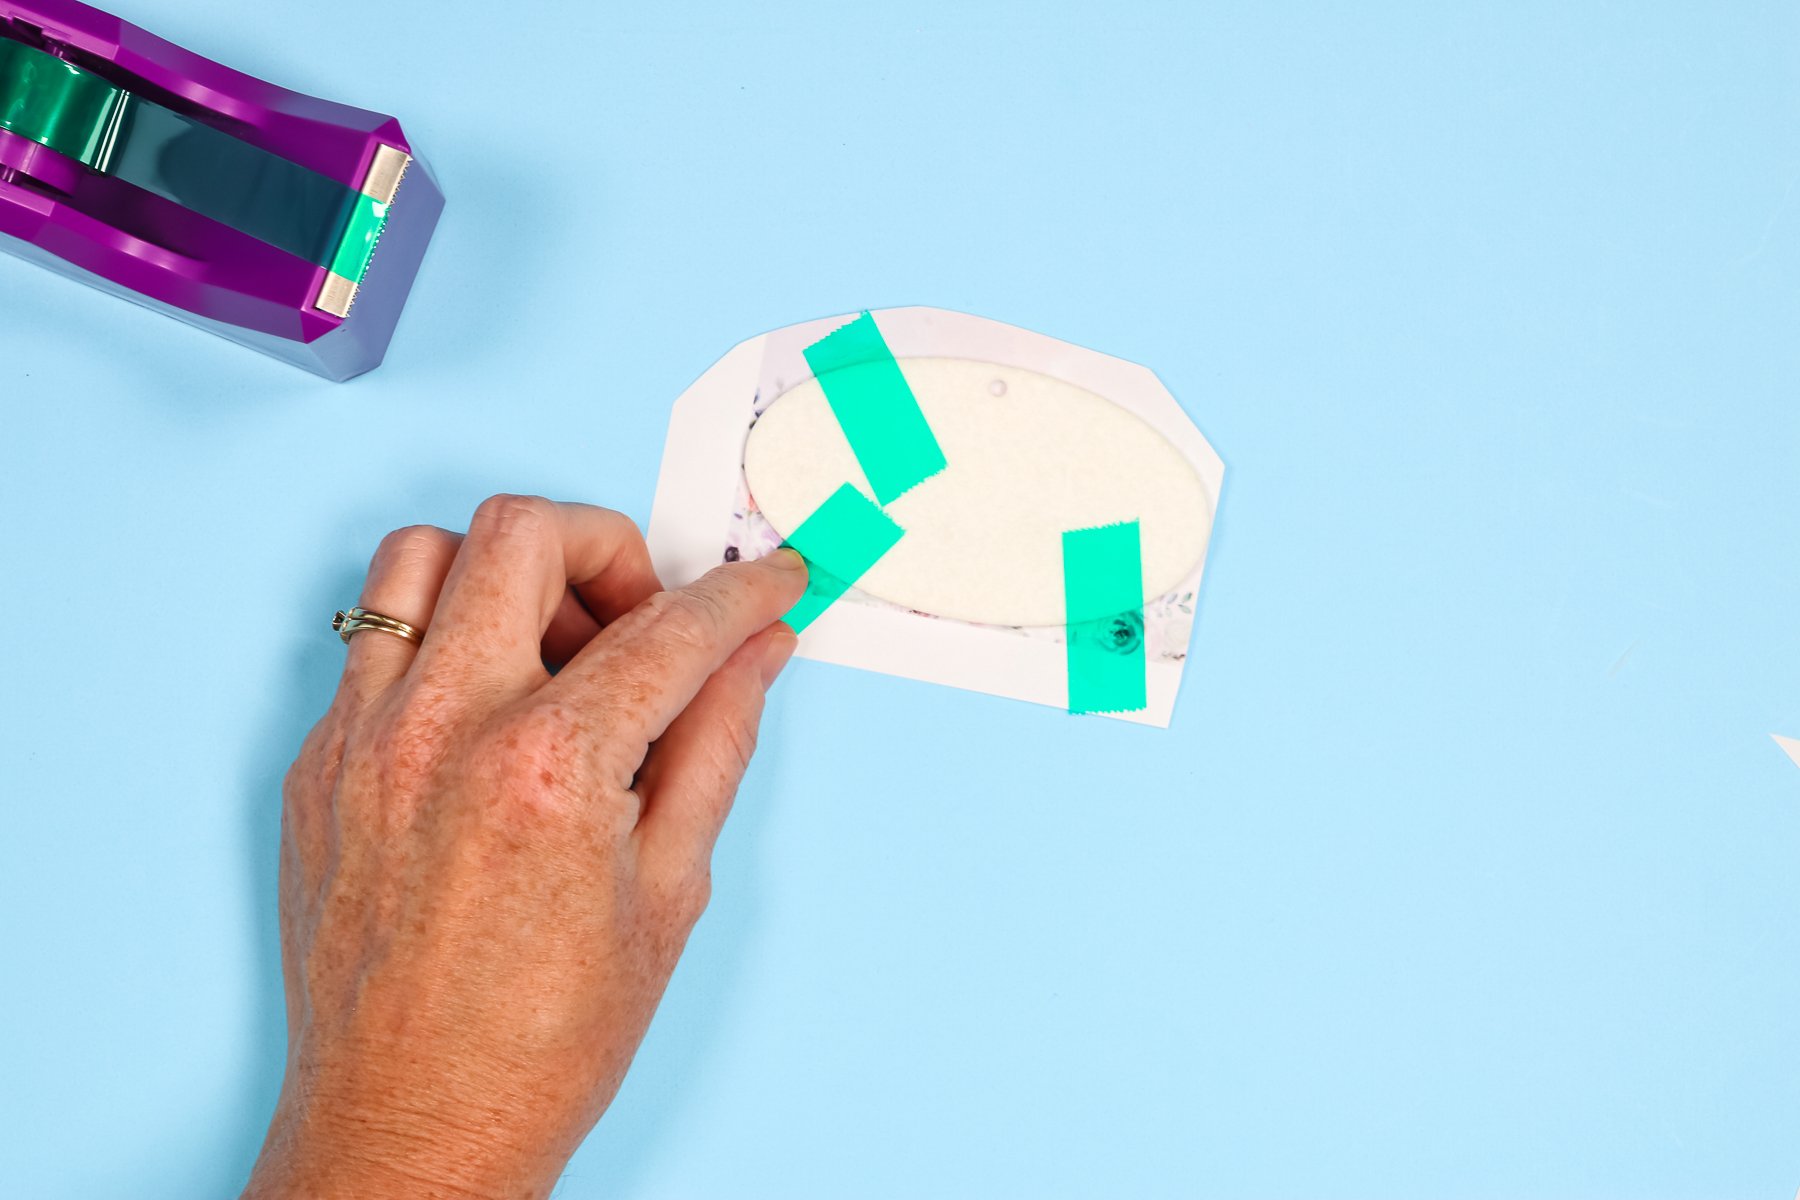
Add your sublimation blank to the print so it is located where you want the design to be and trim off the excess making sure to leave a little overhang. I found using three pieces of heat-resistant tape to secure the blank to the print worked best.
Pressing Sublimation Print to Sublimation Air Freshener
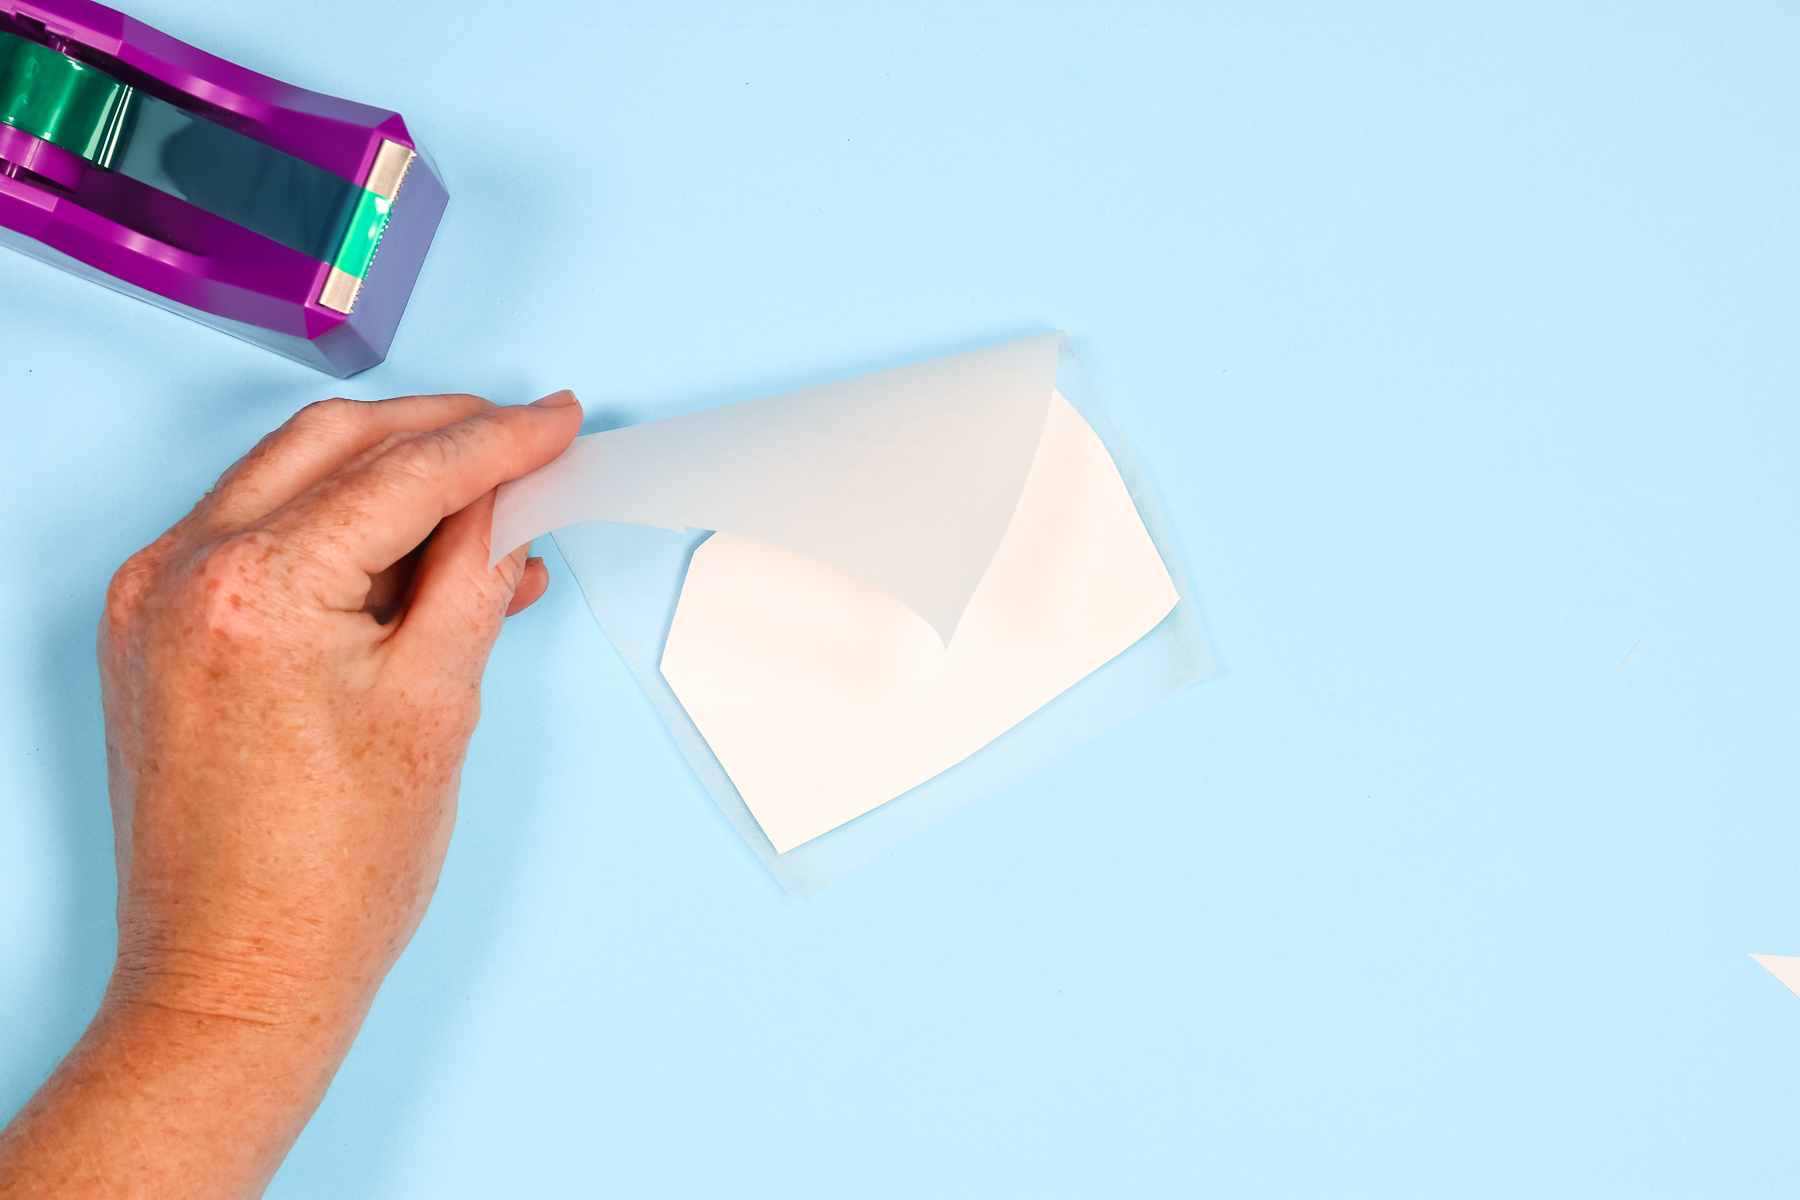
Before pressing use a small piece of protective paper on both sides of the sublimation blank to protect your heat source and the EasyPress Mat.
Set the whole thing on top of the EasyPress mat with the sublimation print side up. Make sure the whole thing is under the heat plate and press for 60 seconds at 385 degrees with light to medium pressure.
Once the time is up, remove the EasyPress and quickly remove the print from the air freshener. To help prevent the sublimation air freshener from getting wavy from the heat, place it on a hard surface and put something heavy on top until it is cool.
Pressing Back Side of Sublimation Air Fresheners
To apply a sublimation print to the back side of the air freshener we’re going to repeat the same steps as before.
Make sure you use a new piece of protective paper to cover both sides of the sublimation blank and press as we did before.
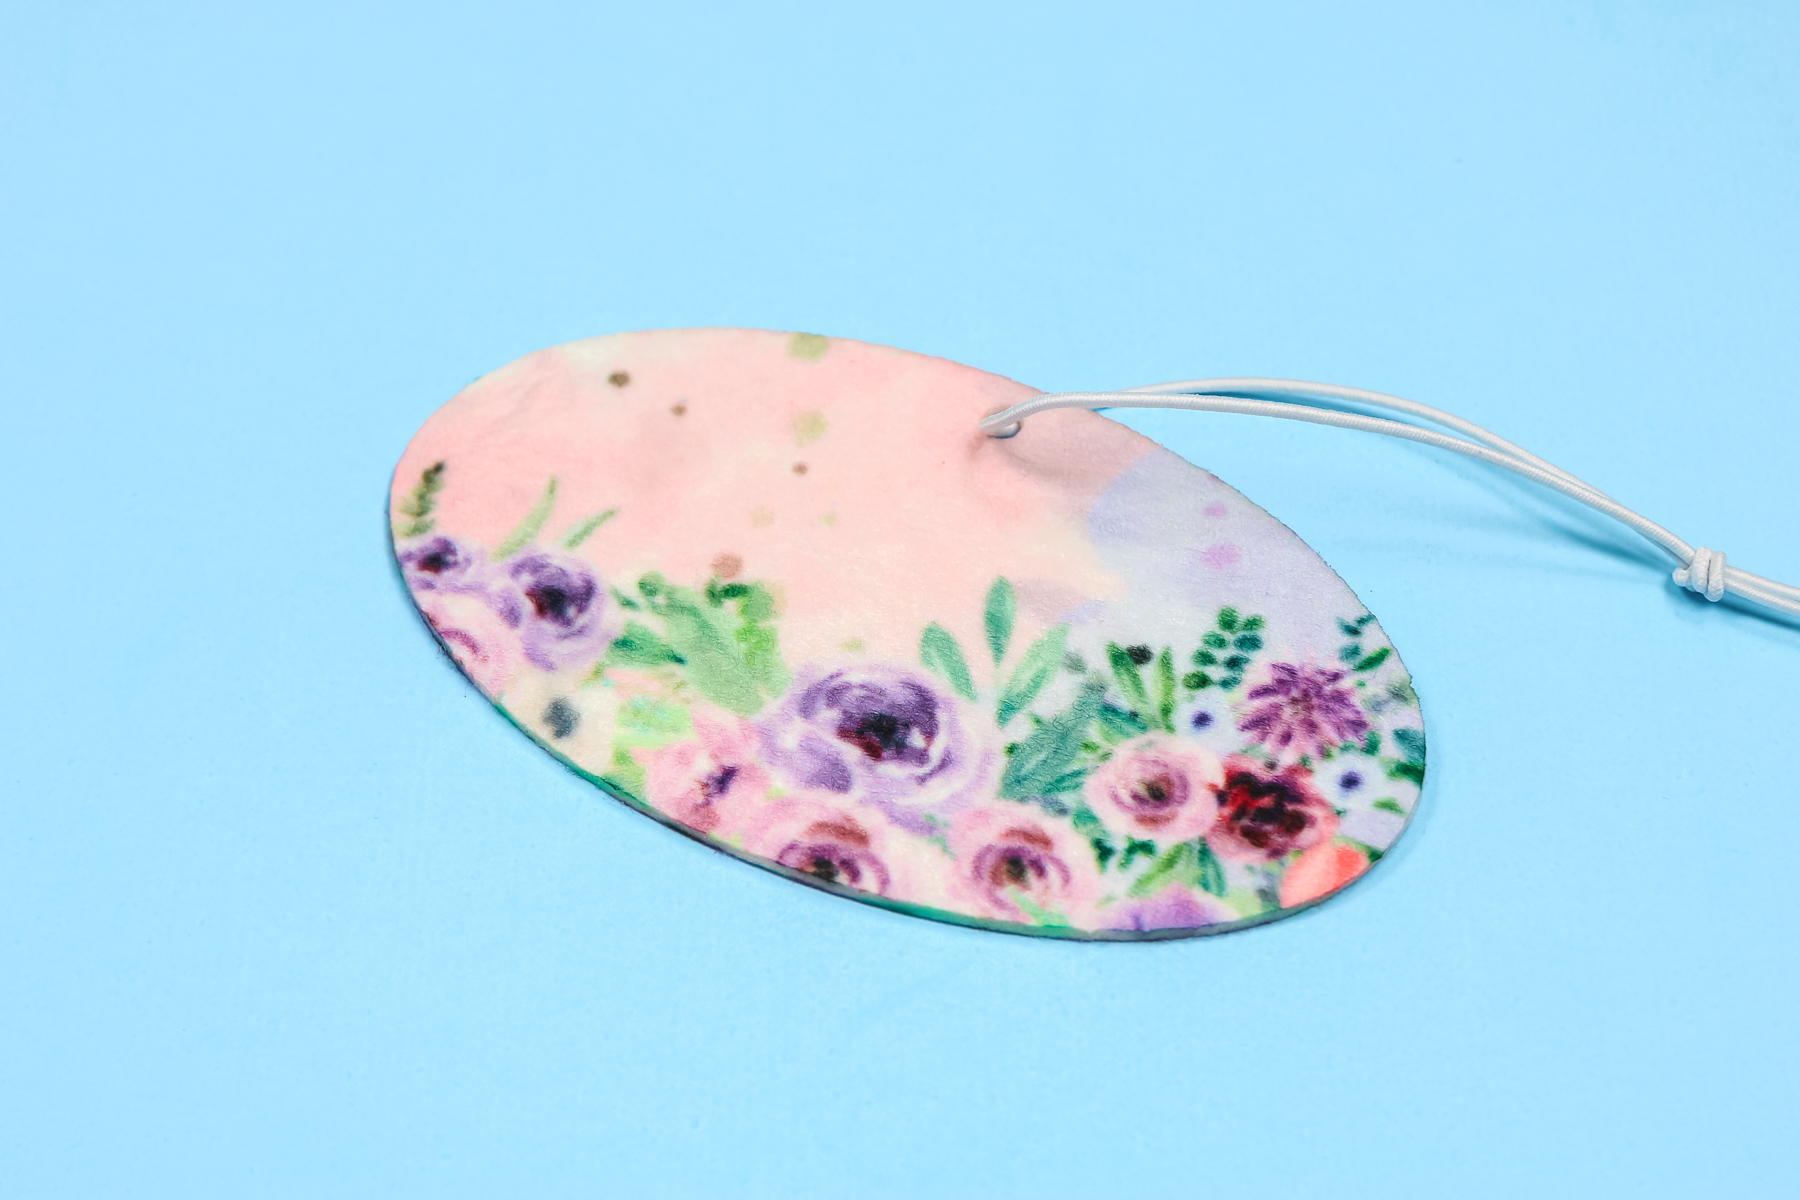
To keep the air freshener from getting wavy, we’re going to place the air freshener on the EasyPress Mat and, with heat-resistant gloves on, use our hands to press down on the blank until it cools. And now we have a double-sided sublimation air freshener.
Sublimating Two Sides of the Air Freshener at One Time
I want to show you how to sublimate a straight-side air freshener. The process is the same except we can sublimate both sides at once. Wrap your sublimation design around the sublimation blank and secure all the way around with heat-resistant tape.
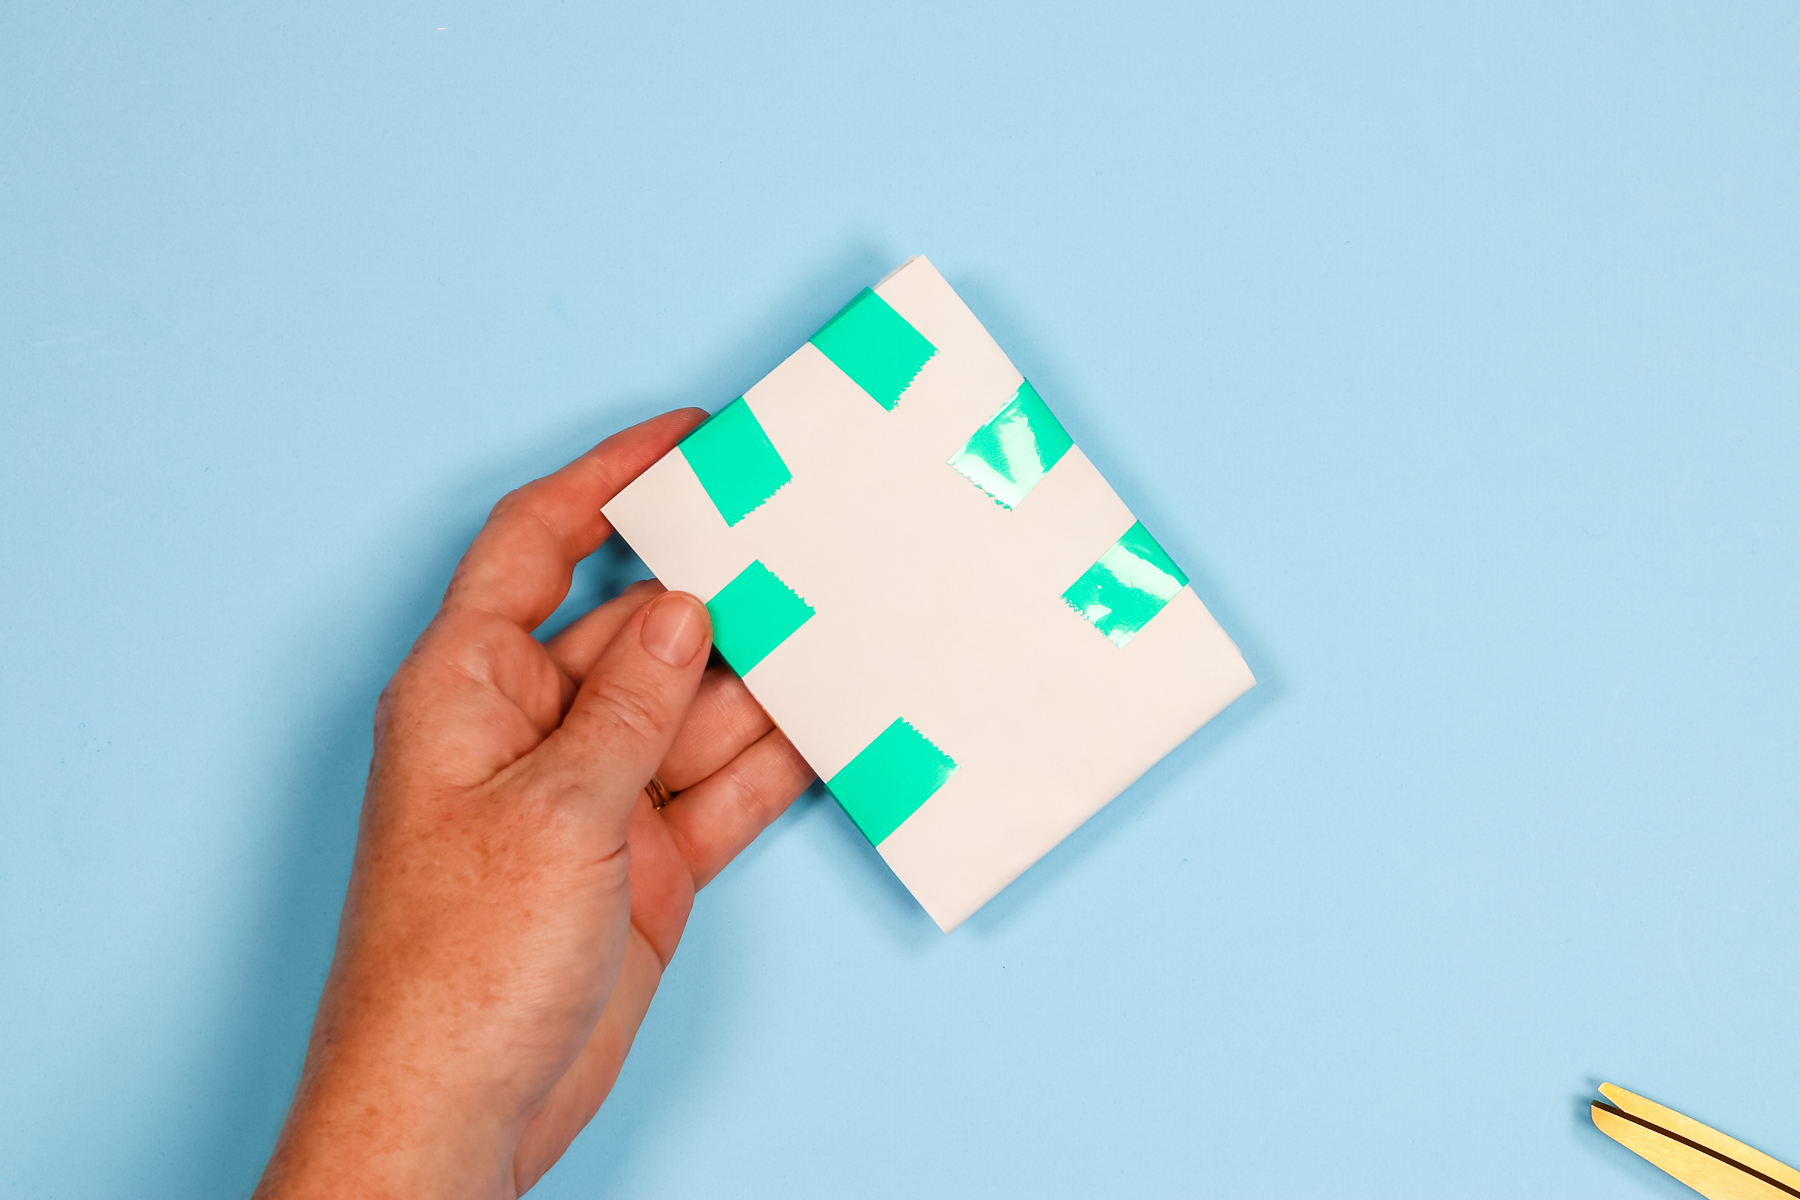
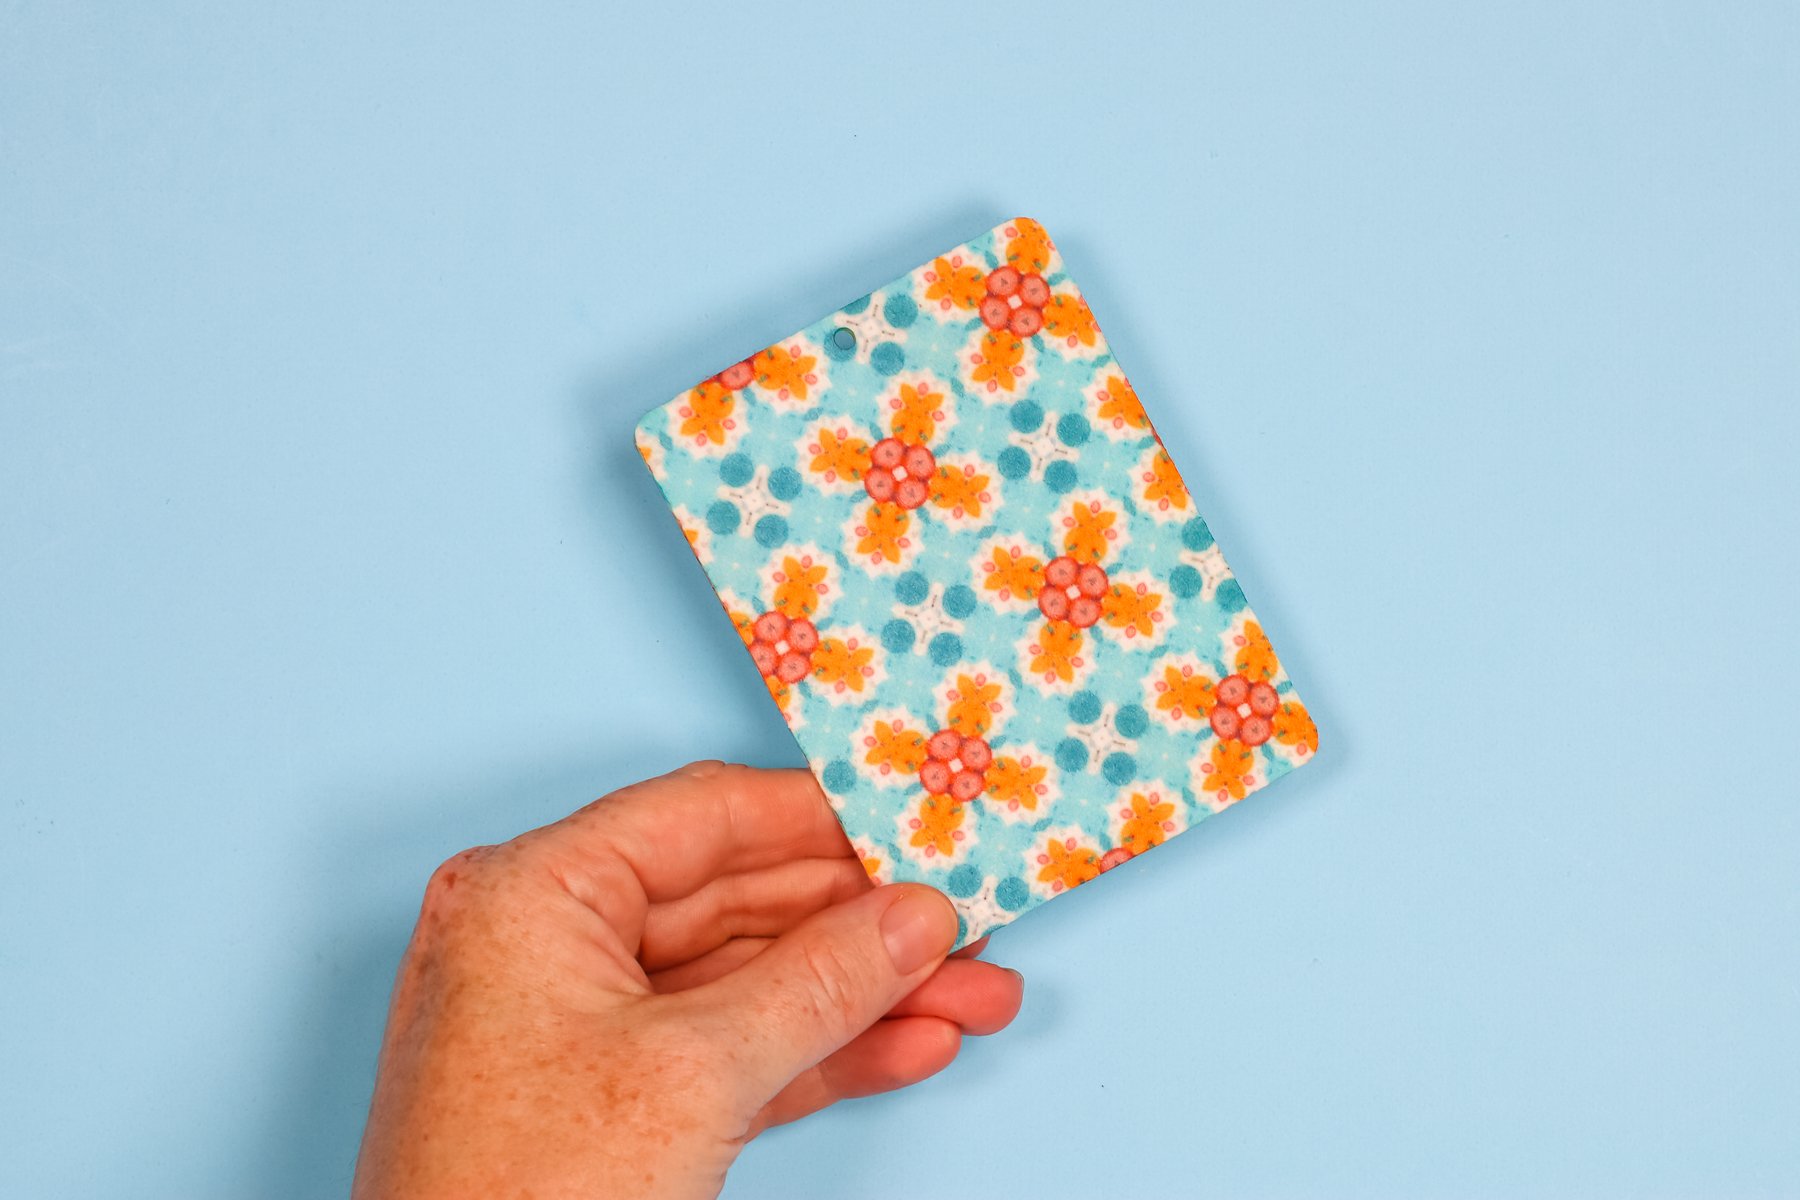
Press for the appropriate time then flip and press one more. Then follow the same steps for quickly removing the design and keeping the air freshener flat. Here we have a completed double-sided, straight-side sublimation air freshener.
Applying Fragrance to Sublimation Air Fresheners
All of my sublimation air fresheners have the designs applied so let’s add fragrance. The great thing about these sublimation air fresheners is that you can add any fragrance you want. You do want to make sure that any fragrance you use is clear so it doesn’t discolor your air freshener.
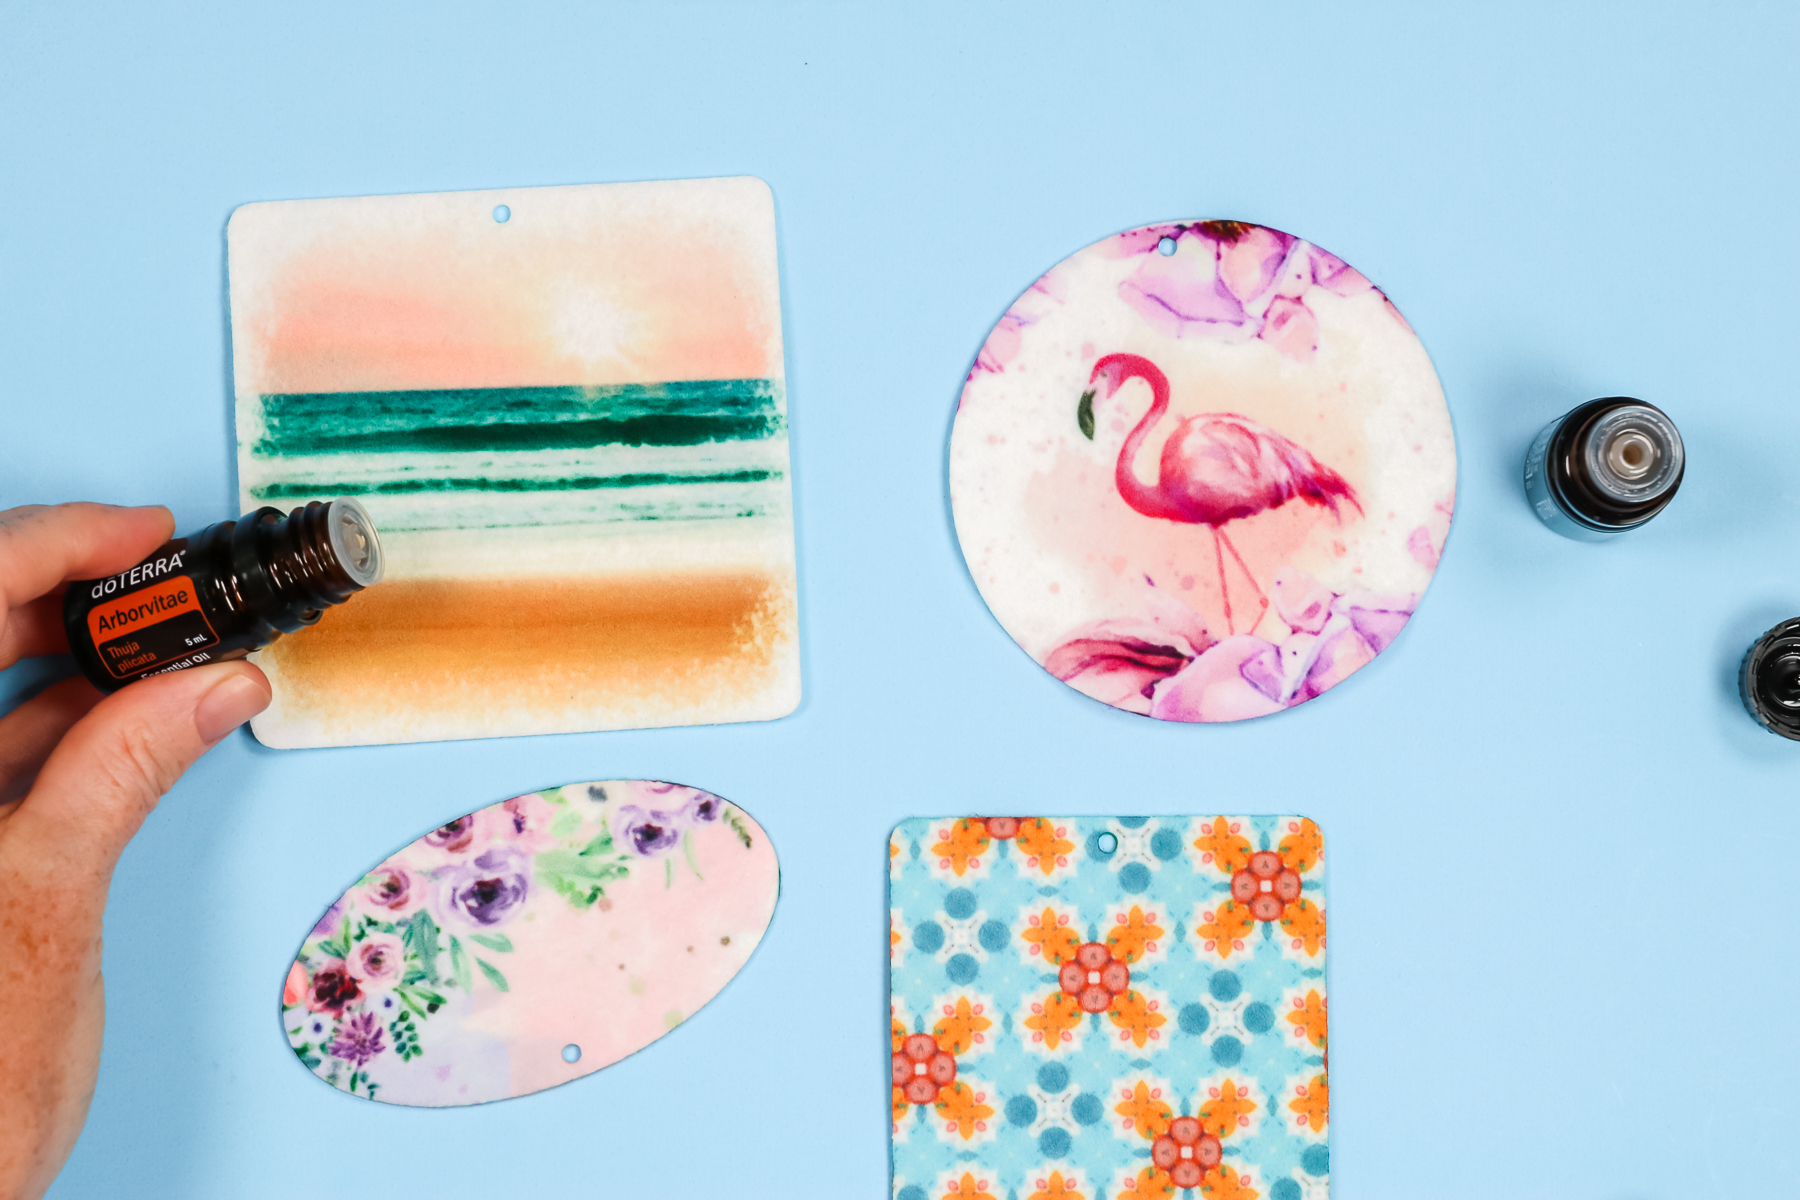
Essential oils are a good choice as long as the one you’re using is clear. Test the oil first to make sure it is clear. I found a few essential oils that were clear that I liked the smell of so I added a dot to each of the four corners (or top/bottom/both sides).
You could also choose to dilute the essential oil with a little water and spray it on the entire air freshener or choose to use perfume or other fragrance.
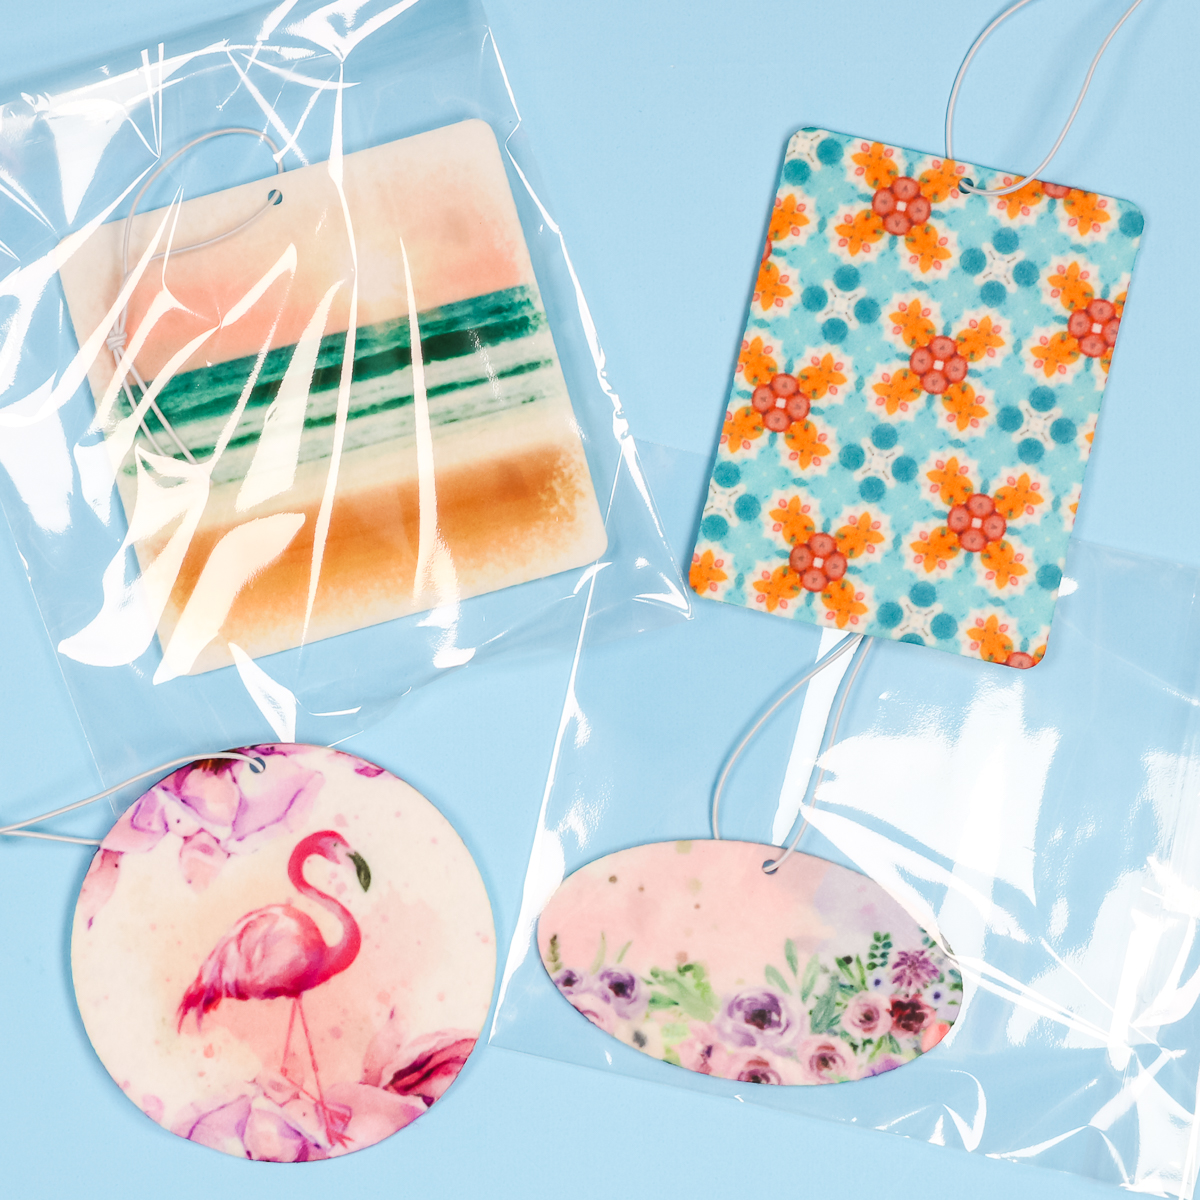
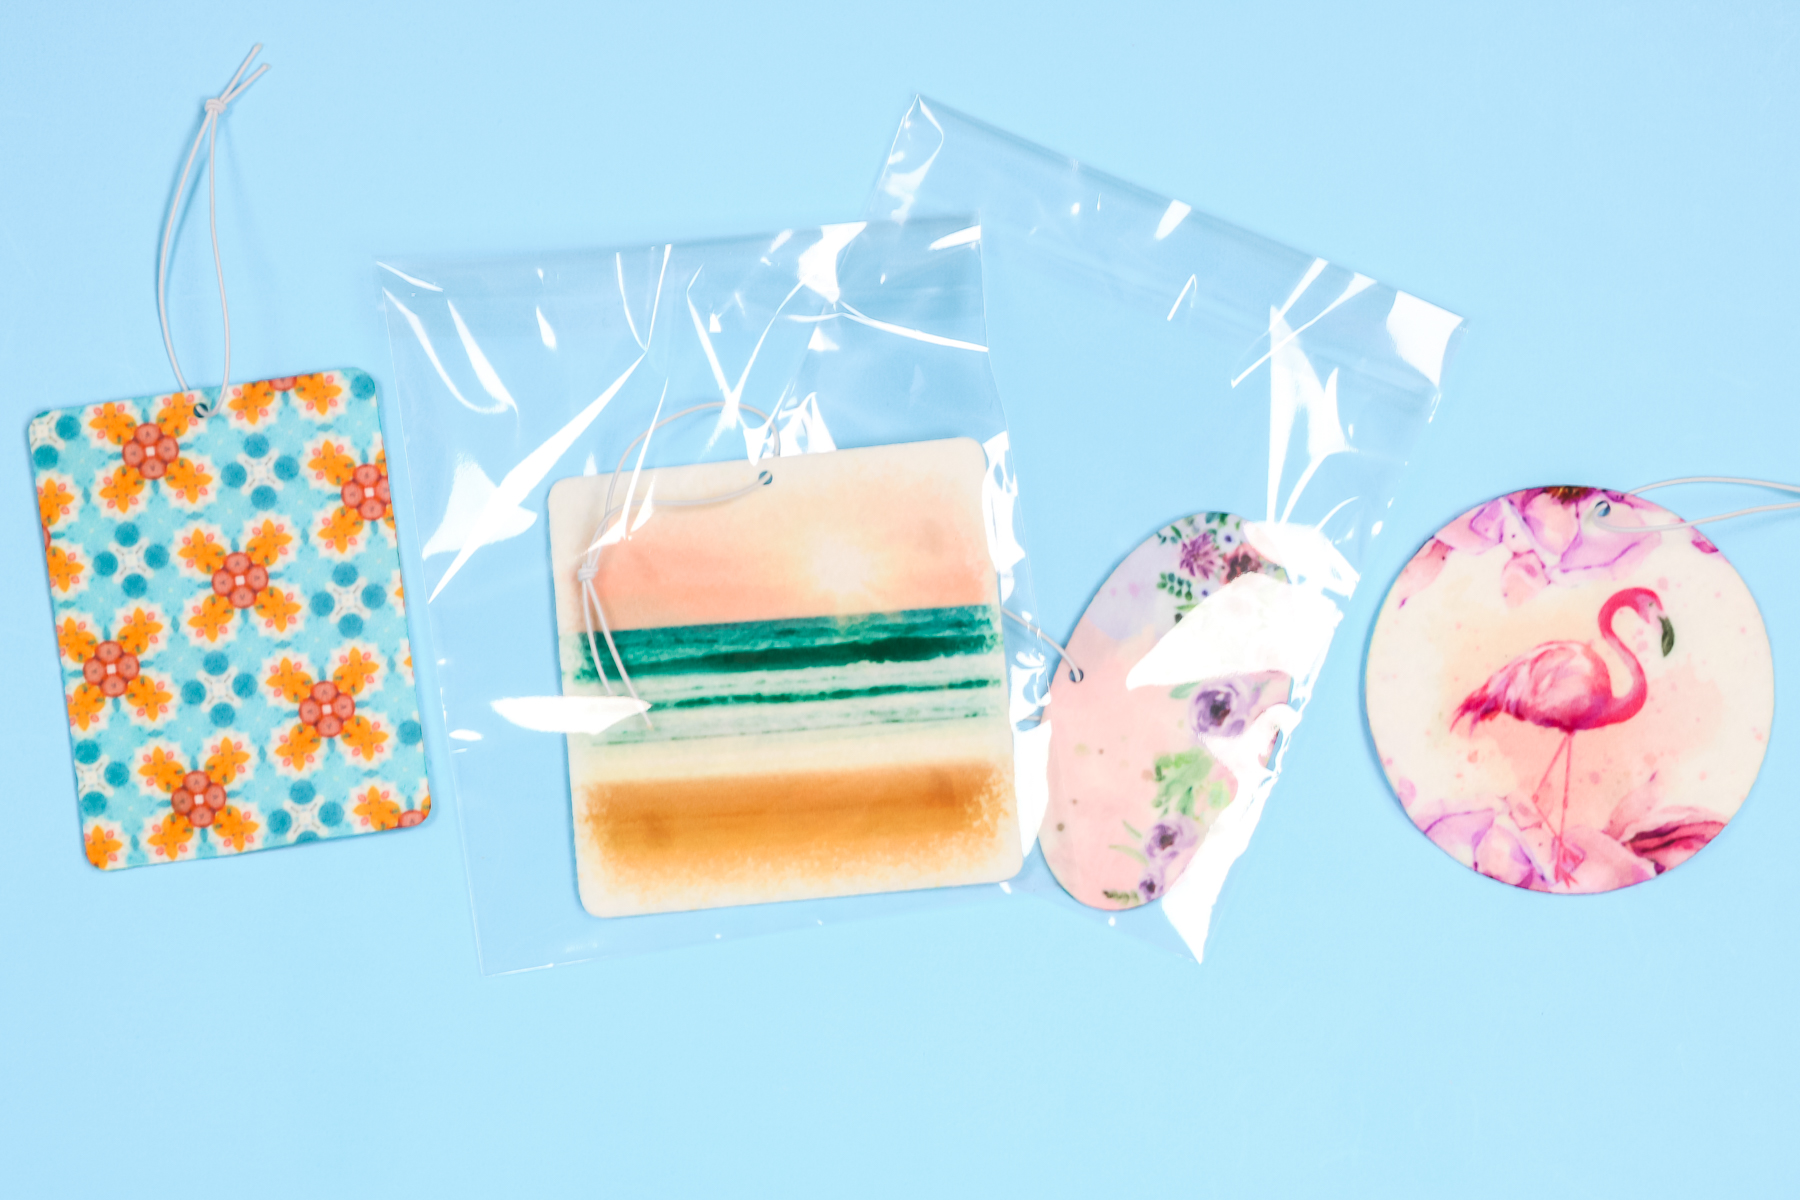
Finishing the Air Freshener
Once you have the fragrance applied to your air freshener, you want to add the string (or use ribbon/twine, whatever you want) and immediately place the air freshener in a bag to hold the scent.
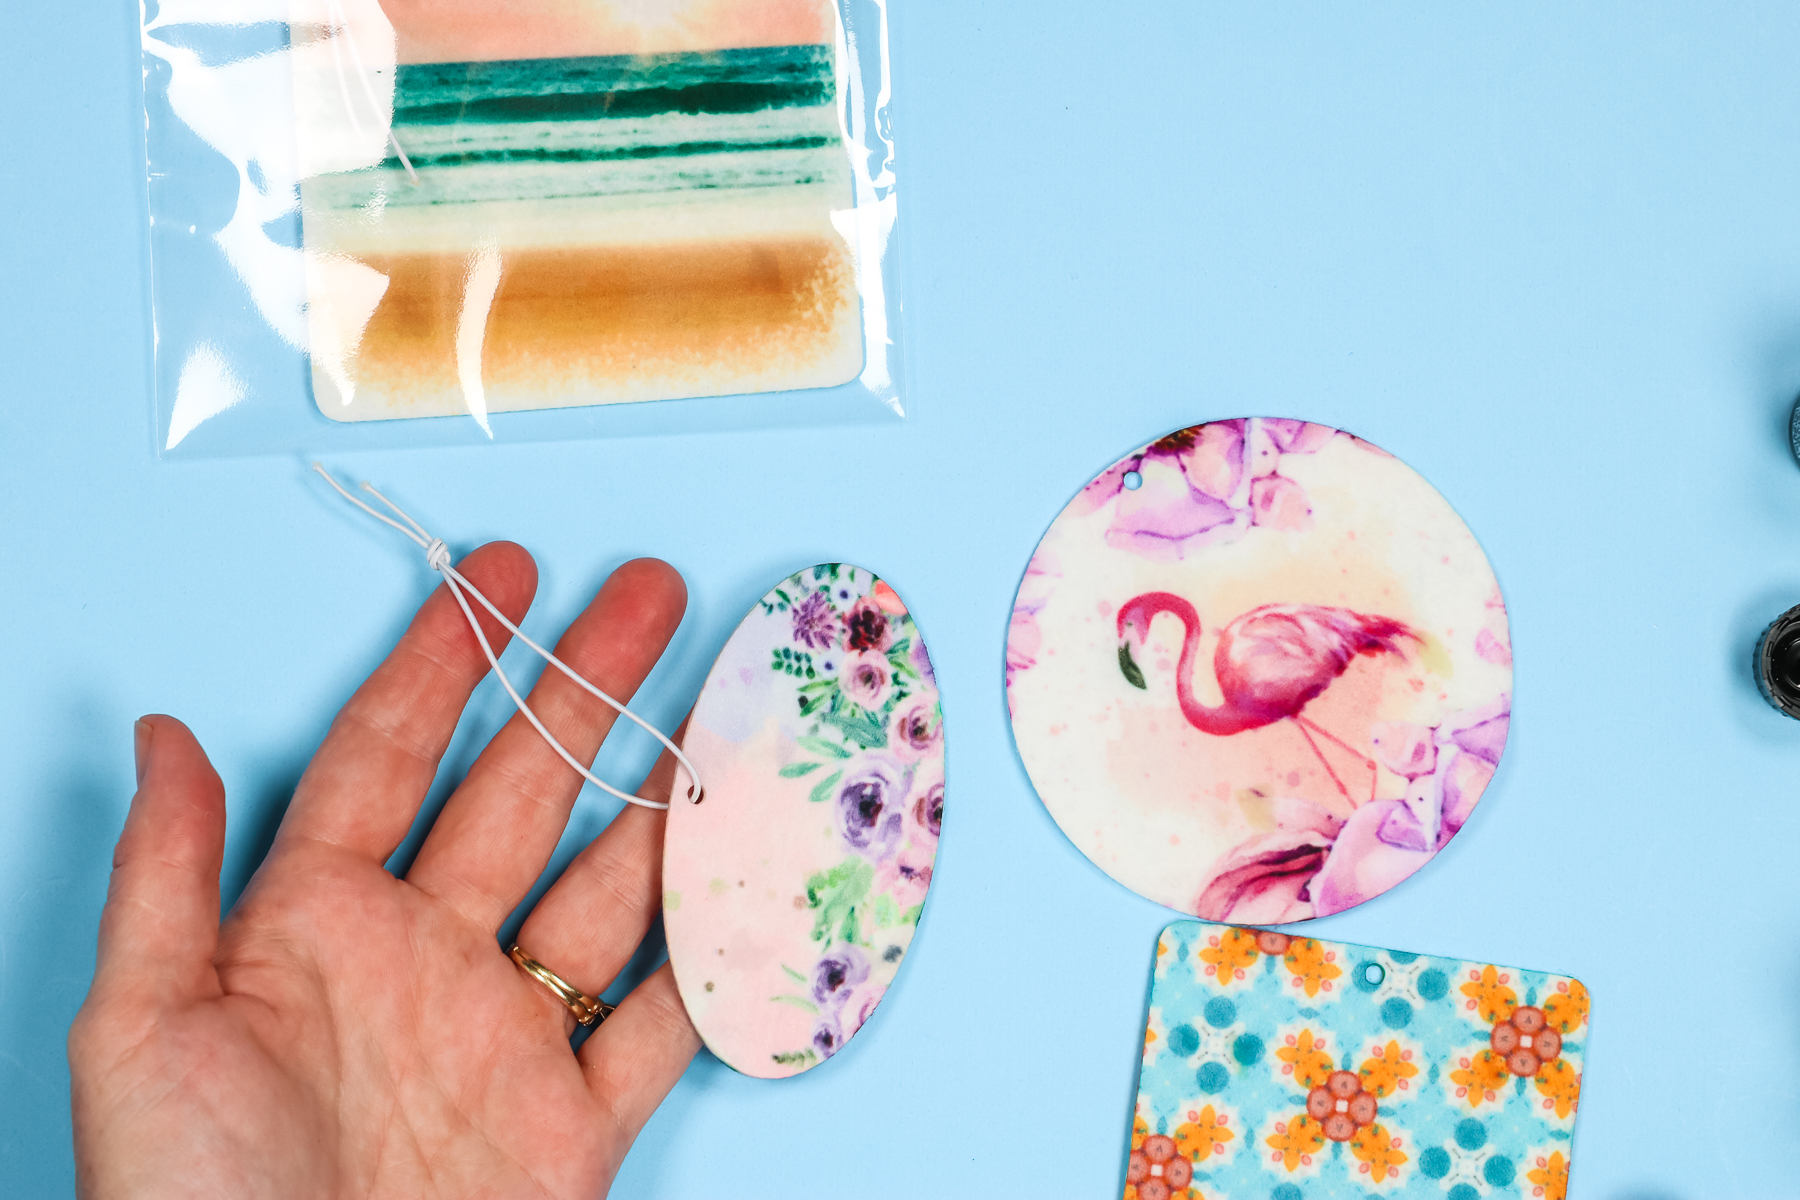
If you plan to use the air freshener right away, you can go ahead and put it where you want. If you aren’t going to use it right away, you want to put it in the bag (again my set came with bags) and seal it. Sealing the air freshener with the scent applied in the bag also helps intensify the fragrance so it can spread to the entire air freshener, not just the corners. And, once you have it all bagged up, it’s ready to store or give away!
Final Thoughts on Sublimation Air Fresheners
This was my first time ever using sublimation air fresheners and I am so impressed with how well they turned out. Not only did the prints turn out beautiful but they were so easy to do.
I think these make a great beginner project for a couple of reasons.
- They’re really easy to make.
- They’re a great way to test out your sublimation. You can use these blanks to check colors and supplies and have something useful at the end.
I really like the idea of making my own air fresheners because sometimes store-bought ones can have a really strong scent. With these sublimation air fresheners, you can add as little or as much fragrance as you want.
Just remember that the scent will intensify in closed spaces. This includes inside the bag and closed up in your car, especially on a hot day. I would start with just a dot or two of scent and go from there.
Another great thing about these DIY air fresheners is that you can reapply the scent if it starts to fade. This is definitely not something you can do with store-bought air fresheners. I really hope you found this tutorial helpful. If you have any questions about sublimation air fresheners or the process of making them, please leave them in the comments and I’ll get them answered for you.
Love this sublimation craft idea and want more? Try the links below as well!
Are you ready to try sublimation on glass? Sublimating on glass is a great way to personalize your home decor and gifts. Keep reading to learn how.

Make your own earrings with a sublimation print and these MDF wood blanks.

Make a flag for your garden, car, or even just a fun party with a sublimation printer and any design!