
This post and photos may contain Amazon or other affiliate links. If you purchase something through any link, I may receive a small commission at no extra charge to you. Any supplies used may be given to me free of charge, however, all projects and opinions are my own.

Recently, Cricut offset was introduced. This feature is new to Cricut Design Space and allows you to add an outline around text, images, and so much more. I am going to walk you through how to use it today so you can get started using offset on your Cricut machine. If you want to learn more about the other features of Design Space, be sure to read our Cricut for Dummies guide.
Cricut Offset
I do want to note that at the writing of this blog post Cricut offset is still in BETA. This means that there may be glitches but I find it very functional and love using it for my projects. So, let’s take a look at how the function works on a variety of projects. You can actually watch me use offset in the video below if you just click play.
Can’t watch the video or missed some of the information? I have all of it below for you as well so just keep reading!
System Requirements
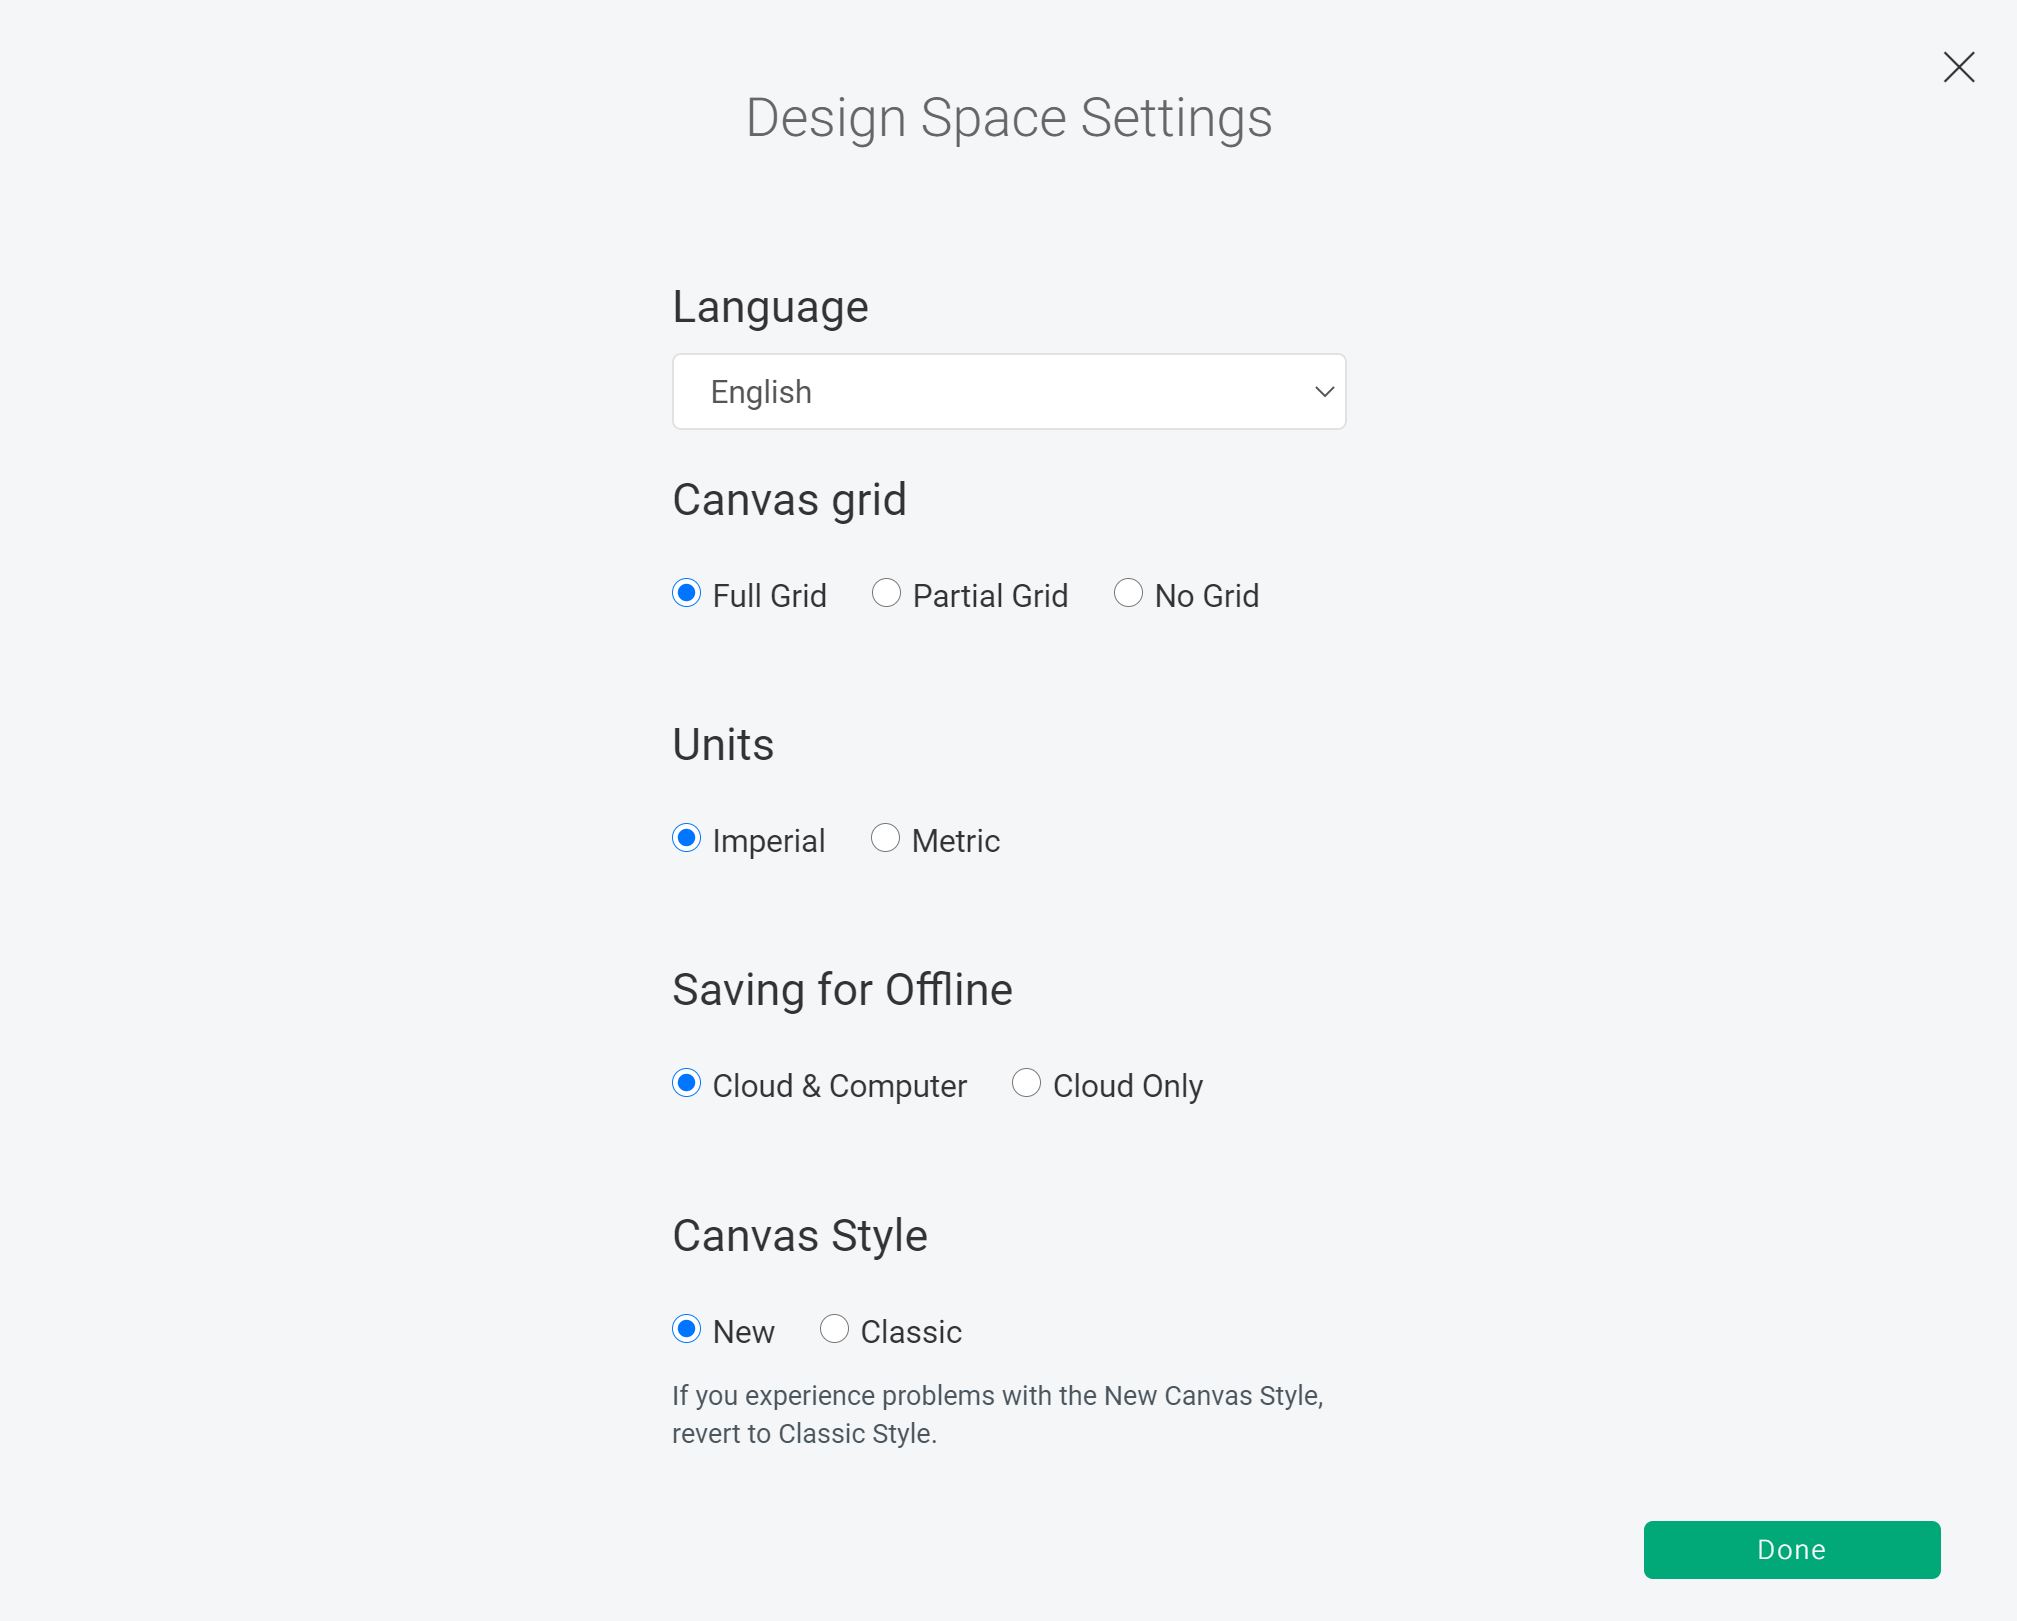
The Offset feature is supported on systems running Windows 10 (64-bit only) and higher, and macOS 10.15 and higher. It is only available on computers at this time so you will not be able to use it on phones or tablets. You also want to make sure your canvas style is set to new and not classic. To check this, go to your settings. Offset does work with all machines.
What is an offset?
So, what exactly is an offset? If you have never heard of this term before, you may be confused about why you would need it. An offset is simply an outline around your text or image. If you have ever tried to outline text yourself, you know that is can be impossible to do neatly and cleanly. Well, the offset function solves all of that for you!
Why do you use an offset?
Now that you know what an offset is, why would you want to use one? The most common reason for offset is making stickers with print then cut but you can also use an offset as a design element. Maybe you want to put a light color HTV on a white shirt? A dark offset around it would really make it POP! I am sure once you see how to use this function, you will think of a variety of ways to use it for your Cricut crafts.
How to Make an Offset in Cricut Design Space
So, let’s get down to it and start making some offset designs. I am going to walk you through making an offset on a variety of objects below with different elements. Pick and choose from all of these ideas for your particular project and make it your own!
External Offset
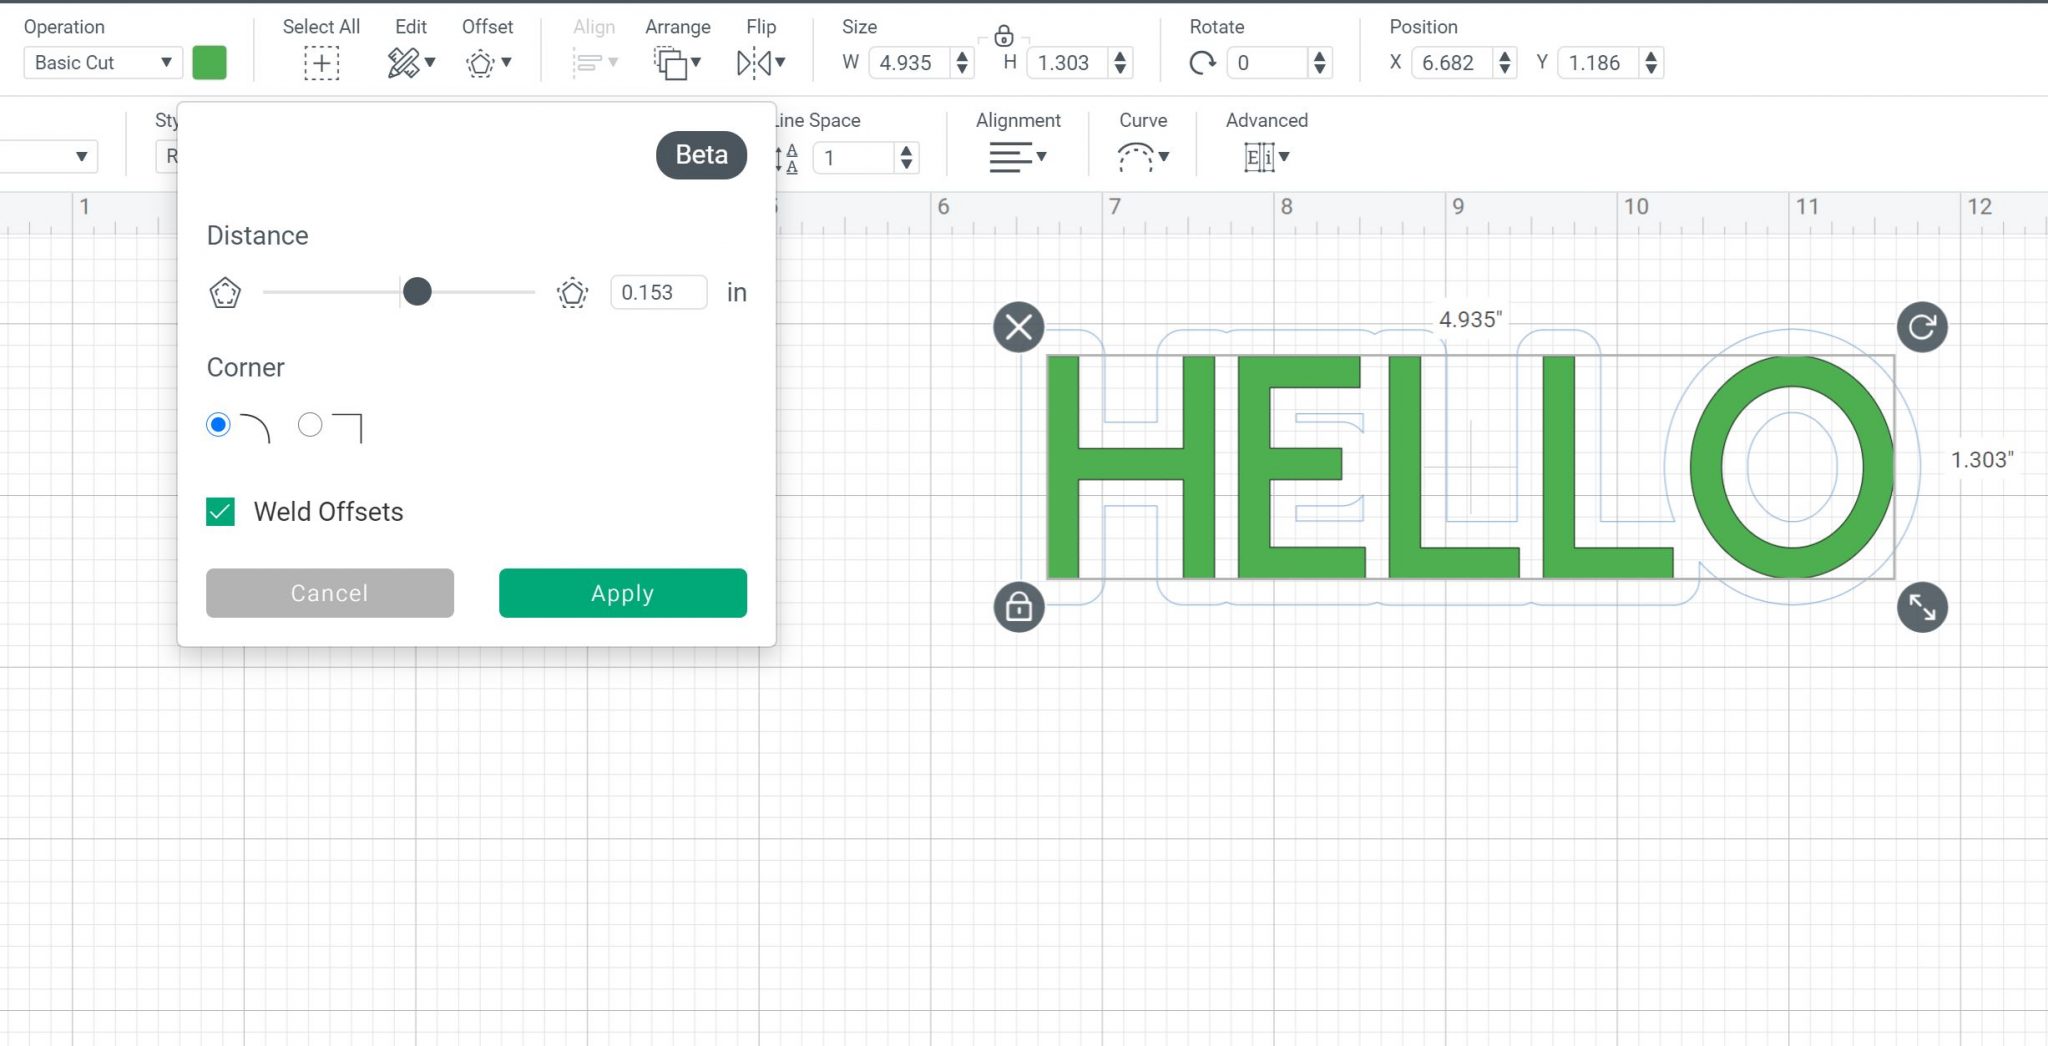
The most common type of offset is external. This is where the offset goes around the outside of your object. Click on any text or image and then you will see an offset button at the top of your screen. Pull this down and you will have a slider. Moving that slider to the right makes an external offset. You can play around and make it as large or as small as you would like.
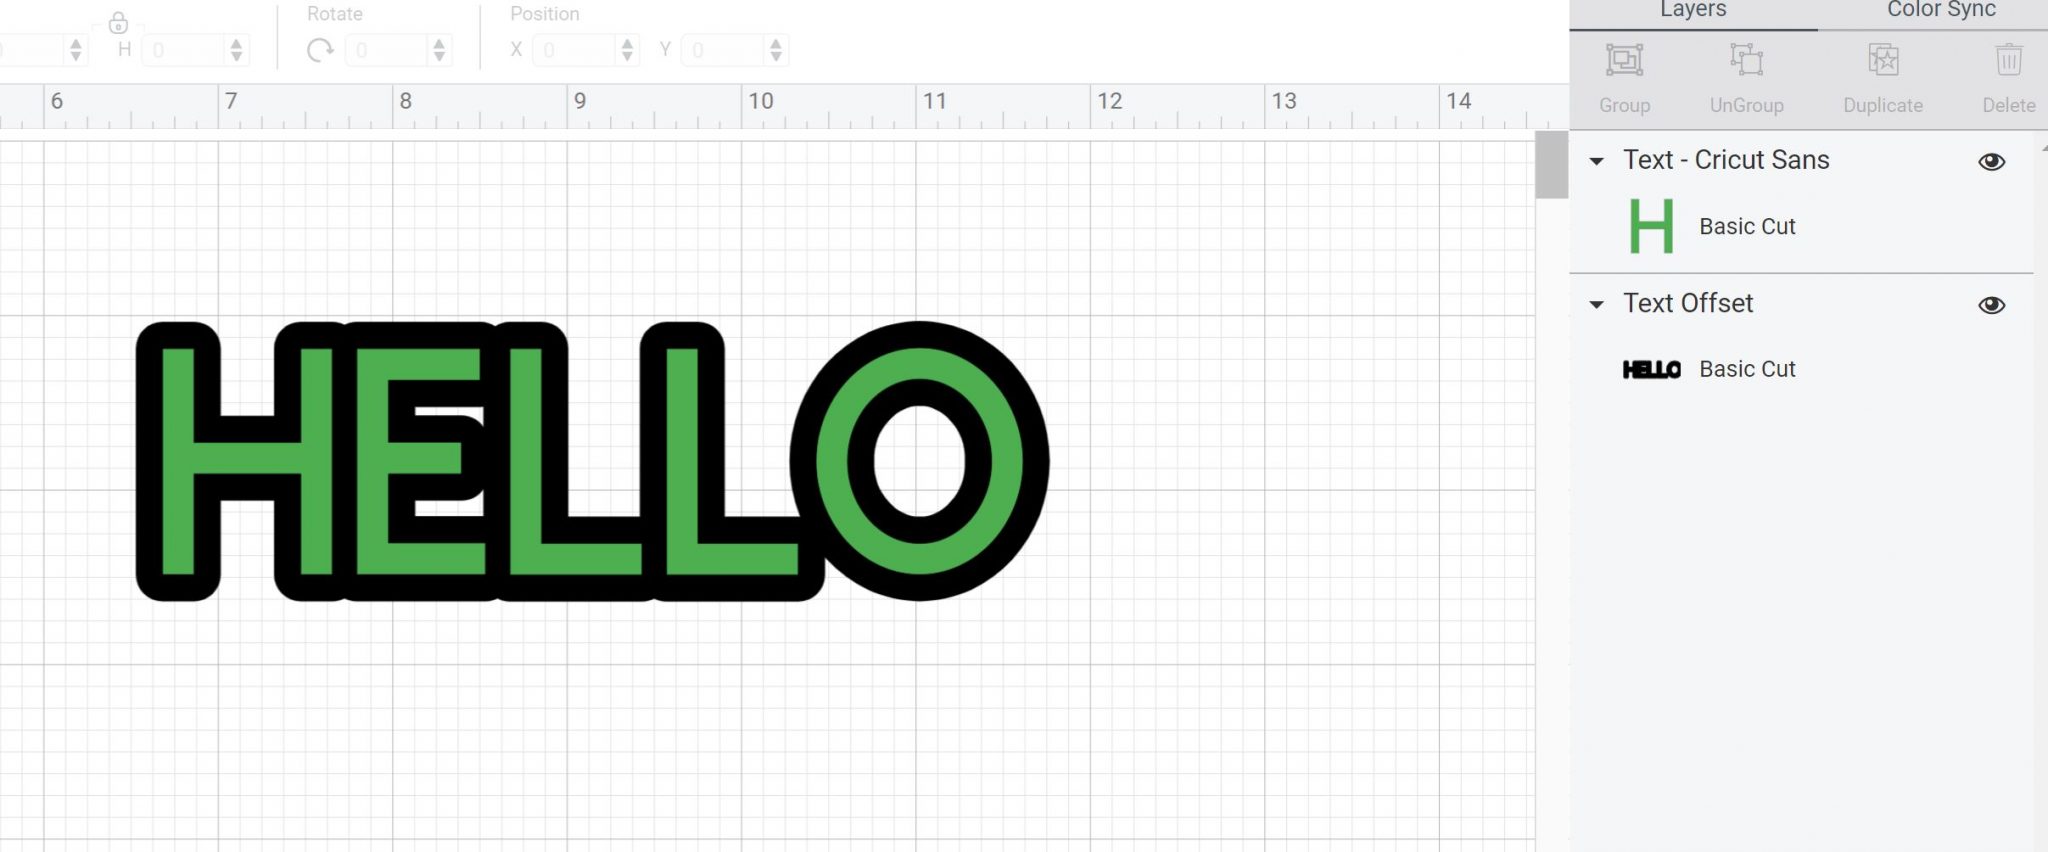
Then click apply and your new offset will be a new layer on your canvas. Please note that the offsets come in and they are not attached or grouped to anything else on your canvas. The offset will always show up as black when you first create it and you can change the colors to be whatever you like to get a better idea of how it will look when you make it.
Internal Offset
You can also make an internal offset in Cricut Design Space. So, instead of an outline around the outside, you will get lines inside of your image or text. Once again, you will pick your object and click offset in the top toolbar. Then slide the slider to the left this time until you get the look that you want.

Click apply once again and change the colors to be whatever you like.
Square Versus Round
You can also choose between square and round edges when creating your offset. Once you click the offset button, you will see the square and round options below the slider. Pick these to see what each will look like.
Then once you are happy with the look click apply once again to add your layer. I will say that the square offset is a bit glitchy with some fonts so you may want to play with this a bit to see what looks best for the offset that you want to create. I use round most often.
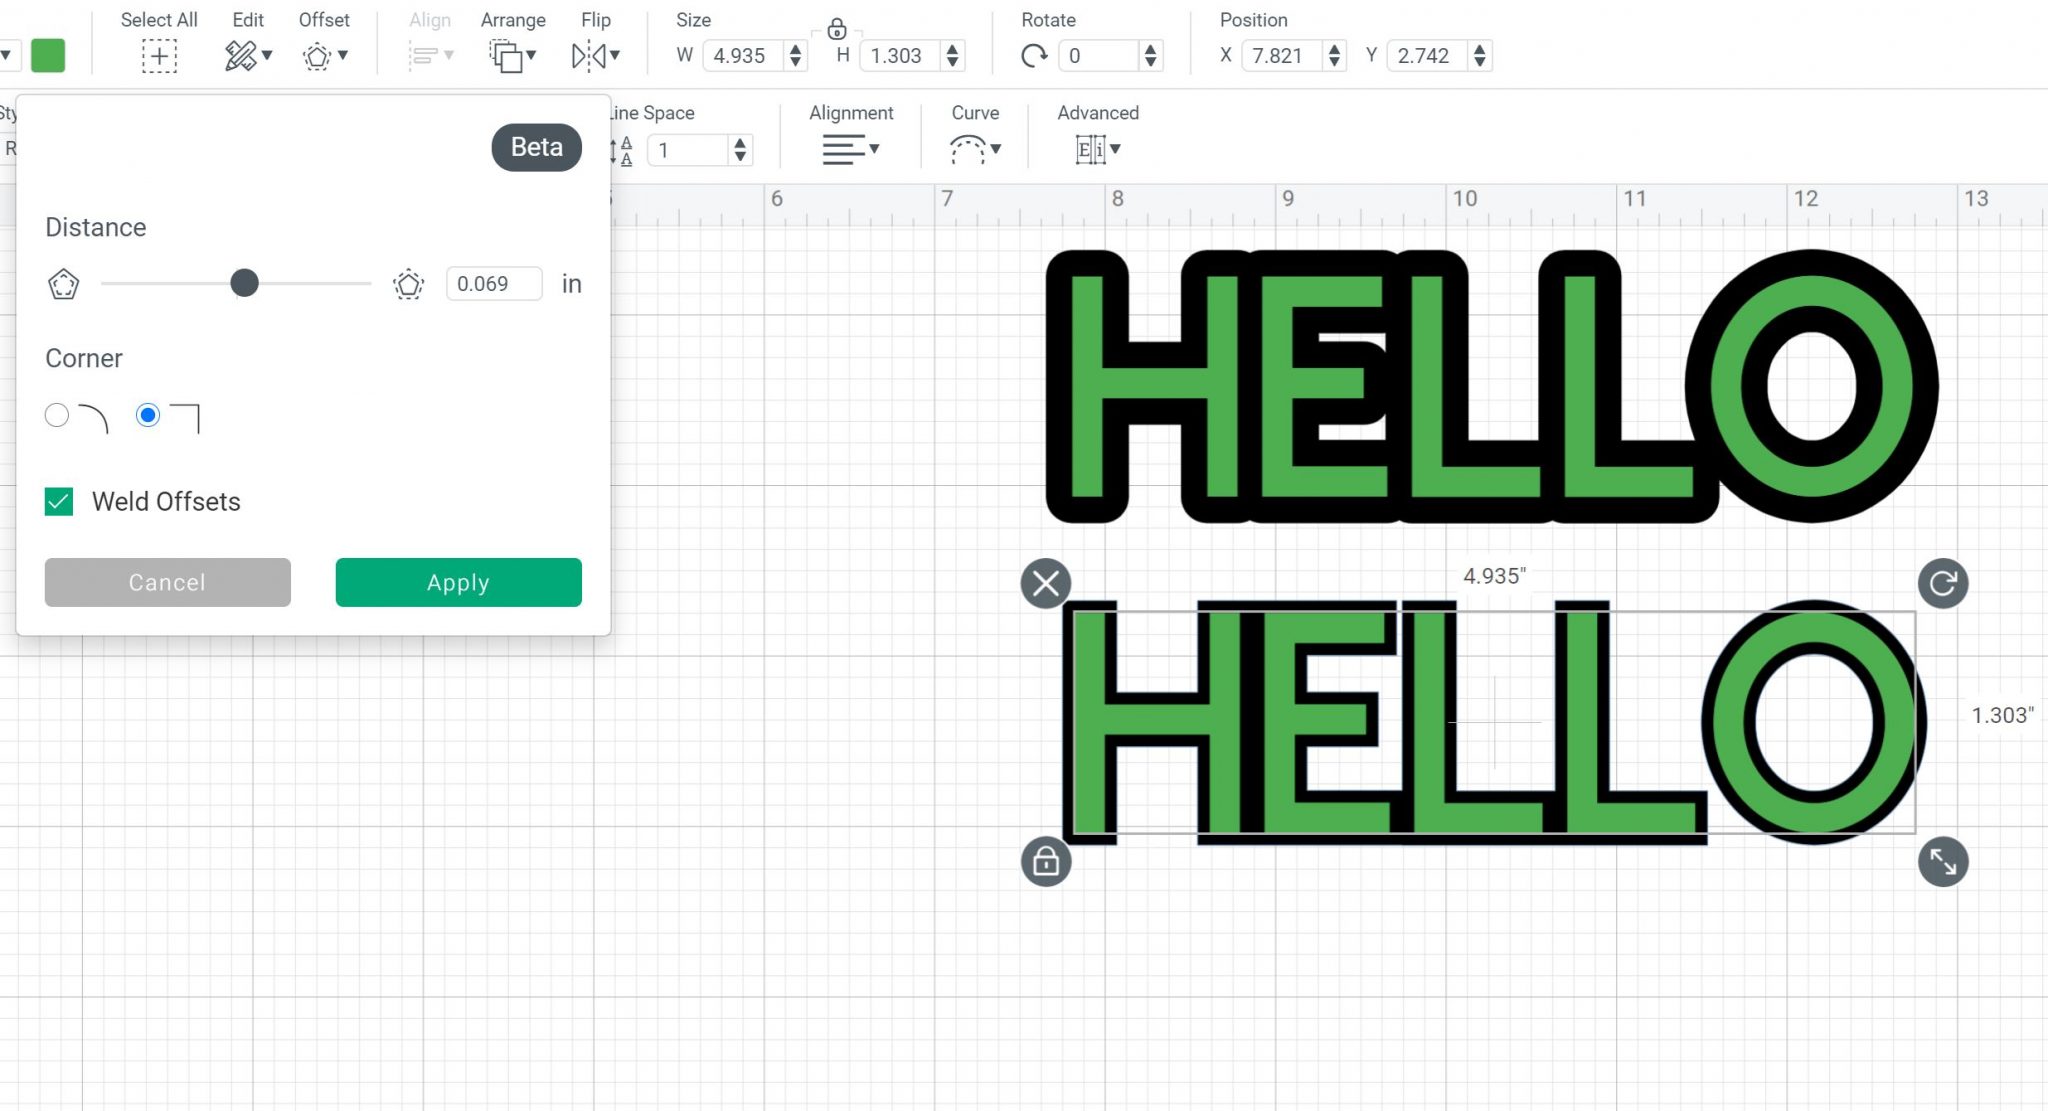
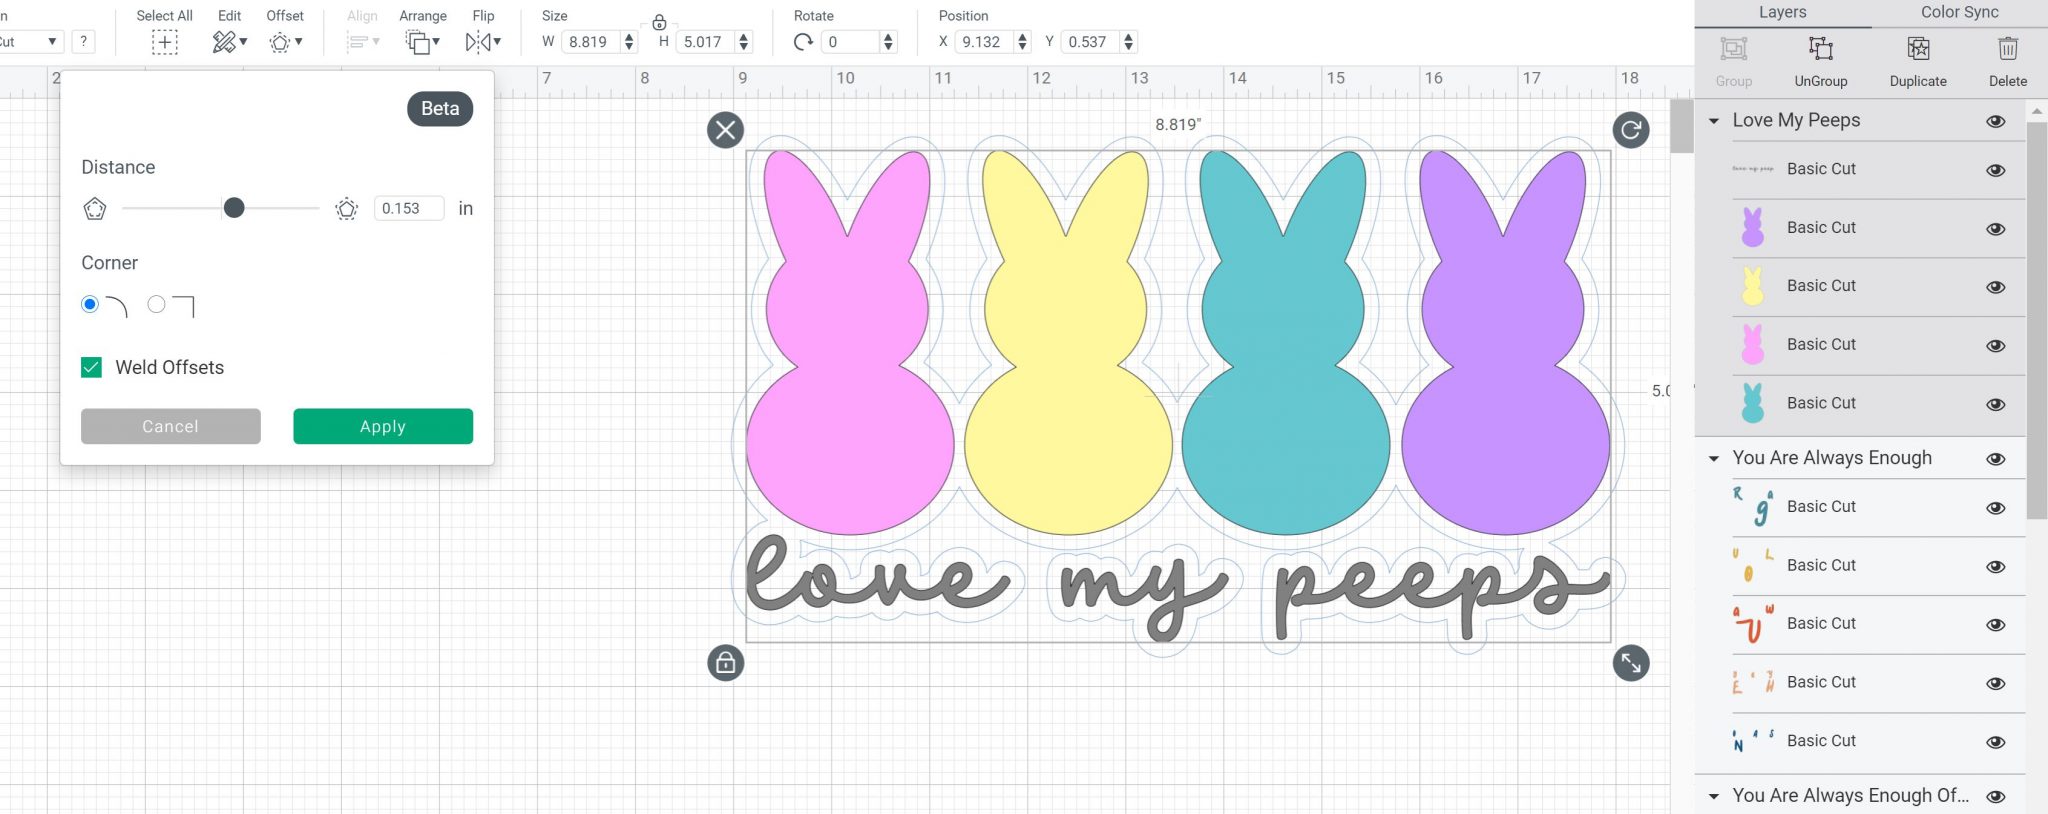
Welded Offset
You also have the option in the offset dialogue box to weld the offset or not. The box will be checked automatically when you start.
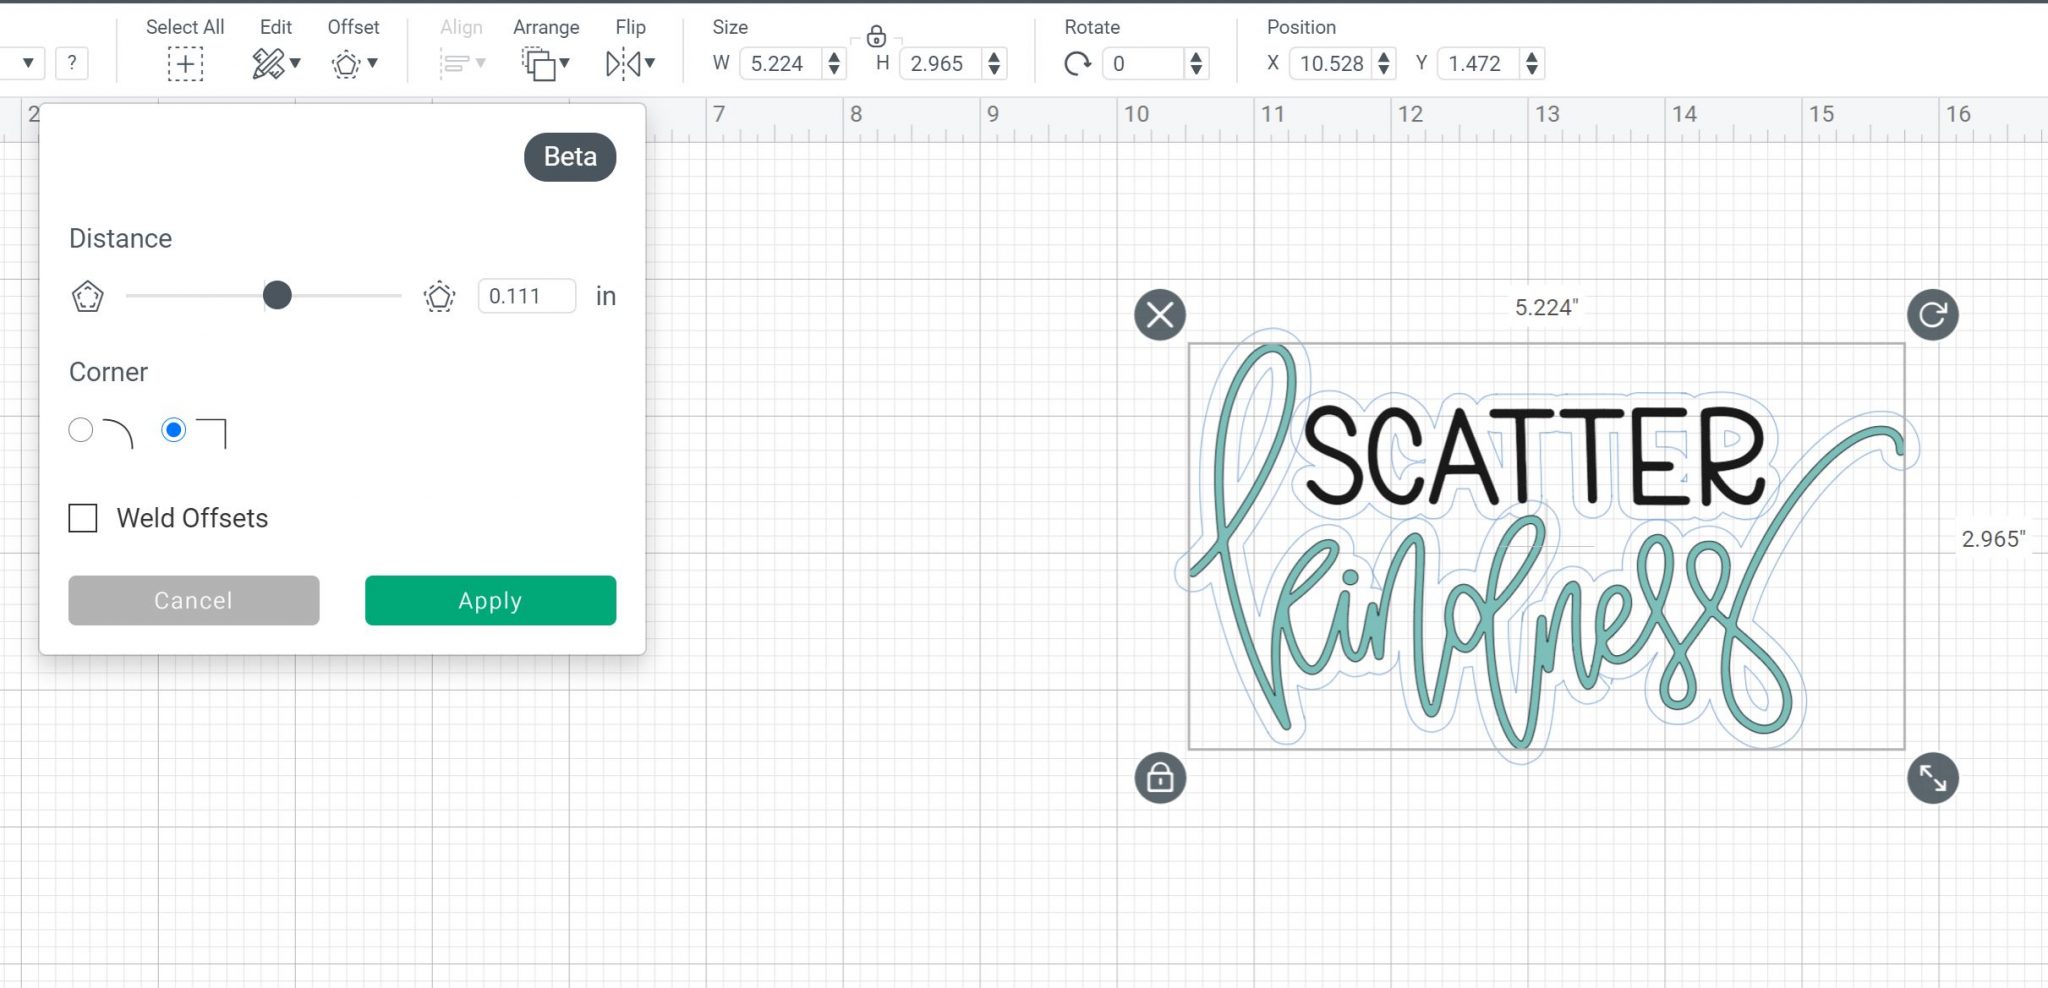
You would uncheck this box if you wanted an individual cut around each letter or object. A welded offset is one where all of the outlines join. Then click apply as you would with any other offset one you get it how you like it.
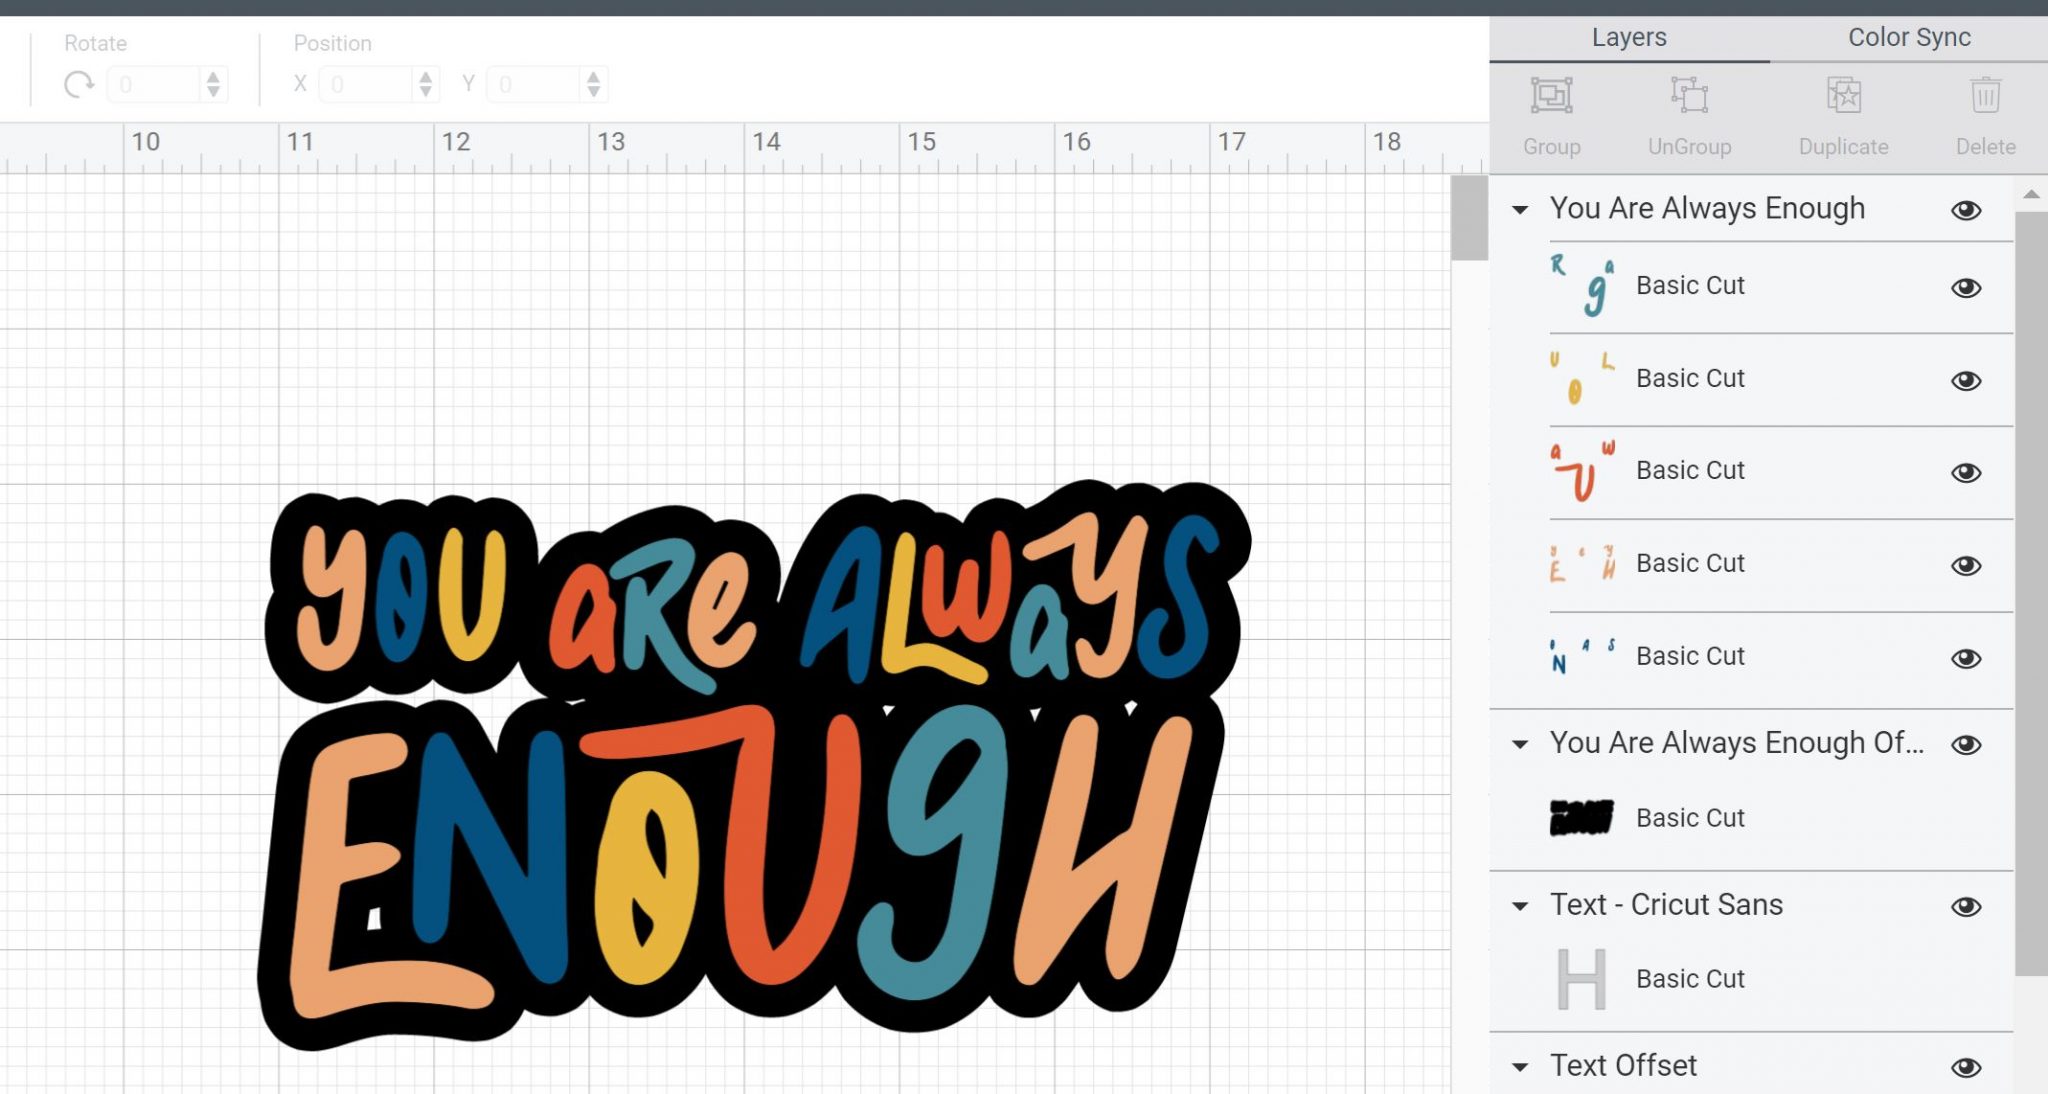
Making Stickers Using Cricut Offset
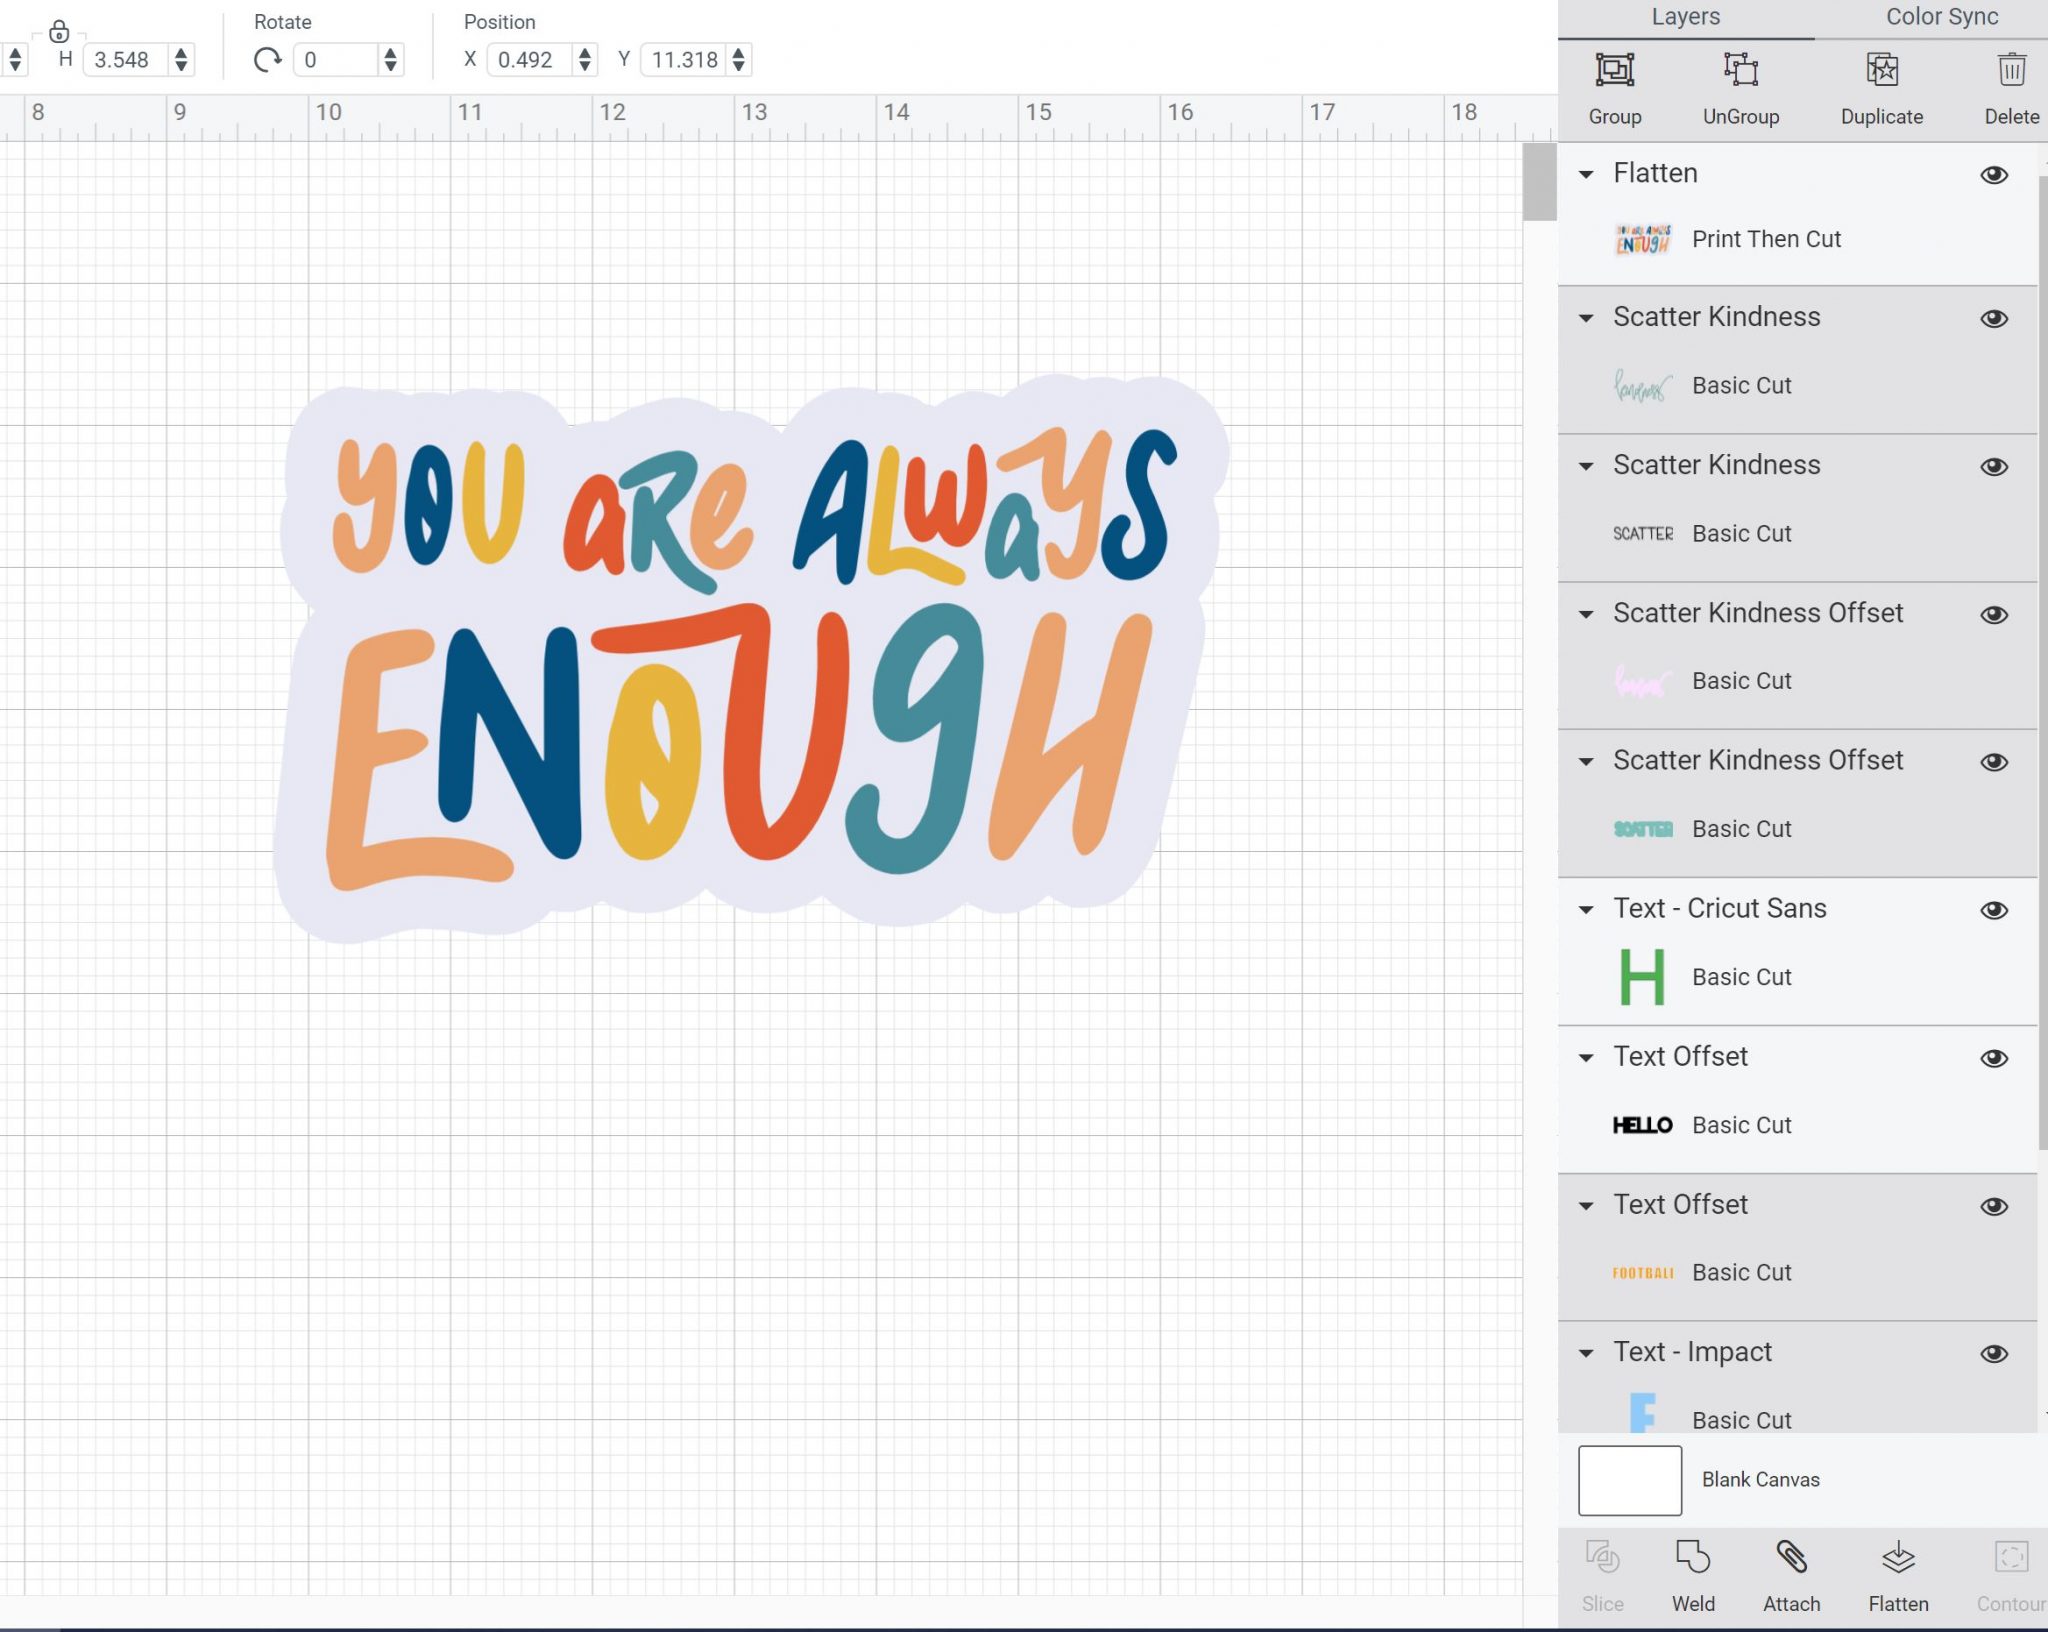
This is probably the most useful project for this feature. Imagine being able to cut a white outline around your stickers right in Cricut Design Space. Just add your images or text for stickers and make the outline how you like it. Click apply to get your two layers.
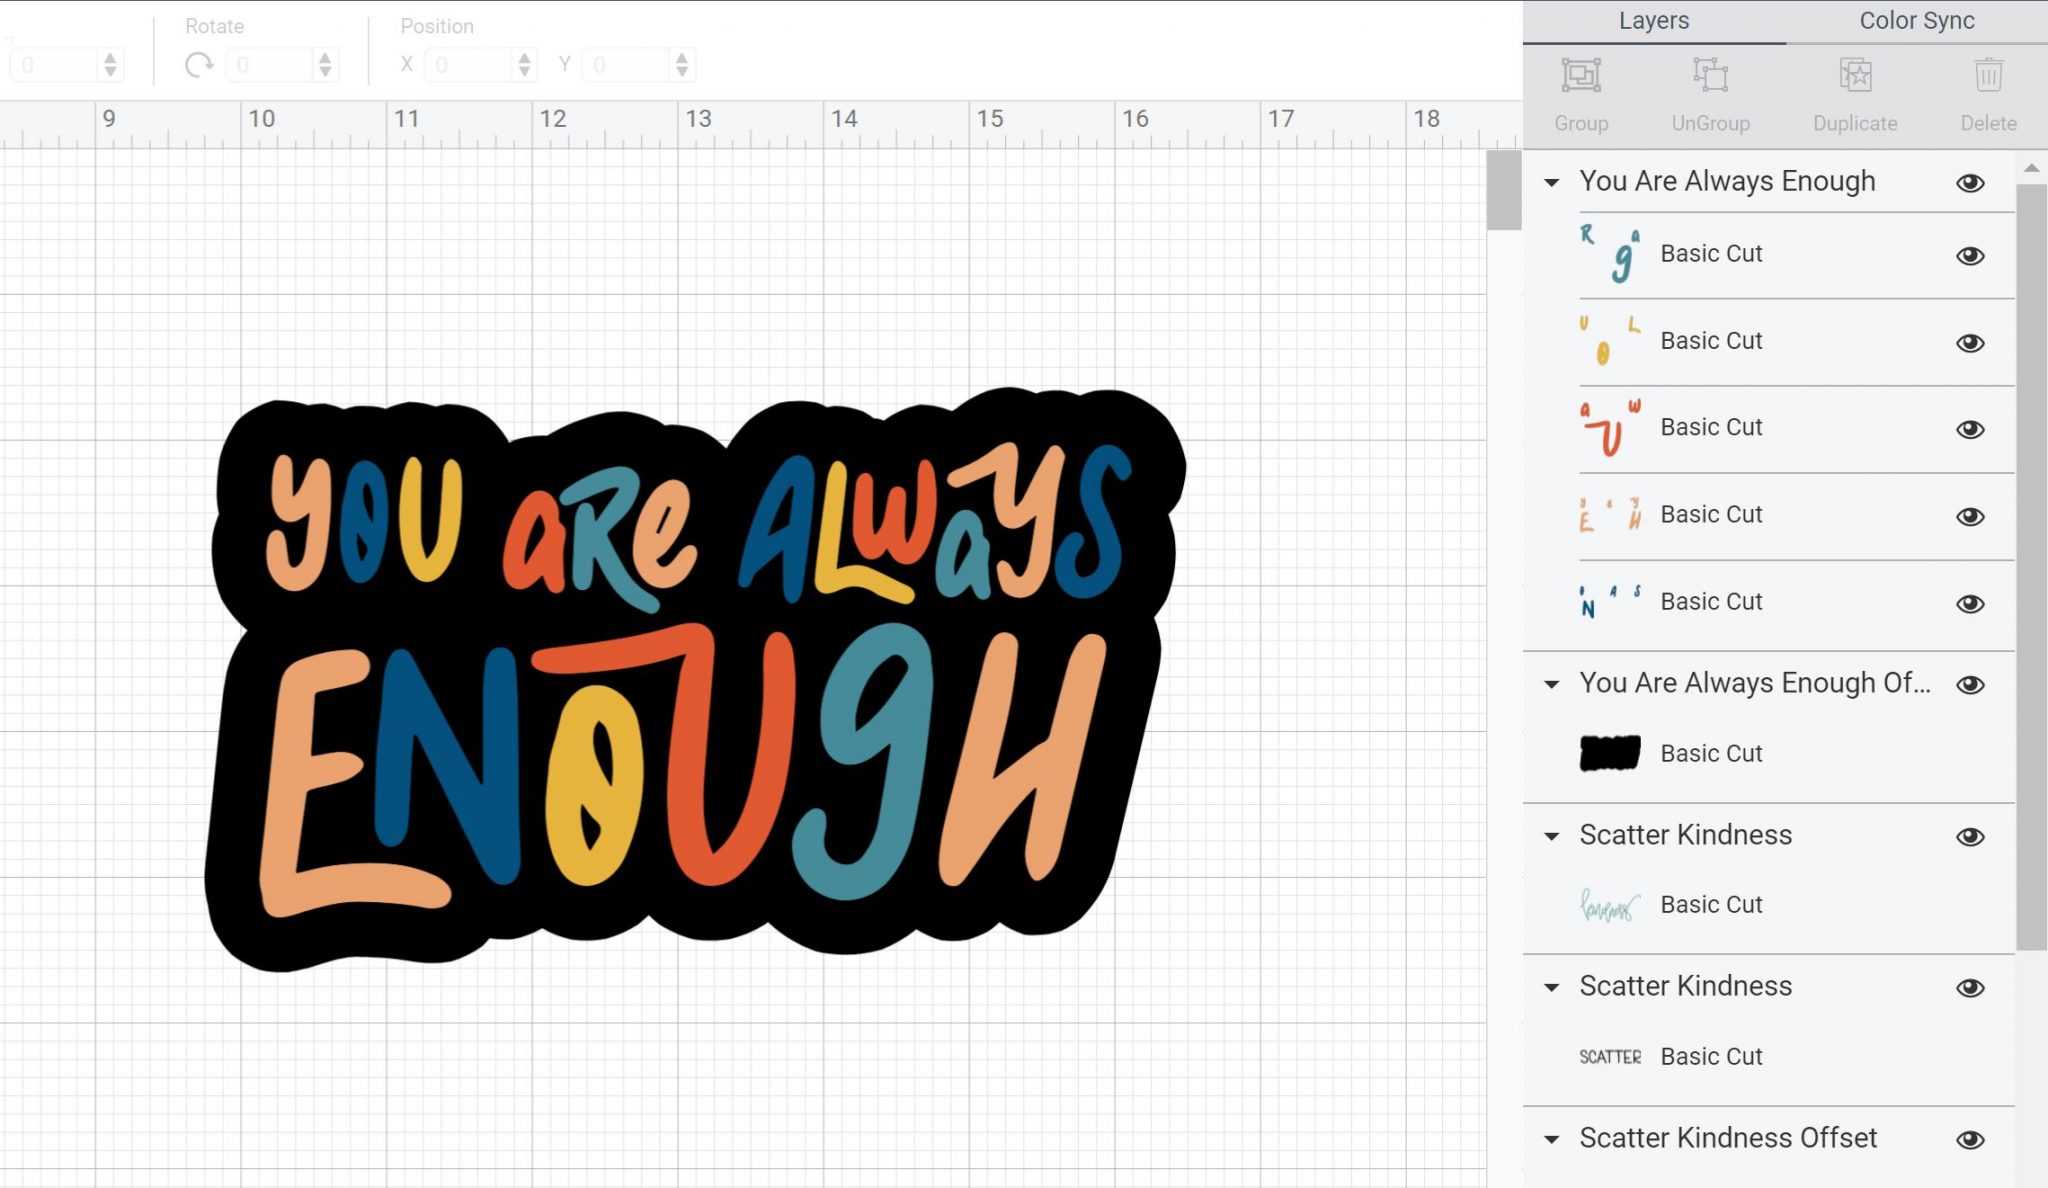
Then pick both layers and click the flatten button. This will make a print then cut sticker. Remember that print then cut only works with Explore and Maker and you will not be able to do this with Cricut Joy. Flattening to your offset will allow your sticker to print and then ONLY cut around that outside line.
Slice, Attach, Group, Etc
We just talked about how flatten works with offset above but what do the other functions do? Let’s take a look! Slice will remove your object from the outline. Do this for things like HTV where you may not want to layer the designs on top of one another but you still want the look of an offset.

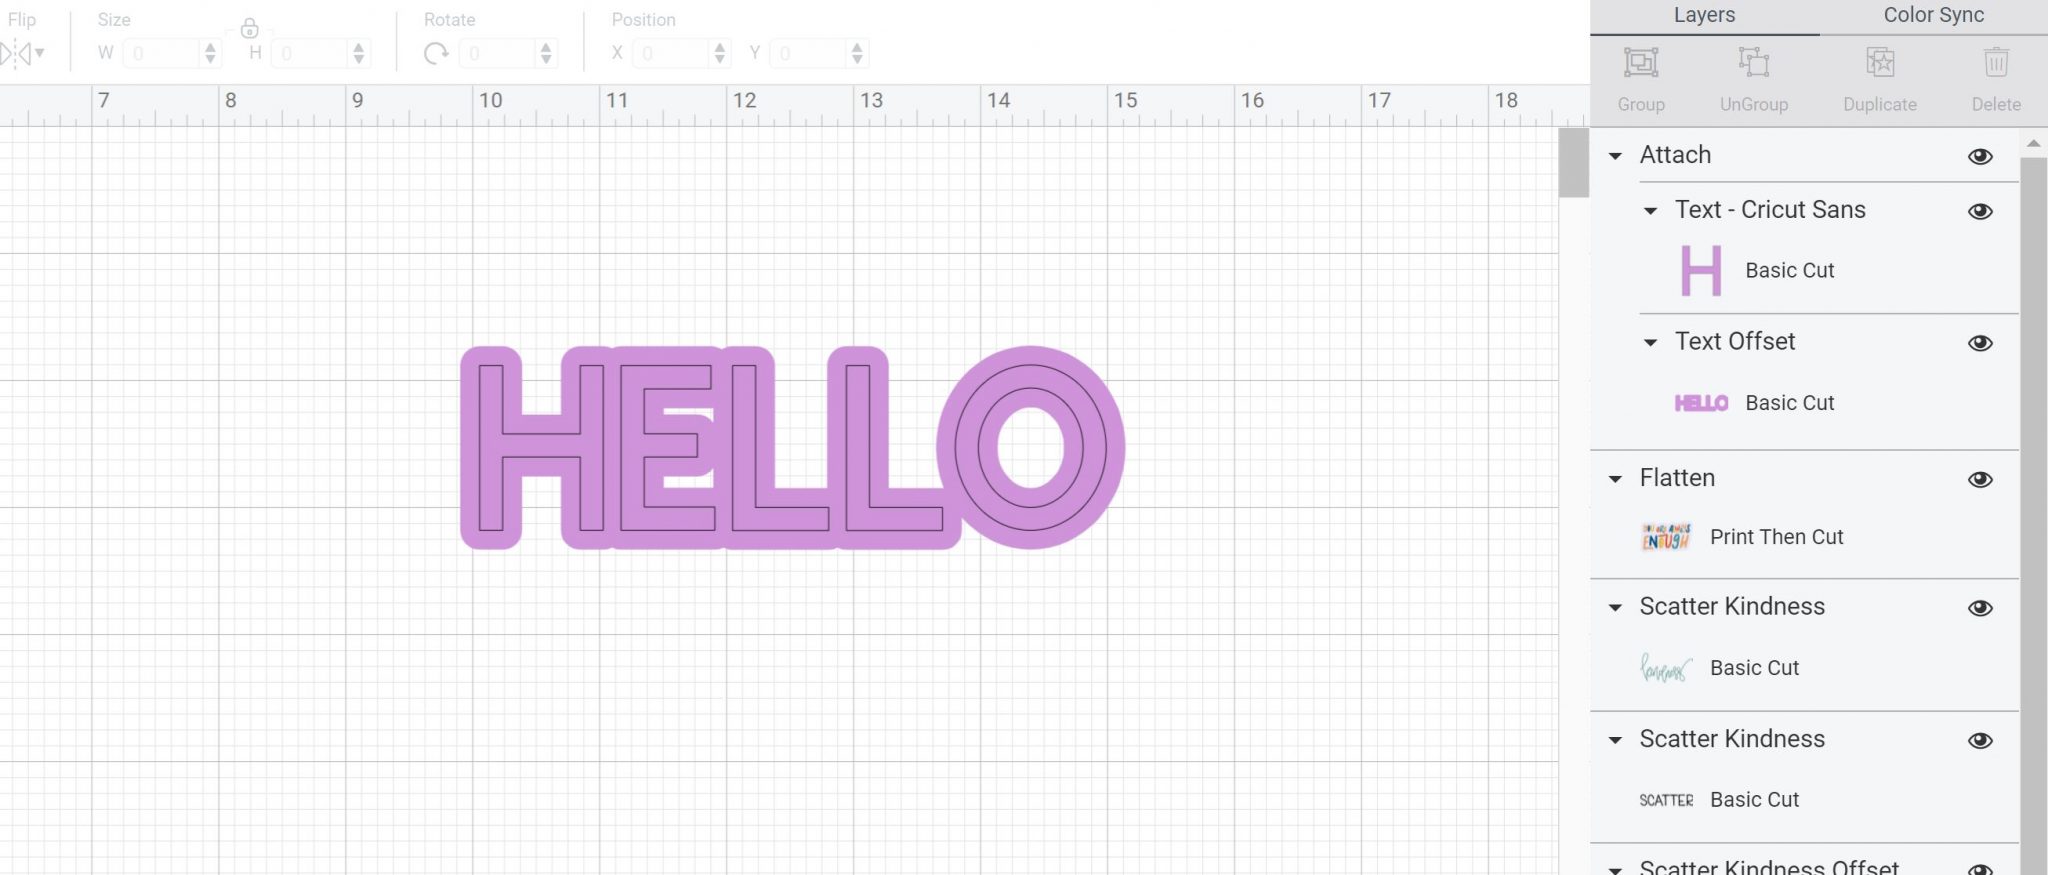
Attach will cut the inside piece out of your offset piece. This is useful if you want a project with just an outline and perhaps want to use the base color as your inside layer.
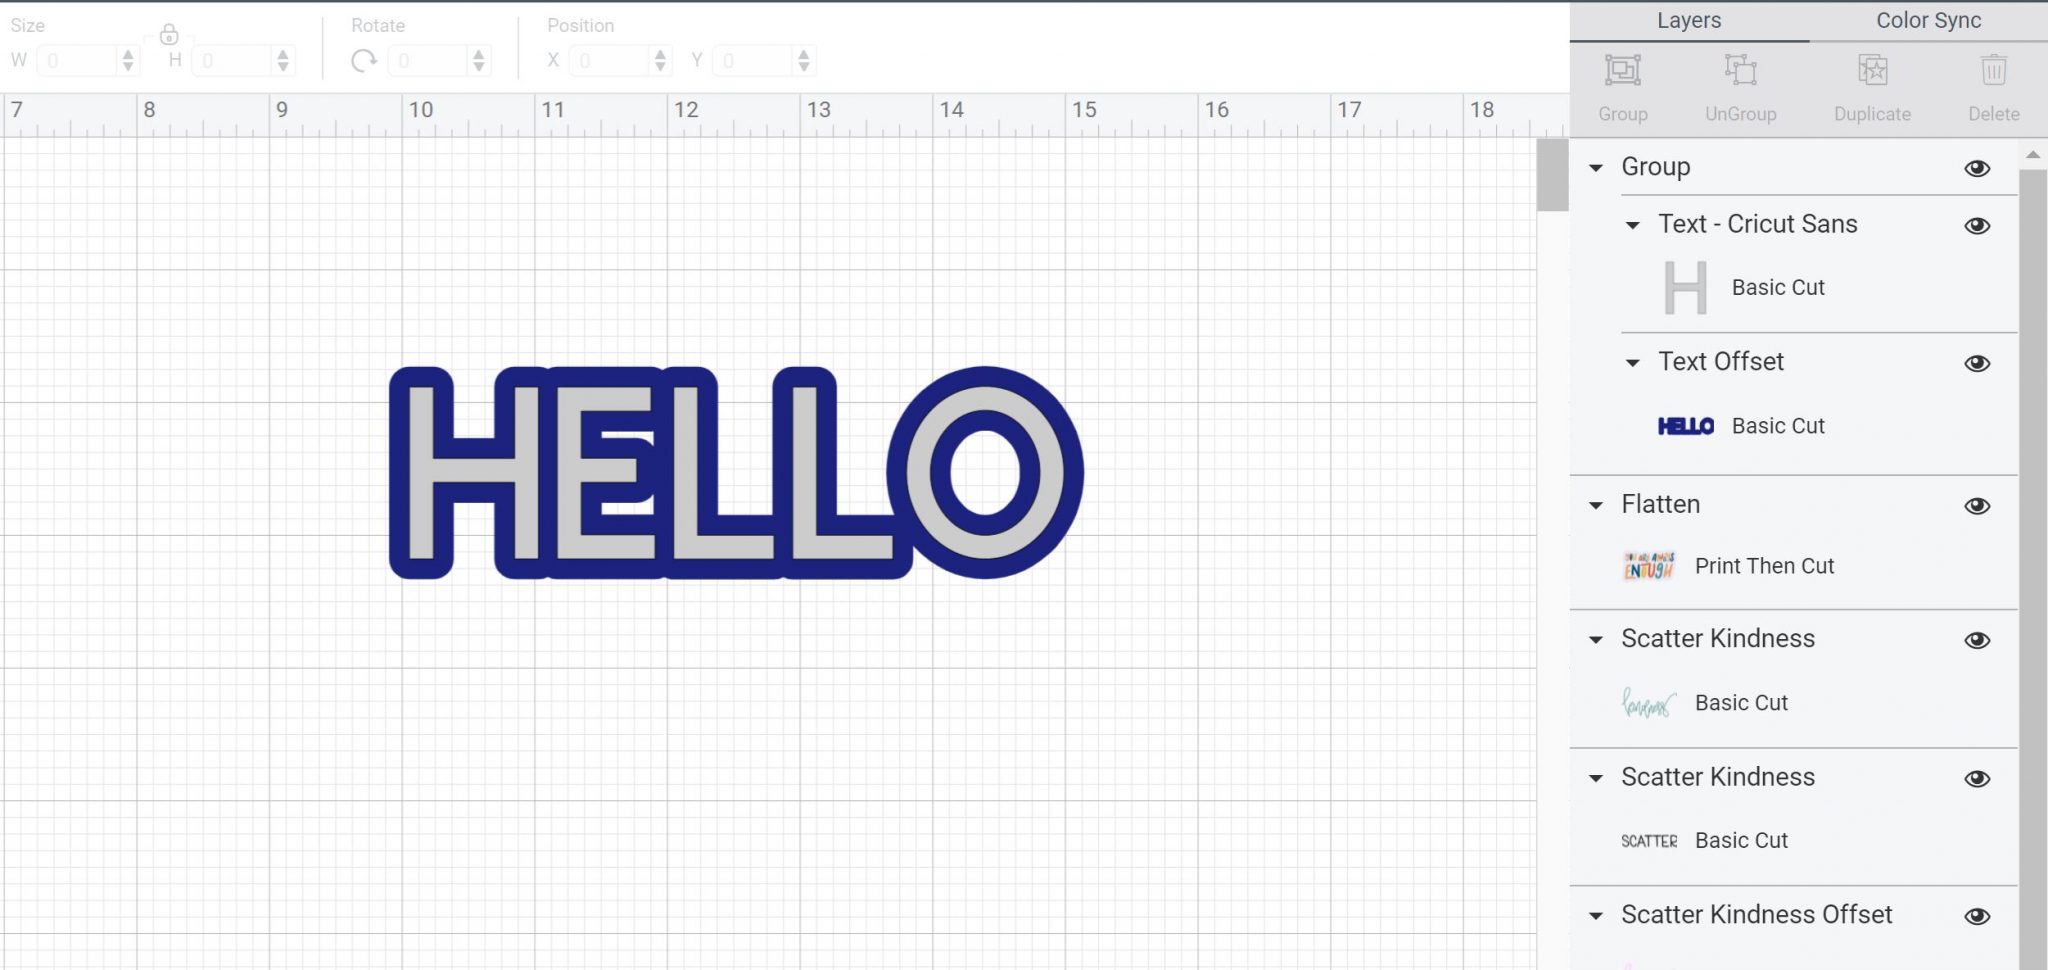
Group will make the offset and the original object move as one piece on your canvas.
Welding the offset to your original object will actually remove the original completely so this is probably something that you do not want to do.
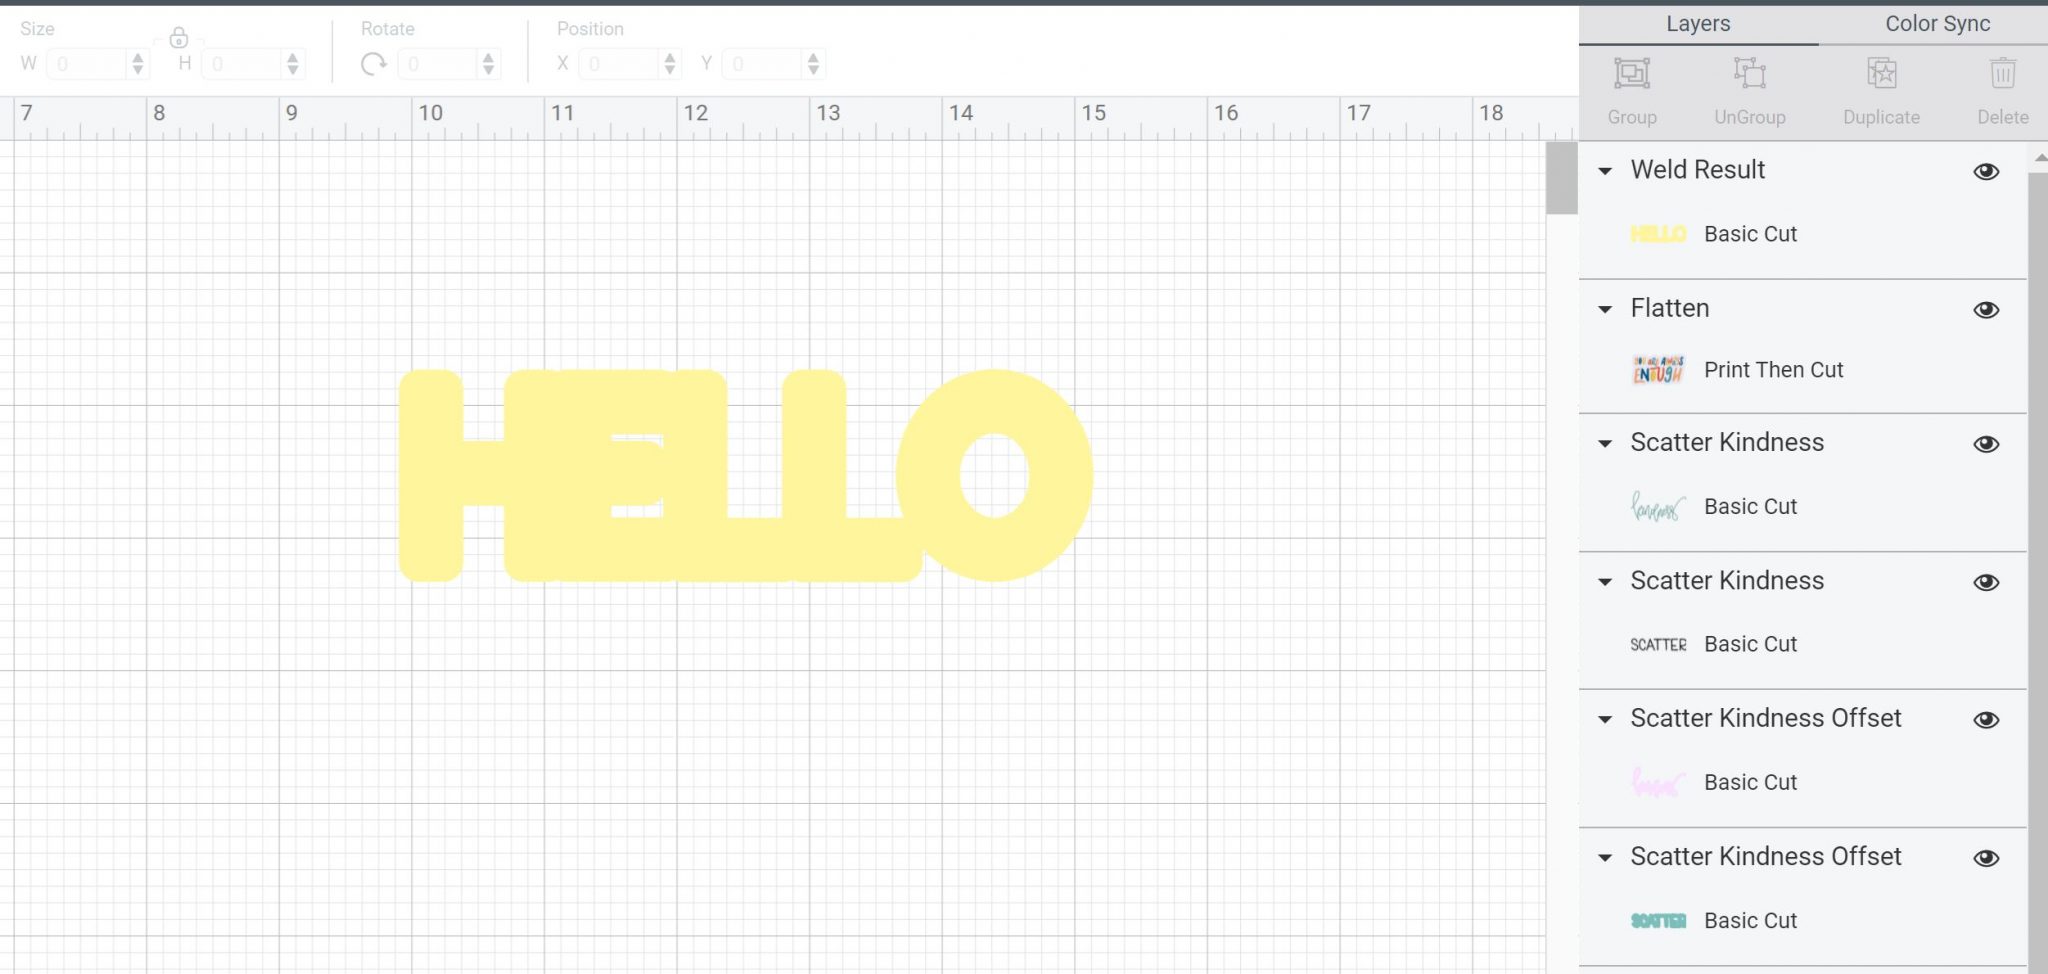
Contouring Your Offset
Sometimes when you use the offset you will get areas that are cut in the center of your object or text and you may not want those to be there.
Contour is perfect for removing those cuts and making a solid background. Just pick the offset and click “contour” then click any cuts that you want to remove from the final project.
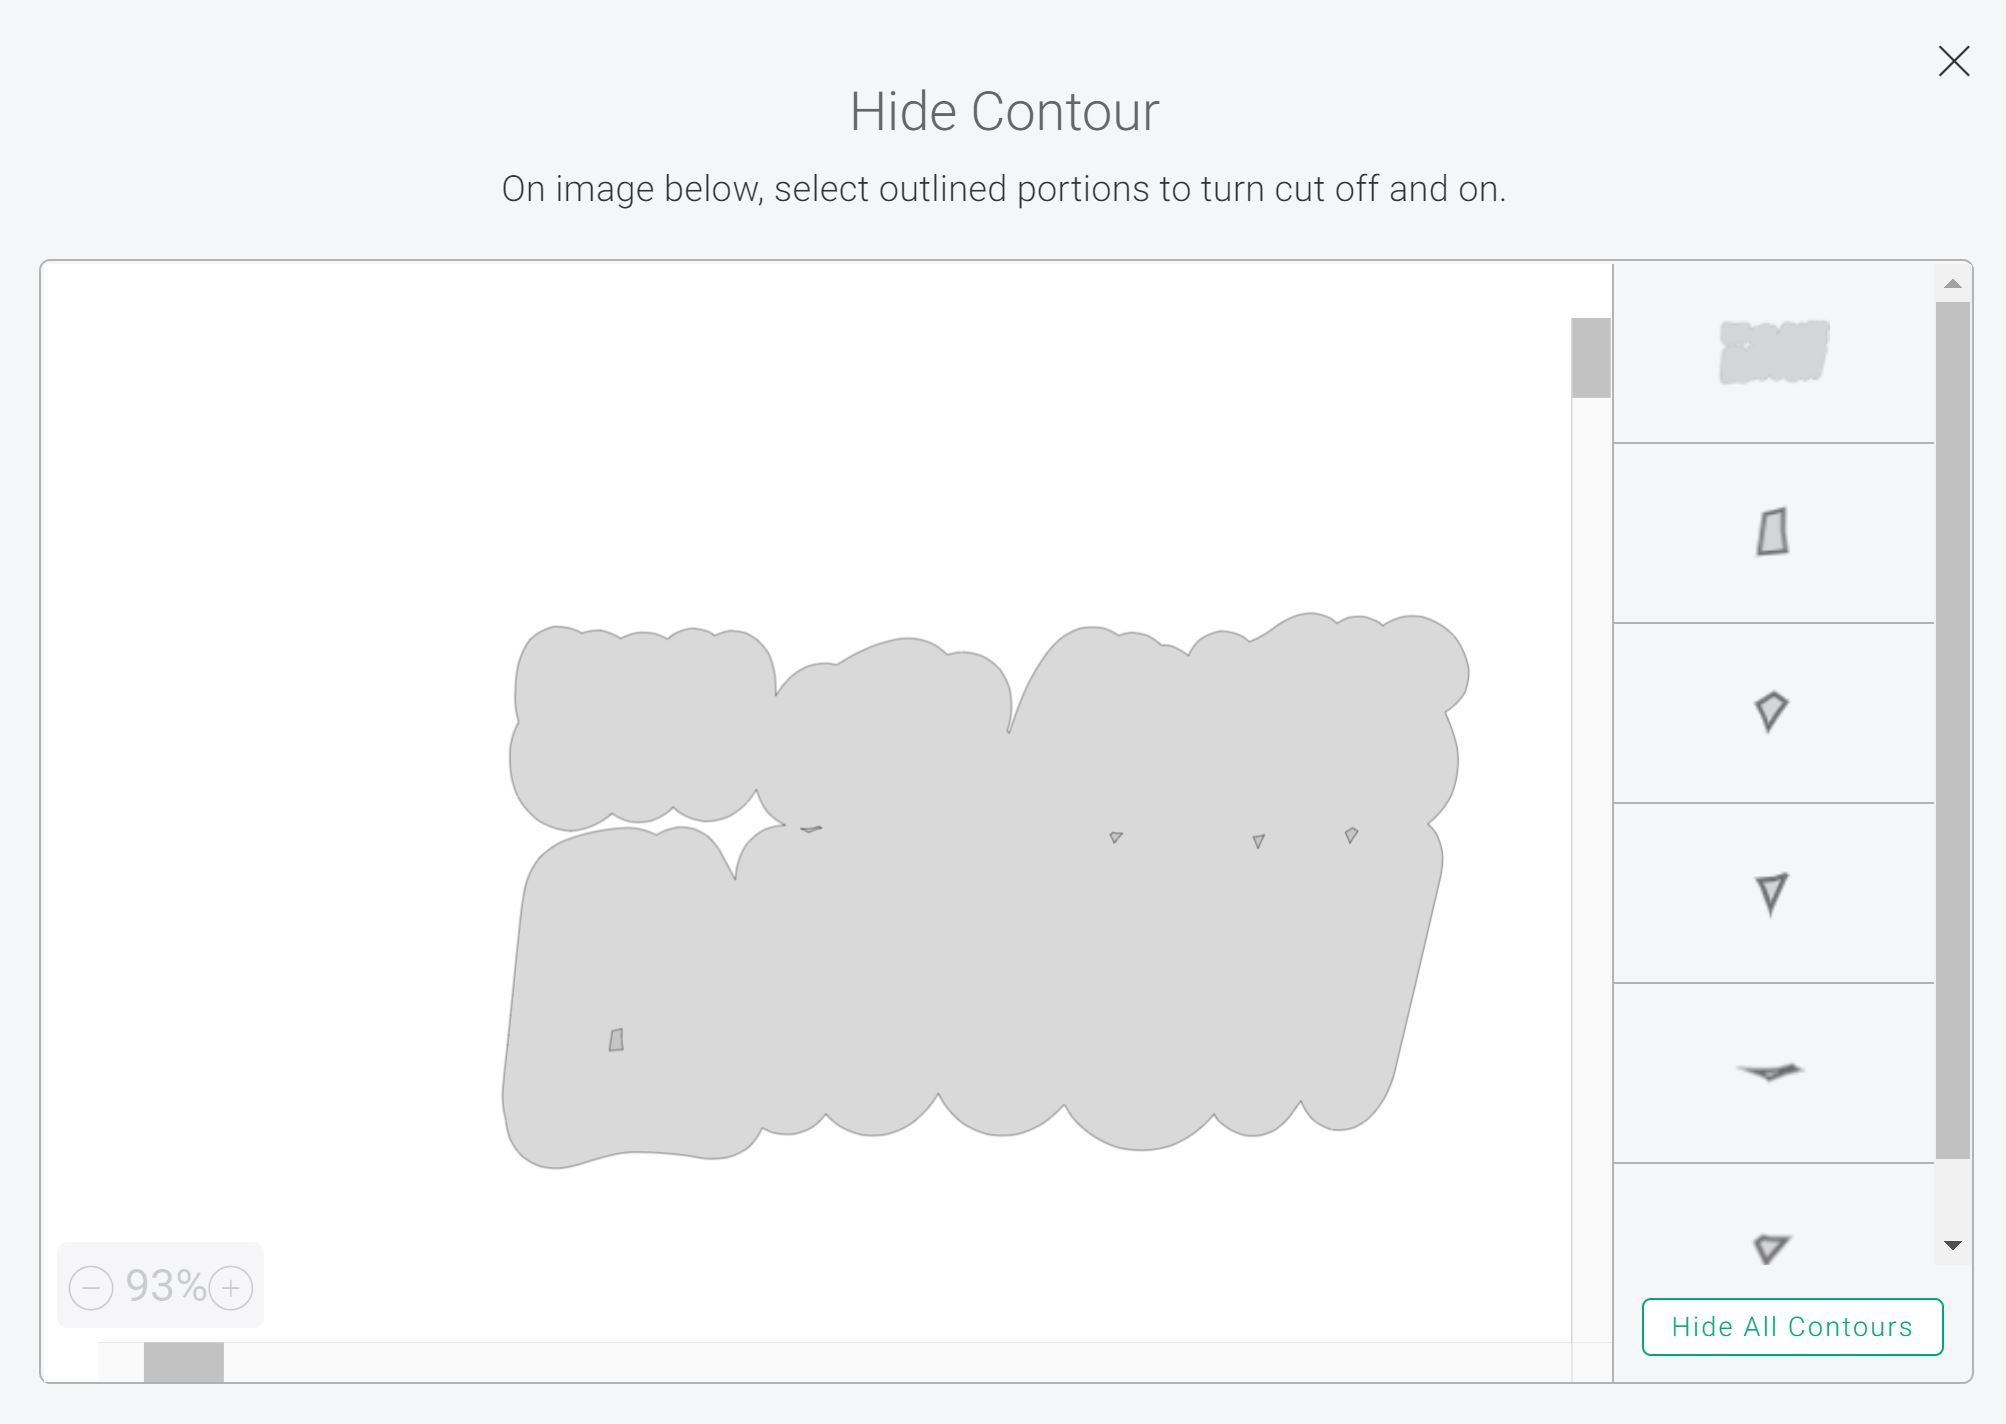
Click the X when you are done and you should be left with a solid offset for your project with no cuts in the center. NOTE: When I contour an image that is already a print then cut, the offset comes in as a print then cut when created. You will need to change this to a cut only in order to get the contour feature to work.

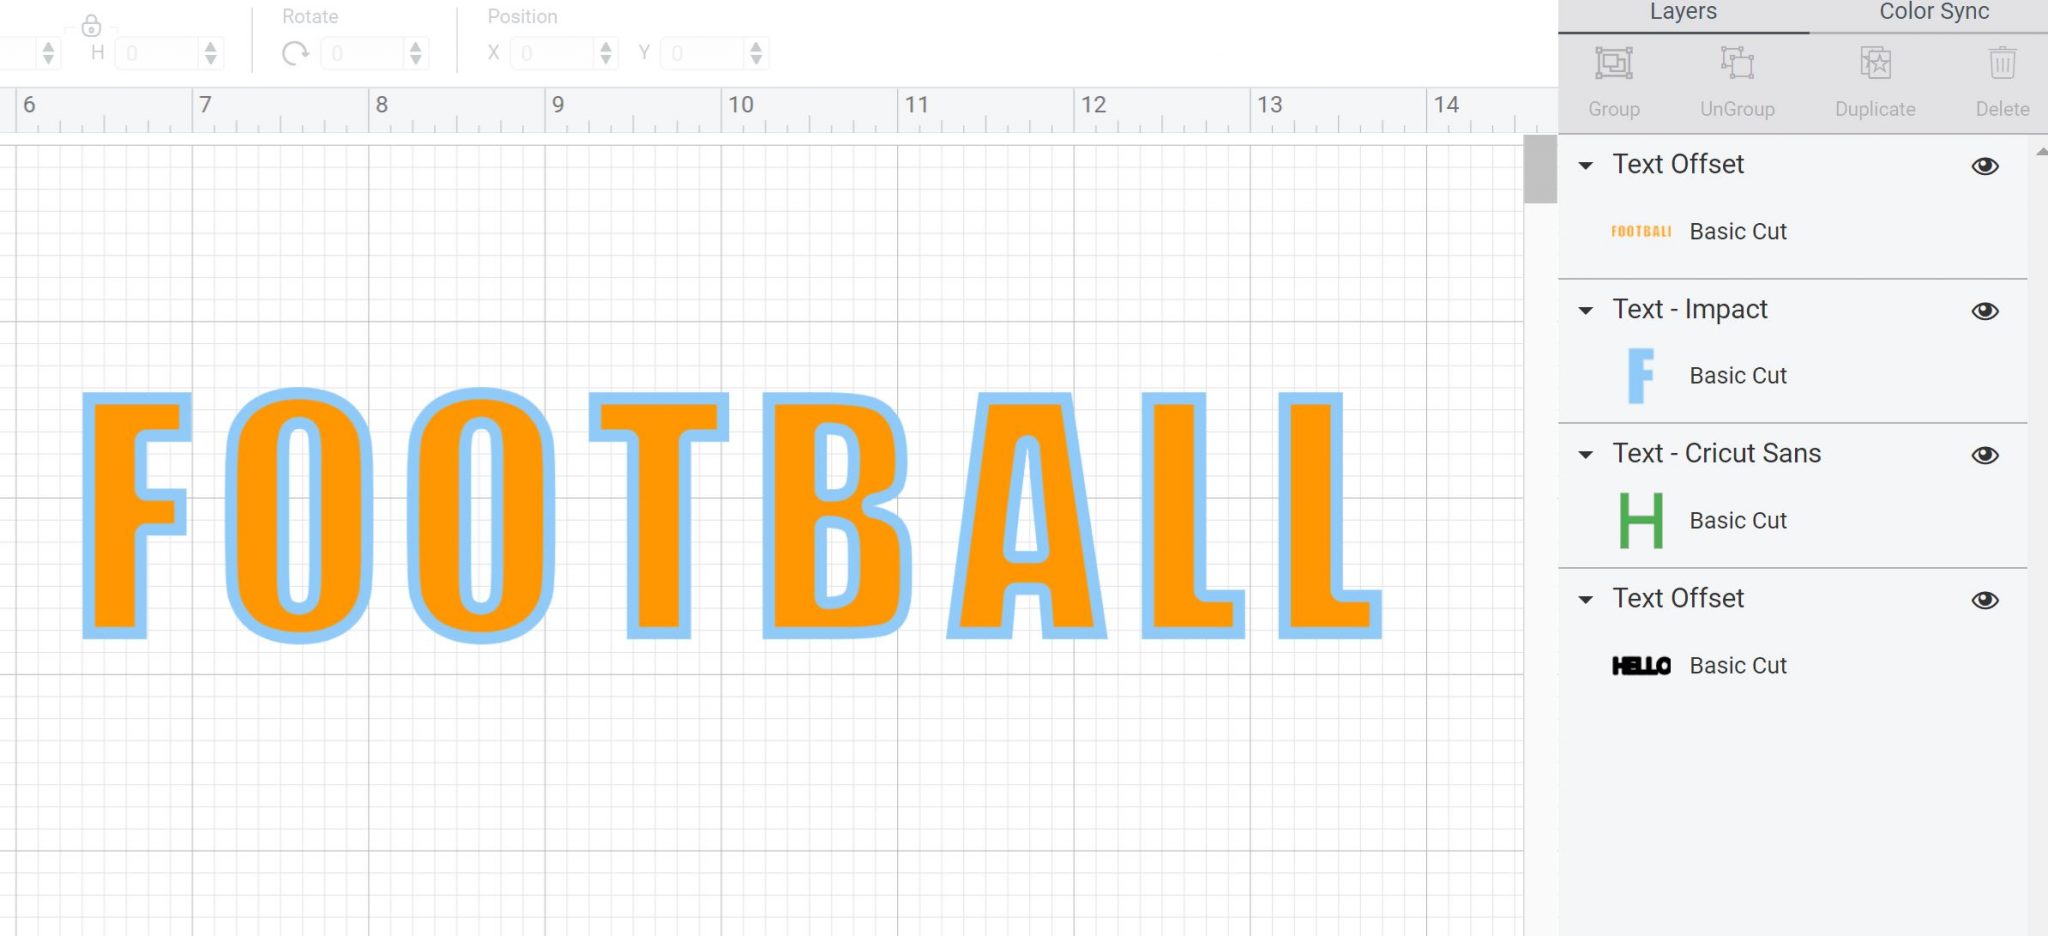
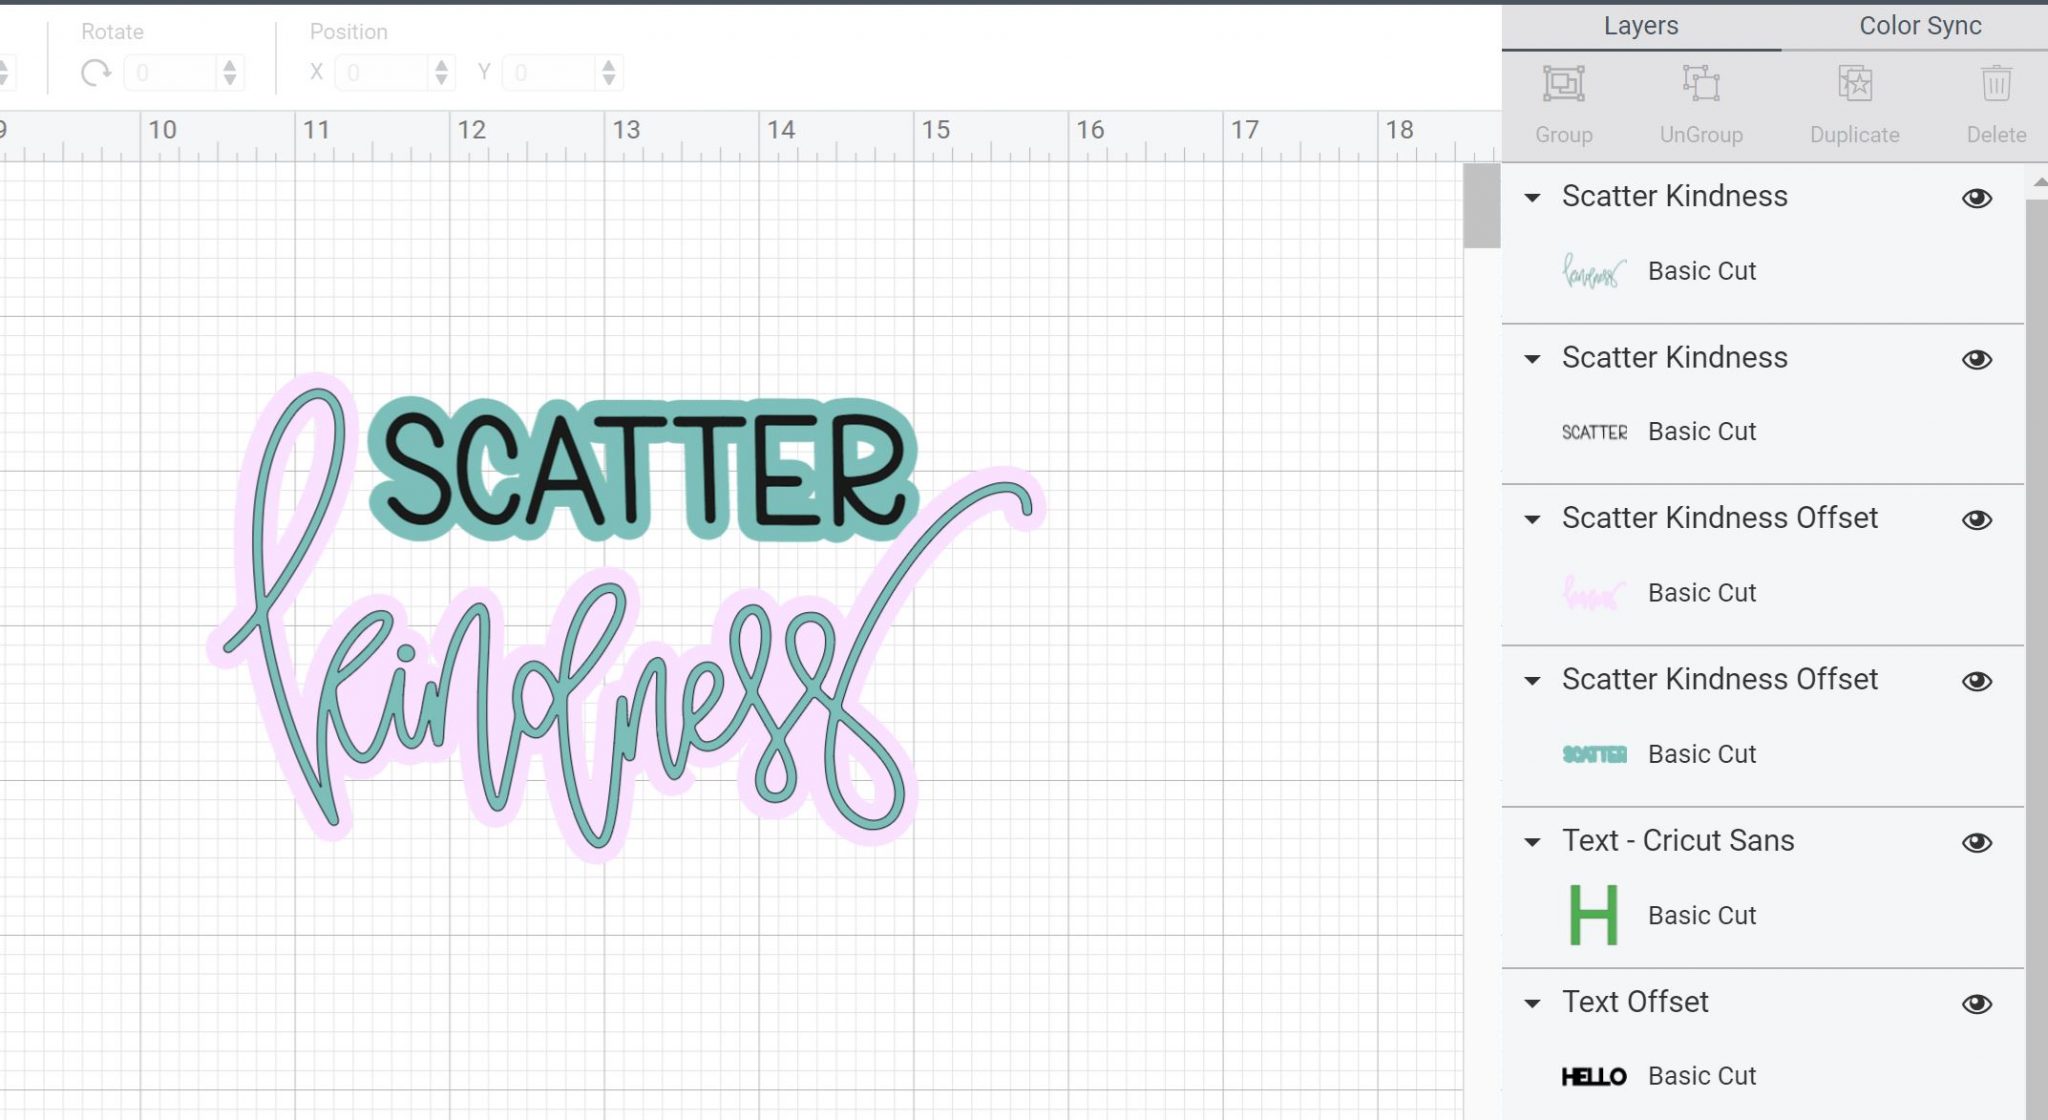
Adding Multiple Offsets
Not only can you offset an object or text, you can also offset an offset! So you can do multiple offsets on one image to get a layered look. Use this feature to make amazing designs that really stand out! Just click the offset button while the first offset you created is highlighted and you will be able to add a second layer. Repeat for as many layers as you would like!

Applying to More than One Image at a Time
All of the steps above can be done on one image or word at a time or multiple. To offset multiple images, just pick them all before clicking the offset button. Once you get it how you want it, you will want to click apply as always!
FAQ:
I know you all will have several questions and you can feel free to ask those in the comment section below. Here are just a few that I have been seeing over and over again.
Why can’t I see the offset button?
Check the system requirements section above and be sure your canvas is set to new and not classic. Otherwise, offset is in BETA and there may be glitches that prevent you from seeing it.
Why doesn’t offset work for me?
Check the system requirements section above and be sure your canvas is set to new and not classic. Otherwise, offset is in BETA and there may be glitches that prevent you from seeing it.
When will offset be available on mobile devices?
I am unsure at this time when this will be.
How can I adjust the offset after making it?
Once you click apply, the offset becomes a layer on your canvas. You cannot alter it to make it smaller or larger. Just delete it and remake another offset.
What is the maximum offset size?
One inch is the maximum offset size.
Why is my offset always a certain dimension?
Once you make an offset, your next one will be that same dimension as it remembers what you did previously.

GET OUR CRICUT BEGINNER’S GUIDE!
EVERYTHING YOU WANT TO KNOW ABOUT CRICUT DESIGN SPACE IN A FREE PRINTABLE GUIDE!
You have Successfully Subscribed!